Transcripts
1. Introduction: Hi guys, got everyone. Welcome back to
my today's class. Today, I prepared for you so many Christmas illustrations. You've got to be together
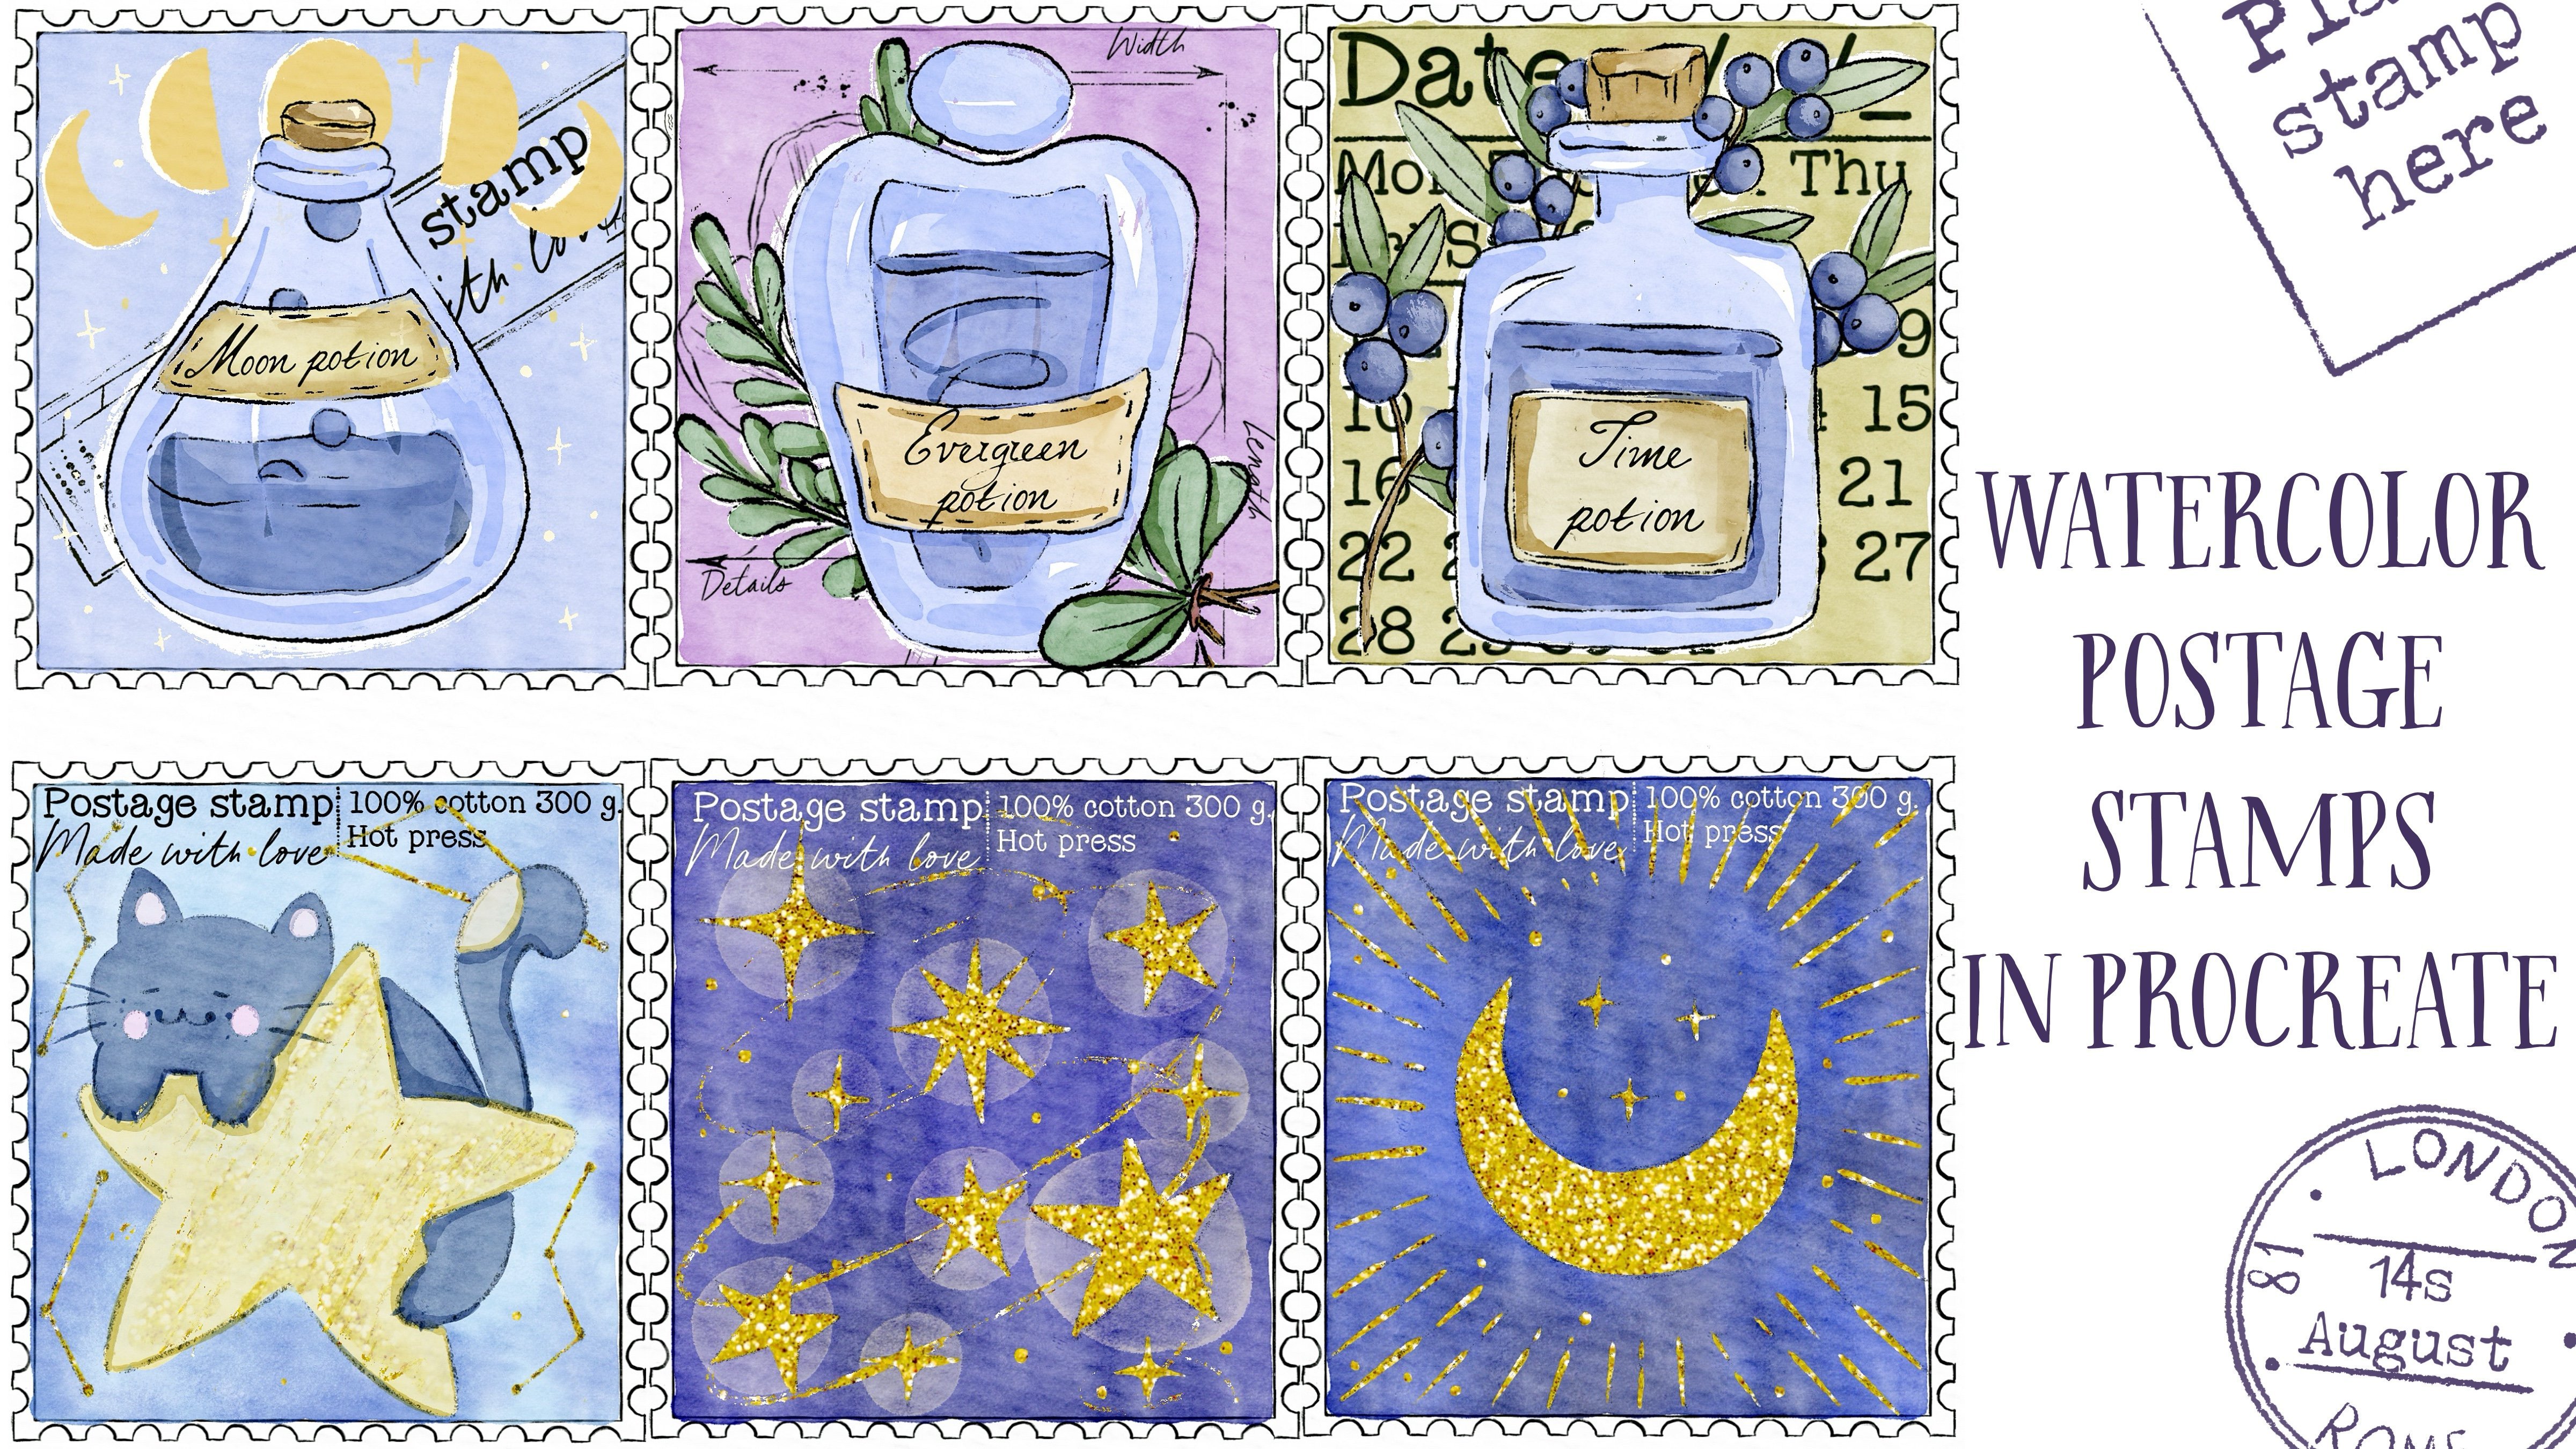
if you're postcards. And I teach you how to make Christmas stamps in
watercolor style. I hope you have a likes it. I prefer it for you
so many brushes and also what are called
paper color palette, along with my watercolor
brush set that I created. Use it for your own projects. And if you are ready to grab your Apple pencil and let's pay Christmas
illustrations together. Hi guys, I am in their
freelance illustrator. Welcome back to my
class and let's dive into Christmas
illustration and paint altogether beautiful cards with different Christmas elements
in watercolor style. At the end of my class, you will learn more about
Procreate and composition, especially how to use layers, clipping, mask, Alpha
Lock Selection tool, and how to add texture, volume, and color
variation to your picture. And most importantly, you
will learn how to paint watercolor Christmas cards in a simple way and new
painting technique. We will also learn how to
make Greece must ten brushes. You can use the illustration you create for Poisson and Instagram added to your
portfolio or sell it on Etsy camera and so on, or just share it with
someone home Uriel alike. I am sure is that you'll
be so happy to get an illustration that
is created by you. Today. I want to show
you that watercolor is so simple and it's a real fun. And in the end of my class, you can see it. Today. I will teach you how to
create texture paper, how to create a brush, how to create both
Kurt results gauge what is composition, how the gray traditional watercolor illustrations
in Procreate. How do you stamp brushes
for watercolor effect? How the pain if tour
without reference picture. How to use my default Procreate brushes for watercolor painting. How to apply mine your
watercolor technique. Word as in you and
says you need to know if you want to create
watercolor illustration, how to use clipping mask, how the texture to your artwork. I will also show you how to
add shades and highlights. I will show you my whole
process from start to finish. And as a bonus, I will share with you my textured paper
has some brush set, color palette, sketch
that I created. I will also add file of
my pictures that I drew. Feel free to use it for
your own art projects. This class is great for
intermediate level fall, so can be useful for beginners. If you watched my
previous classes and experienced artists, probably here, you can
find an inspiration in new ways how to paint
Christmas cards in Procreate. Your class project will be next, bringing Christmas card using the thieves and brushes said, I gave you today. I will use Procreate
for this class, V's iPad and Apple Pencil. So if you have it or
as a mosque drawing pads or just regular
watercolor paper and pains. Please join our
class and good luck.
2. Creating Paper: Hi guys. Hello everyone. During our base class. But when the paint lovely Christmas illustration in water, Castile and I will teach you how to create praise
must stem brushes. And so it's so simple, I hope you will like said. Also, you can create
your own postcards. You can use all my brushes
for your own artworks. And you can present it
to your beloved ones, for your family members,
for your friends, for hay on whom you
want to give it. Then also guys, what
I want to tell you, we supposed to paint
wildflower the day. So his class. But I thought those speeches the order of
my classes a little bit. So as this place filled
with devoted to Christmas, and next class, we're
going to pay him some lovely floral
illustrations. So I prepared for you today and your watercolor brush set care service Christmas
ten brushes. And once again, today
we're going to pay and altogether
beautiful illustration. And we're going to create
altogether new watercolor and not just wanted fellow
also press most gracious. So let's get started. So first of all, we should create texture
paper. How to just add. We need to go to procreate after sad tab plas and to pass again. After that speech from
pixels into inches. And right, Nine pair 11 inches
raise 300 DPI resolution. And maximum layers that
we might have is 56. So it's pretty enough. Well, let's step breed. Next step, we need to
export out extra paper. How did those ad? You might find all my
freebies in projects and sources section in my class. And you guys please note, open my class in browser. It can be Chrome or Safari. Because if you open in my
class, EMs Skillshare app, my free, this might not
be visible after set. You've done a lot also freebies
into downloads folder. You need to go and export also freebies from now
lots father, he, him to sit procreate how
to just first of all, let's duplicate our
layer couple of times. Next step, you need to
tap action pattern, button, Add, and tap,
insert the file. And after said, in
downloads folder, you will find my paper, said cuny expert here. That's our paper. Next step. He's got and applicants
layers TO times, ACT or SAT and blend
and mode to speech to Linear Burn and afterbirth. After sad, replicate linear burn one more time and
merge together. Navigate color burn one time. And Mark said together as well. Legs is after is it lowers the possibility of linear
burn mode, feel 50%. That's predefined. After said, select
two layers and group. Next, tab one more time and press Rename here, and a nice label or
a name and the ride, something like paint here. So our paper is ready. Next, things that
you need to know, you need to export our color palette and
our brushes here. This is our time
about so bright. Okay guys, Now I
want to show you what does approaches
that we have today. And I created lots of brushes. You might see some here. I have some snowflake brushes. I'll show you next eucalyptus, let me change the color. And I will explain you how I
create cause those branches. And as you see, when remained, different leaves have
different colors. Suspicious, Very cool. Next I have Christmas
tree brush. Is fun. I have sicker
Christmas tree brush. You might see it here. Next tree branch. Since brash you might use for
very abstract the curation, like maybe line art. You might move to
black color and the curated and just be creative. It's up to you. Also barriers. Let me choose maybe
reddish color. Depending on which side
you will move your hand. Is a barrier spill change. It's like the direction. I will explain you
today how to use it. Next we have branch is one, bows, lights. And as elides, some trees. And the base dependent
on which side you move your hand that the erection
of a brush can be friends. So pay attention. And as a crease, this brush is cool because you see that we have different kinds of trees and the color is also
slightly different. Today I will teach
you how to set. So a three fingers
back and forth and we can clean sand paper. Next, gifts. I'll see you see the
color is different. Then finally, candy, clear. We have socks. And also you see,
I haven't created some kind of texture
like watercolor texture. I'll teach you how
to do tentorium. Clear, clear, clear, clear. Next, socks like this. You might control the size
and make them bigger. So you have so many options how to create beautiful
illustration. Gingerbread Man, same. Also, you can decide which
size you like snowmen. And we have planned two
different kinds of leaves. Also depended on her way. You can change the
direction of it. Here are reached some
watercolor effect, I'll teach you how
to do it. Leaves. And we have some
watercolor brushes. Boost crop. We're oriented rushed dry
brush to add details, more perfect colors,
small sub-branch which is perfect if you want to
make some colors together. We'll walk our brush.
One of my favorites, color background to eat, to add some shades and
watercolor splashes. Boy, lapis, lazuli,
that snowflakes. And we have three and
native Procreate brushes, miracle rebar, 6-bit
pencil and terror labor. So I hope you are
ready to start. We haves a paper set. You already know how the
export in Procreate. And let's move to the first part where I will teach
you how it creates all slab of the
brushes is that you might use later for
your own artworks. And that's cool.
3. Creating Brushes: Snowflake, Eucalyptus, Christmas Trees : Well, let's start
with a snowflake. I think it's easiest way. We're gonna go and grab color, turn off our paper for awhile, and prep Mercari brash. Next, we need to press Canvas
and press Drawing Guide. And after press
Edit, Drawing pad, menu to tap options
and tap radio. So now we have the perfect
shape for our Snowflake. So the second thing
that we need to know or how
snowflakes look like. So in this way, you might go to Pinterest or probably just Google it and see what does the basic shapes
of small things. So, yeah, cool. We can see here. There's no effects. Has they have an amazing
shapes like say, swan. Image is try to think
which one we like most I like this shape
is her laminate, or maybe even say S1. So try to remember. We have 1, 2, 3, 4, 5, 6, six parts of snowflake. And we, I think we
are ready to start. Next week we're going to paint
lines and maybe nonsense I think is perfect. One snowflake on this part. I hope you like sad, which is so fast and
so easy if you want, you might experiment here. I think what you want to add
possessed part, like sad. I like a snowflake, I'm gonna keep it like this. So next we need to turn off our drawing guide and
we have our beautiful, beautiful snowflake legs
vignette to save it. And as you might see, I will turn off our layer. As you might see our they
have TO brushes with snowflakes and I created
different design here. And now let's try
to find one mole. Let's create one more. So I will tap Plus I
will go to the shape. But before we start doing said we need to
make sure it says the size of our
snowflake is square. And as you might say,
it's not square, so we need to adjust the size, how to choose a tap Edit. Now our Snowflake has
set square shape, and now we can export
the picture Dev added, press, invert and rest,
import the photo. After that tab is two
fingers and now we changed. So we selected an actual
snowflake, tap Done. Choose straw path and increases
pace and art and poetry. Some are randomized. Next we need to
go to Properties, increase the maximum
size and turn off, orient to screen neck
veins that we should do is you see some snowflakes
are less transparent. Seminars are ones. So we need to remove the
transparency, how to use it. And you took out Apple
Pencil and turn off opacity neck thing and we'll go to dynamics and
increase a cheater. So now is the size of our
snowflakes field bit different? Last, last part. Let's go to Shape and increase
the rotation to you 100%. And the last and final part, I want to add a little bit of texture to our lovely Snowflake. So I will go to Grain Edit
Import Source Library. And now we need to
find some splashes, some things that will
help us to reach those realistic watercolor look. So I will perhaps a
squash looks wonderful. Tap down and tectonic. An NGO might see increases size. It has some kind of texture
and that would be so beautiful when we actually
use our watercolor paper, add some water color texture
to the whole picture. And our snowflake also need
to be in the water cap style. Not, this is not the end. We need to rename it. So we can write like snowflakes. Snowflake one because I
already have two more brushes. Now let's clear everything. I legs this brush is lovely. We need to, we don't
need to use this part. Let's just duplicate it a few times and create new layers. And let's move to the next part. So what do I have? I have eucalyptus brush and I'm going to teach
you how to do it. So we will use
mercury brush first. And we need to coil
the goal and paying some kind of guidance. Next thing, we need to
create one more layer. And I have a group
who pay attention. Tpp. Plant should be
very thin like this. So this brush is pressure
sensitive, just press lighter. Very beautiful. Now I want to remove transparency in this way. I will duplicate
layer one more time. One more time after lovers are positive 40 percent and
merge set together. Next, I'm going to
save this picture, whereas Share JPEG next year will turn off picture
moved to the new layer. And now we're ready
to create new branch. By before we close at, we need to make sure that it's a shape of
the brush is square. And we might say that
this is rectangle, so we need to change it. We will go to this part, this part and have a preset
button and press square. We'll go to Shape, tap, Edit, Import, and
choose our eucalyptus. Tap. Two fingers, one time. Perfect, tamped down. Next rotation follows a stroke. Next thing go to stroke has x's go to Properties
maximum size and turn off orient
to screen neck. If you want, you
can go to dynamics and increase the
size a little bit. Next, let's return to space, a space in and change
the size a little bit. Like say is I think
is pretty good. Next video, go to Grain, Edit, Import, Source Library. Perfect tab data. Like how it looks like. Next we'll go to Apple Pencil
of a positive step down. And as you might see now, we have perfectly eucalyptus. If you want, you can increase the size and make
it even beaker. And about airbrushed, change it, give it a name like eucalyptus. So this is a briar set
to be just created. So I will change
the name a little bit because I already
have eucalyptus here. So we'll go and grab
how boo or call brash. Saying we are on a
new layer and we need to create is the
imitation of needles. Tensions. It's this tip should
be very thin. I will go grab free hand. Press vertical. And now thanks to the strokes, may create some kind of volume replicated because
I want to make it thicker. After, Let's go press Share
and save it as a JPEG file. Create neck thin. As you remember, we need
to double check whether the size is not rectangle. Next venue to press
both the shape added import photo tab and press
down perfect neck thing. Remember a flirtation
till 100% NEG thing. Go to Stroke path. Here Moses space and Lexis, our neck thing and go to Grain Edit Import
Source Library. Now let's think, where is
our watercolor texture? 55. Gosh, watch this one. Perfect tab that this is
not to go to dynamics. Increase the size of a
cheater and lethal bed. Next, go to Apple Pencil
turn off the capacity. Like say is perfect. Increase, go to Properties, increase the maximum size and
turn off, orient to screen. Go to shape. And after that, you need
to press bleep why? A small nature of it
looks more natural? Next, you can add
a little bit of color variations
called color dynamics. Both color pressure and increase a Hue
Saturation Brightness, and add some secondary color. That means when you paint
and if your stroke, if you're like press harder, you will have different color. You see like this. Press
harder light or hard light. And you have two
colors altogether. So now you know how to paint lovely Christmas tree branch. And if you want, you
might change the color. And then the color of our Christmas tree,
little bit different. And you guys, we have
so many brushes, of course we wanted to all exam. But the most interesting, I will teach you how to do that. Okay, Now next step I will teach you how to
paint Christmas tree. That's very interesting
and also easy. I will move to mercury brash. I still need our
Assisted Drawing Guide. Turn on here, Edit Drawing
Guide, Symmetry Options. Make sure that assisted
drawing is turned on. Tab it carefully with a line
because you mistake link and press like this
white color and you want see the line
here, tap that. Next we are on a new layer and we can print our
lovely Christmas tree. You might experiment
with this shape. It can be like this. And after you can
feel the color, the black color and we have
our Christmas tree like this. Or you might pay into
nasa picture like use your creativity and make some American interests
in Christmas tree. Like say is, it's very lovely. I actually like it. I'm going
to duplicate the layer. And now I want to clear this one and I want
to create one more. So as the ones that I
have already saw as a Christmas tree will be
very simple like this. And it's a shape is very soft. Next, I need to paint the trunk. And yet Christmas trees rating. Go grab eraser and you
might create some strokes, imitates the shape of a
tree trunk like this. I don't need our
drawing guide anymore, so I will turn it off. And I want to create some
kind of very crazy lives. Okay, loudly, loudly
Christmas tree. And we're going to save
this Christmas tree and I'm going to save the Christmas
trees and how to one. So go press Share and
save it as a JPEG. I wanted to save this
as Christmas tree because I like this
crazy creative shape. Yeah, perfect. Turn off a goal, change the size of the
picture into the square. Perfect. Tap Done. Next two-plus, go
to Shape, Edit, Import, scrap our first
three flexes, tab down. Neck thing I want to avoid, I forgot rotation
for the stroke. Next go to Grain tap Edit,
Import Source Library. And now we need to
find some quash wash. Yeah, perfect. Tamp down. Next step, go to
Properties maximum size. Orient to screen. Next, go to dynamics, increase the size a little bit. Go to Apple Pencil and turn off. Capacity. And Lexis. Go to Stroke Path and change the proportions
a little bit like this. About the brush, gives
the name Christmas tree. Tab, tab, create one
more layer, green color. And you see it has very beautiful, realistic
watercolor look. Can you imagine? Let's
turn on the paper. You see it's very,
very authentic. So this is the first
Christmas tree. Let's move to next one. By the way, you guys,
you might save you time by just publications
a Christmas tree. Like says, Go back, go and press the brush, rename it, right,
Christmas tree. Oh, tool. Go to next, go to Shape, Edit, Import and grab
says Christmas tree. Be careful of is overlap pins. Maybe here we need to Priuses size between
trees like this. Right? So lovely. Also guys. So what you can do, I'll show you one trick. We will duplicate this
brush one more time. Next, we'll go to Stroke
Path and increases pacing. Next, increase a
cheater a little bit. And I will go to Color Dynamics, go to Color pressure and increase the Hue
Saturation Brightness, then a little bit
secondary power. So now you might see
that venules, veins, a color of our Christmas
tree, slightly different. And it looks very beautiful. You might increase the size. Now, our Christmas tree, so colorful and saying We can do it with the
first Christmas tree. Let's duplicate it. Change the name to 0, 1. Then go to Stroke path. May be maximum,
something like that. Go to Twitter, go to
dynamics, increase the size. Next graph, go to
Color dynamics. Keller pressure increases
size a little bit. Change the color. Menu you see when we paint our
Christmas trees so loudly. If you want at your painting and you see all your
Christmas tree, you should be very straight. Not so crazy. Different angles. You go, go to shape, go to
rotation, and move to 0. And now you see your
Christmas trees falling in just one direction. But I want this
Christmas tree to lead to be a little bit crazy. So follows a stroke. And I will move to this
Christmas tree, this one. And here I will change, I will go into shape and I
will move to rotation to 0. So that means that now they
have the same direction.
4. Creating Brushes: Bells, Snowman, Sock, Leaves: Maybe we can make it together. So how does it go
grab black color? Let's go and grab mercury brash, we appointed a new layer. Okay, How the pain bow? So it's pretty interesting. You're going to
paint one circle. And we're going to paint
one was throw colic here. But of course the
size can be nonsense, accurate and proportions will come even know it's the same. And we're going to paint
one more circle here. After say, or do we
need to feel also areas together with black
color and paint. There's a bow here. The last part of a bell. This is a wrong option. So in our bell is ready. If you want, you grab eraser, use mercury brush as an eraser. And you can add some
kinds of decorations by erase in some parts of the bow. You can do like says. So this is the first way. How can we make bile? And as a one, we will
create one more layer. I'm going to go to Canvas,
Press drawing guide, edit drawing guide, tap options, and press vertical tab Dan. Dan can now paint
it's more accurate. And when he paints
from one side is the same picture it will
have from an asthma. Okay. 10 batteries. Read it, go grab eraser. And we have loudly bell, this is a second option. What you can do while mobile, we can also save it. Next, let's grow to Canvas
and turn on drawing guide. What we should do
like we did before. We will save the picture. And save picture one more time. I actually like this
more than another one. Next, we need to
make sure that it's the shape of our
picture is square. Square increases size times W1 less return to
Procreate tap class. Both the Shape Edit, Import. Here we have our
lovely double-tap. Next stroke path. Spacing like say is go to shape, rotation, neck theme,
we'll go to Apple Pencil, turns up positive down. Go to proper does
increase the size. Orient to screen, turn off. Go to Stroke path. Yeah, this is perfect. Once again, if you want, you might go to dynamics and
change the size of Salaam. So Biles together, tab that. I want to add line liter. So that's why I
have mercury brush. Then the pain's a line and
now it looks more realistic. So let's clear it. We've done this out Bauhaus. And next step what we're
going to do is let me think. And now I think we can
make snowmen here. That's very simple. And we'll move to black color. After that. Go to mercury brush, go to Canvas, drawing
guide, edit drawing guide. Make sure that assisted
drawing is turned on. Tab that next we need
to paint a circle. And one must record. Okay, lovely snowman. Next if you want, you can pay and scarf. And we will finish
editing scarf and maybe some kind of hands
from the branches. Now let's turn off
assisted drawing guide. Press here and turn
it off here as well. Next, we need to finish it in scarf likes and grab eraser. Now we need to choose
where our eyes, our nose, and mouth. Next we need to go and
emphasize our scarf. Okay, very realistic. Next button, F1, F2, F3, lowers the size. Here we can experiment
with design. Okay, I'll snowmen
is read as well. Let's say it's a picture
and make a brush from it. Kept floss. Go to Shape, Edit, Import, import
the Fatah prep house. Now man, two fingers
inverts a picture, Now's a snow man is selected. Tap down, stroke path, increase it. Maybe the exits. And go to Properties maximum
size, orient to screen. Go to shave the nation. Next step base will
go to Apple Pencil. Turn off that porosity and go to dynamics, increase the size. Go to Stroke Path. Yeah, perfect snowman. Maybe even too close. Like that. Don't forget about the green
Edit Import Source Library. I will grab clouds. Press Done. Now, you
can increase the scale a little bit and go to about
ZBrush and write snowman. Let's turn, owns a paper. And you might see
how realistic it is. I want to teach you how to
make some kind of leaves. So I will go and grab our brush. I'm on a new layer. I need to paint the line
here. Ten froms a line. We will paint some leaves, like a branch line. Hence that's pretty much it. I want to duplicate a layer, move to 50 percent and
merge set together. Let's remove the
paper and save it. Added square increases size. Tap, tap, tap, tap. Invert, invert the Fatah. Here. Rotation follows a stroke. Grain Edit, Import
Source Library. That's fine. Quash wash. Perfect. Properties increases size,
increases GIF really, Toby and go to Apple
Pencil turn of capacity. Go to Stroke Path. And let's just find reached stroke would
be perfect for us. Maybe this is fine
about the brush. Let's find leaves. 01. Switch to green color. Looks fantastic. If you don't want
those overlap hands, you might just go
to stroke paths and increase it a
little bit more. If you want to add
some color variations, remember how I told you, you will go to Color Dynamics, go to Color pressure, and increase a little bit sizes, 25, 54 percent like this. So you press harder, you have slightly some color variations. I'll show you. See press lighter is more greenish and harder,
it's more bluish. And also guys, what
I want to do is the last thing I wanted
to as the last brush. This brush is called
SOC. I'll show you. Let's just grab red color. And you see it's
so lovely and it has this real least a
quarter color look. So now I'm going to teach you how to make this lovely brush. So you're going to
grab black color, create a new layer,
grab mercury brush. And now we need to paint
some kind of like cloud. Yeah. Like this. And now
let's create soccer. If you don't like it, you might go ahead,
change the shape, increases size houses like
cloudy form, poverty shape. Okay, that's simple. Next and most important
thing is you need to erase some parts of a
sock and make a curation. Grab your eraser. And we need to show that
we have is this shape. This is lovely circular wide
shape of the top of a sock. And next, we can
divide it into parts. And each part can have
different design. So for example, this part, I can make a strong plexus is the first one. Next we can create
this wavy shapes. Like say is also pretty to lie. Here we might paint
some circles. Yeah, just paint strokes. And from this side let me think. Maybe also tiny dots,
very small ones. And our SOC is ready. You say it. So, so cute. Now let's save, it. Saves a picture. Now let's turn off this layer. Create new one. Headed square increases size tab that now go to our
brushes to have plus. We will go to the Shape tab, Edit, Import, import a photo. Let's find our SOC. Two fingers, one tab, there's a socket
selected tap Done. Next rotation. Perfect. Theme is I will go and grab grain Edit Import
Source Library. I want to add some
gouache wash that, that stroke path
spacing property. We need to change
it a little bit, go to the properties, increase the size of sub-branch. Turn off, orient to
screen, go to dynamics, increases size of
like of the GTR, both the Apple pencil
to our capacity. Go to Stroke Path. Hen, try to find a ride. Distance between socks. Likes this. Next
about the brash. Now let's grab red
color and let's try to paint sock and
you see it's so cute. Let's find the ones
that I created before. Here. I gave you two different
kinds of socks. You might use
possums amines fine. And now we've done
with our brushes, guys, you can experiment, you can create the ribbons, you can create all set. We need a hand on
the Christmas tree. You can create Christmas star. You can create so many things that are related to Christmas. But I think the most amount of brushes that we created now
it's pretty much enough. So now let's move
to the next part. We're going to
create a postcard.
5. Christmas card: Watercolor Snowman: And now let's create
law fenestration. Let me think maybe
a dark gray color. I want the grabs a SOC rotated, increase the size like so. Now I want to love
herself positive likes, he's like it's just barely seen. Go to lower layer on Denise. And less crap. How snow middle. Grab a bluish color, puts a snowman here. I think that sock we can
place on Denise likes. I'll create one
more layer and bow. Let's grab Christmas tree. I think I wanted to use sauce, Christmas trees, green color. Ways it summary here. Place our snowman in
front, dedicated one time, go to lower layer, tap hue, saturation and brightness
and increase the brightness. Because I wanted to remove
the transparency Lexus. One more time. Like said, like such
merged together. Go to the Christmas
tree and you see our snowman in some parts
is actually transparent. So I'm going to remove this
transparency like sad. Now let's keep
creating one layer. Now we can put says
gingerbread cookies. In front. I'll 7, 8
thermoset transparency, go to lower layer, merge together and
merge together. Now I need to create
one more layer. And behind our snowman, I want to grab is in your tree. To be created recently. This one. Summary here. Select these Christmas tree
and increase the size. Like sad. Also need to remove
the transparency. Got the logger layer
increases size, duplicated TO times
and merge together. I keep neck theme, vagal, go and create one layer. Underneath. This time we'll grab
boo or bold brash. Go and grab law, the law of live by the
color, almost wide. And we need to create
some kind of snow. And because this is night
sky and it will get darker and create fair released too quick to
atmosphere of night. My survey we can turn on paper. I almost forgot about. It. Creates a gradient. Flight light blue color here. Some blue shades from the trees, and shades from our
gingerbread cookies, shade from the snowman. I can now grab blending tool. As a blender. We're going to use
terror lab rash. The rest you shouldn't
blend, it's totally fine. Next, let's create
one more layer and in nice, most color. But we still have
both ortho brush. And I want to add this a wide
color under our snowman. Because I want to show
he's not transparent. You see lenses now emerged
as a result, snowman. Perfect. Now I want to add some
kind of shades and colors. So grab a dark blue color and I want to add some
shades to the snowman. Now grab a reddish color, maybe orange, even forage. Now, reddish color. Like that. Next thing, let's grab some brush and
I want to add shades, press clipping,
mask, grab multiply. Bluish color, this one, and we will speech brush to
go watercolor background. So I want to add some realistic watercolor shades, like sad. So same we're going to do with the rest of our
lovely illustrations. Some reddish color here. Can you shouldn't forget
about hands from both sides. And reddish color to
the nose of loudly, of our loudness normal. Like a snowman is ready. Let's merge that together. Now Christmas trees, glib and
mask multiply same brush. And we will grab a darker shade. Merge together, save as
SaaS Christmas trees, clipping mask, multiply by K. Last final touch, we have
our gingerbread cookies. Clipping mask,
multiply orange color. And when it does
show some shades froms a cookies as well. And you had some kind of
mentioned to Sam and perfect. Now I want to add
some snowflakes. Both tag prep, white-collar
ones that we created, controls the size
and not around. They can pay in different
kinds of snowflakes. But be careful, don't
put too much of SAP. Perfect. Now what
I want to do next, I will merge together
all our layers. And I want to make it
a little bit brighter. Go to curves in preset color and play around
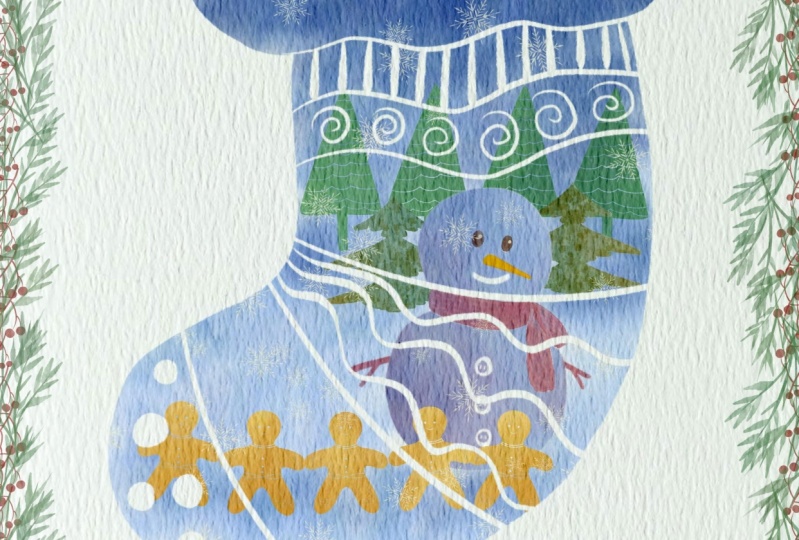
with some variations. And now it's so, so saturated. So as a neck fans at v
should DO real create some specific shape
for our illustration. So now I'm going to show
you some magic trick. We'll go to our
stock in and press Select neck thin press, invert. After that, we move those
layers are just on a top and press Clear and
turn off our stock. And here is a little bit
less brides a tie expected. So we're going to duplicate
the layer 2 times. And now as you see, we have a stocking like it has a beautiful picture in
the shape of our SOC. And it looks so cute. Also, you might add
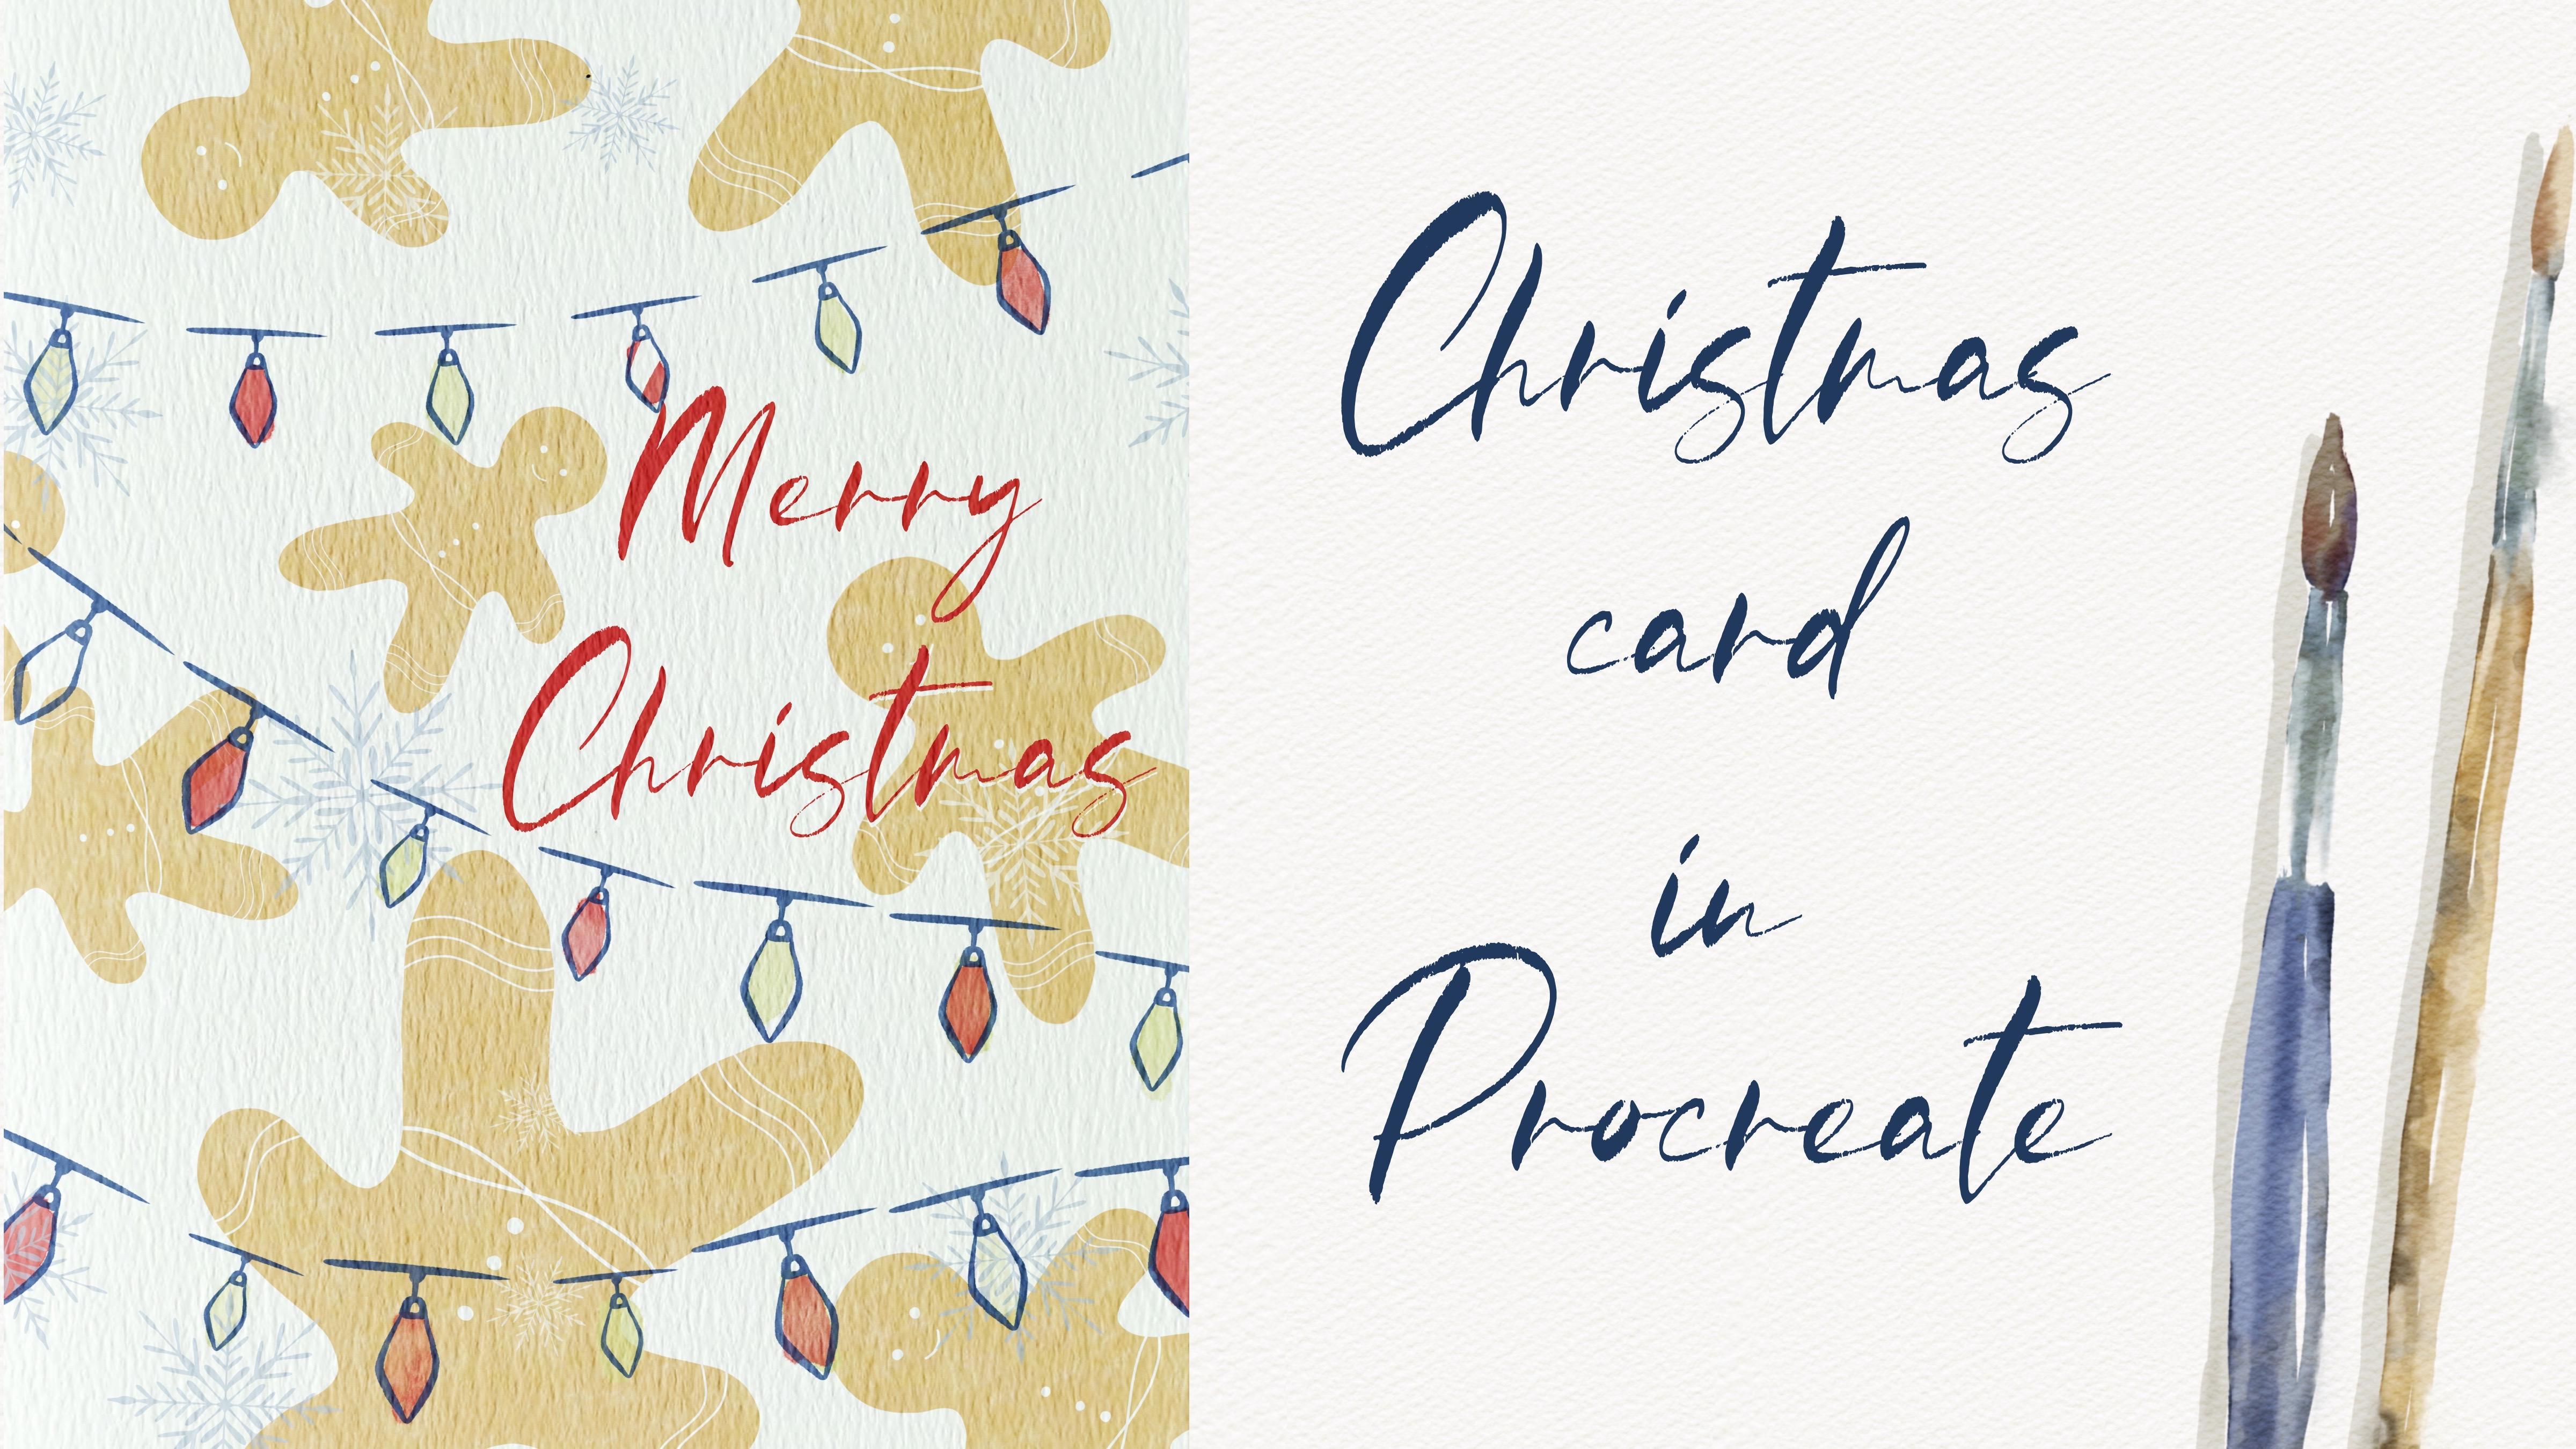
some other decorations. Don't forget to write Merry
Christmas, of course. Grab red color, create
one more layer. And after that, press Add Text
and write Merry Christmas. And think where
you want to place. It can be here as a size and the color
can be slightly different. Maybe you want to
choose blue color, I think would be more suitable. Yeah, Merry Christmas. And around we can also add
some kind of decorations. That's when you might
grab eucalyptus. X is just so beautiful. Altogether is eucalyptus we
can create one more layer. Go grab branch. Maybe not set beak size and place it underneath
and replicate eucalyptus. Create one more layer. Grab hold of SHE. Handy, you might paint berries. And it looks fantastic. Wk to make it more saturated. And our first Christmas
postcard is ready. Let's move to the next part.
6. Christmas Card: Wreath: Okay guys, we created
couple of new layers. After said, let's
grab Christmas tree. One brush. Grab dark green color. And we need the creative
brief versus perfect. I think. Maybe a little bit, of course, this part, create,
create one layer. Grabs a slide on green color and you can
experiment with leaves. Choose the leaves at
you like Moore's, it might be very suitable. Like see swans, I like so slip so I'm going to
duplicate it. After that. Flip vertical and flip
horizontal and play it. Sam promises side. Like the head. Next, I'll create another layer. Grab brown color. And inventory are not
connected, but like says, I will place it underneath everything and I will
remove some of the parts. Next I will grab a
bright red color brush. I want to show
very big barriers, not everywhere, of course. Some parents can be smaller. On the top of everything. Experiment with a size, likes a head, neck thing. We need to remove the transparency
and that's important. Go to this beautiful
Christmas tree. Their actions, hue,
saturation and brightness and tap
brightness to maximum, replicates a 20 times
and merge together. And as you see now, SaaS
farts is barely seen. Now let's call it
TO our branches. And I wanted to erase
some parts and go to various merge together. Saying this plant
pen merge together. Now the thermosphere
of her lipids. And several of those plans
should be behind, underneath. If you want, you might
place it on a top branch. Removes the brightest
parts. Okay, code. Now guys, what we should do, we can add a little bit
off colored dynamics. So create been malaria, a bow, our Christmas tree. And I will press clipping mask. Next, I will set as multiply when the layer mode here
over to color background, grab a dark green
color because this is multicolored,
Multiply blend mode. So it's me and said, colors feel more saturated. Hey, saying you're going
to drop its leaves. Create one more layer. Press clipping mask, said that
as a multiply green color. If you're going to
grab a darker shade, grab our total. As a blender, we're going
to use terror layer, brash, also human
CREB, both crop. So it gives even darker shades. To blend that. Same here. Dark green color. Saying is red color, merge together and
merge together. Same base, red color,
clipping mask. Multiply our credit shade. I would like to choose
Go Apollo brush here. And later we can then blended. Looks way better. Almost done. Merge
together, merge together. And we have says
branches also TO same multiply. Brown color. Once again put into
it everywhere. Just randomly. Yeah, perfect. Now, merge together,
create one more layer. Clip it, multiply. Greenish color. And I want to show some shade here is create a new brain, some color then LQ. And the final, final touch, or what we should
do is we need to add a text like Merry Christmas. This reddish color. Add, add text. And the right Merry Christmas. Place it here and
choose fonts that you have chosen funds at you. Like I have so many
different fonts. So for me it would be probably difficult to choose a
vines that you like most. And final batch we
can add snowflakes. I think it would
be so beautiful. So create one more layer. Grab bluish color to your my play, some nice. So those who want their fear, we use our paint. Henna, final, final
touch we're going to grab full lap is lazily. You can grab the color, create one more layer on top of every pain and add tiny
bit like a filename, snow. Thanks to you see
you so splashes. And we've done it was our
Christmas wreath illustration. You see, it's so simple. And now I wanted to give you some kind of foreigners
illustration. We will create lovely postcard for Christmas in a five minutes. That would be so fast. Let's do it together.
7. Christmas Card: Gingerbread Man: Hi, I hope you're ready
for our last illustration. And Sutcliffe is so quick. So I will go and grab Gingerbread Man brush and
create lovely illustration. So let's just randomly
place some code around. But don't overlap. Hold together. Yeah.
Yeah, Okay, I like that. So there is a background. Now let's move to
next part forever and think where we want to find the lights and be
careful Visa barrage, it follows a stroke. So be careful, okay, allow live. Next we need to add some colors. I'll create one more layer
underneath and grab our brush. Okay, down versus
decorations as well. Now, we also need to
write metric response. To replicate this layer. Go to lower layer
and tap wide color. As you see, one of the
pillars would provide. So I move it a little bit to the right and we have
some kind of shades so it doesn't interfere with our gingerbread man pool
cue and neck thing. I want to add some kind of snowflakes and I'll
choose so one, create a layer,
controls the size. I will say if you want
you can grab slide a bluish color and
play some haul around. Well, while I'm all other
postcard is ready and you say it took us less than five
minutes to finish it. Guys, I would like to see
all your creative artworks. I wish you luck with your
Christmas illustrations. Who's creating
Christmas brushes? All teach us any new media. And in our next video, we're going to be lovely
floral illustration in a watercolor style. This is the end of our class. And now you know, how can we praise must brushes
in Procreate. I hope you enjoyed
my today's class and now you have
so many ideas how to make a watercolor postcards devoted to Christmas
in Procreate. I will be happy to see all
your projects that you create. You can share Sam in projects
and sources section. And if you have some
questions, suggestions, or recommendations, you might also leave some in
discussion section. And let's see chairs in
a new class, mobile.
 Inga Yoon, Digital illustrator and teacher