Transcripts
1. Introduction: Hello, I'm Jennifer Nichols and Layland post studio. I'm an artist teacher in the fabric designer and today I have a fun mini class on drawing stylized bubbles in three ways. I'll show you a soft link that looks great on light backgrounds and a chalky style and painterly style, both of which look amazing on dark backgrounds. We will take a look at some fun ways to use your bubble art. And I have a Pinterest board with even more inspiration. Joined me for my first mini class. These are so much fun and surprisingly easy. Let's get started.
2. Downloads & Brushes: To get to the class resources, go ahead to the project in resources tab and make sure you're in a browser that is in landscape mode on your iPad, not in the app. And here's the resources over here, there's a brushes set, just a couple of things. It just started pouring down rain so hopefully that you can't hear that. And a couple of jpegs, these are also in the Pinterest board. So the Pinterest board has some really great photo inspiration of somebody's art and a couple of photos as well. So for the brush set, just tap on it. If you're in Safari, it might work differently elsewhere. And then tap Download. You can see it, download right here. So you can tap on it and go. It'll go right to your files app. You can just go to recent and it's that very first one. And you tap on it and it goes right into Procreate. Once you're in there, it'll be at the top of your brush library. We're going to go ahead and start a 10 by 10 canvas. It can be really any size you want. So tap the plus sign. I'm going to do inches at 10 by 10 at 300 dpi create. And that's what we're gonna do to get started. The Jens Carmel variation brush is a tweaked brush. That's not really mine. So I put it in quotes. And then I have a little silhouette of a little boy blowing bubbles and a little girl blowing bubbles, and I'll show you those later. The rest of the brushes we're using are actually Procreate native brushes. So you can go ahead and go into calligraphy and the monoline brush and just pull it right out. Loops, pull it down, kind of grab it. Sometimes it takes a second. It looks like you removed it but it won't be removed and then tap on the bubbles and drop it in. So I just like keeping all my brushes together. You don't have to do this. I'm going to use the soft blend air brushes. Well, pulling these out without duplicating them is only working because they're Procreate native brushes. If it was something else that was somebody's creation, it would, it would actually move them. And you would need to make a duplicate before you move it around. We're gonna go down to the charcoal section. And we're going to get charcoal block. And let's go into painting and get wet acrylic and get turpentine. And we're ready to get started.
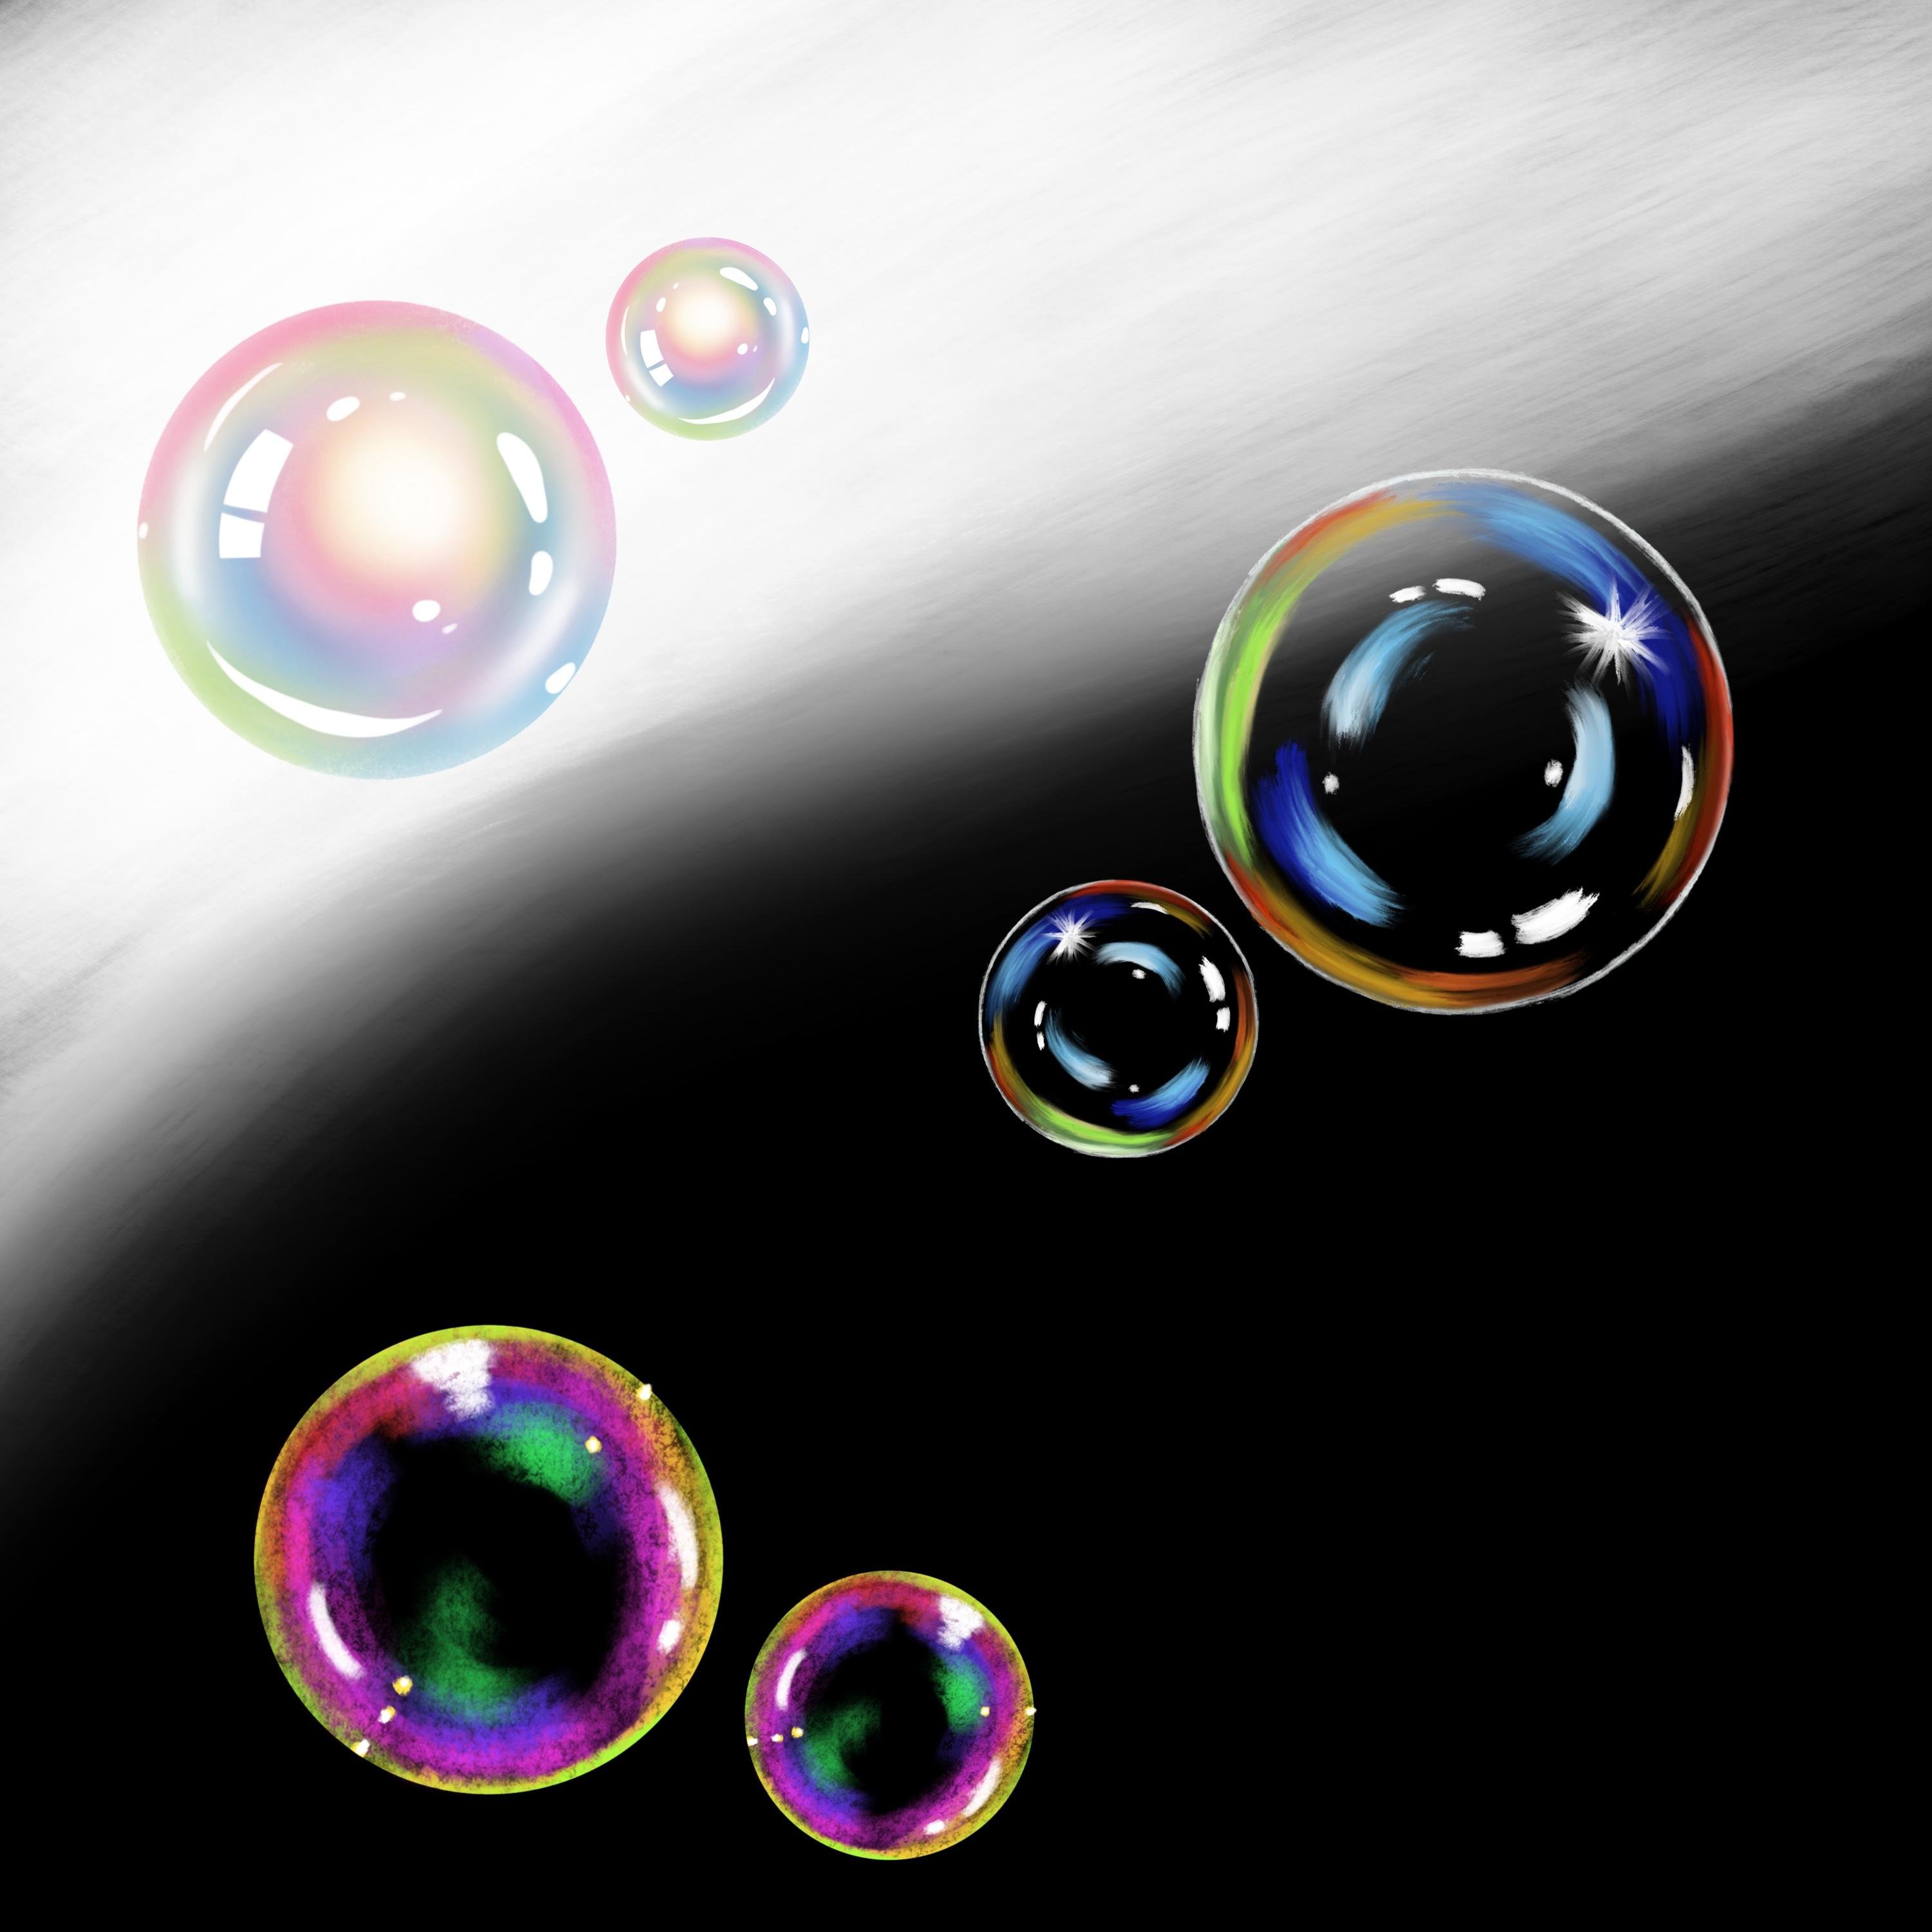
3. Bubble #1 - Smooth: All right, Let's go to the monoline brush. Any color, I'll just choose black and make a big bubble. Draw your circle, let it snap, put your finger down to make it a perfect circle, and then drag and drop. I'm having a hard time with my iPad today. Alright. We're going to turn that off, but we are going to select it. And now we need to go to a different layer. Let's go ahead and use wet acrylic. We're going to have some pink, pretty much all the way around. We'll been a purple. Put some purple on both sides, some blue on both sides. Some yellow. You'll find this wet acrylic is very transparent so you can go over it a couple of times. I'm going to put a little bit of yellow, of lighter yellow in the middle there. And you could even do a little bit of white around the edge, but we have a white background so we don't want to make it to white. We're going to add some green, more like a splotch of green here and there. And now we're going to go to the smudge brushes and do the soft blend on about 10 or 11 percent and do short little smudges that are in the direction in the curve of the bubble, back and forth, back and forth. I might even turn that down a little bit. So I have a little bit more control. In the center. I want it pretty white. But everywhere else I want a lot of color because I want to add some very bright white reflections on it later. And if I don't have too much color here, then those reflections really just don't show up in a smudge this center a little bit. I think I need a little orange in there. Let's grab a nice bright orange. Smudge that in. Maybe tapped a little too hard on that. Needs the lightest touch. Now, I have my pressure curves set so I don't have to use a very hard touch. Let me show you that really quick. So if you go to the wrench tool and prefs and edit pressure curve, which is right here. So I have mindset like that. So I don't have to press very hard on my brushes. Okay. There we go. I'm happy with that and I'm gonna go to a new layer. Go to the bright white. Let's go ahead and go back to the monoline brush. Let's do some small wins. So we're putting some reflections on, you don't need to think too much about this. Just go with the curve of the bubble. If you're doing a very super hyper-realistic bubble, you know, it's almost impossible to look at a reference photo because they are all showing the reflection of what's around them, what was around those bubbles. So I'm just kind of throwing out some smaller and larger reflections and I'm going to tap and hold the eraser. So I go to the monoline with the eraser as well. And I might break this one up. That's a little t, big break that went up in also straighten those edges. So it's not the curve of the monoline brush on those ends. So that's something that you can play with or use an entirely different fresh. But that is essentially all you need to do for making a bubble. It's perfect. The nice thing about it being transparent is no matter what color your background is, you can see right through it. It's gorgeous. Oh, now I can see where I maybe need to smudge some more. If you need to smudge some more, go ahead and select your circle again so that you end up staying in the lines. And then you can smudge more and keep that knee circle shape. So this is a tiny bit of an airbrushed or maybe watercolor ish, look. And it's a great one for white backgrounds, just like this. Alright, come back for a couple of other styles.
4. Bubble #2 - Chalky: Alright, I've turned my layer, my background dark, and I have my circle here. I'm gonna go ahead and turn it off, but select it and go to a fresh layer. Go to my charcoal block brush. And I'm going to start with bright yellow. I'm not going to be smudging this lens and being a little extra careful. And when it go with orange, I'm going to make it a little bit more orange here, smaller size, an orange mixed in there. Switch to pink, some blue. And finally some green. Kind of work in the green into this center. A little bit on both sides. Still go in with the curve of the bubble. And I'm going to add some white pit. This brightened up a little bit over here. Just in a couple of spots. I feel like this is too solid of a pink spot. So I'm gonna go back to my orange smaller size and just extend this orange a little bit. Brighten it up a little over there as well. So you can make these as great as you want. And then of course, the next layer for the brightest spots is the crucial point here. So we're going to do some really big staying with the curve. This is where you can cover up some proofs. Maybe do some smaller, longer areas like this, some even smaller ones. And then maybe even a couple of little random clean spots. D select. And there you have it. That's your charcoal bubble. I'm going to turn the background black reel clicks. You can see how the impact of that is much better with a black background. So much fan. So this charcoal texture has a nice rough texture, but this super sharp clean edge. If you don't want a super sharp clean edge, you can make a circle. The circle that we used. You can make a circle with any brush, so it has a textured edge as well. And use that as your selection when you do your bell. Right, one final double. In the next video. That one will be painterly.
5. Bubble #3 - Painterly: Now we're going to make a painterly looking bubble and this is probably my favorite, although I don't know, I think I can't pick a favorite. I, we're not going to use this as a selection, we're just going to use as a guide. So I turned it a bright color and I'm going to turn the opacity down. That was just our circle that we made in the beginning. So since I went a painterly look, I don't want that sharp edge. I'm going to go ahead and use the turpentine brush. And I'm going to put it on white and a really small size, I'm at 2%. I'm going to fast-forward through this, but all I'm doing is making a thin painterly line following the edge of that circle on a different layer. You can see how painterly at really Lex. And now we don't need that circle anymore. And on a fresh layer, we're going to continue to use turpentine. I'm going to bring my size to maybe just four or 5%. So we have this painterly circle here. We're not going for realism. I'm going to go with this red, but I'm going to bring it down a tiny bit darker. I'm going to put some red around the edge here. And a little bit over here. And a little yellow. This one's going to end up with a lot of black still showing. We are doing a little bit of smudging on this. So I'm just kinda getting some color on for now. I'm going to get the orange. We're going to play around with a few blues. Let's go a little bit bigger for the blues, I'm gonna kind of curve may bubble here. I want some darker blues on the outer and then some lighter blues inside. So I'm right now on that same blue. But I'm going to be adding some lighter blue to this inner one. And some darker blue. Maybe even bring it down into the more royal blues and get simple rate believe. And I also went some green. Can't forget the green. And I'm going to tap and hold this smudge brush. So I'm on turpentine. I mean you go up to about 7% and I'm just doing quick little strokes, tapping back and forth. I don't want to lose this really cool paint texture. But I still want it smears. So I wouldn't want to make it really smooth. You can, of course do it as smooth, as rough as he went. I think I'm going to stop right there. I know there's a lot of black. I'm going to go ahead and add another layer and do the white. And then see if I like it. So let's add some pretty big glossy areas. Going with the curve of the bubble. I'm going to add a couple teeny tiny little Glisson's. And I'm going to smudge this a little bit. So this can be as painterly as you want it. And I think I'm happy with this. And then this time we're gonna go ahead and add a little glimmers star. I'm having the hardest time with my iPad today. I don't know if there was an update or wet. Okay. So I just went down to a teeny tiny size, I think 2%. You can add a little glimmer on the edge. Or on the top here, maybe should do it on its own layer and then smudge as well. Those little paint strokes really stretch out. Still has a really cool painterly look. I think I'm liking this outer one more than this inner one. So I'm just going to take that right off. And there you have it. There is your painterly bubble. When other things you can do is go ahead and alpha lock that bottom layer, that is the ring. And you can change the color of it. So if you want to make it green over here where the green is up against it. You can do that. Red over here where the red is up against it. And then a won't stand out as much. But it is kinda nice for it to stand out to you. It does give it that more homemade painted look. It's all how you want it to look. So the way we've done Bibles today, we, you know, there are some reference photos you can check out. Most of them show the reflection of their environment. So we don't really need to do that. So just have fun with colors, blank spaces, all of that stuff. The, the white layer is what's going to really make it pop c. Let's zoom out and look at that. I'll show you the other one I did. Another one I did. I love it. And if you want to make repeat patterns, go ahead and check out my repeat pattern class as well. This was super fun to do. I just duplicated and move things around. It's just one bubble. So here's one with that painterly look with a lot more color on it. So that's what that would look like. So you have you can just make it however you like. I'll see you in the next video and I'll show you exactly how to make this, how to make the bubble flips so far away and all of that. All right. See you then.
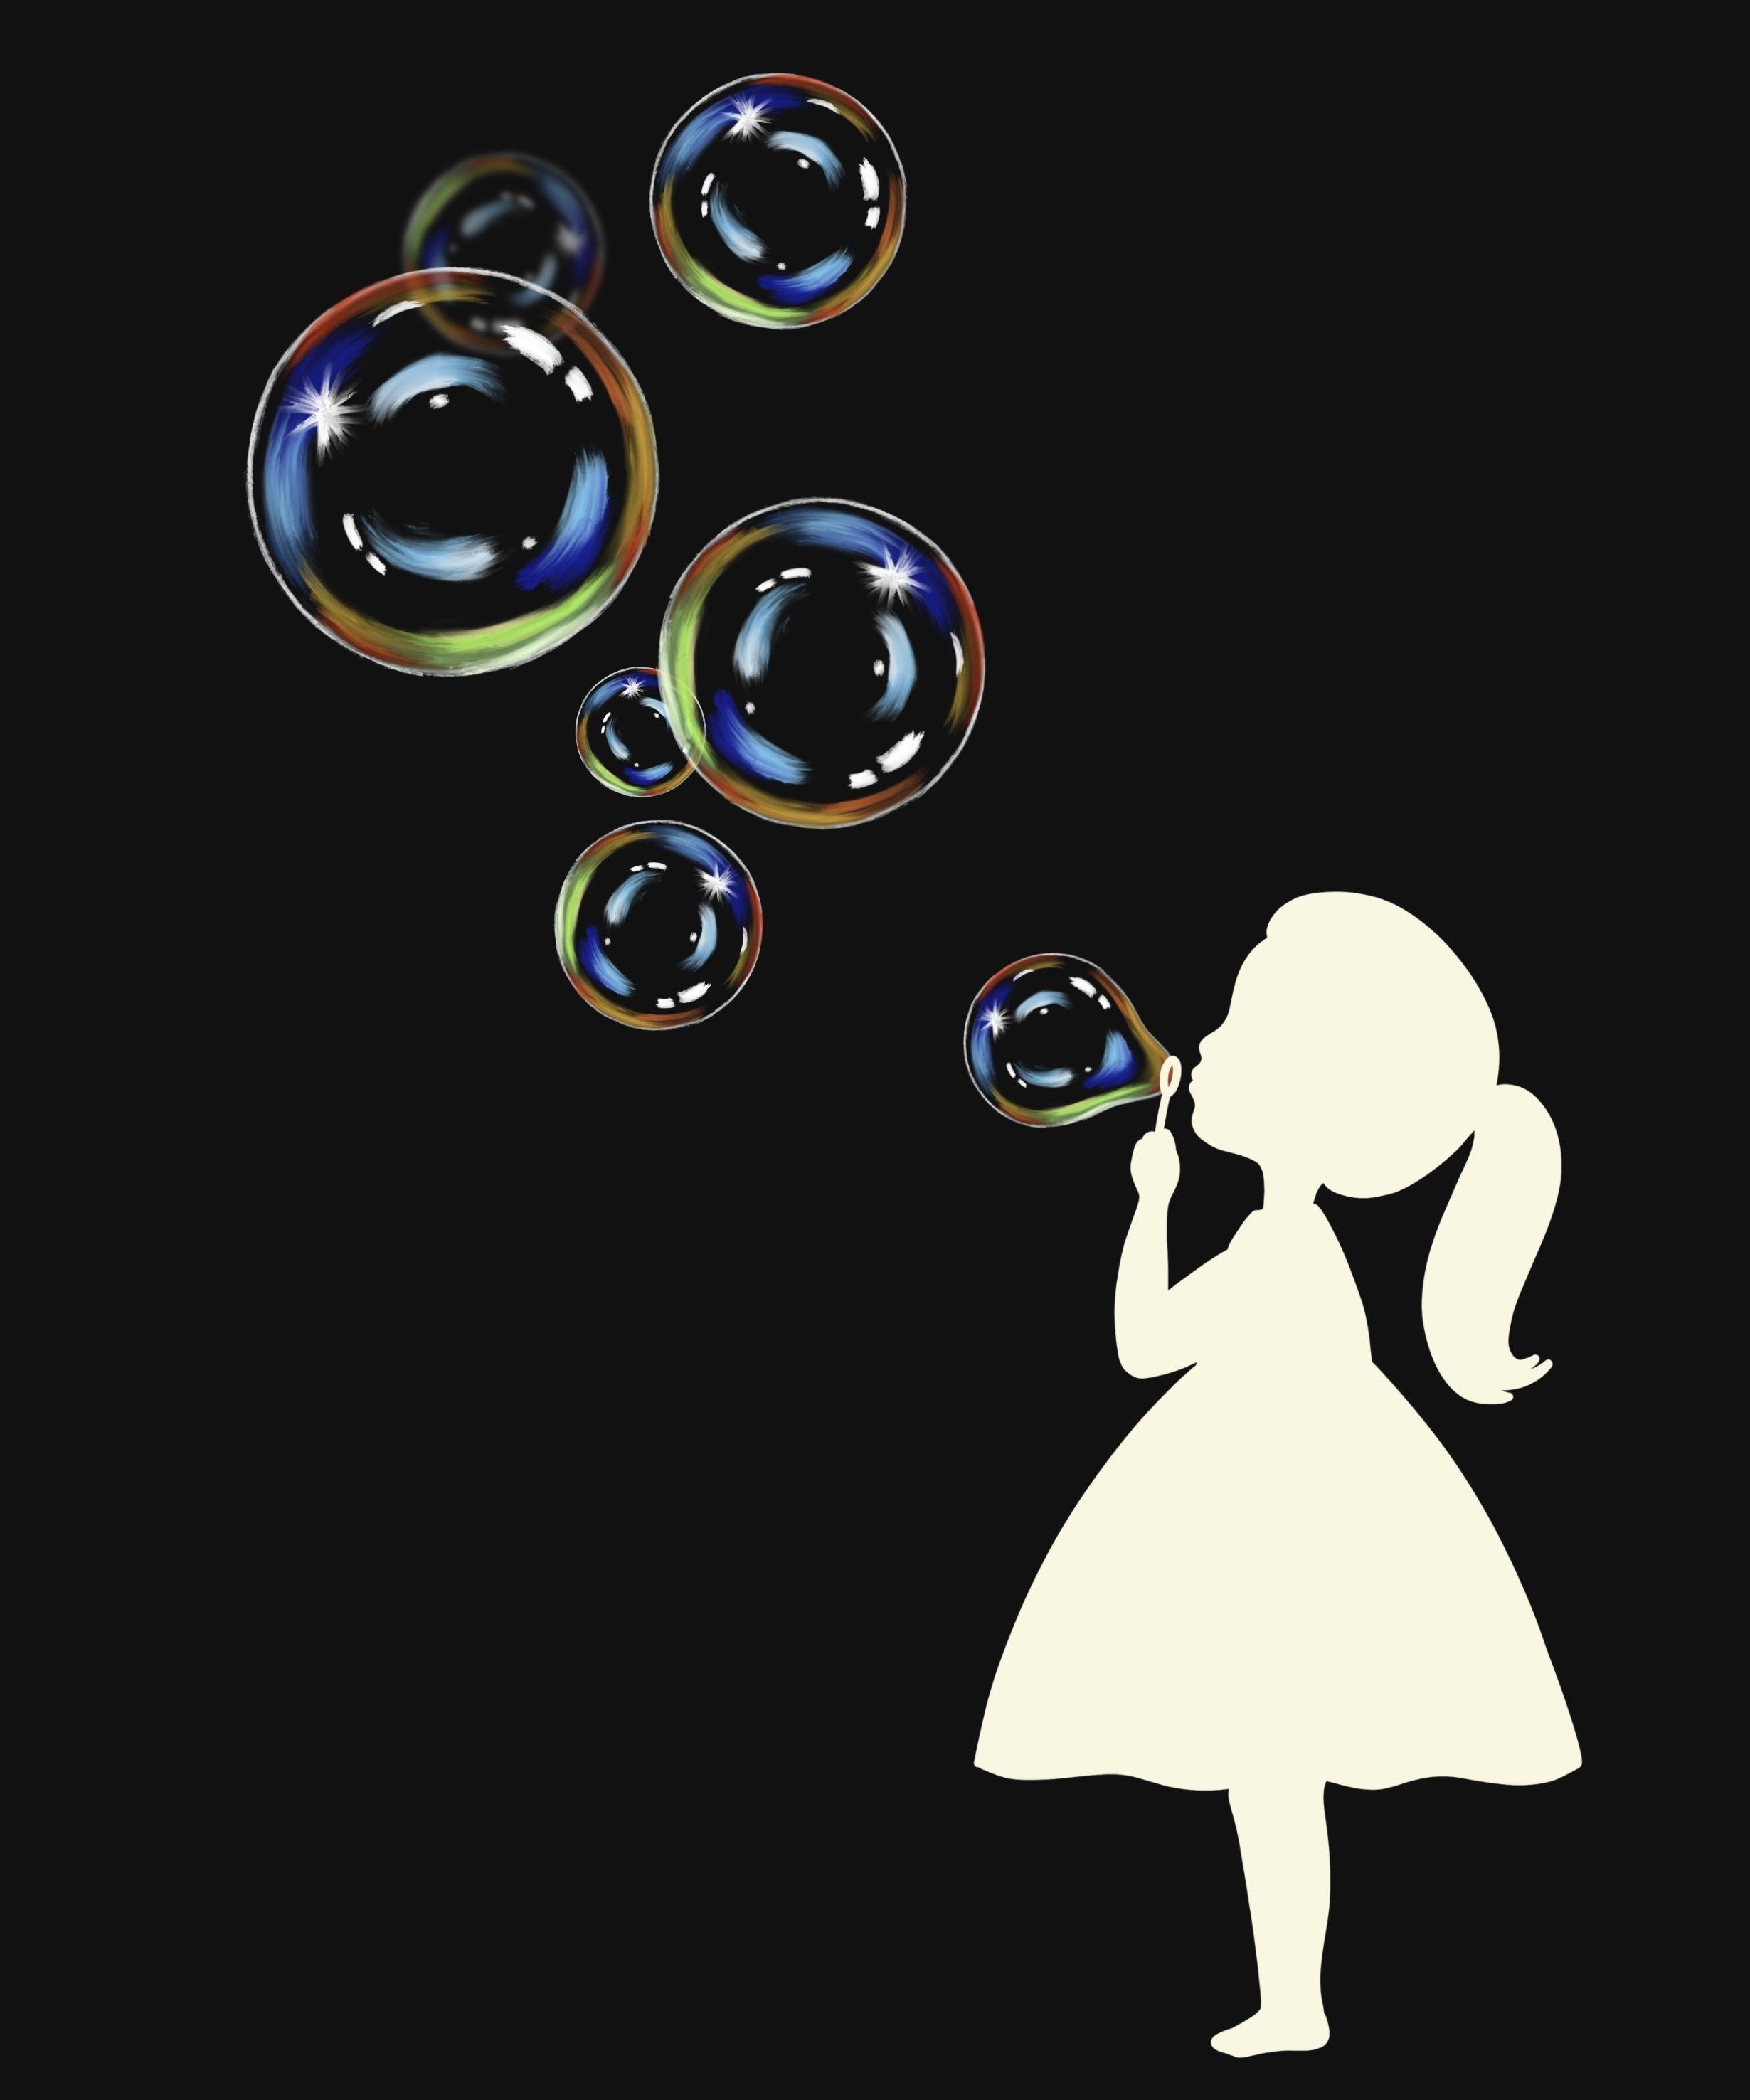
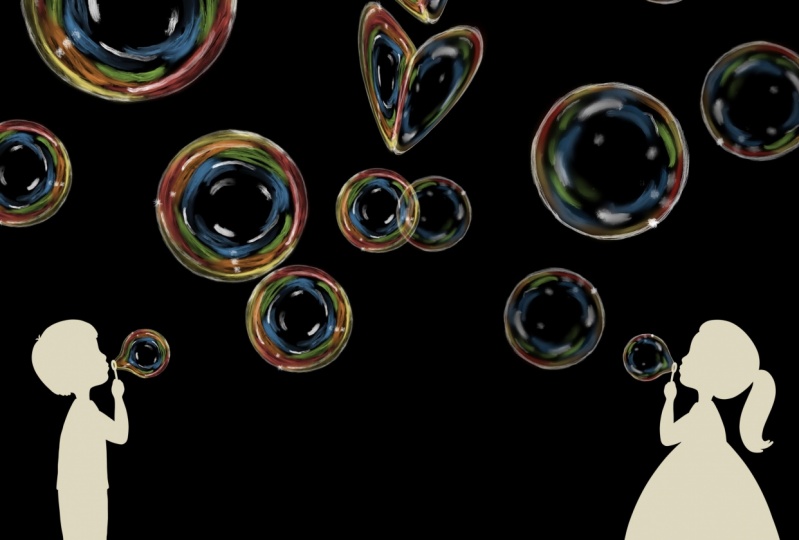
6. Inspiration & Class Project: When idea for our class project is to go ahead and have fun with my little boy and little girl. Stamps here. Pick a nice light creamy color and stamp it. Oops, let's open a new layer and stamp it. I'm going to turn my background up to just a little bit. Now you can place this where ever you want. You can even have her cutoff down here. Hurry you want to please her? You could full libertarian Peter over here. And then take your bubble. I just used our final painterly bubble here. I'm going to duplicate and keep my originals intact and then take the duplicate and flatten it. So now I have this new bubble that's all on one layer. I can rotate it and flip it so it's looking a little different from that one. And move it around. If I don't want anything quite as big as this original on here, I can just turn that off and keep using this duplicate here. Maybe that's going to be my biggest one. And then I'll have some more smaller rotate. If I have it, look further away, I can bring it down to the layer that's under this other bubble. Overlap in a little bit. And then turn the opacity down. And I can even boiler it a little bit. So those are a couple of ways to get that to look a little bit further away. So making them smaller, reducing the opacity and blurring them. So I started this original, duplicated when I can keep using here. Make them even really tiny. I probably will duplicate the tiniest when each time. But if you're just going for a smaller, we can't make things bigger. But if you want to go for smaller, you can keep going down in size. Now for me what I did to get the bubble looking like it's coming right off of the blower. There is go to liquify. Oh, they're on Alpha Lock. That's why that didn't blur so well. Okay, so I'm gonna do a blurred one again in a second here. So let me find this lens on this one. Take alpha lock off, liquefy. I'm on push and I'm just going to pull this end of the bubble this way a little bit. It doesn't need to look super realistic like an actual bubble being blown out here. Looks pretty awesome. Let me show you this blurred one more time. So I will go ahead and delete this one and take this next one here, shrink it down. Now it's not alpha locked. Turn the opacity down, and blur it. There we go. So just 3% gives it a nice distant. As you can see, you can go a little crazy doing a whole bunch of really awesome little bubbles. And of course, making them teeny tiny is going to make them look farther away as well. So this would be a really great class project or you can be inspired by anything else you want related to bubbles, I would love to see anything you do. This one was inspired by the picture in my Pinterest board where there's a little boy in a bubble. So I just took a previous painting and duplicated it so I can mess with it some more. I just erased the bottom of the bubble down here. And then be sure to hop over to Pinterest where there are some photographs as well as some more painterly looking bubbles. And I hope that you're inspired to make some beautiful bubble pain teens head over to a class and in the same tab as the resources you can create a project. Tap on it. This upload image is just for the cover image and it will crop it to rectangle and it has to be super small. This image button down here is to add images to the content of your project and you can add multiple images. So I would love to see your work and adding your stuff here allows everybody else to see it as well. Please go ahead and leave a review and let me know what you think of class and hop over to my profile where you can find all my classes may links to everywhere I am a mine and have lots of fun. See you in the next class.
 Jennifer Nichols, Artist & Teacher, Procreate