Transcripts
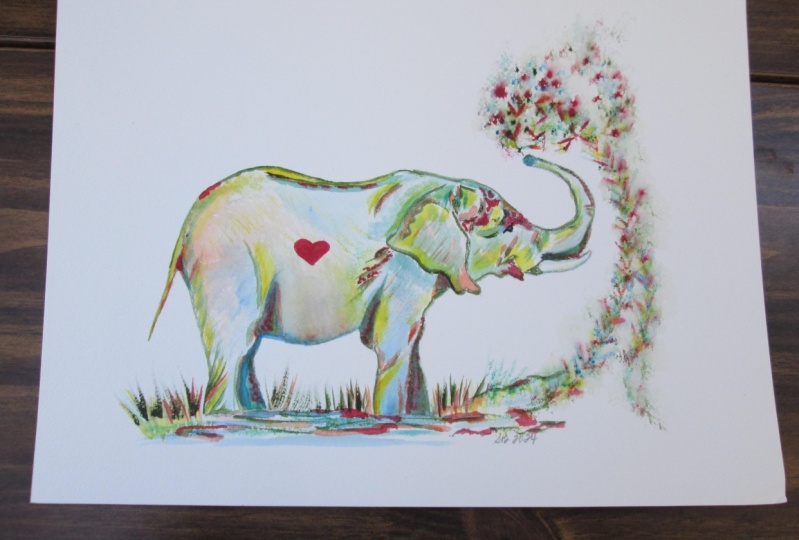
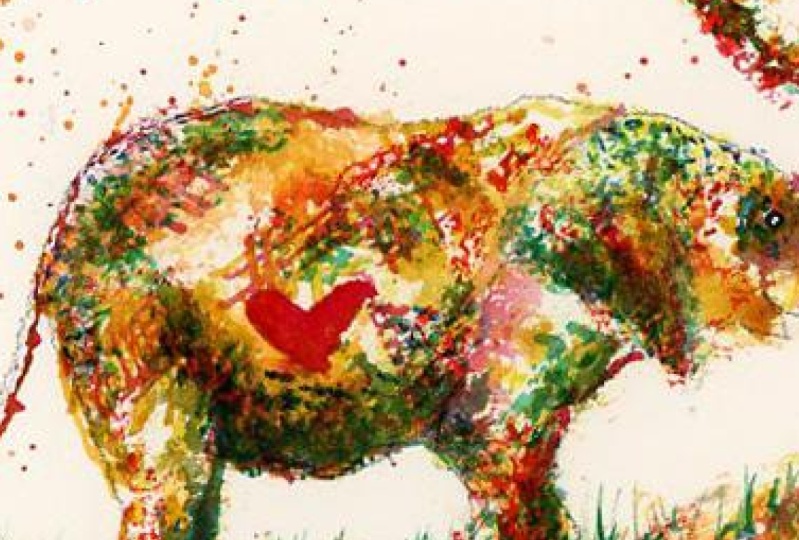
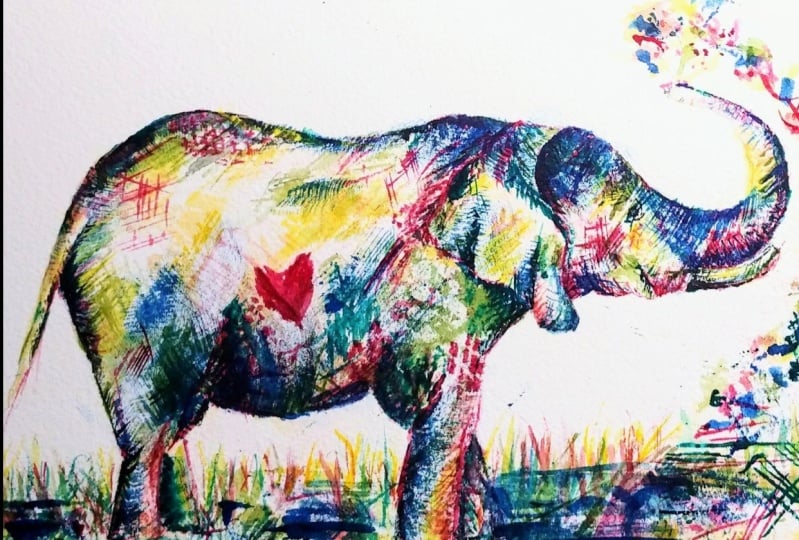
1. The Playful Elephant Trailer: Yeah. Hello. My name is Sarah Gardner and I'm a self-taught
watercolor artists. I love bright colors and animals and texture
and watercolor. More than anything, I really
love experiments in my art. So that's why I'm here today. Welcome to my first
class on Skillshare. Today we're going to be
painting a playful elephant. And don't worry, this is a beginner's level class and I'm going to walk
you through every step. We'll start off by
looking at photographs, will identify the mid, the light and the dark tones. And then we're going to
assign colors to those tones. Next is mark making. In my opinion, mark-making
is the best part about this class because you can
use any brush that you want, anything that has texture
and speaks to you, or you can even use sponges. I love sponges and I will be using sponges throughout
the whole class. So we're going to create
forums and layers, do some fine details. And at the end, you
are going to have a beautiful piece of elephant
art to put up on your wall. So let's do it. Let's be brave. Let's be free. And let's remember
why we love and why we started watercolor
to be in width.
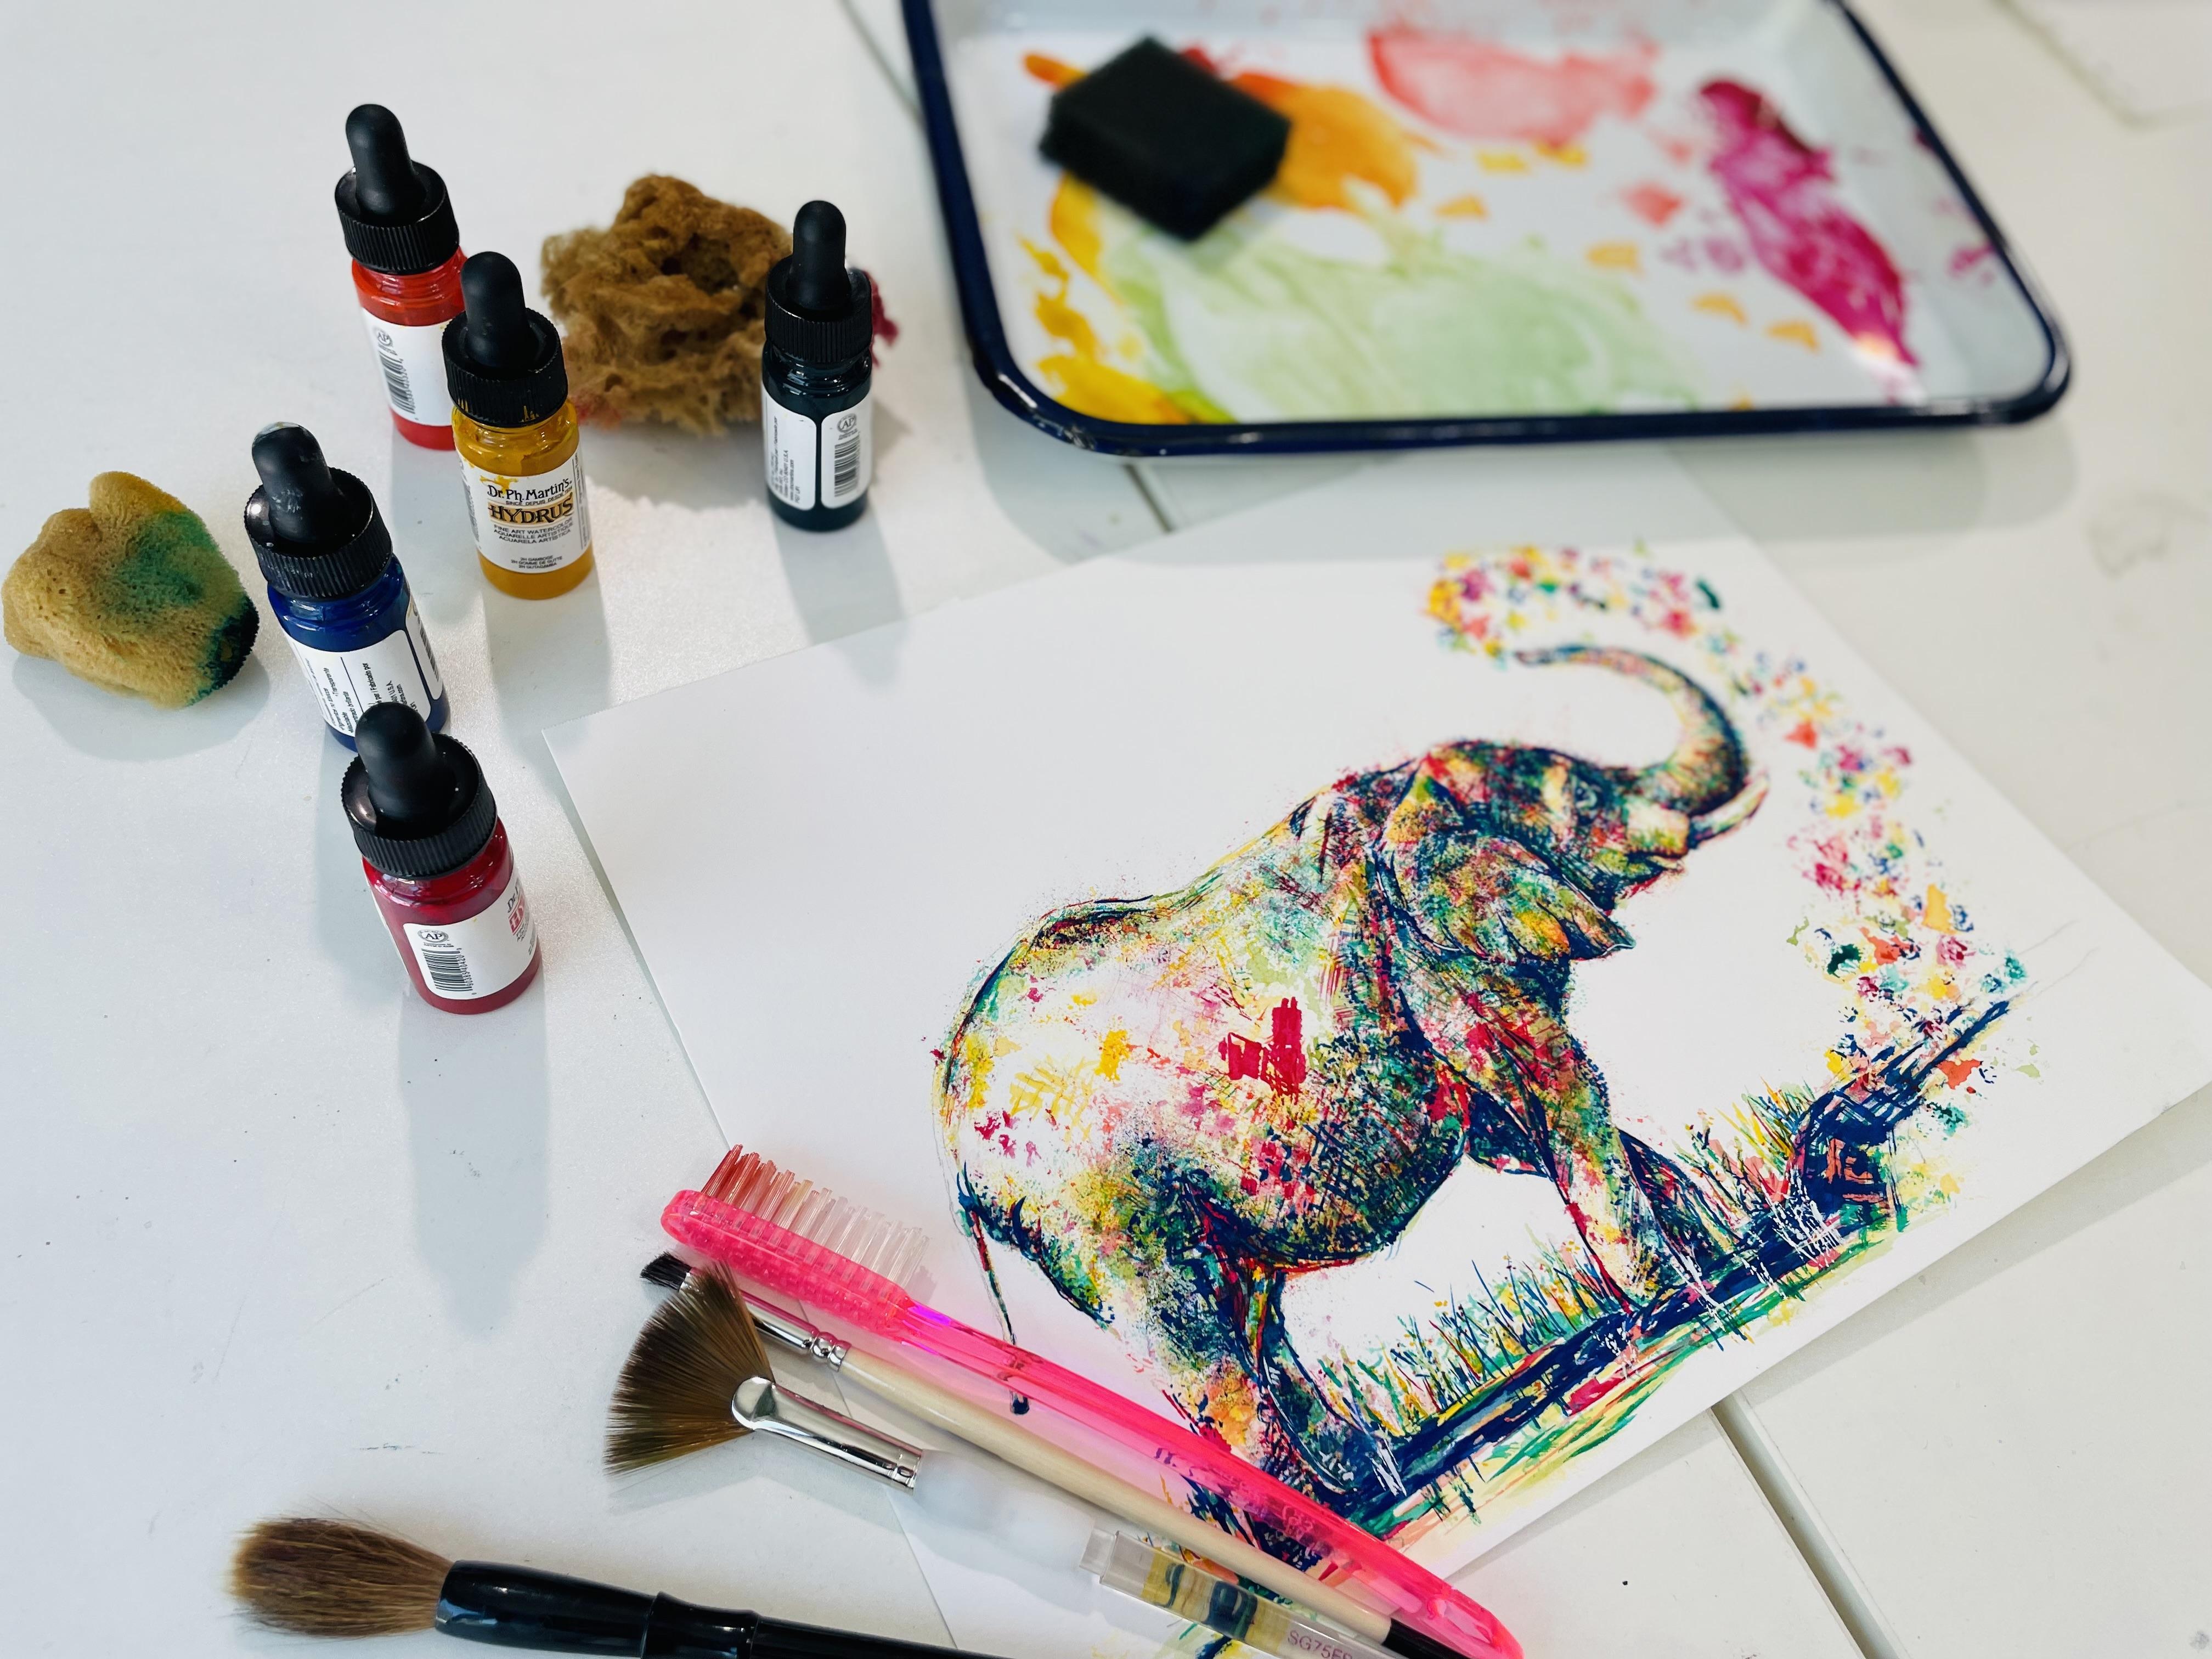
2. Supplies : All righty. Let's get going
with our supplies. So first of all, make sure
you have some paper towels. Those are perfect for
drying your brush, say a dry brush
technique as well as blotting for cleaning up messes. That happens, which I
wouldn't happen to you, but it might for me. Next, make sure you have some
containers for some water. I'm just using some
old pasta jars. They worked great for me. Then. Pencil. Make sure when we do our
sketching you have a pencil. I like to use mechanical
pencil because I get really light lines and also
keeps me from getting, making too many lines,
which someone is. If I get like an artsy pencil, I like to make lots of lines and just start sketching away. Also puts out a color picture, black and white picture
of your elephant. Or if maybe you don't want to print them out, you're
going to save paper. Go ahead and just look
at your screen when we go through the
evaluating phase. As for the actual paper
I'm gonna be using today, this is Canson watercolor paper. It's nine by 12 inch, a £140 cold press. Now you don't have to use
paper that's this heavy. We won't be using any heavy
water at work today because something lighter that
should work to paint. Everybody loves paint
paint, so that paid. So I'm using Dr. Ph. Martin's hydrous paints today. We've got the deep rose read. This cadmium red,
yellow is the gamboge, phthalo green, yellow, blue, and some carbon which will
help us darken up our shadows. Now, sides shadows, we have highlights and sometimes they disappear during a painting. We'll use some bleed proof
white to put them back in if you have white acrylic
that will work as well. So how are we mixing
up our paints today? What are we going to put
them on? You're going to put them on some pants. I'm using a plastic palette
and a metal wash pan. But if you have a ceramic plate, you can always use that as well. For painting and
creating texture. In our elephant painting, I'm going to be
using some sponges, which I'm gonna be honest, I really loved sponges. This is time on my favorites. It's no packing sponge. And I think if you
kinda kitchen sponge, it might be pretty similar. This is a sea sponge in
this artist's sponge, which I've never used before,
but I want to use it today, so I brought it along. Then brushes so you don't
have to have any brushes. I think you can just create textures with
whatever you have. But I will say, I enjoy having a Ryan around to brush when it comes to
doing some fine details. And really use this
flat brush so much. So having a small flat
brush is really helpful to do details and create geometric shapes and
all kinds of grids. This is a 3 eighth inch, so that's my favorite,
It's my go-to. I will use it a lot as you will see for the rest
of your brushes. So I don't expect you to
have all these brushes. I expect you to go
to you in your house or your garage and
dig through and find brushes and other
things that have texture that you're
interested in painting with and using
for laying down color. This is an old nylon brush
that used to live in my gosh, I think it was for
stain or something. I'm not a 100% sure.
But I brought it upstairs to come live
a good life with me. Create art. This is a fan brush. I use it a lot for grids. I also like to use it
to create solutions. What's next? This
is a stipple brush. So this is a brush
that actually is for creating dots and I
use it a lot for water. When I'm doing the water
on the elephant spray. What else? Tell me that this is just an old brush that I
really do take good care of. And now it's become a texture brush instead
of a paintbrush. But it really creates a great look for Warren
skin for this elephant. And so that's why I
use it and I love it. This brush maybe has lived the hardest life of
all the brushes. This is this one belongs to
my five-year-old daughter. I rescue and on the weekends. And it comes to
create art with me. And again, I use it for a lot of the splash patterns as well. I think that's most of the must-have supplies or
probably want to have. What about optional stuff? So this is a light pad and I'm going to show you
how to use them on to basically trace the outer
edge of the photograph. If you want to,
if you don't have time or you're worried
that maybe you don't have the skills to draw
an alloca free hand. This is great to use. Or if you're a more accomplished
artist and you're like, I want to draw it myself
and challenge myself. Do that. Absolutely do that. Just do whatever is
comfortable for you. In addition, we will be doing
each layer, one-by-one, each color, starting
with yellow and moving to the darkest
colors, black and blue. You can draw each layer as we go or you can naturally
let them dry. I tried to naturally
let them dry so that I can think about what
I wanna do next. But again, it's
absolutely up to you. Finally, he met. So if at the end of this you
get to it and you're like, I'm not sure my real
artists does it look good? I have found nine
times out of ten. Throw in mat on something. Suddenly. Love it and it feels great. So you don't have to have it, but I recommend it. So let's get going.
3. Evaluating Tones and Colors: Alright, now we're
going to evaluate our photographs and
choose our colors. Hopefully you have printed out your black and white
color photograph or you're looking at your screen so you can
go along with the mean. The first thing we're gonna do is look at the black
and white photograph. But basically we're going
to find the shadows, the mid tones, and
the highlights. So we're looking at a
black and white photograph because I think
it's easier to see these things because you don't
have the colors that are getting in the way and
messing with your brain. Now a value is how light
or how dark something is. So that makes sense. Shadows easiest to find. Generally speaking, shadows are going to be on
the underside of animals, which makes sense, right? They've got something
over top of them that is putting them in shadow
that is making them darker. Here on our elephant. This inside leg is
going to be darker. The bottom here, the belly. Up in this area, down through the
front of these legs. You've got this big shadow
that's going through here. Ear, the line around it. These little cavernous areas
in the face of the elephant, the mouth, the trunk, and the tusk going up around. We've got some darkness where all this water is spurting
out, up and around. Those are our shadows. Now the easiest thing to find next is actually the highlights. Now that we've looked
at what's really dark, Let's identify
what's really light. So what pops out to
me immediately is the sun is coming from
back in this area, right? So whenever the sun is hitting first or butt's sticking out, It's going to be the highlighted
are the lightest areas. Here is, but it is rump
the top of his tail, this backside of
this right hind leg, this little leg that's pushed
out the top of the ear, the top of the shoulders. Right here in this
part of the face. This is sort of right
above the eye piece where the tusk is sort of sticking out and the top of this trunk, those are highlighted areas. And if you get confused when you're looking at
an animal picture, say you're doing something else, just think the parts of the
body that are sunken, right? Like if you were looking
at your own face, like your eyes are sunken, your mouth, if you were to
open your mouth, your cheeks. The more sunk in an area is
the darker it's going to be further and shadow is going to be the further
it's pushed out. Like your forehead and your nose and in
his case like this, this forehead area and
his ear, it's pushed out. Those areas are gonna be
the brightest lights. The good thing about
identifying the shadows and the highlights is that
anything you have left is pretty
much the mid-tone. So looking at this elephant, all this area here, the middle of the body, parts of the legs, and all throughout the face. We've got some mid tones
to and through the water. Those are your lights and your
mid tones and your darks. So why do we care about
those in this painting? Why do we care? Well,
lights and darks together are what gives
something 3D shape and form. So what's going to
give our elephant form on these edges here
is we have mid tones. That's right along
here in the back. Where those mid tones are in some of these aren't,
some of these will go, we will leave lighter and maybe
keep them a little bit of highlight for visual interests into break things up a bit. We don't want to
outline our animal like black outline because
it's going to flatten him. But where he's moving away as
his back is rolling around, that area is darker
because it's away from us. We're going to take
these values, the light, medium and dark, and we're
going to assign them colors. So I will keep this picture
with me the whole time. I will be referring to either the black and white
or the color photograph. And let's talk colors. So let's jump right
back into highlights. The brightest highlights are here on the back and the button, the leg, we said all
this area, right? So we want to make
sure those satellites, so we're going to use, we're going to leave
white and put some yellow and maybe a little bit
of light orange in those areas depending
on how light they are. The absolute lightest areas, I'm going to try to leave
as much white as possible, but if it doesn't work out, bleed proof white will save us. So don't worry about
it. Don't stress. And we're actually going
to use the yellow in the highlights and the
orange and leave white. We're going to put it
all through here, right? So we can be pretty
laissez faire just throwing it out there
because we're going to build our layers after we get the first layer is a yellow
down in some oranges. Then we're gonna put
our mid tones in, which are gonna
be red and green. And with each layer
that progresses, we are going to get a
little bit more strategic, be a little bit more
purposeful in our strokes. Will start to put those
colors in here, in the back, here in the middle,
and there'll be over top of those
yellows and oranges. So we're going to put
them all through here, even in the dark areas. We're going to put
all the mid tones in here to try to keep it separate. We're going to let each
layer dry color by color, by color, so that our colors
don't mix and get muddy. Then the final thing
we'll do is our shadows. And as you can see,
these shadows look pretty purple and blue. And so we're going
to mix some purple and we're going to
use our indigo and our other dark colors to put
them here on our elephant. These colors are going to be these last colors that we've
put in, right up in here. Some of this will
be a round brush. Some of this will
be our flat brush right around in there. Right there, right there. Lot of this'll probably
indigo where you see these super dark areas
right here and here. I his ears, his mouth
where that goes in deep. And then that's how it works. So let's get going.
4. Using a Light Board to Sketch: Okay, now like I said before, if you want to sketch this
elephant out yourself, you are more than welcome to all I'm going to try to provide
an outline that works out. However, if you have a light
board and you wanna know a quick way of how you
trace your own outline. I will show you real fast. So here's our light board. Mine goes up three times, 123, whoo as bright. Now I will say it's
a rainy day here, which normally I don't like
to paint in a studio on rainy days because the
light isn't as good. The light is super great. Using the light pad because
the darker the room is, the better, because you can
really see it a lot better. The darker does. Of course, you don't
want a pitch black room, but I'm going to show you
how to do this yourself. So let's start. I'm gonna do this a little
bit darker for you guys, but normally I would do
this as light as possible, but I felt they
could still see it. I'm not going to do
with tons of detail, but let me show you here, my daughter screaming
with her dog. They're having a good time. So we'll go here
around his butt. Down, down, down, down, down, round this little tail. Go up here. I'm kinda going in a
little worried these are darker just to remind myself, like hey, those are
darkened areas. Lighter here. I'm pushing
down on the paper here, whereas foot goes is flipped, kind of meets the shadow. So it's a little tough to tell. Trying to push down here. Like it's like it
goes up like this. I'm also going to trace this
little bit of shadow just so I know when I'm putting in my darker stuff
later maybe like, Hey Sarah, that's where the
darkest of your shadows is. So here we're going to go back down and do the
rest of this leg. Can I finish his
little belly appear? You can kinda see here's where
one leg is going behind. Here's the front leg, right? To do, to do. If we need to, we can always fix this sketch up a little bit. Go down and grab the
rest of this leg. Here is where these
two separate. Again, this doesn't really dark on the bottom or this shadow is so we can kind of blend those together if we want later. I'm gonna go trace
around this ear. Pushing down again. This is what it
looks like to me. Again. I go down the top of the ear, but we will try and
make it a little. I don't want it to be too. I've done this before and I
make this too straight here. So I need to make it
as random as possible. So you do what you think works. It's hard to exactly
to see here. I'm also going to trace
this little highlight here. So I remember he, Sarah, keep that, keep that. So you don't have to
bleed proof white but white it later. And here's where the dark
and the light separate here. I'm gonna go down here, grab this little highlight
so I preserve it. Let's see. And this is dark areas where I stopped for open
around his head. I'm kinda okay. We'll go there in a minute. Okay. I'm going to
follow his head down. Make this little shadow
here, keeps the shadow. Can barely see his eye. I know it's like in this area, but I'm just kinda mark
it know to go back in their leader and
try to put it in. It's kinda hard
to see right now. There's a little bit of
a highlight there, boop. That's where that shadow stops, come down and then around
holding it down really hard. So I can see the outline
back down here to the mouth. I'm sure you can trace it
out and figure it out. I'm just trying to talk
you through it here. Shadow under that tusk and another one sort of under
this side of the trunk. Going to try to make this
a little wavy or fix. It won't make a ton
of difference when we're making it. Circle. Here's our little spit thing. Circled around, circled
around, circling around. How this is going
to be a little bit different on our outline. I'm going to try to
keep it kinda close. I'm making invisible
splatter right now. This isn't really
in the picture, but I know where I want it to go on the picture, so
I'm just dotting it. And I'm gonna look down here. I'm going to try to do
this shadow at the bottom. I'm going to put it
in the plants later. I'm not going to try to
put them in right now. Done this so many
times and it's like sometimes, I don't know. Like do I want this to be here? Do I want this to be water? I'm tracing around that
you didn't have steel up to you artist's discretion. Let's see. I'm going to do, is you do a little bit of grid
patterns because what I really want to remember is
skin texture is so important. Here. There's a little bit
of a darker tone up there. I want to have a little
bit of a darker tone here. Shoulder blades. Hey, this is kinda
highlight there. I think that's pretty good. I might make it a
little bit of stub. Remind myself, Hey, the
tusk is moving this way. Don't. It'll look less real, even though it's not
going to be super real. It looks a lot less real. If you get the lines
sometimes gone crazy ways opposite where they would go in real life
like the trunk lines, I mean, because that's an
appendage. That's the muscle. Okay. Thank you. It looks
good. I think. Let's check it real fast. I'm going to pull the light
board out from underneath. I think he'll work. Hope
you're starting out well.
5. Mark Making and Warm Ups: All right. It is
time to start with I mark making and our warm-ups. Now, I understand and I sympathize and
empathize with people, want to skip the warm-ups and
get right to the painting. You know what? You feel super confident and super brave, you can do that. But I will say as a caveat, I think that warm-ups make a real difference in
how my painting is turnout because it
gives me a chance to get my mind and
my body warmed up, my right brain gets going. And it also makes
me think through what strokes and maybe what
brushes might be right, since how I'll be
switching a lot between these things do with
that information, what you will you
do definitely do not have to do to warm ups, but I think they're important. I'm using some old paper here. So remember this counts as
painting. This painting. So don't feel like, Oh,
I'm not painting at your painting,
we're gonna do it. It's important part
of the painting. First I'm going to test out
my flat brush and we're going to talk through
what we use it for, picked up a little bit of blue. So I like to use my flat brush for
shadows and for muscles. So a lot of times I have to go into little areas,
right, like this. Little switch there. Oh, dry brush it a little bit. Something like that. It's just see what it can do, can make geometric
shapes with it. I like to do a little
bit of circles. Looks cool. Also use the flat brush
for creating plants. Can our picture duty do see
that's that little plant. Maybe this is a taller weedy or plants at trying
to keep it random. This is the one
thing that's right to remember with all of this, like keep it real bad. Of course plants, we want
them to be smaller at the top and then a little bit thicker towards the
bottom, but those are fun. We're just really doing
impressions of paint lands. We don't want the plants to
take over the artwork, right? This is all about
Eli the elephant. I've named them you
live because I've named all of my paintings
and my animals. So we're going to
call this guy Eli. What else can we do
with the flat brush? Outlines? So a lot of what I do
with the flat brush, as I will outline the edge of my animal or certain
features of the animal. Like a good thing, this is just a mark-making. There we go. That's really here. Let's see. Let's just say a little
bit of time ago. Something like that. Although it'll be a little different when we're
actually in it. And you can change the
water amount of water. You can also pull it. So let's say we were
outlining decimal. I'm going to pull it
in, pull that in. Pope Paul. Just a very how
thick the line is in different places to make
it visually interesting. Also think about
the skin, right? Because this is an
elephant with thick skin. So I'm going to do a lot
of grid patterns on him. I often squeeze the
brush like this. I don't recommend always
doing it with paint, but I've that's why I
have this paper towel. So now it's too late. Bu okay. Just squeeze it and then
put the paint on it. But yeah. So, um, what these grids to be? Perfect because these
are wrinkles, right? They're not gonna be
perfect on his skin. Maybe something like that. Maybe we want to make some
thinner lines. There. Those are just some examples of how you might want to
try to use that brush. And actually it
looks like a weed. Okay. So skin water, Oops, we'll use it for shadows too. So when we get to the
bottom of the elephant, well, I tend to like to
drag it across like this. Feel like that makes
some really good shadows or some really good texture. So that's the other
thing I like to use the flat brush for shapes. But we've can use it for
like to use a basket weave. I like it a little
bit of a dry brush, and I like it with
a basket weave too. So something like this
where you can see those brushstrokes because it's very visually interesting. I don't want to make
it more random. It doesn't look too. Here we go. That's fine. Something like that is gonna be
very visually cool on your elephant when you go
back through the flat brush, cheryl, do something else
different with them. Show you too, but those
are just some examples. Really just get creative
and think about your brushes and what you have and how you might
want to use them. I'm going to look at
the sponges next. I'll look at this black
little sponge first. I'm going to put him in a
little bit of red tide, different color for some, for some visual interests. Dry them out just a tiny bit. So I can show you what happens
when we put water on them. So let's do this. See, I use these a lot for shadows and to give
texture to the skin. Again, I'm trying
to be random and kinda move that around. And I see how that goes. Now what I'm gonna do
is add a little bit of water to my sponge. And then kinda go to
the edge of this. Maybe a bit too much water. But you can kind of
see what it does. We're gonna kinda
flows really cool. I like watercolor because it does things that I don't expect. Unexpected. It gives
us some cool patterns. Sometimes. I also use this sponge to outline actually,
which seems weird. But I found that it
gives a very random like I'm going around
part of the animal. I wouldn't do the whole thing, but I often use it in
that manner as well. Here's our sea sponge. Like to use this little edge
and this little edge here. And of course turns
still, keep it random. I'm going to stick this
guy in the orange. I mixed a little bit of red
and yellow make orange. It's kinda like hopefully
this shows up for you. If not, I'll just stick
it back in the red. Okay? Yeah, here we go. You can kinda see
how that one works. Alright, onto the other brushes. This omens quickly. So
here is our fan brush up. First. I really love to do like
sweeping grid textures with it. I think that works out nicely. So something like try
to keep it random. Gnarly the brush-up first. Something like that. You can also stick a little bit of
another color on the edge. Let me see if I can
pick up the balloon. That works. So if you wanted to do
a little bit of blue, and sometimes I'll take
the number two and you see these little boxes now fill them in with
different colors. Again, just for some
visual interest. I also like to do some, sometimes some grasses or some swoops with this thin
it out a little bit. It's cool little bit of texture. So that's what I enjoy. The fan brush for. Toothbrush. Let's look at the tooth brush I've
got here toothbrush. I will say be careful
with the toothbrush. If it can sometimes do stuff that's not
super random, right? So it's, these
bristles are set where they are and they're exactly the same amount of park kind of. So I like to use it for
the water in the splatter. I have to move the brush
in a little bit more water in certain areas
so that it looks like every droplets gonna
be different, right? So that's kind of how it
works with the splatter. Little bit, maybe not
as random as I'd like. But that's alright
because we're going to do lots of layers and that's an important thing to remember
through this whole thing. Lots of layers. So if one thing doesn't
turn out perfectly like, oh wow, that's fine. I'm also going to
splatter it a little bit, so I'll put a little
bit of paint here. Wham, boom, boom. You see that? That's fun,
splattering. It's fun. My five-year-old is a huge
fan of splatter in some way. Next, my daughter, we're
gonna go ahead and use her. Her brush the kids
breast will look at the kids breast milk
at the stipple brush. So I will use these
a lot from making little tiny circles
for doing dots, water splatter in the shadows for some of the darker areas. So grabbed the
stipple brush first. Here we go. See if you can write.
We'll do it here. Again. Great for the water splatter. Be careful. Keep
turning the brush. Do they do they do they do
they do it for the shadows? Pretty simple. I don't really use it to make other marks with
that I can think of, maybe I do and I don't
even realize it. But be creative, maybe you find a new way to use it and it does a cool texture. I haven't figured out yet. Here's my kids brush comes to work for
me on the weekends, get away from my daughter. This is also a good
one to use for water. A lot of different
little textures. I like to swirl it,
make little circles. I think that if I
were to do like a leopard or a
cheetah or something, it might be something was spot. So if you're doing
something with spots, here is something different. I mean, it could be cool. I'm going to put that
in the brain bank. Not doing obviously not doing
a Ledbetter to you today, but I can also eyes. I could probably
use that for eyes. Now it'd be neat. Okay. What else do we have? We've got our what
our nylon brush or a number two brush
and this other brush. And remember if you
have other brushes, you need to be playing
with those and figuring out how they might tie into the skin of the animal. Or maybe an eyeball or just keep playing with
it and see maybe you have, I'm sure you'll have a completely
different and cool idea that I have not come up with. So now we're looking at the nylon brush, one
of my favorites. I use it for flowers,
she wouldn't think. But I also my elephant. I like to use them, use them a ton because
he's kinda big. And you just think about size in the small
parts of the elephant, like on the trunk. You're probably not going to you're going to
want to be careful. I'm not going to, you're not
going to use these brushes, but I wanna see you want to
be careful because if you go outside the line a
little bit, it looks cool, but if you get too
far outside the line, it looks like his
appendages are wrong. So let's try this. It's perfect. I love that. I use this. I would like to use
this on the belly. Sweep it up. Also, you can use the edge
of a brush like this. Yeast it like for fire before. But now that I'm looking at it, I think maybe it would make
a good fire breast nylon, but water, I also
use it for water. If that was blue, it would
make a good splash of water. Sometimes I spin it
around and throw it into the splash that's coming
out of the trunk. Can also use it for part of the shadows if you let
down near the bottom. You know how we
talked about this? The flat brush here
I can go in and darken maybe some
of the water like that with some thicker
paint on my brush already. So let's see this brush,
old gnarly brush. Let's see what it can do. Boop, boop, boop, boop, boop. Good for splatter, good
for a little texture. I like that one. See where it does when you might be able to even do a few little interesting grids on there. It's very Warren looking
very good for elephants. And then here is our
number two brush. Now, I might use it a little bit to make some tiny
lines here and there. Maybe to fix up some plants. They feel like they need a little more of a delicate hand. Sometimes I do like
little dots with it. Although it's hard to
make it random enough, even though the agency
that's like I switch it up, but I think a lot of the
other ones work better. You can create
some good patterns with it if you wanted to, if you wanted to get
specific or just do some really tiny areas,
which I sometimes do. But I think that that's all my mark-making
step that I've got. So I hope this gives
you some great ideas. I hope your brain and your
hand is really warmed up.
6. Yellow Layer: All ready, Let's get
started with our yellow. I've got a watery yellow. These patients can be
very concentrated. So for our first
layer of yellow, I want something kind of light. And then a little bit of the
darker concentrated gamboge, and then added a tiny
bit of the cadmium red, so it has more of that
orange tint to it. So we're going to be
working with those three. Hopefully they'll
drive pretty fast. So it will be alright. Now I've got my picture of my elephant that I'm
looking at closely. And it looks like, as
we talked about before, the majority of
the highlights on this back portion here
and this back leg. So I'm going to start by
inputting a little bit of yellow back with
my flat brush. And I probably want
to fill it in, but I like the idea, a little bit of a line here, maybe some dots
going down the tail. As far as some of these
little pieces are. Great there. Maybe some yellow
swoosh right here. It's fun to start it off. They got in the middle. Maybe I'll leave the
middle there so that area we're going to
keep really light. So I'm going to think
a little bit more before I just start putting
a bunch of stuff in. There. May be some sort of
like basket weave here, some better this loop. Then little lighten up this
side a little bit. Lift. Here we go. A little
bit of grid stuff here. I just want to get a bunch of this texture, yellow texture. So it looks like there's
some lines down here. Still using the lightest yellow. See there's a little bit of
highlights that running here. Seen. A fan brush. But this lightest yellow. Gnarly it up a little bit. Maybe come down.
That's kinda fun. I sit a little bit
and go up like this. Bump on the camera. Try to be a little
bit more careful. Oh, cred their grid. Grid. Grid. Okay. Again, I just wanted to lay down some paint doesn't
have to be perfect. I just want to give
it some texture when you use this brush next. Run up. In this area. Maybe
a little darker. This maybe a little bit
of that down here or even this appear appear a little to see if I can
lift that up a little bit. It's kinda hard sometimes to
lift it with watercolors. I'll figure something else
that might look cool there. I'm not too worried about it. Next I'm going to
take some yellow kind of mimic what I see
there on the picture. Kind of some bright
yellow showing through. I've had the more
concentrated yellow kind of going over some of the
areas that I already had. The yellow because they
are the same color. I don't really have to worry
about them getting muddy might blend together
a little bit. I'm not mad if they do that. Okay. Here's some Here we go. Again. Donning some yellow. Maybe this up here. Like
a little yeah, Good. Take a little bit
more of the gamboge. He ran through parts of
this that I made here, here, here. That's just fun. Let's see what else. I see some yellow
moving through here. Maybe just sort of
brushing it like this. Diagonally ish lines. I just really want
some cool textures that are going to show
back up through here. So maybe because whoosh here. Swish. Nice. Alright. Keep an eye on with the yellow. Like I said, we're
keeping this area wipe to I'm gonna go back
in there with a sponge, kinda put some lighter
stuff in there. Oh ma'am. Dropped. Brush. Believe that see what
that can become later. Run a little bit of yellow here because there
is a highlight, a little bit running down
that side of the leg. But dude, do make. Now we said this
was a highlight. Here's our swoosh highlight. The back of this leg with
a light is hitting it. There's some Here we go. I'm going to put some here. We will darken this leg a lot. I went a little bit of yellow to show through on
some parts of it. If we can catch, everything gets written, if
we can remember. Again, I really want some
sort of a grid or something. Oh, this is fun. Something different here. Not to pattern like, that's what I gotta
be careful of. Some lines of yellow
running here. Yellow writing down, that's
gonna be really dark there. I'm going to need to be careful, but I want some other
colors to shine through. Again. Here up in the shoulder. We've got a lot of highlight. So I'm going to run some
yellow around that. Maybe take a little yellow
off the top of this. I see a little bit. It's like a highlight running
up until this shoulder. So we can have different
line, different thickness. It gets dark a little
bit on that side, so I'm just going to nap
on the yellow that way. We've got the yellow. Well, this is the
highlight up here. So let's kind of goes
like that, kind of turns. So I'm gonna do that with it. Then. This area,
some lines here. We wouldn't really
important too. That seems like a lot. Staff that down a little bit. Now looking into his ear, create some shapes here. But in a lighter yellow. So I'm just going to water
down a little bit of it. And C, AB, swirl it in. Bring this in. And I will definitely be
darkening up a lot of that area. But until then I'm just
kinda make some fun. Colors that can
poke through on it. Yes. Alrighty. Like that. Moving onto his
face and his trunk. Now, even though it can
be pretty free on this yellow because we can
fix it up a little bit. I still want there to be
quite a bit of texture. So this is a, this is a lighter part here. I'm just gonna make some
little dashes through here. This is gonna be maybe, maybe take some, mess
it up a little bit. I'm going to run a
little bit of yellow through here to here. Cookbook. I don't think that's
going to hurt because that's going to
become pretty dark. I want some of this yellow to run down here around the eye. The eye is going to be dark. I want some lighter
colors around his mouth. I want this to pop, pop, pop, pop, pop up. Be careful here. I want some yellow on this task. Pull some yellow up,
random, random, random. Then I really want the top of this to
be white and yellow. All white, but not all yellow. That's definitely be lighter. Then I want some dashes here going this way
because that's the way that those wrinkles are
running on the trunk. Looks good. Now I'm going to
take my sponge in and I'm going to
do a little bit. The darker gamboge. I will try all the
sponges and play around and see a really want this area to have more sponge stuff because I'm
trying to keep the white. So the sponge is
going to let the white stay through for us. To try this artist
sponge I found. All right. I'm going to take this kind
of in and around this area. Dark. You can really see it that well. That's better. Then this is kind of a darker
part of the highlight. Then down through here, we'll take some yellow in and around here, kinda see that. And there's gonna be a lot of darkness in here. I think I'm also going to make
a graphic shape in there. Thinking that through, again through, so you get it through. You take that yellow up there, run some yellow through here. Around this leg a little bit. Then hind leg there. Boop, boop, boop texture,
texture, texture. Okay, That's good. A little bit. And maybe at the bottom
little bit in here. Let's look at this. We're running a little bit of
this darker color up here. Some through here. Then a little bit through bottom over what
we already have. Layering sort of
the brighter gamba was over the lighter one. Then. Let's try this. I'll put this on the
top of the head. And then a little bit around these areas here where
those circles are. Some of this around the mouth. Then some of this here
in the middle trunk. A couple of it appear.
It's kinda fun. Is there anywhere else?
I think I need it. Maybe a little bit here. Then I'm going to
again select darker. Maybe another, but
I do like it a bit. Okay. Now I'm going to take some of
this yellow on the sponge. I'm going to try it,
sort of spreading out a little bit more
water on it now. Probably should have taken
some of these dots out. That's alright though. I
think it will be alright. I will fix it. Fix it. We've also, we're going to
lay her lots of colors, so I think we'll be
all right in the end. That's some good texture. I'm going to run a little
bit of it down here to like texture
moving throughout the picture has some good yellow, I will say I'm a little worried that's a bit too patterning. Just take a little bit now, the orangey red in these areas. Some of this up here. Don't be afraid just to try it. I think we can probably
fix it if we need to. And then a yellow,
orange down here, a little bit in there. Here, here, here. This line right here, kind of a little bit going up, just hit the highlights
for the ends. Could do want to take some
of this around at ear, then put a few spots
of it on the ear. Time and the time. Appear a little bit
good at my picture. Then. Here. This is a little
darker. Going up there. I'm like I said, we'll go
over a lot of this part. So let's just put a
tiny bit in here. Tiny bit here. These are bigger, heavier. There's more water on
this part of the sponge. So that's why you're getting
those sort of looks. Spinning it around here. This needs to be, it's going to have some
more medium color. ****. Alrighty. I like where this is going, left a lot of highlights. I'm a little worried about I'm not worried about
we'll make it work. I'm going to put some orange in this spray on just yellow. I mean, before we do our
actual orange layer next, I'm just moving this around. I like that seems
to be going well. And then I think
I'm going to take we want to take this brush and use it as mine a little
bit there on the side. Let's see. Let's do this. And I will put a heavier I put a heavier grid
there in red I think, but little bit except for it. Take this brush and
use the side of it, maybe running along here. Now this is where we're
going to have our shadow at. I'm going to let some
highlights in there as well. Put the darker
towards the front. I think that'll be that'll
be alright for now. Alright. Let's let this dry. We'll take a pause and come
back and use the cadmium red.
7. Cadmium Red Reverse Style Layer: Okay. So had a little malfunction with my camera and I already
did my orange layer, but it turned out really good. So I thought maybe on this one, I can sort of do
it backwards and explain to you what I
did with each brush. And maybe then you can
reconstruct it on your end. So the brushes I use for this
color were the fan brush, the flat brush in my I use my sponge so we didn't
use a ton of stuff. I'm going to show you what
I use with each thing. I started off to show his belly. I did swipes with a fan, brush this way, and
then the opposite way. And then I went
through and darken them a little bit
with some paint. Then I took a little bit
of swishes appear through the back little bit
in here on the trunk. So that's all I really use the fan brush for on this color. Then I took my flat brush, which of
course, you know, I love. Starting in the back. I blotted this tail. I kinda did a little bit of
an outline down the leg, did a little bit in this
middle shadow area, came up and around data, a little bit of grids
here and a little bit of outlining in the back. Nothing really here in the
middle with the flat brush. But then I took it up sort
of a dry brush banded up around the back of the shoulder and the
back of the ear. Then I talked extensively
about how I'm extremely emotionally committed
to this ear turning out, because I've done this ear. Oh my gosh, I've done
this painting so many times, maybe five times. There's something about it. I always feel like it could
be better, which is fine. There's always a part of your
painting where you're like, man, I wish it had turned
out a different way, but you love other parts of it. This time I feel like
the ear, it's moment. So I did an uneven line, kind of imagined where these creases would be
going up because it's, you can see them in the picture, but it's a little tough. Then I darken these little
areas around the face, came down around the top, this brush to this a
little bit under the jaw, down here to the face, just a tiny bit to that little
bit of grid pattern here. Tiny bits of grid up through the trunk, a little bit up here. And then I ran the brush
down here around the bottom. So just a little
basket weave here to just a tiny bit on this leg. And then I decided I wanted to do a little
bit of orange because I've not done the ground a different color before
as in the plants. So decided to make a
little bit of orange on the plants and then
to see how that plays out when I get
that green in there, might've been a big mistake. But I'm really interested
in how it turns out. Next. I took my sponge and I started off
pretty dry with it. And all of these marks
around the edges, I went around the edges a
little bit through the middle. I was still trying to
preserve this middle here, but I wanted to put
some around the edges. I think this could be a
little bit too light. I might end up adding some
darker bits here at the top, but I'm just going to leave it. I can always get rid
of shadows and get rid of highlights a
lot easier than I can get rid of too much shadow. I ran a bunch of sponge
through the middle here, a little bit on this ear. Again, really, really
working on that texture. Then I did some sponge work
here and as you can see, it got outside his face. But I really liked that. I feel like that almost
makes me feel like he's won with the splatter.
Didn't make me mad. But I said if you want
and make it smaller, you can always curl up
your sponge like this and try to use that
in a smaller area. But I really liked that
it was going outside. Then I added some water to this sponge so it
wasn't as concentrated. And that's how I got these
big wet blobs that you see, and I really loved that and
you know what I love to, I'm glad that there
are some they're still wet so I can show you. I like lifting them. I think sometimes that leaves
a really cool imprint. This one didn't
turn out that way, but sometimes edges will be darker than the middle
will be lighter. But yeah, I like this. I even threw some splashes
down here around his legs, which will lend itself to if we decide to
make this water, which I'm still a little
undecided. I'm undecided. I'm going to let the
painting speak to me and let me know
how it should go. So I didn't get to paint
that one in front of you. But maybe it's better if I just explain it to you what I did first and then you can decide if that's how you
want to take your painting. So let's move on to
red. Let's do it. Maybe I've had too much
coffee. Let's be honest.
8. Red Rose Layer: Okay, Now we're going to
move on to the deep red. Honestly, I think it
worked out pretty well. On the last take of this. We are showing you what brushes and I was going to use first. So I'm going to try that. And I'm going to try to make myself work with
whatever I have. So I'm going to try
this disheveled brush, nylon brush, flat brush. Here, my stipple brush. And for sponges, let
me give this a shot. Now, I figure, since this class
is about experimentation, I should experiment with all
the stuff that I've got. So you guys can see. And also to show like this is not super planned out class. I've tried so many
things and done so many things
with this picture. I still like to be creative. I still like to try
and do stuff with it. So I think at my red here, water down a little bit because these are
very concentrated. My stipple brush. First, I'm going to
try to stipple brush. I'm going to start this time. The other times
I've been sort of starting with the elephant. I'm going to start with
the supplier this time. I'm going to try to make
it nice and random. Need to be random
or right there, you'll need more randomness. Do it. Obviously, we're overlapping
at this point, right? Because we've got lots
of different colors. And that's what we want. We want to see some overlap. Now I'm going to take
some of this red. I'm going to take this, this red is the
medium, the mid tone. And how a lot of different places where
we have these mid tones. I'm going to start
by moving it through the leg with the stipple brush and see what I think of it. All right, let's do
that. So I'm going to take these in
here under this. That's gonna be
pretty dark later. But I liked the idea of
keeping some red in there. This is going to be dark the
back of this leg, but again, let's get some red color
in there to make that pop. Next, next, next, I really
want some over here. It'd be the darkest will
be up in the inside, but I'll need some
darker colors anyway. Texture, texture,
texture, texture. Looking at the picture as I go, maybe try a little
bit of like, oh, those are going to
go a little bit aligns with the stipple brush. Maybe that was too
thick of a line. They don't want to quite thick. I'm going to do
didn't not want that. I think I tried to lift
a little bit off here. See if they can scrub it
off a little bit here. Maybe I'm here being lifted. Florida. Maybe again. Maybe
I can come up. Again. Lifting these liquid
watercolors can be really tough sometimes because
there's just so concentrated and paper
just sucks it up. So that's again,
why we need to be very strategic with
what we're doing. The darker that we get. So it's gonna be a lot of
darker pieces up here. Again. Appear. These legs need
to get darkened for sure. And there needs to be more it needs to be more stripes on them because we need to show some
more of those wrinkles. So I'm gonna go with me to fly for us to in a
minute and do that. And I do a couple here. And these are these mid tones. I'm going to, I'm
trying to darken these areas so that you can
see that shape in that form. It's going, I'm also I got a
little exciting thing plan. This is me like
an exciting stuff with everyone's like, Okay, you say Zara floats your boat, going to take some of this red, pop it into the ear. I think I want it over in this area and then
move it through here. And I want to do it
needs to be an arc. If you look on the painting, there's like an arc
that goes here. So I'm trying to create
that line a little bit. Maybe tiny. And then I'm down here. Down here. Alrighty. Let's tube light here. I think. I'm just going to fill
some of this in with pink. Again, this needs to
be darker back here. I'm worried this is a
little too patterning. So I think I'm going to
switch this brush out. I'm not a lot of those
will get covered over, but I want to be
careful with this. Now I'm gonna take this brush. Nylon brush. Tried to create a little bit
of this bottom shape here. See what happens to whole lot. There wasn't very dirt. So like I don't wanna be
too is pretty concentrated, but I want this color
to be concentrated to maybe I can try
to take it up here. Yeah, I'll try and
take that up there. It's appear a little bit. Take this around here. Stippled. It ish This is like
right where that rounds. Let's kinda nice there. I'm gonna go save
some bumps. Okay. Now I'm gonna go
to my flat brush. And I just cannot stop thinking. I'm trying to make it dry. So what I'm doing right
now is in red to it. Then dabbing it on my
paper to make it dryer. Now, it could be crazy, but I kinda feel like I
can see heart rate here. Do you see this in the mid area? I'm crazy. I kinda wanna make a heart. So C that goes here. I feel like it goes like this. It's like that. Then
most like here. And down here. Maybe I'm crazy, maybe
that's not a heart. I see a heart. I swear I do. So if you see one drawing, if you want to put
something else there, put something else there. I wanted to look
not perfect though. I want to make this down. Alright, I like that. I might try to lift
it as a tiny bit, see what happens. Don't
really lift too much. I'll probably take a little bit of a darker color in there. I like it. I wanted it to look. It says, I am an elephant
and I might not. But I'm a painting as well. So I'm going to be very careful. Use this brush. Go up that using the
side of this brush. Don't want to fill all these colors in
because I liked them. And I also I'm going to
have to put some dark in. But I feel like
this, I like that. Do that up here to this red. We're going to now just
back of this leg here. I'm going to pull that
in and I want to go in. And like I said before, so you've got these lines. I need to see these lines
a little bit better. But I don't want them
to be perfect and I don't want to just draw a
straight line across it. Okay. I'm just trying to keep in mind I need to
be really strategic here. Because I've still got green
to go and I've still got blue and probably purple. Can I'm trying to think if
I want a mix of purple. Undecided, decided. Okay, I'm going to take
back of this leg and read. And again, I kinda see this
is not the super, super dark. So I see a lot of mid tones
in here and I'm not sure I want I'm going to have so much darkness
in their darkness. Okay. Also feel like no, I'm just going to hold
off on that first. I'm just going to hold
off and no one knows. I'm talking about
it like I'm holding off on things that nobody knows. I'm talking about. Alright,
little bit of red up here. Going to think there's
a darker area here. How do you use both sides
of this brush here? Again, I'm sure you can tell by what's going on as
I move the paper. I am definitely I'm looking at my picture the
whole time because I want to. These texture is going
in the right direction. I'm not putting them everywhere. I also want to make
these mid tones, like in the right areas. So this is a darker area here. It's almost like a
triangle here. I see. Just making a little
pattern there. I don't think it's a little bit. That might be a little
bit to like repeating. So I'm going to try to
break it up a little bit. Now. Take my red again. And I'm going to go around this ear sort of in
the same places, but not just darken
some of these areas. I really liked
what was going on. Trying to not make it too flat, want it to look like
it's moving and bending a little bit and
not the right word, but I wanted to look
like it has more shape than that, I guess is. Okay. I like that. Darken that
up a bit over top of this. Now. This is going to be pretty dark. I use wearing a head
band right now. Head band down to the top
of this and make this red. I don't want it to be
too perfect of a line. Sort of why I'm using
this like that, even though that looks
varied on random, There's something about
it I really enjoy. Again, these lines are going
to need to do this here. He's a node, really
an old elephant, but he's a playful
wise elephant. All elephants, I feel like our anyone else out there
just wanted elephant. Maybe I should talk
about the painting. I love elephants there. I think their texture for their
skin. This works so well. I'm cross, I'm going back across like went down
and then came back across the bat around,
around, around. And I'm going to
take the red and sort of go around his mouth. Part of his mouth. Feel like he's smiling. He is smiling. Smiling. This is kinda his eyebrow. I want to make it
like an eyebrow. I want the eyebrows to
look like an eyebrow. Okay. Darkening this
area up a little bit. To, to, to, to, to to, to to do using
the side of it. Needs to be a little thinner. Darkening that. It's tough in this
part because you really don't want
to go overboard, want to have enough, because you need to get
that contrast in order to give it form one on along
the bottom of the tusk. Now with this, again, I think I got them on
the top of the tusk to all the way across because we're going to do some blue and some green
somewhere in here. Just so you know, green makes me
nervous on some of these animals
because I feel like sometimes you just
have to be really careful if you overdo
it on the green, it loses something in mammals, I think maybe it's just
something I think, or maybe I just haven't done it away that I really have found
that I really enjoy yet. But boom, boom, boom, boom, boom, boom, boom, boom. That might be a little darker. Maybe a little
dark there. Right? I'm going to take the
corner of this brush. Well, we'll do this first. First I'm going to go
down and get this, outline, this a little bit more. And again, I'm probably going to do something a
bit different with that. At some point. I really want to color in some of these little squares in red. Not want them to be random. The grids not dark enough
for you to see what this is. I wonder if I can want
to take a little bit of red and side of this brush to darken this grid a little bit so
you can see what it does. Be careful though. Because you don't want to lose. You don't want it to be random. I need it to be random. To be darker. This is a very mid-tone
area in a shadowed area. And I feel like this
needs to be darker. I really want these
to kinda show up. You can kind of hear
that, but whatever. Kind of like that too. Okay. Okay. A little bit more
red on this leg and then we'll bring
it into the spray. Do a little bit. This is bell-shaped to it, trying to make that
make sure you can tell their legs or their feet are sort of
like a bell, the bottom. Okay. Okay. Use the right colors, I guess. We'll find out. Okay. Suppose I'm sadly,
we're going to use the sea sponge this time
around in the water. Wow, that's heavy. Heavy. Mid tone wise. It is alternately fun and scary. Yeah, I want some there there there, there
there there there. Down to the bottom
here to this leg. And this leg is
shadow and highlight. How to control on the edge. We'll have to figure out
what we're going to do that. We want to keep
that in this area. I'm going to go up
behind the shoulder with the sponge. Might have to. The other side of this
budget a little bit towards its bottom. This is shadow, like I said. That's more shadow. Okay. There's a little bit of a shadow here starting into that shadow. Alright, I think I'm gonna
do now is you see splatter? This a little bit, but yeah. Feel like he would
thousand right. Call he needed a
little bit more. Back to the back to the flat brush one more time to run some red into this bottom. Keep it close to the orange. Thinking through everything
ends up going in my brain. I'm loving how this is going. Hope you were loving
how yours is going. We can do, alright. We're gonna call
that the red layer. And that's a little
long, I guess we made up for that
short orange layer. Alright, necessarily be
brave and try green.
9. Light Green Layer: All right, Now we're
gonna move on to green, and I just have to
make two greens. So we've got this green, which is a mix of our
gamboge, yellow, blue. And then we've got
the straight yellow, green, which as you can see, it's darker and very bluer. I think what I'm going to try and we'll see
how this works out, is to use the light
green as our medium. And then that darker green integrated as part of the
shadows with some blue. And then we will see if we
need the Carbon Black or not. Then I don't think unless I
really think it needs it, I'm going to make
any purple because I really liked the idea of putting those two
different greens then. Okay. So starting off
looking at our photo again, we're looking at
the medium areas here in the middle of the body. A little bit, we'll
put in the face and a little bit
around the edges. That's my plan. I've got the paper
in front of me. Let's get started.
Flat brush first, loving the fibers, you hear me? Okay. I'm going to start off by doing a little bit of
basket weaving this here. Trying to make it non pattern
as we always talk about, as we always talk about as
we've been talking about for the biggest part of this. Okay? I'm going to green back here. I'm going to run some green
on the top underside of this. Then I'm going to dark
green part of the back. Like wherever I see. I wanted to be completely
across but I tried to put it where there's
not a completely all the red is on the
top of this trunk. On the underside of
this part of the trunk. Work my way back through a
little bit of green here. Green and here. Of course I let
this dry completely because I don't want
it to be muddy. I liked the idea of
a green mossy trunk. A little or a tusk, you know, like oh is he eating? Is eating some grass
and got it on. They're going to make a
few little things here. Now as we know, this is
mid tones and shadows. I'm just going to fill
in some of these areas. They're kind of already there. Some green live in preserving
some of the highlights. I go around the eye with
a little bit of green, but leaving white, leaving
a white rim around it. Then I'm gonna go down
here onto his mouth. Kinda put a
diagonally line here. Lead into that. You can see
preserving this year, but I'm going to add some
little dots in there, a little texture lines. Now I'm gonna go up here. I kinda looks like
there's some lines that go like this across
that part of the eye. So I'm gonna do that. Then. This is kinda like a
little triangle here. When a triangle that up, make that into a triangle, I like that idea, a
perfect triangle. But the triangle, and I'm gonna go up here to
the top of the head. That part green. I like the
idea of that being greener. Again, being more strategic and sort of think through
everything as I go. Now. Top of this green. Pull that up. Now. I like the idea of having some lines that go
across like this. Some dashes. Then just
some dabs of color. They're down to this part, dabs of color here. Falling down here. Do, do, do, do, do,
do, do, do, do. I make it random? Command ear. This is our time targeting this fold here and
this fold here. And then pulling that around. Finally, I'm going to go, this is supposed to
be darker, right? Because that's going to push that air out in this
area is darker. We know that it's darker
from our photograph. And I'm going to a little
bit of green here. And then run some
lines of green here. Grid them to create things
like can I say lines here, grid I'm going to, there's a shadow that
runs right here. Some dabs of green there. Here. Make some grids appear. Do, do, do, do, do, do. And then run some
green down here. Because it's like
I said, it's gonna be in shadow as well. I want to preserve some colors, but I also want it to be darker, so we'll get some
green in there. It gets. Darker. Now I'm going to
take green around here. That front of the leg has got quite a bit of shadow there. This back, back part of the leg and maybe
swirling green there. Like make just going to
drag the brush a little. And here I'm going to
skip the brush like this. And here swoop like a
little bit of that green. Getting outside. What I'll actually do, flatten the brush a little bit and I'll probably will go through
with dark green. At the end. I'm going to take some
light green here right now, because like it inside a
little bit of green in here. Let's see. I like the
idea of the screen here. Because we've got, again, this is mid tones here and a
little bit of shadow colors, some of these in green. Kilohertz, remember our
grid boxes like it. Okay. Moving on. Let's get our light
green back on the back. Legs, back part of the legs to the side of the slide first. And then in here, just some dabs of it here and there again, I'm trying to be random.
Sometimes it's hard. Here. I'm going to run
some green down here. And then here, trying to
fill in some of this white. So we'll fill that in with green and then pull that across. And I'm going to run a little bit down
towards this leg again. But portion really
needs to be darker. This is going to have a lot
of really dark color at some point, perhaps some point, probably soon since wow, yes, run the screen here. Just want that to be. Then here. Little bit there. This also, you know what, I'm going
to take splatter in there. I think I don't want to put
another design in there yet. So now I'm going to pick up my sponge and pick up this
spend and black sponge. Go to, go to green. Go to the green
spoon right here. See you practice that. See, it's got a pretty good
amount of water. Let's see. I will outline a few areas here, kinda like where we
already have some green. I'm just going to
dot some of this in. Make it okay. I'm going to cut some of
this in here. Like that. Started up top. That in there. Maybe transition S
and this one green. I like that RED, they're
too heavy. That backup. Maybe I'll go in there
with dark green. Now, I'm going to
take my sponge, induce bladder and
green boop, boop. Like those ones,
they look very like, star-like and sparkly. Good, good, good, good. That worked out really well. I hope it's coming
alive for you. I feel like he's
coming to life for me. I really enjoy him. I'm going to run some of
this green through here. Because that's mid tones,
right in that area. It transmit, transmit probably will be a little bit
darker at some point too. Okay, well, he's busy but
that's how we'd like a busy, busy, busy jumping back
in with the flat brush. Now, I'm going to do some of these plants and we're
going to layer them late grade and then we'll go back in with some dark greens. So just be creative here. These are impressions of plants. I'm using this side. I'm going to try to make
them random as possible. Random, random, random, random, random. I need to do. Then I'm going to run
some green through here. Again. This is a lighter green. So I'm going to try to get next to the yellow a little bit. And yeah, there's gonna be a lot of blue that's going
to run over with, as I said before, this
is going to be water. I forgot. I obviously water. You have to be water. It's
gonna be land, I guess. Now I'm going to take
some plants up through here and go over these
orange pieces a little bit. I love these flowers,
flowers, plants, whatever. Just going to have
fun with them. Do what you will. Put them where you think
looks right for your picture. Might be going overboard, but I really enjoyed them. So this is just a very
fertile area. Fertile area. That's fine. It's fine. I'm going to maybe
do this slightly. I'm probably going to
have to go back in here, figure out the final details, what I want and my backyard. Okay. Dark green being do we need
to let the light green dry? I think it will let it dry
and then we'll go back in. Once everything is dry,
even though it is green, don't want to lose the light
green and mix the two. Straighten it out for you. It's looking good though, right? I think it's looking good now. Almost looks like a butterfly
coming out. Alright. I'll see you in a minute.
10. Pthalo Green Layer: Okay, now let's go
back to our greens. This dark green right? Now
there's a little green. And being strategic,
careful withheld dark, we go and layer. So I've got my flat brush here. It's, you know me. That's why I love to start with. I'm going to start with some
of these darkest shadows under here and try to
make interesting marks. Make some in here. I'm gonna go in here with a
sponge to and not yet though. So trying to create
texture, texture, texture. Knowing that this is again our darkest area and
we're looking at this shadow closely like this. This way. First in this brush, flat
brush around to make some interesting things.
Following it down. Then again, this is a
very dark area here. Moving down this back left leg. That interesting shape here. There's almost like a triangle with a curve on the
bottom for that part. You'll definitely have more
dark parts coming in there. But I do want to run a few of these in this lines
to show those. You can see on his leg, right. Those lines that go across. I want to make some of those we put impressions of
them with the red. I want to put some more
impressions along with the green and keep them
a little different. Now this there's
a dark area here. Moving forward. Again. Kinda like a bell-shape. Aching back of that leg. Look good. Dark. This is dark in shadow. This back piece here. I'm going to try to curl
that up a little bit. Again, this is dark. Underneath the butt
is really dark. So let's make sure that this is, we're going to definitely
go up there with some, some really dark blue. Now. Play around with the green. Go down the tail where it get on either
side of these colors, so we're not losing
them completely. And then pull the
bottom of the tail. We're still going to be going
over that with some blue. So you have to
remember that then. I think this is a
light green here, but I think it would
be nice to have like a little bit
of this going on. Like a fan shooting
out like that. Then I just crossed
over it. I like that. Now let's look up here. I'm going to like the idea of a very small green shadow coming up there around his back. What? They add some here as well. Just pulling, pulling,
pulling, pulling, pulling. It's giving him forum. I hope, I hope yours
is taking form. Some dashes along. I liked that splatter
that's there. I don't want to
completely lose it. But I also want to take some of this green in here a little bit in these areas. So I'm going to have a lot of time just enough to
pass and be like, oh yeah. Look at your own pictures,
see where it needs it. Going to put some green and some areas in these little
boxes strike created. Like this box is
going to be honest. I think I've said
that a few times. Pull some a little
bit through here. This is definitely be darker. Now, I'm looking at the shadows. We've got a pretty dark
shadow back here, right? But I am texturing it. I'm not. We still have these highlights that are running through it. I will put some bigger chunks. Just being very careful,
Careful, careful, careful. I'm going to create
it without losing. Alright, I'm going
to put grids here, some grids here. Again. I really want to
pull some of these down, pull some lines here. And here. This needs
to be a lot darker. This needs to be
quite a bit darker. This front of this leg. I'm going to run this
like this almost align. Don't want it to be a
perfect line though. I needed to curve a
little bit diagonal lines to there's this darker. And this is gonna go up here. This is darker as well. Some more darkness,
darkness, darkness. And again, that's, you know,
this from saying is like. We're just looking
at our picture, evaluating it and
trying to figure out, I really want that year to pop. Sorry, need to have some
really dark areas behind it. There's like a dark
area here on the top. Then I know we put red
here and the stripe, I kinda felt like
it was too much. So I'm going to try to
go over it with green if we doesn't make it quite
so striking already. Okay? Alright, alright,
alright. And then here, let's go down here and here, and here and here. Drop that. And I want to make this
a little bit into, okay, I think he needs there's some
has that highlight, right? So I need to make this
darker is highlight. So I wanted to preserve that. Now let's take a
look at the ears. He's in. So a little
bit of a weird place, so don't be mad at him, just give him some
time and some space. There's amazing
this flat edge here to make these lines go down. You do to do, to do. I'm going to draw
his mouth that I'm afraid of women lose this line. Two. Then. This is a shadow
right here, right? We've talked about this
quite a few times. This is a shadow. So I want to keep some of
these other colors in here. So I'm just sort of grading
it, crossing it completely. Going up or along this
I still preserving a little bit of a white circle
around everything. Okay? Okay. Okay. And then under Let's go under
here and then around here and up this
part of his trunk. Do you want to bring some of
these lines dark dark green? Not all of them. Some of them tried to look at your painting and
see what it needs. Then I'm going to take the screen to
the top of the trunk, running on either side
of some of these lines. Then I'm going to
hear underside pull, pull, pull, pull, pull, pull. This needs to be dark
on this underside. As you can see, there's a
shadow or these wrinkles are. Alright, I'm gonna make a little bit of green
on the tip of this ear. And down there. This is a darker area. So I need to figure
out how to make this round preserve
some of the stuff. I want to put some lines here, Einstein's lines, lines I sides, and then some lines
here like this. And then lines
here, my deadlines. Okay. Few in this ear. I think that there
needs to be some there. Here. Maybe some hair. Look like dots rather
than like lines. Then here. Put some up here, or here, or here. So those are just babies. Then maybe some more here. I'm just going to
twist and pull. Okay, Interesting. That's an interesting colors. I'm going to, again darken
a little bit of this. But a little bit,
I think it just needed a little bit more. Little bit more. So now
let's go to the ground. So I'm going to bring
some green in here. What would you do? The shadow will be in here
as well. Don't forget. That'll be the blue
and maybe some other black to haven't figured out. Still trying to figure out what he needs for that portion. Now going to take in and
do some of these plants. And I like to make
them very Daddy. Daddy. Is that the right term? I don't know. I like to use the marks
that we're using for the mark-making around down here. I'm just gonna make
the front of this leg. Is that as light or
those some plants could be either at this point. Random, random is the
key to this part. The main focus of this
is the elephant anyway. So if it turns out there's
something you're not like a 100% in love with on the
ground, you're okay. I mean, come on. You. People are going to be very busy staring at this elephant. They are not gonna be like,
oh, look at the ground. It shouldn't be like this. Only you're going to
think that and I bet you, you're going to notice
when you look at it again, there were some little tiny piece of it and you're like, oh, I like that and you're like,
wait, I think about it. Another week or two,
you'll look at it. You'd be like, I'm
not, It's amazing. Amazing. Sometimes you need to, again, just dotting these grasses. If you, sometimes you just need to step away
from your painting, which is also why we're
doing it in layers. So if you don't like it
for some reason at 1, let it sit a day, come back, we'll talk about
it and look at it again. Maybe you'll be
like, Oh, I love it. Or if you're like, oh, I
know why I don't like it, then you'll know how
you should fix it. Because I think that's
part of it, right. Like sometimes you don't
know why you're not like loving something and you just need to sit with it awhile
and think about it. Now, I'm going to take
this black sponge again. I'm gonna put a little bit
of this thaler green on it. I'm going to go into some of
the areas here on the back. It doesn't seem
to be going well. Alright, and then I want
to put some of these dots, like literally I don't know
who I'm seeing these dots. So concentrated sometimes
when I water it down, it's not water it down too
much. Put some more water. It's like I want
to fit but watery. Know why that seems
to be a problem. Okay. Alright. I think we've got
a better handle on it now. Really thick, right? Watery
side. It's really watery. It's almost like half that's
sitting heavy on the paper. I tried to dry it
off a little bit. Sometimes I really
liked that look though. So I like once you
give it a minute, it's like, oh, it's okay. It just needed to
figure itself out. So I'm going to run some of
it underneath this trunk. Heavy, watering, heavy. I'm going to lift some of it. So little bit of it and see. Actually came up pretty well. Just don't want it to like, I'm afraid it will bleed into the other colors of it's too wet and then ovulate
sitting on top of it. It'll be we'll get
muddy and mix itself. Not what we want. Is that with you elephant, some reason I'm
flipping the sponge. I don't know why. I will say it's good to mess
with your paints before, I haven't used the
fallow green a ton. I normally mixed male veins. Haven't done a ton of fan. Yeah. I don't know if it's just
thinking, thinking, thinking. Okay. I'm trying the other
sponsors to see if maybe the other sponge
will work better. The wonder of it. Thinking, thinking. Thank you. Thinking, thinking,
thinking, thinking, thinking. Play around with it. I do like how that green
in the back is coming up. Let's put a little bit of
green here. Green here. You got to work through this,
right where you're like, what is the thing about
that that I don't like. Put a little bit of green
supposed from there. Okay. Okay. Secretly do next is pickup this kid's brush
and put the green on this. I'm going to try to
use that in the, in the splatter a little bit. Keep it tiny. Like in that good splatter. Thanks for thanks for
doing what I need. Splatter. Appreciate it. I mean. All right. Oh, oh, maybe I should use
this brush to do the shadows. I think I will like it better. My word I'm looking for good. Good, good, good. Let me go
back through some of us. Do not talking, just
spinning the brush around, trying to take up space and these areas that
should be shadows. Don't want to run it through
the background here. I'm just going back
and forth inside. Why I like it. So
I'm just doing that. I'm going to put it each
of these areas a little bit before we bring in the dark blue and the other things. He's coming together. He is coming together. I hope yours is
coming together to write a pause and go for our blue and possibly make some backward
that if we need to.
11. Pthalo Blue Layer: Alright, now we're going
to do a few more shadows. Starting off with my fan brush and ran it through
this Thaler blue. Where I'm going to try to do
is just go a little bit up here and cross it back through
here a little bit again. Put it up here in this shadow here and the
shadow a little bit here. Here. I do a tiny
bit of blue up here. Tiny bit here. Once
top of it here. I'm only using this side
of it. Exhibit back in. I'm going to try to use
this a little bit here and then cross it through here. And these shadows darken
them around this eye. Down here. Trying to be careful with this blue
preserve some of the shadows. Will probably have
to mix this blue with some black at some point. Running corner of this brush
up out of the center of it. Trying to get these edges. Maybe a little bit
here. That's fine. But up here. Now, again,
strategic, strategic here. Well, I think a little
bit more about the body. I'm going to grab this brush, my good old nylon brush, and I'm going to do this shadow. I'm looking at the picture. So I'm going to try to recreate, Wow, just soaked up
all that sailor blue. I'm going to need some more
squeezing it down on there. Okay. So now I'm going to brush, I'm going to start at the
start at this foot, right? I'm going to try to
brush it out straight. Then dabble a bit more. Grab this foot, and
then like go like this. Then these fields click
on together here. And I'm going to darken that. We go, That's more what I want. Then here, here, here. And I'm gonna go up
this little thing here. And up, I'm not going
to take this all the way because I like these colors and I
want to preserve them. I'm going to try to go between
it a little bit like that. It turns out cool.
Then bring this back down and connect this. I, pulling some of that
color back through. I like that. I'm going to put a little
bit in the back here too. Okay. So it's giving me a
little bit of time to think through some
other things in my head. I'm going to grab
the splatter next. I've always just
going to keep going. So I'm going to take this blue
and dance it through this. This is going to
quite a bit of it. I want it to because
the water is blue. But I think it's good contrast. Now I am putting it
in the white area, but also going over the colors. Girl, I didn't want to appear. I will probably sponge a
tiny bit in there too. Now, let's take this blue. Get a little bit more
heavy handed with it. Spinning this brush. Spinning, spinning,
spinning, spinning, spinning, spinning,
spinning, spinning. Back here. It'll spin. To go inside of this leg, darken this up quite
a bit because this, there's a lot of
shadow back here. And then a little
bit of that here. Just a little bit
on the back there. This is our shadow folks. This is the button that there. I'm going to take the flat
brush and go under the tail. This is too wide for the tail. Then here. This is going to go here. He is definitely taken shape. You can definitely
tell his forum now. I'm going to go out this way. And then now here, there is a line and I'm also
just dotting this up. Trying so hard to
preserve those colors. Dancing through
here with the blue. It's like man, you want those other colors
to come through, but you also need
it to be darker. And I'm going to
take some blue here. So pretty I like them. Okay. He's gonna
make it everyone. He's kinda make it already. Some blue in there. And I'm gonna dance. Dance is a technical term. I'm going to put some
of this through here, like this needs to be rounder. Just wanted to take
that out a little bit. Maybe not quite
that round. Okay. Then this needs to
be darker in here. Definitely because that's
where bursitis and I'm going to go around here a
little bit and give him I was worried about
that green a little bit, but I feel like the blue is really kind of balancing
that out for us. Who does. This is really soaking
up the blue, this brush. I like it. So now I'm gonna go pick
him here and here and here. And it gets some glue
around these eyes. Lift a little bit up
there. Not too much. I need the flat brush
here in a minute, but right now I'm just
really liking that. A little bit of like This is leaving so much of that nice
color for us and I like it. I like it a lot. When we were on
such a long layer, like you're not really
seeing the fact, I mean, it's just
such a late layer. You're not seeing as much. You're not seeing
that it's maybe a little bit more patterning because we've got
so much other color here. I'm going to M twisting it. But Matt up. Some of this darker. I think this really
needs to be darker, even though I like
these colors here. Then here, here, here, here, here, here he is. He's turning that Okey-dokey. All righty. There. Alright, now I'm going to
pull a flat brush out. Select the rush. No,
I'm just kidding.
12. Final Details and Celebrate: Okay. We're on to our details. So the first thing I did this morning was make sure all that my professors,
when they sink. And I'm going to
try to go by color. I made a list of all
the things I need to do to make my elephant the
best he could possibly be. They're not super
difficult things, but they're all little things. And I think I can do them all in this layer without
mixing anything. First, I'm going to take it, you have to evaluate
your own picture, right, and see what it needs. One of the things I
really felt like, I felt like these
grasses under here are missing a little
bit of something. So I'm going to try
to put some yellow, some gamboge and see how
that makes things look. Just see somebody
use the number two. I'm just going to try to
make dots around these. I think it would add a little
bit of visual interests. I feel like they're
a little flat. I could use a sponge in here, but I kinda want them
to be a little more. I want them to look a
little different than that. So I like the idea
of using this yellow through here because you can't
really see it super well, but it's alright, I
have the front layers, but I've got a good idea
for what we can do there. Okay. I've drawn a
little few lines below through visual interest. I'm going very light. Like I said, trying to be random to yeah, there wasn't very much. Now, I'm going to take
a tiny bit of red. The same thing. If I really liked
that, a yellow, I think that the
red add to it too. Again, this I'm
probably going to use even less of the red. I'm not going to draw
any lines with the red. I don't think that's personal
choice. Not gonna do that. Very, just going to add a few tiny red ones
here and there. Don't just want
tiny little pops. This is final details, right? I just want a couple of little
things here at the end. I don't want too much. I think those look pretty good. I'm going to try not to. That's kinda weird right
there and that's alright, That's on my list to
take care of that. So that's my yellow
dots, red dots. Next color I'm going
to look at is orange. So I think that my
oranges pretty good. Cadmium red orange. Why I did that in the thing I heard it was like throwing it. It looks orangey.
Okay. My defense It's cadmium red though. But anyway, so what
I really wanted to, I feel like there's a pretty decent amount of orange in here. I wanted to we've
got that hurt there. This I wanted to make sort
of a darker heart here. You'd have to kinda
look for that. I don't know if
you can see that, but there's a little heart
right there zooming in. It's right over here. I started just put a little
heart right in here. Zoom back out. Again. What's the orange? Although now I feel
like I want to take a few dots of it in here. If you didn't hit anything. I don't think you
can really tell much about the orange here, but man, this love colors. I love my mike. Just going to do red and orange, yellow. That's cool. Okay. Yeah. I'm just putting that
one little hurt in there. Kinda like as a little surprise. Although let me tell you
there is a part of me that wants to go through and
heart that whole splatter. And if that's what
you wanna do to, I'd love to see it all
splatter, all hearts beautiful. Okay, next, I need to do a
little bit of phthalo green. I want to do two things with it. So first, I'm going to
take a little bit of it and to try to put it in
here with this blue, probably going to have to put
some yellow in there too. Now that I think
about it anyway, I wanted to put that here. I wanted to put a
little bit darker, just like darken up some
of the thaler green that's in the shadow
and on the ground. Have a ton of it. Not
make it all the darkest, but feel like it needed
to pop a little bit more. Then I'm going to take
my fun and one of them and I'm going to dip
one the sponges in it. Or yeah, you could take
the sponge if you needed a color in here or you
could use a brush. I think I'm going to take
want to take something. I'm going to take that
professional button, which again, I'm going to take and
put some darker green, not a ton of it, but just some
darker green in the spray. I just feel like it's too late. I'd like something a
little bit darker. I'm trying to go over
those green ones. They already have. Very dark. Beautiful Sarah. Because now is the place
where we get crazy, right? And you needed this
is fine details, so don't get too crazy, Sara. That's the corner that okay. I kinda like the big
square inches but kind of some tinier ones too. That's better. That's better. Let me see. Yeah. I just wanted a little bit of contrast and that's okay. That green one, that
green one says to me, contrast that one. Okay, elsewhere they're
too close together. Let's see if I can let that
guy, Sarah, That's alright. Nice bluish. See if I can pull part of that. That might drive kinda cool. So I'm not too worried. You get worried
about things like, you know, I have a feeling. I'm the only one that's
going to notice that. That's probably true for that. Okay. I'm not gonna do any more
that the next thing I want to do is take a little bit
of this fellow green. I feel like maybe this area needs a little
bit extra something, but again, I want
to preserve this. It's got a little money. So I'm going to do, I think this sponge
by blacks buttons, again, assess your own piece. See what it's calling for. I just think that there's
too much highlight back here that needs just
a little bit less, like something a little bit
more behind that shoulder. Smith thought, I'm
gonna go with green. I could do blue if I
don t think grains enough, I'm gonna go blue. So be prepared for that
because that could happen. I think it's enough. I don't want to get crazy
and I don't want to like start pulling into the
other part of the highlights. Like I'm okay. Next. Like reading my stuff. Read I want a darker red and the spray and you can do that
too, by the way. Look at your painting and I took actual notes
because I was like, What do we think it needs? Then some of the stuff
ended up looking at and going this morning after I'd taken some notes
and I was like, you know, I think that's okay. It's wanna do some
more red splatter, a little bit of darker red. I just want to more of a
brighter pop of color, kinda going where the
red is already yet, because I don't
want to make them a deck that I did
with the green, which is where maybe I took
a little bit too much. I think there needs to be some
here knowing when to stop. Right. Okay. So I'm just going
to do that red and blue, the face in the middle back. So I think with that, I mean, morning Sarah for talking
for night, Sarah. Sarah, what are you doing? I'm gonna take this the
five-year-old brush again. And what I'm talking about is like these little
circles right here. You see this over that go in
and the ridge of the eye. And I want to make those a
little bit more pronounced. I think they kind
of got lost here, but I need to be very careful. So let's see. Going to do that. I'm not doing the whole
thing like straight like a I'm just dotting it through because I want it
to be a little bit darker. And then right here a
little bit tiny bit appearing on his face. I think there was any
other shadows that were lost on here. I don't have anything
looking looking, looking maybe a
little bit of blue here and a little
bit of blue here. I think this could use
a little bit more. I think I can darken
this up a little bit. This shadow Meta. And I might, I'm
trying this now, but what I might end up doing is pulling some black into this. I still haven't
completely decided yet if this blue is dark enough. I think I think
it's dark enough. I'm gonna I'm gonna say that
I think it starts next. I have white on here.
That makes sense. So now we're going to pull
out our bleed proof white. And this is where you really
don't want to get crazy. I have done on many paintings, but you also, I mean, like I said, Look
at your own work. I sometimes get really wild
with bleed proof white. Next thing you know, like, I hope painting is
bleed proof white, which I would never,
I mean, I like it. I like it. I'm going to put some of this
bleed proof white on my flat brush and
on my round two. And what I have down here
is make the plants, okay. So I like to do this where I go over this
shadow part and make some plants like this. Maybe pull it a little bit. Here we go. A little bit of pulling. And then right here, what I'm doing, I'll
put a little back here even though I don't really think you
didn't see that. I just think that's like, oh, these things in the shadow
there now sticking out, we couldn't really see
them before, right. Okay. That's weird. And too much and too much lifting that lifting
that lifting that sometimes this can be
really hard to get off, so just be careful. Sometimes doesn't
come off very well. I'm going to try to pull
it up and lift it and then take the flat brush
because I made a mistake right. Now I'm losing some of
that shadow and it's a little opaque maybe. I don't know, it's
not as bright. It's not as bright. So I'm taking this back in. All right, I'm happy with that. Eli or elephant. I think that slider as good as faces, good,
everything's good. I'm going to sign them
wherever you want. I liked back at the back of
animals then their back legs. I don't know why. It's just where I
generally like to do it. You figure it out. I'm
going to use dark blue. So maybe it's just a shadow. I'm going to put my signature. It's like I don't want
to like take that away. I liked that plant
like that too. I'm going to stick it in. Now. You gotta do what
you want to do. But I am going to say in here, almost make it
look like a plant. Can make yours more
obvious if you like. But I am not going to on
this one sometimes I do. So I put mine is sort of
like a secret in the corner. And date your
painting if you want. I many times I date
my paintings so that I know when I completed
them and I can be like, hey, that was a year ago like this without
growth as an artist. And you know what? I'm going
to show you something. So I did this painting for the first time and
they came up with these ideas about a year ago. First crack at it. Then look at that. Yeah, I mean, it
takes a while to refine things and to figure out how you want things that
he got to paint things. A lot of times I painted this
at least this week alone, at least six times they figure
out how I wanted it to go. And each time it was a
little bit different and each time I learned a lot. So don't, don't get
overwhelmed or don't think, Hey, like, I'm not good
at this isn't whatever. It takes practice, it takes
time and you can get there. You just have to be passionate
and keep working hard. Now. So my side and let's see, what did I say at the beginning? Doubt that it looks good or you're worried about
if it looks like a professional painting. Put a mat on it. Beautiful. I'm sure yours turned out great. Please share yours. And I would love to see
all the cool things that you did differently and all
the colors that you used.
13. Final Thoughts: We did it. We made it. Congratulations. The end of a painting. What I always like to do is
try to focus on the positive. Because as people
and as artists, it is really easy
to continually tear ourselves apart and look at
all the things we did wrong. So you take a look
at your painting and figure out three things you really love
about your painting. One thing that if you
were to do it again, you could approve upon. So I'll go first. I really like all of
the highlights and colors I was able to
preserve in my shadows. I really like those hearts
that are in the spray. I think that I'm out of all the elephant ears
I've done this week. This is the best one, so I'm really happy about that. And that's it. The only thing left
is for you to give me some feedback and that's
what I really need, please. Because there's no way
that I am going to become a better artist or a better teacher if I don't
know what I'm doing wrong or what it could do better because we're all a
work in progress, right? Thanks so much.
 Sarah Gardner, Watercolors or what not