Transcripts
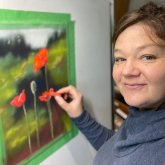
1. Mushroom intro: Hello, I'm Heather Nelson. If you're anything like me, then you love exploring the forest and finding
little fun guy. Now, I didn't pluck
this little guy. I found him lying
down in the forest. I would love it if
you would join me in painting a cute little mushroom. We're going to
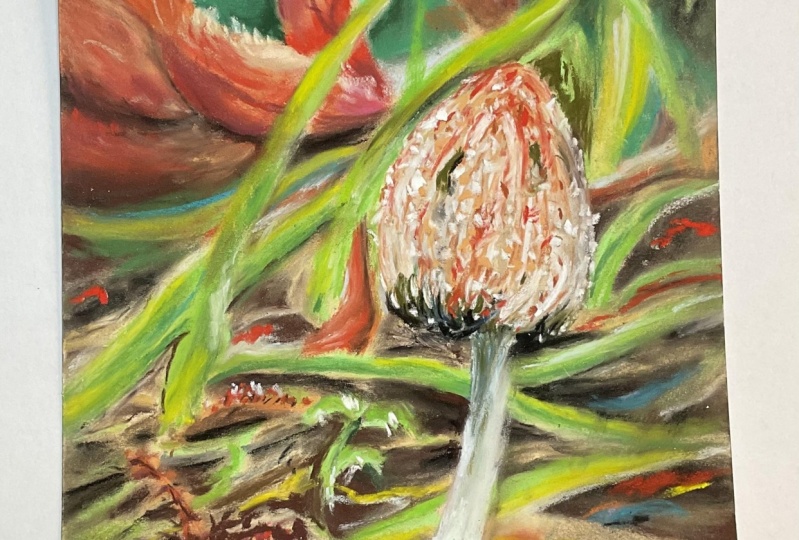
paint with pastel. We're going to work on form and light and shadow and texture. We'll sketch the
mushroom from scratch. I've used a pastel
pencil for this, and then we're going to create
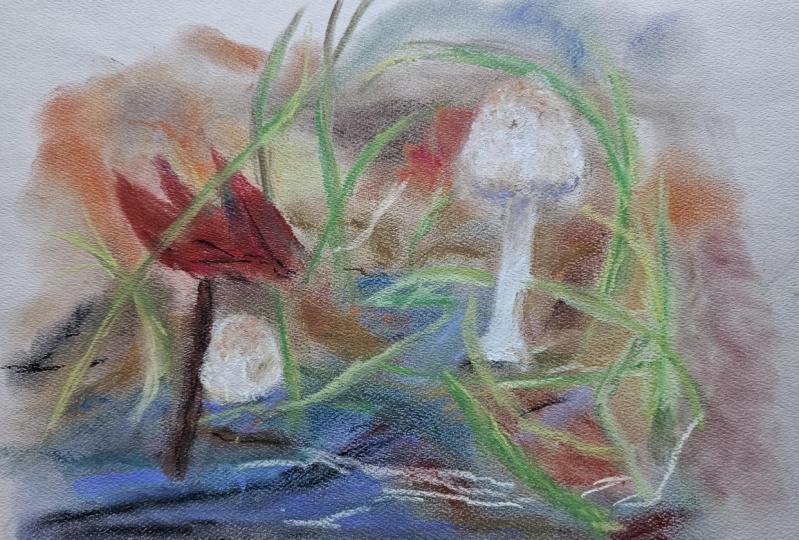
a nice blurry background. We'll add more
background elements and foreground details. I would love it if
you would share your project, please submit it. You can get the picture,
the reference photo that I took from the
resources section. I hope you have a lot of fun and I really hope you
enjoy this class.
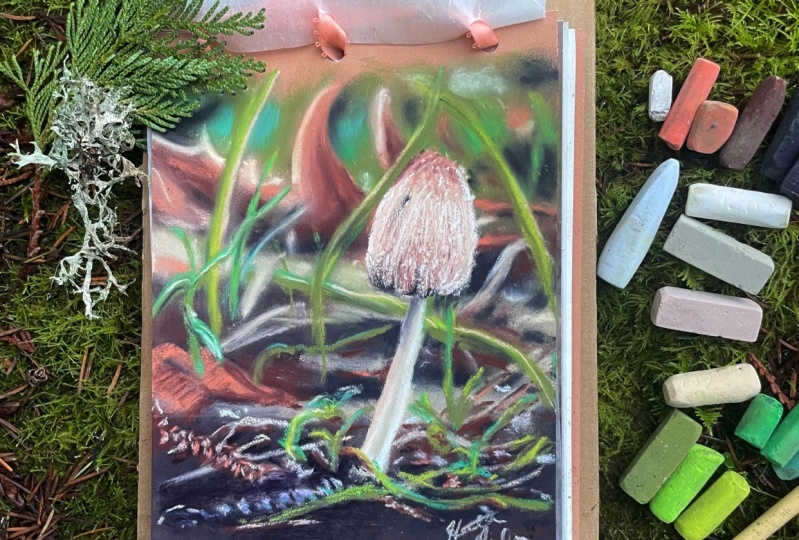
2. Materials for mushroom: For the materials, paper is actually the most important
aspect of pastel work. You want a textured paper that
can take a lot of layers. My favorite is the pastel mat. It's quite pricey, but it is the most effective
that I have found. But sanded papers
can work as well, even sand paper can work. I did choose the sienna color, but the color isn't so critical. I'm going to be working on
an eight by six inch piece, which is 20 by 15 centimeters. For our assortment of pastels, I like an assortment of
different tones of green, especially like a yellowy green, some mid tones, some
vibrant greens. I could use a darker green in this assortment that
could come in handy. And instead, I'm
probably going to blend with these darker colors. So I've got the Terry
Ludwig eggplant. I've got a navy
blue. These two are so similar that just
one of those would do. And then I've got some
different tones of, like, orangy browns and then
some more kind of, like, lighter
neutrals like cream and a little peach and a
stony color and some white. I did use a bit the new pastel, but that's not critical as long as you have
some sort of white. This is a white canela. And then also this light blue. This was a unison came in handy. There's so many
different brands of pastels right in this
assortment alone. The brand isn't as critical,
like, use what you have. I do like to have a cloth. I like to have a
cloth so that you can clean off your pastels, and then you're not
leaving any color behind on your canvas that
you never had planned. Hands get really dirty, so I'll often have
some wipes nearby, like makeup removing wipes
or little diaper wipes. But of course, you could
just use soap and water. Of course, we're going to
need our reference photo. You can download that from
the resources section. I use some paper towel to blend. You could use a blending tool, and if you don't have
anything like that, well, you could use your fingers,
but we tend to want to avoid to blend too much with
our fingers with pastel.
3. The sketch: Let's begin with our sketch. And we do need to decide on the composition of our mushroom. I don't want it
right in the center. I want it kind of, like,
off into the distance, but I also want enough
room from the top. And so I'm going to think
about, where do I want the bottom of my mushroom to be? And where do I want, say, the top of my mushroom to be cause I want
space above and below. And then I'm just going to
kind of sketch out an arc. I'm sketching it with a pastel
pencil, cream colored one, but you could also just do this with one of your soft pastels, or you could even actually just do it with a willow charcoal because you're going to
cover it up later, anyway. And I do want a little bit
of an arc to the bottom of the stem because I think that makes it kind of interesting. Makes it more mushroom aske
not too much of an ark. And I kind of like, you know, the bits of bits of grass
that are coming around, but I'm going to
be forming those. It's a little green plant here, which is kind of kind of cute. So I'm probably going to include that and a little
bit of the debris, but I'm not going to be
going to town with it. I do like this leaf, and I'm going to make it very fogged out in my background, but I'm still going
to include that leaf. So let's just concentrate on our mushroom a
little bit more here, make sure that it's
the star of the show. And then I have captured the idea of it
properly before I get too carried away. Okay.
4. Background: Always tempting to start
with your main subject, but it's usually easier to start with your
background first. I'm going to start
with some of my darks. I've got this is a sennelia. It's a dark blue, and I don't have to get everything
perfect in the background, so I'm just going to
make some marks where I see some dark areas
and dark shadows. Just did a little
swoop under there. We don't have to get
this perfect because we are also going to
be blending it in. We can go over top with it. So I can really cover a lot of different areas
with this knowing that I'm going to be
doing other things later. Now I'm going to come in with maybe some of my leaf
idea in the background. Again, going with
the darker colors. First, maybe add a little
bit of that over here. Anywhere you see it doesn't
have to Like, nobody knows. Nobody knows, but you,
what this looks like. So you are the one who can kind of mark in various
different spot, various different points of
color to give a sense that, you know, something
something's going on here. And I might even bring my darker color into
the whole bottom here. Like soap. Now, I want to start already thinking about
blending some of that. But I'm going to add a
little bit, I think, of my stone kind of color
too before I get too blendy. And then I've got actually
a lot of greens up top. So I'm going to start
with kind of like a sage green because it's
a little bit more neutral, I can bring more bright color in later when I'm not
blocking in the colors. I'm just going to block that
in with green to indicate, like, Yeah, there's gonna
be some green in here. And now I'll come around with my paper towel and we're just going to blend
the blocked in areas. I like to blend my backgrounds, and I start with
the lighter colors. Can blend with various different
types of blending tools. You can also blend
with your fingers, but it's better not to get too much pastel
on your fingers. I just rolled my paper
towel over to get into this lighter stonier area. And then I'm going
to just fold it over again and do the darker bits. If some of the paper tone comes through, this is
not a bad thing. Now, I know that I blended
over top of where I had my little clover grass
kind of little thing. But I'm not really worried
about that because I just like to frame it in the first place so I know
where it's going to be, and then I can always
put it in again later. Don't worry about
all the pastel dust. When we're working horizontally, I decided to work
in my sketchbook, then the dust is going to
kind of get on everything, whereas if you're
working with an easel, it kind of drops down into
your tray, which is nice. Okay. So that is my background. Once I have that really
blurry background in, then I start to
think about making the background a little bit clearer, a
little bit crispier. I'm going to just stop thinking
so much about blending. I might still blend
a little bit, bring in a little
bit of dark here. Underneath, I like the contrast going on underneath mushroom. And you can sort of draw in
some of your other shapes. So I'm taking this peachy color. I'm gonna give myself a little idea of this
leaf in the background. There's even a little
bit lighter color there, so I'm just gonna give it a
little little high light tap. Catch a little light. And
we can blend that a little, but now I'm not gonna
blend it as much. So I'm just going to
blend a little bit. I'm gonna still kind of leave
a little bit of texture, a little bit of roughness. Just not as much. I
think backgrounds, they always look kind
of funny until you get, you know, your main
show stopper in there. And yeah, don't worry
about it too much. You can really
overthink a background. I have definitely learned that. And you don't want
to. I'm even going to bring in this yellowy color. Just add that little
whatever that is. We've got little bits of later
dead grasses. I can even
5. Stem and grasses: Well, I don't know.
I'm going to use my little stone color to block in my actual mushroom. Don't worry that it kind
of blends with the side, and you're like, Well,
where did my mushroom go? We're gonna fix that with other brighter colors
and contrasting colors. So yeah, with this creamy color, I'm going to just
take it on its side. So I'm using about a quarter
of an inch, I guess, taking it on its side and
just running it down here. And then there's actually,
like, a blui color. So this is a This is a unison here. I'm just
gonna clean that off. And use it almost like a
pencil running it down side, I can see that that kind of blue highlight just
gets in there, like so there's a little bit
of shadowing underneath, and I can be really careful with these colors
and sort of blend, but I might need to
use something else. So I'm going to
see if I can just glaze it with this
eggplant color. And then if I want it to
be a little bit lighter, I can blend just a little bit. There we go. Mm hmm then we're going to just
bring in again these, like grass colors. You can put them
wherever you like. They're not going to be the critical piece of
this whole drawing. But they'll bring
us some interest. And we're going to, like,
we're probably going to blend a lot of it so that it doesn't
really matter too much. If you're going to take this
lighter color in here and just kind of scrub in
this little leafy bit. Great little little delineation,
a little shadow there. And what's important is
that you don't like, look at your background
and then just be like, Oh, it looks like nothing. An interesting thing
about pastel is it often looks like nothing. You got to give it
time, and it starts to get clear and make more
sense as time goes on. So I'm even going
to just bring in a little bit of the grassy areas that's next to our mushroom. You can decide how much of this you want to
bring in because maybe you don't even want
many of these grasses. You might just want
to focus, like, completely on the mushroom that is within your prerogative. And you could sort of switch switch up colors
with these grasses. Pick different tones. That's what's going to make
it seem authentic and grassy. Just drawing little lines, much like with, like, a pencil. Bring them around. If you want it to
be more grassy, just put your pastel
right on its edge, and then you can make
these, like, little swoops. You can make those
kind of random. This one's a little bit lighter, so I'm just going to bring in
this arcing one over here. And I'm even going to
use this creamy color right over top of it
to kind of highlight. And then because it
is in the background, then I can use a
blending to kind of say, Hey, yeah, there was
something back there. Trying to follow similar
lines to what you had before. But, you know, if you can't
follow perfectly those lines, I don't want you to
worry about that because it's not that critical. Pick out different
colors and just see what those different
colors look like for you. See if your eye buys
it that it's grass. It's like, Yeah, that
color looks good. So I'm sort of changing up all these different greens
and just making some marks. It's more vibrant green. We're just gonna
throw this in here. I can even see that there's some light bluey areas back in there. I'm gonna just kind
of dot those around. And then I'm gonna blend them. Because I am still
in my background, and I don't want things
to be too clear. I also don't want it to
be blended in too much, so it's just gonna
have like an air of blending, so to speak. You can blend a little or as
much as you like back there. There's even some, like, little shadow areas on some
of these grasses, so I can throw those in too. And I can blend since I'm
still in the background. I can follow the
pieces that you like, can add a little
bit more vibrance to this one and you
can glaze over. When you start glazing
over multiple colors, they start to blend
just like paint. That's a cool thing about pastel and that's why they
call it painting, I think with pastel
rather than drawing is because you can just
blend blend colors. We can get darker here. I might go find some
darker colors in my collection too for that. I like the sharp
edge on that leaf, so I'm going to bring that into with my peachy
peachy orange. I'm even gonna bring
in this, like, sort of fogged out little
piece of leaf here. And if you put it on light
with a really light touch, that's where you can get
the glazing and blending of colors together
without having to actually blend with
a blending tool. Just really gentle glaze
will give the same effect, or you can do more or
less where you like. Bring in some other little
color in my background. You can make this
so random, like, nobody knows what's
going on back there. Essentially, you're just trying to create the illusion of, you know, some
litter leaf litter. I do want a little bit
of contrast there, so that's why I pulled that in, and then I can my grass. Then I can use my
light yellow green and just follow along. If it misses and you're like, Well, that doesn't make sense. Then just just fill that in.
6. Mushroom details: Now, even though I'm
not done my background, I can still play with my
mushroom because I can be like, Well, now I want to
do the mushroom. And then you can come up with your bring in your
dark colors first, even darker than you think that you should go
and just put in this little dark sort of it's kind of like
a ripply bottom. But you usually want
to go a little darker with your shadows
than you think, and you can always
layer over top. So that's how I'm going to
put that little shadow in. And then I'm going to
come in with, again, a darker color than you
might think and block in And it's actually very
similar to my paper, but I did actually choose this paper color
because of that. I can kind of glaze over that. Dark little spot that we had. And I'm not gonna
be bunding now. This color is more present
up top here, though, so I'm going to just
see if I can kind of fill it in a little
bit more up there. You can always wipe your hands. They're starting to just get so grimy that it's a problem. Then we can look
at the different colors that we have here. I'm thinking, I'd probably like to bring in this creamy color and I'm going to use it on its edge in lines as I'm filling in the tooth because there is that texture. I can leave some of
that dark texture down below as I'm creating these
teeny tiny little lines. And, like, there's even part
of me that thinks, you know, I probably should have
gone even darker, 'cause I'm trying to
create these textures. But we can always
fill those in too. It's just as easiest
to go darkest first. Make sure you're
going with the grain of the texture on the mushroom. A little more through
the middle and bottom, then up at the top,
because the top has that kind of orange color. And if I want even
a little more tone, I'm going to put this darker. I just see how when
I glaze it in. Then it doesn't go in
as dark as you would think because it's mixing
with the colors below, and I'm doing that
in the bottom, too. So I'm just putting it on, pulling up, pull up, pull up. So using it sort of as a
pencil, scratching it up, and now all three
colors are mixing together and doing exactly
what I want them to do. As I pull up and I gradually
lifting as I do so. So I'm using a little bit
less pressure every time. And then I'm going
to come in with my lighter creamier color, and I'm just going to
do the same thing. So I'm just going to
kind of put it on there, and the areas that
I see are lighter, kind of.it around a little bit. I don't want to
fill in everything, putting it really gentle, gradually pulling it up. Put it on bigger where
there's actual highlights. Like, you can put it
in a little thicker. And just sort of
scratching that on. I really want to leave
the texture below so I don't want to get too carried away and
cover everything. That's part of the
key here. This is just lightly putting it on. And then let's say I already want to
explore these little, kind of, I don't
know what these are. I mean, it's fungi.
Fungis a mystery to me, but you know how it has
these little sparkles. These little dots, whatever
these are. They're freckles. I'm just gonna freckle around. I'm gonna keep dotting
these over dot, dot, dot. It's probably not
going to be, you know, fantastically accurate. It's just spin it
around and dot this on. I find the new pastel goes on really well when you
do this kind of thing, but you might want to give it a little clean with your cloth. And these little white
freckles, whatever they are. If you're not noticing them, they're three DA, so they even come over
the edge of this. Then put them on a
little bit bigger. If you're not noticing them, put them on a little bit bigger. It's not going to be a problem. The important thing is
you can recognize, hey, there's some texture here, and you do want it to be dot
like as you sprinkle it on. You don't really want
it to appear as lines. We can even try a little
twist. Oh, yeah, that works. I'm putting it on and I'm
giving it a little twist, especially over these areas where you can see some shadow. Those are the areas
where your dots are going to show up the most. Then after that, then the
human eye is going to go, Oh, that's what the rest
of those things are. Okay, I get it. There were some areas where
we had little shadow, little imperfection
here on the mushroom. Your mushroom doesn't have to
have it if you don't want. But you might want it. You might think,
Hey, you know what? Brings authenticity
to my mushroom. You can even bring in
a little bit darker, but just very
carefully just touch on to create some
more of the texture. If you feel like you lost any, just scratch in some little
lines here and there. And then we can always do the
same process again, right? Like, that's the great thing. You can come back in with your lighter color
and just go over, and then you have both darker and lighter all working
together for you. I almost want a more playful
orange on the top here, so I'm going to go
looking for one. It's your mushroom. You
get to do what you like. So I brought in this
more vibrant orange, and I'm just going
to kind of blend it also over the top here. I don't want to go
too heavy with this, but If I lose anything about my little dome, I can come back in, scratch over my other colors
just like I already did. I mean, I know my program
now, right? I know it worked. Oh. Very gently introduce a little
shadow to the top here. That coloration that
orange coloration. And then I can just come back in some gentle little lines. And I did go grab something
that's much closer to white. I'm going to clean this
off. It's a sanelie and I wanted to use it to sort of gently put in some grooves
through the center. Again, to just bring me a
little bit more brightness and a little more texture. I'm going to vibrate it
in along the edge here. And it kind of creates that
little texture in those little I don't know
what those things are. I don't know much about fungi. I'm sure one of you does. Got some scientists in the crowd or just some people
who really love it, then you would know,
whereas I don't know what these little
bits of texture are. Okay. And say you went a little bit crazy over on the side and you're like,
Okay, that's too much. Well, just bring
in another color. You can fix it.
That's a great thing about pastel. You
can always come in. And there it is.
I'm pretty happy with how that's coming
together, the mushroom itself, but I do want to bring in a
little bit lighter color, something a little bit
lighter down in here. So bringing this
creamy color here. I'm just going to kind blend it across over there to the blue. And then I'm even
going to bring in my lighter color,
my whiter color. And just mix it a little bit with the
colors that were already present to brighten
them up a little. But not too much in
this shadow area. Can use my finger to kind
of blend that out a bit. And actually, that
blend pretty nice. I liked how purple it got. So I'm just gonna mess
with it very carefully. With my finger and
blend that down. I don't want to do that to
the southern area, though, because I like the effect
that I'm getting here. I am missing a little bit, and I just want it, so I'm just going to
carefully bring in sort of ripple shape that I
get with that darkness there. But I don't want
to make it a line, so I'm going to bring
in my other color, kind of skate over it. Okay. That is the I think that's good for
the mushroom itself. I might go a little
bit darker on the shadow just so that
we buy that this is, in fact, covering it up. And then I'm just gonna
blend that. I think so. But now I need to do more
on the actual background.
7. Background additions : Now that we have made
our mushroom quite nice, we can get in and just
mess with our background, foreground, all
that kind of stuff. I'm just going to come in and add some visual
interest to the background. You can really do
what you want here. But I'm going to just add some color And a little bit of business to the background? Not too much, of course, not too much, but
just a little bit. And with this, when I'm
in the back background, so to speak, then I can really mix up the
background quite a bit. I am going to add some
things to my background, but I'm going to make them also kind of blurry at the same time. I decided I wanted it a
little bit more back here. So I'm going to just
bring some stuff in. And I do usually
work back to front. But this time, you know,
I see some things. I'll add some things. You can really just throw in
random bits here or there. But then I would advise
mixing it around. Because it's in the background, I'm just going for multiple
colors back there. And then I'm gonna mix
things together to create sort of that blurry
bouquet background with things that I think
might I don't know, kind of be believable
back there and complement my main picture. This is not something you
absolutely have to do, but I just thought
maybe it would bring a little interest in a
little believability. And if you're looking at
it and you're like, No, Heather, I don't think that
that brings it anything. Well, you don't have to do it. I go to use my finger there because I think it
might be a little bit easier. Just adding like little bits of debris and leaf litter
into the back very random. It's more kind of creating
the concept that, yeah, some things are back here. But then blurring that out, that might seem a
little bit weird. It's like, Well, why would you put it in there and
then blur it out? But I'm just trying to
create the idea that yeah, there's stuff going
on back there, just so you know what setting. Our mushroom is in. And then as things move a
little bit forward, then you can get a little
bit clearer about them. You blur them out as
much as you want to. I can create a
little edge on that. And then I can also create a little highlight and
blur that out, too. And that starts to
bring a little bit of life to that back area, and I'm just going
to bring in some little shadow there, too. And again, I'm just
going to blur it out. I know I said not to
blend with my finger, but it often happens. Ka. Kind of get inspired by
what I see in the picture, but also make
things very random. So people aren't entirely
sure what is back there. The more you add a little bit of detail
to what's back here. Again, the more
believable it becomes. You can still blur
some of those items out and you certainly
don't need them all. Something like that. So
then we know you know, there's some business back here. I still kind of want a little
bit darker back here, too, to just indicate the depth
that's back in there. And we can also do that
kind of thing to bring in some more contrast
near our mushroom. Like, maybe we bring
that dark in next to the mushroom and then
carefully blur that. You would be really careful
when you're going next to your main subject to create,
you know, a little bit. So then the mushroom kind of jumps out at us
a little bit there. You know, maybe there's
some little leaves. I do this very randomly. I just get inspired by
the reference photo, but I don't I don't specifically try to match
the reference photo. I just get inspired
by shape and color, and then I make
it up from there. You, of course, if
you're like, Well, I don't know quite how
to make that up, well, then you can do it a little bit more like just draw what you see or pick certain things that you see and then draw those in, but don't add everything. I don't want it to be too busy. I just want it to be believable that there's
something back there. I'm going to add a
little bit more light to my leaf and background, maybe even a little bit
more depth to a two.
8. Background and midground: Because again, that's going to play nicely with my mushroom. And then I might come in
with my more vivid orange actually and just mix and glaze it with this
reddish brown. I can blend those
together because this background area
has got to be pretty blurry because that's what
the camera was doing with it. Well, I'm just kind of bringing some color and some vibrancy
into the background, but without making
it the main star. That's why I'm blending it. Kind of having it tell a story of activity in the background. This bit of grass going to have that one catch a bit more light. Maybe even a little highlight
from one of our peach. And as I move forward, so these are going
to be quite blurry because that's behind there. And I like this sort
of stony, stony color. Go to bring that in a little. Now, as we start
to move forward, we can decide how
much is going to be blurry and how much
is going to be clear. Because we want to
start bringing in some clarity as we start to get more at
the mushroom level. So back in here,
I can still make things kind of fogged
out and blurry. Most of these grasses have
a few elements to them. They've got the highlight, the shadow, bringing
that sense forward. When you want to make a grass, you can pick a particular green, say this one's twisty. I'm going to go with
my medium green and I'm just going to
twist it over through here and then it's got a leaf and it might have a
little piece off of here. Then I'm going to add
other colors to that. I might add something a
little bit more muted. But then also bring in
something that's more like a highlight for
those little ribbons so that I get kind of
best of both worlds. We've got highlight
and we've got a little bit of shadow
muted and brightness. And then when I
want more shadow, I can bring back in my
sort of seed year green, and I can also use my blue, and I can kind of just
mix it a little bit. Or if you have a darker green
with you, you can use that. And then because that one
is going in the background, I'm going to blur
it a little bit. Everything is kind
of heading this way. Could be good to
have some things heading off in another
direction, too. So I kind of went that
way with that one. Now, this is still fairly
blurry in the picture. So I'm just gonna blur out
this mid section here. But I could still bring
in some shadow and also a little bit
of light in there, so I'm going to just mix up
going light, going dark. But it's still in
the background. So it gets a little
bit of shadow. And this kind of quite
of a yellowy thing here, so we're just going
to let it follow through so they can see
where that one went to. Our viewers I'm thinking of
because they might wonder, like, Hey, where
did that one go? Little contrast, bringing
in that brown for contrast. And, you know, sometimes you
might, if you went over top, you may have to bring
your light one in again. There's even bits
of bits of dirt. Now, here we want to be
a little bit clearer. But yeah, there's little
shrubberies and things. You can dot them around. Add in some other colors, too. Throw in some little highlights and then give it a
little bit of a blur, but maybe not as much
blur as what we've been doing because now we're
starting to come forward. I'm careful around
your mushroom. And if there's a spot
that you feel like you need to kind of remind it about its green grassiness
go ahead and do that. Bring in a little bit
of yellow in there. Just a little touch of
smeary. There we go. As I come forward, now I'm going to start
getting a little bit less blurry as
I come forward. We're going to
start making things make a little bit more sense. I'm not going to be
blending them as much. I might blend a little bit. Or I might use my actual
pastels to blend a little bit. So by glazing over with
my pastels themselves, I can also blend a little bit, kind of like we did
with the mushroom. So these ones are starting
to kind of come into focus. Overlapping debris here. Maybe it goes onto
that other side. And if you want to give it like a little gentle tap tap tap, you can to start bringing some stuff a
little bit more into focus. There's even some areas where I think water is
sort of glistening on little chips little
wood chips, maybe. Sure you can just dot
those around, too. Gently gentle little tap
tap for the debris areas.
9. Foreground: I'm just kind of making
little grass marks. I can make some of these
little bits of plant. I'm making this
three little leaves, and they've got a little
bit of sort a teal color. So if you've got a teal on the
edge there of those plant, and also a little bit
of the yellowy green. Going to add in some
little other pieces of grass and leaves
that seem to be around. There's even actually, like, this yellowy yellowy one here. I could even bring that in
with my pencil if I like, 'cause this wasn't my pencil
that I sketched with. And you can make wines
where you want them. Because we definitely
have lots of miscellaneous debris
lying around. Even some of it can
have a bit of a green I think as long as you're kind
of mixing up a lot of the colors and
adding in these bits of green and these
little bits of yellow, then it'll be very obvious that, Hey, there's grasses here. And that's really what we're
trying to get across at this point is just that there's some little grasses
growing with our mushroom. This one I kind of like
this little plant over here that's just recently grown, so I'm going to put that in, and it's got a
little funky bit of stem little bit of the leaf. So you can use all
your different greens to kind of tell the story
of that little stem. It's even got some lighter
kind of stony outlines, so I can put those into. Throw in some
darker shadow bits. Kind of brown. I just kind of
sketched that in in, like, a haphazard kind of
fashion, went back and forth. I'm just sort of
making these kind of, like, sketchy kind of lines. Adding some color
here and there. Very randomly, kind of
throwing in a little this, a little of that to
create a little business. Of course, I don't
want so much business that it distracts me too much, but we do have some kind of shiny Shiny bits of debris, I guess, leaves. There's even this other
little mushroom down here, but I don't know if I really
want to get into him. I'm making, like, a herring
bone pattern for this one. It looks like a dead
cypress of some kind. You can add a little bit of the dark to that
little herring bone, and I'm even going to bring
in some of the lighter. Just to throw in a little
bit of texture and make that believable that
we've got some sort of plant lying on
the ground there. Just go to blend this part here. I didn't want to really bring
in that other mushroom. I'm just gonna bring the
dark into the front. But do you think I
kind of like how this grass blocks the front of the mushroom or kind
of grows in there. So I'm gonna just add that in. You be going to bringing
a little bit of a yellowy yellow
color into that, which is Oops. Here we go. Using the dark to kind of work
with the negative space to create some delineation
on some of these grasses. I kind of want this to go. Off the screen just try
out some different greens. I don't want it to
be too vibrant, so I'm gonna mess with it
with some other colors. I don't have, like, a
dark green with me, so I'm just going
to use my blue. There's even some interesting
patterning of a really old I guess it would be
some sort of cypress, so rotted out that it's black. But it has, like,
these light highlights heal for that, actually. I then bring the dark back in. I'm going to just kind of
stand back and take a look at it and see what else I need
to be thinking about adding. Hadoy glaze to this
piece of grass. How I'm going to do
that is by blending it, and then the highlight
of it as it comes. Add a few bits and bobs. Little points of light, where it looks like maybe we've got some rain or water or something kind of glittering
on some of these pieces. And I mean, the humans
not gonna know. An human looking at it, they won't know what
all this stuff is, but it just creates a little
bit of business down here. Just kind of mix it
up and scrabble over the different
colors that you see and making sure that you
have enough variety. Because that's really the key to creating some sort of textures. Having a little bit
of a dark color and then having a little bit of a mid tone, and then
having a light. I'm actually going to
sign it with my pencil. We'll see if it
works out sometimes pencil won't go
down well enough.
10. Closing: You so much for
joining this class. I hope you enjoyed painting
a little mushroom. Please upload your project
to the project section. Let me know what you
thought of this class and give me any feedback so I can help bake classes
better in the future. You can also let me
know any projects you would like to
paint along with me. Please give me a follow so you see what classes I
have in the future. I hope you had a lot of fun
painting this mushroom.
 Heather Nelson, Pastel artist