Transcripts
1. Welcome to the Class: Hello, and welcome to the class. I'm Pile, an artist and an
art educator based in India, and you might also know me as thesimplyaesthetic
from Instagram. I love painting
landscapes and even more helping people understand them in a simple and
approachable way. My teaching is all about
removing the fear of the blank page and having a clear process that
you can follow. Over the past few years, have had the
opportunity to teach thousands of students
here on Skillshare, and I'm also a
Skillshare top teacher, which makes the process
of sharing what I've learned with you
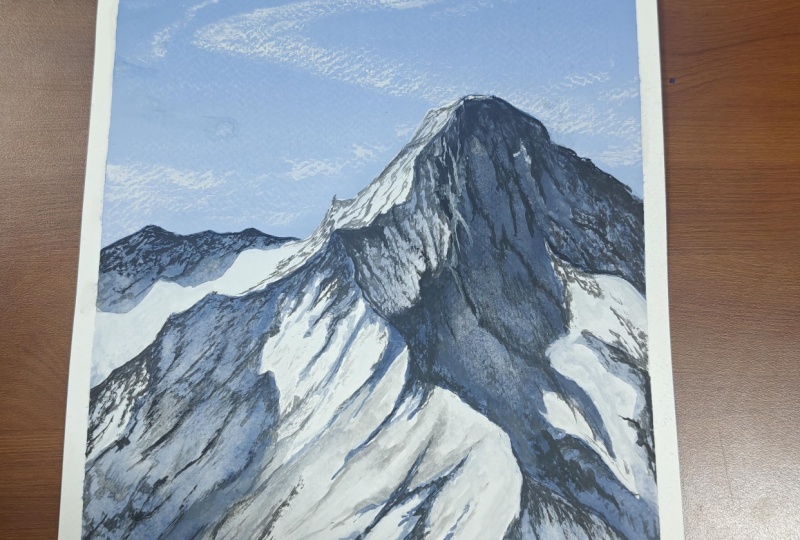
even more special. In this class, we'll paint
a snowy mountain landscape using gouache and learn how to approach the mountains
step by step. So you'll have a
process that you can reuse in your future
paintings as well. Instead of copying the
reference line by line, you will learn how to break down the mountain into shapes, identify lights and shadows, mix believable snow colors, and create texture using
the dry brush technique. By the end of the class, you won't just
complete one painting. You will learn how to approach
mountains with confidence. This class is beginner
friendly but also suitable for people who know how to paint but find a
subject challenging. I'll be there to guide
you through each and every step slowly and clearly. So gather your supplies, and let's paint some
mountains together. I'll see you in the next lesson.
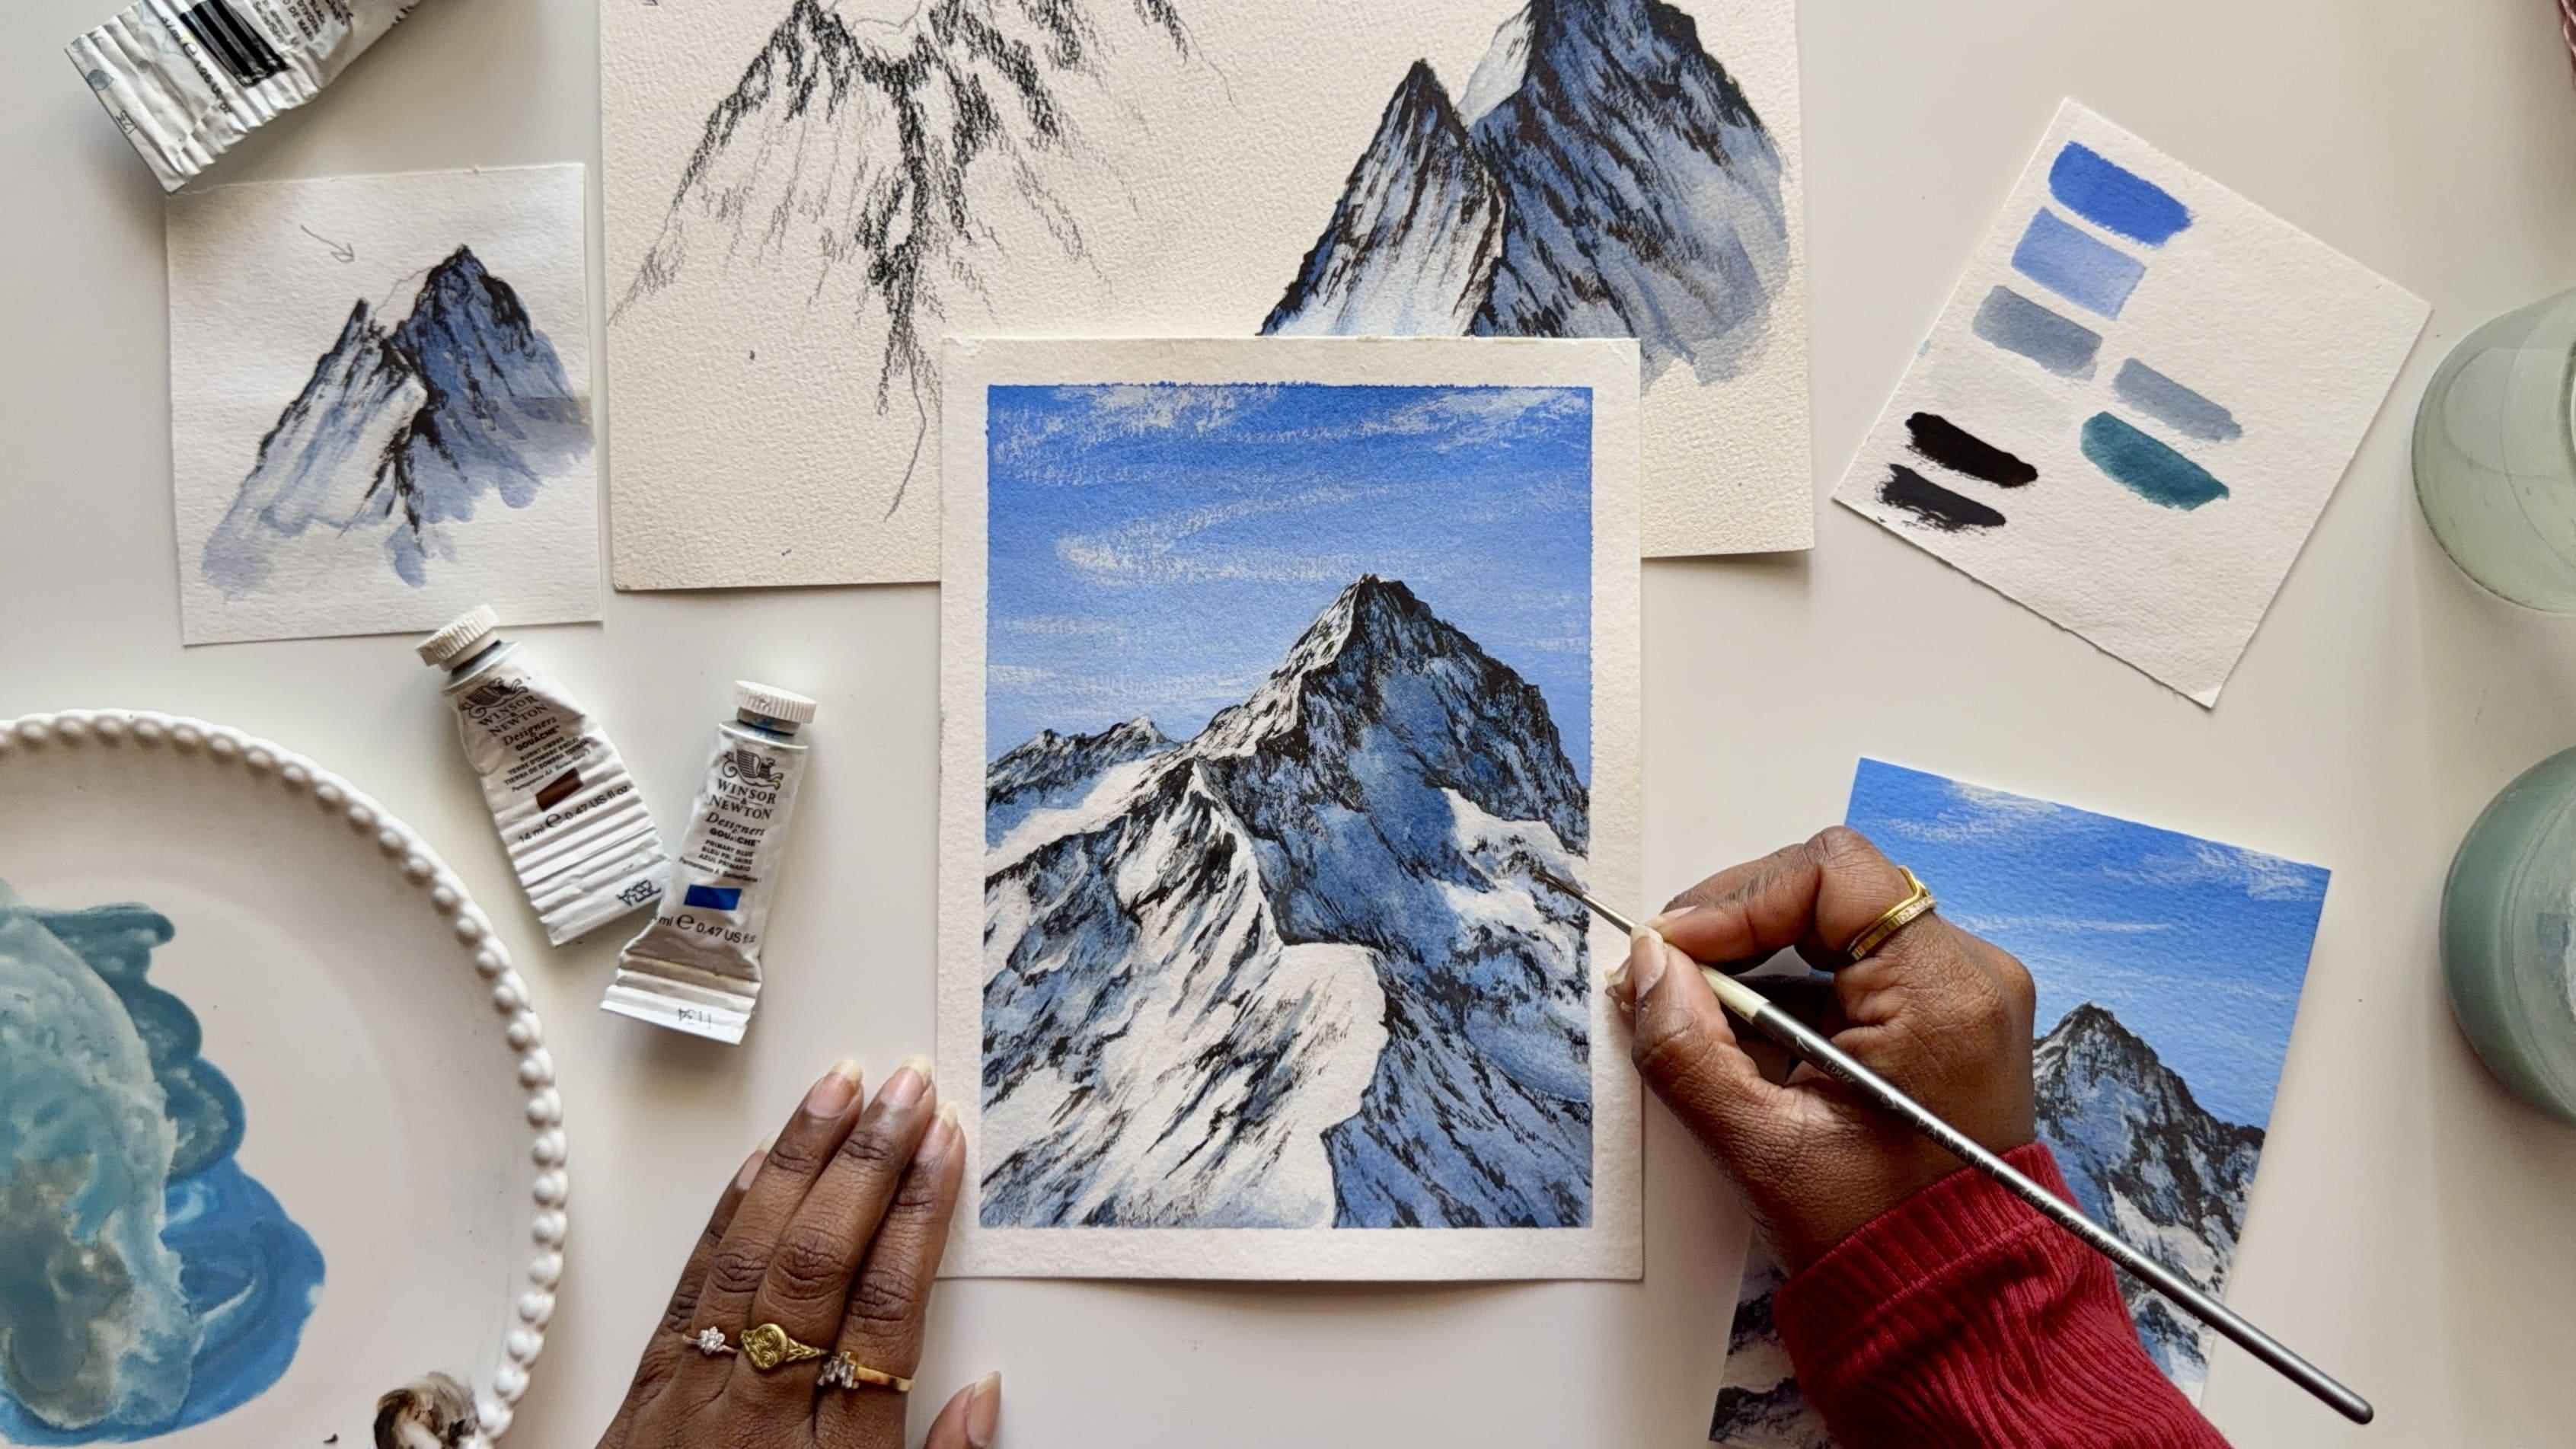
2. Materials Used: Let's take a moment to go over all the art supplies that
we need for today's class, and you don't need that
many fancy supplies. Let's start with
the paper first. So for the paper, I will
be using my Strathmore, 100% cotton, 300 GSM paper
in the size six by 8 ". Now, you don't have
to stick to the size. You can also opt for a
smaller size if you'd like. Or go larger, if that's
your preference, but this is the
size that I'll be using for the final
class project. Let me quickly show you
the texture of my paper. Now, since this is
a cold press paper, it has a little bit of texture, which I really enjoy for my landscape paintings as the dry brush technique
works beautifully on this. So, along with my paper, I've also kept this acrylic
sheet, as you can see, and I will be using
this to tape down my paper on using
my masking tape. Now, I like to have
a little bit of movement on my working
surface, but if you'd like, you can also tape down your
paper on the table itself, but make sure that you keep this half an inch or 1 "
masking tape with you. Next, let's talk
about the paints. Now, if you've been following
my classes for a while, you know how much I
love Winsor Newton paints for my gauche paintings. Along with that, I'll also use
Brust rose titanium white, and let's talk about
the color palette here. Now, for this class, you don't need that many shades with you. So let me quickly
show you the colors I'll be using from
Wins renewton. So over here, I
have a burnt umber. Next, I'll be keeping some ultramarine blue
and primary blue. Now, you can use either of
these colors that you have. Any of these blues
work perfectly fine. Next, I have some black paint. These are the colors
from Windsor and Newton, and from Bruce
Drow I'll be using this titanium white tube, and these are all the
colors that you need for this class. Very
limited, right? Next, let's talk
about the brushes. I will be using a
different combination of flat and round brushes here, and you don't need that
many sizes, actually. So let me quickly show you
the sizes that I'll be using. I have size 18 and size ten or 12 size flat brushes for the flat washes that I'll do and the
blending that I'll do. And for all the other details and finer details
of my paintings, I'll use size four and
size one round brush. So these are all the brushes that you need for this class. Next, for the mixing palette, I'm using a ceramic
mixing palette, but feel free to
use whatever mixing palette that is
available with you. No hard and fast rule here. But make sure that you keep two jars of water at all time. One to rinse your brush, and the second one to
double rinse your brush so that you don't have any
pigment on your brush. And this is a very
important step when you're painting
with gouache. Next, you want to make
sure that you keep a pencil and an eraser with
you because in this class, we will be doing a
little bit of sketching. Next, you'll need
some tissues or a cloth rag with you to dab off any extra water or
paint from your brushes. So you need to keep
this one next to you. And lastly, make sure that you have a small piece of
paper so that you can swat your colors out on it and
ensure that these are the right mixes before you use them in your final painting. And that is it. These are all
the art supplies you need. So gather them, and I'll see
you in the next lesson where we learn how to break down
and see a mountain together.
3. How to See & Breakdown Mountains: Before we start
painting anything, I want to take a moment to teach you how to
observe the mountain. Most difficulties with
painting mountains comes from jumping into
the details too early. So in this lesson, we're going to slow down and understand the structure of the mountain first so that when we
do start painting, things feel a little easier
and less overwhelming. All right, so this is
a reference image, and before we start discussing, I want you to take
a deep breath. Now, I'm asking you to do this because there are so many
details and it's very natural for us to get lost in all the nitty gritties of this reference image because
there's so many things, you know, like snow, texture, shadows, and a lot of
these tiny details. But before any of that matters, we need to understand that
the mountain is a solid form. So the very first
step to do here is to ignore all the snow
that you're seeing. Pretend the mountain is
made of stone or clay, and when you do that, the shape immediately becomes a
little bit clearer. If it doesn't, let's
work on it together. I'm just going to show
you a quick outline of what the mountain
looks like, right? So as you can see, the entire
mountain is simplified into a large triangular or a pyramid like form with one strong peak, and everything flows downwards
from that peak, correct? That is the basic
structure of our mountain. Now, another thing that I'm
going to do is I am going to add a few extra details that are the faces of my mountains, which I will explain to you in detail in the next
part of this video. So coming ahead, you will
know more about them. But once you have
the major details or the major faces
of your mountains, it's important for us to
figure out the light source. So I'm just going to
decrease the opacity here, and we are going to figure out where the light
source is coming from. So in this reference image, the light is coming from
the top left, right? And you can see very
clearly what this does is that the left
side of the mountains, which is towards the light, appears warmer or brighter, while the right
side is the shadow, and it looks cooler and
darker because it's not receiving the
sunlight on it directly. Now, this tells us
something very important. Mountains are made up of
flat surfaces or planes, and each plane
reacts differently, depending on how it's
facing the light. A helpful way to think
about this is to imagine the mountains as a large
folded piece of paper. Wherever that paper faces the
light, it looks brighter, and wherever it turns away from the light, it appears darker. Okay, so now that we know that the light source is from
the left hand side, we can start breaking down
the mountains into planes. Now, instead of seeing
hundreds of details, I want you to just look
for a few large surfaces. In this mountain, there is
one dominant sunlit plane on the left side and one large shadow plane on
the right hand side. And then at the peak, it breaks down into smaller, smaller sections, and it becomes a little
bit more complex. But I'm just taking
this yellow color to show you the area, which is on the left hand side, which receives light directly. And in our final
project as well, we will denote these
areas as bright, vibrant, white light, slightly
warm color as compared to the right hand side of the areas that are
receiving the shadow. So on this section, as you can see, along
with the larger surface, you've also got tiny kind of slopes or little planes that are a little
bit more flatter, which are catching the light. Now, over here, we also get to know one very
interesting thing. Steeper planes tend to appear darker while the flatter planes catch more light and appear brighter or lighter
and catch that light. Right? So over here you can
see how the right hand side was really steep and obviously
away from the sunlight. So it was not catching
enough light, and it had a lot of
shadow in there, right? So wherever those areas are, which are steeper will appear
to have a lot of shadow. At this stage, simplifying
the structure is the goal. We are reducing the
mountains to, like, three to five planes
and we're not copping every ridge and curve that
we're seeing on the mountains. So once we have the
structure ready, we can bring snow back
into the picture, but only as color,
not as texture. What I mean is in this image, you see that the snow on the sunlit side appears slightly warmer.
It's bright, right? And the snow on the
shadow side is cooler. It has that bluish tone. And that is because the
snow only reflects the sky, and that is why it's
rarely pure white. So even on the white side, it does have a slightly
kind of bluish tone to whereas the shadow side
appears slightly bluish gray. I said bluish gray, but bluish gray
because it's cooler. You want the tone to be cooler. Now, one important
thing to remember here is that snow only follows
the shape of the mountain. So it sits on top of the planes
we've already identified. It's not going to flatten them, and that is why it's very
important for us to understand the structure of our
mountain first, the faces, the planes that there are
before going ahead and adding the snow or the texture or the ridges or the
details in them, because what we have done so far is basically setting
the foundation for our reference image and the painting that we are going to create together. Alright. So the last thing to talk
about here is texture. Now, texture is always
the final detail that you add in your painting because it's not really
creating the form. It's only enhancing
what is already there. So that is why your
lights and shadows and the flows of the planes are more important than
adding your texture. So you need to get that right first before you go ahead
and add your texture. Alright, so if you
look very closely at this rough and image, you'll notice that the texture appears more clearly and more evidently along the ridges and the sharp changes
in the mountains, and that is because the snow is simply kind of going to slide towards the slightly
flatter areas which will catch the snow. And similarly, the
larger flat areas will have very less
visible texture. So yeah, that is pretty
much how the science will work for the mountains and
how the texture will be. Another thing to keep in mind
is that the texture will always follow the
direction of the plane. So it's not random. You have to notice your
brush movements and flow your brush movements along the direction
of the plane. And texture is not the same
as detail of your mountain. The texture here
is created through variation in the value, in the edges, and
in brush movement. And the details
would be going into every little crack and
ridge of your mountain. So we are just roughly
adding texture here. Keeping in mind that it is along the plane of your mountain. One last step from me would be to make sure that you're
being a little bit mindful about the amount of texture that you're
adding in your mountains because too much
texture can actually flatten the mountain and
make it look very busy. And we want snow covered
mountains to look realistic. So that is why be a little bit mindful about where you're
adding the textures. So based on our reference image, as you can see here, I have a smaller painting
that I created. As you can see here, is not the exact replica of
the reference image, but I was fairly able
to capture a lot of the characteristic details
of the reference image, such as the way this
light is falling on the snow or on the
mountain, the shadow area. I've also captured a lot of those textured details that we were talking about earlier, and we'll learn more about
this in the next lesson. But this is just my way of getting a little
bit of practice. Let's wrap this up and discuss everything that we
have learned so far. So when you break down or when you want to
observe a mountain, you start with the
big shape first. So you focus on the overall form before any of the
other tinier details. Next, you find the
light direction. This decides which areas receive light and which
fall into the shadow zone. Next, we break the
mountains into planes. So think of this as flat
surfaces and not textures. You want to see how
many different planes that you have in your
reference image. Next, we add the snow
but as color first. So the snow is going to
reflect light and the sky. So it's not always
going to be pure white. You have to keep that in mind. Last step would be
to add the texture. Now, you have to be very
careful when you're doing this. You don't want to
overdo this step. But the texture is going
to be the final step, and it's all going
to come together as a beautiful little
painting. So this is it. These are my tips of observing the mountains and breaking
it down and simplifying it, and I tried my best to explain it in the most
easiest way possible. And this is a method that I follow as well whenever it
comes to painting mountains. So this is it for this lesson. I will see you in the next
one where we'll practice some gouache techniques before we start with the final project.
4. Understanding Planes, Colour & Texture using Gouache: Now that we know how to
observe the mountains, let's learn how to use different gouache techniques
to build them on paper. The goal of this
exercise is to not build a final painting or
create a final painting, but to experiment, get
comfortable with the medium, and build confidence before we start with the
final class project. So here's a reference image that I'm using for the
practice lesson. So let's break this down. So if you squint at this image, you will notice that all
the details disappear, and what's left is the triangular
form of the structure. Now, this is very important because we want to
break this down step by step and use everything
that we've learned so far to simplify
this reference image. So over here, you can see
that the peak is sharp and pointed and everything flows
downwards from that peak. That downward moment is very important
because it tells us how gravity and structure
work together in a mountain. Now at this stage, I'm deliberately ignoring all the
smaller peaks and details, and I'm training my eye
to see the mountain as one solid form and not a
collection of random textures. So if you get this part right, your half the work
is already done. Now the next thing to do is figure out the
direction of the light. So in this reference image, the light is coming from
the left hand side, and you can see that
very clearly because the left facing plane of the
mountain is brighter and more open while the
right side feels darker and cooler and heavier and has all
these details, right? So this immediately helps us divide the mountain
into two sections. Light. And we've got
the shadow portion. So I like to mentally divide
my mountains into sections, especially for these
kind of reference images because that
immediately simplifies this completely and makes it easier for us to approach
this when we start painting. Alright, so keeping
the direction of the light and the big
shape of my mountain in mind, we are going to
roughly draw a very, very loose sketch of
what we are seeing. Now, this exercise is
not a drawing exercise, but it's an exercise
for you to think, observe, and see all
the details that you're able to capture in a
rough, loose sketch. So you don't have to be
really hard on yourself here. Just take a moment to draw
everything that you're seeing, but don't forget to
keep the direction of the light in mind, right? So over here, I have one peak that I have in this
triangular form, and then I have another one
above so this is going to be that small portion that
receives light along with that left section where
the light is falling on, and then everything
else that slopes downwards is going to
receive the shadows. So over here, what you'll
notice me doing is that I'm not drawing the mountain
like a silhouette at all. Instead, I'm using
angular broken lines to show how the
mountains flow and turn. So you don't want to use curves and very
smooth lines here. You want your pencil
strokes to be really rough and broken
and angular, in a sense. Once that outline of the
mountain is in place, I start adding these rough
lines inside the shapes. So these lines are not
just for decoration, and I'm not just
adding there for fun. These actually represent
how the surface of the mountain
moves and breaks. So most of these lines,
as you can notice, flows downwards from the peak, and that's because that's how the mountains are
naturally formed. Some lines are sharper and
a little bit more angular, and especially it comes
in those areas that are a little bit more exposed and doesn't have snow on them. Others are softer and a
little bit more spaced out. And again, that is
because the snow collects and smooths
the surface out. Now, what I'm really doing here is mapping out the planes. Each rough line
actually helps me understand whether that
area is facing the light, turning away from it, or
sitting somewhere in between. As you can see, I'm also
using these lines to suggest where the texture will go when
I actually start painting. But this is just to guide, and this is not a
final structure or the final texture
that I'm adding. This is just for me to
create that rough sketch and understand the placement of all the different
details that I'm seeing. So, honestly, over here, you're actually
thinking of this stage as giving your future
painting a roadmap. Now, I'm saying
this because you're not just filling in
the details yet. You're simply helping
yourself understand the structure of the mountain
before all the details, colors, and texture
comes in, right? So if this sketch looks
messy or unfinished, that is because it's exactly
how it is supposed to be. You're not going to
spend so much time figuring out all the details, but rather take time to put
down the details that you see and you observe and also understand where
the planes are, where the light is, what the
shape of the mountain is, how the textures appear. How are my brush
strokes going to move? As you can see, my
pencil strokes kind of move downward from
each slope, right? And it moves along that slope. Everything that we
have learned in the previous lesson and
how we broke it down. So we're just applying
those techniques or those ideas here and
creating a rough sketch. So over here, I've created another outline for the
same reference image. And right now, we're going to start painting all the shadows. So I'm starting off with
my flat brush here, and while we start
painting shadows, I want you to take
a note of this. Snow is never white, right? So you need to work with
different values of colors to denote the lights
and shadows of the snow. So over here, I have mixed my ultramarine blue with a
little bit of burnt umber. And as you can see,
my consistency of the paint is really thin, and I want it to be
that way because, A, it's the base layer, and I will be
building onto this. And second, I want the
layer to be very uneven, even though it's a flat wash, as you can see, the values
kind of differ slightly. Some areas will be
a little bit more uneven and have a little bit more pigment
than the other areas, and that's exactly
how I want it to be. I have switched
to my round brush here because in the area
that receives the light, even though the snow should
ideally appear white, right? But since snow does
not appear white, we will have to break that down and add a few
shadows in there. So right where the rocks are
exposed of my mountains, it will create a
little bit of shadow, which I'm denoting it here. It eventually gets covered in with the textures
that come on top. And even at the bottom portion of that face or that
plane of the mountain, you see that the color
is slightly blue or slightly more gray because
it's receiving those shadows. And for the lighter parts or
the areas where the snow is, I am mixing a little
bit of blue color, the same cool gray color
that we used here, and I'm mixing it with
a lot more white, and I'm covering in the surface. Now, one thing that you
want to ensure here is you want to do this
step while the paint is still wet so that
everything kind of blends into one another a
little bit more seamlessly. Now at this stage,
the idea is to just block in the values and create depth using color
of the snow first before we can go ahead and add details for the
textures or the rocks. So it's very important
that you spend some time here to get
this step correct, because if the base
of your mountain is ready to be
added textured on, the painting will come
together a little bit more seamlessly and look a
little bit more natural. Over here, you're just working with inconsistency of paint. That is something
to keep in mind, and you just want the lights and shadows to kind of
blend into one another, especially on the faces that
have them both in picture. Now we're going to let this dry. Alright, so now that the base
layer has dried completely, I'm going to go ahead and
use the same color mixture, which is my ultramarine
blue and burnt umber, but this time with a slightly
more pigment in there. So the consistency
is almost the same, but it's just a little
bit richer in color. Now I'm going to go ahead and add this over
the shadow area. And as you notice, I'm not going to cover
the entire area again, but instead, I'm focusing more on building depth selectively. I'm going to focus more on
the top edge of the mountain, especially the areas where
the planes kind of change. So you've got one front plane, and then you've got
this side plane that I'm working on currently. So as you can see, I'm
outlining or adding more of this richer color in
the edges specifically. Now, what exactly this does
here is that it reinforces the deeper ridges on the shadow sidee the side that I'm
working on right now. And these are the areas that are especially turning more
sharply away from the light. And these are usually along the inner folds
of the mountains, and they are closer to
the steeper slopes. So basically, by layering the slightly
darker tore over the base, I am trying to create dimension without losing the structure that I've already established. So as you can see over here, when I added the darker color over the base layer
that I already had, I was able to add a little bit more dimension and depth into the shadow area, and more of it will change
as I add the texture on top. And I'm going to go ahead
and do the same thing on the side that is
receiving the light as well. So even these areas
where the rocks are exposed or where
the snow breaks, they do receive a
little bit of shadow. So I'm gently going to
just mix the same gray mix into those smaller crevices and rock areas on
the light side, just enough to suggest depth without
overpowering the light. So you do need to have the
light in there as well. So I'm leaving enough
space for that. For the lighter tones
here, I've used a mix of titanium white with
a small amount of ultramarine blue in there. Now, I'm doing this because
you don't want to use pure white for the snowy areas, but rather use a
color which kind of seamlessly blends with
its surroundings. One thing to keep in mind
here is that you want to do this step while
the paints are still workable and blendable
in case you do end up creating really harsh lines in case your paint or the
base layer has dried, you can go ahead and use
a damp brush to kind of slightly blend the
edges with one another so that they feel a little bit easier on the eyes and the
transition feels easier. Just swatch of my white
color that I've used, and as you can see, they do have a little bit of blue in there. Now, at this stage, the goal here is to slowly
build contrast layer by layer until the mountain begins to
feel solid and dimensional. I've taken my size one
round brush here and it's time for us to move
on to the next step. And that is because our depth and structure are all in place. Now, we're going to start adding texture using the
dry brush method, and I've used a mix
of burnt umber here, along with some
ultramarine blue. And you're going to load
up very little paint, and as you can see how I
brush across the paper, the paint will catch on to
the texture of the paper and create these really rough
broken dry brush strokes. So you're going to
use that method to add as texture in our
mountains as well. Want you to pay attention to the direction of
my brush strokes. For your reference,
I've also included the reference image on the side so that you can see how I'm creating these brush strokes depending on the textures and the exposed rocks that I'm
seeing on my reference image. So if you notice very carefully, the brush strokes follow
the direction of the plane. If a slope is moving
downwards from the peak, my brush strokes will
also move downwards. If the ridge is cut diagonally, my brush strokes will
follow that angle. You want to keep looking
back and forth at your reference image so that you know where the brush
strokes are going to go. But at the same time,
keeping in mind that you don't have to make it
look exactly the same. Over here, I've shown you how if you add too much
water in your brush, you won't be able to create
that dry brush stroke. So you want to make sure
that you have very, very little water on your brush. This can be a little bit
annoying to do because you keep running out of little
bit of water in your brush, and it's not very workable. So you might have to add
the tiniest amount of water in your mix so that
it's a little bit workable. But at the same time, you
don't want to overdo this. This step might take you
a little bit of practice. You can practice this on a rough piece of paper
to get a better idea about how much water you need
to add into your paint mix. For the exposed rocks, I've
used a size one brush with the mix of my burnt umber and a little bit
of ultrabery blue, and I'm applying this
very selectively. So it's mostly along
the sharper ridges, deeper shadow lines and areas where the snow would
naturally break apart and reveal the mountain or the rock that is underneath. So as you can see,
I'm not drawing every crack I see in
the reference image, but at the same time,
I'm trying to place them closely where they are in
the reference image as well. I've switched to my
size four round brush because what this does
is allows me to create even broader strokes and add
a little bit more texture while not going back and forth with my paint that many times. So it is a little bit faster. One thing to keep
in mind is that you don't want to
overdo this step. You don't want to cover your entire mountain with texture. If you add texture everywhere, the mountain will become
very visibly noisy and flat. So you want the
large flat areas to remain calm and the
sharp turns and crevices and ridges that you see
to have a little bit of those exposed rocks in there that are
represented by texture. Also, your texture does not need to look exactly like
the reference image. As I mentioned earlier, the
reference image is here to guide you and not to be
copied line for line. So just observe what you're seeing and try putting
them as you go. Again, there is no
hard and fast rule here for it to be exactly
like the reference image, and you can always just
take the details that you want to capture and
leave what you don't. So if something seems a
little bit too complicated, you can always simplify it. Expanding on that, mountains
are organic forms. So as long as you
allow the texture to follow the plane and
respect the light direction, it will feel believable. And what we're doing here
instead of actually copying every little detail is understanding the logic
of the mountains. So the light, shadow planes, and letting the texture
support that logic is what will make your mountains
turn out beautifully. One thing to notice here is, along with all the
shadows and textures, I've gone ahead and added a little bit of
my titanium white along the areas where I want the snow to be a little
bit more highlighted. So whenever I want to add more details in there
and that area to kind of stand out and appear a little bit more vibrant
to the observer, I've gone ahead and used
just titanium white. Now, I know you're
going to say, I asked you not to use titanium white, but these are going to
be supported in areas where I want the highlighted portion of my mountain to be. So it's okay to
use that titanium white in certain places, but to ensure that you're
not using it everywhere. Anyway, once you are happy with adding those
highlights, like over here, I've gone ahead and I
had tiny highlights on those areas that
are facing the light. So exactly that sharp
curve in my mountains is going to receive that harsh
light falling directly on it. So I've gone ahead and
highlighted that part. I am actually really happy with the way this
has turned out. Let's have a closer
look at how we did. So here's a close
up of what we did. We explore different gauche
techniques to capture light, shadow, and texture
on our mountains, and I really hope
this practice piece helps you feel a little bit more confident about attempting
the final class project. So gather your supplies
and I'll see you in the next lesson where we get
started with the project.
5. Project Part 1 : Sketch & Sky: Alright, let's start
with the class project. I've taped down my paper
on all four sides, and here is a sample piece
that I've done earlier. But this is using
everything that we have learned so far the textures, the gradient, the
shadows and light. We have applied all of those techniques to create
the sample piece, and we're going to
be doing that in our final class
project together. So we're going to start off
with the basic sketch first, and my mountain is
going to be placed in the two third area of my paper. Over here, I will be
using a two edge pencil. You can use an HB pencil or
any pencil that you'd like, honestly, but opt for
lightly sketching it out. Now, you can download
the reference image from the project and resources
part of this class, but I've also put it on
the screen so that I can see a side by
side comparison of how I'm observing the details and mapping
it out on my paper. Now, even though we've already discussed how to break
down the mountains, I always take a
moment to re evaluate the big shapes before
I start sketching. So over here, I'm
starting off with the smaller peaks that
are on the left, right? And I'm also mapping out where the shadow or the texture
area is going to be and what areas of that
section need to be wide or receive the light. So it's very important for us to just slowly build
on to the shape. Let's move on to the
dominant peak here. And if you notice
very carefully, you see how it is
strong and triangular, but it is also asymmetrical. So one side slopes longer and softer while the other side
is steeper and sharper. And that asymmetry is what makes that mountain feel very natural. So when I start sketching, I am not focused a lot
on the tiny details. Just create these
broken strokes, and I just want to indicate
where the highest point sits. And from there, I draw
the main downward slopes. Now at this stage, I'm only mapping out the
major shapes first. So if a line isn't perfect, that is completely okay. You don't have to
make it be perfect. Now, like I mentioned earlier, mountains are organic
shapes, right? So they're not
geometric triangles or not circles or things like that that will have
to have symmetry. So if your lines are
broken, crooked, works. That is exactly what you need. And I sometimes honestly
make these small shifts to make my structure look
a little bit more natural. Now I'm going ahead and drawing the different faces
of my mountains or the different panes
of my mountains. So you see how the
left section of the mountain is
facing the light, and that is exactly what I'm mapping out here with
these broken lines. Now, they aren't perfect, and the shape is a
little bit wonky, and I will go ahead and fix that once I have the
other details in. But it's very important for
us to map out the lights and shadow areas now once we
have the main structure in. So you can see how
at the speed not only does this entire
plane receive light, but you also have the leftmost
section of that mountain, which is tilted away
from the light, and that's why there is a little bit of a
shadow portion there. I am going to go ahead and
quickly erase this line. I felt like I mapped up too much of this light portion and
just the shape wasn't right. So I've erased it,
and now I'm going to start focusing on the
secondary shapes. Now, when I say
secondary shapes, I am talking about
the different ridges that are branching off
from the main peak. Now, these ridges
are not random, like we have learned earlier. They kind of flow downwards along the plane of the mountain. So instead of outlining
every snow patch, I just want to focus on where the exposed rocks are and where the textures
need to be placed. Now, I'm also going to mentally divide the light
and shadows area, and you can also kind of sketch it out roughly so that you know which areas are areas
where you'll have to put a little bit of shadow because like we did in the
practice lesson, a little bit of a turn
or shift in the plane is going to create shadow
on your mountains. So it's very important for
us to kind of mentally place them there or even
place them with your pencil. When you start blocking
in your colors, you know exactly
where the light and shadow is supposed to be placed. Now, if I make a
mistake here and there, I just go back and slightly
adjust it wherever needed. And that is why I
mentioned that you want to go with a pencil that is light so that it
doesn't leave a lot of pencil marks on your sketch. On the shallow side
of the mountain, I'm just mapping out the areas
where the texture will be. And as you can see, there is a beautiful snow
patch in the middle, but there's also a slight
shift in the color there. And that is why I've
just roughly gone ahead and mapped it out
so that I know that I need to have a snow patch in that particular area where there'll be a variation
in the color. And on the side that faces the light, like
I mentioned earlier, there will be small
shifts in the ridges and the different movements
in the mountains that will create as that
will receive shadows, and then areas where the snow will be collected and
that will appear white. So I've gone ahead and just
roughly place that in. You don't have to draw
every single detail out, but focus on what you see and the ones that
you want to capture. This little section that
I created on the left, you can see is the area
where the shadow will go, and that's why I've
mapped it out, so that when I start
blocking in the colors, again, I would know
where to do it. I've got one plane that faces the light and
one plane that is away from the light with those smaller changes and smaller details in
the middle as well. Now is your time to
go ahead and make any changes that you
like in your sketch. And once you're happy with it, you are going to
stop because there is something like
overworking on your sketch, and we don't want to overwork
because the magic comes when we start painting and
filling in the colors. Now that our sketch is in place, let's start painting the sky. I've taken all the colors that
I mentioned on my palette, and I'll be using my size 18 flat brush here for
creating the gradient. Let's start with
the first color, which is a mix of
ultramarine blue and white, and you just swatch
of the shade. As you can see, I want
the shade to be deeper, so I want more blue
pigment in there. The next color is the same mix, but with a little
bit more white. So you can see how the color
has lightened while I'm making sure that I'm maintaining the consistency of my paint. I want it to be not too thin because I want to capture
the opacity for the sky. I'm going to lay out
the lighter color at the bottom of my sky area and the deeper color at the top. In case you feel like it's
gotten a little lighter, you can always add more
blue pigpnt in there, making sure that you are
maintaining the consistency. You want to make
sure that you have an even consistency of paint throughout the
blending process. One tip to ensure a
smooth transition between the two or three colors
in your sky is to ensure your brush remains
damp at all times, and you're maintaining
that consistency of paint, and you're going in
this to and fro motion. So your brush strokes need to
be in one particular order. If it's going up and down, you have to follow that
throughout the sky. And if it is going left to right in this to and fro motion, you want to ensure
that you're following that throughout the sky. So over here, you see me lay out the colors next to the
mountains because I don't want to get entirely into
my sketch with the blue. So that's why my brush strokes are a little bit
different there. But when I move above the
area where the mountain is, I'm ensuring this to and
fro motion so that the gradual color transition
or shift in the colors, I want it to be very seamless. So ensure that
your brush remains wet and your consistency
is maintained, and you're always applying even pressure when you're
blending your colors. I am actually really happy
with the way the sky looks, so I'm going to let this dry. Once it has dried, I
will switch to my size for round brush and
I will just load up a little bit of my
titanium white on my brush and using the
dry brush technique, we will add the clouds. In the reference
image, the clouds are very dispersed and soft. They're not heavy or dramatic, they're airy and light
and they flow everywhere. For this kind of clouds, the dry brush technique
works the best. You will just load
up a tiny amount of white in there on your brush, sure that you wipe off extra water or paint
from your brush. And as you drag your
brush across the paper, the texture will pick
on the paint and create this beautiful dry brush effect and those airy clouds
that I was talking about. If you notice very carefully, I am not shaping the
clouds directly. I'm allowing the texture
of the dry brush to naturally create that
dispersed effect, and that is exactly
how we want to do it. The clouds stretch horizontally, especially in the area above
the mountain that you see, and there's a scute
curve that I wanted to capture that I really liked
about the reference image. I'm keeping my brush strokes
really soft and gentle. And once I'm done with the first layer that
you can see here, we've got one layer in. I'm going to go ahead and layer
in with more white paint. Now, as titanium
white is opaque, it will dry down and pick on the color that is
in the background. So over here, it
will dry down and have a little bit of that
bluish color in naturally. You'll have to layer
multiple times to bring out the opacity and add a little bit more depth
into your clouds. So that is exactly
what I'm doing here. Again, I'm going ahead with the same dry brush
technique and layering over the shapes that I've already created to add depth
in certain areas. As you notice in the
reference image as well, as the clouds are a little
bit denser in certain areas, they appear to be more white, and as they are dispersed in
the sky in certain areas, they are more spread out and
more textured and lighter. Take your time
with this, observe the reference image,
and that's why I said, look at the reference image, observe it, and try capturing
what you're seeing. Your clouds can look completely
different from mine, and that is completely okay. That's exactly how I want you to capture them in your
final paintings as well. I'm happy with the
way this looks, so we'll stop, and
in the next lesson, we'll block in the colors of
lights and shadows together.
6. Project Part 2 : Blocking Lights & Shadows: Now that our sky portion
is completely dry, we're finally ready to start
painting the mountains. So in this lesson, we are going to block in the light
and shadow areas. The color that I'm using here is a mix of ultramarine
blue with a tiny, tiny amount of burnt
umber in there. So think of this step as
separating the mountain into two main families
light and shadow. If this stage is done well, the mountain will be ready and look three dimensional
even without the texture. But this step is quite literally very important
for you to place. As you notice here, I'm keeping the consistency of my
paint really thin, and like we did in
the practice lesson, I am placing them with
different values. So I keep going back and
loading my brush with a lot of water because I want to
use a very thin consistency, and the more uneven my
base is going to look, the more natural the
finish is going to be. Carefully observing the
reference image and following the planes that we've mapped
out earlier in the sketch. So as you see, I'm not filling all the areas
with the shadows. If there are any white spaces
to be left for the snow, I'm going to go ahead and leave those spaces so
that I can come back to it and add more details
with the lighter color there. This side of the
mountain, you only have to leave a small amount of white space and cover everything else with the
color mix that you've made. And once you're done with
this side of the mountain, you'll move on to the side
which receives a lot of light. So like we did in
the practice lesson, we went ahead and added some shadows for the rocks
that will come over this area. So as I mentioned, earlier
in that lesson that every fold in the mountain and its faces will
create some shadow, and we will have the
texture come on it. So those exposed
rocks will create shadows which will
appear on the snow. So that is exactly what
I'm doing here as well. And since we worked
on our sketch, took some time to map out where those shadows
areas are going to be, this step becomes easier
for us because we know exactly where we
need to lay the shadows. I've also gone ahead
and added the shadow at the tiny peak on
the left hand side, and now we will work on
building the shadows. So like in the practice lesson, we worked with a
darker color on this. And when I say darker color, I don't mean in the shade, but I mean in the pigment
ratio with the water. So in this section
that I'm working on, I have added a little
bit more color in there, and that is why it looks
a little bit intensified. My color looks a bit more gray than I would
like for it to be. So I've gone ahead and added a little bit more blue in the mix so that it looks a little
bit blue and not gray. So make sure that your color mix is not gray, but rather blue. Now over here, when I apply it in this side
of the mountain, which is the left side
or even the shadow side, I've gone ahead and
just applied it in the middle so that I can create more depth
in my painting. If you notice the
reference image in detail, you will see how the center
portion where the snow is. The color slightly shifts. And it's a very slight shift and gradual shift in the color, and it's not all flat. And that is why we need
to add different values, even for the shadows
to build on and create more character and
depth in your painting. Right now, we're working with gouache as one would
work with watercolors, if you ask me because we've
diluted the paint so much. Gouache is a lot more opaque. But in certain areas, we use gouache like
watercolors when we want to bring in a little bit of
transparency in our painting. So over here, I want the
second layer to kind of go over the first layer
while glazing and adding a little bit of
character in those sections. And that's why I've diluted my paint to create
this character. So that's why I
personally feel like gouache is such an interesting
medium because you can work with it like
watercolors while also having a lot more
layers are built in, which you can also
do with watercolors, but this time, the layers will turn out to be opaque later on. So I've gone ahead and added more depth on the
light side as well. And honestly, I'm just
observing the reference image and picking the sections
which needs more dimension. So in the left side,
I felt like it needed more dimension
with the shadow. Now I'm creating a mix
of white with a tiny, tiny amount of blue in there, and it almost looks white, but there is pigment, I promise the camera
is not picking it in. So I've gone ahead and
I've added that in the light areas or the areas which were receiving the
light in my painting, and I'm also ensuring that
the edges kind of blend in. I'm using a bigger
brush for this area. So here's a size 12 flat brush, and I'm going to
go ahead and use that flat brush to
apply this a lot more seamlessly because the
flat brush is going to cover far more area
than a round brush wood, especially with the
size that I have. Can also see how
I brush over with my flat brush over the areas that the
shadows already were on. And that is because I
would like to glaze over this soft light
color over it. Now, at this stage, there
is a lot of back and forth. And that back and forth is
because in certain areas you want really
precise light there. And by light, I mean this light
white color that we have. And in certain areas,
you want crisp shadows. So there is a lot of
back and forth here. You'll have to keep looking
at your reference image and place the lights and
shadows accordingly. And as you see here, playing around with
the lights and shadows and placing
them correctly here itself has brought out a lot
of details in our mountains. You can see where
the planes are, where the fold is, where the light is, where
the shadow is. The only missing piece that
we have here is our texture, which we will add later on. But it is very important for us to get the
foundation right. L our practice
piece that we did, where the shadows
were not really defined in different colors. We worked with very little positional values
for our shadows. And over here, you
can see there is deeper shadows, lighter shadows, and you're going
ahead and playing around with different
values of that color. Now, over here, when I felt like the shadows got a
little too lightened, I went ahead and added
them back in just to bring that crisper shadow
plane in that area. And again, like I mentioned, there will be a lot of back
and forth in that section. I've also gone ahead and added some shadow at the bottom of my light area because I want
some shadow at this corner, and I'm going to also blend
it with the white paint that's there slightly so that
the edges are not as harsh. And I really like the
way this has come along, especially for the base of our shadows and lights
in our painting. So we're going to let this dry, and in the next lesson, we'll
add some texture in there.
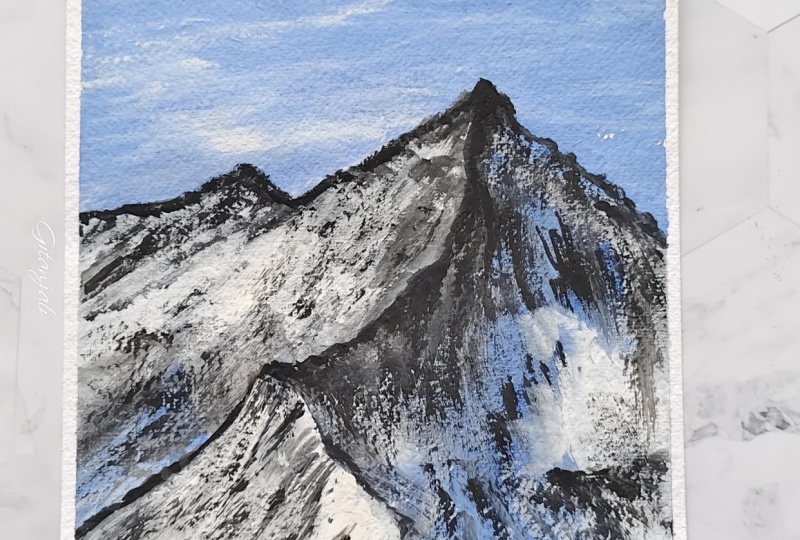
7. Project Part 3 : Adding Base Texture: Alright. Now that the lights and shadows are
in place and dry, I'm going to take my
size four and size one round brush and
create two color mixes. One is a mix of burnt
umber and black, and one is a mix of the same colour with a little
bit of white in there. And I'm going to start creating the texture using the
dry brush method. Going to start with the
smaller peak first, and it's a good
place to understand the rhythm of the strokes before moving to
the main mountain. So you can see how I lightly load my brush and remove
the excess paint, and using the dry
brush technique here, I create irregular marks that feel like rock instead
of drawn lines. So keeping the strokes small and controlled suggests
that the rock breaks through the snow. Now I'm moving to
the shadow side. Now, on this side, the
texture is a lot more visible because the
contrast is a lot stronger. But one thing to keep in mind is that you
want to make sure that you're not adding too
much texture because, yes, there is one thing
that you can do here, and that is add too
many exposed rocks, and that will make your
painting look really flat. I have the reference image open on another
screen next to me, so I keep pausing
and observing it. So over here, I'm
trying to look for the exposed rocks formation and the way in which
they are flowing. And I try not to
copy every crack but understand the direction
in which they are moving. So most of these rocks kind of travel downwards
from the peak, flowing the gravity
and the slope. So my brush flows in
the same movement. This step, I let the
dry brush do its magic, because the dry brush will catch onto the surface
where the texture is, and some areas will break
and some areas will skip, and that irregularity is
what makes it feel natural. If I fill everything, the mountain will become noisy and it will lose its depth. So I leave plenty of calm spaces and empty spaces
in between the texture. Now let me expand on the
dry brush technique. Now, when you use this technique and when
you load your paint, you have very, very little
water on your brush. And because the
brush is very dry, every stroke will look
slightly different. And that variation
is very important. If I add water in my paint mix, the strokes would
become too smooth. And if I painted it it
will lose its texture, and the rocks aren't smooth, and there are very, very tiny, tiny details in these rocks, which is not easily something that you can
capture with a smooth paint, and that is why dry
brush technique works like magic here. And if you notice
very closely here, I sometimes rotate the brush slightly to change the
edge of each stroke. And then also adds
character in my rocks. It also shows how the
rocks are moving and how the faces are changing of these rocks and what
I'm trying to capture. So the more variation you
add in your brush strokes, the more natural
is going to look, but keep in mind
the brush strokes will kind of flow
along the slope. So if your slope is steeper, your brush strokes
have to look that way, you know, like it has to
flow along with the slope. If you notice very
carefully here, how that slight change
in the angle of my brush brought in the dimension in between the two planes
that we have here. So my brush strokes
kind of indicate that the area that is behind
or at the highest peak, the slopes and the
brush strokes look different compared to what
I'm making at the bottom, and that will immediately
suggest the way in which the movement
of your area is. So there's a lot of back
and forth movement here as well in different areas,
in different sections. Over here, I've added very, very tiny strokes at the top, where the light is at my peak. I'm moving ahead to
the main surface area where a lot of light falls. When I'm working on the area where a lot of light is falling, I make sure to kind
of lighten the color slightly because I want to build onto the texture as
well in the next lesson. So over here, I want a
slightly lighter color. And if you notice that my approach here is
a little bit softer. I'm not applying a lot of
pressure on my brush for this section because I want less contrast
in this section. Thing you'll notice here
is how the direction of the brush changes the
face of the rocks. So if I drag the
brush downwards, the slope will feel steeper, like over here because there is a slight curve in the way
the face of the mountain is. But if I ankle it diagonally, the plane will start turning. So a lot of movement of the brush actually
defines the structure. So over here, one thing
that I would suggest is you keep looking at the
actual reference image as well alongside this video that you can understand
what goes on behind my head and how you're able to observe and capture what we
are seeing on our painting. Now, I always emphasize
that you don't have to let your painting be the exact
replica of what you're seeing, but you're capturing
the organic shapes, you're capturing the way
the mountain will turn, the colors of the sky, or if there is a particular
element or a character about the subject
that you want to capture, you focus more on that, the technique in which or the techniques that you will use to capture the essence of what you're seeing
on the painting, whereas you're not
focused a lot on all the details
and all the cracks and crevices of your
mountain, because honestly, that will make you feel very overwhelmed
because the mountains are so heavily detailed with all these exposed
rocks and snow, the slight color
shifts and everything. But we are doing our best to capture this in the
most easiest way possible using the
simple techniques of gouache that we are aware of. Another thing that I wanted
to emphasize here is that the shadow layer actually makes it easier for us
to add the texture. And that is because when the shadow layer is placed earlier, I know exactly where
the rocks will go, and the shadow
actually acts like a map or a guide
for your texture. So it was very
important for us to take time and build
on the layer in the previous step a lot better before we
start adding texture. So the texture actually
sits on top of the mountain along
with the lights and shadows which
are underneath it. So that's why it's important for our previous
step to be correct. In case you made slight
mistakes in the previous step, you can always go back and spend some more time
understanding that before you go ahead and start adding texture on
your mountains. I can't believe we had spent
about 7 minutes just using dry brush technique to cover the entire area of our mountain or all the textures
in our mountain. And it's 7 minutes in the video, but it actually takes you a
lot longer, but trust me, this process is
really meditative because you're just
going back and forth and eventually you kind of reach a flow state where you know that you pick your brush and
the paint has to be dry and you're just
brushing over your paper, you know, letting the paper
do its magic and everything. Anyway, I really like the
way the texture looks now, so we're going to let this dry, and I'll see you in the
next lesson where we start adding further
details into this.
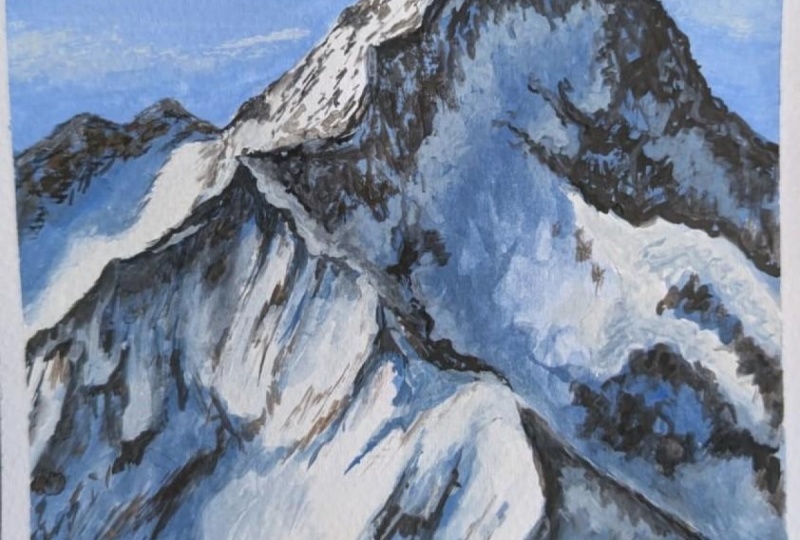
8. Project Part 4 : Building Depth & Contrast: Alright, so here I'm
going to take my size four brush and create a
color mix where I add white into the same shadow
color that we were using earlier to create a lighter
version of that same color. Now, at this point,
we've already established our main light,
shadow, and texture. The mountain looks believable, but it still feels
slightly flat, and that's completely normal. In this step, we're not
adding any new elements. We're just strengthening
what's already there. So the mountain is going to start gaining more
depth and character. So I'm going to start with
the shadow side first. Right now, the shadows exist, but they're mostly one tone. So I'm going to introduce
variation inside them. I'm going to take the
white mix that we made, and I'm going to apply that in the area right below
the textured section. Now, what this does is
creates a separation between the rock texture
and the shadow plane. If your brush strokes
are really harsh, which they will be because
the layer has dried, you can just use your
damp brush to kind of blend it into the
background so that it doesn't stand as
a separate layer and blends in with the color
that is beneath it. Now, as you see that
when I blend it, what this does is
creates the separation between the rock texture and
the shadow plane behind it. Instead of the texture
blending into the background, it now stands forward slightly. And this subtle change makes the mountain feel a little
bit more dimensional. One thing you'll
notice here is that I don't place this
color everywhere. I look at the reference image and notice where the
surface is turning, where does the light slowly
reach inside the shadow, and the softer shadow tone in selected areas will
come under ridges, sometimes along the slopes and sometimes in
mid shallow plains. So the goal is to
break that shadow into multiple values so that it doesn't feel like a
flat block of color. Now I'm going to move
into the light area. I take white and
apply it gently into the areas facing the
light most directly, and it's not everywhere, only the plane that
feels the most exposed. And this, as you see, increases the contrast between the
two sides of the mountain. But as you can see here, after adding the light, the
transition feels too abrupt. So I have to go back to the edge using a small
amount of shadow color. And what this does is softens the transition and adds
depth at the same time. Now, at this stage, there is a lot of back and
forth happening. I adjust the shadows,
then the light, then return to the
shadows again, and each small change
will affect the other. So instead of making
large corrections, I work in small passes. Gradually, the mountains
begins to look a little bit more natural
and less painted. And this process
cannot be rushed. It's more about the way you observe and how you place it onto your
paper using your brush. Take your time with it, observe what you're seeing in
the reference image, and it's not just about the harsh lights or
the harsh shadows, but more about that gradual
shift between the color. As the depth improves, I start reinforcing certain
areas slightly more. Some ridges need
stronger separation, so I deepen the
shadow next to them, and some planes need clarity, so I brighten the
light next to them. And honestly, contrast
works best in pairs, a darker shadow beside
a lighter plane. And that's what creates the illusion of
height and structure. Alright, now that I'm happy with the way the light
and shadow looks, I'm going to go ahead and add a few extra touches
of texture again. And I'm not adding
this everywhere. I'm just adding this in area. That needs a little
bit emphasis. Now, because the value
underneath are now richer, we've added a lot of different
variations of colors. These textures appear sharper and a little bit more natural. So this step kind of
ties everything that you've learned so far and
done so far together. At this stage, we have
redefined the mountain by introducing variations
inside the shadows, strengthening the light planes, and moving back and
forth between the two until the depth felt convincing. And finally, we have reinforced selective textures to bring
clarity to our structure. Honestly, take your time here. This step is where the painting truly becomes three dimensional. And once you're happy with
it, walk away from it. Literally, leave your working
task, take some time off. You can come back
to it the next day or just take a break. And once you're ready,
we can go ahead and add the final touches in our
painting in the next lesson.
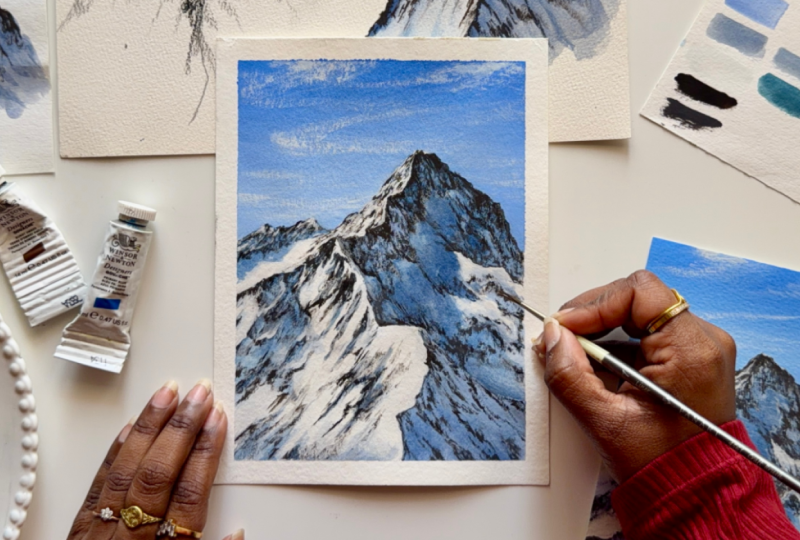
9. Project Part 5 : Highlights & Final Details: In this last and final step, we'll just be adding
highlights and finishing textures to better define the planes
of our mountain. Now at this stage, our
mountain is already complete, but we are just looking to
clarify a few extra details. I'm looking for areas where the light feels
strongest, and usually, these are the sharp
edges, the upper ridges, and the points where the surface turns directly towards
the light source. The highlight color,
I'm mostly using white, sometimes softened very slightly so it doesn't feel too stark. I apply this carefully along the ridges that catch
the most direct light. If you notice, I'm not
dragging long lines, I'm placing strong,
controlled and small strokes. These highlights help separate the planes and make the
mountain feel criss. You'll also notice that
even a small amount of highlight can change the
way the surface reads. I also add highlights
on the exposed rocks. Whenever rocks surface
turns towards the light, its edge catches the brightness. So I place these tiny touches of light in those
turning points as well. This basically
makes the rock feel sharper and gives more
dimension to the mountain. After adding the highlights, I also pause and look
again if there are certain areas that require me to go back with the texture. Sometimes highlights reduce
the contrast in nearby areas, so adding these textures can reinforce a few
shadow accents. They're very minimal and they're just done to balance
the brightness. The purpose of adding
these final details is to not improve
the whole mountain, but just to add a few
highlighted areas. These small accents help
guide the viewer's eye. They strengthen the ridges, sharpen these turns, and make the light feel
more intentional. But it is also the easiest place to overwork your painting. When you keep adding
these marks everywhere, the mountain will slowly
lose its structure, and all the planes will
begin to feel equally busy. So instead of thinking,
what else can I add, I try to think what
actually needs attention. Usually it's just a few edges, the peak, some turning planes,
and a couple of rocks. After adding these few strokes, I pause and look at a
painting from a distance. If the form reads correctly, I stop because painting
feels natural, not when every part is detailed, but when some areas stay quiet and the
others are defined. I really like the way
this has turned out, so we're going to quietly
peel the tape off. Try weaving the
tape off away from the paper so that you don't
tear away your paper. One tap that helps with
peeling the tape is to go over with a hair dryer over the section so that
it loosens its grip, and it'll make it easier for
you to peel the tape off, and it'll also ensure that
you don't tear your painting. And honestly, having
this border around your painting really brings
out the painting more. Let's have a closer
look at our artwork. We've worked so hard
in creating this, and I'm absolutely in love
with the way the lights and shadows and all the details in our mountains
have come together. I hope you enjoyed
painting along with me and are super proud of
your creation, too. This is it for this lesson. I'll see you in the next
one with my final thoughts.
10. Final Thoughts: And that brings us to
the end of this class. Together, we've learned
how to paint this beautiful, snowy
mountain landscape, and I hope through the process
you learned that painting mountains wasn't just about
memorizing the steps, but more about observing them. The goal was never to capture the reference image
line for line, but about taking
some time noticing the details and building them in a painting with confidence. If you've painted along with me, do upload your projects under the project and
resources section of this class because I love seeing different interpretations of
the same reference image, and I believe it also encourages others to upload theirs, too. If you like the class, do leave a little
review down for me. I love reading your
thoughts about the class, and it motivates me to
keep creating more. You can also follow me on Instagram at thesimplyaesthetic, where I'm constantly sharing more about my art
journey and process. And that is it from this class, I will see you in
the next one. Bye.
 Payal Sinha, TheSimplyAesthetic- Artist & Educator