Transcripts
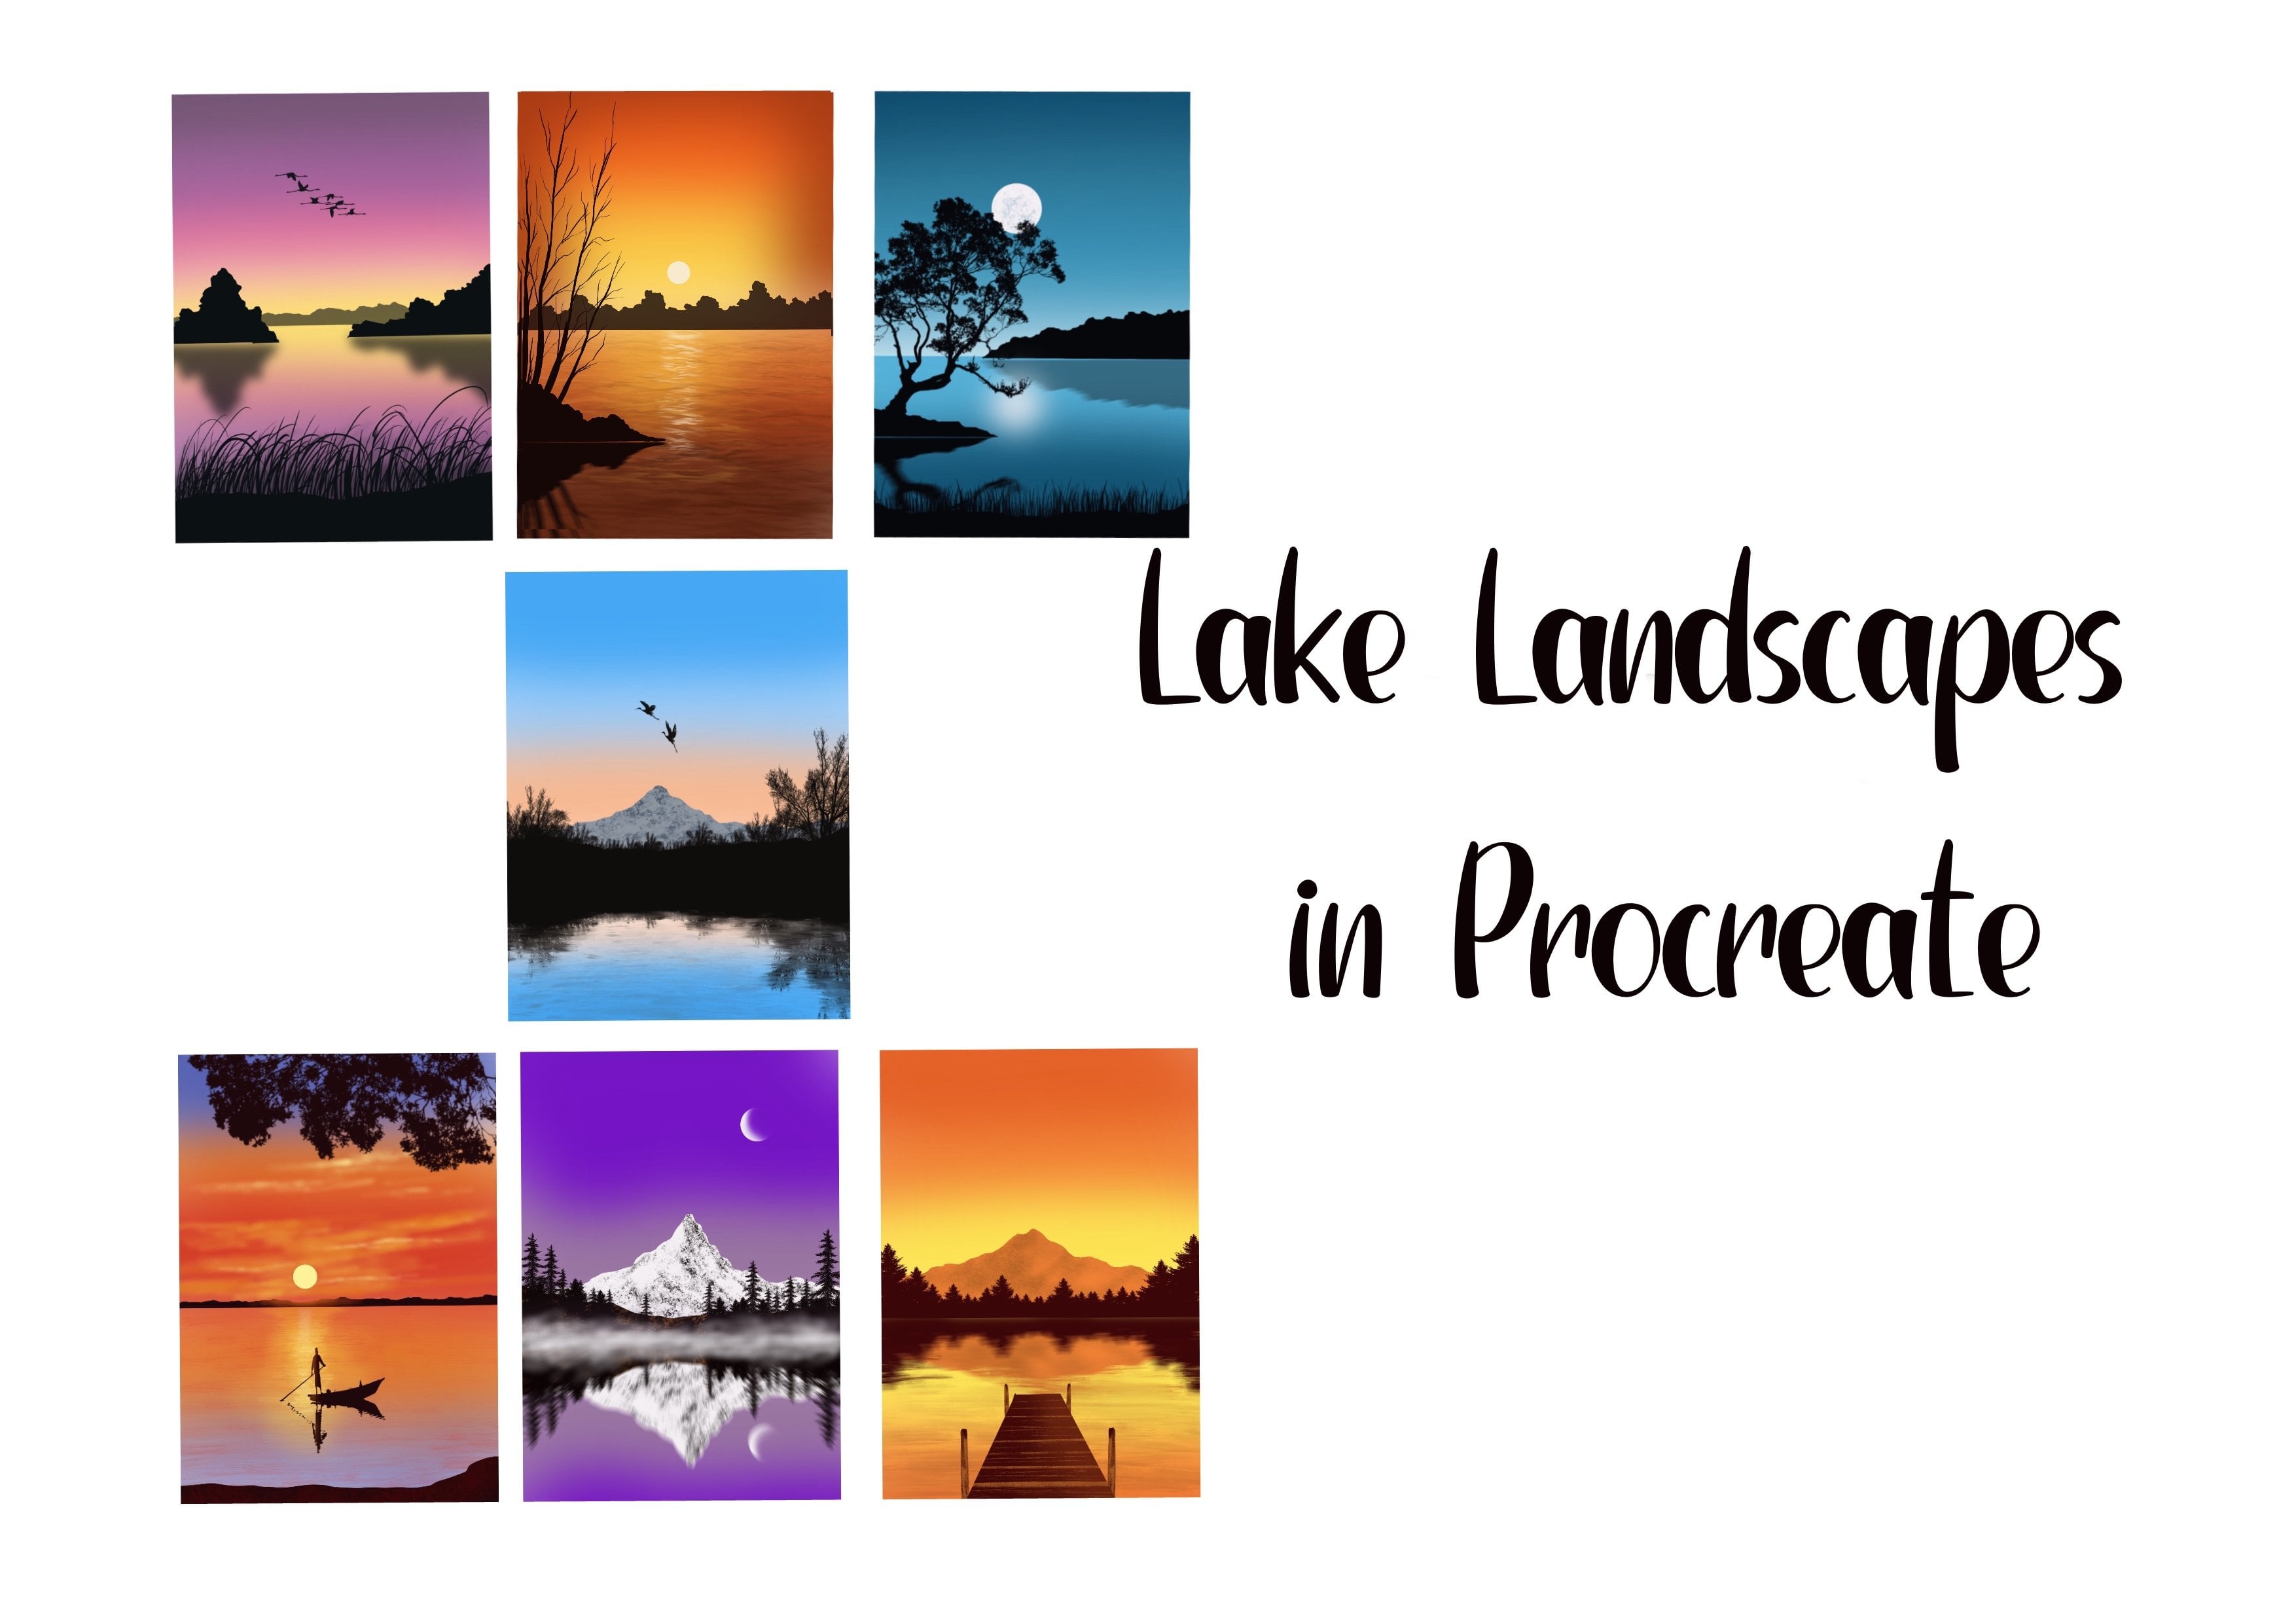
1. Introduction: Hello, and welcome to
my Skillshare class. In this class we
will be painting 20 beautiful and
colorful sky projects. Projects are mindful
and relaxing. Introduction to
expressing yourself creatively while unwinding
from your busy day. These are low pressure
sessions about enjoyment and setting
aside few minutes in a day for creativity, as much as developing
your drawing skills. So join me on a
journey in procreate as we build your skills to
draw and paint and to create, double-up, accrete your routine
and help you slow down, relax, and enjoy the process. At the end of this class, you will have massives, my grant, the masterpieces that you
are going to be proud of. All the projects are totally
easy and beginner friendly. Add, do not need any experience. I am so excited to
teach you this one. Let's have a great painting
experience together. So if you're ready, let's move on to the
next section and look at the supplies that
need to get started.
2. Tools Required: Let us quickly look
at the tools that is required to get started
with the class. You will need an iPad, not the pencil or the stylus that is compatible
with your iPad. And Procreate application. A very basic knowledge
of Procreate would be useful but not essential. Procreate isn't amazing. Digital application on
iPad for sketching, drawing, illustrations,
and painting. It is a very flexible
application that total beginners or
seasoned professionals can use to make digital art. If you can scribble with
an Apple pencil and iPad, then you can definitely do the projects that you will be creating
is to help you relax and unwind
from your busy day. These are low pressure classes
and are about enjoyment and setting aside a few minutes
in a day for creativity.
3. Setting up the canvas: Using the Polaroid style
was for all the Baltics. Let's see how we can create
app on the plus icon. And you see the setup
default canvases that are already
available in Procreate. And I will go with
this paper canvas. This is of this size, 11 by 8.5 inch, and I am going to turn
it around like this. We had the canvas here. Once this is ready, let's see how we can
change it to Canvas. And just adjusting
the canvas here. Now on the layers. And we need to set the
background color too. Slightly grayish tone color because we want to distinguish the canvas
from the background. So I'm doing a full set of grayish white background and change the color
to white as well. You can do that later once
you have the Canvas 3D. Now tap on the layers and we have our
background color set. And now this layer one, we are going to create
another canvas. Tap on the color wheel and pick white color for the Canvas. Once you have the colored ready, go to the Brush Library, calligraphy and select
this mono line brush. We are going to draw a rectangle
on top of this diagram. I am going to set the
size of this brush to around 20 per cent and
opposite is set to 100%. When you draw using
this white color. Because the background
is not too wide, it is set to Grace. You can see the rectangle that we are drawing
on top of it. If you keep the
background white as well, it will be very difficult
to distinguish the colors. Will the bathroom, and again, this will be white board. I just created your rectangle. Now in case what
drew the rectangle, you can edit and select the rectangle option
that you see. Once the rectangle is ready, tap on this arrow icon
that you see in the top and adjust the placement
of this rectangle. Just move it around until central line appears like
this so that you do need, so that you know that
it is pleased or vaguely get a little upwards. Now, you need to drag and drop this white color,
this rectangle. And the Polaroid
can now complete. Now we'll get, well,
we're going to fade, needs to be on top
of this layer. One is the Polaroid Canvas, and we will be adding more
layers on top of this, where we are going
to be painting. All this layer need to
follow the parent layer, which is the layer one. I am going to apply clipping
mask for the layers above this layer so that it stays within this Polaroid
Canvas and doesn't cool. Outside the canvas. We will see how it works. Actually when we start painting, I'm going to rename
this layer to paint. The layers above
the layer one are going to be the ones where
we are going to be painful. This see how this actually works when we start the projects. And I'm going to rename
this layer one as Canvas. So we're not going to
paint on this layer. You can go ahead and add
more layers by tapping on the plus icon and make sure that all these layers
follow the parent layer, which is the Canvas. So you need to apply clipping
mask on all the layers. That is about the canvas layer. Now let's just. Quickly check if this
actually want to go to the color palette and
pick any color that you like. I will go to the Brush Library and select this mono line brush. And check if this line goes
outside of the Canvas. I'm going to the
layer painkiller, or we could do with an
empty layer, layer three. We're going to start
from this call now and take it all the
way to the other side. And now drag and
drop this color. And you see that it is staying within this
polarized Canvas. And that means that canvas
is now ready to vote on. Double-tap and undo,
undo this thing. And we will see this Canvas
because I don't want to be creating this canvas every now and then for all
the 20 projects. So what I'm going to do is I am going to save this canvas. And I will use the
same canvas every, for every project that
we are going through. That way, the size of the
canvas or the size of the rectangle that
you draw it as an differ in each
of the painting, it remains the same. Also, you don't have to
create this rectangle. Every time you create
a new painting. That all actions
item that you see on the top-right,
top-left corner, Share. And you see a couple
of options here. This is the canvas that we
will be using for the project. I am going to improve it in the appropriate format
and the format. I like this Procreate option. Select this option,
save to files. You can save it
wherever you want. I'm going to save it on my iPad. I'm going to rename it
as political Canvas. Then save it. That's it. We than saving the project now go
off to the gallery. All goopy the file there, you'll have saved it. You can check if
it is available. Good to the fines. And you'll see that
the canvas is saved, that the book create extension. So if you just tap it, will be automatically open. The Procreate app opens
up in Procreate app. And then it is for you to use it for your future projects. This is one way I will
show you another way. Importing this procreate
canvas from the saved file. That when we started projects. This is how you create a Polaroid style canvas
for the projects. If you're ready with this, let's move on to
the next section and start with the projects.
4. Importing the stamps and color palette: Now let's see how to
input your color swatches and the brush stamps included
in the resource section. I hope you'll have downloaded them and it is ready to use. Now, let's go to the file where you have this downloaded items. You can see that
the file includes all the necessary things that is needed to get started
with the full text. So I have this project, 20 day project set, one set and 20 day
project set to. I have this color palette
file between clues, swatches for all the 20 projects starting from day one to day 20. Now let's see how to
import the brush set and color swatches to
procreate application. What you have to do
is you have to just stop on this project set one. And it will be
automatically imported to the application tap
on the Brush Library. And you can see the
20-day project set one, which includes the
stamps that we will lose from day one to day ten. Similarly, go back to the file and tap on the 20th objects that can be automatically import it to a
booklet application. And you will have this
terms that we will be using from the
element to date, went back to the files and go to the color palette file and just tap on
the day one lift, which will be imported to
the appropriate application, will be the color wheel. Just scrolling down. You can see the day
one color palette, which you can use. Stack the projects. Similarly, you can import your color swatches
for the other days. Go back to the file that
on this day to swatch. And you will have a two
swatch color palette. It's very simple. I want you to download all the best scams and
the color swatches from the one big lake
doing feet and keep them ready before you
start the projects.
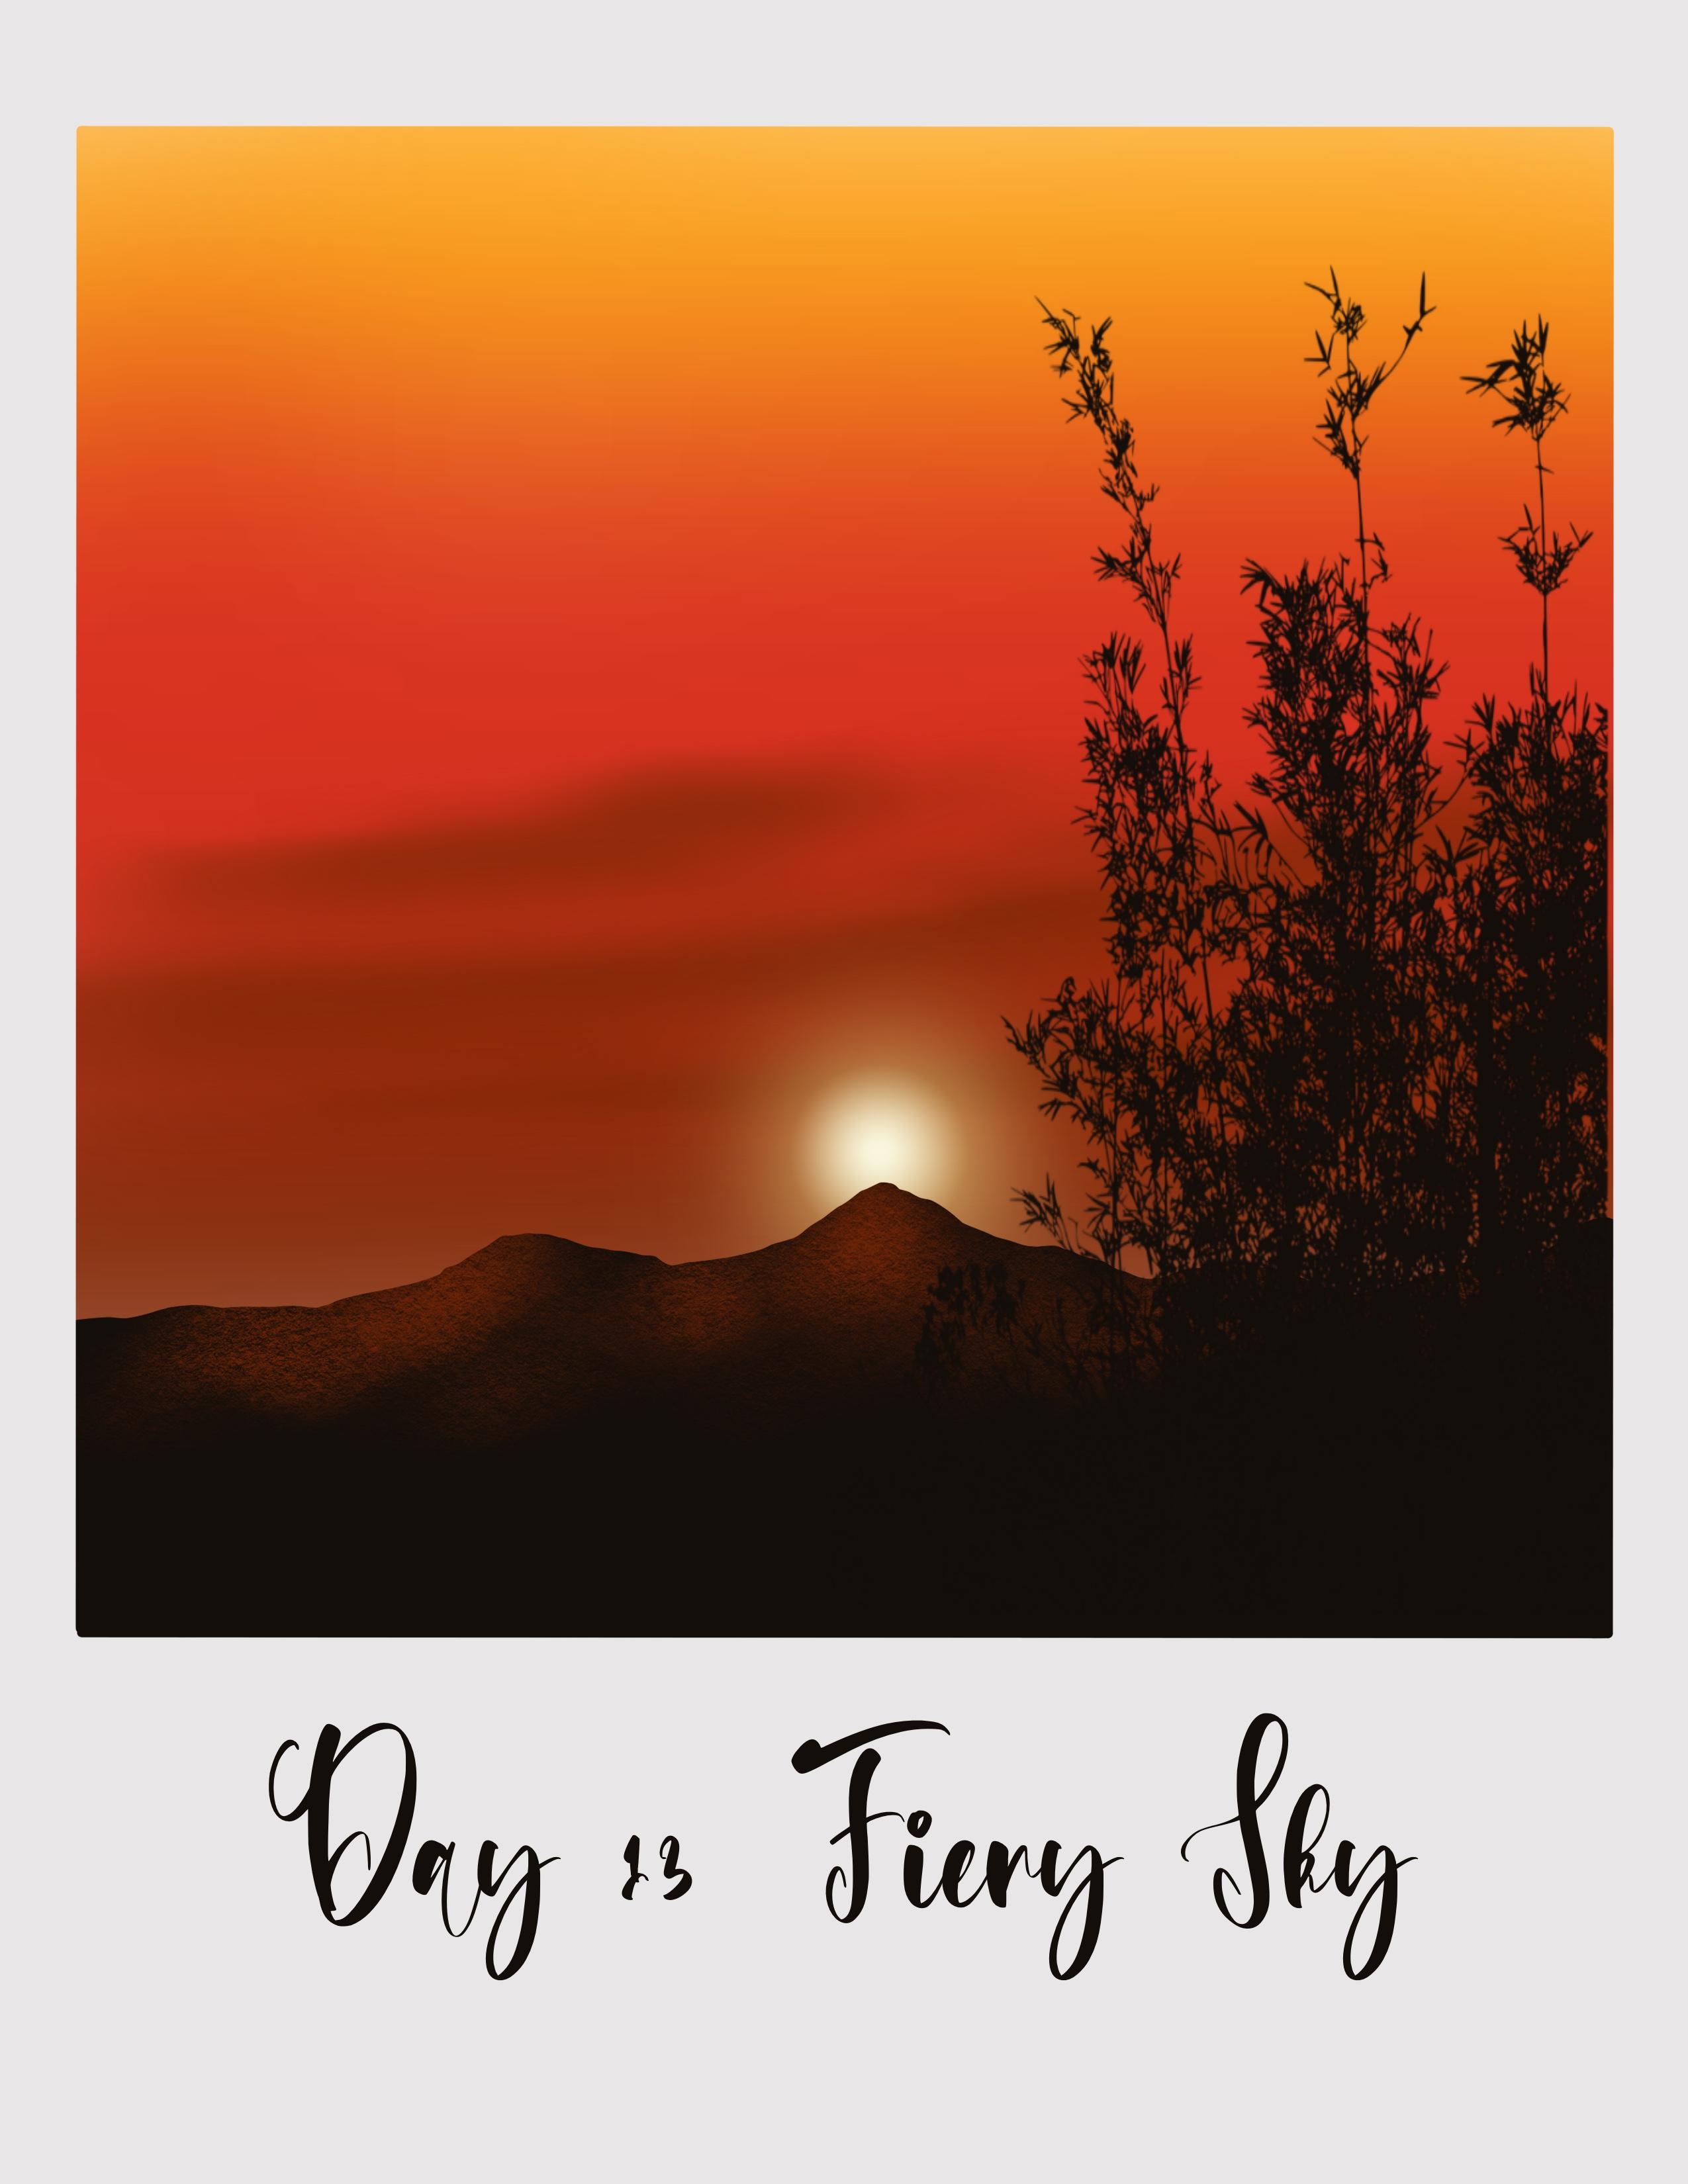
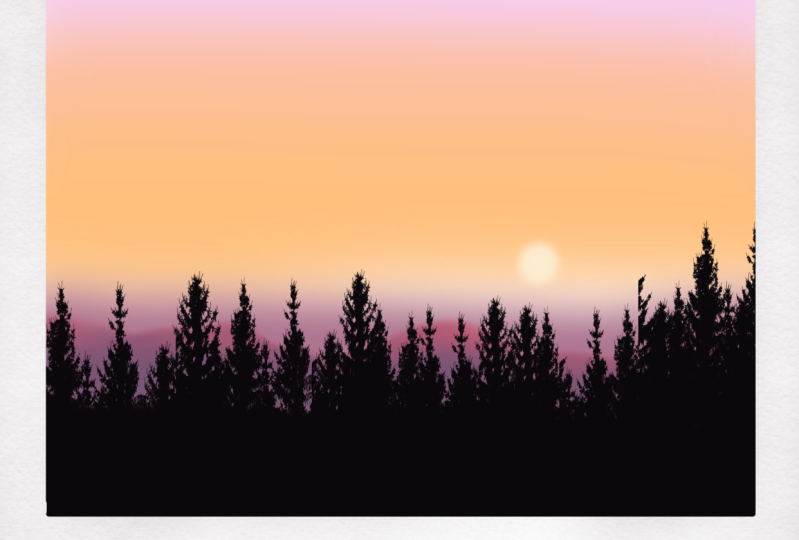
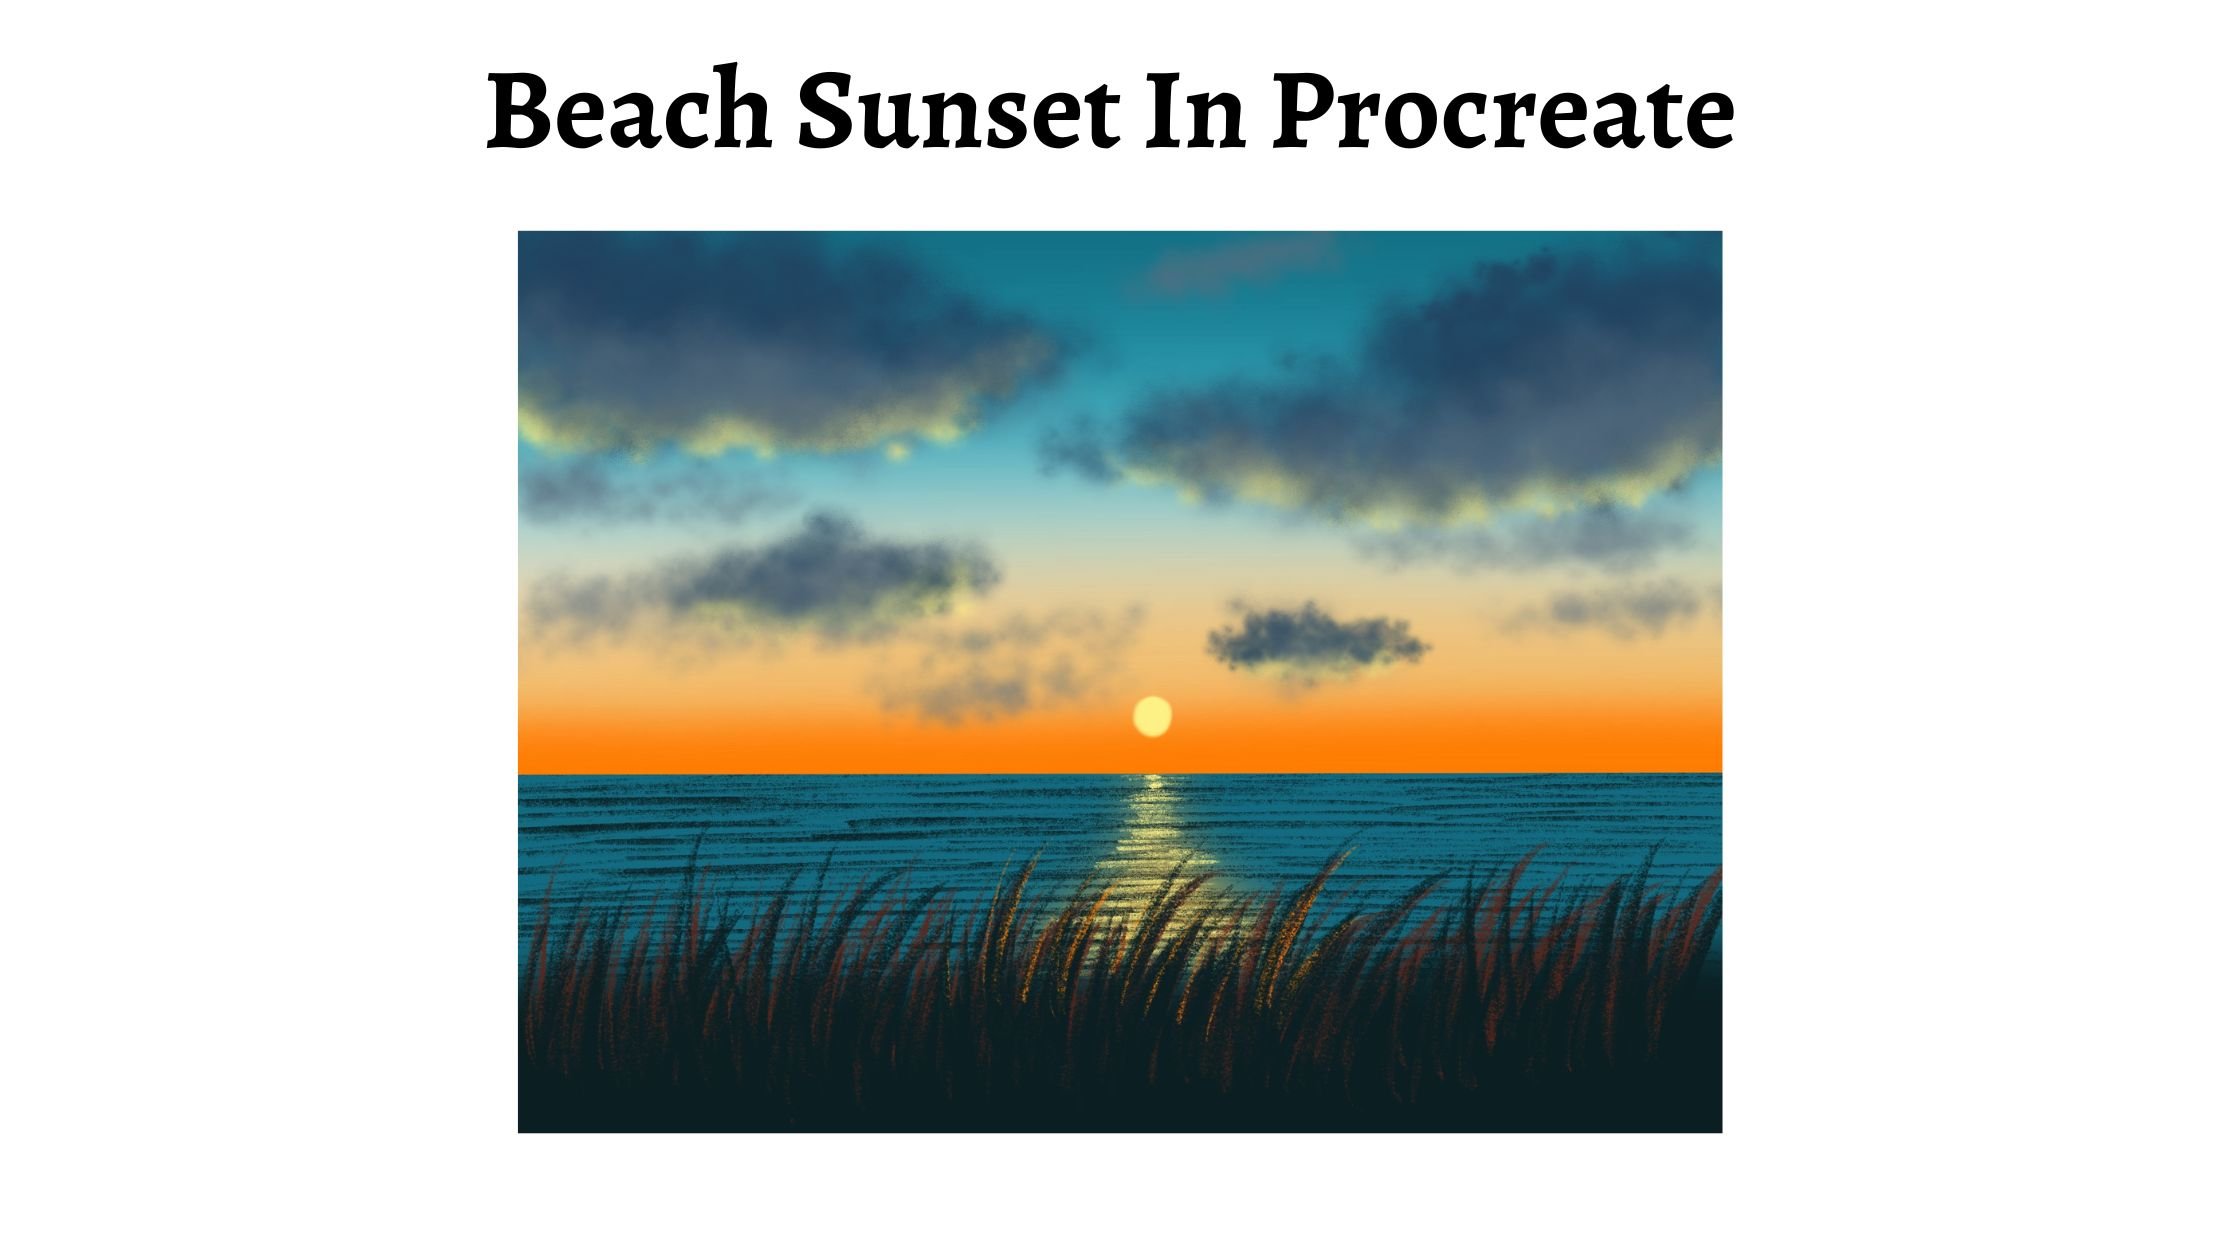
5. Day 1 - Evening Sky: Now let's start first
project and I'm going to use this
canvas that we did. And I'm going to
rename this one. I'd walk estate one
app on the canvas and let Doug project to adjust the placement
of the canvas. Now we are going to be
using one color palette, which you should download from the project resources
section on the ballots. And I have all the Padlet tool. So I am going with
the D1 palette here, which has this pretty colors. So I'm going to pick this first color from
the day one pallet. Go to the Brush Library, airbrushing, and select
this medium brush. I'm going to set the
size of this brush to around 15% and opposite
is set to 100%. And I will apply this
horizontal strokes and level. One floor does the
canvas with this color. Now go to the color palette
and pick the second hello, which is a shade lighter
than the first one. The next 1 ft off the
canvas. With this color. By applying horizontal
strokes like this. Go back to the color palette
and pick this top color, which is a local low. And leaving a tiny white gap. Right? I'm going to
say the next 1 ft off the canvas with this L-shaped
using the same brush, that is the medium airbrush. Go back to the palate and
pick this orange shade. And again, using the same brush, apply horizontal
strokes and fill in the next section with the shade. And these are the colors that we will be
using for this guy. And I'm leaving the white gap. Width is going to be the ground, which we will later on. So these are the
sheets of this guy. And now we need to blend all these colors to
create nice vibrant sky. So what I'm going to do is
tap on adjustments, icon, Gaussian know, and
set the blur around 30 to 35 person by
tapping the tip of the pencil on the screen and
dragging it to the right. I've set it to around 35%
and we have a nice gradient. The orange and blue for the sky. No gap on the layers. And I am going to rename
this layer as DIE. Next layer, that is layer three. We are going to add the Cloud. So I am willing to rename
this layer three as well. And I will rename it as clouds. Go get the color palette and make this shape or
dimension does shape. And this is the color that we
will use to add the clouds. Go to the library and
select the soft airbrush. We are going to be adding
really soft clouds to this guy. So I'm going to set the size
of this brush to around 25%. And obviously you
said 200,000 and I am drawing very gentle
horizontal strips. Lovely. If you apply
a lot of pressure on the people who
pencil this tau doubt, it's going to be, we
do not want that. Let me undo and started
being by applying very gentle horizontal
strokes like this. Do not apply a lot of
pressure on your pencil and add these horizontal
lines, adding them randomly. I'm not following any
particular order. And adding them in the
bottom section of this guy. This is it now we need to blend this so that it
looks really soft. Going to use the blend tool right next to the brush library. I'm going to set the
size to about five, goes into 6% and the
city is set to 100%. And I will blend the color, went to increase
the size to 10%. And then just simply
blend it with this guy. That looks like for
release, light, loud that is blending
into this guy.
6. Adding the tree silhouette: So if this is it, we are
done with the clouds. It doesn't really have to just
blending in that this guy colors no gap on the Laos and lead the next layer by tapping
on the plus icon. And I apply the clipping mask. So that good for lose the
canvas or the bait into you. And I am going to
rename this layer for ground color palette and pick this last color that's
black color from the palette. We'll do the Brush Library, calligraphy and select
this mono line brush. Setting the size of this
brush to around 15%. Is it is set to 100%. And I'm going to start drawing uneven line by starting from the extreme left corner of
the background and taking it all the way to the
right of the background. And now drag and drop
the color to this area. The ground section
is now trading. The need to add the final
element to this painting back. We're going to add
a silvered go to the Brush Library and go
do this 20-day projects. Set one when I have intended
the stamps that we'll be using from day one
to day ten projects. And let me go with the
day one stamp where, which is kind of a pine tree. And we are going to be
using the same color, that is the black
color for this. And let set the size of
this time to around 30%. Let me see. Yeah, I'll
set it to around 30 plus and tap on the center of
the screen like this. Now you can adjust the placement of the stamp
wherever you'd like. Before that, let me just
add this separately also, I'm going to tap on layer, tap on Plus icon and
create a new layer. And I will rename
this layer five. And now just tap on
the screen like this. And you have the
three-cell back. Now, tap on this arrow icon. You can adjust the
size to the left or the right by
dragging it around. And you still do dots on the corners that you
see to adjust the size. Know it around like this. You can place it to
the extreme right, extreme left, or in the same
dove into where you like? I think I'm going to
move it and place it. Right. Yeah. This looks good. So let me please secure. You're free to place it
in the center side, left, wherever you like. This is set. We are ready with
our first project. I am thinking of adding the title of this product
here in the bottom section. Can do it or you can
leave it as it is, or tap on the Actions
icon next to the gallery. Add and select this text. I'm going to move
this or Xbox section. And I will select the text
and replace this text. My bad thing. And as
day one, evening, sky. Now select this complete text and I am going to
change the font here. You can select the
form that you like. I am pulling matchbook
phone that I have. Just the size, increase or
decrease the size accordingly. And now select this text box and use this arrow
icon that you see. Just the placement and
positioning of this text. You still blue dots that
you see in the corners. Adjust the placement and
the size of this text. Now you can see that the text we added comes up as a new layer. We can undo all, uncheck it if you do
not like the text. That is it we are done
with plus project. That is the one
evening sky project. I hope you enjoyed painting
this one, but I needed it.
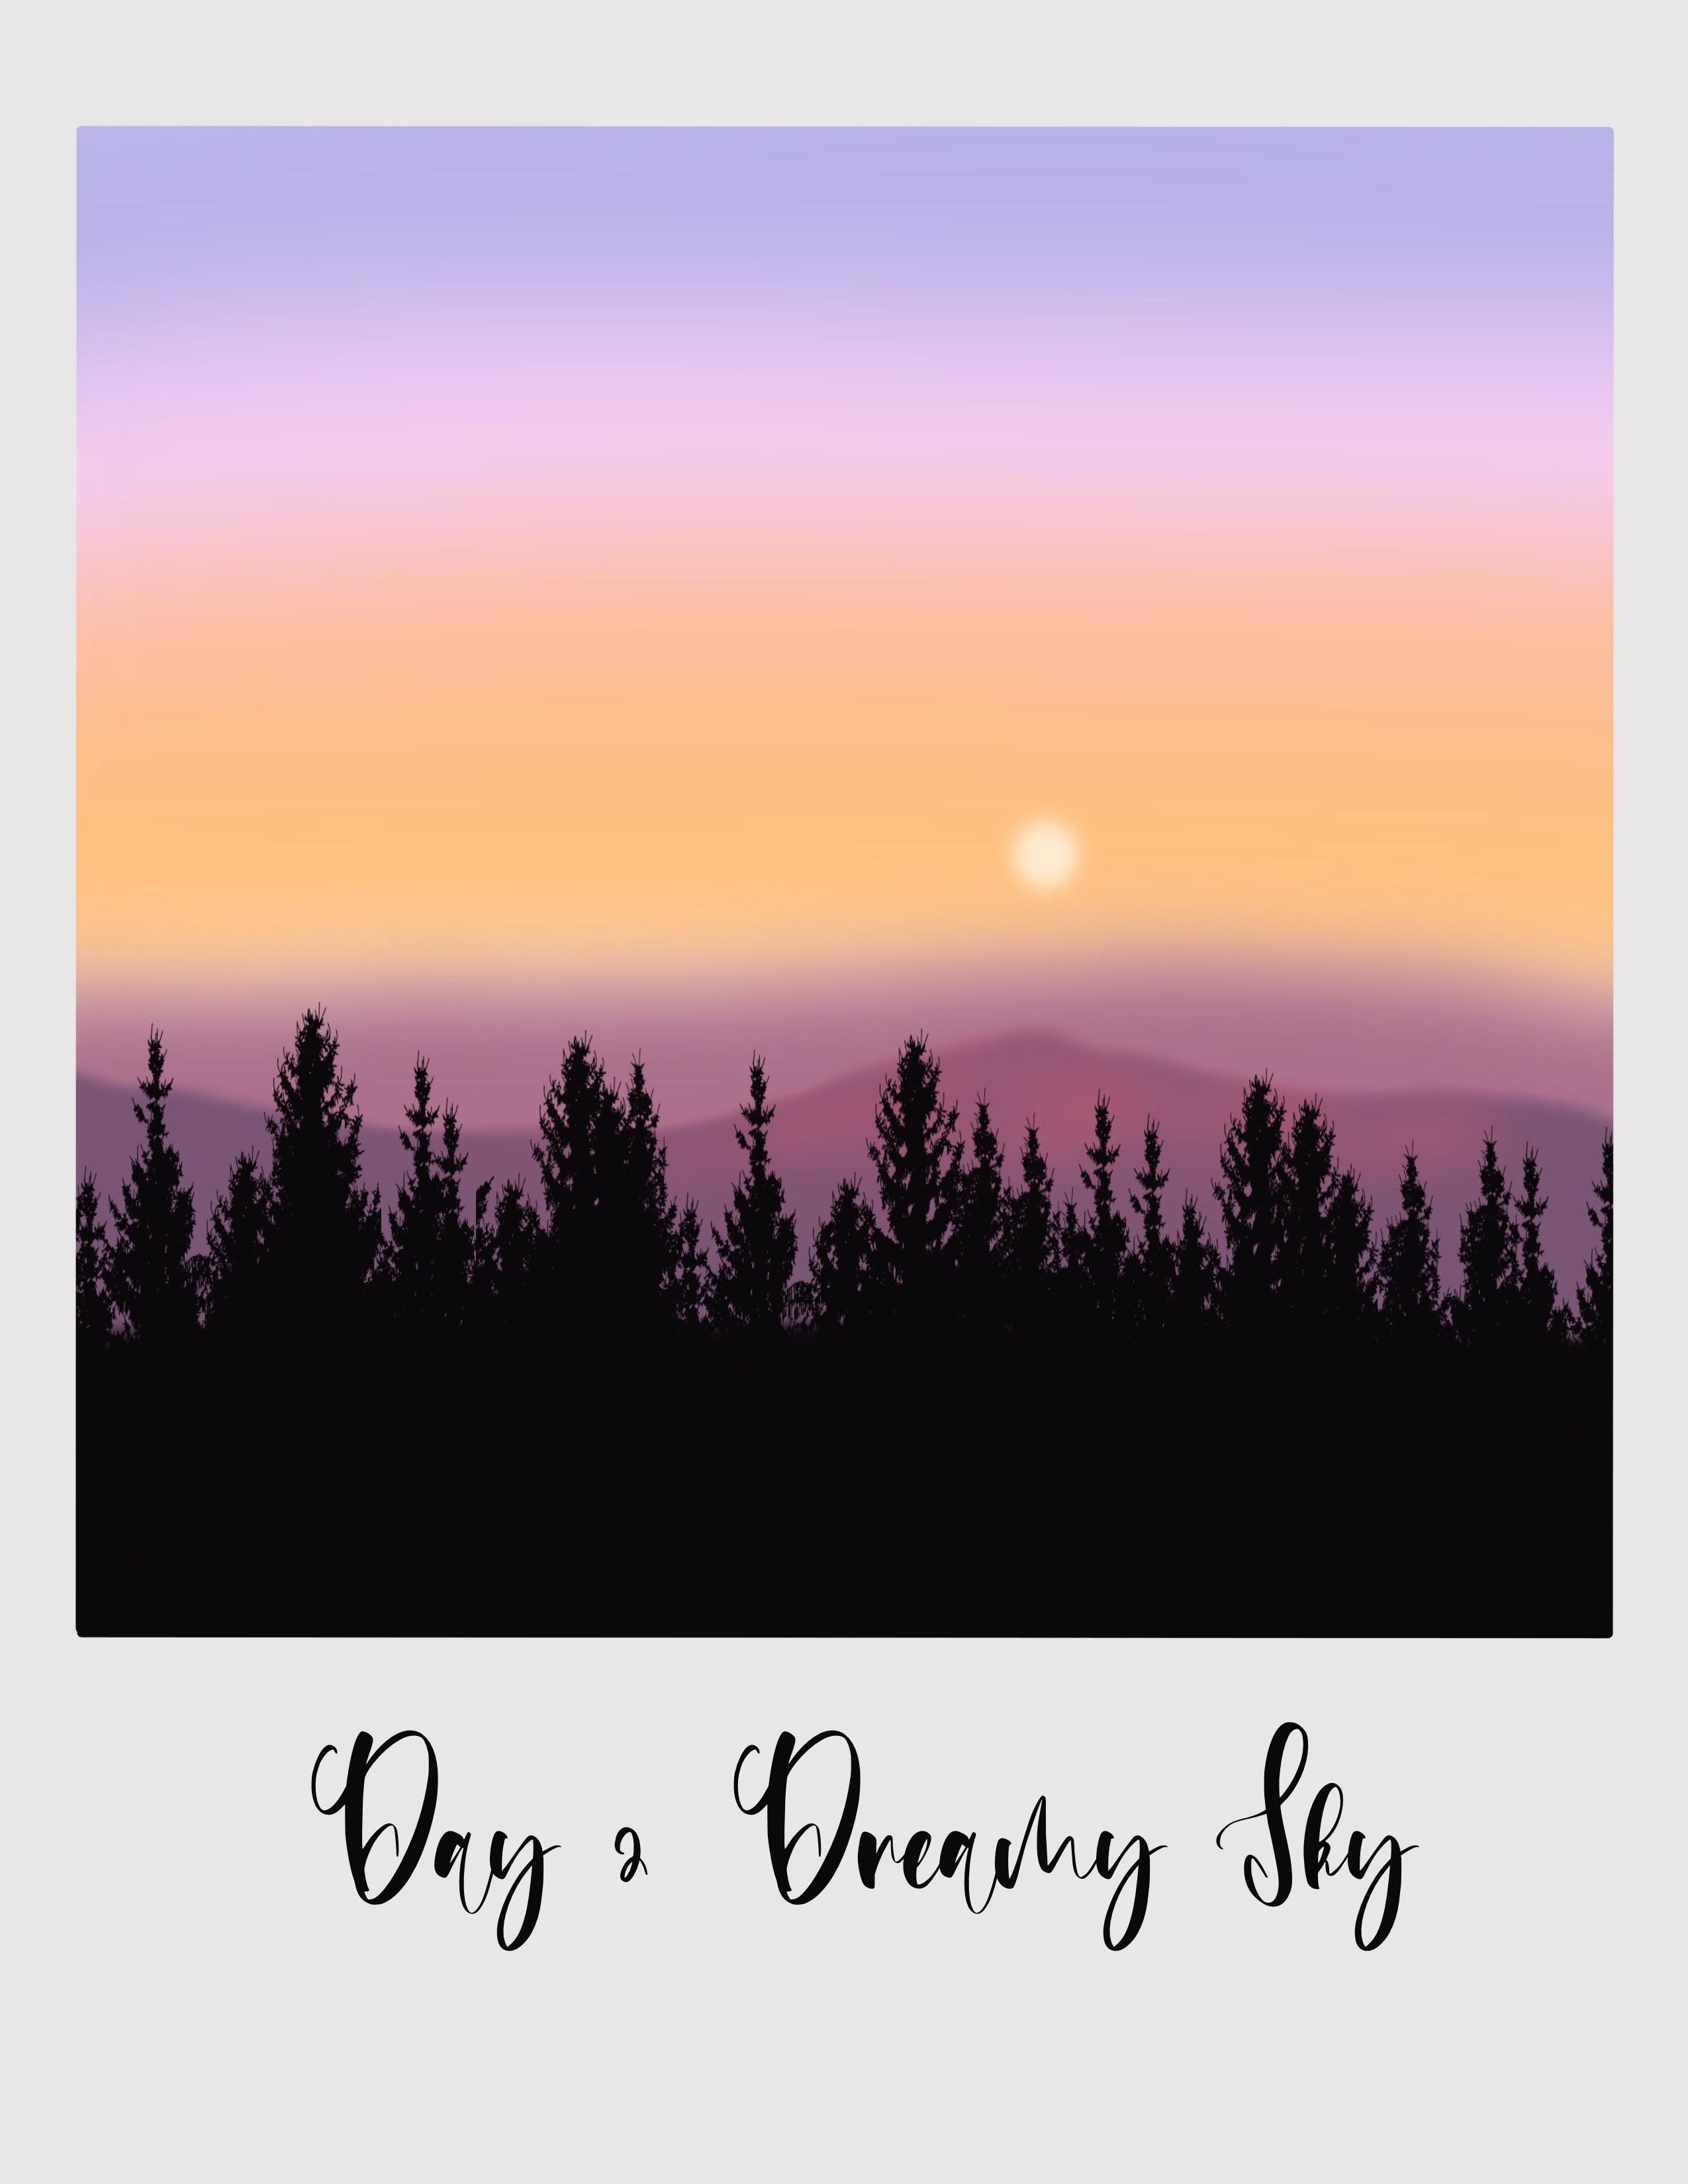
7. Day 2 - Dreamy Sky: Hello and welcome to The. Today we are going to be
painting or pastel style. First import the candles
on input and go to the file where you have
saved the Polaroid Canvas. It's on my iPad in that it is just tap on it and it will
be automatically imported to your Procreate application and you have the canvas
ready to work on. This is another way of importing the Polaroid Canvas that you
have saved any file on iPad. Go to the color palette, and I have my color
palette ready. Here is my day to color palette, and I hope you have
downloaded and imported to your book
Create Application. These are the colors
we will be using the pastel colors
for this project. Because boost color, which is the lavender or lilac color. And I'm going to the Brush
Library and rushing. And I will go with
this medium brush. Then set the size
of this brush to around 15% and Open
City is set to 100%. And I will start by going with the horizontal stroke like
this feeling about the canvas. Next, go to the color palette
and pick this second color, which is very light
shade of pink, and using the same brush, I will play next one, food for the canvas
using this color. Now go back to the palate and pick this code
color from the palette. And continue filling
the next one food off the canvas with
this, each shape. Go back to the palate,
the fourth color, and continue the
same process using the same brush by applying
horizontal stroke like this. And the next portion or the
next section of the Canvas. So this is, these are the sky Carlos that we are
using for this project. It's in this layer. And now I am going to adjustment
section Gaussian low. And I will set the blow
to the bulb about 40%. Yeah. We have a nice pastel sky 3D. Now we will be adding
the mom in schools. So I'm going to layers
and I'm going to rename this layer as Skype using the same
canvas that we see. Now. We will add two
layers of mountains. So I'm going to rename this layer three as
small thing one. Now go back to your painting, go to the color palette and make this fifth
color from the palette. We'll do the brush library. Neville, go with
the airbrushing. Go with the soft air brush. I'm going to set the size
of this brush to about, say, we'll set it to
around 70 per cent. And obviously it is set to 100%. Using this brush, I'm going to clean my first
layer of mountains, make sure that it is not a
straight horizontal line. So it is going to be
the farthest mountain. I'm going to fill about
one-fourth of the canvas. And now to make it look like, Oh misty mountain, I'm going
to tap on adjustments. I can gaussian blur and I
will send the blood to allow the people sent so that it
looks like a misty mountain, but just far away. Now it's time to add the
next set of mountains. So tap on meals, tap on the plus icon. And I'm going to rename
this layer for small thing. And in my next set of Mountain
Dew, the color palette. And make this six shade
from the D2 palette. We'll do the brush library. And using the same brush, I'm going to paint the
next set of monthly. Now I have not applied
clipping mask. You can see when I paint it
comes out of the canvas. I'm sure you know
what you need to do. As you can see, it is
coming out of the canvas. You do not want that. So go to the layers and
apply clipping mask on this mountain so that it
follows the parent layer, which is the Canvas. And now you try it. You can see this div, it stays within the Canvas. So let's start
with the next set. We want to set the size
of the brush to about. They'd say I'm going to
set it to about 70%. And I will add the next set of mountains right below
the first month. And again, I'm not going
to keep it straight. Make sure that it
looks like a mountain by adding beaks like this. And I'm going to fill my board one for section
using this color. So there we have the
second set of mountain. Now we're going to be
painting or adding sand here. This section of the
mountain needs to look lighter because of the
sunlight falling on it. So what I'm going to do is I am going to apply alpha
lock on this layer. I'll go to color
palette and pick this pink shade seven color. If you do not apply
the Alpha Lock, I will show you what happens. Now. If you do not apply alpha lock when I tried to apply the color, it is going to the
other mountain as well, but we do not want that. We want the second
mountain layer to be led by the sunlight. So what do you need to do
is you apply alpha lock on this layer to mountain layer. And then you apply your
teams is that is AD, make this section of
the mountain lighter. So when the sunlight falls on this section or the peak of this mountain, it
appears lighter. Now, I'm using the same
brush as you can see. If you apply a lot of pleasure, it looks too dark, you want it to be light. So apply tiny amount
of pleasure on the tip of the pencil and
lighten this top section of the mounting using this color so that it looks
like a sunlit mounting. This is how the
sunlit area looks.
8. Adding the tree silhouette: Now go to the layers and add a new layer by
tapping on the plus icon. And I'm going to rename
this layer five. I will be adding the
trees in the next layer, which will be on
foreground, trees. Go to the color palette and this black color from
the day to palette. You know, what is
the mistake now, we have not obliged clipping
mask on trees layer. So you need to do that. Now when you try it. States within the camps. So I'm going to fill the
rest of the canvas using the same brush and fill this section using
this black fellow. Need to add the trees. So I go to the Brush Library, link to the 20-day
project set to one. And we have this dam for data. So I'm going to duplicate. I'm going to set the size
of this brush to a low 20%. And I'm going to add
it in the trees area. Let me do that in
a separate layer. So double meals dabbled
plus I couldn't read and Leo an applied clipping
mask on this layer. I'm going to set the size
of this brush 20 per cent. And I will just tap on the screen like this
and add the trees, the pine trees, he'll fill
in this bottom section. And that's it. We are done with this. It's as simple, so I do not want you to be
spending a lot of time on adding the details
of the tree details. All you have to
do is just tap on the screen and the
silver is really, I'm going to fill in in
between by just tapping on the screen and
making it more dense. Just dab in-between them. Now we need to add an icing sun. The color palette
like this last color, when they walked to
the village luxury. Airbrushing. And select
this soft airbrush. I'm going to set the
size of this brush to about the present, around 30% and a moon do
layers and create a new layer. Now you can apply
clipping mask on this layer and I'm going
to rename it as sun. It's always a better idea to create each element
in a separate video so that it is easy to
believe or redo it. Draw a tiny cell. Create the misty
effect and boom, do adjustments section lotion. And I will set the
load about 8% so that it looks like the sun
is covered by this mess. And we are done
with this project. And now it's time
to add the Titan. So let's just do that. I can add, I will add the text. I'm going to pick black
color for the text. I'm going to rename
it as Genie Scott. I'm going to select this
text and change form. What I had selected earlier
for the day one project. Select the text and
this text down. We're going to adjust
the size of this form, deliver more. It's up to you how
you want it to be or what size should be. Debbie are done with
all they do project, which is this nice guy. And I hope you enjoyed
painting with me. Please. The same door. And I hope you enjoyed painting this mood blue sky
with me today. Let me just rename this canvas
or the adverb as the dome. That's it. We're done
with our project.
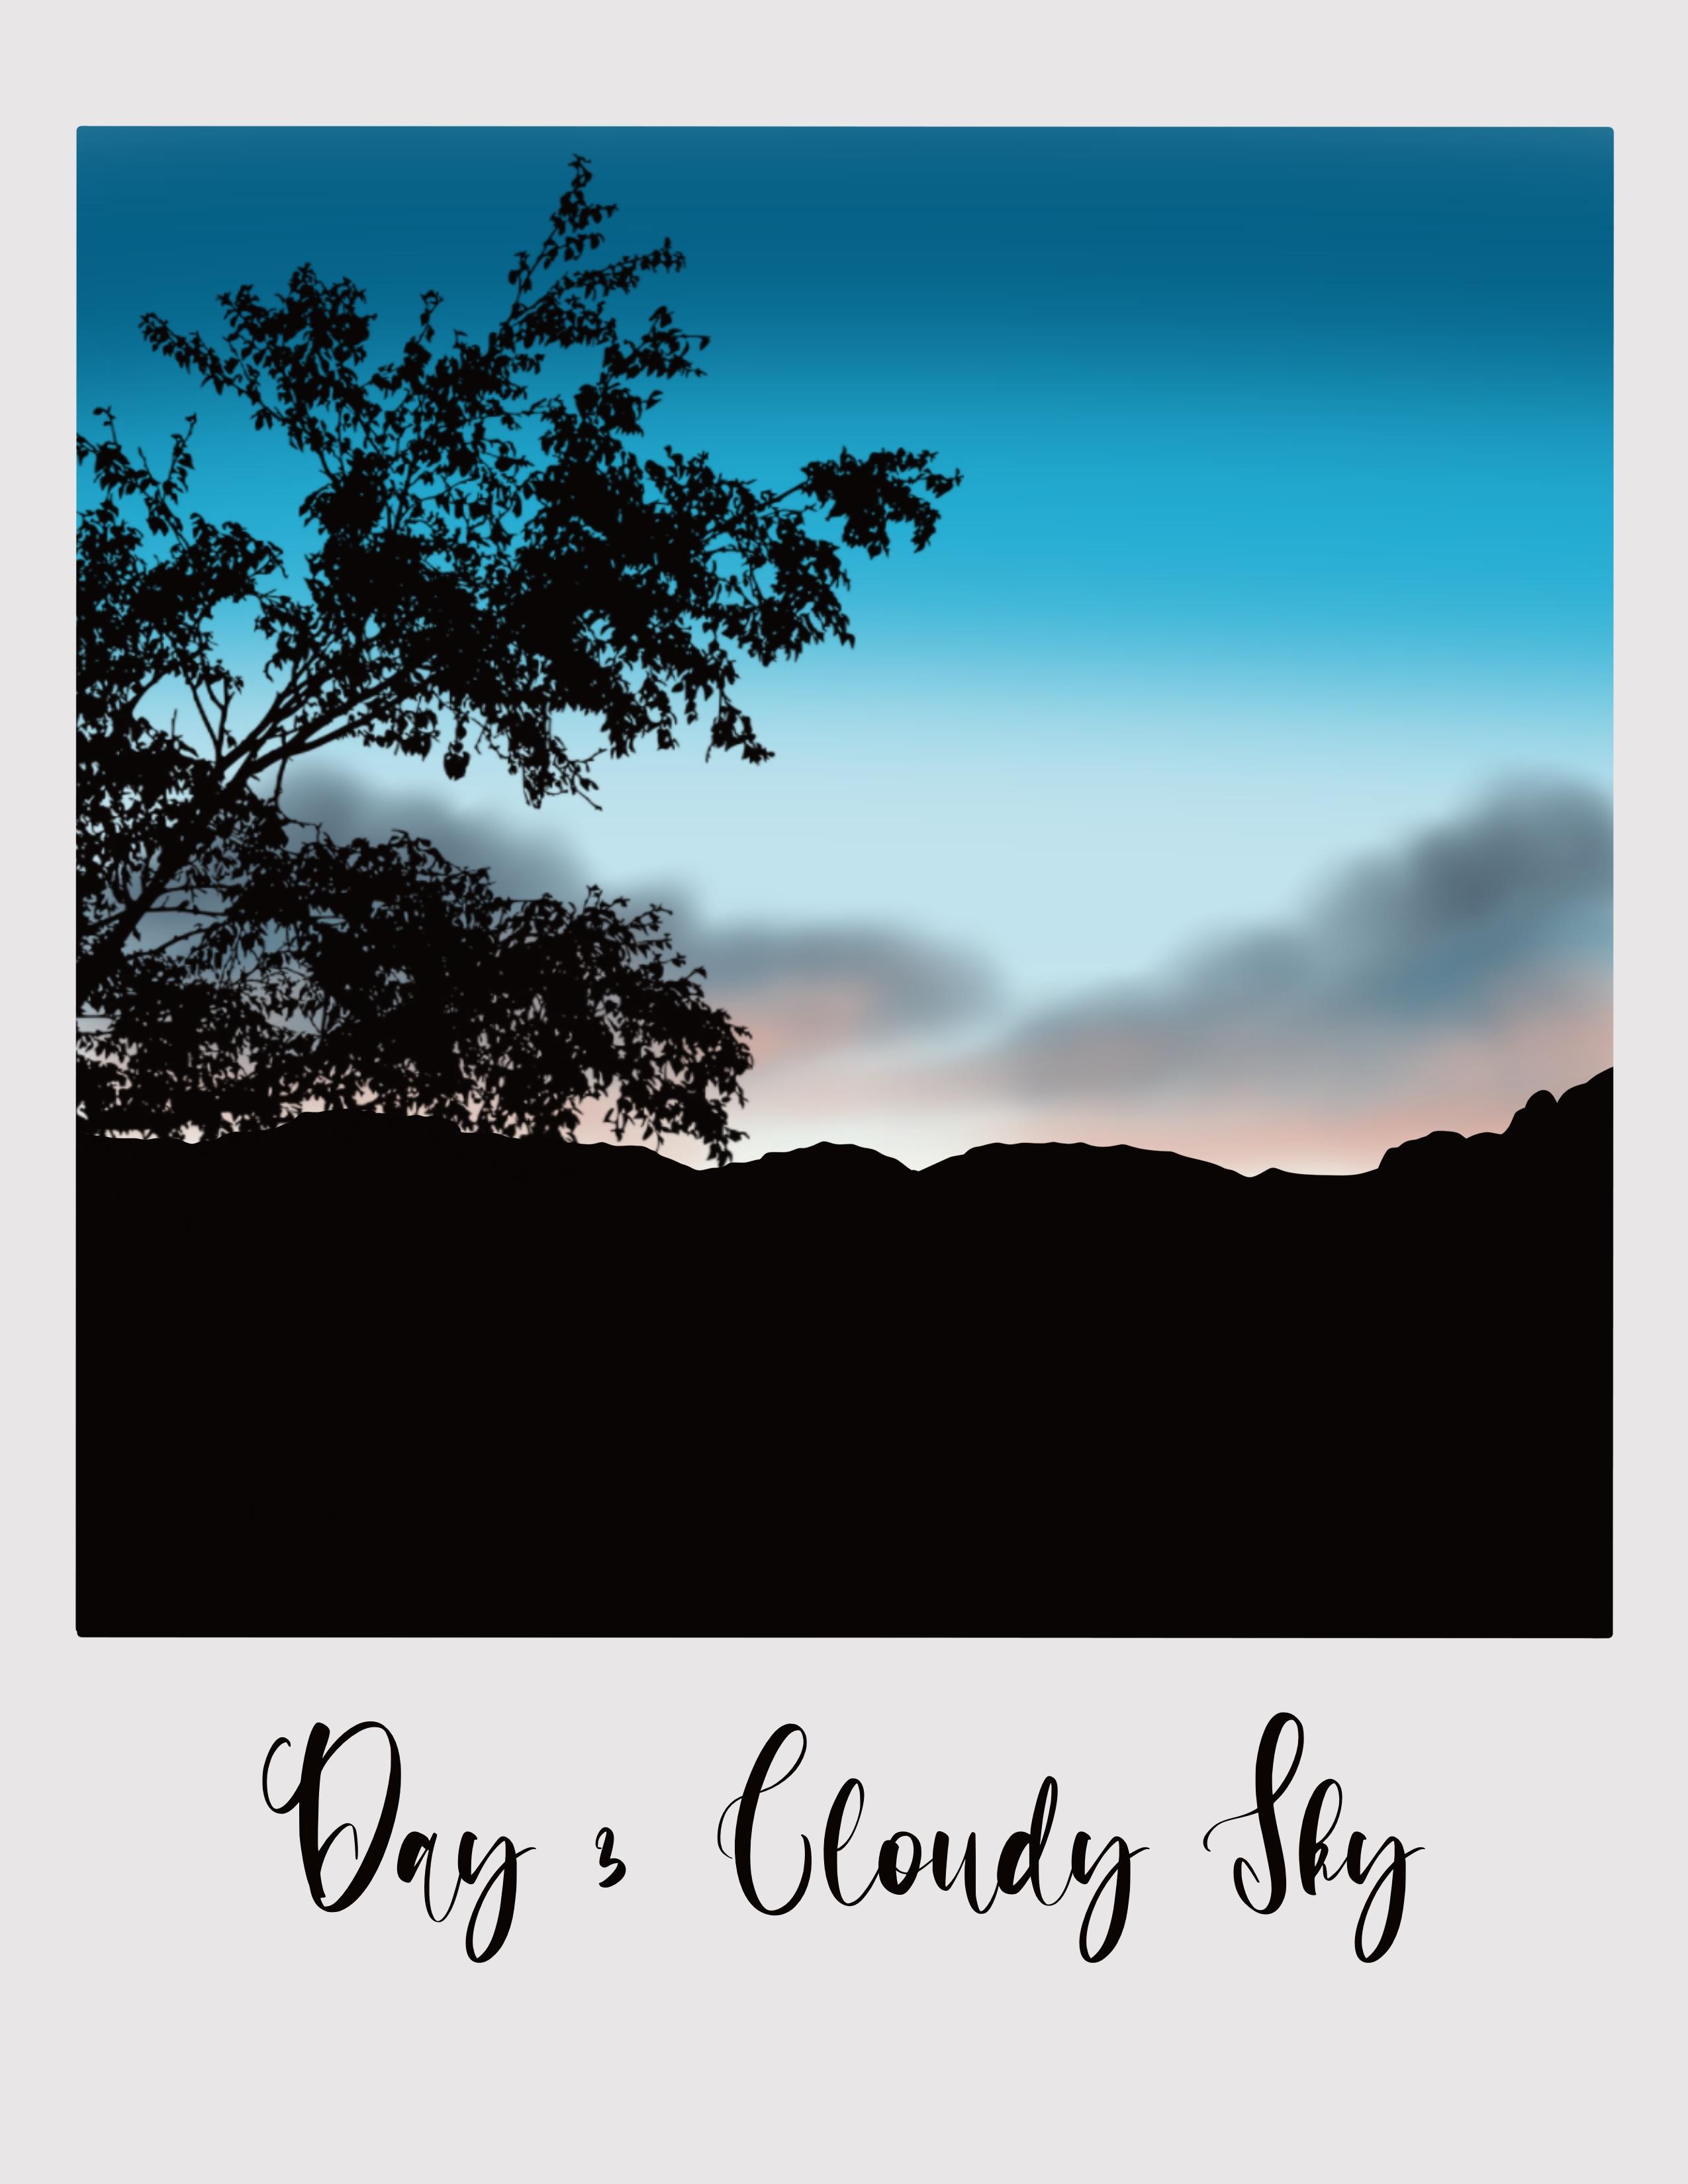
9. Day 3 - Cloudy Sky: Hello and welcome to day three. So we're going to
start by importing the Polaroid Canvas to the
Procreate application. Do have the Canvas 3D. Let's look at the color
palette that we will be using for today's project. I have my day three
pallet ready here, and I hope you have
downloaded it. So as usual, let's
begin by painting the sky for someone to pick the first color
from the palette. Brush library, airbrushing. And I will go with
the medium brush. The size is set to around 15
to 20% and opacity set to 100% and horizontal strokes and fill the board one photocopy
Canvas using this color. Now go to the color palette
and take the second color, pick the third color
from the palette, and fill the next one who told the canvas with this color. And finally, the second color, which is a very light shade of blue and fill the rest one who took the canvas
using this sheet. And finally, I'm picking this
food color from the palette and filling the remaining
canvas with this color. So these are the four pillars
that we need for the sky. No Doppler on the adjustments. Ocean know and take the
blood to around 40%. Let me decrease it and set it to around when to send the
blood to around 30%. And this looks really wonderful. So I guess we are
done with this guy. So tap on the layers and
rename this one guy. This is pretty much similar
in all the projects. And we use the same technique, same brushes for this guy. Now go to the layer
tree and I am going to rename this
layer as clouds, where we'll be
adding some clouds. No tap on the color palette. And I'm going to pick this
color from the palette, which is kind of dark
gray, bluish green. Go to the Brush Library. And I will go to airbrushing and go with the soft air brush, which we will use to
add the soft clouds. I'm going to set the
size of this brush to around 40 per cent and
opacity set to 100 person. Now, let's see how this
brush works now view, if you apply a lot of pressure
on the tip of your pencil, this is how it looks. You do not want that. You want like really so Cloud. So you need to apply a
tiny amount of pleasure on tip of your pencil and
start adding the clouds. I'm going for a really
soft, flowy loud. So I will start by applying a tiny amount
of pleasure on my, on the tip of my apple pencil
and start drawing this. So blush strokes.
As you can see, I am pulling with this
dinosaur glass tubes to create that soft clouds. I'm not going for any
particular shape and just randomly adding
to cloud here. Now, I'm going back
to the color palette. And I will this shift
color from the palette. And I will add some. I will again repeat the
same circular motion and add some clouds here. So make sure to do
this very gently. Now go back to the
color palette and pick this color
from the palette, which is a kind of peach color, and add some PT clouds as well. Right below the one which we
have just painted or added. Going to blend it
all together so it's not going to look
very clean right now. You can see just doesn't
make sense, but don't worry, trust the process and
you will see the result. So now go to the Brush Library, airbrushing, and select
this soft blend brush. I have said dopey city to 100%, and I will set the size of
this brush to around 5%. So I'm going to smudge, tap on this match
tool that you'll see. And I'm going to set the
size of this much to around 10% or reduce it further down and set it to
5% and then went to smudge, all G, all these
three colors really well to create the soft, loud. I am again going but this OK, the last strokes and
blending all these, tweak those matching these
three colors into each other. I'm repeating the same steps by going with the silk
gloves, strokes like this, and blending in these
three colors like that, that looks like once
in the Cloud with different shades off does matching. It didn't it looks like Let's make it a
little more dark. So I'm going back to the
color palette and Apple, like this bluish gray color. And go to the Brush Library and go with the soft blend brush and set the size to around
five or six person. And I'm going to go read
the cell glass trucks and add in more depth to this cloud as to make
it a little more dark. Again, I'm going
with Toklas, true. Lending the color, but the
one that is already there. So I'm just making the top section of this
cloud a little more dark. Nobody about the
shape of the cloud. If you are concerned about the shape of the
cloud, are not happy. You can always refer to
the reference image. That is the project image
that I've uploaded in the results section
and then go with it.
10. Adding details to the clouds and painting trees: You can stop it here. Or if you want to add in more color and drama to
the Cloud, you can go out. I am going back to the color
palette and picking this each color and adding
some more beach below. So I'm going to
reduce the opacity of the brush door on 60 to 65% and adding in some beach or
blending it with this cloud. As I said before, you can keep
it simple or if you want, you can add more drama by using differentiates and
create the Cloud. Now I'm going back to the
color palette and I will go again with this face blue and adding it to your dog and
blending it with the beach. I'm pretty happy
with the results are wounded. Stop it here. Now, go back to the layers
and create a new layer. And I am going to apply clipping
mask on this layer four. And I'm going to rename
this layer as ground. So now I will pick
this black color from the palette and go to
the Brush Library, telegraphy, and select
the mono line brush. So I'm going to start adding. I will set the size
of this brush to around 15% and I will
add a slanting line. Oops, I can see that I have not apply clipping mask
on this layer. So let me just do that and start adding line right
below the cloud here. Now, drag and drop the color. Now it's time to add new layer. So tap on the Layers panel, create a new layer, a clipping mask on this layer. And I'm going to
rename this layer. I'm going to rename. So I will name it
as trees or three. And I will go to
my Brush Library. The 20 day project set to one. And I will go with
my date stamp. Set the size of this brush to around 25% and tap on
the screen like this. So you have the Tree Hill. Now, select that
with the arrow icon. And I'm going to flip
it horizontally. And please take your
extreme left corner. I'm going to make it I'm
going to expand it using this blue dots that you see in the corner and place it here. Now again, the placement of this tree is up to you
where you want it. You can keep it small. Keep it vague,
hover. You like it. So I'm just checking that
it looks this looks good. So I'm going to stop it here. So you can flip it horizontally. You can keep it on the
left or the right. You can make it smaller
or you can make it big. It's up to you how
you want to place it. So if you want only the
top section of the tree, you will do that
by just tapping on that arrow icon and dragging it to the position where
you want to place it. So this is where I
want my tree to be, so I'm going to stop it here. We are done painting
the date, the project. Now it's time to add the
next tap on the Actions. I can add an X, select the text and
delete this text. And I will move this text box down and bring it
for this section. And I'm going to
type in the three. And I will name it cloudy sky. Now I will select this text
and change the form too much. Just the size. And then now select this text box
using this arrow icon. And it's just the placement
and size of this text box. So that's it. We are done
with the D3 project. I hope you enjoyed painting this cloudy sky with me today. So let's go back to the gallery. And he mean this
untitled street tree.
11. Day 4 - Vibrant Sky: Hello, it's time to
clean basal project. I'm going to start by
importing the illiterate can. Now, let's have a look at the color palette
for Dave full. So I have my day
four color palette. And I hope you have read, read, read us why. I'm picking the first color from the color palate to
the Brush Library. Airbrushing. Sushi, go read, medium brush, or you can go
with soft pressure as well. It doesn't really matter. I'm going to set the size
of this medium brush to around the bus. And I would start by
applying horizontal strokes. I'm going to fill about
half of the canvas color. Now go back to the
color palette and make this second Palo
default palette. And the next half of the canvas using this kind of see one-fourth of the canvas. As you can see, I
have left all white, deaf green now with the
lingo for them section, but by law using the same brush. This section is going
to be the ground. So I'm living as it is, up on adjustments, I can go low. Melinda said the 30%. Let's go back to the
layers and rename this layer of paint, your thigh. And I'm going to rename
this layer three. We're going to be in the clouds, so I'm going to
rename it as clouds. Now, let's go back to
the color palette. And I will pick this
color brush library, airbrushing and select
the soft air brush. I'm going to set the size of
this brush too long, 40%. And I'm going to add some
strokes in motion like this. Not exactly self-love, but I'm going to end fruit we went
through to add this truths. So again, we are
adding clouds here. So I'm cooling for this
tactic tumulus kind of loud, which is like this. Really bad clouds. I'm adding this back in to fall through and through motion clouds
gathered loud here. So we're going to highlight it more by going to
the darker shade. For now, we will use this
color and add this add clouds. And it is called strata
cumulus cloud expert. So I think that is
what it is called. Me. If I'm wrong,
as you can see, I am leaving some
gap in-between two. You can see those guy be needed. So go back to the color palette and pick this darker shade. Using the same brush
I'm adding the same to and fro motion
clouds on top of this, orange clouds, adding in
more depth to this clouds. So let me just reduce
the opacity of this. Sounded five boys in and add in some more in-between or
write about this orange. Adding in some more
clouds here in the top section begins to seem step, all meet at the side as well. Now, let me just go back to the color palette
and big orange. I love rounding eyelid
and add in some clouds. Green just blended with
their darker shade.
12. Adding the tree silhouette: I will stop it here and let's move on to
the next section. Now, tap on Laos and create a new layer and applying
clipping mask on this layer. I'm going to rename
this layer as ground. Now go back to the
color palette and pick this last node that has black
color from the palette. Brush Library, calligraphy,
monoline brush and add lime, and drag and drop the color. Now, let's add some grass. So I will go to the Twinkie
day project sect one. And I will select this
stateful glass brush stamp. I'm going to set the
size of this brush to alone would be
pleasant and build grass by just tapping on the screen like this
and fill in this section. I'm also thinking of
adding bagged trees. So I will go to the brush
set and I will select this stuff for a stamp added. So I'm going to set the
size of this brush to around 4% or even less. So let's set it to around 35%. Let me add this
in our new meals. So I'm going to
create a new layer and I'm going to
rename it as tree. Now, just tap on
the screen to add the tree at just the placement by tapping on this arrow icon. And they'll drag this odds just using this blue
dots on the corners, you can increase the size
or decrease the size and move it around and place
it wherever you like it. I'm going to place it
here. This looks good. Size accordingly. So this is set, we are ready
with the default project. It's now time to add though. We'll just do that. That ball on the actions. I didn't add the text. Now I'm going to
rename it as Dave for and name it as dramatic. Because there's lot
of drama going on in this guy's name
it, dramatic sky. With just the size
and placement of this title. And that's it. We are done with
the basal project. Now let's go back
to the gallery and we named this project to move to name this untitled artwork. I stay for that.
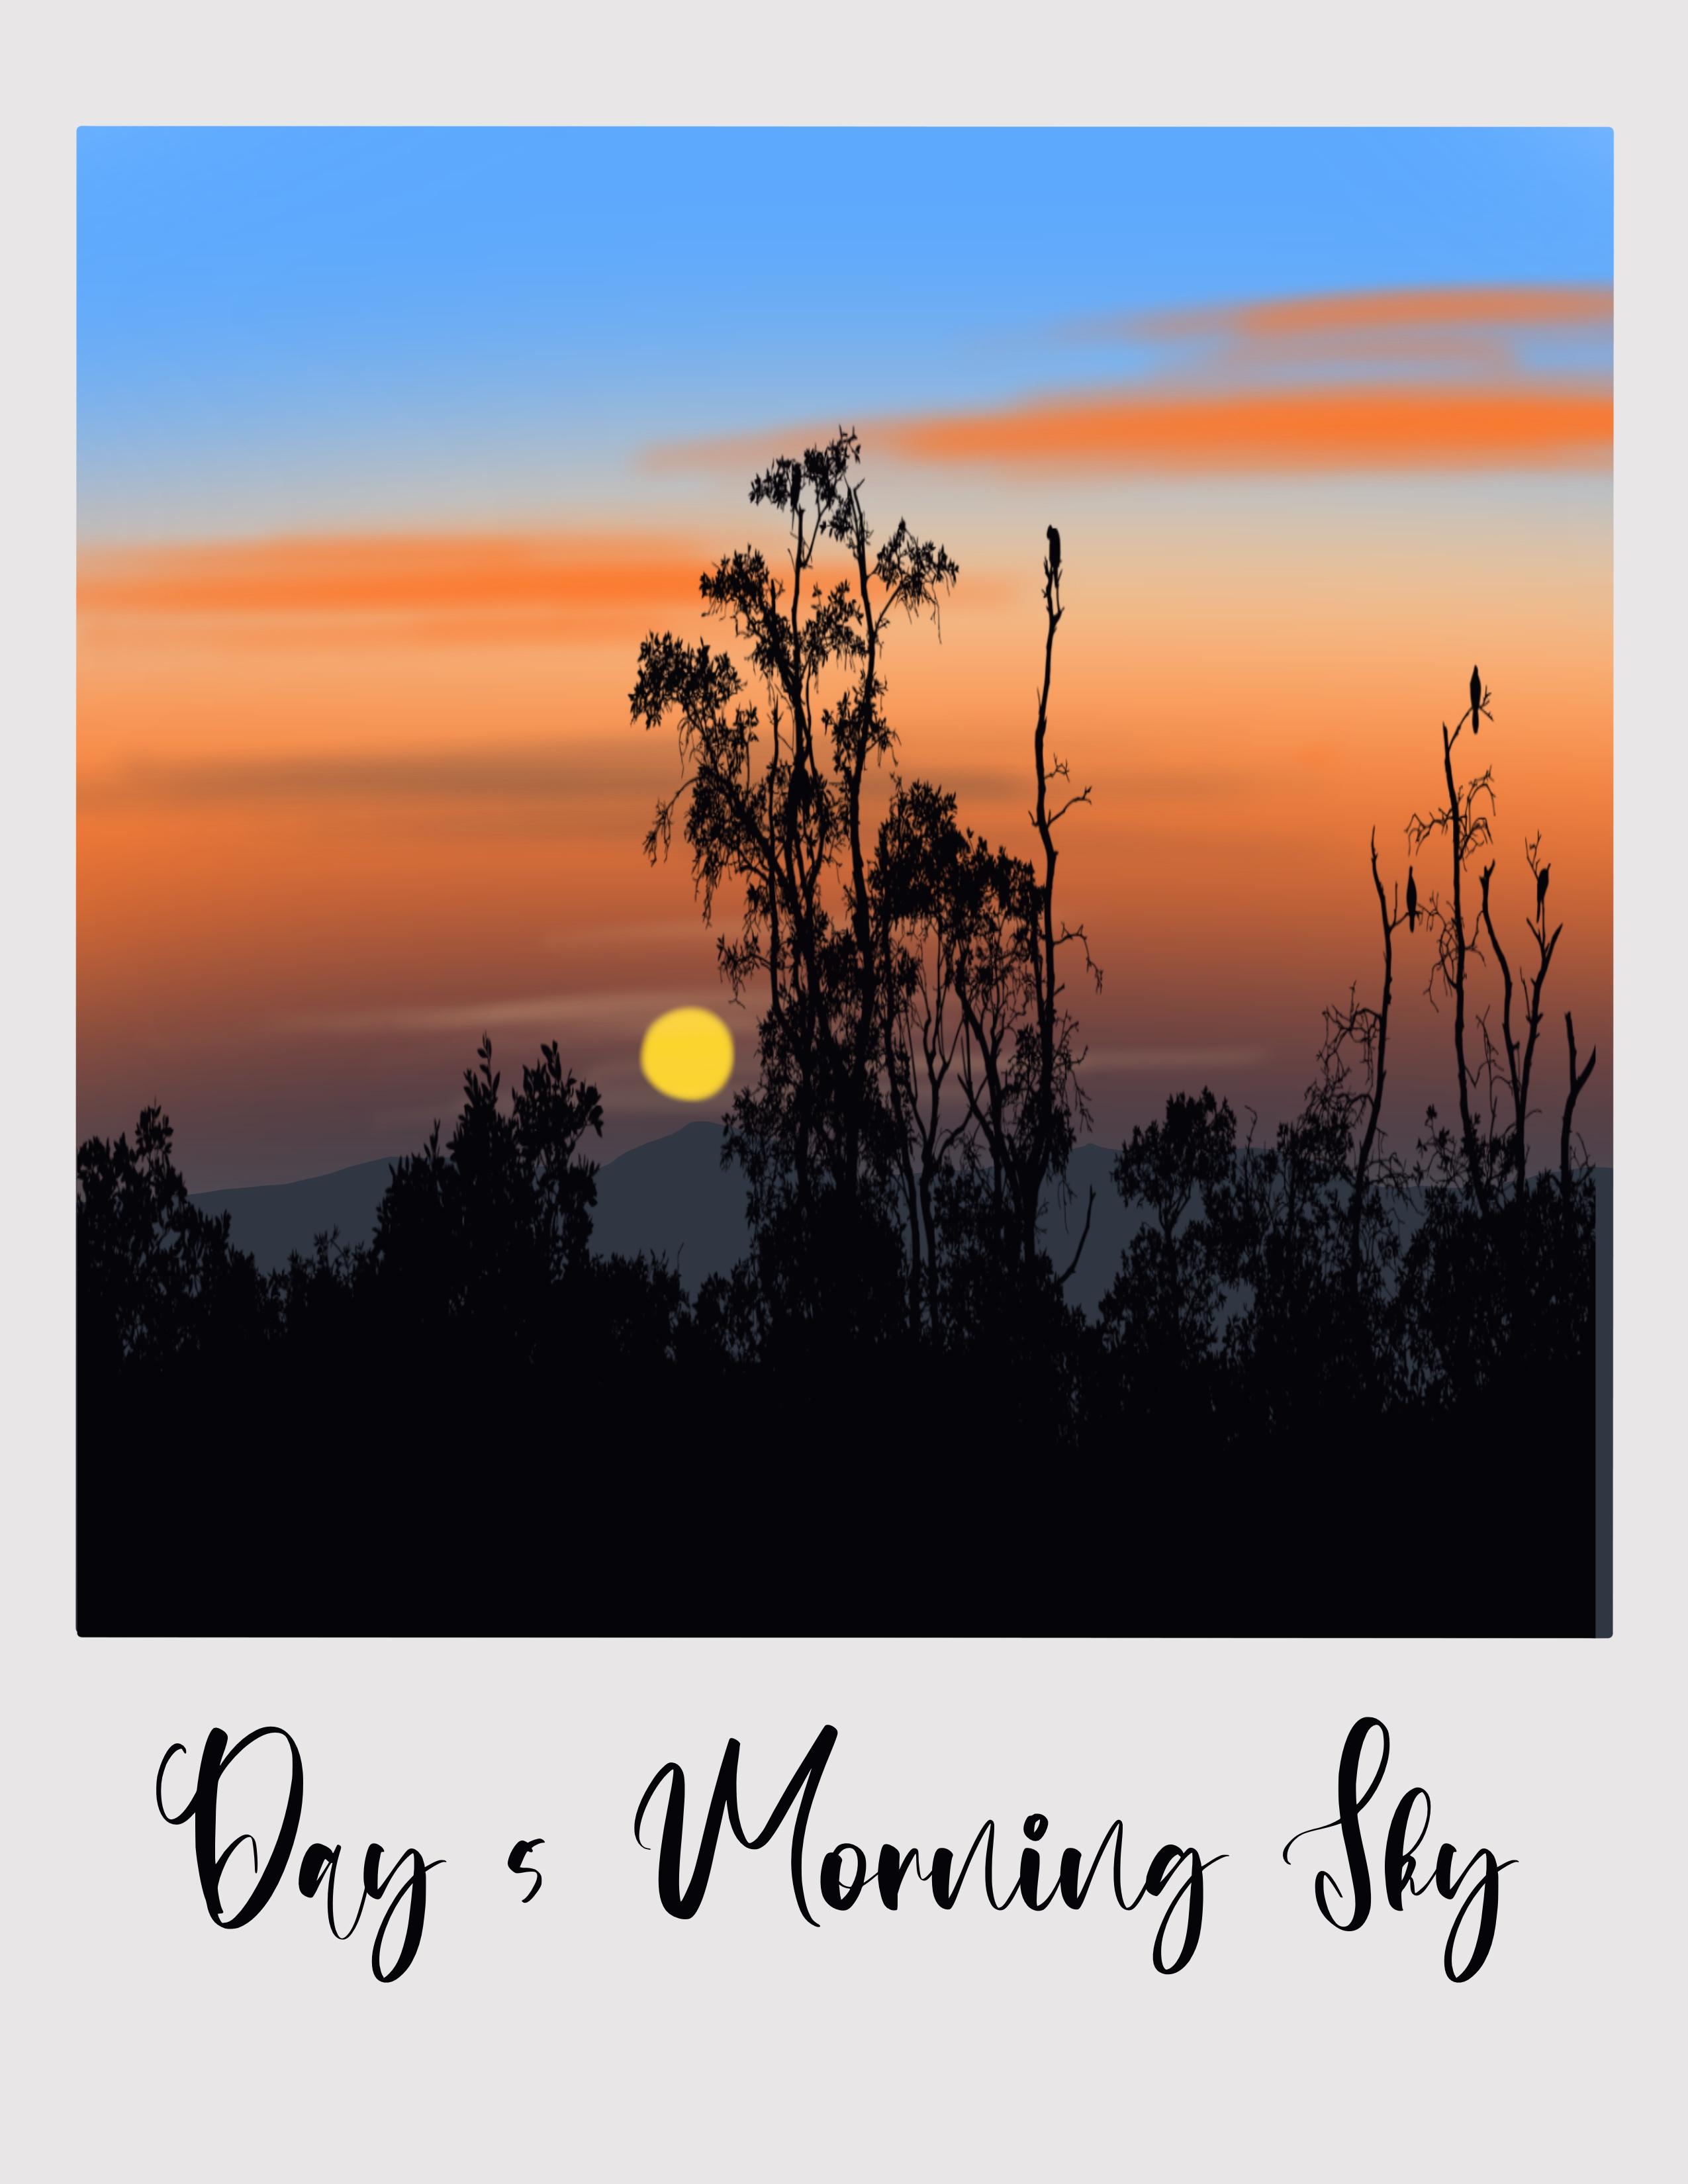
13. Day 5 - Morning Sky: Hello. Let's start
our DeFi projects. So I'm going to start by
importing their Polaroid Canvas. Let's look at the color palette that we're going to use today. And I have this day, if I color palette, I'm going to pick the first
color from this palette. Go to the Brush Library, airbrushing, and select
the medium brush. The size of this brush to
decide to do about 25%. Infill the top section
of the Canvas with this color by applying
horizontal strokes like this. Now go to the color palette, the second color, and
fill the next section, again using the same brush. Go back to the Bartlett. And this Todd color
from the palette and fill in the next section by drawing one horizontal
line like this. I'm going to reduce this
size and I will set it to around 15%. Go back to do color, palate the food color, and fill this section
with this color. Finally, I will pick
this fifth color and fill in this bottom
section with this color. Now these are the
colors for the sky. That bone, I just mean
cyclin Gaussian blur. Instead the blog to around 40%. I'll go to the layers and rename this pain pill or
layer as a guide. And go to the next layer, rename this layer as clouds, where we will be adding very
simple and easy clouds. Now go back to the
color palette. And big this dot color
from the palette. Go to the Brush Library, airbrushing, and select
this soft airbrush. And will reduce the size of
this brush and set it to around 30 per cent and
opacity set to 100%. And I will add fuel
load is on two strokes. And these are going
to be the clouds. It's very simple. Just add 0 random
horizontal strokes in few places like
this. And that's it. Very simple and easy
way to add the clouds. All I'm doing is adding very gentle and very
gentle horizontal strokes. And adding in these clouds do not apply a lot
of pressure by adding this horizontal
strokes at them. Very gentle. Now go back to the ballot and big
this fifth I loved from the palette and I'm going
to reduce the opacity of the same brush and set
it to around the eye. We'll set it to
around 50 per cent. Size is the Lizzie marathon 15%. And I will add few
more horizontals, strokes like this, and add few more darker clouds here
in the bottom section. Now go back to the layers
and create a new layer. Let's add a tiny sun. So I'm going to rename
this layer as sun. Light clipping mask
on this layer. Go to the color palette
and pick this last color, the yellow color
from the palette, using the same brush. I will say they'll be
city 200 bucks and reviews this size or increase the size to
around 20 per cent. And using the same
soft airbrush, I'm going to add a tiny
so good. Like this. Now let's move on to
the next section.
14. Painting the mountain and trees: And I'm going to
create another Leo. Going to rename it as mountain. Apply clipping mask on this layer will do
the color palette, and I'll pick this fifth
color from the palette. Go to the Brush Library, calligraphy, and select
the mono line brush. I visit the size of this
brush to about 15 per cent. I will set the size to around 20% and
opacity set to 100%. And I will draw the mountains or just
outline the mountain here. And now drag and drop the color. The mountain appears to
be a little too high, so I am going to tap on the arrow icon and
move it down here. Let me move this down. I'm going to place it here. I'll go to the Layers and create a new layer of like
clipping mask. And I'm going to rename
this layer as trees, where we will be adding
the trees **** silhouette. Go to the Brush Library. Go to the color palette and pick this black color
from the palette. Go to the Brush Library, do the 20 day projects, set one, and go with this. They fight stamp. I'm going to set the
size of this time to around 50 per cent and tap
on the screen to add those. Now use the arrow icon and adjust the
placement accordingly. Make sure that the mountain behind this layer
should be visible, not completely,
but a part of it. And displacement looks like
I'm going to stop it here. Now. I'm thinking about adding some more lighter
clouds around the sun. So go to the sand layer, will pick this second
color from the palette, go to the Brush Library, airbrushing, and select
the soft airbrush. And I will set the
size is set to whatever it was said previously, reduce it to around 15% and add a few more horizontal
strokes around the sun to add this lighter
colored clouds around it. At the marriage until you do a lot of casual on the
tip of the pencil. It has to be like really light. I will stop it here and
it's time to add the text. So let me just do that. Go to Actions, Add Text. Now teens still
allowed to black. Just typing in the cookie. You're not able to
scale it because we are doing it in the sand layer. So tap on the layers
and delete this layer. I bought the sun and go back
and go to the trees layer. And now the text added will
be about the trees layer. So let's do that. So you're already
in the trees layer. So whatever texts you want
to add is going to come. I bolded choose layer, so now you can add the text. I bring it down, replace this text and
type in as the five. I am going to need
met the morning sky. Now select the text and change
the font to match book. Increase the size. Then now adjust the placement of this text and
bring it to the same though that we are done
with the DeFi project. I enjoyed painting this one and this guy looks
really beautiful. Now, let's go back
to the gallery and rename this
untitled artwork. Men go to define that.
15. Day 6 - Pastel Sky: Let's start today's project by importing the
Polaroid Canvas. I have this day six
color palette here, which we will be
using for our deck. And I would go with
this plus color that is local to the Brush Library, airbrushing and medium brush. I will set the size of this
brush 15 or 12 per cent, and I will draw a
circle like this and this top left corner. Now go back to the palette. And I will pick this second
color from the palette and draw the circle
around this circle. In this section. Now, go back to the
palate and pick this third color from the palette and
repeat the same step. I'm going to fill in this section and cover
it with this color. Lastly, I will go for this food color and fill this remaining
section when this color. Now let us blend all
these three colors. Tap on adjustments. I couldn't go some blog. And I'm going to set the
blur to about 40 per cent. Yeah, I'm going to stop it here. Now go to the layers and
rename this paint Hill, Aliyah, I'm going to
rename it as Guide. Now go to the layer three and
rename this layer as sun. To do the color palette
and make this fifth color from the palette go to the
Brush Library, airbrushing. And I will go with
the soft air brush, adjust the size to about
15% and opacity set to 100% and add tiny circle. Now let's blooded of beds. That bone the adjustments icon Gaussian Blur and set
the blur to about 10%. Now, we need to add the
reflection of this guy. So let's do that. What I'm going to
do is I am going to combine this guy and
suddenly you're together. I'm going to pinch
these two layers together to make it
as a single layer. And let's add the
reflection now. So tap on the Actions. I can copy and paste. So you will have another
copy of this guy, Leah, now flip it vertical
and bring it down. Just a placement accordingly. Now we can see it is
coming outside the canvas. Or what we need to do is go to this inverted image and
apply clipping mask. Now you can see this
within the frame. Now let's add just the placement of this inverted image
that is the reflection. Use this blue dots on the corners and
adjust the placement. Now, I will go to the eraser. And it is this top section of the inverted image that
is covering up this guy. As you can see. I'm going to bring
it here somewhere in the center and
it is still see this white section. Yeah. This is it.
16. Adding the trees and reflection: Go to the Layers and create a new layer, apply
clipping mask. And I am going to rename
this layer as trees. Go to the color palette
and pick this last color, black color from the palette, go to the brush light duty, 20 day projects set one. And I will go with
this day 63 stamp. I'm going to set the size. So this than I do about 50% and just tap
on the screen like this. Now using the arrow
icon that you see, just the placement and bring
it to the center like this. Do exist the placement pure. This looks good. Now. This looks good right? Now, we need to add some labels. So let's do that. Now go to the color palette and make this bold
color from the palette. Brush library painting. And select this dry brush. I'm going to set
the size of this to about 15% and opacity
is set to 100%. And I will add horizontal strokes at the
ripple effect on this lake. So all you have to do, you're just dragging the color
that's already present and adding like the reported
reflection on this lake. I'm just pulling this dragging the tip of the brush
on the other side as well. Once this is done, I'm going to erase this section here because there is no tree, but you can still see
this black ribose. Don't want that. So I'm just erasing it. Now go back to the Brush Library elements and select this ocean brush. I'm going to set the opacity of this brush to about
seven people are sent and set the size to about 20 to 25% and
add some ripples. Again, applying
horizontal strokes and filling in this section. You don't have to fill
the entire section, just add some labels
here and there. This section that you'll
see, but the ripples. And that's it. We are done with
this basics project. It's time to add the text. Now. Let me just do that. Actions add. Before that, let me just change
the color to black. Now, Actions Add and Add text. I'm going to bring it down
here, replace this text. I'm going to name it
these six. As to Sky. Select the extent Jane
the phone, too much, bulk, breeze the size. Just the placement of this text. And then we are done with
this stage six project. Now go back to the
gallery and I am going to change this to be six. Dan.
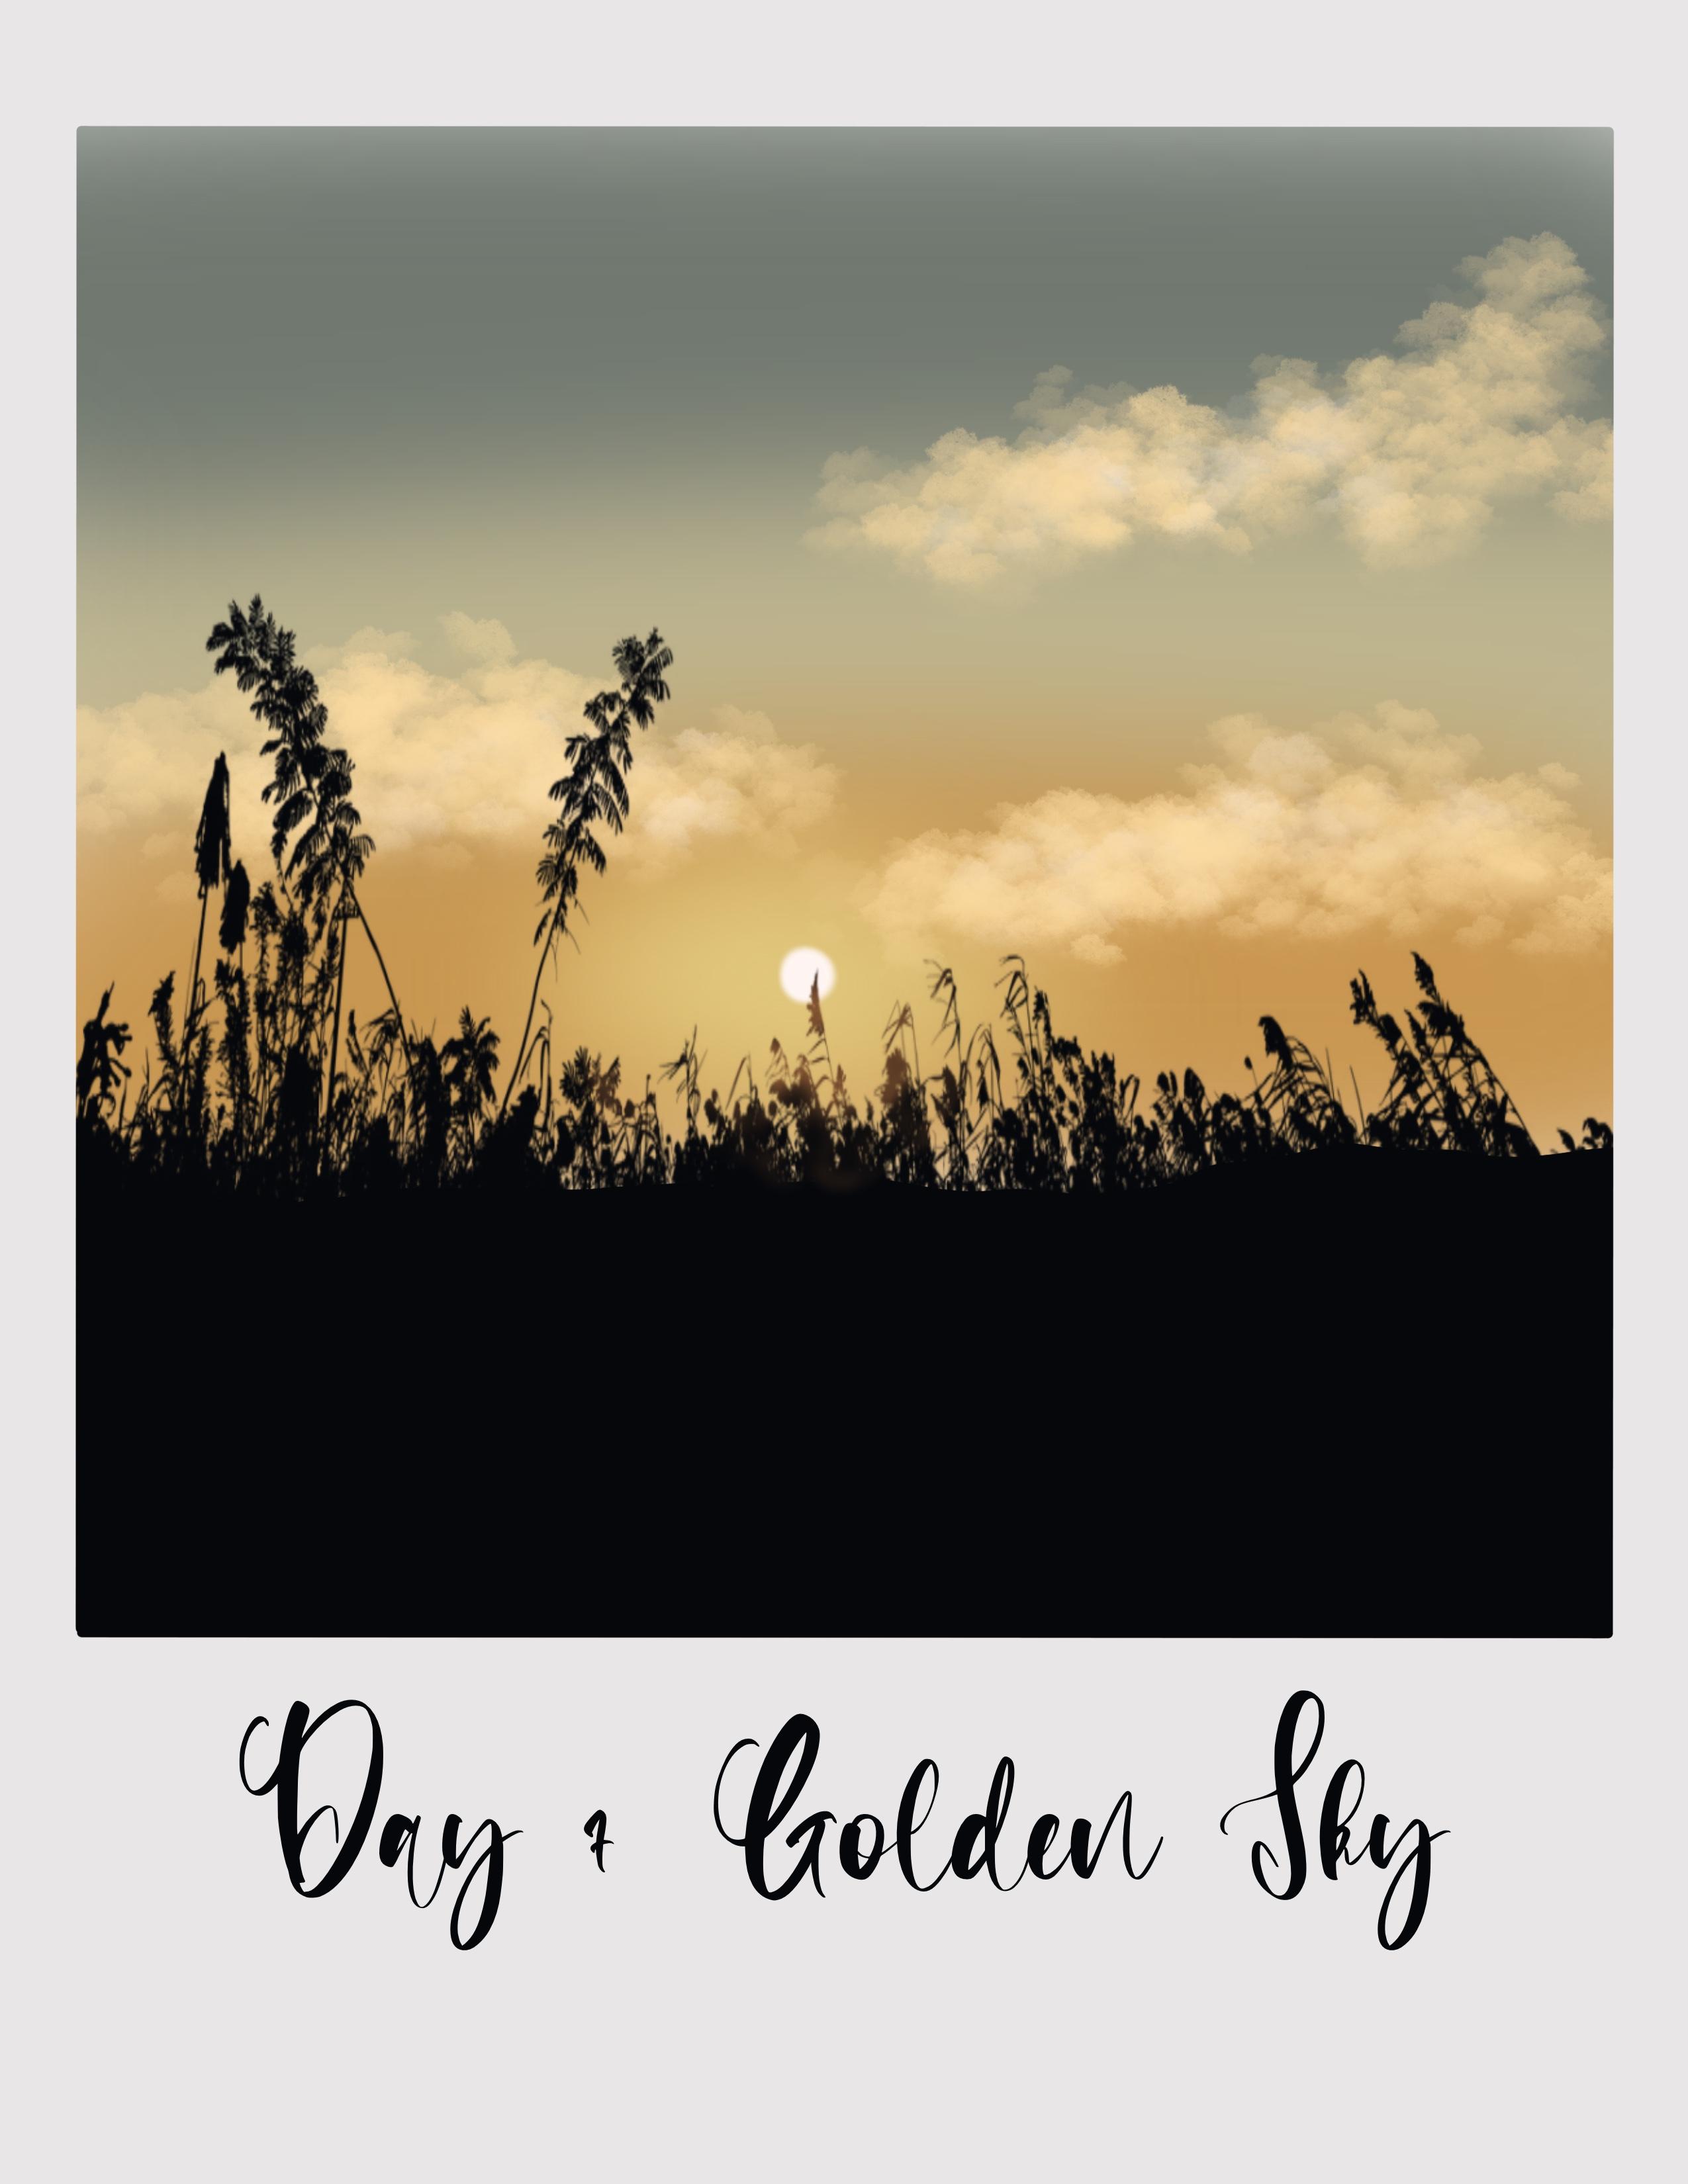
17. Day 7 - Golden Sky: Welcome to day seven. And today we're going to be
painting all Golden Guide. We're going to invoke
the Cadbury impulse to the file and import it to
the appropriate application. Could be the color palette. I have this A7 color palette. These are the colors that we will be using
for this project. And I'm going to pick the
first color from this pilot, will do the brush
library airbrushing and go with this medium brush. So I'm going to set the size of this brush to around
clinical isn't. And I start applying
horizontal strokes, usually for this guy. And I'm going to fail more than 1 ft off the
canvas for this color. Go back to the color palette, pick the second shade, and the next section, using this color
and the same brush. Now go back to the
color palette and this toward color
from the palette. And fill in. Before Dr. Canvas are filled with
these three colors. You need to create
a seamless blend of these three colors so
you know what to do. Go to the adjustments
section, Washington, and set the blur to around 30% to create a seamless blend of
these three colors. Now it's time to add the clouds. So tap on the layer and I'm going to rename
this layer one. And layer two is going
to be the clouds. So once you're done with it, we're back to the
color palette and pick this bold color
from the palette. Now go to the Brush Library, organic and select this
name for the splash. So this is the brush
that we're going to use to add the clouds. So I'm going to set
the size of this brush to around though 6%. And I will just tap on the
screen like this using the tip of my pencil and add the clouds
in a random shape. All I'm doing is just
tapping the tip of my pencil on the screen
to add the clouds. You see it we have
scattered clouds. Now I go back to the
color palette and add some more dimension
to this cloud. So I'm going to pick this
fifth color from the palette, which is almost
white or off-white. And I'm doing and
repeating the same step. And I'm just adding the clouds or the one that we
have previously added. By just tapping the
pencil on the screen. I'm thinking of going back to
the color palette and pick the food color and
add some more clouds. It and make it more
dense or intense. Just trying to team the shape of this cloud by
just tapping on the screen. Now you don't have to worry
about the shape of the cloud. You can go ahead and add your own sheep loud,
it doesn't matter. I think I was top it Shaw and move on to the next section. Go to the Layers. And I'm going to create
a layer just above the sky layer on the glass icon. And it automatically follows eight inch tail, as you can see. And I'm going to rename
this layer as Sun. So I'm adding the sun behind
the clouds that we painted. The color palette
and six color from the palette to the Brush
Library, airbrushing. And select this
soft blend brush. I'm going to set the PCT
200% and size to around 6%. And I am just adding
some really light, yellow light behind
these clouds here. I will be adding the sun on top. Perfect. Now tap on the adjustment cyclin
Gaussian Blur and set of low to around 30% or maybe
I'll set it to around 25%. Now go to the color palette and pick this white flight color from the palette brush library
with the soft airbrush. And I'm going to set
the opacity to 100%. I will set the size to
around 20% or even 20%. And I will add a tiny hole in the center so that it
looks like a glowing sun.
18. Adding the tree silhouettes: Now it's time to move on. Next layer, back to the layers and create a layer
right above the clouds. I going to apply clipping
mask on this layer of Phi. And I'm going to need met. This is going to be
the ground section, so I'm going to
rename it as ground. Go to the color palette and make this black color
from the palette. And I've been going
to the Brush Library, calligraphy and select
the monoline brush. And the size is set
to around ten to 15%. And I'm going to draw an IV line like this and fill in
the ground section. Now it's time to add the silver. I have done that I've included in the
brush library for you. So before that we will create a new layer and apply
clipping mask on this layer. And I'm going to rename
this snail its price. Now go to the Brush Library and go to the brush stamp set, that is to 20 day
project set to one. And I will go with goldman
this day seven stamp. And I'm going to set the
size of this brush to around 35% and add this damp. You'll note that on the arrow icon and
adjust the placement of this class and extend it or expand it to the sites using the blue dots that
you see on the calmness. And I like the placement
of the grass here, so I'm going to stop the cure. Now this section here
that you see right below, the sun is going to be
illuminated with the sunlight. So it is going to
appeal a lot lighter. So we are going to
add some brown shade. I'm going to do is go to the glass layer of like
alpha lock in which Leo go to the color palette and pick this last
color from the palette. Knife to brush
library, airbrushing. And select this soft airbrush. And I am going to lighten section by adding
some brown shape to the glass area here
so that it looks like this, illuminated by sunlight. So it has to appear
a little lighter. Just going with this last
stroke and lending wet, blending it with
the black grass. Going back to the color palette, if you think it is too light, you can go and make
it a little darker. Let me just zoom in and
show you how this looks. Now, you don't need this
whole section to be brown. Ada died when Lucas son
needs to be lighter. So I'm just doing that. Is you can go and make it
dark though. This looks good. Now. Let me mouth and be done with it. Nice at Linfield dig, it's time to add the title. So let me just do that. Tap on the Actions. I can select this text and replace it. Is sovereign. Going to rename
this as Gordon sky? I'm going to change the
form to match book. I didn't say let
me just do that. Adjusting the placement of x. That's it. We are done with
the D7 project. Holden Skype. I hope you enjoyed
painting this. Now go back to the gallery and lead to swim in
this project as D7. And we are done
with this project.
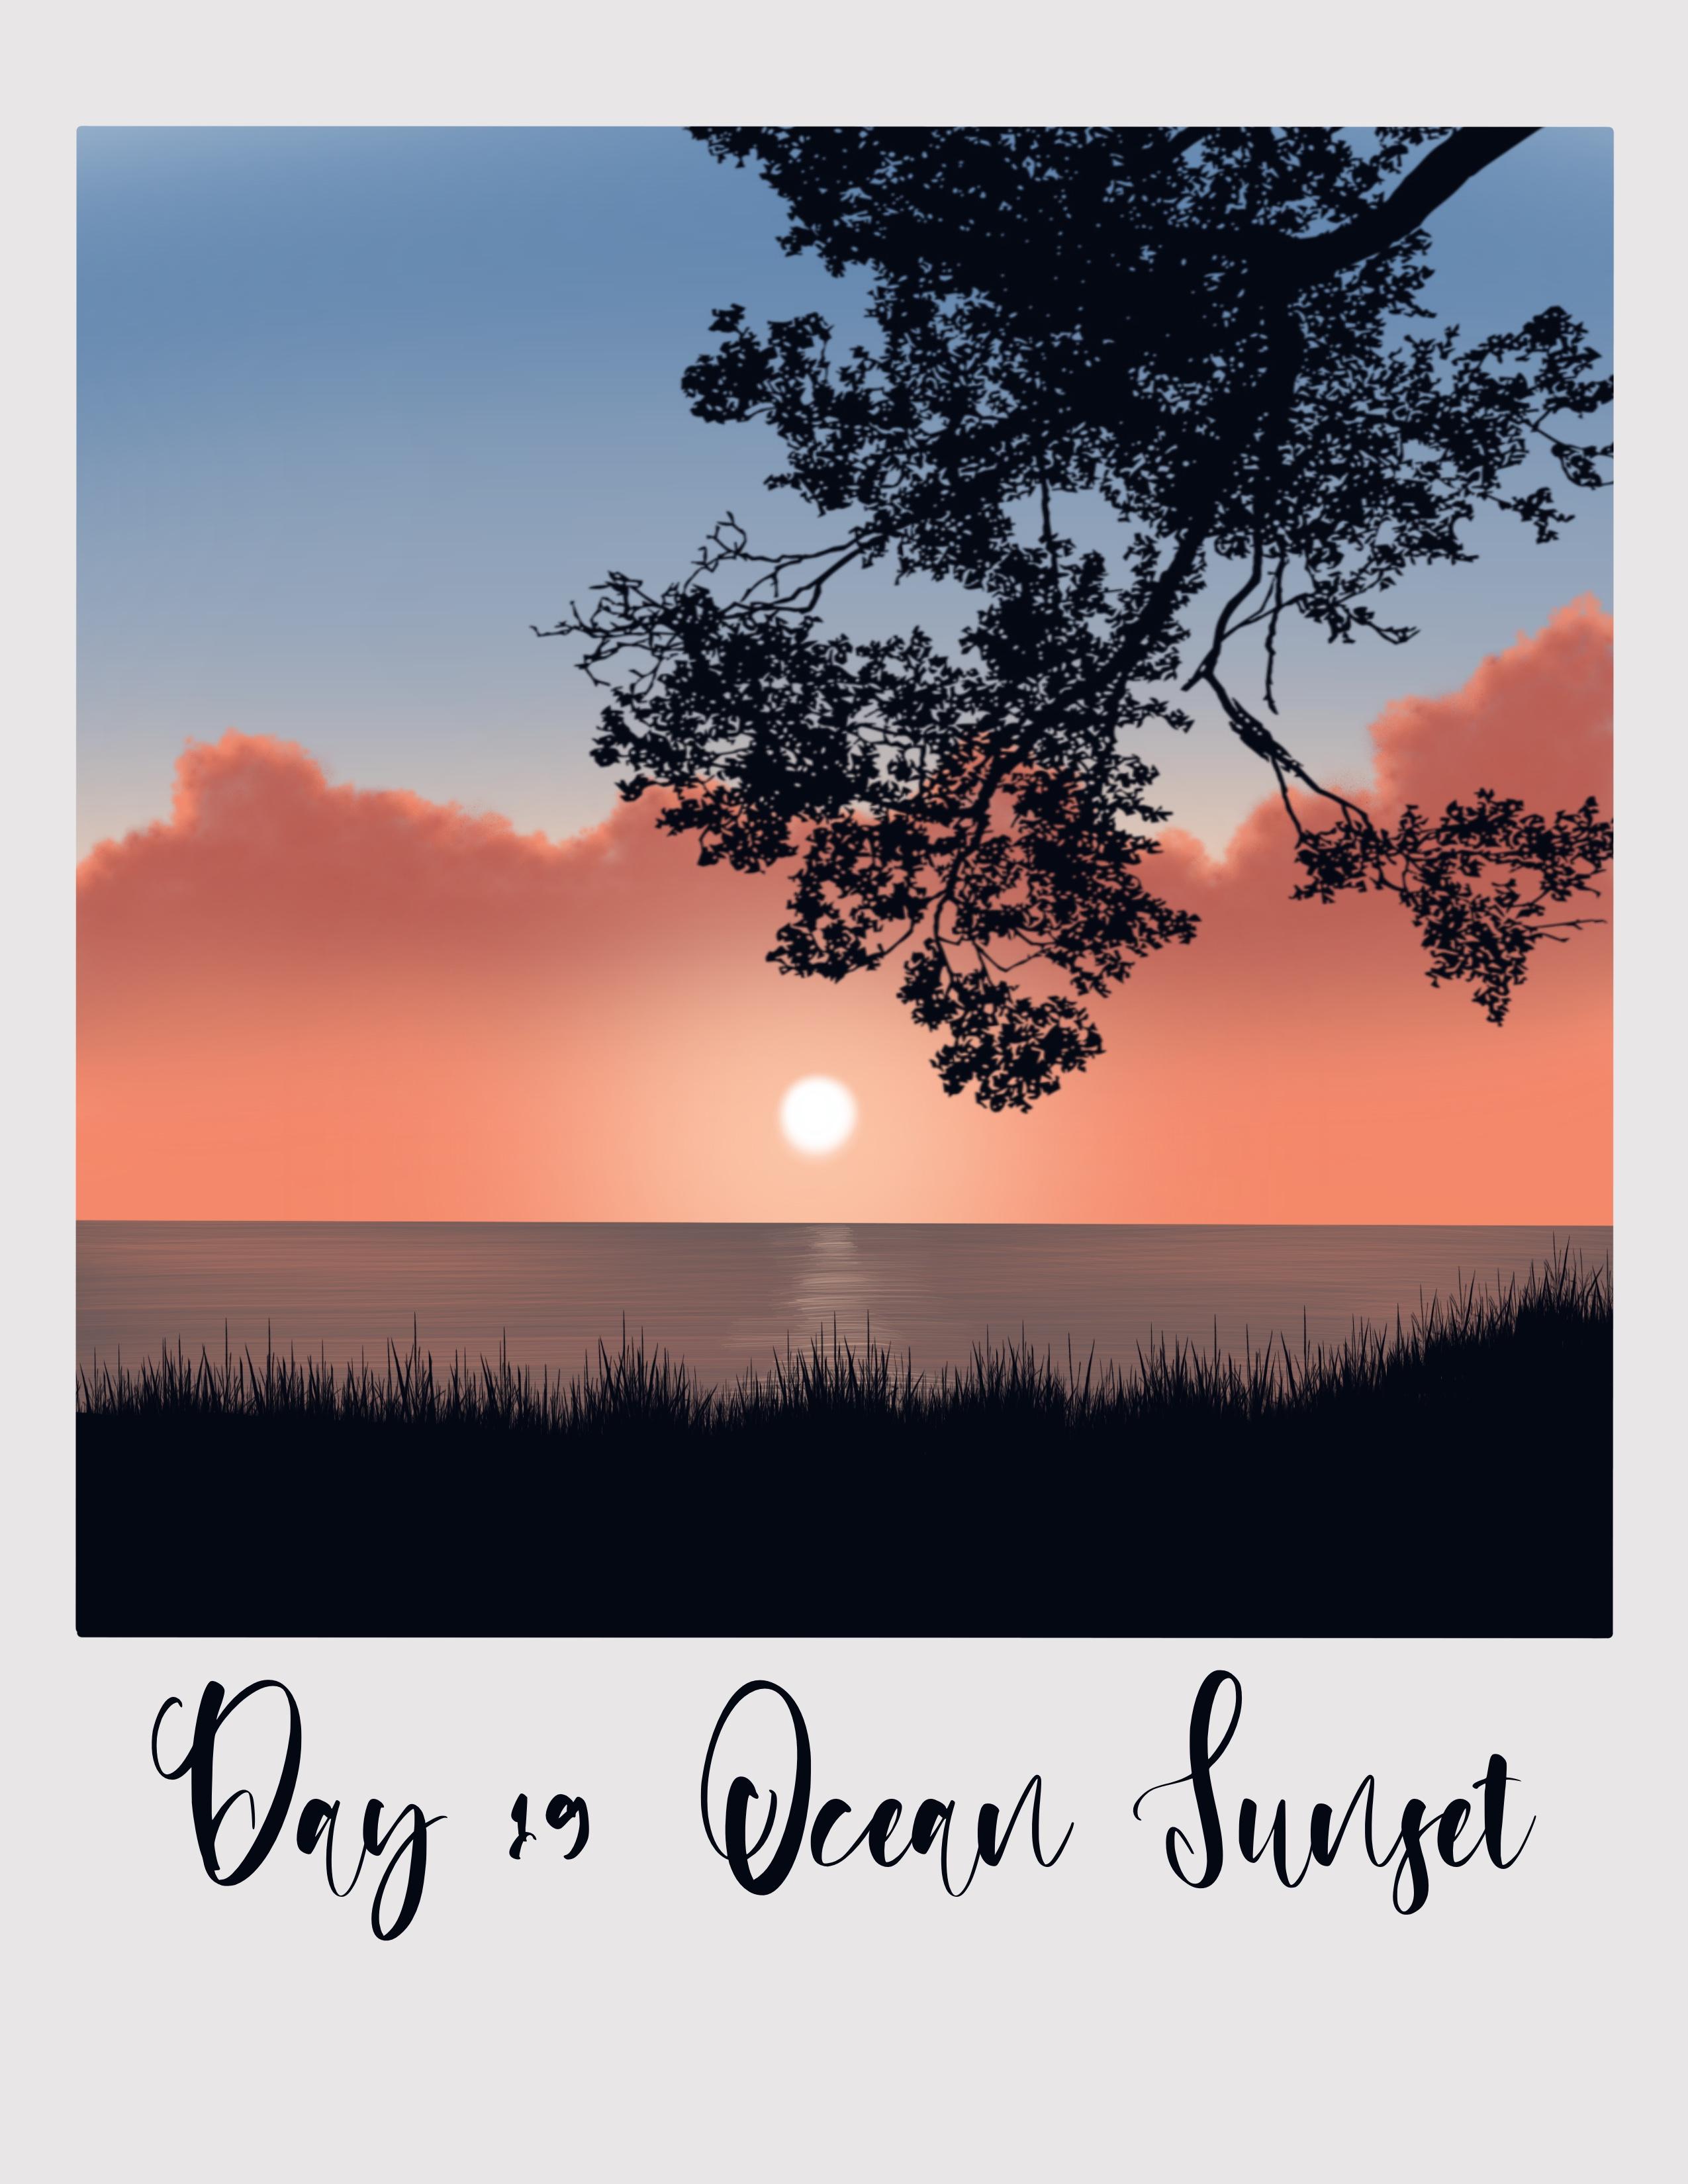
19. Day 8 - Sunset Behind the Trees: Hello, it's starting
to be a project. Let's start by importing bill
goes to the application. When do I just stick there? And now let's take a look. I lived bounded for this. I have my color palette
trading cyclists, we will be using just by
colors for best sticky. Select the second
color from the palette and go to rehash liability. Airbrushing. And go read them
medium or soft airbrush. Going to set the size of this
brush to around 20 degree. Anyone poison ivy Finland go. I really feel almost half of
the cameras with this color. Now go back to the
color palette. And big bestowed by
law from the palette. And for the next
half of the canvas. Red, this color stamp to blend the colors to tap on
adjustments. Good question. No. I will take note on 30%. Now go to the layers and rename this painkiller
layer as a guide. Now go to this layer three
and unmute duty name this layer three as clouds. By now I'm pretty
sure you must have understood why working in layers is recommended because if you have to correct any
element in your painting, it is much easier to do it. Now, I will go to the
color palette and pick the first color
from the palette. On brush library routines, they paints and select this five nodes inside the size of this brush to around 15% and opacity
is set to 100%. And I will start with gloves, so I will go with
circular motion strokes. Add the clouds. So I'm going to start from the top section of
this guy by Googling radars agglomeration
and almost gobbling bill DOD section or
began with clouds. Now I will reduce the
opacity folder down to 80%, 80%, and I will start adding
lighter shade clouds. In the same. Non-doctors have a go with this hopeless
truths like this. Next section. You can still see the color underneath. That is, you can still
see the colors of this guy below the clouds. So that is what you
want to achieve. We need differentiates. Four. Now I said obesity little more. I will say 90 v and then add some babble lobes on the edges. I'm Linda said, or reduce the size further down
to train people isn't. And add some clouds, leaving some gaps
in-between am adding some more smaller
clouds right below it. And again, do not apply
a lot of pressure on people feel fence
and it needs to be. Gentle strokes that will reduce the opacity to 80% and again, continue adding lighter clouds. You, all I'm trying
to do here is use different shade of a shade
of the color on the top and lighter shade on the bottom so that it looks
like a shadow on the clouds. Notice that I am not
filling it completely. You can still see the layoff of what the
color underneath that is. You can still see the
color of this guy. I reduce the size of the
brush further down and adding some distinct layouts using no PCT also further down
at all, 50 per cent. Now, again, the shape
and the size of the CloudStack to add up
to you how you want it. You can find all
different shades of shades and shapes of cloud. So what you're doing
feeling have to follow. What I'm doing is I'm just
showing you how you can do it. It's up to you to experiment. Clouds retail father
are being stood up your small grain size compared to ones
which are your yield. I'm going back to the
color palette and picking default
second color from the palette because I
feel that the clouds here in the bottom
section of beers. When going over and
using the same brush, I'm just adding some sky colors. I slide down. You'll notice that I'm not applying
a lot of casual. I'm just managing, delete
a blank Jones yonder, get both my pencil and lightening few areas
of the clouds. You can see the
color, eventually, how the colors
reduced by just going over it with the same
color as this guy. I'm thinking of drug use in
the clouds farther down. So lively, cool or warm, red snaking Carlo, which is completely fill
it with a color that you will still not
happy with how? So I'm just going to completely, you could completely
erase it all, covered it with this color.
It's one and the same. So I'm just covering it
with this color completely and back to the color palette and pick this first
color from the palette. I'm Linda said this isotope, this brush to around 20% and
opposite they said to 50%. And I will add some
lighter shade loud here. The golden section.
20. Refining the clouds and painting the trees: Now let's make some adjustment by going back to
the color palette and make this third color from the palette and go over it. Enlightened few alias. Go back to the color palette and this first color
from the palette. And I'm doing, please
don't hesitate to 100%. And we're going to add or adopting the
values on the sides here. And adult section. Just adding the shadows, the clouds that it will mean
that it appears to light. You can go and again, going with this Oakland motion, just causing you're analyzing,
this actually looks. Go back to the color palette
and pick the second color. Going to lighten the areas. Now, as I mentioned earlier, you can play around and
experiment by changing the size of the brush until you're happy with all
the clouds appear. So I think I'm going
to stop it here now. On the Layers and
create a new layer. I'm going to rename
this layer to as trees, where we will be
adding the trees down to the color palette
and pick this last color. And apply clipping mask on the new school back to us
and apply clipping mask. Now go to the color palette
and pick this last color, that color for the
two silhouette. Go to the Brush Library.
During the day before. Take set to one and select
the eighth or G stamp. When you do said the
size of this dam to detect it to around 40% and just tap
on the screen like this, tap on the arrow
icon that you see to access the placement
of this stamp. By using this blue dots on
the corners that you see. Now you can place your order, just the placement of
the trees accordingly, hope you liked it. Slopes. Good. Need to add one
more element though this isn't one going
to the color palette. And I will make this food color from the palette two layers
and create a new layer. You're going to be
adding the setting sun. So I am going to
rename this layer as sun and apply clipping
mask on this layer. Now go to the Brush Library, airbrushing, and select
the soft air brush. We're going to set the size
of this brush to around 15. Do I don't drink the poison
ivy ad also good like this. Now, tap on the adjustments. I couldn't Gaussian Blur
and said the blood to 15%. So that looks like it's glowing. On top of this, I'm going to draw another circle like this, this same brush and
add this sun so bad now it looks like there
is a blue around the sun. This is it we are done
with the project. Now it's time to name
or add the text. Now before adding the text, I need to change the
color of the exon, going to pick this black
color from the palette. Now that bone actions, I can add text. We're going to bring it down and I'm going to rename it as they ain't no sunset
behind the trees. Now let's select the text
and change the form. I'm going to change the
font to match book. Now, adjust the
placement of this text. Yes. We are done bed eight a day. Now go back to the gallery and you name this untitled
artwork as they age.
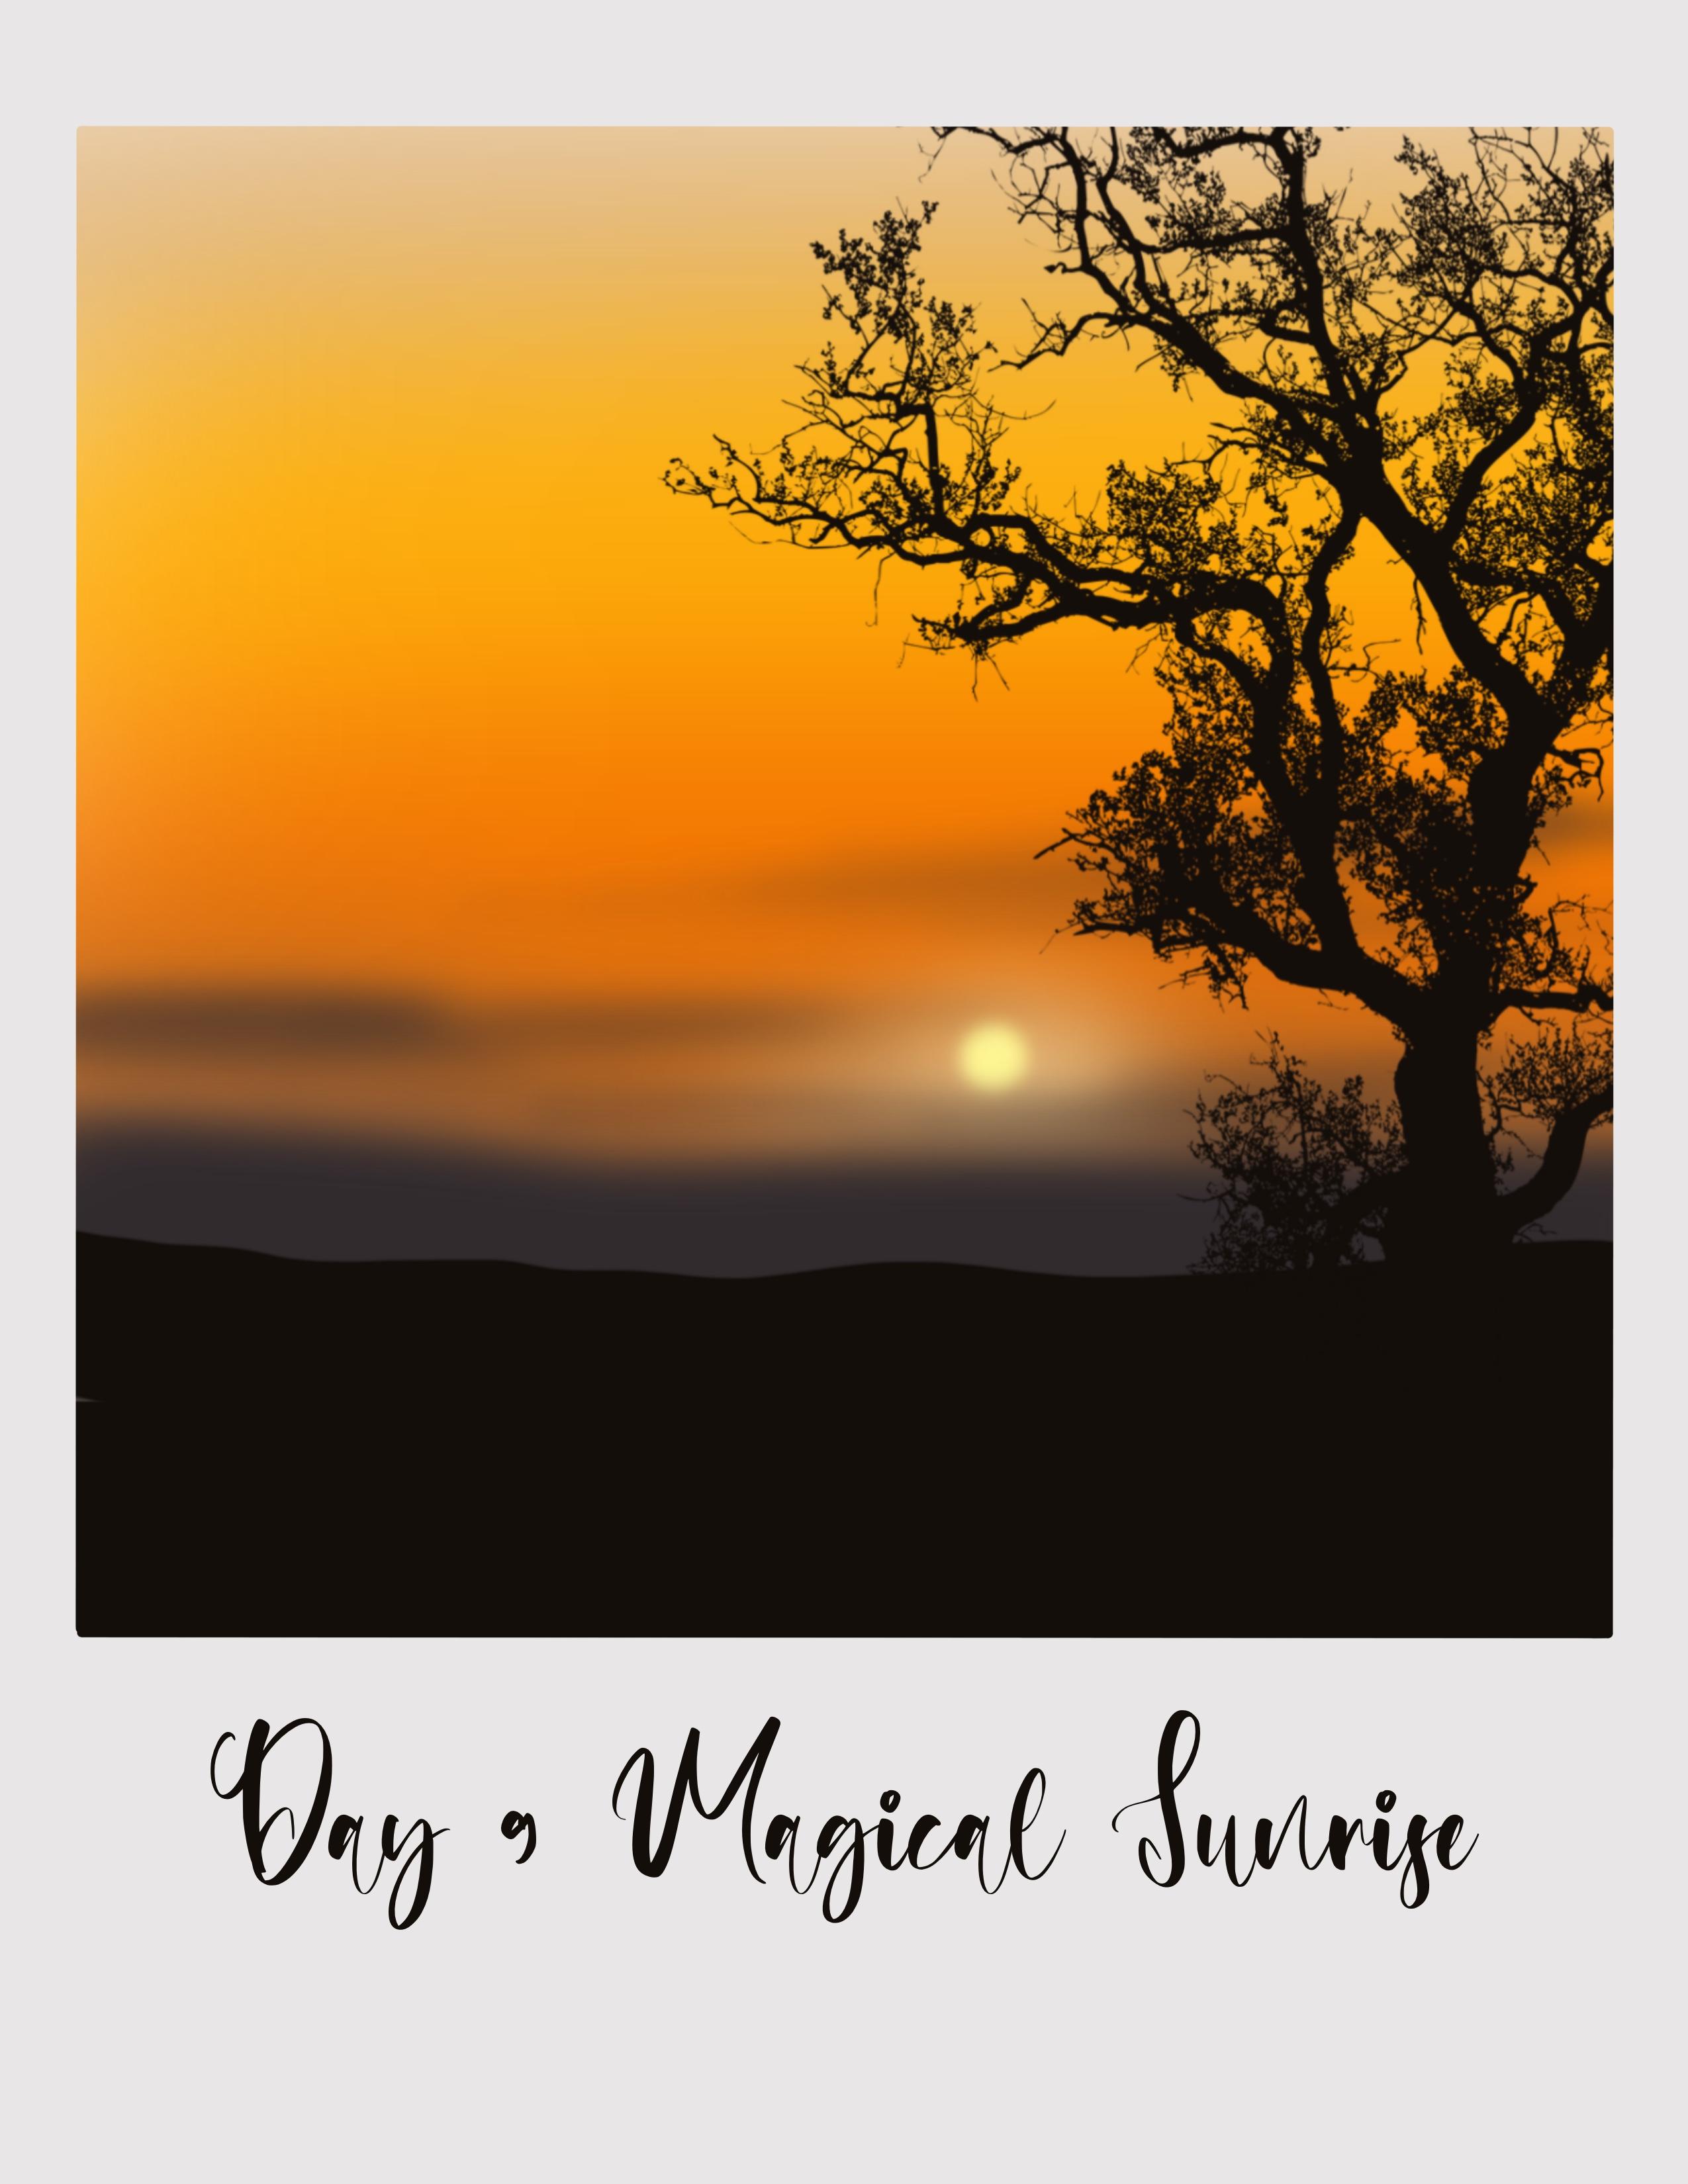
21. Day 9 - Magical Sunrise: Hello and welcome back to
day time being nine project. Let's start. I'm going to start by importing the Polaroid Canvas to the
appropriate application. The canvas. Now let's look at the color
palette for this day. Nine. So tap on
the color palette, and this is the color
palette that is D9 color palette we are
going to be using today. So, um, we'll pick
the first color from the color palette, go to the Brush Library. Airbrushing medium brush,
set the size of this brush to 15% of the city's
set 200 per cent. And the first one, food with this color
pipeline, horizontal strokes. Next big the second color. Repeat the same process. Apply horizontal
strokes like this. And the next one
go to the Canvas. Next, go back to
the color palette, pick the third color. Repeat the same steps. Fill in the next
portion of the canvas, and go back to the
color palette. Though food color, which is a shade of brown and fill
in the next section. But this color and the school
will be this guy colors. Now we need to
blend it together, so tap on adjustments. I couldn't go learn
and set the floor to around what the person. So these are the colors that we're using for this
project, for this guy. Now cool, tap to tap on layers and go and rename
this layer I Skype. But the layer three is the one where we are going to
be adding the clouds. So tap on this layer of like a rename this
layer as clouds. By now. Very familiar with
the first two step, that is sky and clouds. Go to the color palette and
this last but one color. And go to the Brush Library. Airbrushing and select
the soft airbrush. This is the brush that we
will use to add the clouds. I will set the opacity of
this brush to around 70%. I bisect it to around 75%, and I will set the size
of this brush to 15%. And I will start
fighting the clouds. It's a pretty simple Cloud. All you have to do is apply very gentle horizontal
strokes like this. Now I think the size
looks too small, so I'm just going to
undo and set the size to 30% and just apply a very gentle horizontal
strokes like this. You're not adding
a lot of details. Because simple Cloud. So all I'm doing
is just a blind, very gentle horizontal
strokes like this. Again, I'm ending
the adding them randomly in different places. Really don't have to
stress about adding this. How the shape should be. Main aim of this project is to have fun to create telephones. Guys will just start getting fruit. Apple on the adjustments. I couldn't Gaussian blur. I'm going to blow the clouds. I'm going to set
though to around 10%. They looked like this release. So distributed clouds. This is six. Now let's move
on to the next section. So tap on the Layers
and create a new layer. Now, I'm going to
bring this layer right below the cloud, cloud layer. And you can see the clipping mask is
automatically applied. I'm going to rename
this layer as we add, adding the sun
behind the clouds. So go to the color palette. And big this sixth color
from the day nine palette. Now I will use the same brush, someone who said
increase the opacity to hundred percent
and I will set the size to around 40%. And I'm just drawing or adding
this horizontal strokes. This is going to be the
glow around the sun. So bone the adjustments. I couldn't go too low and
set the blur to around 25%. And now we'll do the
pellet palate and pick this fifth color from the
palette and use the same brush. I will reduce the
size of the brush to around 35% and add
a tiny circle here. To add the glowing sun. Tap on adjustments. I can gaussian blur and
set the blow down seven.
22. Painting the mountain and trees: So this is it. Just
added a glowing sun. We painted a gluing sand. Now go back to the
layers and create a new layer above clouds
and apply clipping mask on this color palette. And seven color
from the palette, which is kind of dark gray. Now go to the Brush
Library and I will go with the medium hard airbrush. Obesity is set to
100% and I will set this size around 40%. And I will draw the
mountain by going with the slanted line like
this and fill in about one-fourth of the
canvas with this color. This is going to be distant mountain that
bond the adjustments. I couldn't Gaussian
Blur and set the float to and do per diem per cent. Now go back to the layers. And I'm going to rename
this layer as mountain. Now, tap on the plus icon
and create a new layer. And I will rename this
layer, sits as ground. We'll do the color palette
and pick this black color, which is last color
from the D9 palette. Go to Brush Library. And I will go with
the same medium. Airbrush. It the same
size and opacity. Okay, now we have not applied clipping mask on this layer. So go back to the Nios and apply clipping mask
on this ground, LEO, sorry, not Alpha
Lock, clipping mask. The Alpha Lock and fill in this section with this black
color using the same brush. Just filling it by cooling with autism to strokes into
when Phil motion. Do not keep it straight. Go forward, always go
for it. Toby line. Now go back to the
layers and create a new layer where we will
be adding the silhouette. So I'm going to rename
this layer seven. I'm going to type it as three. Apply clipping mask. Now, go to the Brush
Library and select the 20 day projects at one and go with this T9 tree stamp. 200%. I will set the
size of this brush to 20 per cent and tap
on the screen like this. It's too small, so I'm going to increase the size
and set it to 30%. Yes. And now using the arrow icon that
you see in the top, going to flip it horizontally. I'm just going to turn it around or you can
keep it as it is. It's up to you and adjust
the placement of this tree. Now you can see that we have not applied clipping
mask on this layer. We can do that back first. Placement and place it
wherever you like it. You can keep it in the
center or on both sides. Either go for the left side, right side, increase the size, so keep it as it is, however you like it. Now, I will go back to the
layer and apply clipping mask. Just increasing the size and adjusting the
placement of this tree. This looks good. That's it. We are done with D9 project. It's time to add the text. Tap on the Actions. I can add an add x. Now replace this text to bear. We're going to
replace this text. I'm going to type in D9. I'm going to name it
as magical sunrise. Now select the text and genes deformed and adjust the size. Just the placement of
this text by tapping on the arrow icon. And that's it. We are done with
the nine project. I really loud, loud
this project and I hope you enjoyed
painting this with me. Now go back to the
gallery and rename this untitled
artwork as the line.
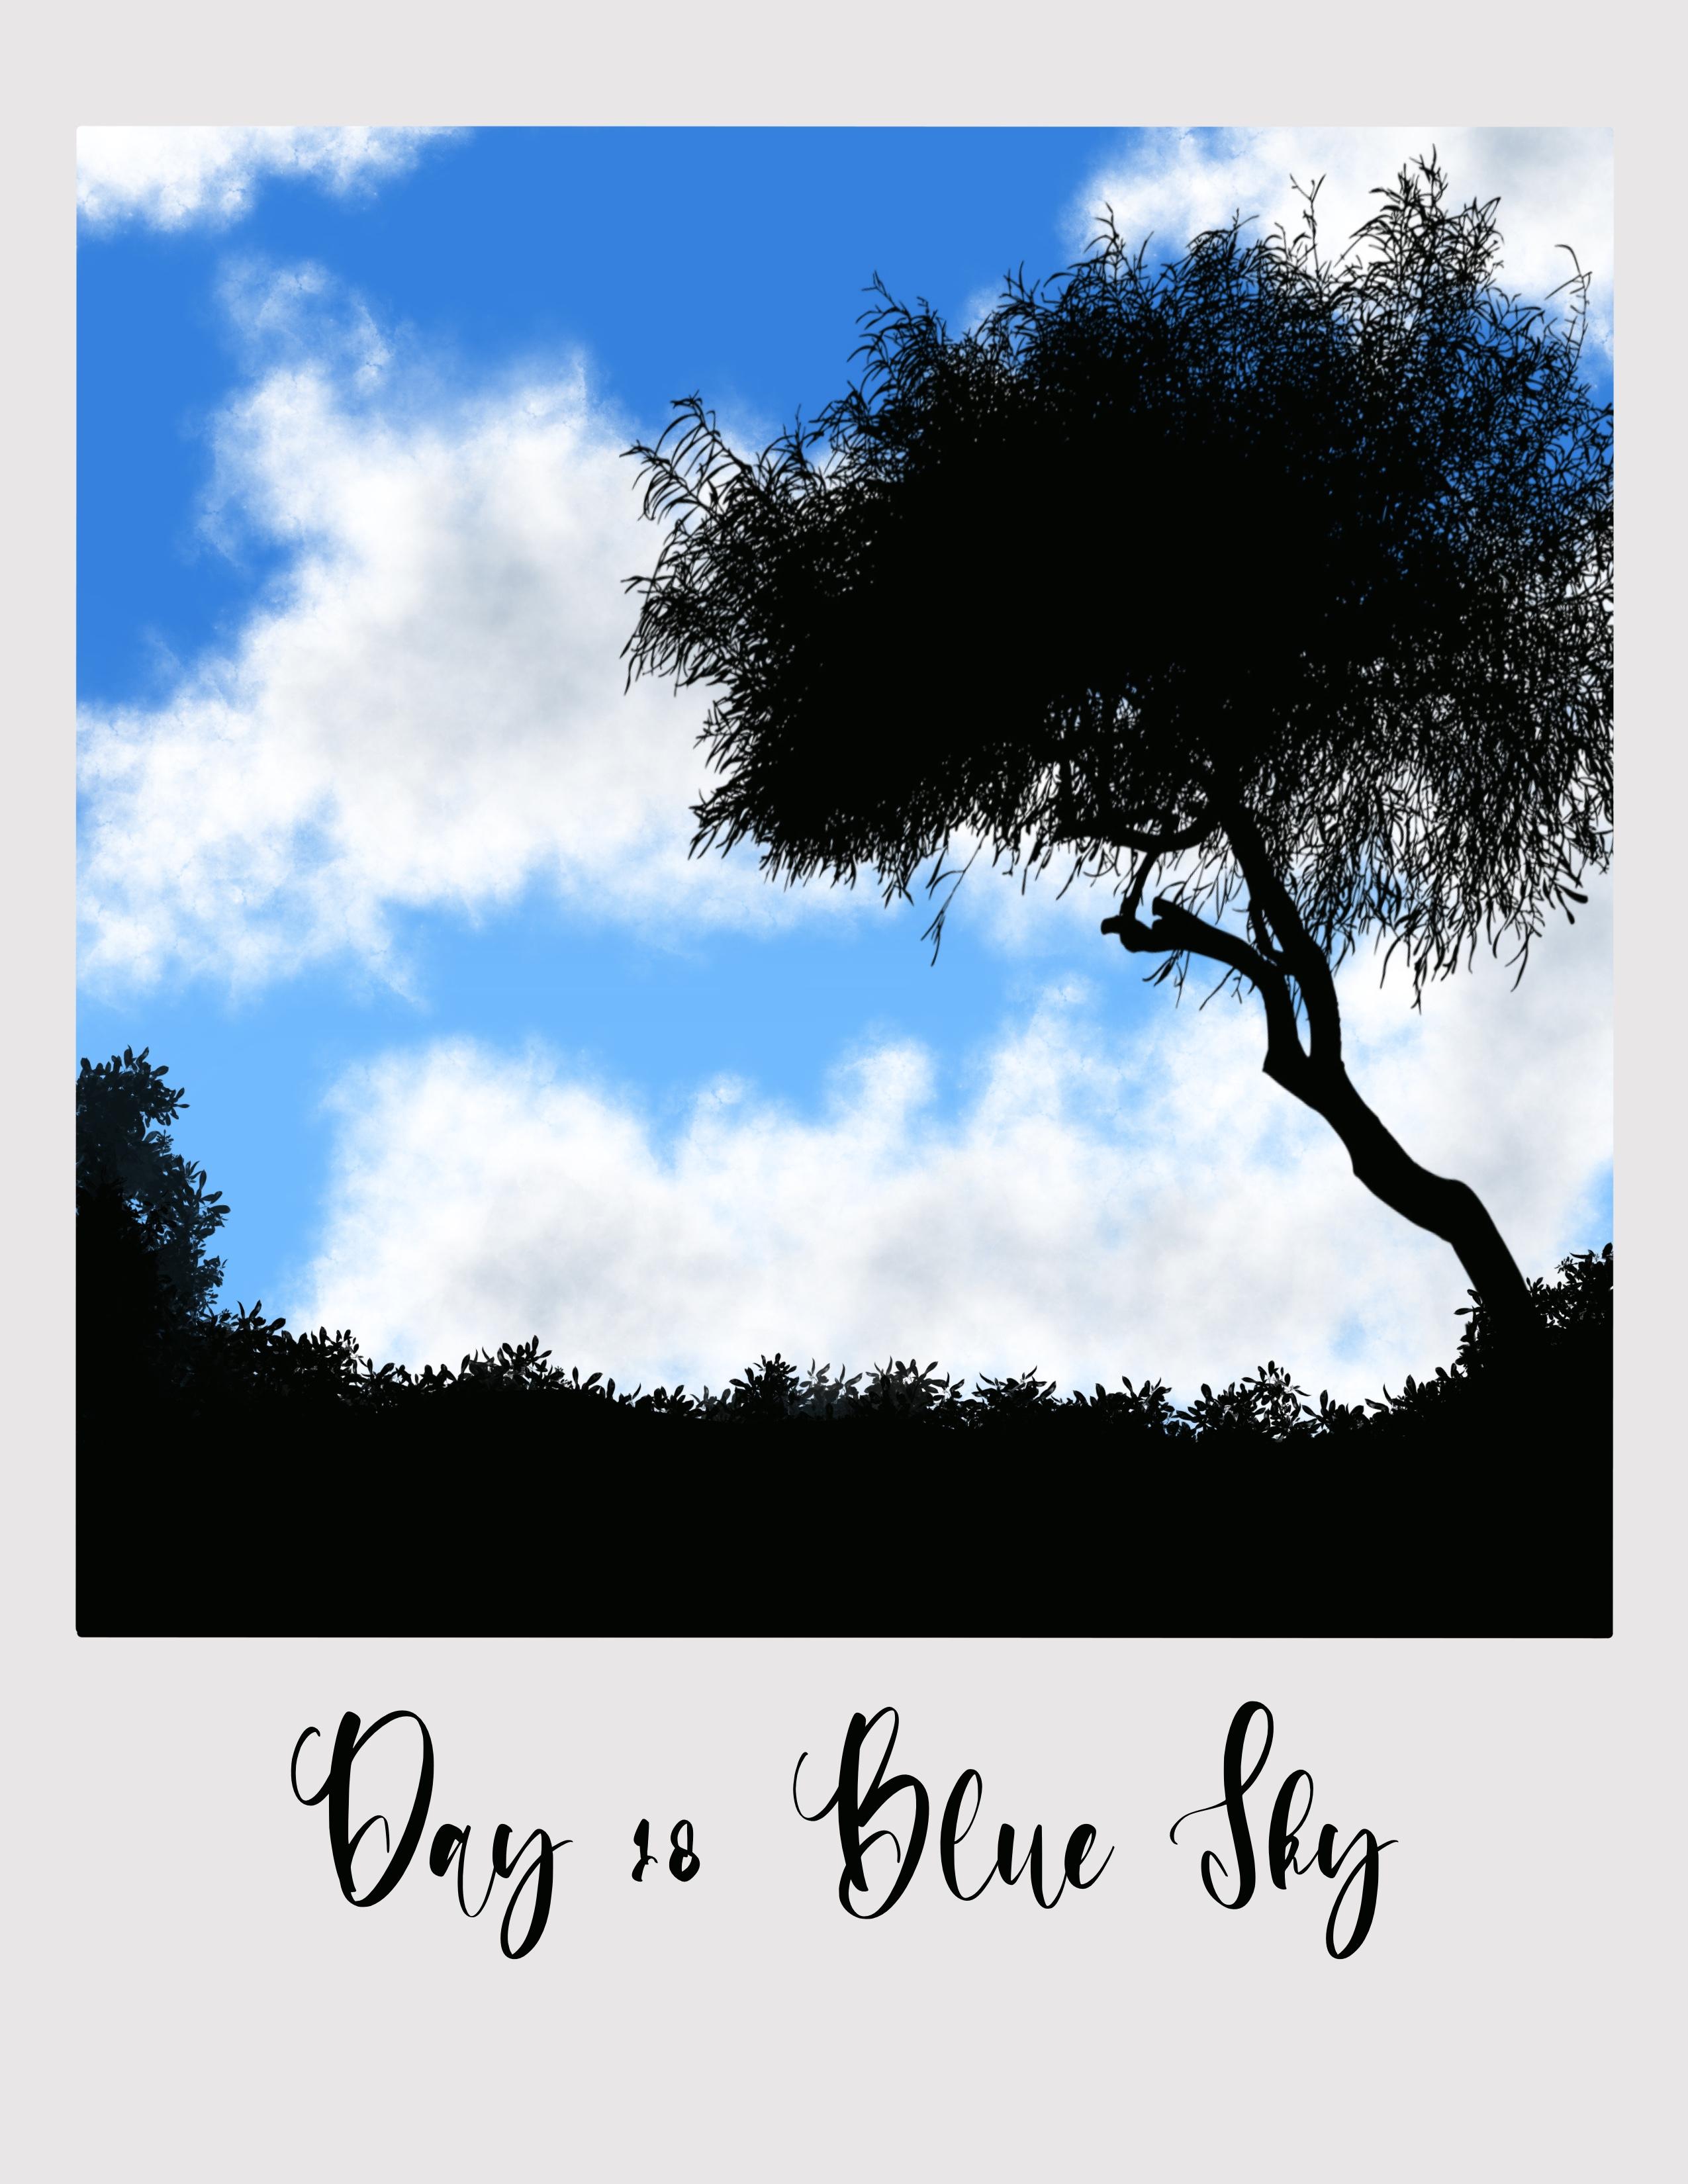
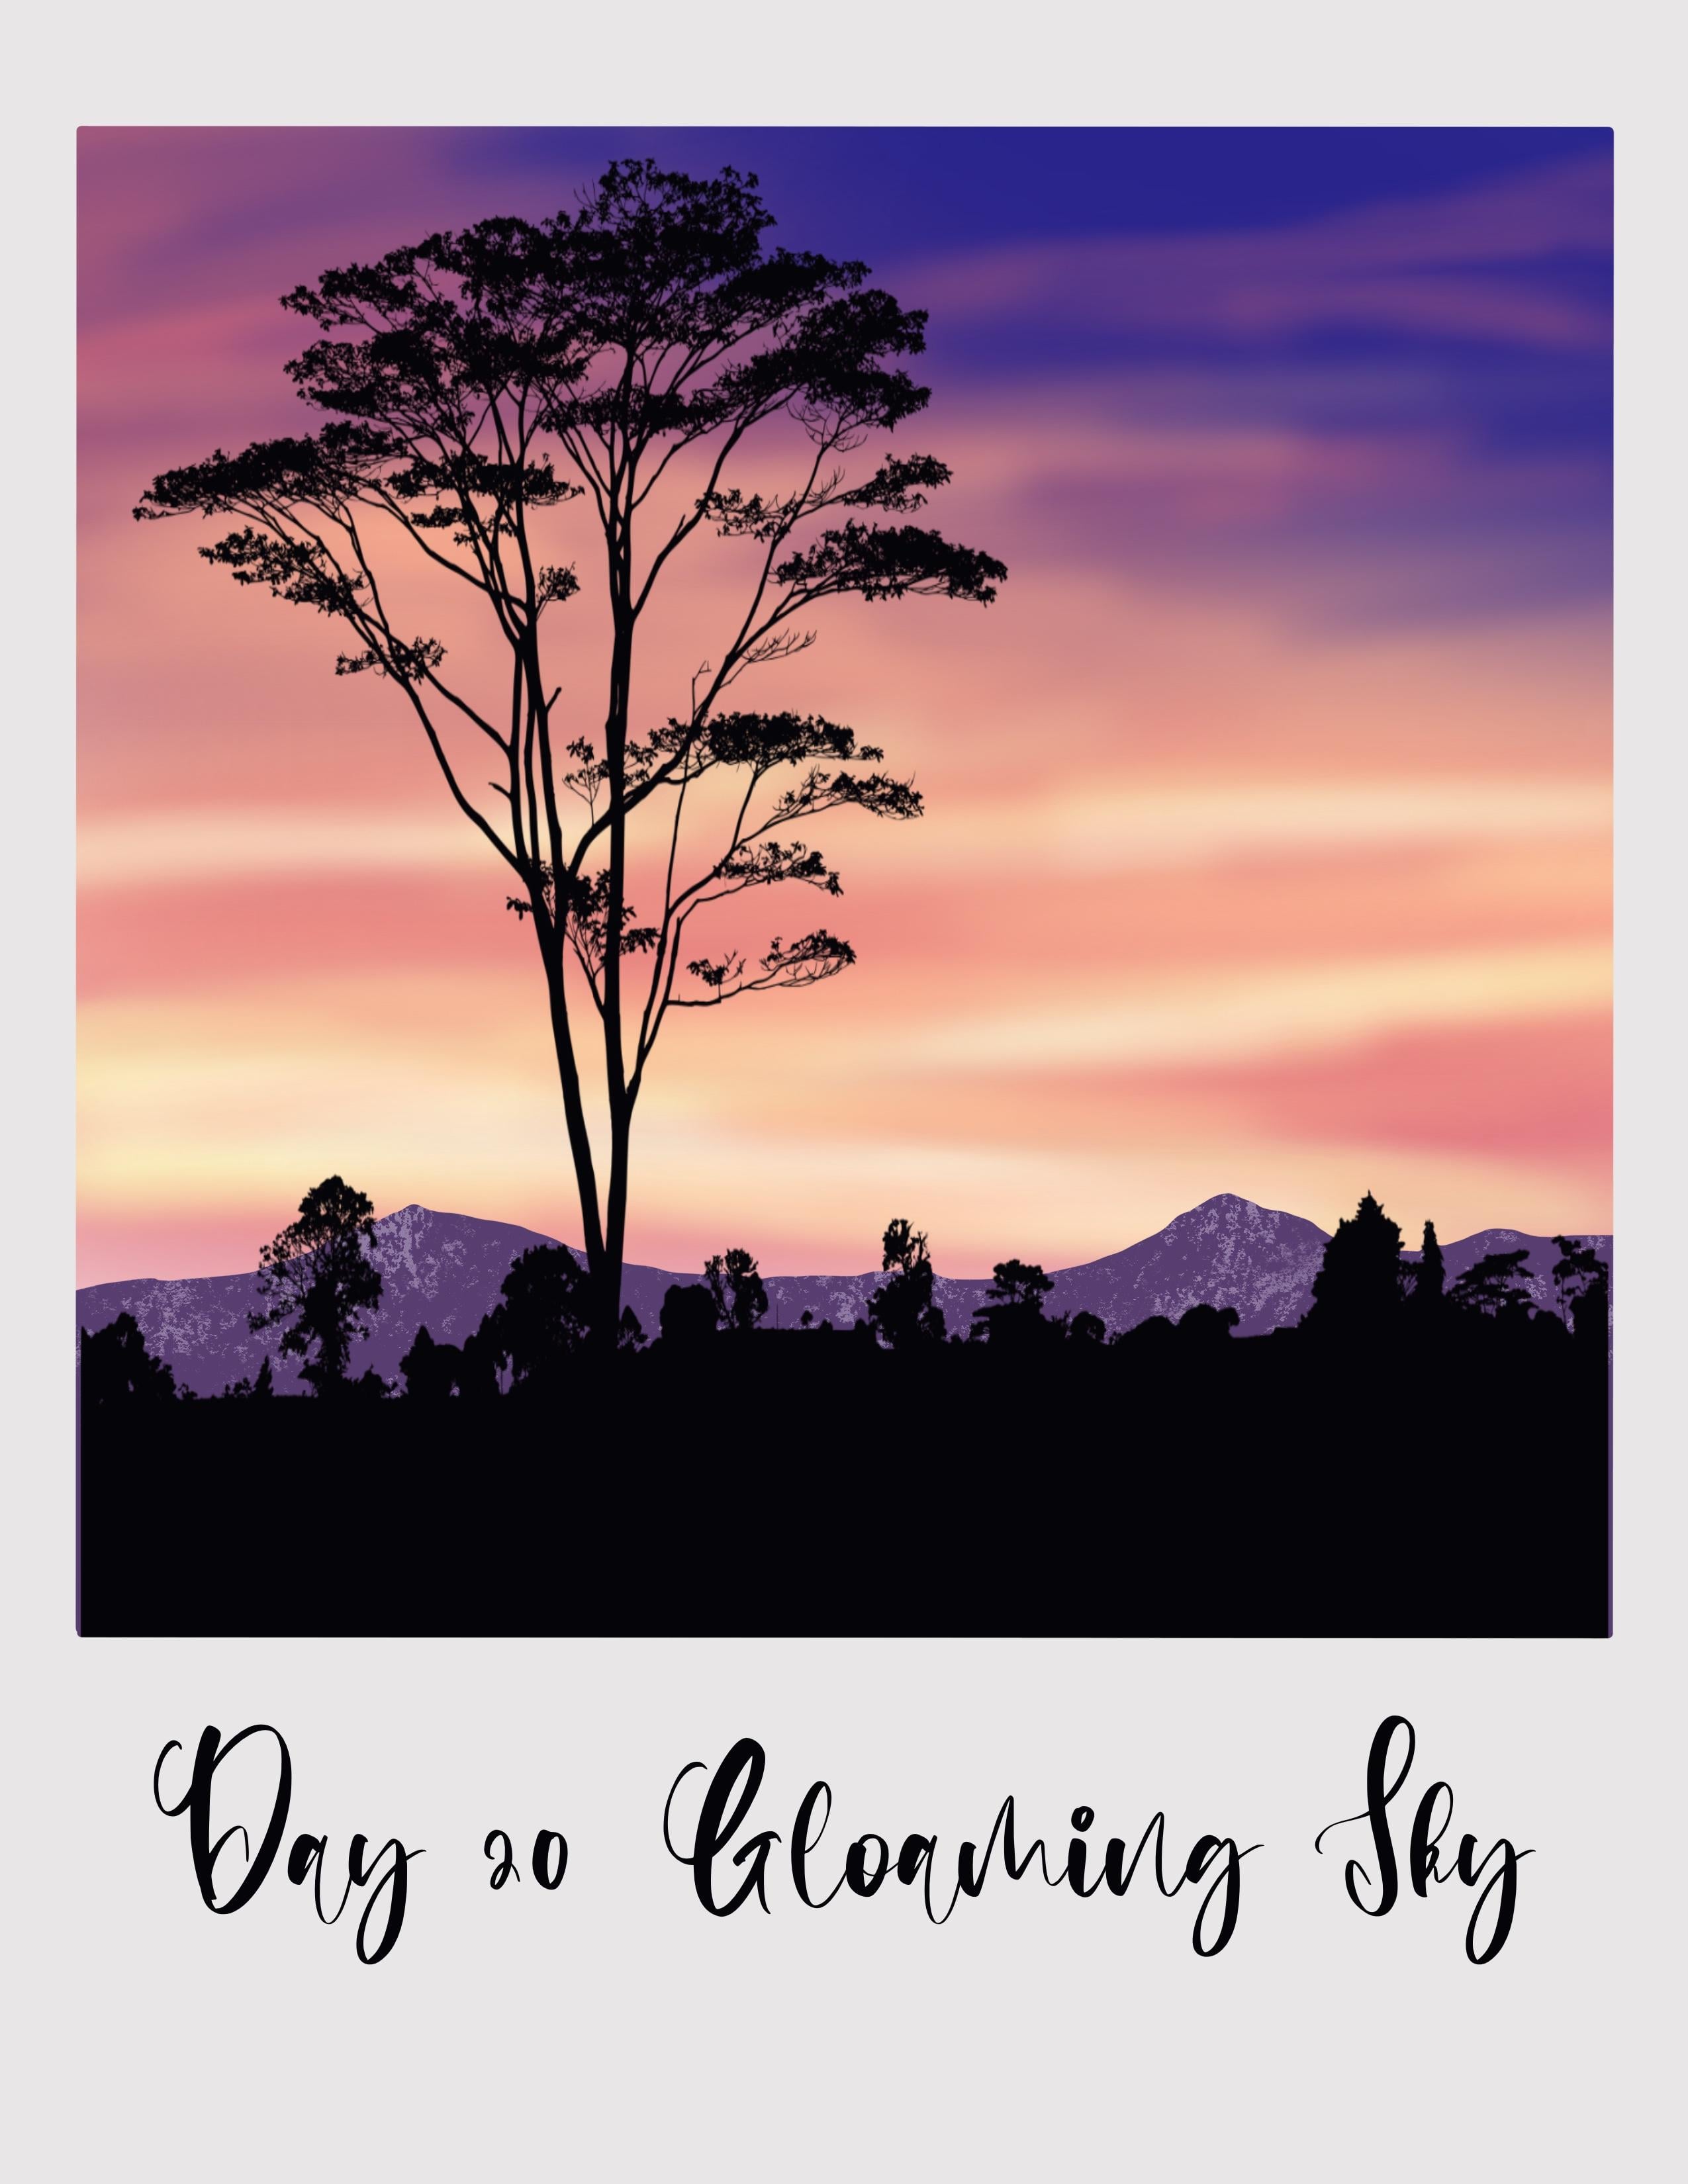
23. Day 10 - Lilac Sky: Hello and welcome to take them. Let us paint lilac sky today. Net force in both
the Polaroid Canvas. Let me just Canvas and let's have a look at the color
palette for today. So I have this date and
color palette ready here. These are the only colors
who we will be using just four colors today and
creating very beautiful sky. I will pick this first
color from the palette, go to the Brush Library, airbrushing, and go
with this medium brush. I will set the size
of this brush to about 30% or 25 per cent. And I will start adding
horizontal strokes and fill in about half of the
canvas. But this color. Next, I am going back
to the color palette, and I will think
this pink color. And I will fill the next half of the canvas with this color. Now that bone, the adjustments, I can go ocean bluff and send
up to about 60 per cent. Now go to the layers and rename this paint here layer as Skype. So this is a common process when can you name the
first two layers, the sky? And if there is any cloud, we will name it as Cloud. Now before adding the clouds, Let's go back to the sky layer and add some modification
to this cloud. So go to the Brush
Library and use this airbrushing
soft blend brush. Alright, I'm going
to set the size of this brush tool 15%. And I am just going to blend this thing
with the purple sky. You'll see that it looks
like that the pink color is scattered onto that
line, that area. You're going to pull it
down as well and blended, and go back to the
color palette. And I'll pick this first
color from the palette. And I'm going to blend this
on to this pink area as well. Even on going for all
uniform blend in the center. But rather it's like
the two colors are like margin onto each other. Now go back to the
palate and pick the second color and
then repeat the process. And I think I'm going
to stop it here. Now it's time to add the clouds. Tap on layers and go
to the cloud layer. Go to the color palette and pick this third color
from the palette. Go to Brush Library. And I go to my 20 day
project set to one. And I have included this
cloud brush for date, and I'm going to use this brush. I will use this size to 60%. And obesity sector person. And I will start adding
the clouds by cooling. And this circular motion like this and giving 0 puffed up. I'm painting of BAFTA Cloud giving it a random
shape like this. You can check the project
image that I have uploaded in the resource
section and try it. Now, reduced opacity of this
brush to around 70% and add all fill in this bottom
section of the cloud. Keeping the shade lighter
in the bottom section and doubt go in the top
section for this globe. Now once the system
tap on this icon and move it down a bit so that the pink area is
visible to the brush. And then in this section. So as I mentioned
earlier, the shape is, you can shape it to me you like it doesn't have to
look exactly like this.
24. Adding the bush silhouettes and moon: Once you're ready
with the cloud, go back to the layers and create a new layer, apply
clipping mask. And I'm going to
rename this layer. So blush, where we'll be adding a boost stamp to go to the color palette and pick this last color black
color from the palette. And I will select this, go to Brush Library and
I will go with the date and brush stamp opacity set to 100% and I will reduce the size to set the size to 50. Now you can see that
it is going outside to go to the layers and
apply clipping mask. Now mobile app on the
arrow icon and more it and place it
within Canvas stream. I just still size by using the blue.it is sitting
in perfectly so. Now it's time to add
the final element. So I will go back
to the layers too. I forgot to include white
color in this pilot, so I'm just including it now. Let's add a tiny crescent moon. Will do the brush library, or you can add it in
a separate layer. So I'm going to
create a new layer, rename this layer as moon. Now go to the Brush Library, airbrushing, and select
the soft airbrush that will set the size of
this brush to around 60%. And add glue or the
moon like this. Now, go to the eraser
and adjust the size. So I'm going to reduce
the size to 10%. And then due to eating slowly, it is a section of the
moon like going in circular motion like this and
create this crescent moon. And it's one of
the simple way to create a realistic
present moment, to draw a circle and then use an eraser to a
section of the moon. That's it. So let's, we are done with this project. Now. It's time to add
the title. The text. Just a placement tap on actions. I can add, add text. I'm going to, so this
is in white color, so go to the color palette and pick black from the palette. And I'm going to
replace this text. The den. And I will name
it light like Skype. When to select the text
and change the bone too much smoke edges to size. Tap on the arrow icon and adjust the placement of this text. Then that's it. I hope you enjoyed painting this really simple lilac
sky with me today. Now let's go back to the gallery
and rename this project. They, then it's done.
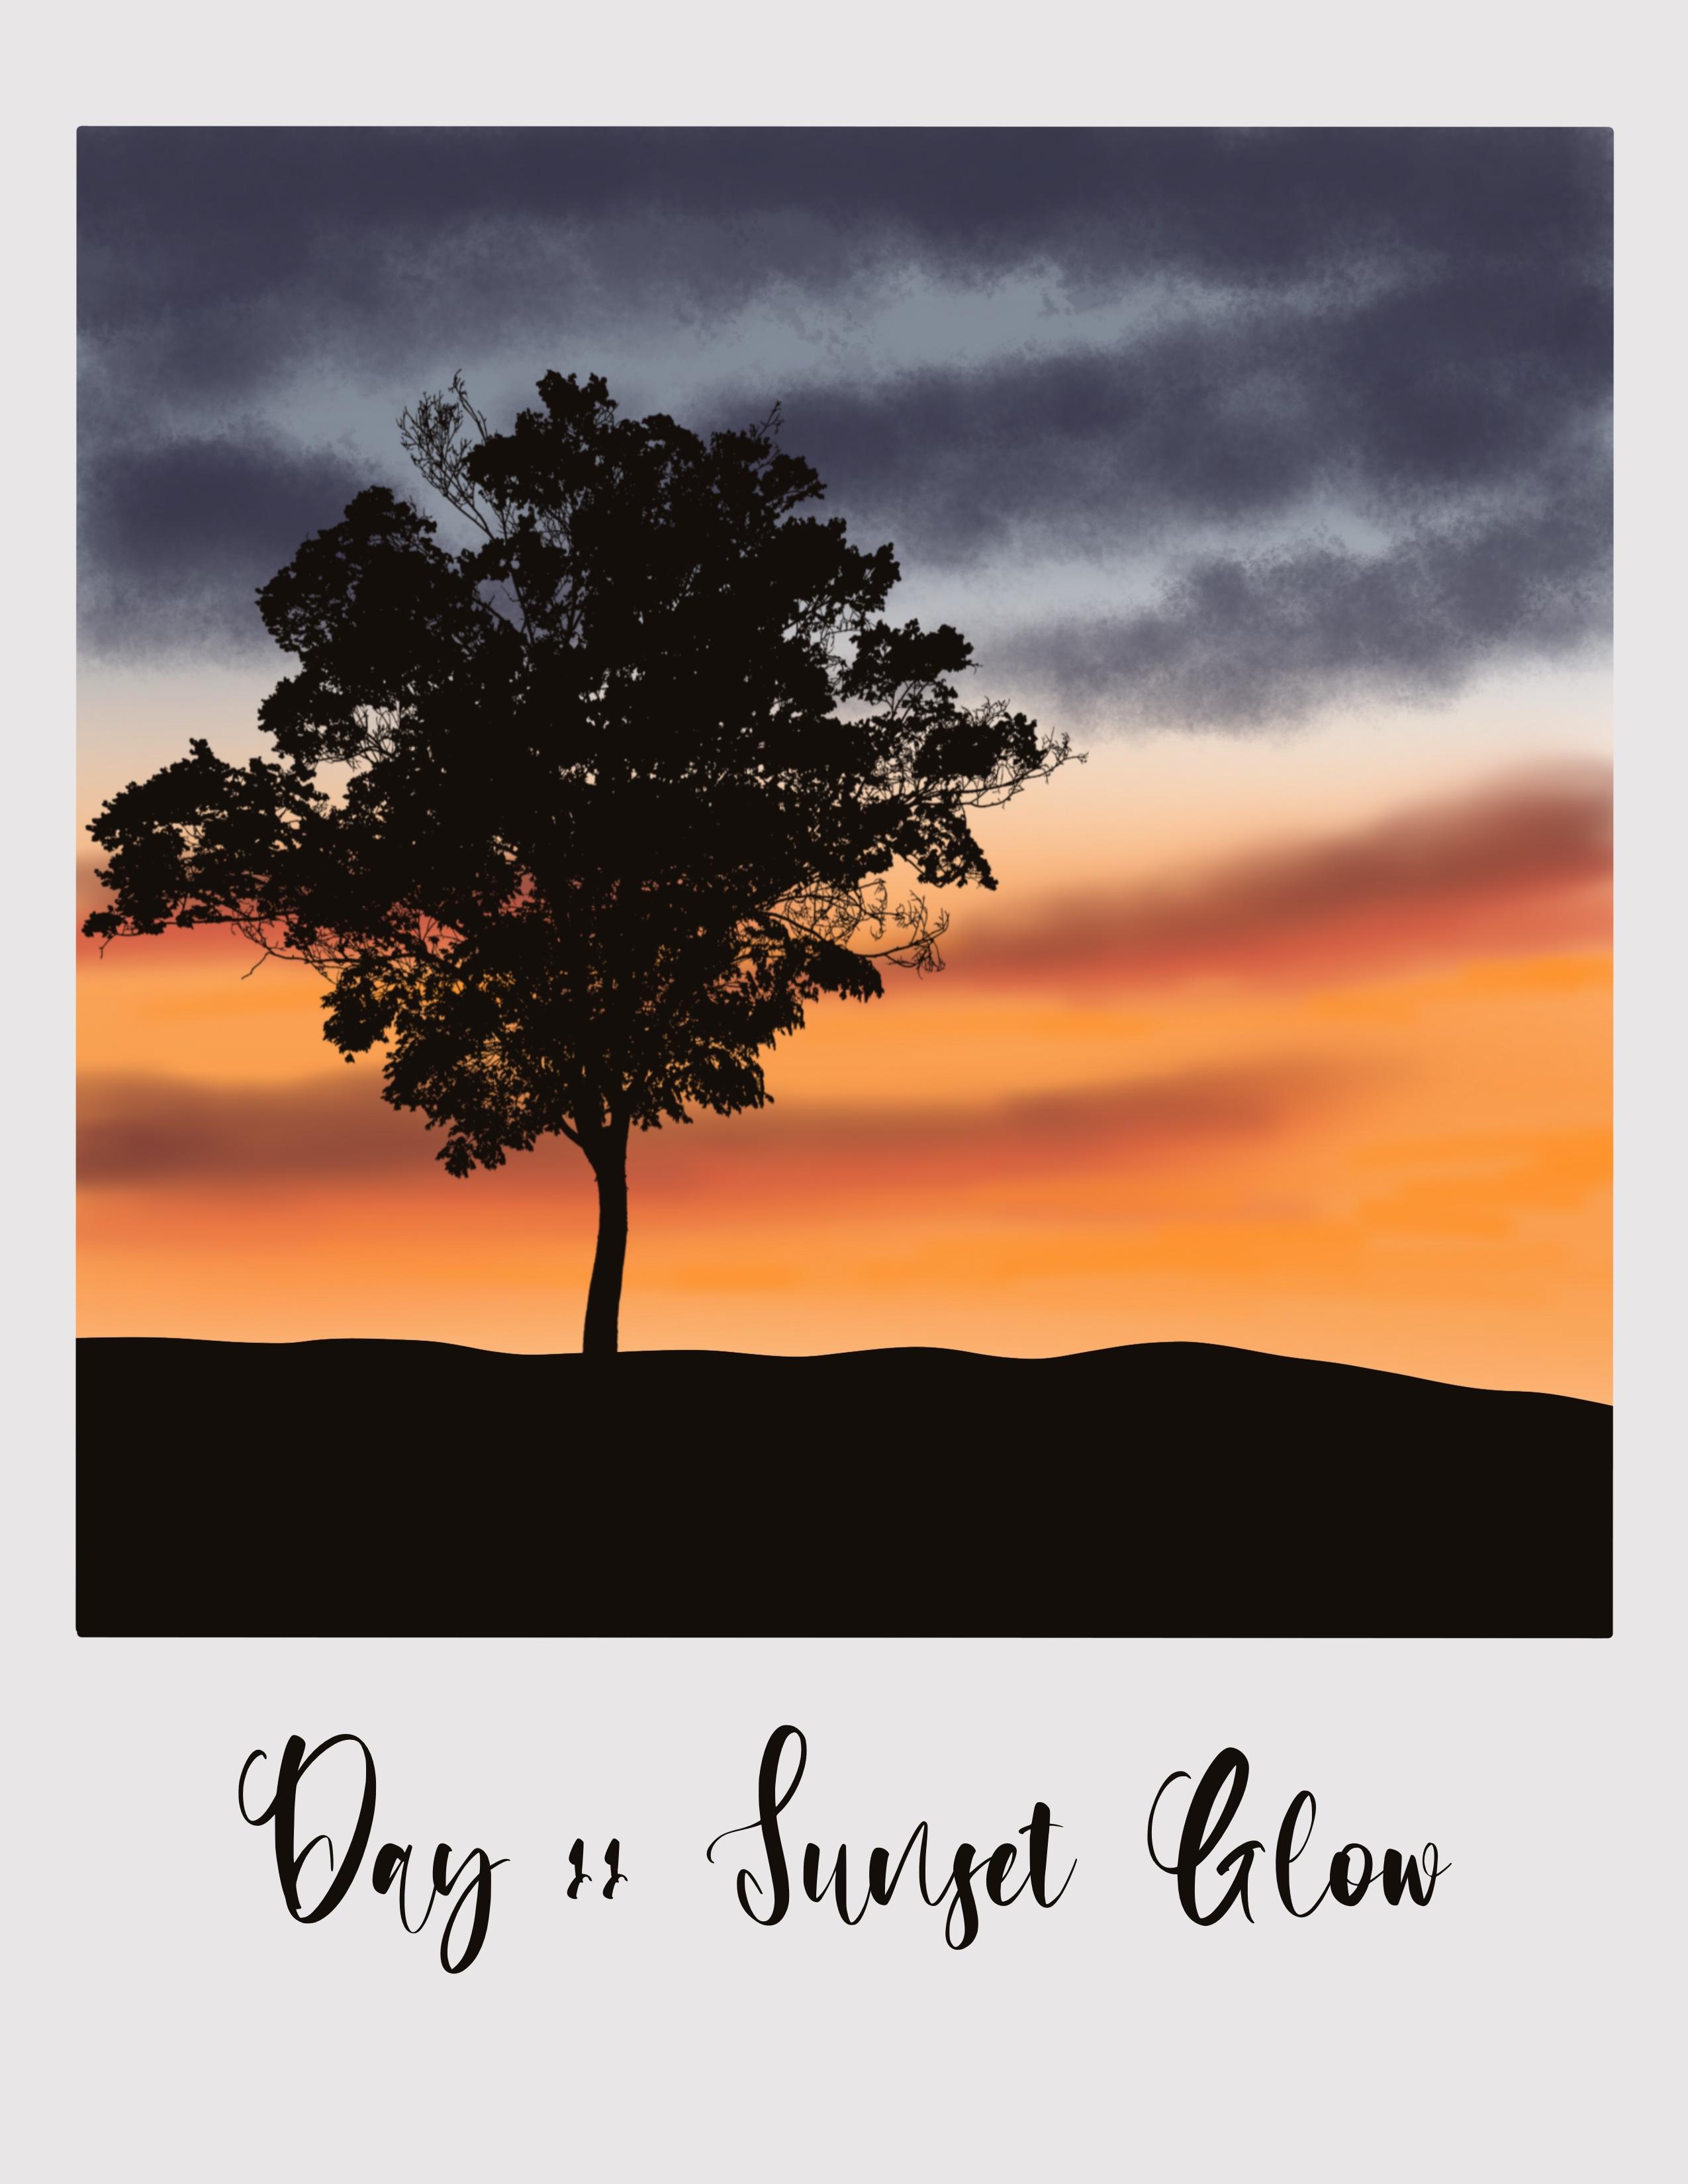
25. Day 11 - Sunset Glow: Hello and welcome to the 11. Let's start today's project by importing the
Polaroid cameras. Been using a lot
of colors today. Let's go and check
today's color palette. First, let me just edges
through Canvas and tap on the color palette here and who they are
and color palette. I'm going to pick
the first color from the palette to numb. You know, the process, go to the trash
liability airbrushing, and go with the medium brush. Loading dose and the
size of this brush to around 15% and fill in the
top section of the Canvas. Go back to the color
palette and make the second color
from day 11 ballot. Filling though, they
stopped the canvas. This color, I am giving this white gap in-between
the school colors. Now, tap on adjustments. I can go and set the blur total. I said the go-to around wasn't know that bone layers
and rename this layer, rename it as Guy. Du is going to be where we
are going to add two clouds. So I'm going to
name it as clouds. Now, go back to
the color palette and the third color
from the palette. Go to the Brush
Library, organic. And select this cotton, Josh. This is the brush
that we are using to add the clouds.
And this project. I am going to set the
size of this brush to around in person. And I will start adding
the lungs like this. Again, I'm going to
and fro motion here. To add the clouds. The main aim of this glass
is due in two different ways in which you can
add the clouds to create a different interesting
looking sky each time. Again, it's up to
you how you want to add the Cloud to decide how
you want to shape the clouds. Adding some in the
corner, you as well. I love some gap
in-between the Cloud. Go ahead and adjust the
size and opacity of the brush to add darker
and lighter clouds. I'm going to fill
in this section and make it a little more dark. Now, if you are not sure
about the shape of the cloud, you can go and refer to the
project that is uploaded in the project section and died
to recreate the same thing. It's time to add a different
shade or a different color of clouds on going to
the color palette. And I will pick this food
color from the palette. Go to the Brush
Library, airbrushing. And I will go with the
soft airbrush now. Save this size to it. Wasn't. And I will add
horizontal strokes. No size looks. This one's from learning
Gleeson said to do it on 30% or threonine
glycine and add some, what is on the clouds. Adding some more here
in the bottom section.
26. Adding the clouds and tree silhouettes: I'm not applying
a lot of pressure on the tip of my pencil
to add this cloud. Now go back to the
color palette and pick this last but one fellow which is like round and intensify the color
of this cloud here. I'm adding shadows to this. Well, making it a
little more darker. Adding them in the
circular motion. So based on the
shape of the cloud, you want to take, you can either go for horizontal strokes or
you can go for so close to the to and fro motion to
add if fin shaped clouds. Now go back to the
color palette and big food color again. Going back to the color palette, and I will pick this Seven color or six color from the palette. And never go to the Brush Library and
brushing and soft blend, blush, Moody, blended together. Synthesized, stood on ben
blessing and blend these two to create the
soft looking cloud. Going with the circular
motion to blend these two so that it looks like the two
colors are part of the same cloud and
doesn't really look. Now go back to the color palette and this darker color, again, brown shade and
said this size do I don't fibers and
just blending it, making it a little more intense
here in the top section. Now I will go back to
the color palette and big Hello from the palette, go to the brush by doing airbrushing and select
the soft air brush again, I've used the size further
down to around 20% and had some horizontal strokes
like this in between. And I didn't shade ready gently, it doesn't
have to be too dark, so I'm ready gently adding the lighter shading
between the stub clouds. And that's it. We are
done. Cloud section. I would stand to move
on to the next meal, so moved to the US and that
will create a new layer. And I will rename it as an apply clipping mask. Or you go through the color palette and
pick this black color, which is last color
from the state. Go to Brush Library calligraphy. Select the mono line
brush now decides this sector around them
present and others start drawing a
line starting from the extreme left
corner and pulling it all the way down to
the extreme right. And I will drag and
drop this black color. Now it's time to add sulbactam. So I will go to my windy
day project set to. So I will go with the day 11. Tristan said the size of this dam do around
what the present. And let's add this three
and when a new layer, so I'm going to create a
new layer clipping mask. And I will rename
this layer as tree. Like always say it's
a better idea to create each element
in a new layer. And just tap on the screen
to add the tree silhouette. Now, tap on the arrow icon
and adjust the placement and the size of this tree stamp. Please sit better view like it. I think I will stop
here. This looks good. It's time to add the snow. That bone actions I can add. And I will replace this text typing the 11. And I will name this
project as sunset. Let me to select the text and change the
font of this text. Match the size. Tap on the arrow icon and that just the placement of
this text accordingly. I'd say we are done
with the 11 project. Back to the gallery. And I will rename this
untitled artwork. I'm going to name it as d 11.
27. Day 12 - Dawn Sky: Hello, It's time
for the project. Let's put polaroid Canvas. Ones who have dog and was ready. Let's look at the color
palette for the day. So I have my color
palette ready. So these are the
colors that we will be using today for the project. Will pick the first
color from the palette, go to Brush Library airbrushing, and select this medium brush. I've said the size
of this brush to around 15% and about half of
the canvas with this color. Next, I will go with
the second color. Next section using
the same brush by applying horizontal
strokes like this. Now go back to the palate and the third color
from the palette. And for the remaining
portion with this color. So these three are the colors that we'll
be using for the sky. Tap on the adjustments. I can go and set this
to about 40 per cent, reduce it further
down to around 30%. Now go to the layers, and let's rename this
layer as a guide. Go to layer three, and I will rename
this layer three. Clouds. Now go to the color palette. And there's some really
cool with this bold color, which is kind of all. Hello. Go to the Brush Library and go to the 20-day
project set to. And I've included this
brush for the clouds L, which is named as state law. And I will reduce the size
of this brush to around 25% and obesity is set to 100%. And I will add the clouds like this by going into
and through motion. You can shape it according
to how you like it. I'm adding some
more clouds hill. Again, going with the
two through motion. We're going to fold
this guy with the Lord. The Lord loves tiny clouds. So I'm adding the strokes healed and they're random shape. Now, let's go back to
the color palette. And I will make this
fifth Carlo molar. I'm going to pick this
last but one color, which I will add, add the darker, shade hillock that don't
move to cloud here, which we have already painted. Using the same brush. Just identifying the color of two cloud that we
have already added. I will go back to
the ballot and pick this color and add
some clouds here. And the mid section. You can notice that
the color appears much lighter here
because I am not applying a lot of
pressure on the tip of my pencil to add the clouds
here and the midsection. And keeping the pressure
very minimal and adding this really
gentle strokes. Now go to the color palette. And I will pick this fifth
color from the palette. And again, I will add
some clouds heel. Again, I'm keeping the ratio on the tip of the pencil ready
minimum and adding this. Now go back to the ballot
and pick this color, six color from the palette. I'm reducing the size further down and I will set
it to around 15%. And I will add some more clouds. In the bottom section. Now go back to the palette and the color from the palette. And that will reduce
the opacity of this brush further
down to around 70%. And I will add some
much discolored cloud on top off to one
side we painted. Just play around with
this to add the Cloud in the shape that
you want available. Go back to the Padlet. And I will pick this food
color from the palette. And the clouds here in the top section
appears much smaller. So I'm going to add some more dimension to it and
will increase the opacity. And I'll fill in this
section to add no clouds. Odd make the clouds
appear a little bigger.
28. Adding the grass and electric poles: Once you're done, adding
the clouds will be two layers and
create a new layer. I'm going to apply clipping
mask on this layer. And I will rename this. So I will rename it as ground
to back the color palette. This last color
from the palette. Go to the Brush Library, calligraphy and select
DOE mono line brush. I'm going to start
drawing the line. Just the size of this brush
and set it to around 20%, float around 15%,
and start drawing the Gobi line starting from one corner and take it all
the way to the other side. And now drag and
drop the column. Now let's add some
grass to this layer. So I'm going to
the organic brush. And I will go with
a birthday ZBrush. Say the size of
this brush to it, then goes and opens
it is set to 200,000. And I will add the grass. Did this right above the line. Just stopped though.
If both your pencil on the screen and
I still leaves, going to reduce the
size further down and ads more smaller use heal our tap on layers and create a new lingo
and apply clipping mask. Now I'm going to rename
this layer five, where we will be adding
the electric tools. So I'm going to name
them as electric poles. We're going to add a very
simple electric pole was just a straight line. So go to the Brush
Library calligraphy and go widow mono line brush again. And I'm going to set
the size to about 15%. And I will draw a
line like this. On this right side. Now I will add one
molecule on the left with this short toe compared
to the one on the right. Now I will reduce the size to about 10% and draw tiny lines. He'll be the same step
on the other side. And now add the wires. So I will reduce the size
further down to about 2%. And then show the
wires connecting this. Adding 1 mol. Joining it to the pool is going to reduce the size for the down and
set it to one person. And I will add one more
while connecting the poles. You don't have to worry about if dividers group
period or something. It's just write this as
medicine, the project. It's now time to add the text. So let me just do it and add, and add extra place to text. To type in D2L. I'm going to name this
project as dawn sky. Select the text and genes to form so I didn't
change it too much. Bulk. Increase the size. No tap on the arrow
icon and adjust the placement of the
text accordingly. Implicit consent. That's it. Now, let's go back to
the gallery and name this drug. Going to name it.
29. Day 13 - Fiery Sky: Hello and welcome
to date that Dean. Let's start the
project by importing the Polaroid canvas. The canvas. And let's quickly look at
today's color palette. To tap on the color palette. And we hadn't state
13 color palette, which is warm colors. And I will pick this first
color from the palette, which is the darker
shade of low. Go to Dash library,
airbrushing, medium brush. Set the size of this brush to around 15% and fill in the
top section of the Canvas. Now go back to the
color palette. Pick this red color
from the palette, and fill the next section. Using this red color. I'm going to fill about
half of the canvas. Now go back to the color palette and pick this third color, which is kind of brown and fill in the bottom
section with this color. Now, tap on the adjustments
icon, Gaussian Blur. And I'm going to set the
blur to add on 50 per cent. Bring it further down and
I will set to around 45%. I'll go to the layers
and rename this layer. I'm going to rename it as Guy. I'm going to rename this
layer three as clouds, where we will be
adding the clouds. Now go to the color palette. And I will use the same
color that is blown color. Go to the Brush
Library, airbrushing, and select the soft air brush. I will set the size of
this brush to around 20%. And I will start
adding the Cloud or I'm going to set the
size of this brush to around the 20 per cent and start adding horizontal
strokes. For the clouds. Again, it is a
random shaped loud. Add the strokes very gently. Don't apply a lot of pleasure
on the tip of your pencil. Just add very gentle, soft strokes like this. And add the clouds. Now, go to the Brush Library and select the soft blend brush. I'm going to set the size
of this brush to around 7%. And I'm going to blend
it with this guy to create the soft clouds. Only if you see the hard
edges on the clouds, you can go ahead and blend
it if you have already created a really soft clouds
where those soft airbrush, you do not have to have to worry about blending it in
to create the soft look. Go back to layers and
create a new layer. Like, Oh, I am going to
rename this layer as Sunday. We will add setting sun. Go to the color palette and pick this food
color from the palette. Go to the Brush Library
and select soft airbrush. Select the soft brush. I'm going to set the size. So with this brush
to around 10%. And we're going to create
a circle like this. I can gaussian blur and set
the blur to around 29 to 30%. Now go back to the
color palette and pick this color from the palette. Go back to the Brush
Library and set the size to room 8% and add a
tiny glowing sun.
30. Adding the trees and silhouettes: Now go to the Layers
and create a new layer. Apply clipping mask. We'll go to actually be
mustered his son Leo. So I'm going to do that as well. Now. Let's go back
to this layer, and I'm going to rename
this layer mounting. Go back to the color palette
and this black color, which is the last color
from the palette, go to the Brush Library, calligraphy and select
the mono line brush and add the size of this brush
to about ten per cent. And start with though. Or add the mountain
peaks starting from this extreme left corner or start from extreme
right corner. And add this curvy mountain
with some peaks in-between. Two. Or the son Leo, like this. And add another peak, June the sun, and bring it all
the way towards the right. Now, drag and drop the color. Now go back to the color palette and pick this brown color, which is the third color
from this palette. Go to this layer and apply
alpha lock on this layer. We are going to add some
light to the mountains. So we'll do the brush library, telcos, and select this cabins. I'm going to set the
opacity to 100%. Set the size to around 10%. And I will add some light so
that it looks like it is. Add some brown shade to this speaks not covering entirely, but just adding on the labs all the left
side of the peaks, I will add some
light and shadow. We're just showing the
light and shadow, shadow. Ready gently at this brown shade to the peaks of the mountain. And you can already see how beautiful this looks when it is, when the mountainous head by the sunlight going
to stop it here. Now it's time to add
the tree silhouette. So I will go to
the brush library. I will go to the color palette, pick this black color from the palette to the layers
and create a new layer. I will rename this
layer six is three, where we will be
adding the tree stamp, apply clipping mask, and
go to the Brush Library. Go to the 20-day project set to select this data
in trees down. The size of this brush
down to around 30%. And tap on the screen like this. Now tap on the arrow icon and adjust the placement
of this tree stamp. You can place it on the left
side as well by flipping it, flipping it horizontally and I'm going to place
it on the right. The placement. Yeah,
this looks good. So I'm going to stop it here. I'm happy with the placement
hills, so that's it. We are done with our
data team project. It's time to add the text. So let's do that now. Tap on the Actions
I can add a text, replace the text is, I'm going to type in the 13. I am going to name this
project has fiery sky. Select the text and
replace the font. Change the font. Match book size. Now, tap on the arrow icon
and adjust the placement of the text and bring
it to the center. Yes. We are done with our
data team project. Go back to the gallery
and rename this untitled, hard for them to type in. Deep 13. And we are
done with the project. I hope you like this bright
and colorful project.
31. Day 14 - Colourful Sky: Hello and welcome back. Let's begin. Today's project. I'd Canvas. Let us look at a color palette. I have this table being way too, we will be using today. I really big the forest Carla
from the Bartlett folder, the brush library, airbrushing, medium brush. I will set the size
of this brush to fill the present
and obesity 200%. And I'm going to fill in the top section of the
Canvas with this kind of go back to the color palette
and the second color from the palette and full
in the next section, when this light blue sheet, we will do the color
palette and pick this top and bottom section with
this color adjustments. I couldn't push. And now I'm going to set
the blow for both. I'm increasing the
viewer and setting it to about 40%. Only O's. And I am going to
rename this pain pill. And I'm going to
remember this guy. I will rename this layer
to me as clouds bad. We will be adding some clouds. Now go to the color palette
and big this food color. From the palette, go
to the Brush Library. The goal with the
20-day proud dig. And I will pick
this day 16 Cloud, which we will be using for
the full screen as well. And I will save the
size of this brush. Let me just undo it and then set the size of this brush to about eight per cent. And I will add the clouds. You really don't have
to shape the cloud. You can see that it really
takes the shape of the cloud. You just have to use the
tip of your pencil and go end-to-end flow motion
and Finland, clouds. It is that simple. Now, go back to the
color palette and pick this color from the palette. And I like the clouds to add a darker shade on
top of a low clouds, clouds that we painted. Again, all you have to
do is just use the tip of your pencil and drag
it into and full motion. And it's very simple. I'm going back to
the palette and I will pick this color and I'm adding few more and looked out here in
the bottom section. Now, I'll go to this blend tool. And I will blend this yellow and orange
together to create a smooth transition so that it looks like they're
part of the same loud. Now go back to the color palette and pick this last color, which is black color
from the palette. Did a brush library. And we will go with the galley
graphene monoline brush. To set the size of this
brush to about 1%. We have to add
this on new layers and layers and I will create a new clipping mask and I'm going to rename this
layer as ground. Now using this mono line
brush and then draw the line. Now, drag and drop. Let's add some grass
to this ground. So I m going to
the Brush Library, do organic, and I will
select this week.
32. Adding the grass blades: Set the size of this brush to about 16% and
opacity set to 100%. And I will start adding this glass plates
starting from dome from the bottom and dragging my tip of my brush towards the
top section like this. And add the glass plate and fill in this complete section
where the grass blades. Now, if you find this to meet a lot of work and
remote one spin, the world, want
to spend a lot of time and adding scraps, splits. You can go to the stamp set
from day one more day due to Java has this grass blade
and just add the stamp. Instead of spending
time on this. It is pretty simple. All you have to
do is use staples and add the class
play starting from bottom section and
pull it upwards. I am going to speed up the process here since
it is already leaping to do step and only need to do is fill in this complete
section and make it look. Now, once that is done, go back to the Brush Library
means select the telcos. I didn't select the
bone tree gouache. I'm going to set the size to eat Watson entry limb,
this bourbon section. We're going to
increase the size for this section where the grass and the ground needs so
that it looks familiar. You can clearly see the ground
and the grad separately. I don't want it I
want to make it look with a lot of grasp it. So that's what we did. Now let's go to the 20, the full deck said
before being pre stamps. So this is the tree
that we will be adding. So let's do that on
a separate layer, on the Layers and
create a new layer. Rename this layer as a tree. Apply clipping mask. Now, just tap on the screen
and you have the tree. Before that, let me just
reduce the size and set the size of this brush to around 24% and add
the tree like this. Now, using the arrow icon at just the basement
of the tree, you can set it either to
the left or to the right. I'm going to flip
it horizontally. Let me just check where
my move it around. It's up to you where it's
completely your tree, wherever you'd like it. To just move that only check
whether it looks the best. Because I want the clouds
to be visible and I don't want it to be covered completely
by this adjacent invest. Just take him back. Please said, Yeah,
this looks good. Still visible. So I'm
going to stop it here. It's time to add the eggs. It's due that actions
I can add and change it. Before being dark. It is colorful and bright. Bulb. We're gonna mean
with colorful, scary. Select the text and butane
the form too much work. And adjust the size. It's just the placement size of this by using this blue dots. Look almost the same. We are done with that before. Jake. I hope you enjoyed painting
this with me today. Now, let's go back
to the gallery and rename this untitled
artwork as defaulting.
33. Day 15 - Bright Sky: Hello and welcome to the 15, wherever you are going to be
painting of tropical oils. And let's start by importing
the Polaroid Canvas. So once you have
the canvas ready, Let's now look at the
color palette for the day. Where I have selected very
bright or Carlos for this guy. Color palette. And we have this thing, 15 color palette here. So I'm going to pick
the first color and go to the Brush
Library, airbrushing. And we will go with
this medium brush. I will set the size of this
brush to print the person. And the first, the top section of the
Canvas with this color. I'm going to fill about half of the canvas with this color. Now go back to the
color palette and pick this second color from the
palette and the next hop, the canvas with this color, I'm leaving this white gap
between these two colors. Now on the adjustments, I can go motion blur. And I'm going to set
the blur to 40%. Go to the layers and rename
this paint layer as a guide. Now, I will go to layer three. I'm going to rename this layer three as Sylvia, not going to be adding
clouds in this layer. Instead, we will add the
low, the sunset glow. So I'm going to rename
this layer as sunset glow. And let's see how
we can do that. Go back to the color palette and make this bold color
from the palette, which is a low. And go to the Brush
Library, airbrushing. And I will go with
the soft brush. Let's set the size
of this brush to around 15% and opposite
is set to 100%. Now I'm using this brush, I'm going to add always shaped blue around somewhere here in the center
of the circle. Doesn't have to be exactly over because we're going
to blow this again. So kind of selfish shaped a little glow around
the center of the canvas. Now go back to the islet. Know before that, let's
go to the adjustments. I couldn't go Schindler. And I will lower this. I'm going to set the
Gaussian Blur to it on the insect it to around
21, 20 per cent. Now go to the layers
and add a new layer. And I'm going to
rename this layer as sun and apply clipping
mask on this layer. Now I would pick this fifth
color from the palette, and I will use the same brush. I've been said the size of
this brush tool per cent, and I will draw a circle here. Now I'm again going to that just meant I couldn't go ocean blue. And I will set the blow to around 15 to 20% to
around 20 per cent. Now go back to the
color palette and pick this off-white color
from the palette. Now I will use the
same brush again. And let me just
undo it and reduce the size down to about eight per cent and I
will draw the glowing sun. Yeah. So you can really
see the glow now. So I'm going to stop it here and move on to the next section. Go to the Layers and create a new layer by tapping
on the plus icon. And I'm going to rename
this layer five. We will be adding the
blurred mountains. So I'm going to
rename this layer as small things or to
the color palette. Before that apply clipping
mask on this mountain layer. Go to the color palette. And this brown color or
color from the palette, go to the Brush
Library, airbrushing. And I will go with
medium airbrush. Now, the size is set to
around 15 to 20 per cent. And I will start adding them
on things like this by going with the horizontal stroke
and fill in this section. Could also use the
calligraphy brush by drawing all Toby line and
then drag and drop the color. You could do that as well. Now, tap on the
edges means I can go shun blood and I
will set the flow to both inputs and now go to the Layers and
create a new layer. I wouldn't be picking
this black color. Now before going to
the Brush Library, Let's finish this layers.
34. Adding the palm tree silhouettes: We'll go to the
layer clipping mask and rename this layer six. I'm going to mimic this tree. Now go to the Brush Library
and go to MPD projects set. And I'm going to pick
this day 15 tree stamp, adjust the size and
set it to around 30 per cent and tap on
the screen like this. Now, tap on the arrow icon and adjust the
placement of the trees. Now, don't worry
about this white gap. We will fill it later. First edge is still
placement of the trees. First I adjust the placement or the trees going to
bring the same bill. This looks good. Now let's fill in
the bottom section. So we'll go back to the layers. Go to the Brush Library,
window, airbrushing. And I will use the same medium or go with a medium hard brush. And I will fill this
bottom section, the white gap that you see. This completes section
using black Gallo. Make sure there are no gaps. And we need to
lighten this section. So we need to apply, go back to the layers and apply alpha lock on this tree is Leo. What do the color palette
and pick this third color, the brown color
from the palette. Build a brush library, airbrushing, and select
the soft blend brush. I'm going to set the
size of this brush to around 15 or let me set it to around 12 person and
obesity set it goes in and Advil or light in this area. Since we selected down,
it isn't working. Let me just undo
it and go back to the color palette and
this orange shape, second color from the palette. If the same step, I'm
just blending it in here. Lighten the Alia, the
trunk hopeless and some use of the trees sites. I think I will stop it here and we are done
with this project. It's time to add the text. So let me just do that. Deb own actions, I can add an extra change the color of x, so no need to change the color to the color palette and black, the love from the pilot. And then type in, I'm going to type in the 15 and I'm going to
name it. Right guy. Select the text and
change the form. I'm going to change it too much. It just the size and done. Now I just the placement
of the text accordingly. That's it. We are done with our bright and vibrant
day 15 project. Let's go back to the gallery. I'm going to change this
untitled artwork x, and I will replace it as 15. And that.
35. Day 16 - Rising Sun: Hello, and let's start L 16 project where we will be
painting a beautiful died. So let's start. Let's import Polaroid Canvas. Let's take a look at the
color palette for the day. And I have this base 16
color palette with me, which all the warm colors, as you can see, lot of browns, orange, and a loop. I'm going to pick
the coolest color from this basic scheme palate, who do the brush library? Airbrushing. And we'll go with this medium brush as usual. Instead, the size of this
brush to go around 25% and fill in the top section
of the Canvas. Like this. We're going to add
all these things. And so we are going to follow a slightly
different approach. This guy here, I will go back
to the color palette and I am going to take six
color from the palette, which is the skill of color. And using the same brush I am
going to draw us like this. Center. Now, go back to the color palette and pick this fifth color
from the far left, which is the orange sheet, and draw a triangle to
reduce the size and set it to around 15 to 17% and draw a semicircle
around the self illusory. That means just being something
like this, filling in. And now I will go back
to the palate and pick this color which
is a darker shade, and draw another semicircle around this orange
semicircle that we just fill in this complete
canvas with this four colors. Now that all the adjustments
I can go ocean node and I've been said the blow to about 30%. Now go to the layers and
rename this layer mask. Now go to the layer
three and rename this layer three as loud. Now go back to the
color palette. And I'm going to pick the
second color, or dark brown. This is the color
that we've done to add loud at the top
for the panelists. And then we will add moving to something like it is
blending on to this style. So let's see how we can do that. Now go to the brush library. I will select this medium hard airbrush and set the
size of this brush to about 35% and opacity
is set to 100%. And I will add the
cloud, if you will, in the top section, where you can see the
lighter brown shade. Now I'm going to give it
just a random cloud shape. Drawing the outline here. Using this brush. As you can see, dislike, it's going up and down. We've just giving us the
shape of the bottom. We can see that I'm doing to
fill in this section below. Say about one-fourth
of the canvas. Now let me just reduce
the size further down to about the person. You're finding these edges. I'm just giving it more. They find bell shape. Go to the cloud layer, tap on this arrow icon
and move this up. I'm going to place it at
the top of the canvas. You just now go
back to the layers, go to the sky layer
and create a layer just above the sky layer
and below the cloud layer. I'm going to rename this
layer as second Skype, where we are going to
blend this guy but this cloud so that it looks like the cloud is blending
in with the sky. So let's do that. Now go and go back to the color palette
and pick this brown color. I can go to the Brush
Library, medium brush. And I am going to set the size of this
brush to about 10%. And I'm filling this section
right below the cloud. Now I'm going to
fill in this section right below the cloud with this brown color so that it looks like it is a
part of the cloud, but we're doing it in
a separate linear. Now go back to the
color palette and big this third color with
this, a lighter brown. And go to the Brush
Library airbrushing and filling the
soft blend brush. The size of this brush
to about ten person and then gently
lead blended with this darker brown color so that it looks
like it's about it's kind of blending the cloud is kind of blending
with this guy. Will go to the color palette
and big this darker brown. And now just blend it
with this guy like this. Going in semicircular motion. And just blend the cloud and this guy together
so that dust cloud, which isn't a separate layer, looks as if it's the
part of the sky, smoothly blending
in with the sky. So this is how it looks. Now you, while doing this, if you see that you can see
the harsh line of the cloud, you can go back to
the brush library, select the medium brush, and just reduce the size and
just blend it together like this so that the line doesn't appear so that you cannot
see the cloud line. And then use a blending brush. That's all soft blend
and then blend it and it has to look like it's released
more than you should be able to see the tide
line of the cloud.
36. Painting golden lining and tree silhouettes: You can see that the cloud appears to be blending
in with the sky. So this is where I'm going to stop and be the next section. We'll do the color
palette and pick this last but one color, which is kind of coffee
color, shade, lighter maybe. Now go to the Layers and create a layer above the
second sky meal. And I apply clipping
mask and I'm going to rename this layer
as golden lining, where we will be
adding golden lining behind this cloud that
we painted earlier. The Brush Library Artistic. And select this Gold Rush. I'm going to set the
size of this brush to about 8% or seven frozen. And I mistyped outlining this cloud that we
just painted earlier. So that it looks like a
golden lining for the Cloud. Because we will be
adding a racing sun. It looks like a
beautiful light that is coming from behind the
drought behind the cloud. To create this Gordon liming. Now go to the Layers and create
a layer just about done. Leah, apply clipping mask
and rename this layer. I'm going to name it as
standard pebble bed. We will add the rising sun, go back to the color palette and pick this off-white color, go to the Brush Library and rushing. And I will
go with the soft rush. I'm going to set the
size of this brush too about L and present. And I will draw, I will add a circle like this by just tapping
the default, my pencil on the screen. And we add, we have
though racing sun. Now, let's move on
to the next section. Create a new layer. And I'm going to
apply clipping mask, rename this layer
that has streets, but we will bunch of trees
or adding a tree stamp. Apply the clipping mask, go to the color palette
and pick this black color, which is the last
color from the Padlet, will be the Brush Library
20-day project set. And select this
day 16 tree stamp. I'm going to set the size of this brush to about 50 per cent. And tap on the screen, put this tree silhouette
now on the arrow icon. And using this blue corners and blue dots that you
see in the comments. Damp sand looks like it is rising behind those trees. There. I'm going
to place it heal. The tree trunks me to
appear little light. So I'm going to apply alpha
lock on the trees layer, go to the color palette and
pick this orange color, which is poured color
from the palette. And go to the Brush
Library and brushing. And select the soft brush
size to about in-person. And just lighten this
section of the trees. Lead though tree up your
stride behind the sun. It has to appeal it to light up. Just making this section
the little light. Using the soap. Gosh. Yeah. Need to stop it. And we are done with
the day 16 project. It's time to add the text. Let me add the app
on the actions. I can add X. This is in orange color, so let me just undo it. Moved to the color palette and this black color from
the palette and add in, we'll do white base 16. And I moved named this
project as rising sun. Now select the text
and change the form to match both sides. Now that won't be liked
and then that just the placement and the stakes, right? Oh, yeah. How beautiful is this project? I'm in love with this. And I hope you enjoyed
painting this one. Now, let's go back
to the gallery and rename this
untitled artwork. Change the text to be 16.
37. Day 17 - Twilight: Hello and welcome to the 17. Started by holding the
Polaroid Canvas canvas. Let's look at the color palette that we're going
to be using today, which is the day
17 color palette. Just delete this. So these are the colors. First color from the palette. We'll do a brush library, airbrushing, and select the medium brush. I'm going to save the
size of this brush to in-person city sector
percent section of the Canvas with this gun up. Now go to the color palette
big the second color, which is a shade
lighter than first one. And for the next section, hello. Doug gala, which is a shade even more lighter
than the second one. We are using sheets or
fully transition colors. Now go back to the color
palette because food color and fill in
the next section, we're going to be using a
lot of colors for this guy. It says the full color. Go back to the color palette, sixth color from the palette. And then I'll go back to the color palette seven
Carlo and fill in the welcome section of
the Canvas where this column that does
a lot of colors. Now go do. That just
means I can go in. And I'm going to
set the blue about, going to set it to about 35%. See that beautiful below
in the bottom section. This is what we want, will be the layers and
rename this layer. Rename it as a guide. I'm going to rename this layer. I'm going to type in Laos, this is where we will
be adding the clouds. Now Goofy, the color lip and
this color from the palette. Go to the Brush Library. I'm rushing and select
the blend brush. I'm going to set the
size of this brush. Then I will start
adding the clothes. Ready gently. I don't like
the color of the loud. So let me just undo it. And this is not
the color that I'm sleeping for amping this
fifth from the palette. And I will add the clouds. I'm using very gentle
strokes like this. Using the blend brush will induce going to reduce
the size further down. Olson or vocals. And I will add the clouds and the random shapes by going
with the flow motion. Random. So again, I'm adding random shaped clouds
in random places. Now go back to the
color palette. This cream color or off-white
color from the palette, and add some of that alert loud here in
this bottom section. Using the same land rush, it's going to create like
really soft clouds spread. It is just blending it. And you will not
see any hard edges. Just adding a little
drama to this guy, like me being this really, really soft clouds here.
38. Painting the mountain and tree silhouettes: Now that one the layers
and create a new layer, we'll apply clipping mask. I'm going to rename
this as mountain. We will be adding
their distinct move, then move to the color palette. And this last but one
color from the palette. We'll do the Brush
Library calligraphy and select the mono line brush. When you said this,
I store it on. Then plus and then start
adding the mountain. Starting from where to
start from this corner and add some more
bandwidth, aches leg, and bring it all the way. Right? Now, drag
and drop the color. Let's now go to the
Layers and create a new layer like clipping mask. And I am going to rename it
as you go to the color on it. And there's lactulose last
color from the palette. Again, I'm going to repeat the same step and I did it all. Start laughing. A mom thing. Again.
Funny one line. You're going to
take it all the way till again, overlapping
the mountain. Now drag and drop the color. It's time to add the trees. So we'll go to the
layers and rename this layer clipping mask, and that will rename
it as a tree. I'll go to the Brush Library and let us pick the tree
stamp that we are using for today will
be this day 173 stamp. Set the size to about 40%. And I will just tap on screen
like this to add the tree. Now that select
the arrow icon and adjust the placement of
this tree accordingly. Using the blue dots, you can just increase the size. I'm using the green
dot that you see. You can turn it around and
place it wherever you like it. I'm going to do on a
slanted this tree here. This is how our day 17,
Belichick, looks like. Happy with the reserve. If you want to add glowing moon. Now let me just add the eggs. The actions I can add an x. I will replace the text. Wounded typing the 17. I'm going to name this
project as Twilight. Now select the text
and replace the font. I'm going to change
the font to match the size than just the placement
of the text accordingly. To reduce the size
a bit like this. And now let's go
back to the gallery. This looks gorgeous, isn't it? Now, let's go back
to the gallery. And I've changed this
untagged and 17.
39. Day 18 - Blue Sky: Welcome to the AP and they
start the project in bulb, the Polaroid Canvas,
complete application. Today we are going to be
painting blue sky with clouds. So let's go to the
18th color palette, which has only the sky colors. So we'll pick the first
color from the palette. The brush library. Airbrushing. Select
the medium brush. I'm going to set the
size two brush to around 25 per cent. And I will feel about half of
the canvas with this color. Now go back to the color palette and pick this second blue from valid and fill the rest of the canvas
with this color. Now go to that. I can go in and set the blur to around totally percent or 3%. Now let's go to the layers
and rename this layer. And rename this
layer three Clouds. It's all very, very simple logic and it can be
done very quickly because I have created this cloud brush to
make it easy for you. Go to the color
palette and think this white color
from the palette. Go to the Brush Library. 20 day project set
to go with this day. 18 loud. I'm going to set the size
of this brush to around. Doing the two 25%, 25%. Opacity is set to 100,000. And I will start adding clouds by just
stopping the tip of my pencil on the screen
and dragging it like this. To add this loud. But Linda gaps give it
the shape that you like. Adding some more here, go Now, all you have to do is
just do people feel pencil on the screen and
Jackie don't pull it to left, tried to add this gloves in
the shape that you like. The lag 1 mol on
the bottom section. One making it to add one
more in this corner. I think I will make
this little girl learned, join it
to the Cloud here. Fill this section completely wiped over and meet this cloud. Completely white. We will add the shadow
using a different color. Fill in this section completely. This looks okay. Now go back to the color palette and
pick this food color, which is kind of bluish gray. I'm using the same
brush shouldn't seem same size and repeating
the same step. Adding some gray in-between this mid-section to add
the shadows to this cloud. Now, if you feel it is to, you could use the
opacity of the brush and add the shadows. You can go back to
the color palette, white again, and go over it
and make it a little lighter.
40. Painting the grass and tree silhouettes: Now it's time to
add the new layer. So tap on the layer and create a new layer above the
clouds, a clipping mask. And I am going to
rename this layer. Name it, that's codon. Now go back to the
color palette. Black color from the palette, go to the Brush Library, link trophy and select
the mono line brush. The size is set to
around ten to 15%. And I will draw a line as usual. When you don't delete the right. Now, drag and drop the color. Now we need to add some you
could ask to this area. So I'm going back to the
Brush Library, organic. I will go with this paper brush. The size of this
brush to around 5%. And I will add this wood end-to-end through
motion and add this. Could ask are the leaves and the section I'm going to cover the top section
of the ground, LEO. Just giving it some shape. Now you will see some
gaps in between. You can fill in. Now, go
back to the Brush Library. Before that, let's add the
train and separate layers. So go to layers, create a new layer. And I'm going to rename
this layer as tree. Now go to the Brush Library. Bring today's set
to select this. They eating brush. I'm going to save the size
of this brush too long. They need to take the 2% that print on the screen
and add the tree. Now that one, the adult, I can adjust the placement and the size using the new corners. The blue dots that you
see on the calmness and with that on using
the green dot that you see at just a placement weekly it a little bigger. Gloves should be visible, so I'm going to place it. You're free to place it
wherever you like it. So this is if we had done
with the day eating project, now it's time to add the text. So let me just do that. Actions, add a text down
and replaced stacks. I've been the eighth thing. I'm going to name it blue sky. Selected text and
change the form. I'm going to change
it to match book. It's just the size. Then. Now I just the
placement of this text deep to the center. And yes, we are done with this begging beautiful
blue sky with clouds. Which is a very simple
project that I hope you. Loud painting this. Now, let's go back to the gallery and rename
this untitled, outbursts. Protests. A thing.
41. Day 19 - Ocean Sunset: Welcome back and let's
begin with the 19 project. We're going to import
the Polaroid Canvas. Once you have the canvas ready, Let's look at the
colors that we will be using project today. So I have this day 19
color palette with me and I will pick the first
color from the palette, go to the Brush Library, airbrushing, and select
the medium brush. I will set the size
of this brush to around 20% and
opacity set to 100%. And I will fill in the top section of the
Canvas for this color. Now go to the color palette. And when the second color and fill in this next
section with this color, go to the color palette. I'm picking the food color
from the palette and the Lindow bottom section, but this color tap
on the adjustments, I can go shun blood and
set the blog to about 40%. Now, go to the layers and
rename this layer as Skype. And go to the layer three. And I will rename
this layer as clouds. Go back to the color palette. Though. This fifth
color from the palette with brown sheep go
to the Brush Library. When DDA projects I do and go with this twin, the D9 loud. Emily said the size of
this brush to about 6%. And opposite they
said 200 per cent. And I will start adding
the clouds by just tapping the tip of my Apple
pencil on the screen. I'm going to reduce the size, but then down and set it to
about 4% and add the clouds. All I'm doing is
just seeing the tip of the pencil on the screen
and adding the clouds, giving it a random
cloud shape and filling in this entire
section with the Cloud. That will reduce the
size further down and refine the shape
of the cloud here. Fill in the gaps. So the badge of the cloud
may appear light dough. You can go ahead and go
over it and add though. They'll fill in the gap. So once you are done with this, now go to the Brush Library,
airbrushing and select. And I will go with
the soft airbrush. I'm going to set the
opacity to hundred percent. And I will set the size to around 15 per cent
and it's still small. So let me set it to around 30% and fill in this section using
this soft airbrush. Filling in the gaps in
between with this brush. Go to the color palette. This next color, which is the
six color from the palette. And using the same brush, I will increase the
size for the answer to, to around 50 per cent
and the next section, but this color, don't worry about how
this is looking now, we will blend the two colors. Now. Use the blend tool and just blend these
two colors really well, so that it looks like the color is going from darker
shade to the light shade. I did this part. Skype. Want to read you increase the size to her own person and just
blend these two colors. I'm going to stop it here. Now, let's go back to the
layers and create a layer right about this guy or below this cloud where we
will add the linings. So I'm going to rename this layer four,
apply clipping mask. So it will be applied to, I'm going to rename this
layer for as lining, where we will add lining for
the Cloud that we painted. Go to the color palette. We will use the same color. Go to the Brush Library. Use the same cloud brush that is 20 day protests set to the 19th. Cloud, reduce the size further down and set
it to around 2%. And using the same, use the brush and
add the lining. We'd asked to appear
lighter on the edges. So I'm using this lighter
shade and filling in though, outlining the cloud so that it appears like
a golden blaming. You'll want to experiment. You could use this brush and add the clouds in
the way you like it. You need not follow the exact
same step that I'm doing. Instead, you can experiment with the cloud, brush the clouds. Linda's complete section
and add the lining. Now, you can see like that is this golden
lining for the loud. With me. Zoom in and show
it to you how this looks. Looks really good right here. I'm going to stop it here. And let's move on to
the next section. App on layers and create a
layer just above the clouds. Go into the color palette and I will make this color
what color from? Before that, let's apply clipping mask and
rename this layer. I'm going to rename
this layer sun. We will add those
settings, some. Now go to the Brush Library. Apply clipping mask, go to the Brush Library, airbrushing. And I will go with the
medium brush again. I will set the size to about
20 to 25% and add the glow. Do adjustments. I can go shun blood
and send the blood to about 35, 40 per cent. Going to set it to
about 40 per cent. Now go to the layers. Again in the same layer, but we'll add this
and I'm going to take this third color
from the palette. I will go to the
brush liability, airbrushing, soft air brush, set the size to about 30
per cent and add a circle, or the Sun here in the middle. So that it is, we
are done adding this setting sun with
the glow around it.
42. Painting the ocean and trees: Now let's go back to the
layers and create a new layer. Apply clipping mask. We're going to rename
this layer as ocean, where we will be adding
the ocean and the bees. Go to the color palette. Big this last part, one color from the palette. Go to the Brush Library, calligraphy and go with
this mono line brush. I will set the size 15, 20%. And I draw a straight
line starting from one side to the other
side, a straight line. Now, drag and drop the color. Need to add the waves. So let's go to the color palette and this sixth color
from the palette. We'll do the brush library. I'm going to go materials and I will select this
short hair brush. I will set the size, the size of this
brush to about 60, 65 per cent opacity set to
100% and add the waves. Now, thing is going
outside the ocean layer, so let us go undo it and go
back to the layers and apply alpha log base that we are adding stays
within this ocean layer. So all I'm doing is adding horizontal strokes and
filling in this section. So clearly thin lines. My just appear like you are
adding a different color. Horizontal stroke. Necessarily do not have to worry or stress a
lot on the adding the details to this
ocean because we're going to be adding one
more layer on top of it. Now go back to the layer. And if you think that the
color appears to light, you can use the same ocean color using the same brush and add some horizontal stroke over
it and make it appear darker. Go to the ballot, and I will pick the sport
color from the palette. Go to the brush library. Now, make devious and select
this fine hair brush. I will reduce the size of
this brush and set it to around 25% and add this lighter shade
right below the sun. Just filling on leave
this section right below the sun using this
color on the brush. I'm going to stop it there
now go to the Brush Library. And if it appears
to light again, you can go with the ocean
color again and fill in the section using
short hair brush. Yeah, This is sick. Let's move to the next
section so I better go to the color palette and add
the grass foreground. Go to the Layers and
create a new layer. And I'm going to
rename this layer seven black clipping mask. And I'm going to rename
this layer seven. Name it as ground. Go to the color palette. And I will pick this black
color from the palette. Go to the Brush Library, calligraphy and
select the mono line, brush, add, Gabi, uneven line. And drag and drop the color. Now, I'm thinking of adding some grass to this
ground section. So I will go to
the Brush Library, 20-day projects, set one. And I will use this grass brush stamp from the food and add
the grass will set the size to about
in-person and just tap on the screen here in the bottom section to add
the grass blades like this. Again, now, you
can set the size, you can increase
the size and add all the grass blades
swell up to you. Let me undo this section. Linda's in dissection, I
will increase the size for the two to 15% and then
add some more blades. Yeah, This looks good. Right? Now, let's move on
and create a new layer. And I'm going to apply
clipping mask and rename this layer where we
will be adding the trees. So I'm going to
rename it as tree. Could do the brush library 20, the project set to
select this day 19, Tristan, I will set the
size of this brush. We'll set it to four people listened and kept the
pencil on the screen. And to add the tree, I am going to flip
it horizontal. And I'm going to turn it around using this green
dot that you see. And just the placement. I will move to this
corner on the right. I'm just adding section of the tree on this
top right corner. You can adjust the placement of the tree wherever you'd like it. Yes, we are done bed
the day 19 project. I am very happy with the result. So now it's time
to add the eggs. Let's just do that. Tap on the actions. I can add text. I'm going to bring
this downhill. Next. We're going to
name it died in the 19. And I am going to
name it ocean sunset. Now select the text
and change the font. I will change it too much. Bulk. Increase the size. Down. No edges to placement. Text in the center. That's it. We are done with it. We are done with actin
Adele, beautiful sky. Now, let's go back
to the gallery and rename this
untitled artwork. I'm going to change
the text to D9 team.
43. Day 20 - Gloaming Sky: Hello, It's day 20, and it stands for
the final project. So let's begin. I'm going to start by
importing the Polaroid Canvas. The Canvas. Let's look at the colors. I have this date when the palate with tasks like really
beautiful colors. I'm going to pick this first
color from the palette, go to the Brush Library, airbrushing, and select
this medium brush. I will set the
size this brush to about 25 to 30% and fill
in this top corner. Now, go back to the Padlet and the second
color from the palette. And I will be using
the same brush. I'm going to fill
this section of the Canvas with this
really beautiful color. Go back to the palate. If this third color, use the size further down, and I will set it to around 15%. In this section. Now,
don't worry about how you are going to
fill in the colors. It's totally up to you. I want you to do
it as you like it, because it's the 20. I want you to fill in
colors the way you like it. Don't stress a lot about the
positioning of the colors. Now go back to the
palette and I will pick food color and
fill in this section. Now, let's blend these
three colorful colors. So that just means
I can go Shin. And I will set the bow tie or I'll
set it to around 40%. Yeah. Now I'll go back to the
layers and rename this layer. I'm going to rename
it as a guide. Now go to the layer three
and renamed it as clouds. We will be adding like really flowy dancing
clouds in this project. And again, don't worry about the shape or the
position of the clouds. I just want you to
have fun and add this flowing dancing
all over the sky. So go back to the color palette. And I will pick this food
color from the palette, go to the Brush Library, and then select for
those soft airbrush. I will set the size to
about Dwayne be pleasant, and opacity is set to 100% and I will add the list of class. I'm going to increase
the size for Adele and I will set it to about 40% and add
this soft clouds. The random shape. I will be adding
the clouds or lower this guy having different
colored Cloud Disk. Adding some more yellow. Your lawn here. As you can see it, as clouds are all over this guy and dancing and are moving in all
possible direction. I will go back to the public
and there's toward color from the palette and add
two more of this color. I'm going to do, I'm going to increase the size
for the insect it to her own 50 per cent
and add some clouds. I just want you to have fun. And though we didn't
all your knowledge. Now, let's go back
to the palette, and I will pick this fifth
color from the palette. Using the same brush. Add some nice glowing clouds
in this bottom section. Adam, very gently don't apply a lot of pressure
because you want them to look like really soft clouds
dancing all over this guy. Adding some more yellow. Now, go back to the Padlet and pick the six
color from the palette. And I will reduce the size
and set it to 47% and add some in-between this cloud and make it brighter.
44. Painting mountains and tree silhouettes: Now if you think that
it looks too bright, you could go back to
the palate and pick this food color and go over it and cover it by applying this gentle strokes
and make it light, dark thing that you
do, too bright. It's up to you how you
want to play around with this brush
and add the clouds to make some, no, I just
meant by going back and adding covering
these clouds. Now I think this
second color and some would make adjustment to this guy and blending
it with the clouds. Go back to the
palate and there's Todd color from the palette
and add or lighten. This blight clouds are met. By applying very,
very gentle strokes. You can stop it
whenever you feel that this guy looks good enough. I will go back to the Padlet
and pick this first color. And I didn't feel more
strokes in between. Now it's time to
add a new layer. So tap on layers and
create a new layer. I am a blind clipping
mask on this layer, and I will rename this
layer as small team. Go to the color palette and
in this last but one color, go to the Brush
Library calligraphy and select the mono line brush. I will set the size
of this brush to about 15% and add the outline, the mountain starting
from this corner at the beach, sand. Bring it to the other corner. Now, drag and drop the color. Let's add some snow
to this mountain. So I'm going back to the
Padlet and I will pick this last color and apply alpha lock on this
mountain layer or water more texture we're going to add stays within
the mountain layer, will do the brush
library charcoals, and select this bond tree brush. I will set the size
of this brush to about 20 per cent and add some
texture to this mountain. Ii gentle strokes so that it looks like it
is covered with snow. Not using white, but a shade
lighter than the mountain. So add the texture. And I'm going to stop it here. And more on layers and
create a new layer. Apply clipping mask
and rename this layer. I will name it as trees. Now I'll go to the
color palette and big black color
from the palette. Go to the Brush Library, link D-Day projects said tool. And go over this date stamp
at just the size of this Dan, and I'm going to set it to around 57 to 60 person and just tap on the screen
and add the key stamp. Use the arrow icon on
and adjust the placement of the trees using this blue dots that
you see in the corner. Yeah. Make sure that
the mountain layer is not completely window
completely part of the mountain layer visible. And that's it. We are done
with this final project, which is the De Duan De, and I am very happy
with the result. Let's add the text now. Go to Actions, Add and text. Replace this text and I'm
going to type in the 20. Hold this down. And I will name this
project as looming sky. Select the text and change
the font to match book. And it just decide accordingly. Now, tap on the arrow
icon and adjust the placement of the
text to the center. And that's it. We are done with. Our final project. Looks really beautiful. So let's go back to the gallery and rename this
Untitled Artwork. And I'm going to factor
the brain being done.
45. Conclusion: Thank you so much for watching my class and I hope you
enjoyed painting simple, colorful and relaxing projects
for 20 days and procreate. I believe that by now
you can confidently paint the sky and clouds
without any help. You can use the stamps and cloud brushes that
I have included in this project or in this class for your
future projects. You can always paint more such
landscapes or cite images, use them differences from
sites that offer free majors, like Pixabay and Unsplash. These types of four tons of
free majors that you can use. Please share your final
artwork and progress shots by floating your block
to your project section. Also, please don't forget to leave a review
about the class. And let me know if you
enjoyed this class. If you have any questions,
please let me know. I am happy, too. Happy painting and take care.
 Sheetal Shetty, artjauntwithsheetal