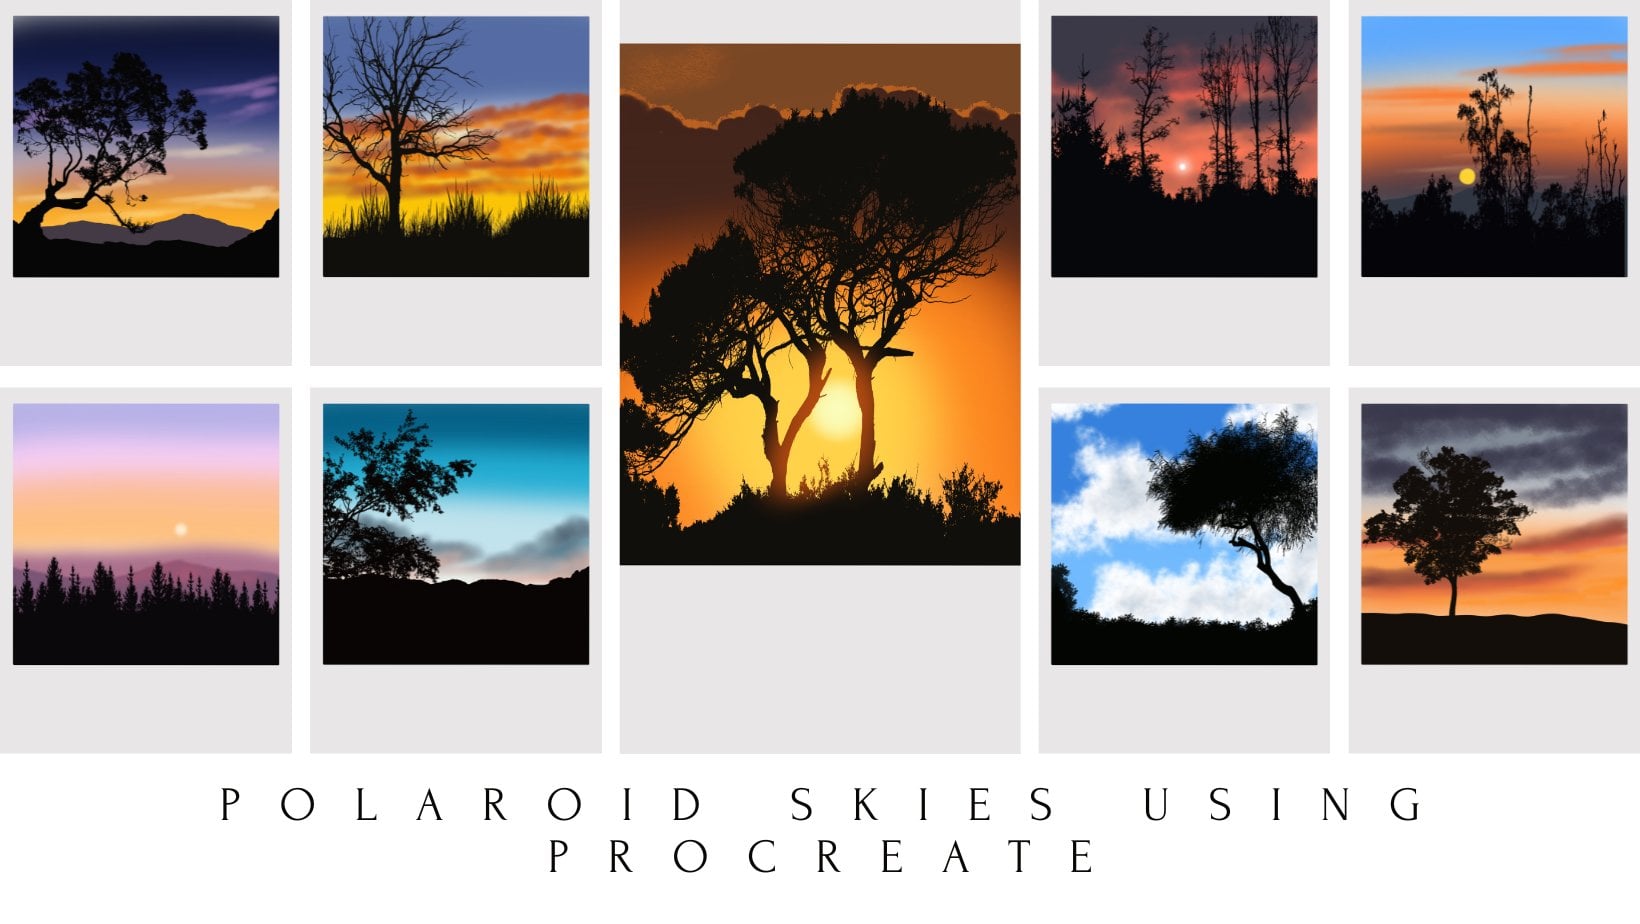
Transcripts
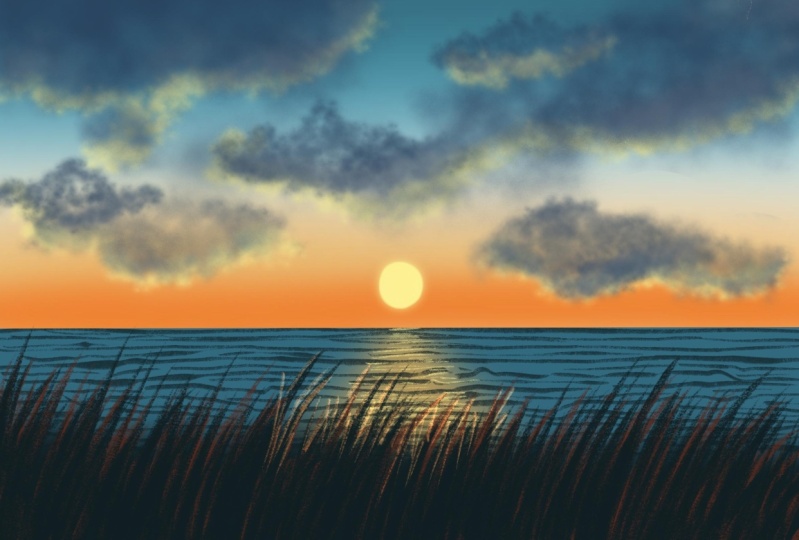
1. Introduction: Doesn't allow a
beautiful sunset. Painting. A sunset
isn't that difficult? That if it is done digitally, it is a fun and easy way to
introduce yourselves to add. It is also an excellent
way to relax. Most impressive
thing about a sunset is beautiful colors and artists love playing
with this color. Hello, and welcome to
my Skillshare class. Not a lot of different
types of sunsets to gain. In today's class, we are going to paint a beautiful sunset. Again, there are many ways
you can paint a beat sunset. No matter which technique you follow the approach
is usually scene. You start by picking
a color badly, deciding the sheets are the
color combination at all, the necessary details
that you want. And finally, you
finish off by adding smaller details so elements and elevate the standard
of your painting. In today's class, we
will do just that. You will be able to
paint a sunset in. This painting is as
simple as it can get. And I will walk you
through step-by-step to paint this beautiful
sunset, the glass. So it is very detailed
and minimalistic. And the end product of all
this isn't aesthetic scene. Perfect, sunset. Now, if you're ready your
iPad and let's get started. Before we dive into the steps
and create this painting, Let's look at the colors and instead we need to get started.
2. Tools: Now let's quickly look
at the tool status required to start the projects. We need an iPad and Apple Pencil and
procreate application. I am using a seventh generation
iPad for the project. I'm using the latest version of Procreate application
with this 5.2.
3. Setting up the canavs,colour palette and brsuh: Once you have the procreate
application open, let's look at the canvas that we are going to use
for this project. Tap on the plus icon that you see your own the
top right corner. And you see the list
of canvases that are available in the
appropriate application. You can go ahead and create your own custom canvas
like this by specifying the Canvas di did
status and height in inches, centimeters
or millimeters. By specifying the
bed and go hide. In this, you can create
your own custom canvas. Just tap on Create, and you will have the
custom canvas ready. Now, it's a custom
canvas of the sides, 100 by 100 pixels that
I am going to create. A canvas that is off
the screen size. I will be going ahead and creating the screen size canvas, which is of size one by
one for this project. Now, let's go back
to the gallery. And you see this is the size or the dimension of the canvas. Tap on that and I'm
going to rename this untitled
artwork as project. Once your canvas is ready, let's move on to the painting. I'm going to add
just a inverse to the screen app on
the color palette. And I have this literally
for this project, which includes nine colors. So I have divided it into a
set of three in each row. And I will let you
know which are the colors that we are
going to use for this guy, though, sudden
behaves and all that. So these are the
only colors that we would be using
for the project. This ballot is uploaded in the resource section
for you to download. So make sure you download it and import it to the
Procreate application. If you do not know how to import it to the
Procreate application, you could check my previous
classes and see how to import the Color Swatch and the brush set to the Procreate
application. Now, apart from
this color swatch, I have also included this fluffy cloud
brush in the resource. So make sure to download
this as well to the appropriate
application before you begin with the project. Now, if you're already
in the Canvas now, Color Swatch and the brush. Let's get to the painting.
4. Painting the gradient sky: Tap on the layers and make sure you're on the first layer. Go to the color palette and make this second
color from row one, would do the brush
library airbrushing and select this brush. I will say this, I stood on 8%. Opacity of this brush
is set to 100%. I will apply horizontal strokes like this and fill the top section of the
Canvas with this color. Now color palette and pick this first
color from blue one. And using the same brush, I am going to fill
the bottom part. Read this shade of blue
light below the one that we, the darker shade of blue, I'm applying horizontal
strokes again. Go back to the color palette and make the second color from second row Live this wide
gap that you can see. And then applied
this orange shade by going with horizontal
strokes like this, make sure that you leave
some white gap in-between. Because when you
blend the colors, you do not want a green
shade on this guy. So I'm leaving this white gap. Now, we need to blend
these two colors. So tap on, I just meant portion and send the blood to
around 35 per cent. Now, if you apply
horizontal strokes of orange color right
below the blue one, when you blend the
three colors together, you may end up with
the shade of green. And you do not want that
green shade for this guy. So that is why I left a wide gap in-between the
blue and orange shade. Now dab on the layers and
rename this layer one as type. We can make more adjustments
to this guy later on.
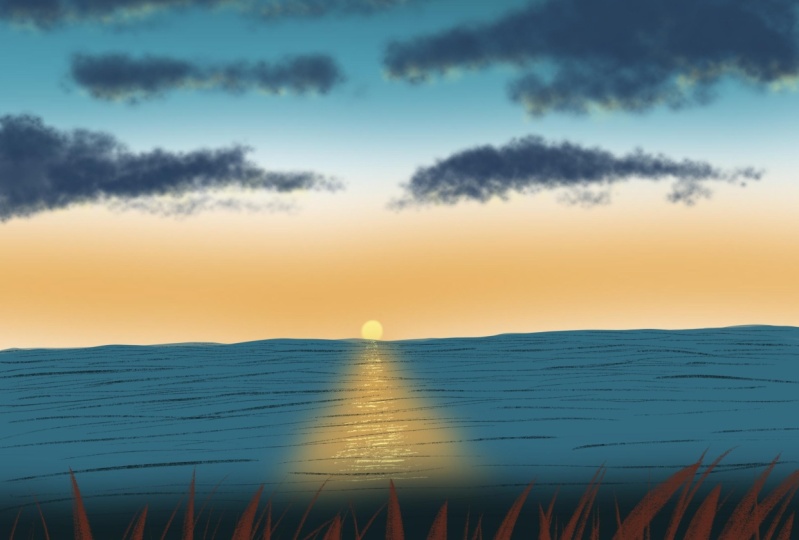
5. Adding the clouds: Now let's move on to
the next section. So I am going to
create a new layer, and I am going to rename
this layer as clouds. So this is Leo will be
adding clouds to the sky. Once the layer is ready, go to the color palette. I'm going to pick this Todd, I love from row three. Go to the Brush Library. Fluffy cloud brush. My job included. And I hope you have
downloaded this brush. And I'm going to set the
size of this brush to around 6% and opacity
is set to a 100%. And I, I'm just dragging the tip of my brush
on screen like this. Add this fluffy clouds. You can go ahead with
any shape for the Cloud. So just use the tip
of your pencil and drag it along the screen
like this to add the clouds. So it's as simple as that. I'm going to reduce the
size further down to around 4% and adding
smaller clouds here. One mole, you'll use this size further down to around two Poisson and add
the smaller cloud here. Keep adjusting the size of
this brush to add the Cloud. This is done now we need to add some dimension or
depth to this cloud. So I am going back. I live and within this
solid color from row one. And I've been using
the same brush, but I will reduce the opacity of this brush to
around 70 per cent. Using the same size,
that is around 6%. I am going to add some
shadow to this cloud here. In the bottom section of
the previously done clouds. It'd be the same step for all the clouds that
you have painted. So you can already see a lot
of debt and the cloud by just adding some
shadows to the Cloud. Let's add some more
details to this guy. So I am going to use, using the same brush. I am going to add
the same color. I'm going to increase
the opacity to around a 100% and decrease the
size further and add some more fluffy clouds size. And they'll previously
done clouds. I think I'm pretty happy
with the Cloud section here. I've installed that clouds here, and let's move on to
the next section.
6. Adding the golden lining and the sun: Let's add some golden
lining to these clouds. So tap on the Layers and create a layer just above
the sky layer. So the lighting we're going to add below the clouds layer. Now go to the color palette and a low color that
is third column from root to go to the Brush Library and select
the fluffy cloud brush. I'm going to reduce the
size of this brush. I will set it to
around three or 4%. If you keep the size of the
brush wedding mini mom, it would be great. I'm going to drag the brush
along the bottom section of the previously done clouds
to add this Gordon lining. Repeat the same step for
the other Cloud as well. Now you can add it to the
small clouds as well. So only thing that you need to remember is keep the
size of the brush minimum and make sure
that you're adding this lining below
the cloud layer. And that's it. We
are done adding this golden lining
for the clouds. Now, let's move on
to the next section. Before that, let's go
back to the layers. And I'm going to rename
this layer three as lining. Since we have added the lining, golden lining, we need
to add the sun as well. So let's do that now. Create a new layer just
above the clouds layer. Now I'm going to rename this
layer for the color palette. And I'm going to use the same yellow color that
is taught color from road to go to the Brush
Library, airbrushing. And I'm going to go
with the soft airbrush. We went to set this opacity
of this brush to a 100%. I've been set the
size to around 10%. And I will draw a
tiny cell good, and add the glowing sun. And that's it. Done. We will come back to it later and make a few more
adjustments later on. Now, let's move on
to the next section.
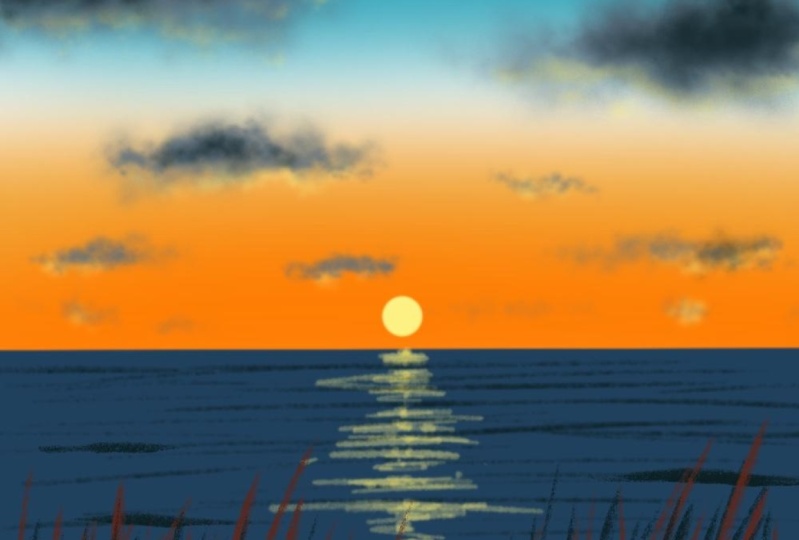
7. Painting the sea and the reflection: Now it's time to
paint the CN beeps. So I am going to
create a new layer. And I will rename
this layer five as C. Once the layer is ready
with the color palette and go with the second
color from row one. Will do the Brush
Library calligraphy and select this mono line brush. I'm going to set the opacity of the brush to a 100 person. And I will set the
size to around 15%. And using the background grid, I'm going to draw a straight line like
this just below the sun. Start from one end of the canvas and adroitly other
end of the canvas. And now drag and drop
this color to the sea. Now, let's go back to the sun layer and
adjust the placement of the sun by tapping on the
arrow icon that you see. And what. You can increase
the size or decrease the size by tapping on the blue dots that you see and
adjust the placement, move it around and place it. I'm going to get a board and
please sit somewhere here. I will drag it down and place it here right about
the C, like this. And this is okay, now I'm going to stop at kill. Now let's go back to the cilia and apply alpha
lock on that layer. The venue apply alpha lock, a checkered box
appears in that layer. Color palette and pick
this second color from row and go to
the Brush Library. Airbrushing, and select
the soft airbrush. I'm going to set the opacity
of the brush to 100. And I've been said decides
to around and Poisson. And using this soft air brush, we are going to add the
reflection of sun on the C layer. By adding horizontal
strokes like this. At the horizon, I am keeping
the size very small. And as I come downwards, I'm going to increase the
width of this reflection. Now, whatever adjustments are the extra hours that
you're going to apply stays within
the C layer when you apply alpha lock on a layer. One Stan tap on
that just meant I couldn't go Schindler and set the blood to around 20 per cent or I'm going to set
it to around 15%. Add more deflections later on.
8. Adding the waves: App on the Layers and
create a new layer. And I am going to apply clipping mask on this layer so that it follows it sparingly. But just to see Leo and
I am going to rename this layer as vapes where
we will be adding the base. I'm going to the color palette and I will pick the
second colostrum. Three, go to the Brush Library, calligraphy, and select. She'll brush. I will set the size of this
brush to float the present. And opacity is set to 100%. And I am going to add
this horizontal strokes. So that is how we are
going to add the waves. Keep adding this horizontal
strokes all over the sea. To add the space. If you increase the pressure
on the tip of your pencil, lines are going to look
darker. It's okay. It can be a little darker and in few areas you can keep it light. I am going to speed up
the process since it is already reproduced step of adding this horizontal strokes. But you can adjust the settings to watch it at the pace
that you would like. I am leaving the bottom section
of the sea and not adding this horizontal strokes
because that is where we will be
adding the grass. So I'm going to be filled with lead half off the C-section, but this waves at
the other half will be covered by the grass blades. Take it slow and add
this horizontal strokes. Make sure that they are very thin lines
and not too thick. One standards time to add some shiny reflection
of the sun. So I am going to pick from the color palette and
I will use the same brush. I'm going to set the size of
this brush to around 15%, and opposite is set to a 100%. And I am going to repeat the same process of
adding the waves. The shiny waves, that
is the reflection. Using this brush. Add the horizontal strokes over the area that we previously did. Add the horizontal strokes or what to shoot reflecting waves. The shiny waves. Make sure that this waves
are the horizontal lines that you are applying or not to take and keep it very thin. I am going over and add in
some more horizontal stroke. Do we make it more bright, dark? And that's it. We are
done with the main spot. Now, it's time to move on to the next section where we
will be adding the grass.
9. Painting the grass blades: Now it's time to add
the final layer. So tap on layers and create
a new layer where we will be adding the grass
on the plus icon. And I'm going to rename
this layer seven as grass. Once you're ready with the Laos, go to the color palette. And I'm going to pick this
second color from row three. Go to the Brush Library. Calligraphy, this
mono line brush. I'm going to set the
opacity to 100%. I haven't set the
size to around 15%. And I am going to
draw a curvy line in this area just above the
CEO, the base layer. And I'm going to drag and drop
this color to this layer. Tap on adjustments. I can go Schindler and to
send the blood to around 15%. And we are now ready
with the background. It's time to add
the grass blades. So let's do that
in the same layer. So I'm going to pick
this brown color as the first color
from blue tree. Go to the Brush
Library calligraphy and select this chalk brush. I'm going to set the opacity
of this brush to about 100%, and I will set the size
to round Sixty percent. Now I'm using this chalk brush. I am going to add
grass blades starting from the bottom and moving
towards the top section, like the grass blades have the sharp at
the top section. So start from the
bottom and apply strokes like this so that the glass plates appear
sharp at the tip. So lenders n-type portion
but the brown glass plates. You can add this grads, please, in any direction. I am taking it towards
the right side. You can add it to the
left or you can mix and match both left and
right side glass plates. I'm filling in few
portions in-between. And also, it does
not necessarily do keep the size of this
grabs, please do uniform. You can add some long, some short depletes lens. This is done. Go back
to the color palette. And big this second
color from row three. And repeat the same process of adding the grass blades and
covering the bottom potion of those brown blades so that only the top section remains brown and the bottom
section appears dark. Again, make sure that
the tips are sharp of this grass blades and add them in all possible directions
or you can keep it, it will 01 particular direction. Just make sure to cover the bottom section of
those brown blades so that the bottom section
appears darker and then the sand falls on this graph on the top section
appears lighter. So I'm keeping it blank.
10. Adding final adjustments: The same step and add
the bleed all over. There's grass area starting
from left to right. I'm going to fill in some
portions here and there, but they'll grasp of what the bottom section appears,
brown, black color. Making some final
adjustments here and there. Now go back to the
color palette and pick this orange color that is
first color from group two. So using the same brush, I am going to add some orange colored
grass blades right below this and you're in
this area or this portion. Now go back to the
color palette. Black color that is taking
color from blue tree and cover the bottom section
with this darker color. Making some final
adjustments here and there. And that's it. We are almost done
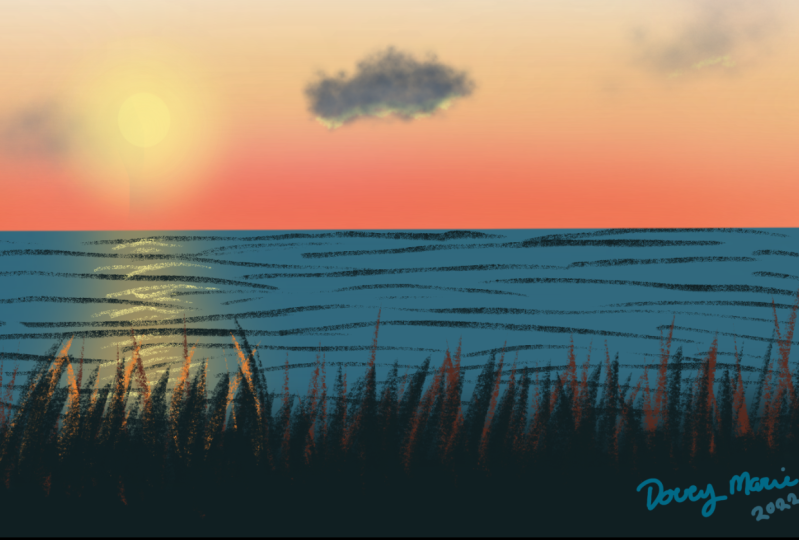
with this grass, Leo. Let's make some
adjustment to the sky. I feel that this guy
appears very dull. So I am thinking of
making it more bright. So let's do that now. We'll do the layers and create a layer just above the sky. Tap on the plus icon
and create a new layer. We are going to merge it to get up in the sky layer on it. Now go to the color palette
and this orange color that is puss color from blue
to do airbrushing. And select the soft brush. I'm going to set the
size of this brush to around six or five boson
and obesity Two, 100%. And I'm going to add a horizontal stroke about the C layer light
about this section. We're just going to make the bottom section of
this guy a little darker, but this orange color. Since one's done,
tap on adjustments, I couldn't go Schindler
and blend it with the previously done sky. So I'm going to set the
caution low to around 15%. And this looks much
better now on the layers. And I'm going to merge
this layer eight and Skype together by
pinching it together. And now we have the
boldfaced sky layer. I'm pretty happy with how
this looks now. That's it. We are done with all the
layers here and we added EBITDA final painting step that we did as optional in that because I felt
guy looked very dull. So I thought of making
it more blight by adding that orange color right
above the horizon. And this looks much better
now, what do you think? We are done with
the final thing? And I hope you enjoyed painting this beautiful sunset with
bright and beautiful sky, fluffy clouds and golden lining.
11. Thank you!: Thank you so much for
joining me in this class. If you enjoyed painting this sunset and
learn something new, please do drop a review about the class so that it can
reach more students. And it also helped me to create better classes
for you in the future. Until the next class. Keep painting and it good.
 Sheetal Shetty, artjauntwithsheetal