Transcripts
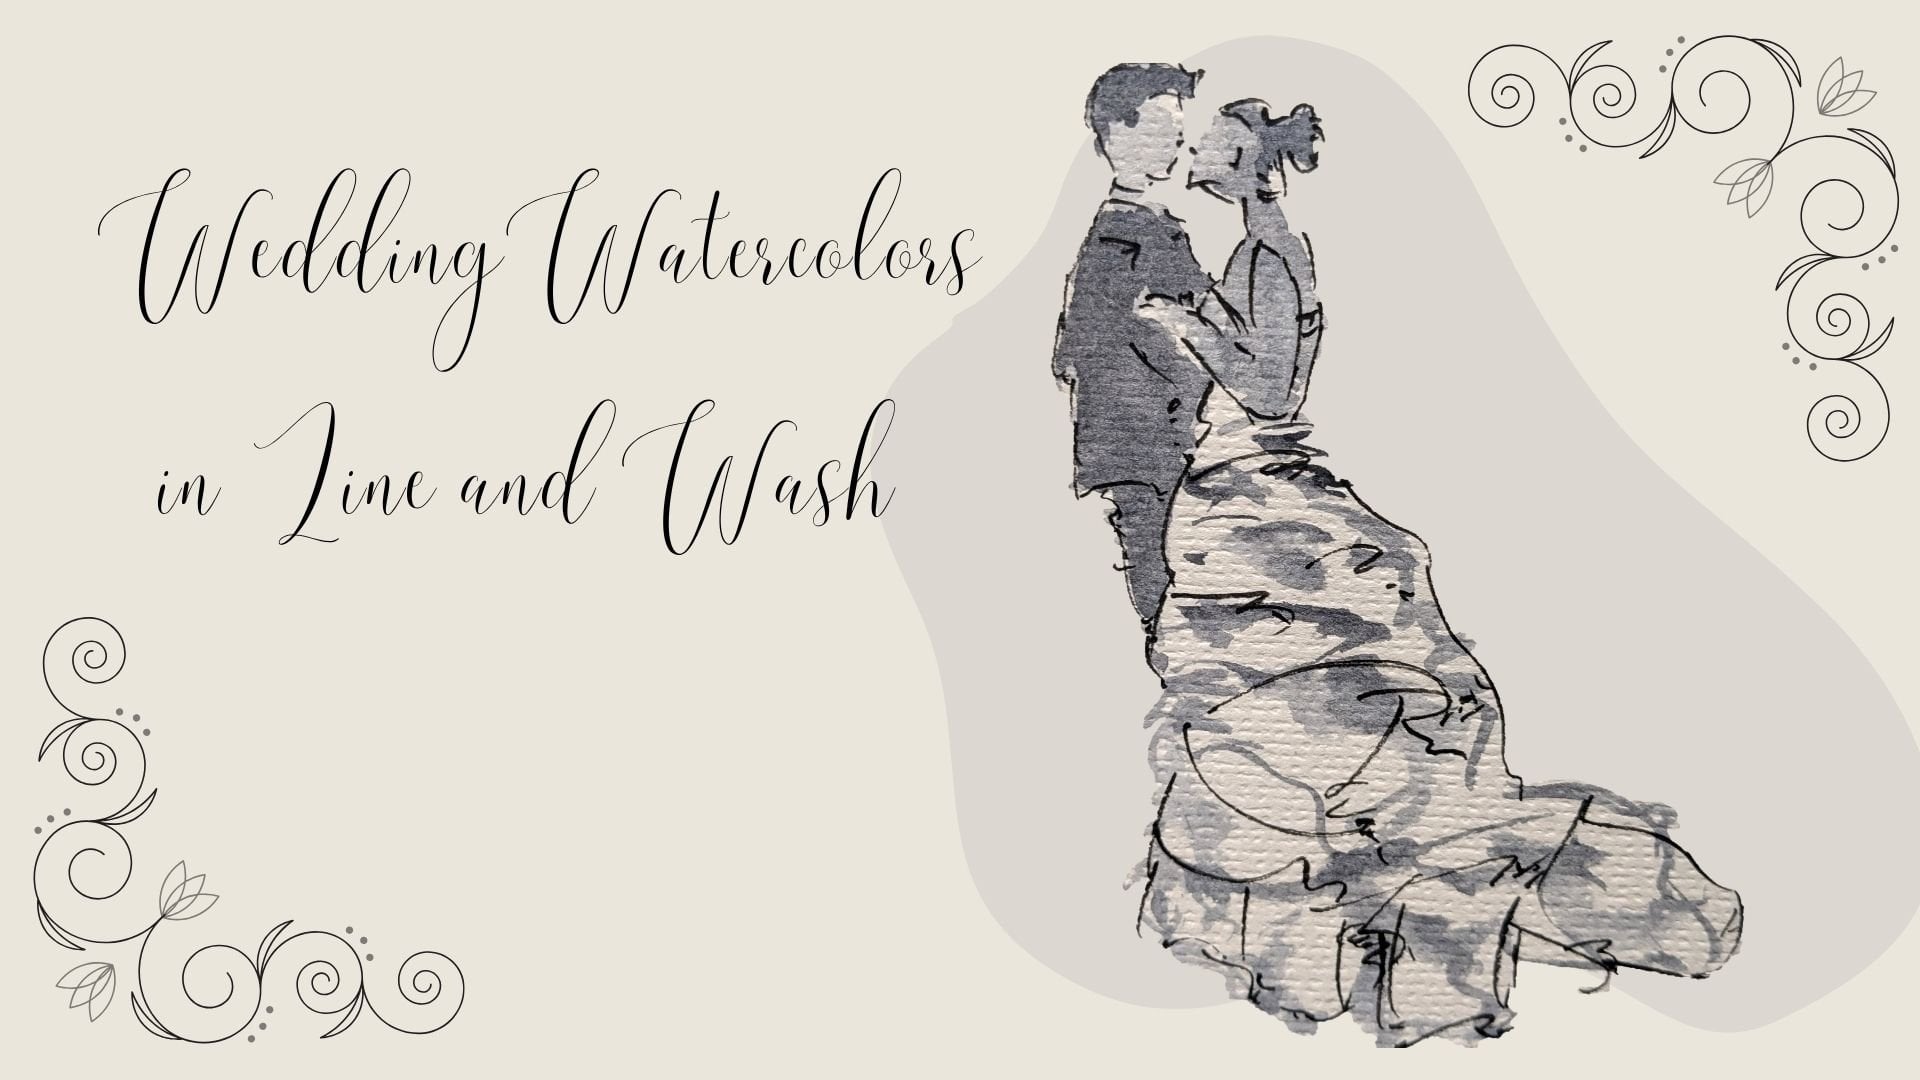
1. Welcome: Hi. Hi and welcome to
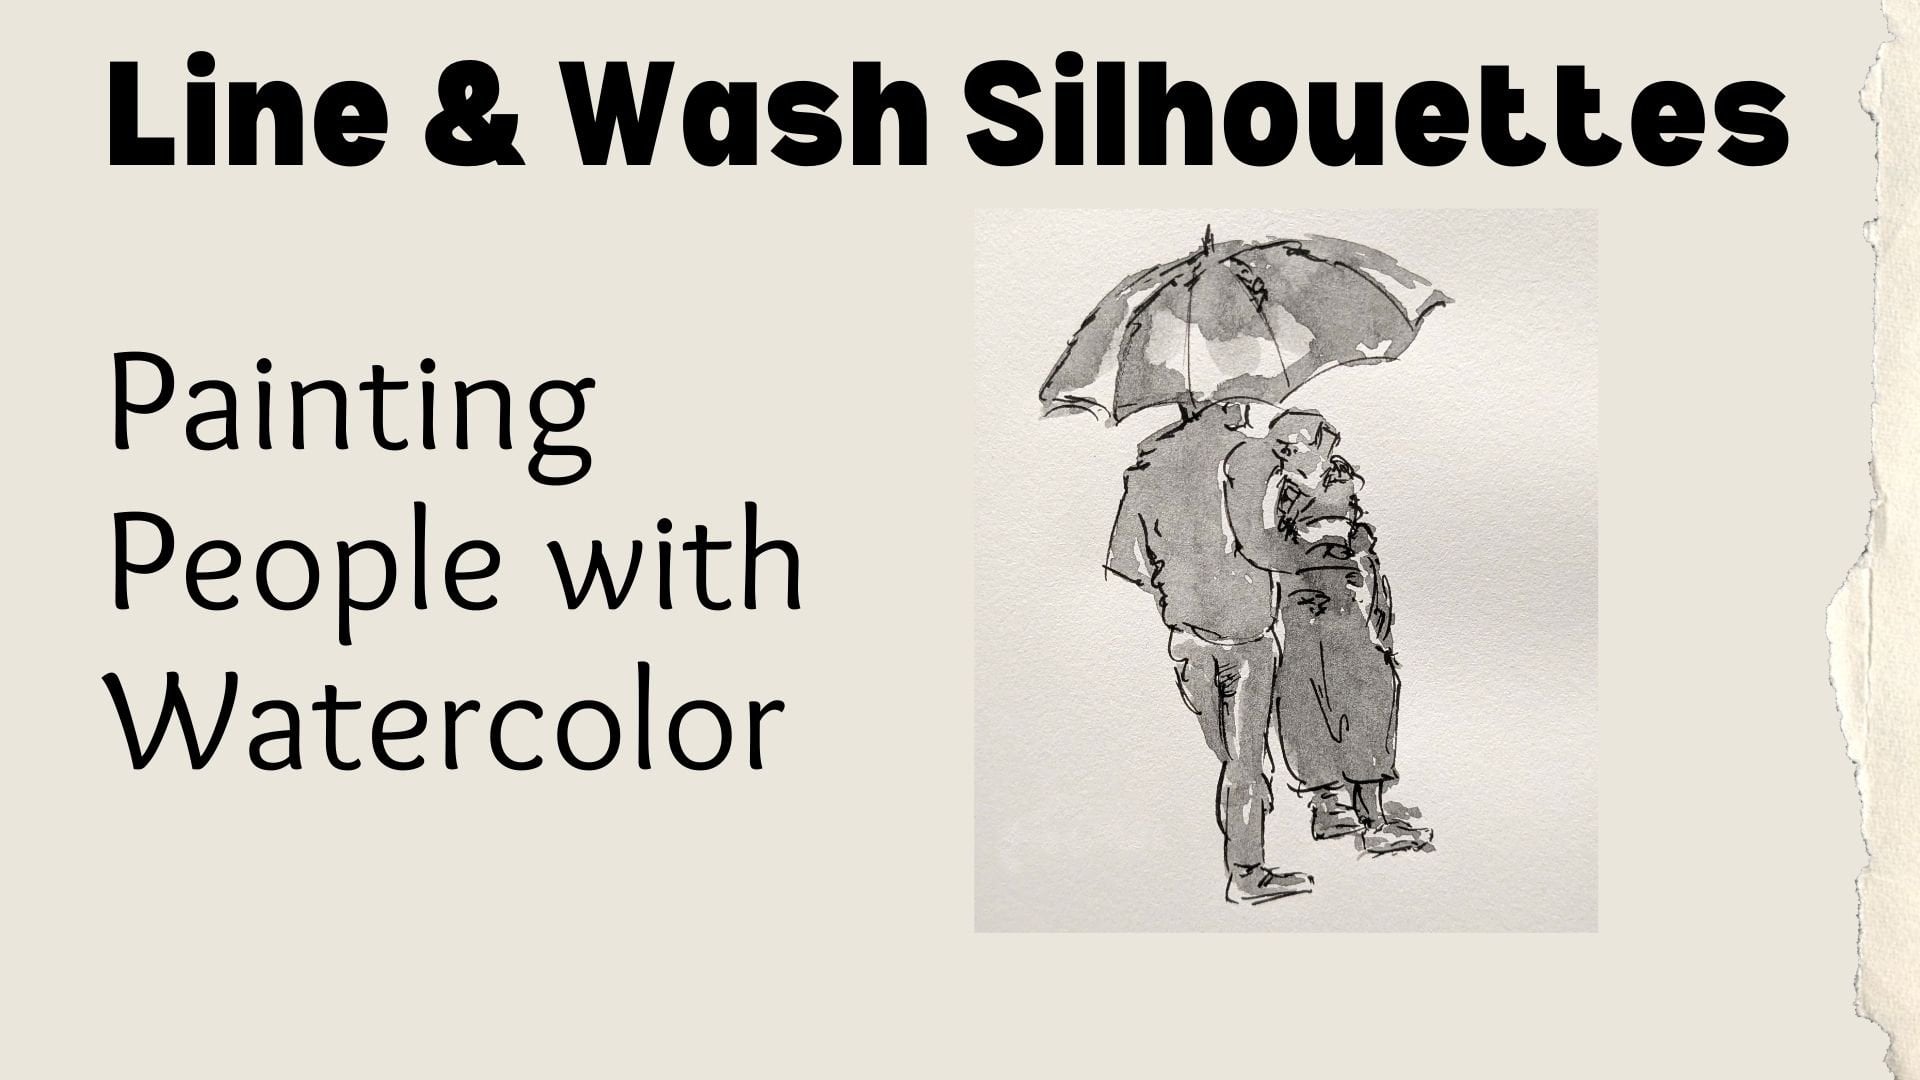
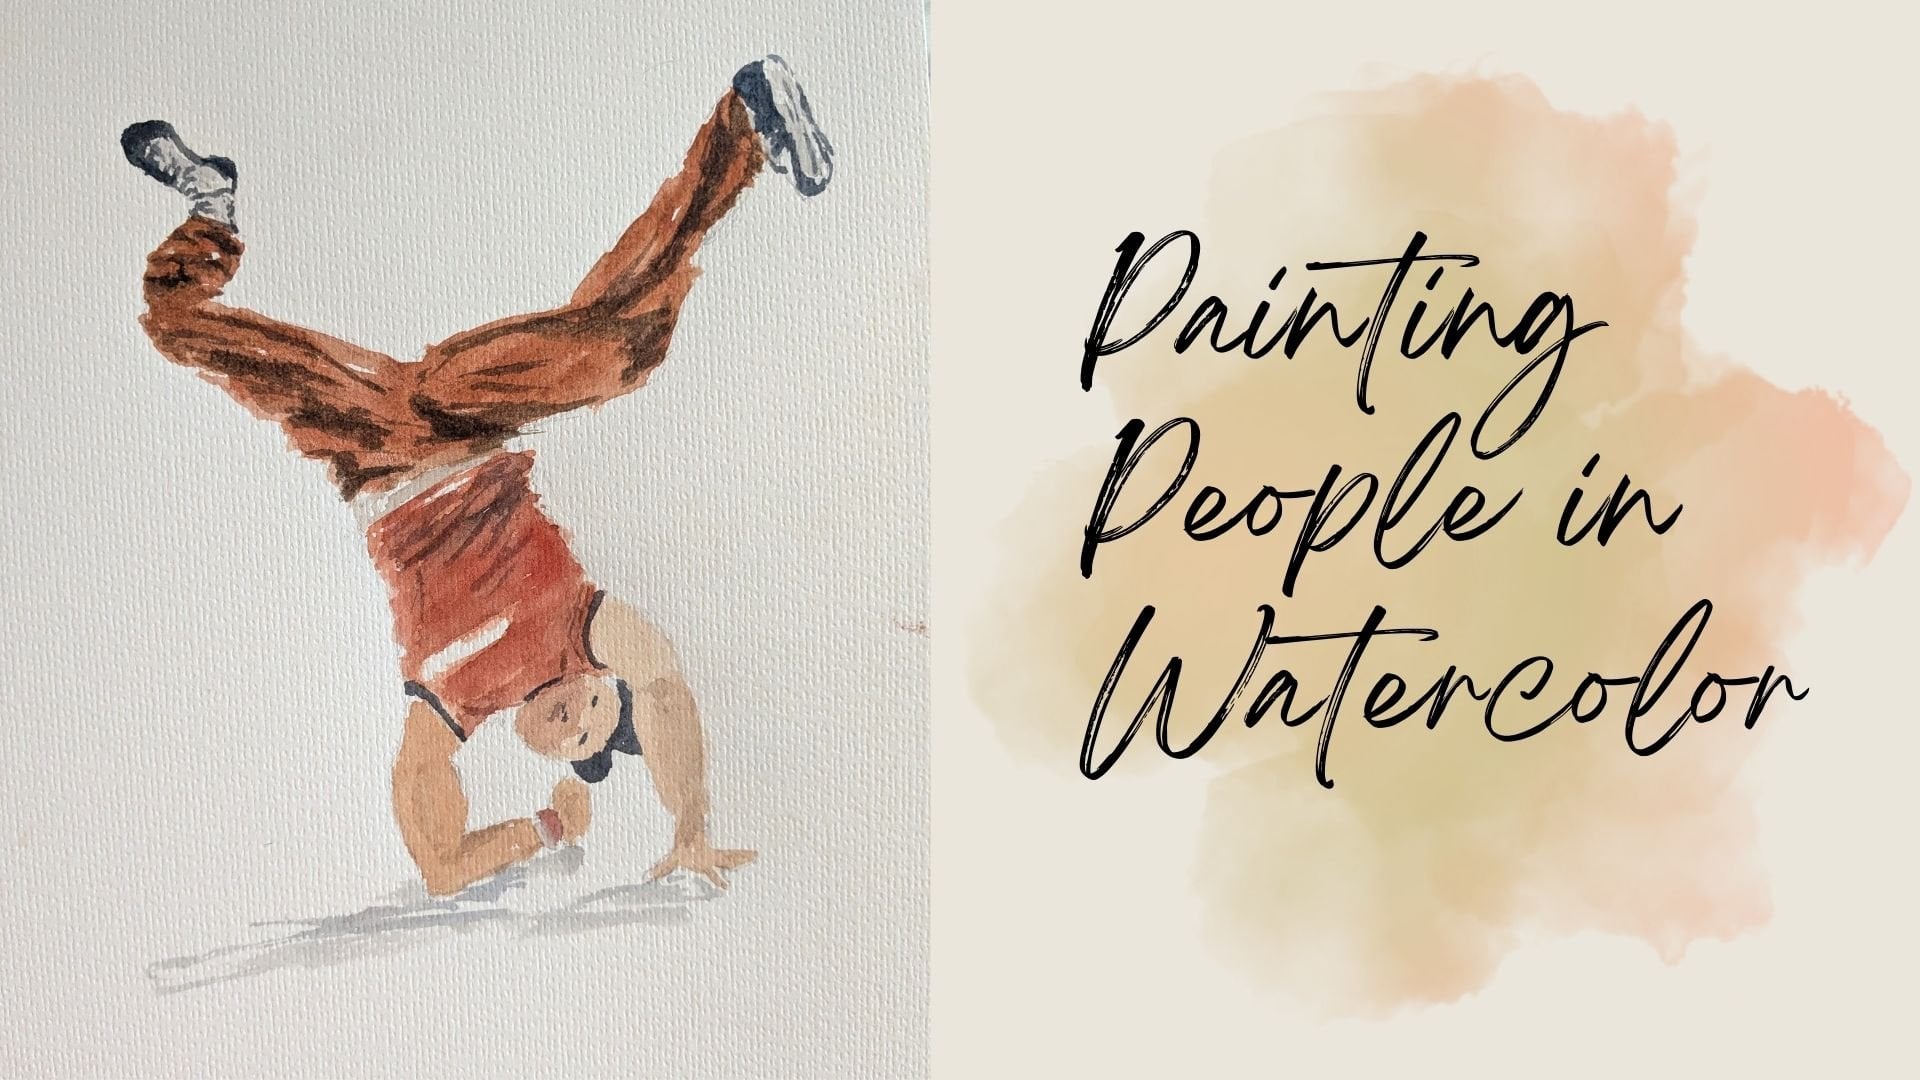
the Skillshare class, where today we're going
to learn how to make line and wash watercolors
of people walking. My name is Avraham, and
I'm a professional artist. I've been giving classes both in person and online
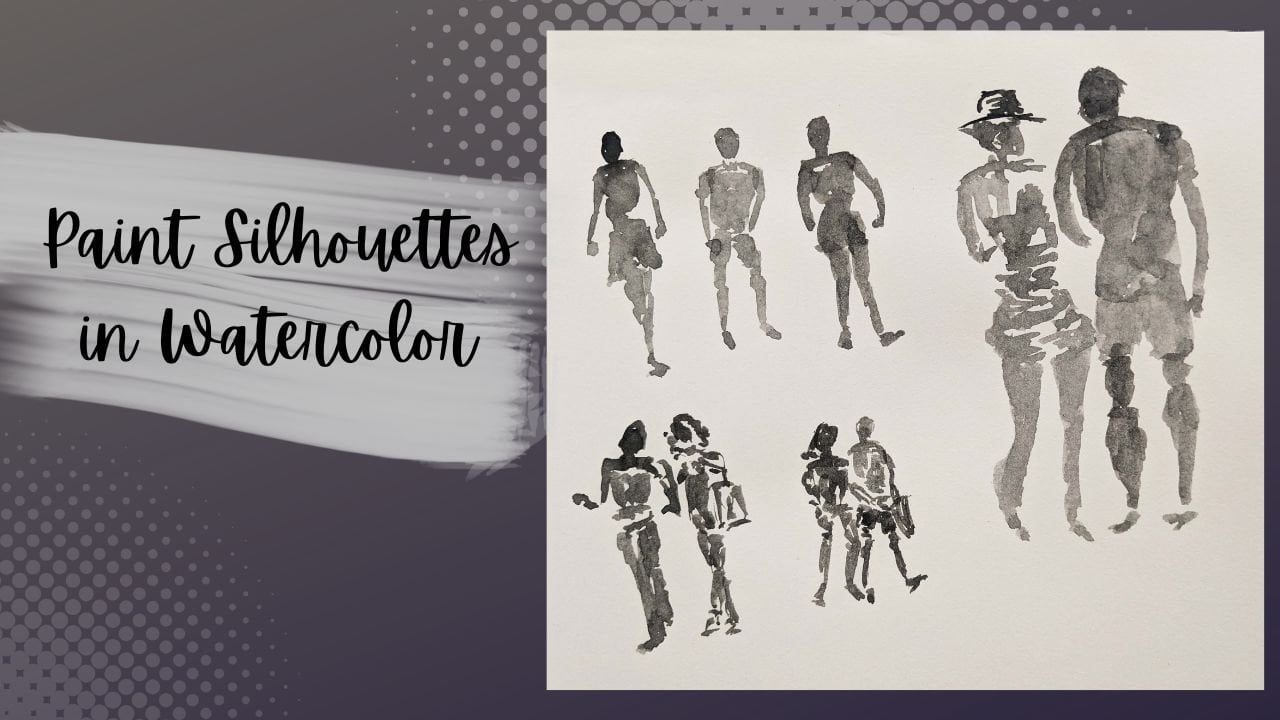
for nearly a decade. This is actually a continuation
of my previous classes with Line and wash that
involve silhouettes. Now we're going to be upping
the ante by including color. Color adds so much more life and vibrancy and so
much more emotions. At the same time, there's
a little bit more of a complexity because
color involves mixing colors and
trying to achieve proper skin tones and what the people are
wearing properly. So in this class, I'll be going over how to mix colors to get the
colors you're looking for. And demonstrating how
we can use line and wash to make beautiful
watercolors of people walking. And as a bonus, I'm going
to tell you my secret to finding unlimited
reference photos for finding people to draw. This class is suitable
for everyone. However, because
it might not be so easy for some people to
get proper skin tones, I would rate this class maybe
as a beginner medium class. But even if you can't get the skin cones exactly matching, you still can have a lot
of fun taking this course, playing with the colors,
and learning how to get really expressive pictures
of people walking. We'll start with some
easy examples and then gradually build up to
some more complicated ones. And on the way, I'm going to show you some tips and tricks about how I achieve certain
effects in my watercolors. The materials for this class
are pretty straightforward. You need a brush, some
watercolor paints, a marker for making the
line work, and some paper. And don't worry
if you don't have the best watercolor paints. In this class, I'm going
to show you how I can get amazing results even with
a basic watercolor set. So if you're ready
to get started, I'll see you in the next lesson.
2. Materials: When it comes to watercolor, we need a few basic
things to get going. The first thing is going to
be our watercolor brush. So this I happen to like is my number ten Princeton round, which holds a lot of water, but as you can see, comes
to a fine point as well. So I can get nice
accurate strokes or larger washes on the
paper at the same time. So this for me is a
good all around brush, and my favorite my go to brush. Besides that, we need paints. I do have a nice set of
Daniel Smith essentials, the three primaries, cool
and a warm of each one. Plus Burnt Sienna
and Payne's gray. However, for this class, what I want to do is just use this basic set that
we have over here. Which gives a lot more
colors right off the go. That way, if we see a color
that we're trying to match, we have a lot more to
start with right from the go and it'll
just make our life a little faster and
easier for this. That's why I use that.
Nonetheless, I do see that we have this nice
area for mixing colors. I'm always a big fan
of mixing colors. So as you can see here, I frequently mix
right in the pans. So we'll see what
ends up happening. But one way or
another, we probably won't be doing straight colors for the most part because I like a little more variety and richness that you get when
you mix colors together. Next thing we need is paper. So here we have this Canon,
which I really like. It's a cold pressed, 300 grams or 140 pound paper, which basically means
that it's very thick. And if you put down
a lot of water, the paper will not buckle. Nonetheless, we are going to be using a lot less water
for our pictures here, and I'll and therefore, we'll be using I'm going
to be using a sketchbook, which is, as you can
see from the paper, just a little bit thinner than this watercolor
cold press paper. But as long as we're
doing psically light washes, we'll be okay. If you can see this
one down here, I went a little bit heavy on the wash and the paper started
to buckle a little bit. But for the most part, we'll
be doing things that are a lot lighter when it comes
to the water approach. So we won't be doing
as much water down, and using a sketch pad like
this is perfectly fine. To control the water,
I do recommend having some type of napkin or rag. And that way, as
you wet your brush, you might also want to take off the excess water if you see it's a
little bit too wet, so you don't have too much water on your
paper at one time. Controlling the water
on your brush is a very important idea as well, because if you have
a lot of water on your brush when you are
applying the paints, the past come out much lighter, versus if you have less
water in your brush, it's a dry brush effect. So then you can really load up stronger colors on the brush and get deeper richer colors
when you put down. Another thing that very
helpful that I'm using is I have actually
this 1 " binder, which basically is
allowing me to put the sketchbook or your
paper on an angle. And what that does is that we draw as we paint that the water is going
to bead at the bottom, because gravity is going to
be pulling the water down. And that will give a
little bit more continuity as we flow from one
section to the next. It's not required, but you
could find it helpful. Last thing we need
for this is we have the line and wash technique
is I have these Tambo pens. I don't know how to
pronounce this word so well, so I'm gonna try. There's two versions here. One is a hard tip and
the there's a soft tip. They look pretty much the same. But the soft tip,
when you use it, it allows when you apply more
pressure or less pressure, the thickness of
the line changes, sort of like you see in
the picture over here. So I don't really go too extreme with pressing
hard or soft, but I do like the
ability to have a little bit of variation,
so I'm going to use this. Nonetheless, you
can use any type of line work, pens
that you like. I use a marker, a pen, even a stick with ink, anything that makes
a mark, it would be a nice cool effect to add in. It does add in a lot to
the picture as well. So if your ray get dared, let's find some people to paint.
3. Finding Reference Photos: So when it comes to finding
photos of what to paint, there are really amazing
resources online, such as this one called
Unsplash or we have Pexels. Lots of great pictures in here. For what I want to do is we're going to go to a
different technique, which is going into YouTube. And we're going to search for people walking in the street. So if you do that, you'll come
with a lot of great sites. So here, this Grandpg is probably one we're going
to look at right now. But there's other
ones as well here, this one in Montreal
and New York City. There's also a Barcelona.
That's a really good one. Here's Barcelona also highly recommended personal experience. But we're going to do this
Greenwich Village one. So basically the idea
here is you come in, and I think I turned
off the sound. But you can watch the
scenes transpire, and at any point, you can get to a multitude of
different pictures. Like, let's say, there's
this girl working over here. So if I pause a
picture like this, we can see her certain
bio position like this. It's a little bit far away
but you get the idea here. It's like, she's walking
like this, or if I move forward just a
fraction second longer, then you can see how
her leg has moved, her feet have moved the
other direction, right? And going on this way, you can have an unlimited amount of poses here she has turned, so we can have from
this direction. Here this person's
approaching us. We'll have a nice size
to work with, right? So look at all the
different poses. This whole walking motion. So at any point, you can stop and say, I
want like this, like this. He's phone out in, you
know, all these things. We have a crazy number of
resources to work from. So this is what we're going
to do in in this class, we're going to use some
pictures of what we're here, but feel free if you have a certain pose you want to work from and find a
resource to work with. So, if you're excited to start
painting, let's get going.
4. How to Paint Skin Tones: I want to discuss something
before we get into the actual painting because we'll be painting
so many people, I think it's very important
that we understand how to get skin color. And I just want to show
you how I'll be mixing the colors to get to skin tones. We're going to go into a
little bit of color theory. And understand how the
primary colors work. So over here, you
can see we have a color wheel and all
the colors represent. What we're doing is we'll
take the primary colors, the yellows, reds
and blues and mix them together to get skin tones. How do we do that? So the way
I like to work is starting off with reds and yellows and putting the reds
and yellows together, you're going to get
an orange someplace. So if I hear a yellow
is over here and a red is over here and
you mix it somewhere, you're going to have maybe
a little bit more on the yellower side
or the redder side. But try to mix it about half and half
and you'll get to something like an
orange in the middle. Then what happens is when
you're adding a blue, you're going to be
moving the color to its complimentary side. By adding to blue, more blue I add, I'll
end up with a blue. But what we want to
do is going to have our orange color and then
slowly add a little bit, touch of blue, and you'll
notice if I add a little bit, but not too much, we end up with a color that looks very
much like a skin tone. That's basically the
process that we're doing to get the colors for
the people were drawing. The idea is, I'll
be playing around mixing these three colors
in different amounts, primarily yellows and reds and then a touch of blue
that will move it from the most saturated
area of orange towards a less saturated area to looking more like skin tones. So after that little
section on theory, I thought maybe helpful to demonstrate it with real paints. The paints we'll be
using, actually. So the same thing I've done
using my Daniel Smith paints, again, we're going to be
using the primary colors, a yellow, a red and blue. So for example, we're
gonna take some yellow. I mean, I'll be mixing it
over here to get the colors, but I'll just show you here initially on
the piece of paper. So if we have yellow, we have something
that looks like this. Lots of brush cleaning over here because I want to make sure that just get pure colors
here. So that's yellow. And then we have
some red, like this. And if we mix the two together, we get yellow and red. So make this, we're gonna
have an orange color. What we want to do
with this color is adding a little bit of blue. So I'm just going to put a
little little brush again. We have is gonna be
very intense here. Not too much water anymore, but have that and then take
a little bit of blue, and you can see how it's
now cooled off, right? And if I were to take this and
then water add more water, so it's less intense, and I'll pull out some
more from here. All right? So now if I do it,
you can see we have a very pleasant skin tone. Alright, so that's
what we did went from yellow to red to orange, and then add in some blue and water it down to
get a skin tone. If we want to make it
like a darker color, so then more tanned skin, then we'd add a little
more blue to it. So let's try that. We'll
have red and yellow. And then we'll had
a little bit extra blue in here, right? And so now let's compare that. Not enough. Little more blue. Like this. Yeah, I think it's
pretty good if we line it. So you can see we play
with the different skin tones and get variations. And this is the idea
of how we can mix the three primary colors
to get these skin tones. So that is the basic idea
of what we'll be doing. And hopefully, that makes sense, and I'll see you in
the next lesson.
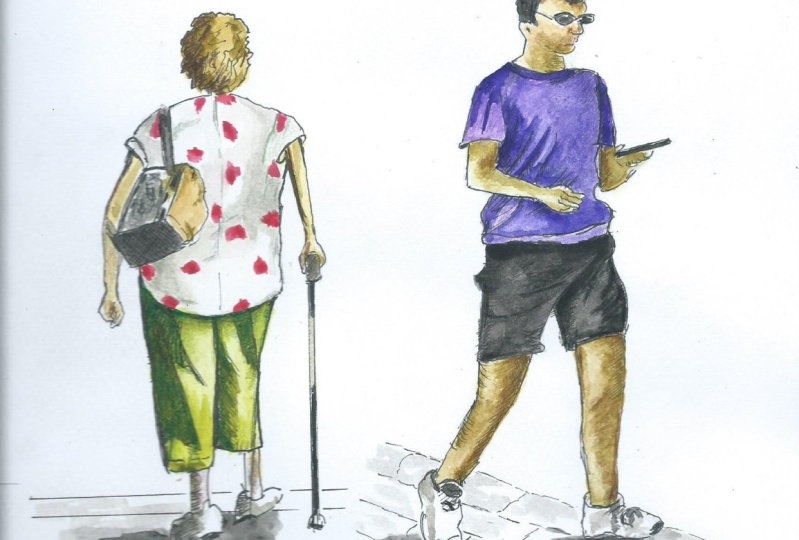
5. Painting a Side View: We're going to start with this picture of this
person walking. I like how his limbs
are clearly defined, and it's also a
nice action pose. When it comes to the arm that's
crossing over his torso, we're gonna have to just be
a little bit careful with that so we can define it
clearly against his shirt. But other than that, I think it's a very good
picture to start with. So I always enjoy starting with the head because that
gives a sense of scale, and we're going to mix
up some skin tones. So getting a little bit of red. And yellow, and that
creates an oranges tone. I mean, I have orange here, but this, I think is
a little bit more. I like the results
that you get from it. But it's always good to
experiment and see what we get. I'm adding a little blue to
darken his skin a little bit. Okay, so we have something
that looks like this. So, I recommend drawing the head so that the scale of the body is about at least 3 ",
maybe even four. It just gives more to work with. I'm not saying every picture I'm going to do is
gonna be like that, but we'll start like that. Okay. I see your skin's a
little bit too reddish, but I'm just got go with it. Okay. And it dries, it might dry a little
bit differently, anyway. So here we have for his head. And we could do now
is try to estimate where his um where
his arm continues. So we have a little for that maybe to make
things a little easier, I'm just going to sketch out a little bit with a pencil here. So we have a little pencil like this and coming
down here, right? So that's gonna be this
side of his shirt, and the other one, it can
come down here and out. This might be very light to see. Make it a little
bit darker, maybe, so you can I'll make it a little darker
so you guys can see, but I would really be
doing this much lighter. Come to here. Okay, so this
is about where we need to be. So, given that, I'm going
to now draw in his arm. Comes down to here, and then shoots across
his body like this. Using the basic shapes
and sizes of everything. So that's what it looks
like to me over here, okay? And we can continue
on and draw a little more of his his shirt. It's gonna come
down like to here, and then we have his pants. Something like this, like that. And here. So if I'm
doing this correctly, that'd be about where his
rest of his limbs are. So I'm going to
hold off on that. Actually, I want to go
and do the shirt first. So let's go clean off the
brush and get to the shirt, which has actually
shaped on his arm. Let's we'll put the arm
in a second. So let's go. We'll get the his
shirt is primarily a light purply color with
maybe a bit of a well, I did a little bit
this lighter purple, we call this color exactly, but we'll put these
two together, and that might help us
approximate, touch it red. Just playing with the colors.
It really doesn't matter. People aren't going to be
looking at your source image so much unless you share it with
them, so it's up to you. Anyway, so here I'm putting
down the short color. I'm trying to make sure
that the touch wear his shirt and the skin meet. But sometimes I do leave some white spaces
to show wrinkles, increases and things like that. This comes in here. Okay. I find that even though
this is going to be one big mass of a shirt, it's still helpful if you paint it in following the
contours of the shirt. That just gives a little bit maybe because of the
way watercolor works, there's a little bit
of variation you can see in every stroke. So it helps give a little bit of definition and characteristics
also to the painting. So I think it's actually
helpful I'm going up and down for this sleeve
and not left and right. For example, okay? And now underneath, I see it comes out like this,
not like my bell pencil. It comes out at an angle. There's this little triangle
shape happening over here. And then it comes
to around here. Getting a little bit
more on my brush. It's sort of drying
out. Let's see. Here. And how much space
is there between his hand and the bottom of his shirt looks
like around here. So I'm trying to just keep
those proportions in mind as I'm painting and filling
in his shape of his shirt. Over here, there's a little
bit of wiggle as it, uh as it was these creases. And here we are. I think
it's a very good shirt. I could come down a little
bit more on this side. If the paint's dry,
then it might not be worth doing it could end
up making these lines, but I'm like that.
Okay, so that's good. And now, while
we're here in dark already before I paint his arm, maybe I'll go and do
his shorts right now. So that's much darker,
black, basically. So I'm going to go and
add black to this. Purple, give it a little
bit of a blue too. I don't like pure black. So I try to lighten it up with a little of
some color inside of it. Black's very dominating, though, so you might not see it so much, but we'll see what happens. So here, I'm plain black. I don't want to go
super, super black because then we'll
lose the effect and the ability to put our
line work in later also. So I'm trying to
keep that in mind. So this is pretty dark, but I believe that we'll
still be able to see the line for line and wash that
we're going to do a little bit after this. I see it comes in like this. Looking at the negative space between his two pants, shorts. So I see this little
angle like this and just trying to be as
accurate as possible, even though I don't
want to be too, you know, get crazy about it. Okay, so why have this dark here? Let's go and do his hair. Okay. It's important to make sure that the paper is dry enough here, otherwise, there'd be some
I'd run a little bit. But I see that the paper's
fine, so we're good. Here, for his ear. It's gonna be a little
bit lower than this. Like that. Okay. Great. That's looking very good. So now we're gonna go
and put the rest of his other arm and legs. So I'm cleaning off my brush. I'm going to do a
double check first the first cup to get the
majority of the water off, and then here my clean water to make sure I don't
see any black in here. And it looks very good to me. So now I can rest
assured that when I mix up new skin tones, it
won't have black in it. So get that red again and yellow and just a
little bit of blue. Also, by mixing it over
here on the mixing tray, I get a feel for
what's gonna look like before I put it down,
which is very helpful. Alright, so now this arm, admittedly, is much darker. So we might come
over a second time. I just want to get in the
main idea of it right now. Yeah, it's very light. And
here comes out like this. It's very foreshortened. I think I need to put a
little more blue in that. So let's move on
to his front leg, which sort of matches
the color we have right here. It's much brighter. It's in the sun. And it
comes out like this. And down like that. Till about here. With calf. Okay, so that is that. And now we want to
make things darker, so we'll add in
shade, which is blue. And we'll draw this
draw over this one, make things much darker here. Okay, fine, sets that
and then lower leg also M Okay. I do add in a little bit
of that here as well, just to keep things
sore similar. So here we are. And using the back side of
the brush to let the water do a little bit
of merging between the two. So it'll be a little
smoother transition between the lighter side and
the darker side of his feet of the leg here. So that's really good.
I'm happy with that. Well, we got this little
darker element in the brush, let's just add a little shadow
in here, I see, as well. Okay. And under his chin, which we'll take care of with the
brush the line work anyway. Okay, so last thing
we want to do is add in maybe the phone
and his shoes. So the shoes I see
are this gray color. So let's go just
clean off the brush. And dry it off, get some black, and
really water it down. And then we're going to mark in where the shoe is dry it off
brush a little bit more. I I want a little
more definition here. I'm leaving lots of
gaps of white as well. So it will sort of
look like a shoe. We're just sort of
hinting to the idea. It doesn't have to be exact. Okay, like this. And, and now something really dark
more black, I suppose, for the phone he's holding here. That. Okay. Great. Next step is to
put in the line work. So here, we're going to
start with the head, and I always like to put a little bit of rim
lighting on the head, which means when I'm putting when I'm
doing the line work, I leave a little bit
of a space around it, so it looks like
there's a little light that's hitting
it like this. Something subtle. Okay? Um
and then there's neck here. Okay, and chin, he's
wearing glasses. So, let's see. We'll put something around a
little circle like that. Another circle that goes beyond his face a
little bit, right? And then the nose and line
for his glasses really thin. Try not to overdo it here. That might be a little
much but whatever. Okay, face. Okay, the face is for sure
the hard part for me, but I think we did an okay job. Next, we got to have a shirt, so I'm gonna put
in the first color and a little darker
where colors I see, buckled up a little bit,
or the shadow here. Now we have the crease
lines coming down, it's how we define where his sleeves are and stuff like that. So it comes around like
this, follow the contour, and then I go in and out
a little bit to show it's darkness and wrinkles
coming to the side here. And like this sus
part of his shirt. We have he's coming down. That's a really nice thin line. And then here Okay, so just continue on
having fun making some diagonal lines for his shirt wrinkles and
creases and stuff like that. And then here we can
do a stronger line across the body because I see
it in the picture as well. For his arm will continue to define a
little bit over here. And then where his
hand comes out, fingers are always challenging. I'm just going to hint
at them a little bit. And then over here, this other arm with
the foreshortening, this is a slightly
challenging angle, and hopefully people
will get the idea that his hand like that. Okay? For his pants, we can
come down now, and again, leaving a little
space around it, and just enough
definition that we can see the linework in the pants. So I'm happy about
that. Okay, for his legs coming around like this and here the shoe This getting the major
shapes and the way the shoe curves around
at the bottom like that. And then this other legs a pillow flick for his
knee coming around. And here the shoe dips in. See the tongue comes out
like that, back and forth. And then the backside of
his shoe comes around here, then sole. I like that. Alright, so I think it's
a pretty good picture. Um, the right hand or
his left hand, sorry, on the right side
here, could be a little bit better defined,
but it's hard to see it. And I think we're okay. I'm just going to do
a little bit more definition on the
underside here. Okay, don't want to Odo
anything, but there we go. Alright, so there we
are. Our first picture.
6. Painting a Back View: For our next picture, we're gonna draw this
lady who is walking with her back to us, cane. It's also a very good pose. The arms and legs
are very distinct, and I think we have a
little fun here doing her dress with the flowers
on it. So we start off. We get her hair in. So
it's this brownish color. So I'm going to use a
little bit of brown and mix it with a little
bit of yellow and maybe try some of the orange. Here. Um more brown hair, darken up part of it. Okay, so for her hair. Um, now for her dress, I want to have do a um
Let's want to do this. For her dress, we have her bag
that's sort of in the way. So let us try like this. We're going to paint
the area with water. And we're going to
do a wet technique. So I'm just sort of trying to add water where I think
her dress is going to be. Might be easier if we put pencil marks here to
determine where things are, but we're going to
try just like this. So there's just water
on the page here. Now, I'm going to
take my brush pretty dry and get some just
light pink color. So a little red, not
so much red here, not so much red on the brush. I'm going to touch
it to the paper in certain places and you'll see that the water that's
already on the paper, let it blend a little bit. So I'm just doing a few here and there. Okay, so we have that. We're going to have to add some more into the dress
also because while this is good for
maybe the flowers, it doesn't really show us where her actual form of address is. So we're going to go
over this again with something. But
that's what we have. We'll leave that now
for her shirt part, and we'll move on to the pants. Hmm. So pants are, like, a yellowy brown color. A little bit of
green, I see, also. So let's get a little a
little green into this. Okay, don't want
to do too crazy. Try to match the color,
but here's what. So I'm going to start
here with her pants, and it comes it shoots
back and forth here. We got some nice highlights and dark areas where the sun is moving back and
forth. She like that. Over here, we have also just these strong directional lines Something like this. It's it's going over a little bit more in the
areas where it's darker. Touch more brown. Over there. Okay. So this could be her pants area.
Clean off my brush. Now for the let's do her arms, and then we have her legs and a little bit of her face also. So this is really, really
bright. Light skin. Let's clean off my mixing
area a little bit. Okay. So we go a little
bit of red and yellow. Touch of blue. And we'll
see how this comes out. So we do her face
here looking a little bit maybe too pink. Alright, so have that
let's come here for her. Her arm comes like this. I'm trying to gauge the distance between
this and the edge of her shirt that we have
already. And here's her arm. And then the other
one, you think about her bag also how it's
going to work here. So something like this, it does get darker behind
the shadow of the bag, but we're going to just paint
it all the same right now. Like that. Okay. And now for her socks area
and lower leg, this is really, really light. So I'm gonna take some
water and just um remove some of the paint from the brush and two heavens
if I paint really lightly. That's almost can't
see anything, so let's go add in
a little bit there. Something like this. Okay. Make her arm a little bit water. Though I don't see
that in the picture, but we'll do that. And now I'm going to
go do her her shoes. So we'll get a little bit black and make it very pale by
making I have a low of water. So it's just a very,
very slight gray. And let's go here her shoes. This shoes look like they
have a little bit of the warmth from the
skin tones in it. So they didn't wash
it out well enough, but we'll just leave
it like that for now. And I am going to add
a lot and really, really dark black
to get her cane. So this is a very dry brush. There's not much water
in it right now. And so that's why the cane
is looking so strong black. So like this here. And it comes down to
right around here. Okay. And we will remove the black from
the brush and then do just a very slight
black approach to try show the silver part of
this staff or her stick. Her her walking stick will have a little
bit of silver on it, so it like this. Okay. And now we
want to also go back to more black to put in her her, her bag that she's wearing. So we're gonna put this here. Since it's very dark,
it can go right over her dress. I'm not
really worried about that. Okay. Like this
comes down to here. And then down here, it takes a sharp angle. Like this, and then
comes out to here. And this area is even darker. So let's I'm taking a little purple to add
some more color to it. So the next part it's
gonna be a little more challenging because
I want this bright, I guess, yellowy
color over here. This water's getting
pretty dirty. Probably going to clean it out before we get to
our next painting. Okay, so we have here, I see on my palette I've got this yellowy orange color a
little more orange to it. And we can put that over here. Somebody like that. Okay, so the only other thing I really want to
do here is try to sow a little bit more
interesting things on her shirt because
it's so pale, we almost can't see anything. So what I'm gonna do
is I'm gonna take a very light purply blue colour and gently add in
some shadow onto her dress. Just in the areas where
I see it in the picture. And I'll give it a little
bit more definition as well even before we
add in the linework. Okay. I do think we could do a
little bit more with her hair. It just looks like
it's the way I drew it was very like almost
like a head shape, and her hair does come
out a little bit more. So let's take a little bit more. It's not ideal to add
after it's already dry, but we're going to try add
some more volume to her hair. So I've mixed up a
little bit more of the brown orange color
we had initially, and I'm just going to Um,
add it to the side hair. Make little curly motions. Give her a little
bit more volume. Okay, I think it's a
little bit better now. The next step is to
put in our line work. No, I'm not going to
do the head just yet, just because we just
add some water to it, so it's a little bit
on the wet side. So we'll start
other places first. We'll start with her shirt. And we have some lines here. Late flimsy lines that show the light texture and light
fabric that she's wearing. Okay. It's like that. Here bag. There some wines on the bag. Underneath. It's a little
dark and something like this. Looking pretty good.
Okay, for her arm, it's still definition
on the arm here. And this arm. Just some simple
arcs and whatnot. Okay, so now for her pants, here are some really
nice strong lines and dark to show that these
are some deep shadows. And her legs coming down, we have sock and her shoe. It's one and the
other sock and shoe. Alright, so now
we've done all this. It's time to go
back to the hair. I check is dry. Feels pretty dry. We'll
try to be gentle with it. Some little curls. Like this. It it I'm putingre extra on the left side because
that's where it's darker. And then on her right, we have her faces come
out like that. And I think that's
looking really good. If we want, we could add a touch a little bit
darker for her hair, do some blue, some brown and just a touch of purple
instead of doing the black. This is way too wet I can see here. There's
too much water. So I'm going to
remove the water on my brush and go back in, and this will make it just a little more stronger color
when we put down this time. It's just putting a little. Yeah. Really nice. Okay. I was a little
bit worried about that. Uh, it was a very light picture, but in the end, I
think we've done it. I do one thing here. I want to do the outside of her
hand on this side. Again hands are very scary, but hopefully the best. Okay, not too many details. Hope that is okay. Alright, so there we are.
That's our second person.
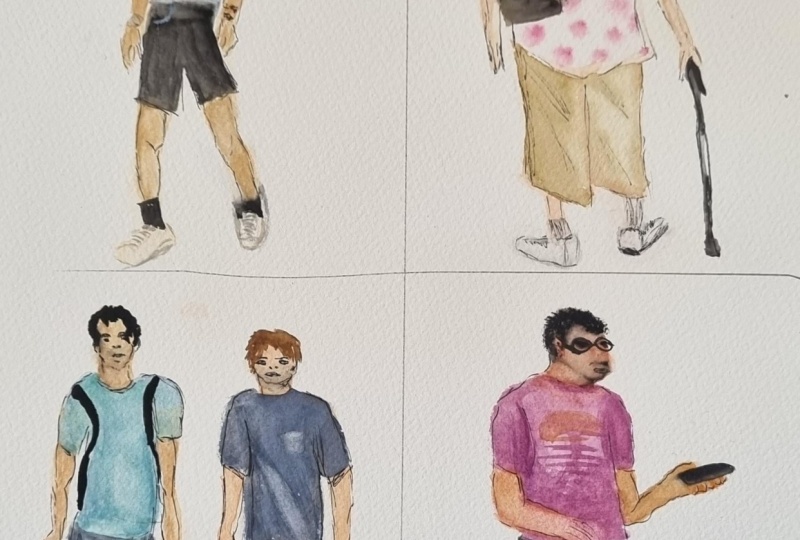
7. Painting a 3/4 View: Here's another guy with a very active pose that
I like very much, and we're going to
go and paint him. So let's start off with getting the skin
tones for his face. Let's clean the palette. Mixing area just a touch here. You'll see actually got
some new water here. So I have some fresh water for my main mixing bowl
right now as well. Okay, Sue his face. Put some red and yellow. And a little bit of blue. Probably have a little bit extra blue because it seems
a little dark here, but we'll see what happens here. Sky over here. His face is coming at a
slight a slight angle. Mm mm. It's looking this way. It's a circular shape, guess. And we'll put his neck, as well. Like that. I pick up a little
bit more blue, mix it in and try to shade this half of his
face just a little bit. Okay. Great. So now
for his shirt area, we're going to stick with a, like purply blue, something light because
really it's a white shirt. But we'll have
something on the page. It looks from the
shadows and everything, it does look very has
lots of blue cast to it. So let us figure
out his, the angle. I want to leave
actually white in this as well to show
that it's not these are, like what I'm drawing in are, like, the highlights of the
shadow parts, you know, so I'm gonna leave a bunch
of empty areas as well, which we'll fill in, um this. See how it looks. Okay. Off my brush and picking
up the residue over here. So we have that and we
can do his arms now, working the way down his body. So I'll pick up some more of
the red and yellow and blue. I think I have too
much blue here. We'll see that's
looking pretty dark. We'll see. It's okay. It works. Okay, so we
have here concato, right? Okay, so it's one
hand like this. And the other one, let's add in just a little
bit more yellow, warm it up a little bit and red. Might be a little
too much yellow, water, and see what
happens now. That's nice. I'll try to check that
angle between his hand, his arm, and the shirt. Comes in like here. So here these shorts
here coming like this. I want to lighten this
up just a little bit because it's a little bit heavy, and I want to be able to see
when I do the brushwork. So we're gonna lighten
this up just to touch it over there. It's gonna be a little bit wet. Could have a little bit
of buckling issues. But we'll see what
happens, okay? Is this. And this pair of shorts
come down over here. If they're careful
around his fingers, I do want to preserve
that we can see them. All right. So like this. And then here, this one, this pants short leg comes out just a little
bit further down. So we'll do that. While we're here with this dark on the brush and pick
up a little brown, let's see if we can get for his hair, do
something over here. So it comes in like
that a little bit. Peaks up a little bit over here. What I'm trying to do is follow
the contours of his hair, and that way, hopefully it will sort of look like his hair. Okay, so here comes like
that, and on this side, comes out a little
bit more like this. Yeah, that's good. I
like it flares out like that and then comes
out again like here. That's a pretty good
representation of his hair, though, it's a little bit light, so it's just to add
in a little more brown with a touch of black,
another touch of black. Okay. It's pretty good.
And the underside of his hair also is a
little bit darker. So it's just darken
that over here. Okay, so we're up to now
we did this. That's good. Now we did here. I think
we're up to his legs. So we are going to
grab some more of the red and yellow and
a little bit blue. Again, it's a little bit darker, but we saw it happen over here with this being a
little bit too dark, so let's try to err on the
side of it being a little bit pink or skin toned. So we're gonna go like
this and get his leg. It's about down to here and then comes out
again after the knee. Like that. It's
interesting shape. Okay, it comes down
to around here, I think that I put his
socks on, whatnot. And for his other leg, we have this for
shortening again. So it's like it
comes down to here, and that's where his
knee is already. And then it comes out behind. And goes like this. And I think that's
really about it. So from there, now it's time to go and do his socks,
which are black. So it's wet the brush
just a tap touch there. Pick up a bunch of black,
make it nice and dark. And here, like, that's one. It comes into his shoe. These are shoe laces just
showing like that a little bit. And then switch over to
his other sock here. Like, here, it comes down. And then also this
little back and forth for a shoe like that. I'm going to take
off a little bit. The sock in the back looks a
little bit too dark for me, so I'm just going to try to
lift it up a little bit. So a little spot there. So taking my brush, which I dried off wet a little bit and dried
off and try to make it clean, and then just go on top
of it a little bit, and then dab it, and that will hopefully take out a
little bit of the color. To make it not as strong. Okay, so that's what
we have over there. I do want to just
pick up a little bit more of our black and do the area of the
shoe like here. And like that. And then on the back
shoe also like that, just so we have some fill
in the volume of the shoe. Okay. Great. Now we are ready, I think, to do the line work. Here we go. So
starting with hair, putting that little
flare around it. Like this. Okay. And then
we have sc out like that. His nose mm Like this. There's Mlle in his eyes always challenging, right? Okay. I think that's decent enough. Now for the rest of his face, we're gonna come here for
his cheek bones and that. His neck could probably
be a little wider. Shirt this okay. So folds, back and forth,
type of thing here, very, very light and gentle. Let's hope. Okay.
Here. We got that. And now for his
arm on this side. He's got a watch there
and his hand slides over, his fingers turn in like that. That, okay, that's good. Maybe we'll have a little
bit more just defining where the shirt and his arm separate. On this side, we
do have some space between his arm and
the shirt, right, so make sure we capture
that and then come in here, define his front arm. I think it could be
maybe a little longer, but, you know, okay. And over here, Okay, like this. And those fingertips
always a challenge, right? Okay. Now, let's go for his shorts. So we're gonna define
the contours of that. So I'll see here, it looks
like it runs around sort of like that around the
front of his leg, and then here we have a few. It's really dark,
so it's hard to see exactly what's
going on here. But I do see on this
side, we have creases. And I don't want to get
carried away with it. I'll probably come back
with a brush on that and make it a little darker now that we have
these lines there. But that's the basic idea and the bottom of the
shirt with these lines. Perfect. Okay, now, his leg, it's probably a little
too dark there. It seems it's wet. So anyway, move along
here and this side. Then on this one, also, we have for his kneecap, cut in Okay. And for the shoe. You know, every time
I'm looking at this, I keep picking it apart, saying, Oh, this didn't go so well,
that didn't go so well. But at the end of the day,
when it all comes together, it's usually pretty
okay, you know, so I'd say just
keep going with it, even if you think it's not
working out exactly right, because people look at the
whole picture at the end, not individual nitpicking
here and there. So I don't stress
about it so much. Just have sort of, you know,
fun with the experience. Okay, so I'm trying to put
in a little bit darker now just on his pants, on the inside over
here, a little darker. I know this side,
a little darker. You know, so we can get away with covering up a little bit more since these pants are
really shorts are so dark. Don't get carried away with it, but at the same time, just to have a little
bit of fun here. So I think there we are. We can also, if we want to
make this side of a space, a little darker, as well. So for that, I'll take
I think blue to black and some brown and a
little bit of yellow. I can see what happens if I run it on the side of
his face a little bit. The shadow. Now, to make it not
as strong and severe, I'm just gonna do a little bit of late wash on the
side like this, and I'll blurts a little bit. There we are. That's a nice, really nice shadow
there. We'll keep going. We'll do with his arm. He I' have as much paint on the brush, so it's gonna have
the same effect. But we could try and get a
little bit back on here, and like this here is
very much in shadow. Okay. And then this leg here, I'll sort of cover up
what I was trying to do with the line work, right? And some things like that. Over here. A lot
of shadow there. And now that this is in here and it's still
a little bit damp, so I'm gonna just gonna
clean off my brush and then smooth out some
of these areas so it isn't so dramatic. It'll blend a little
bit more like this. Yeah. Wonderful. Okay, and
that is our third guy.
8. Painting a Front View: For this last picture, I like to try a picture where we have two
people together, which means we have
to sort of gauge how large the people
are together. So a picture here of these
two guys crossing the street, and so we're going to
draw them together, which means we have to
calculate make sure the size of both of them are proportionate
one to each other. So it's a little bit parder
I think we can do it. So we're gonna start off by
drawing the guy on the left, and we're going to
get his head done. So clean off the mixing area
over here. There you are. And let's go and put in
some yellow with red. It's a little too much yellow, so I have to add
some red back in there and a touch of blue. Okay. Let's see how this goes. Oval shape of the head. Followed by his neck. And where it goes into his shirt comes down
like this, something. Great. Alright, so
then what we can do also since his arms are very
close to his shirt area, so maybe we're gonna just sketch out the area of his
shirt a little bit. Something like that. Now we have that area, we can start again from sleeves or the arms coming
out of his sleeves. So one is like this, his right arm, which is on
the left side of the page. I'm not sure if I'm going
to have enough color in my brush to do both arms. We'll see. Be nice. Okay, now, this
one on this side, is a little more tricky
just because it's going to be flush to his shirt. So we have to hopefully
be drawing it correctly since I draw a more shirt than the
initial pencil on top. Now, his hands,
you'll notice that this hand is slightly
higher than that one. So I think we're okay here. And maybe I can make
this a little bit wider here for his arm. Okay. So let's assume
that's good. In the brush. And for his shirt, so we have this nice
turquoisese color here. So we'll start with that and
mix in a little bit of blue, regular blue just to make it
a little not pure turquoise. So here, I'm going to
come down in this case, I'm actually going to go
right through where his um, backpack is because it's darker
than the backpack straps. So I'm not so worried about, um, painting them over
the shirt afterwards. Okay. It's a little too blue. But as I said before, no one's really comparing it
with the original picture. So it doesn't match
exactly, it's okay. And there's some natural
variation that happens anyway when you're doing watercolor painting,
which is very cool. So you see how some
parts of a shirt are a little bit
lighter and darker. So it all works out okay. Okay. And so his shirt, maybe it's a little
low because I think his shirt actually ends
a little bit higher. But we'll just go with that. I wasn't paying as
careful attention as I should have. Okay. I'll get some black,
a grayish color. So maybe I'll add
this black into this blue color we have
here and I'll give it a like a grayish blue color.
So we'll try that out. And here, a little more black added in. I like
that. That's good. Okay. I'm happy with that. Just going back and forth
a little bit to show the creases in his
pants very soften. Okay. Something down
to around here, maybe. And then his other leg. Split between his pants the legs split off is just
around here, I think. So we'll just put that in.
I get a little bit more. I'm not going to
be able to finish off with the paint
I had in the brush, so I'm trying to continue on and match it
as much as I can. It's not going to
be exactly so good. So yeah, something like this. And then here's
where his knee is, and then it starts to taper off as it gets
further away, right? So we'll make it smaller.
Something like here, and then the rest is going to
be his shoe on either side. So for that, let's just get rid of a lot of
the colour in the brush. Just a really light gray color. I'll put a little
purple into it, too, give it a little bit
of a color as well. So we'll see,
something like that. And here on this side. This shoe also Okay. So we have him.
Let's do his hair. Yeah, it's a good idea. So
he has pretty dark hair. Let's go black for
that and a little purple and a little brown. Just to make it, you know,
more of a multifaceted color, which I've been doing a lot.
So there's nothing new here. Okay, so for his hair, I see it sort of curly. So I'll do these little
circular strokes as I come around. And over here on this side, comes like this
looks like to me. Size a little bit more. And then something by his ears, a small hint of something there. Like a side burn, I suppose. Okay. And that's
going to be him. Next is going to be his friend. I think we're pretty good here. Yeah? Oh, no, I need to put in the straps for his
knapsack, right? So let's go and do that.
Again, using the dark color we have here comes in like this. It's pretty dark. We probably
won't be able to get our lines on top of that. So, uh Okay. There we are. Now, his friend, let us just map it out a
little bit with a pencil. So his friend's hand
is about here, right? And we're working right
up sort of at this angle. The shirt His shirt is to here. His friend's shirt
is to maybe be here. Height wise, they both seem to be the same
shoulder height. And this friend's head is
slightly smaller than his. So maybe this height. Okay. So I think it's a good enough indication
of what we need to do. Clean off the brush. And
using dark with black, let's go and really
make sure it's clean, though the other pan of water. Okay, now it's for sure, clean. Let us go and get some
color for him, his face. Some red and yellow.
Touch of blue. Okay. And here we go. Well, that's his head
and put in his neck. Alright, very shallow, small neck before
the shirt appears. So that's all we got.
And then I guess since we have here where
he drew his arm is, so I guess we can
fill it in now. Look at that. Okay. So come out like this. And then the hand
turns in like this. Fingers. Okay, so
that's one side. Now, the other side,
sketch it out briefly. His shoulders come down
this angle and then heretil about there's
where the shirt ends. So go and put in his
other arm over here. And it comes around
slight angle in, and the hand is a little bit
higher than the other one. Just go to block
it in like this. That's the type of shape
I'm seeing for his hand. Okay. Good. Let's hold with that
and do his shirt now, which is quite a dark color. I don't think it's
exactly black. It might be black,
but we'll make it black with some we'll
add some color to it, too, just make it more fun. So let's go with this, I'm not sure if
there's violet color. Mix it with the black. So it'll have a little bit
of warmth to it, and we're gonna paint it Okay. Coming down like this. I'm hoping it's gonna
be here, good, good. It's lay enough that
we'll be able to see the lines from the
marker on top of this. Otherwise, it'd be a
little bit too dark. The shirt comes like this. And here, try to
work quickly so that there aren't any
particular lines where if the water dries, then you'll see lines here, which I don't really
want to have happen. So down to here. All right? His hand really
does touch his shirt, but it's a little bit off.
So we'll just go like that. Come down. And here on this
side, it's pretty good. I have this, like, I don't know, eggplant color almost,
it looks like to me. Do some lines to show the
direction of the creases. And we'll accentrate that, of course, later
with the line work. Okay. Was it got? How's that? Pretty good? Over here, the shirt comes out a little
bit like that. The sleeve. Okay. And now, going to a much lighter
color for his shorts, so we're going to do two passes, one in a large cup of water, and then move to a
smaller cup of water, and it is very clean. What do we have here?
Hmm. It's a blue, but like almost a whitish blue. We do have white here, and
I guess I could try that. I don't normally use it so much, but we'll take some we'll take the turquoise and this white
and put them together. And we can paint it
like that. Very opaque. It comes down to around if you see his end of his pants is just about where other
guy's hand finishes. So around there. And the other side It's a little bit. It's like matching
this guy his shirt. So um, not exactly right. Okay, let's see
what I can do here. What I'm going to try
is wash the wet wash, get my brush really wet
and then try to lift up some of the color to take
it off a little bit and, um, make it a little more pale, like
we see in the picture. This now, I could do while it's still wet, there's a lot of wet here. Paper is I can go with a slightly darker blue
or purple, maybe. Let's clean this area off a
second and go with this blue, purplish color to add in shadow. Dry off my brush because I don't want too
much water here. We've got a lot of water
already in that area. Okay. Now take this
and come in here. Make my brush even drier. And a few of these
lines like this. And while that is
still relatively wet, I'm going come in
with a clean brush, which I dried off
a little bit and just blur things just to touch. Okay, good enough. Now we're going to
go for his legs. You know the drill by
now, red and yellow. They can type orange color, and then we cool it off just
to touch with some blue. Okay. Here we are
for his one leg. Add some more water
to this because it's a little bit dark. So on watercolor, the best way of laying something
up is adding water. All right. So this first leg comes to around the shoe here
and the second leg, this actually is a little
bit whiter, right? Because the second
leg just darker, just a touch is going
to be over here. In shadow. Like that. Okay, I'm gonna add some of that color to this
side of his leg also, just to give it some contour and hopefully tie the two sides together
a little bit. Maybe I can warm
up the other one. It It's not as easy to
bring a lighter color in, so we might be stuck with it. But I will try something here. Like that. And now for his shoes, we're going to do let's do a gray because his friends
shoes have that purple on, so they should look a
little bit different. So I'm gonna go for a very
light black color here. And let's go back and forth for the shoe
laces a little bit. And this person does
his other shoe. And what I want to do, like
for the front shoe for sure, we have the underside of a
shoe, which is quite dark. So I'm gonna dry my
brush, adds more black. So it's a little
more intense and do the shape of his shoe
the underside like this. You know, there's a little
footprint over there. I think that's about right. Anyway, as we got there, and
now let's go for his hair, which is brown and a
little bit yellowy. So we'll do something
like that. This might be actually a little bit light 'cause there's too much
water in the brush, so let's just add a little
bit more pigment from the From the, uh The paints. Okay. Now, let's try it out
here. It's pretty good. Still maybe a little
bit too light, but, we'll be okay. Comes a these little arcs, the way his hair
falls on his head. And here, I'm really liking
this color, actually. It's a little bit
variations even in there. It's a little bit browns and a little bit yellow
as I can see within it. So I'm really happy about that. Okay. This comes around, like, here till around there. That is. Okay. Now we have all of this. I think we're ready to
add in the paint work. Lines. I wash off my brush. Here we go. Starting
on the on the left, which is heats for sure dry. Don't worry about that at all. Uh, curlines on this hair. Okay. And his eyes. This Okay, bit for the nose, mouth. Okay. Uh, his chin and his
neck comes down to here. Obviously. So now,
doing a shirt. I think he's got wrinkles
on his shirt here. It's not a colored shirt. Okay, and some
scrubby lines here. I don't know if he can
do anything on his belt, strap, like we said, but throw some lines around it anyway. And his arms to the bottom of his shirt and
his arm comes out like this. That's really thin. Okay.
And then the hands, his fingers Okay,
that's one side. His other shirts
comes out like this. And can see it actually the blue actually
connects right with the strap, so that's a little bit off. Like there isn't so much
not so much space between his arm and his shirt as we have it drawn
or as I drew it here. But if you're not looking
at the original picture, you'll probably not notice it. At least I hope not.
Okay, and then pants. It's wiggles for the creases. Pocket comes out a
little bit looks like. That over here. Comes out like this maybe a little bit. And then the other
shoe down here, actually should finish
his leg, right? So it comes like this, grab some highlights
and this cool look. I like to trap that
light around here, so it just adds a
little more interest. Um, stylistically, I guess. And then the shoe has a very smooth outline.
So I'll try that. Alright, so I think
that's pretty good. Um, moving on to this guy, I might come back and add
a little bit of shadow to his face with the
brush, but not yet. Let's go first to this guy. And his hair. Okay. His nose comes like this and his eyes. Something like that.
Doing it very little. The more I do, the more chance
I have of messing it up. So I'm just gonna
leave it like that. And here, his shirt
is pretty dark, but thankfully, the
brushwork is still visible. Okay, here. And Just some creases and shirt. Okay, drawing these
part like that isn't exactly so realistic
looking in the picture, even though in the drawing, even though in the picture,
that is how it looks. So, um, I guess, just
keep that in mind. Okay, that was almost
a smiley face there. So I just want to fix
that a little bit, too. Uh, here, find shorts
look like that. And then his leg a little bit for his knee
comes around like this. Okay. That's one leg, and then the other
leg comes like that. Okay. I do want to
get his arms also. So, this here, it was one arm and
hand, okay, I think. And then his other
arm like this. So it was a little bit complicated what his
fingers are doing here. But just hint to them something
like that, hopefully. Whatever. I'm gonna stop
there with the fingers. And his shoe comes here and like that and I even realize It do his actual this shoe shoe in
the foreground. Never too late, I suppose. Like that. Okay. Uh, just one line here for the shoelaces. Now, as I said, I want to go back in and add a little bit. I'm shading on his
side of his head. Just adds a little
bit more interest, realism, maybe. Like that. Okay. Oh, actually, I think I said I was gonna do
on this guy, didn't I? I do it for both of
them, then, right? Here. Like that. It's on his arm and
this arm, why not? And then what we're going to do is smooth it out
like it did last time, taking the water off the
brush and then just, like, making sure it doesn't
have a hard edge like that. Okay. There's almost no water left
on the brush to paint with, but let's see what we do that. This week so it was a little bit darker and this was darker. And we'll do a little bit
cheek on this side too while we're at it. Alright. Excellent. So there we are. I think this is a pretty good rendering of
the two of them, and a great way to
finish our class.
9. Thank You: Thank you so much for joining me in the Skillshare class where we learned how to
make line and wash watercolors of people walking. I hope you learn some new
tips and tricks about how you get the colors that
you're looking for and the poses that
you're looking for. I would love to
see what you made. So please be sure to upload it to the projects and
resources section. That way, we can
all enjoy seeing each other's work
and get inspired. If you found this class useful, I'd really appreciate
getting your feedback on it, reading your views is without a doubt the highlight
of my day and gives me so much motivation
to continue to produce the best possible
classes for my students. And if you post your
work on social media, I'd love it if you
could also tag me on Instagram so I
can give it a like. I'm always looking for ways to provide more value
to my students. So you have any
comments or questions about this class or want any specificar advice related to the line and wash technique, please reach out to me in
the discussion section. Lastly, please click
the follow button so you can follow
me on Skillshare. That way, you'll be the first to know when I launch a new class. Thank you again so
much for joining me, and I look forward to seeing you in another Skillshare class.
 Avraham Nacher, Artist & Photographer