Transcripts
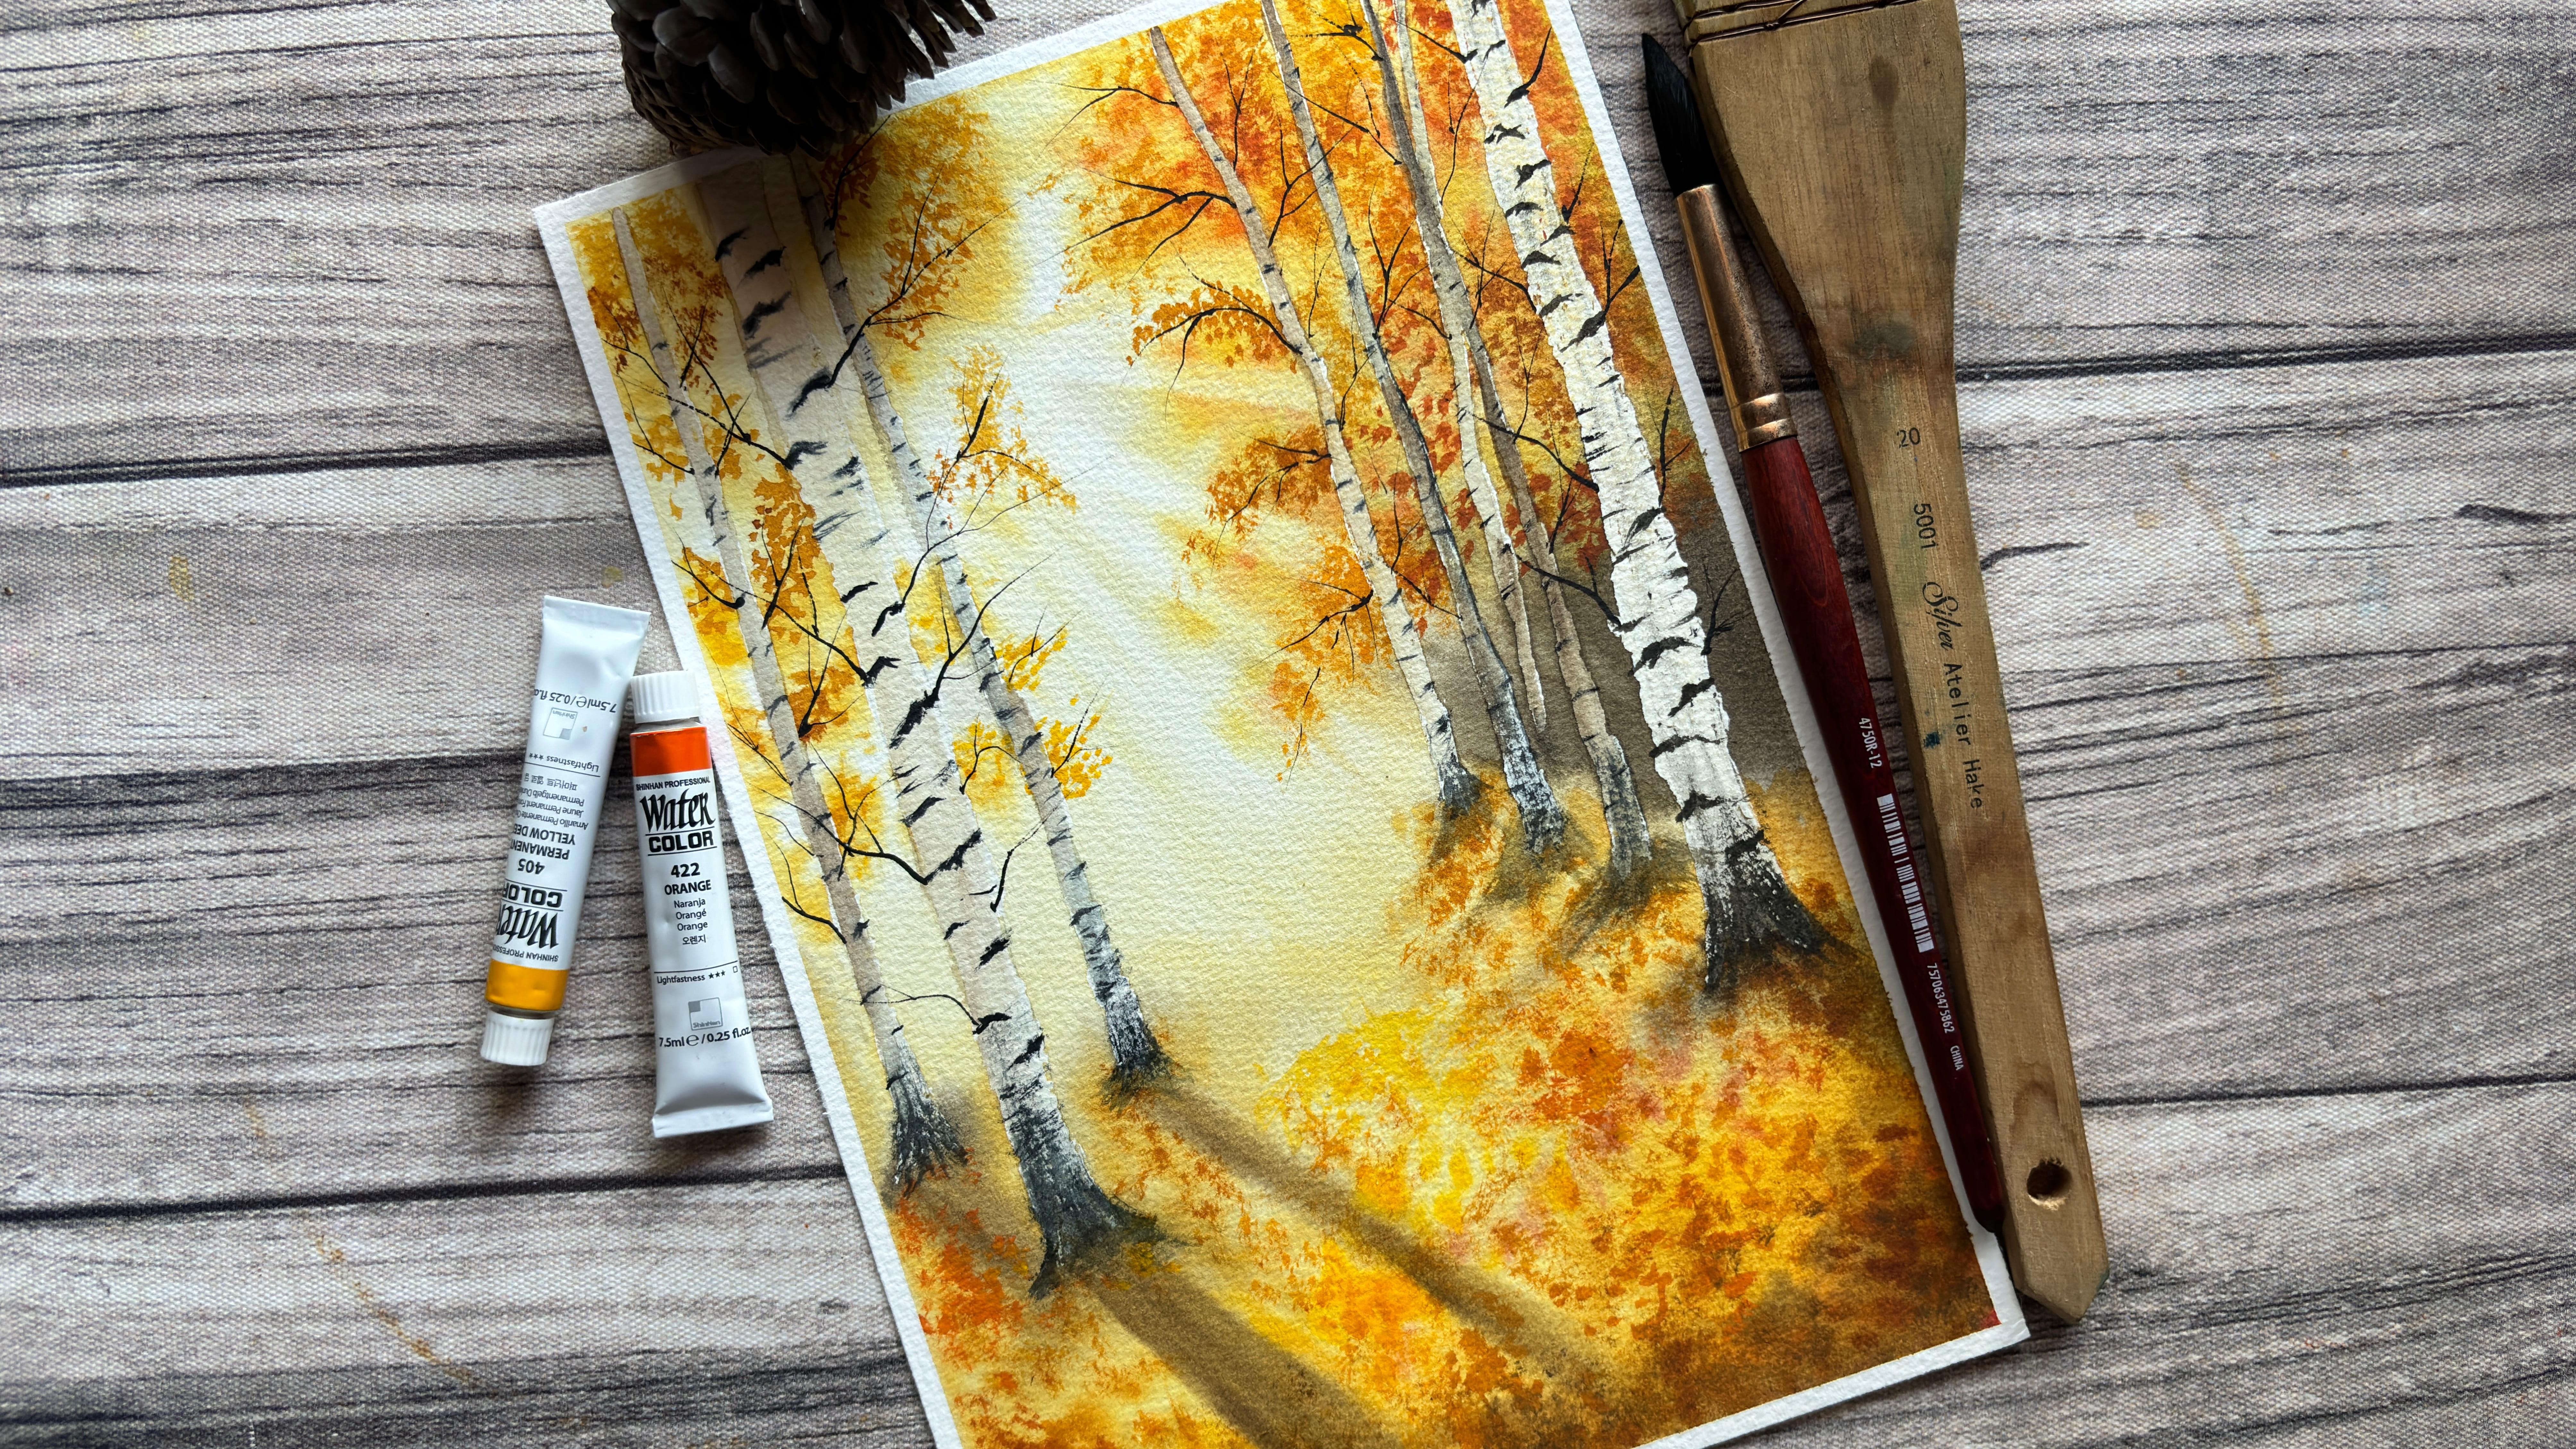
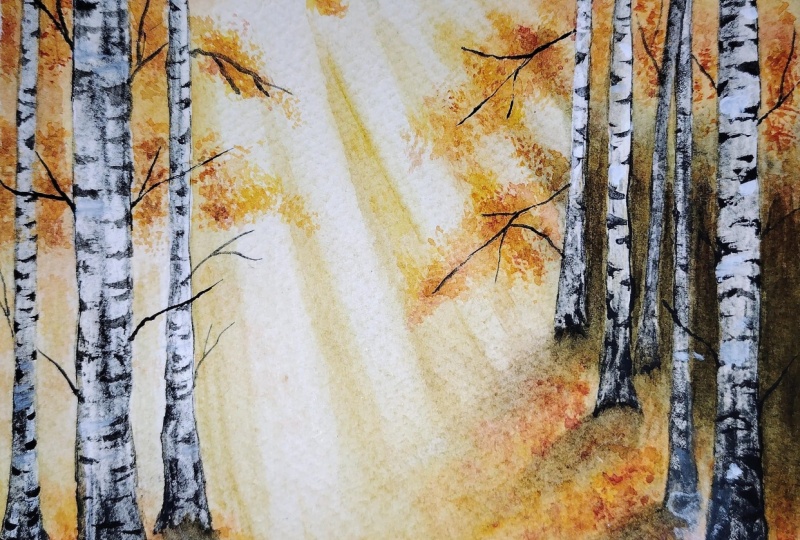
1. Hello Autumn!: Imagine walking through
a quiet birch forest on an autumn afternoon, the leaves glowing in the
shades of gold and orange, the light filtering gently
through the trees and long shadows stretching
across the forest floor. That's the feeling
I wanted to capture in today's painting.
Hello, everyone. I'm Aishwarya an engineer
and a watercolor artist, and welcome to this class. In this class, we will
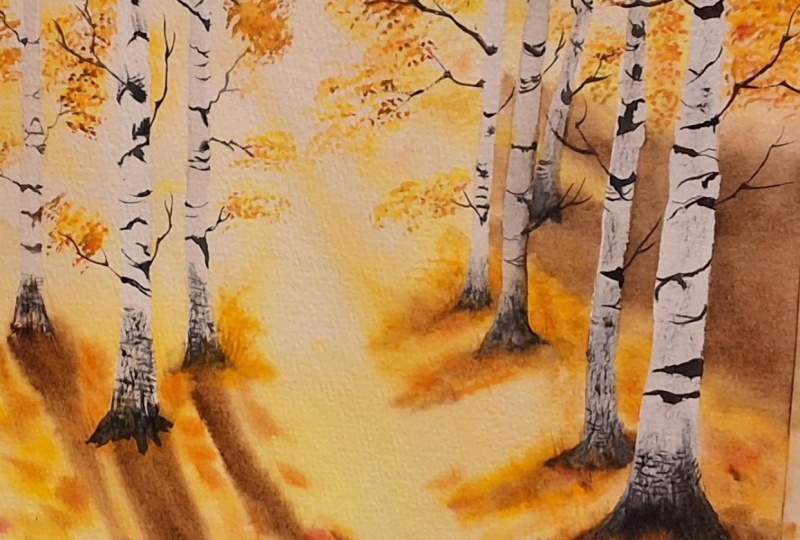
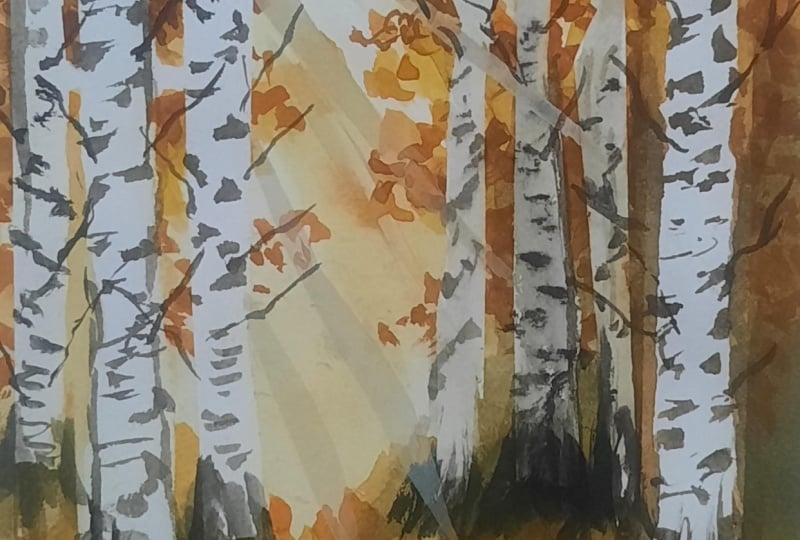
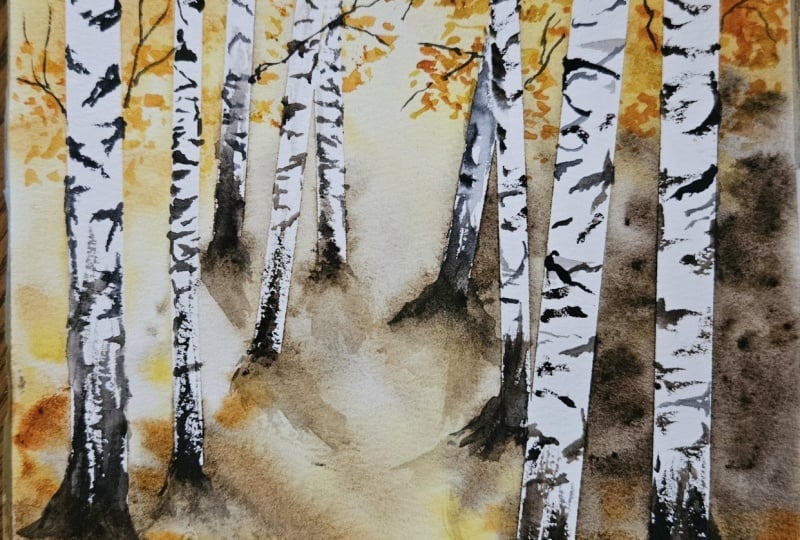
create this beautiful, cozy autumn forest step by step using simple
watercolor techniques to build glowing washes, loose foliages, soft shadows
and delicate birch trunks. The goal is not to make
everything look perfect. It's to let the watercolor
do some of the work for us and enjoy the beautiful
unexpected texture it creates. So take a moment to settle
in, pick up your brushes, grab your favorite drink, and let's paint a little
piece of autumn together.
2. Art Supplies: Okay, so now let
us take a look at the art supplies that you will
need. First is the paper. I'm using the paper from the
brand Saunders water food, which is 100% cotton
watercolor paper, and it is having a thickness
of 300 GSM 140 LV. So this is a cold press paper which has a good
amount of texture, and it is great for
painting landscapes. So make sure you're
going with any of the 100% cotton watercolor
paper to get the best results. Right. So the next is, let's take a look
at the brushes. So the brushes are going
to be really very simple. First, you will need a larger sized wash brush
or a flat brush, something similar to this, so that you can
just go ahead and wet the entire surface
area of the paper. If you don't have
that, you can go with larger sized round brush. Next, you will need
some round brushes like size number
ten, 12 or eight. Any of them would be fine. And to add some details, you will need a
synthetic brush as well as to add some branches, you will need the rigor brush. These are the basic
brushes that you will be requiring for
this particular class. And to add the pencil sketch, you will need a basic
pencil and an eraser. The next thing
that you will need is obviously the colors. So I have all the colors in
this particular palette. For the detailed list
of all the colors that you would be using
for this particular class, I have made a separate section, so you can just go
and watch that. Next, you will need
a masking tape. You'll also need a
cloth or tissue to wipe off the excess amount
of paint or water. You'll need a masking fluid
to mask the birch trees. And if you don't
have that, you can just go with a
masking tape itself. Then next you'll need
two jars of water. One has to stay clean. The other one is to rinse
off all the dirty paint. So make sure you have
two jars of clean water. Next, you will need
a hard surface, something similar to
this so that you can firmly place your paper onto
it and begin your painting. So grab all your art supplies and I's soon in
the next section.
3. Autumn Colour Palette: All right, so let's
take a look at the colors that you will need for this particular painting. So the first color
that you will need is Indian gold or Indian yellow. If you don't have Indian gold, then you can go with any
of your yellow and mix a little bit of orange and
try to get this shade. And also you can
add a little bit of red and brown to
create this mix. And the next color that you
will need is cadmium yellow. This is a basic
yellow that will be present in all the
watercolor sets, so you need not
worry about this. And the next color
is cadmium orange. So this is also easily available across all the
watercolor palettes. So these are the basic colors that you will need for autumn, basically all your
yellows and oranges. And the next color that you
will need is the sepia, or you can go with ndike brown as well if you don't have sepia. Mix a little bit of indice brown with a little amount
of paints gray. The next color that you
will need for creating the birch tree texture
is paints gray. So paints gray is also
easily available. If you don't have that, you
can go with black as well. Mix a little bit of black
with a little bit of blue to get this pains
gray kind of shade. So these are the pretty
much basic colors that you will need for
this particular class. So go get your color
palette ready, and I'll see you soon
in the next section.
4. Pencil Sketch: All right, so let's begin
with the pencil sketch. So the pencil sketch is
going to be really simple. We're just going to
add few birch trees. So these are the trees.
Basically, you might have seen them in the photos
or in some movies. And for some of you, it might be there right in
your neighborhood. Anyways, so I have never experienced autumn in the
country where I live in. But yeah, I would love to bring the magic of autumn
through my paintings. And having said that, so yeah, you can either start sketching
the pencil sketch for yourself or you can just wait for me to finish
the entire sketch. Then you can pause the video, take a screenshot of
the entire sketch, and then you can take
your own sweet time and create a pencil
sketch for yourself. All right. So it's going
to be really simple. Basically, we're going to place
few trees on either side, and we are going
to place the trees in such a way that it should
create a better perspective. So we are not going to be adding all the trees of the same
size and same shape. We are going to add trees
of different sizes, and we're going to place
them at different positions. So we want to depict that there are few trees in the background, and there are few trees
in the foreground. Okay. And when you place
the trees in this manner, it gives a very realistic and natural forest effect
to your painting. So the whole point is to keep the rule of
perspective in the mind. So whenever you're painting,
or for that matter, whenever you're
sketching, sketching is the base or the foundation
of your painting. Once the sketching is done, once you've got it
right, the rest of the thing flows very easily. Okay. So take your
own sweet time and complete the pencil
sketch. All right. So I'll quickly go
and finish this. Meanwhile, you can
prep your paper and start adding
your pencil sketch. All right, so this is the
entire pencil sketch. It's as simple as that. So quickly go ahead, complete your pencil sketch, and I'll see you soon
in the next section.
5. Wetting The Paper: All right. So I went ahead and masked all of these trees with
the help of masking fluid. So if you don't
have masking fluid, what you can do is
grab a masking tape. Basically, the size should
be a little bit thick so that you can draw the shape of these trees onto
your masking tape, and then you can cut
it into the shape of these trees and
paste it on your trees. Okay? So this is a
hack that I used to use before I had
a masking fluid. All right. So once you
have done with that step, you can start by
wetting the paper. And for wetting the paper, I am using my flat brush. This is the wash brush
from silver black velvet, but you can go with any wash
brush that you have got. If you don't have a wash brush, you can use your larger sized round brush
for that matter. Just grab any larger
sized brush and basically grab water and start
wetting your paper. So when it comes to
wetting the paper, again, this is the foundation, and it has to be done very patiently. So go ahead and wet your paper multiple
number of times so that your paper is nicely
soaking since the entire painting is
going to be on wet on wet, you need to ensure
that your paper has to stay wet for a longer
duration of time. I keep repeating this
in all of my classes. I know it may seem boring, but guys, we need to get
the foundation right. If this is right, then everything else
will just flow. Senelessly. All right. So yeah, I know it's boring, so just turn on some music, grab a cup of coffee
or hot chocolate, and just go ahead with the
process of wetting the paper. All right. So my paper
looks good, and if at all, my paper dries in the middle, then I'll just grab
a brush and I'll just keep rewetting
my paper again. All right. Als soon
in the next section.
6. Adding the Background Wash: Alright, so now that our
background is nicely wet, let us start by painting
the background forest. So we are going to be
working on the wet on wet. Let us start with sepia and
little amount of olive green. So I'm trying to create a
nice muted earthy brown tone, and I'm going to add this in the background because we want the faraway trees to be covered with this
earthy brown tone. And on top of this, we will be adding the foliage with yellows and
oranges and red. Okay, so you can see
the intensity of this particular color is very light at this
point of time, and I am not going with
any darker tonal value. The next time when I
picked up my paint, you can see I picked up a slightly more
intensity tonal value, and that is how we will be
approaching this painting. So start lighter, and then
as you progress ahead, you can keep adding more
layers to your painting. All right. So this is just random kind of background
that I'm trying to create. There's no particular area
or shape or size to it. You have to just
go ahead and drop this paint all over
towards the titan side, basically towards the sent
a part of the right inside. Okay. And now you
can see I'm picking up even more darker
tunal value this time, and I'm intensifying
the same color. So this is how we are going
to approach because if you add suddenly the darker
color at the first place, then you'll not be able to
achieve the depth or you know, you'll not be able to achieve that particular realism
in your painting. Okay. Next, I'm picking up some Indian gold and
some amount of yellow. You can go with any yellows and oranges from your palette. It is autumn and you can go with any warmer palette. Okay. So I'm just going to drop some brush strokes like foliages onto the paper
using this color mix, and it's going to be
again, really very random. There's no particular space or place where you
want to add this. You just going to go ahead and drop some shapes
or some foliages. And please make sure that painting if your paper
is getting dried, use another brush, keep
another brush handy, and keep wetting that particular
surface of the paper. Okay? Do this only
if your paper is started to dry, right? So yeah. So you can see, I'm having
one plain brush in my hand, which I'm using
to wet the paper. And in the other hand, I'm just going ahead and painting the main
painting. All right. So now you can see with the same color that
is the yellow, orange and the Indian gold. I'm just going ahead and
creating the foliage. I'm just referring to
the reference picture, and I'm trying to create this. So you can wait for me to add, or you can just go ahead and
add it in a very random way. You need not follow
along with me because, you know, whatever
I am doing here, the result of my painting
is going to be entirely different from yours and it's going to be different
from others as well. So each and everyone is
going to have a very unique, beautiful creation at the end
of this particular class, and that is the whole
idea about this class to bring out your creativity. All right. So now in the center, we are going to create
sun rays effect. So I want the light hitting
from the left hand side. Basically, the sun is shining through the trees from
the top left corner, and I want to have that light effect falling
on the ground. So I'm just trying to
create those sun rays. So for that, I did not paint with the brown tonal value in the center in the beginning. So you remember, I just added
it on the right hand side, and towards the left, I left that empty white space because I wanted to
create the sun rays. Alright, so just keep this in
mind when you're painting, and you can just go ahead with the rest of the
painting. All right. So you can see, I have
just added a little bit more of these foliages now
with a darker tonal value. And yeah, so we're
going to go from lighter to medium tonal value to very high intensity value. Okay? This is the procedure that we are going to follow
for the entire painting. And now, with the
help of clean brush, again, I'm going to start
creating the sun rays. So I'm not satisfied with how it is looking at
the present moment, but I'm just going
to keep going. I'm not going to judge
my painting yet because, you know, it's going to ruin
the process if you do that. So just enjoy the process. Don't worry about the results, wait for the beautiful
creation to happen at the end. You your focus should only be on the present moment and
your focus should only be on painting and
not on the result. Okay? Fine. So you
can see, again, I'm just using a nice damp brush to just go ahead and
re wet the paper. Now again, moving on to
the right hand side, we're going to create a lot of foliage on the right
hand side as well, and the procedure is going
to remain entirely same. Use the same Indian gold yellow or any orange or any yellow from your palette and just
go ahead and drop the paint all over onto
the right hand side. And by dropping the paint, I mean literally touching the tip of the brush
onto the paper and not just going ahead and creating a nice blended look.
We don't want that. We just want to
create some foliage. So keep that in mind and just go ahead
and drop the paint. All right, so I'll just continue and you can just
follow along with me. All right. So now
you can see that I'm going ahead and adding
similar brush strokes, but this time I'm using a
different color that is orange. So the idea here is, while the paper is still wet, you're going to
utilize this time to create different
tonal values, to add different
brush strokes using different colors of
the autumn palette. This is going to
create a beautiful organic natural blend
between the colors. And once everything
has beautifully dried, we're going to add few
more details onto the top. So don't worry about how your background is looking
at this particular point. Just go ahead and
drop the colors. All right, so I'll see you
soon in the next section where we will be painting
the ground wet on wet. Mm hmm.
7. Painting The Ground: All right. Now let
us go ahead and paint the bottom region,
basically the ground. So I'm just going to
quickly go ahead and reave it because my
paper has dried, and, yeah, you can
do the same thing. So now for the ground, we are going to depict
the same colors that we used for the tree. It's obvious, right, because
the leaves are going to fall on the ground and they are going to be
of the same color. Hence the entire ground is going to be covered
with the autumn leaves. And we're not going to add
very detailed release. We're just going to show
that there are some leaves, there are some foliages
fallen on the ground. Okay. And we want to make it look natural, organic,
and realistic. Again, there's no
particular shape, size, or any particular area. You can just go ahead and
fill the ground the way you like it because it
is autumn yeah, so just enjoy the coziness
of the season. All right. You can see I started with a nice brighter tonal value of this Indian gold and
the yellow shade. The shade that I used for
creating the foliage earlier, you can go ahead with any of the yellow or
the oranges that you have used for painting
the foliage. All right. So if you feel like the sun
rays are not too intensified, you can go ahead and use a
clean brush and try to do that now while the paper is still wet because once the paper dries, you cannot lift the
paint from the paper. Okay? So do this only if the paper is still
wet. All right. So just make use of the
time and be very wise, and, yeah, that's it. So this is how it's looking, and now you can see. When I told you
about the sun rays in the beginning when
I started to add them, they were looking
out of the place. But now you can see right how the painting is
taking its shape. And that's the reason
I told you just trust the process and everything else is going to
fall into place. All right. So yeah. I really love how the light
is hitting the tree trunks and it's just creating a
beautiful gorgeous effect. And I'm hoping that
you are enjoying the process and you are also enjoying the
painting. All right. So yeah, so I'm just satisfied. I know, I just keep adding
more touches to my painting, but it's not necessary that
you do the same thing. If you're already happy
with your painting, then just take a step back and just have a look
at your painting, gaze at your painting.
Alright? So, yeah. So let us just
continue by adding the colors onto the
bottom ground region. So again, we are going
to have a lot of depth onto the outside edges, basically the
bottom left and the right corners and
towards the center, since the sun rays is
hitting the ground, we want to show
that the sun rays are falling onto the
center of the ground, and that's why that area is
going to be a little lighter. Okay? So keep this rule
of perspective in mind, keep the entire concept
of light and shadows. Because if you don't
have these things, then your painting is
going to look really flat. And through these classes, I am trying to bring out these particular
concepts so that you can use these in your
future paintings. Okay? So one more thing is the tree trunks
that you have added, you need to add the roots
for those particular trees. Okay? Basically,
we're going to create a shadow for those
particular trees. If you don't create these, then it'll look like as though your trees are
floating in the air. But we don't want
that to happen. We want the trees
to look properly grounded and rooted
into the Earth, right? That's the reason
we are going to keep adding these particular, um, depth onto the painting. I'm going with sepia. You can see if you
want, you can go with dark brown or any brown. Again, going with lighter
tonal value and then adding a lot of
second layer to this. This is how we're going to
follow the entire painting. All right, so this is the last tree that
we're going to add and once this is done, it's very important
to paint this first, because once your paper dries, it's going to
create harsh edges, and we do want that to happen. Everything should be seamlessly done only when the paper is wet. If you feel like your
paper is drying, please wait for it
to dry completely. Go ahead and re wet the paper and begin
the process again. I know it's time consuming. You need a lot of patients, but please do follow this. Otherwise, you're going
to ruin your painting. Okay. So yeah. Alright. So again, this might be looking a little messier at
this point of time, but hold on, have patience, and let's just keep
concentrating on the process, and let's keep
enjoying the process. Alright. So I'm just
going to go ahead back with my Indian
yellow and Indian gold, and I'm just going to blend it out seamlessly with
the tree trunks. Okay, so now going with deeper tonal values
of Indian gold, and I'm trying to add the
foliages onto the ground. Similar brush strokes
that you used earlier for creating the
foliages on the trees. So you can see, with the help
of the tip of the brush, I'm just trying to create
the leaf like structures. And these are not of a
particular size or shape. It's very random. I'm just tapping the brush onto my paper. Okay. So just go ahead and
do it randomly all over. All right. So now that we have added some yellows, oranges, and red, now it's time to create a little bit more
depth to our paintings. So I'm just going with
dark brown or sepia. You can go with a mix of both. And if you don't have
sepia, it's fine. You can just go with dark brown. Okay. So the colors are
really very simple. All are the basic
colors which are available in almost all
the watercolor sets. So you need not worry
about which color I have to use or don't
think about all of that. Just go with any basic shades of yellow oranges and
brown, and that's it. Your fall painting is going
to look really gorgeous. Okay, so you can see now slowly the painting is
taking its shape, right? So that's what I'm telling. Keep building the layers. Go with lighter tonal
value, then medium, and then higher
intensity tonal value. So you can see how the color is shining through the layers. All right. One more
important step is to add the shadows
for the trees. And this step is
also very important. You need to do this when
the paper is still wet. Okay? Because afterwards,
the paper is going to dry and the shadows are going
to look really, very harsh. We don't want that.
We want to create softer looking
shadows. All right. So very important again. Since the sun rays
are present here, the sun rays are coming
through the trees. They are passing through
the trees, right? So we want to show that
there are shadows, and these are the tiny little
things that you need to take care of because once you focus on these tiny
little things, right, no matter how simple
your painting is, it's really going to look
beautiful because you have taken care of all
those nature aspects. By nature aspects, I mean, the light, the shadows, the rule of perspective, the size and shape of the tree, the placement of the
trees, and so on. So yeah, so just
keep doing that. Alright, so now the entire
background is completed. Let us wait for this
particular thing to dry, and then I'll see you
soon in the next section.
8. Adding Foliage: All right. So now that the background has
beautifully dried, let us begin by adding the foliage onto the
foreground. All right. I'm using my synthetic brush, and this is size number two, but you can go with
any smaller size if you're comfortable with that. Just make sure it is
nice and pointed. I'm using a synthetic brush here because we don't
want too much of water. We just want the paint to be
slightly on the drier side. You can see how I am just tapping the brush
again onto the paper, and I'm trying to create
this teeny tiny foliage, some random leaf
like structures. Again, it is not very detailed. You have to just keep tapping. So while I was doing
the pencil sketch, I have just sketched out even
those teeny tiny branches that are expanding towards
the outside so that later on, it'll become very easy to, you know, place your foliage. It's actually not necessary, but if you make that
during the pencil sketch, it becomes very easier later when you're
adding these foliage because we want to place those foliages like at
a particular position. Allright? So yeah, if you're not done during the pencil
sketch, it's absolutely fine. You can just go ahead and just
follow the way I'm doing, or you usually have an idea how the foliage is have to
be presented on the tree. You can just follow your
intuition and just get going. I know right now my hand
is blocking the view, so I'm absolutely
sorry for that, but it's nothing but the same original
process of just tapping the paint
across the paper. The brush across the paper. So again, we're going to go with a slightly lighter
tonal value of yellow. And then as we move on, we are going to keep
building the layers, and I'm going to go with
Indian gold on top. Okay, so you have to keep
switching between the colors. Don't go with one color. It's going to look really flat. Just keep switching between different colors and create
beautiful autumn foliage. All right, so let
me just continue and you can watch or
follow along with me. So we have finished
adding the foliages on the left side and on
the right hand side, it's going to be the
similar process. So you can see, since we
created a nice soft background, and now that you're adding the foliages on top
of that background, the colors are really going
to shine through that. So it's very important
to have a base layer. The base layer has to
be really beautiful. And on top of that, when
you add the extra details, it's really going to
make your painting look really natural and organic. Okay. That is the reason I said, your background or the base
has to be really light. It should not be really
very bright or intense, it should not be
very light as well. You need to just have that
in the mind and rest, everything will fall into place. You can see now randomly I'm
creating the foliage and I'm not just focusing at one particular place or
one particular position. And don't make it too overcrowded
in a particular place. Just go all over and keep
moving your brush across the paper and keep adding
different colors of foliage. It is autumn, so you're
absolutely free to go with any kind of color that is
yellows, reds, oranges. Everything is
perfectly fine. Okay? So, yeah. So again, I am just adding the foliage. Wherever I have
drawn the branches, I can see my pencil sketch, and I'm using that as a
guideline and doing that. But if you haven't added, you can just follow
along with me and place the foliages
randomly on the trees. All right. So again, it's going to be merely
the same process. There's nothing much
to explain about this. So I'm just going to
keep adding the foliage. And yeah, meanwhile,
you can also do the same. All right. So the foliages are looking
really, very pretty, and I absolutely enjoyed the entire process of
adding the foliage. It was really soothing, calming and peaceful, and I hope you did enjoy
the process, too. So in the upcoming sections, we are just going to
add the tiny branches, those thin, delicate branches that are just
sprouting outwards. And for that, you'll
need a rigor brush. So go grab your brush, and I'll see you soon
in the next section.
9. Painting Birch Trees: All right. Now that the
background foliages are completely added, let us begin by painting
the birch trees. So for painting the birch trees, it's really very simple. We are just going to
use the color pains gray and a little bit
of brown if we require. Alright. So I'm
mixing up the pains gray and I'm using my
round synthetic brush. This is from Princeton. Probably it is size number two. So you can go with any
synthetic brush of your choice. And you can see that there's no lot of paint or lot
of water on my brush. Basically, it is a semi dry kind of paint that is
present on my brush. I'm just trying to make
these random strokes. It does not have any
particular shape. It is not in a defined manner. It is just, you
know, criss cross, croquet, just very random. So if you have a hard
time painting birches, what I suggest is you can go to Pentrist type birch trees, and you'll get thousands of different images of birch trees, and you can just see the
texture on the tree. So once you see two, three
different types of trees, you will get an
idea what pattern has to be painted on the trees. So once you do that exercise, just practice it on a small
scrap piece of paper. To make yourself more confident. And then you can come back to the original painting
and add it over there. Okay? So there's no
particular order or there's no particular way. What I'm doing is all
that I'm doing is from either side that is from the left and
from the right. I'm just trying to create
these semi dry strokes. Okay? So you can see, so organic it is
looking and it's really looking very
natural and realistic. So why is it looking natural and realistic
is that I'm going organically and randomly with a very dry paint
so I'm trying to just scrub the brush
against the paper, and I'm just trying to create some textures onto
the tree trunk. So if you have taken a closer
look at the tree trunk, you will see that it is never smooth and defined and polished. It always has some
kind of texture, some crookedness is there, and that's what makes a
tree more beautiful, right? So yeah, so similarly, we're going to paint all
of these birch trees. So this is going to be a long
brusss it depends on you. If you want to paint all
of this in one seating or you want to take some break
and then paint it slowly. Just make sure that you're not rushing through
this process. Take your own sweet time. Maybe you can paint the
trees on the right first, take a break, then go ahead and paint the trees on the left. Okay? The entire procedure
is going to remain same. Now for the tree trunk, that is the base of the tree. You can see that I'm
picking up more dry paint, and I'm just trying to create some upward strokes
and trying to blend that with the ground
to make sure that the tree looks properly
rooted onto the ground. Okay? So you can just watch or
follow along with me. All right, so you can see I am painting the trees
in the similar manner. So another thing that
you need to keep in mind is there are some
foreground trees and there are some
background trees. So the trees that are
in the foreground, just try to pay more attention
to the details on it. Don't go overboard and
add too many details. We don't want that
because the trees are still far away
from the viewer. Just make sure that the trees the two trees that are in front, just add a lot of tiny details. And the trees that are far away, that is the trees that are
thinner and at the back, you can just focus
slightly on those trees. Just try to add
some textures and ensure that there are some
trees in the background. Okay, so don't put
extra effort and don't take too much time by sitting with each tree and
adding every detail. No, don't do that. We
don't want that to happen. The entire focus of this particular painting is
to bring out that background. The essence is there in
the background because we are going to depict all
the autumn foliage, the different colors, the leaves falling on the ground
and all of it. The trees are just
present, okay? So yeah. Again, it's going to be a very
repetitive process. There's nothing much
to explain over here. It's just going to
be the same process. Just make sure that
you're not adding too many too much
intensified colors. Even when you're painting
the base of the tree trunk, make sure you're
not going overboard and make it very patchy. It should not look like that. Make it look
seamless and make it look very gentle and nice. Okay. So yeah. I have successfully finished painting the first three trees. I know it gets boring
in the middle, but it also gets exciting and if you really
dwell deep into that, it's going to be a relaxing
and a very calming process. So make sure to turn on
some background music, grab a cup of hot chocolate or hot coffee or any
drink that you like, enjoy the music and just
vibe with the environment. All right. So yeah. All right. You can
see that I have successfully finished painting
all of the birch trees. It's going to be
the same process, and I hope you have
completed yours as well, but you haven't, it's fine. You can take your own sweet time and then come back
to the next lesson. All right. I'm
absolutely loving how the entire forest is
taking its shape, and we have still some things to be added
before we call it done. Okay, so it's really
been super magical, and I'm enjoying the process. It's like, very peaceful
and highly meditative. And yeah, so I'll allow this to dry and I'll see you soon
in the upcoming section.
10. Adding The Twigs: All right, so we are
on to the final part, and we will be adding the branches in this
particular section. So for this purpose, I'm using my rigor brush. So basically, rigor
brush is that kind of brush which is basically
used for detailing. It is also called as a
detailing brush because it has a very thin and
delicate fine tip, and it is usually longer
compared to your other brushes. So it's very easy to make
details like branches, twigs or if you want to
add some thinner lines, you can use this
particular rigor brush. If you don't have this,
you can go with any of your size number zero brush
or size number one brush. Just make sure it
is not too thick. It should be thin and
nice and delicate. Okay? So with the help of that, you're going to go
with same sepia or the paints gray that you used for painting the
birches and you can see, I'm adding the very thin, delicate twigs or branches, whatever you want to call them. I know right now my hand
is blocking the screen, but so sorry for that. So you can see that I'm
just making those thin, delicate twigs and branches. The trees are very delicate and hence the branches also
have to be very delicate. Don't go with thick
bold branches. The idea is not to paint thick
bold branches over here. Just make sure you're going with nice thin, delicate twigs. Again, it's very random. There's no particular
size or there's no particular shape and there's no particular position that
you're going to add this. It's very random and organic. Just follow your intuition or if you have any
reference picture, you can just use that as your
guideline and just add it. You can see it's very
thin and very delicate. I'm repeating this
again and again because we want to keep
the rule of perspective. Otherwise, the whole
perspective will be lost and your painting is not going to look the way it
has to look like. If you want to make your
painting look more natural, more beautiful and organic, try to take care of these small little
things and see how your painting
changes instantly, okay? So just keep in mind of all of these tips and tricks
that I'm giving you in this particular class
because it's going to be very useful not only
for this particular class, but in your future
paintings as well. When you choose a
particular subject, just sit with the
subject and see what are those tiny little
details that is going to make my painting
look more natural, that is going to make
my painting stand out. So these are the tiny things. It's not about what color
you're going to use. Colors is going to
be the last step that you're going
to decide, okay? But before that,
you need to just make sure that your
composition is right. What are the elements
in the painting? What about the shadows?
What about the light? Everything. Okay? So I have taken a lot of
care and a lot of interest and effort
to bring all of this information into
one single class. So in my future classes as well, I'm going to be sharing
more such, you know, topics about how you
can paint and how you can make your paintings look more natural
and more beautiful. Okay, so the whole idea of
this particular class was not just about painting
autumn landscape because everybody
does that, okay? So I just wanted to bring out something different
by giving you more information on how you need to focus on
these tiny details. So now that I have finished
painting the left hand side, you can see the twigs
or the branches. They're looking very
thin and very delicate, and it's looking so
natural and so effortless. I'm really loving, and this is a magic of the
rigor brush, okay? There's nothing
that I have done. I'm just holding the brush
and I'm just moving it, and the rigor brush
is creating a beautiful, thin,
delicate pattern. Honestly, I couldn't
have done this better with any other brush. This rigor brush is my
all time savior and it's really very good brush. So if you can afford and
buy this rigor brush, it's actually not
that expensive. You can just find it on Amazon, like any brand rigor brush
would be good to go. And, yeah. So I'll just finish off this
and I'll see you soon. Alright. We are at the end, and I am really, very excited about how the
entire painting is looking. I especially loved
those sun rays. They are looking so
natural and so beautiful. I can really feel the warmth
of this particular season, you know, I am just feeling very peaceful and very
lovely at the moment. And I'm really hoping that you are feeling the same
about your painting. And if you haven't painted along with me and if you have
just watched all through, and still if you have enjoyed, I'm really grateful for that. You can just take
out your own time. There's absolutely no rush. You can learn whenever you want and you can paint
whenever you want. Okay? So I'm just very excited. And in the next section, I'm going to reveal
the final painting, so I'll see you there.
11. Thank You!: Alright, guys, we are towards the end of
this particular class, and I'm really grateful for each one of you who
made it till the end. Thank you for always
supporting me and showing love
on all my classes. And just take a look at
your painting, admire it. Look at those beautiful
autumn color palette, look at the sunrise, the warmth that this
painting is bringing. Take a look at those crisper
extras of your painting. Everything about
this painting is so calming and so
beautiful, isn't it? Just take a look at the
warmth and the coziness. So I would be
really happy to see your class projects in the
class project section, and I would be reviewing each of your projects and
giving you a feedback. That would be very useful for
your future projects, as. And if you're posting
this on Instagram, then do tag me using my
Instagram handle my paint story, and I would love to share your beautiful creations with the rest of the
community out there. All right. So I
would be coming up with more such beautiful
classes in the future. But until then, keep practicing, stay creative and
most importantly, trust yourself and
trust the process. The rest will automatically
just flow, right? So yeah, stay creative, happy painting, and
I'll see you soon.
 Aishwarya Shetty, my__paint___story | Watercolour Artist