Transcripts
1. Introduction: Hello, and welcome to this intermediate
watercolour class. Today, we're going
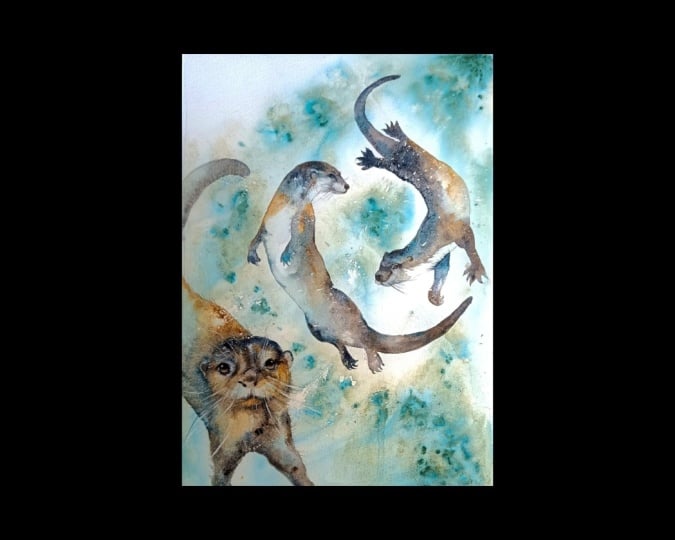
to be painting these lovely flowing,
swimming otters together. This class is great
if you don't have a lot of time to spend
painting in one sitting, as it can be broken down into
easy, doable time sections. And if wet-on-wet painting still seems a bit scary to you, let me show you the joy and magic of placing
paint onto wet paper, and it really is
as easy as that. I'm Jane Davies. I live, paint, teach, and walk my lovely spaniels in the beautiful South Downs
National Park in England. Over the last 20 years, I've taught myself the free flow technique that
you see today. Not having been to art school, finding my own way has been
fun and sometimes daunting, but has allowed me to
develop my own style. This has led me to teach others either on a
one to one basis or as part of a group in a wonderful studio in the
heart of the South Downs. I also run a successful
art business where two days are never the same from the thrill
of exhibiting to painting pet and
wildlife commissions in my own home studio. In all my classes, you will follow
along in real time, where I can guide you
to keeping your work loose and fresh
without overfussing. If you're just starting out, my three beginner
classes will guide you. With your first masterpiece
painted in only 15 minutes. Then you'll find dozens
of my master classes available covering a wide
range of beautiful subjects. In each one, I share the techniques I use in
my own professional work. We'll have a lot
of fun together, and you'll gain the
understanding and confidence to
incorporate everything you learn into your own work. You'll be amazed at how
easy watercolour can be. I provided you with a
great reference photo and a downloadable template
of the whole piece. The template will give you a stress free drawing so you
can just enjoy the painting. I will show you how to create that free flowing background and how much water you really need to add to get
that paint moving. We'll be adding paint
to wet paper to create that lovely movement
of the otters in motion. I'll then be showing you how
to add tight detail onto dry paper while keeping
everything all wonderfully soft. We will look at how important it is to take your
time at the end, and there I say, do
a little fiddling. If you'd like to learn
more about me or my work, then please pop over
to my website at Jane Davies
watercolour.co dot k. This can be found
on my profile page, along with links to my
Instagram and Facebook pages. I love to share my
art and adventures, especially on stories
with many ideas, works in progress, and
tales of studio life. I really hope you will share all your paintings on the
projects and resources pages. I love seeing your masterpieces. And don't forget
I'm here to help if you get stuck or
have any questions. I want you to experience
that buzz of painting in this liberating
wet-on-wet loose style. So come and join me.
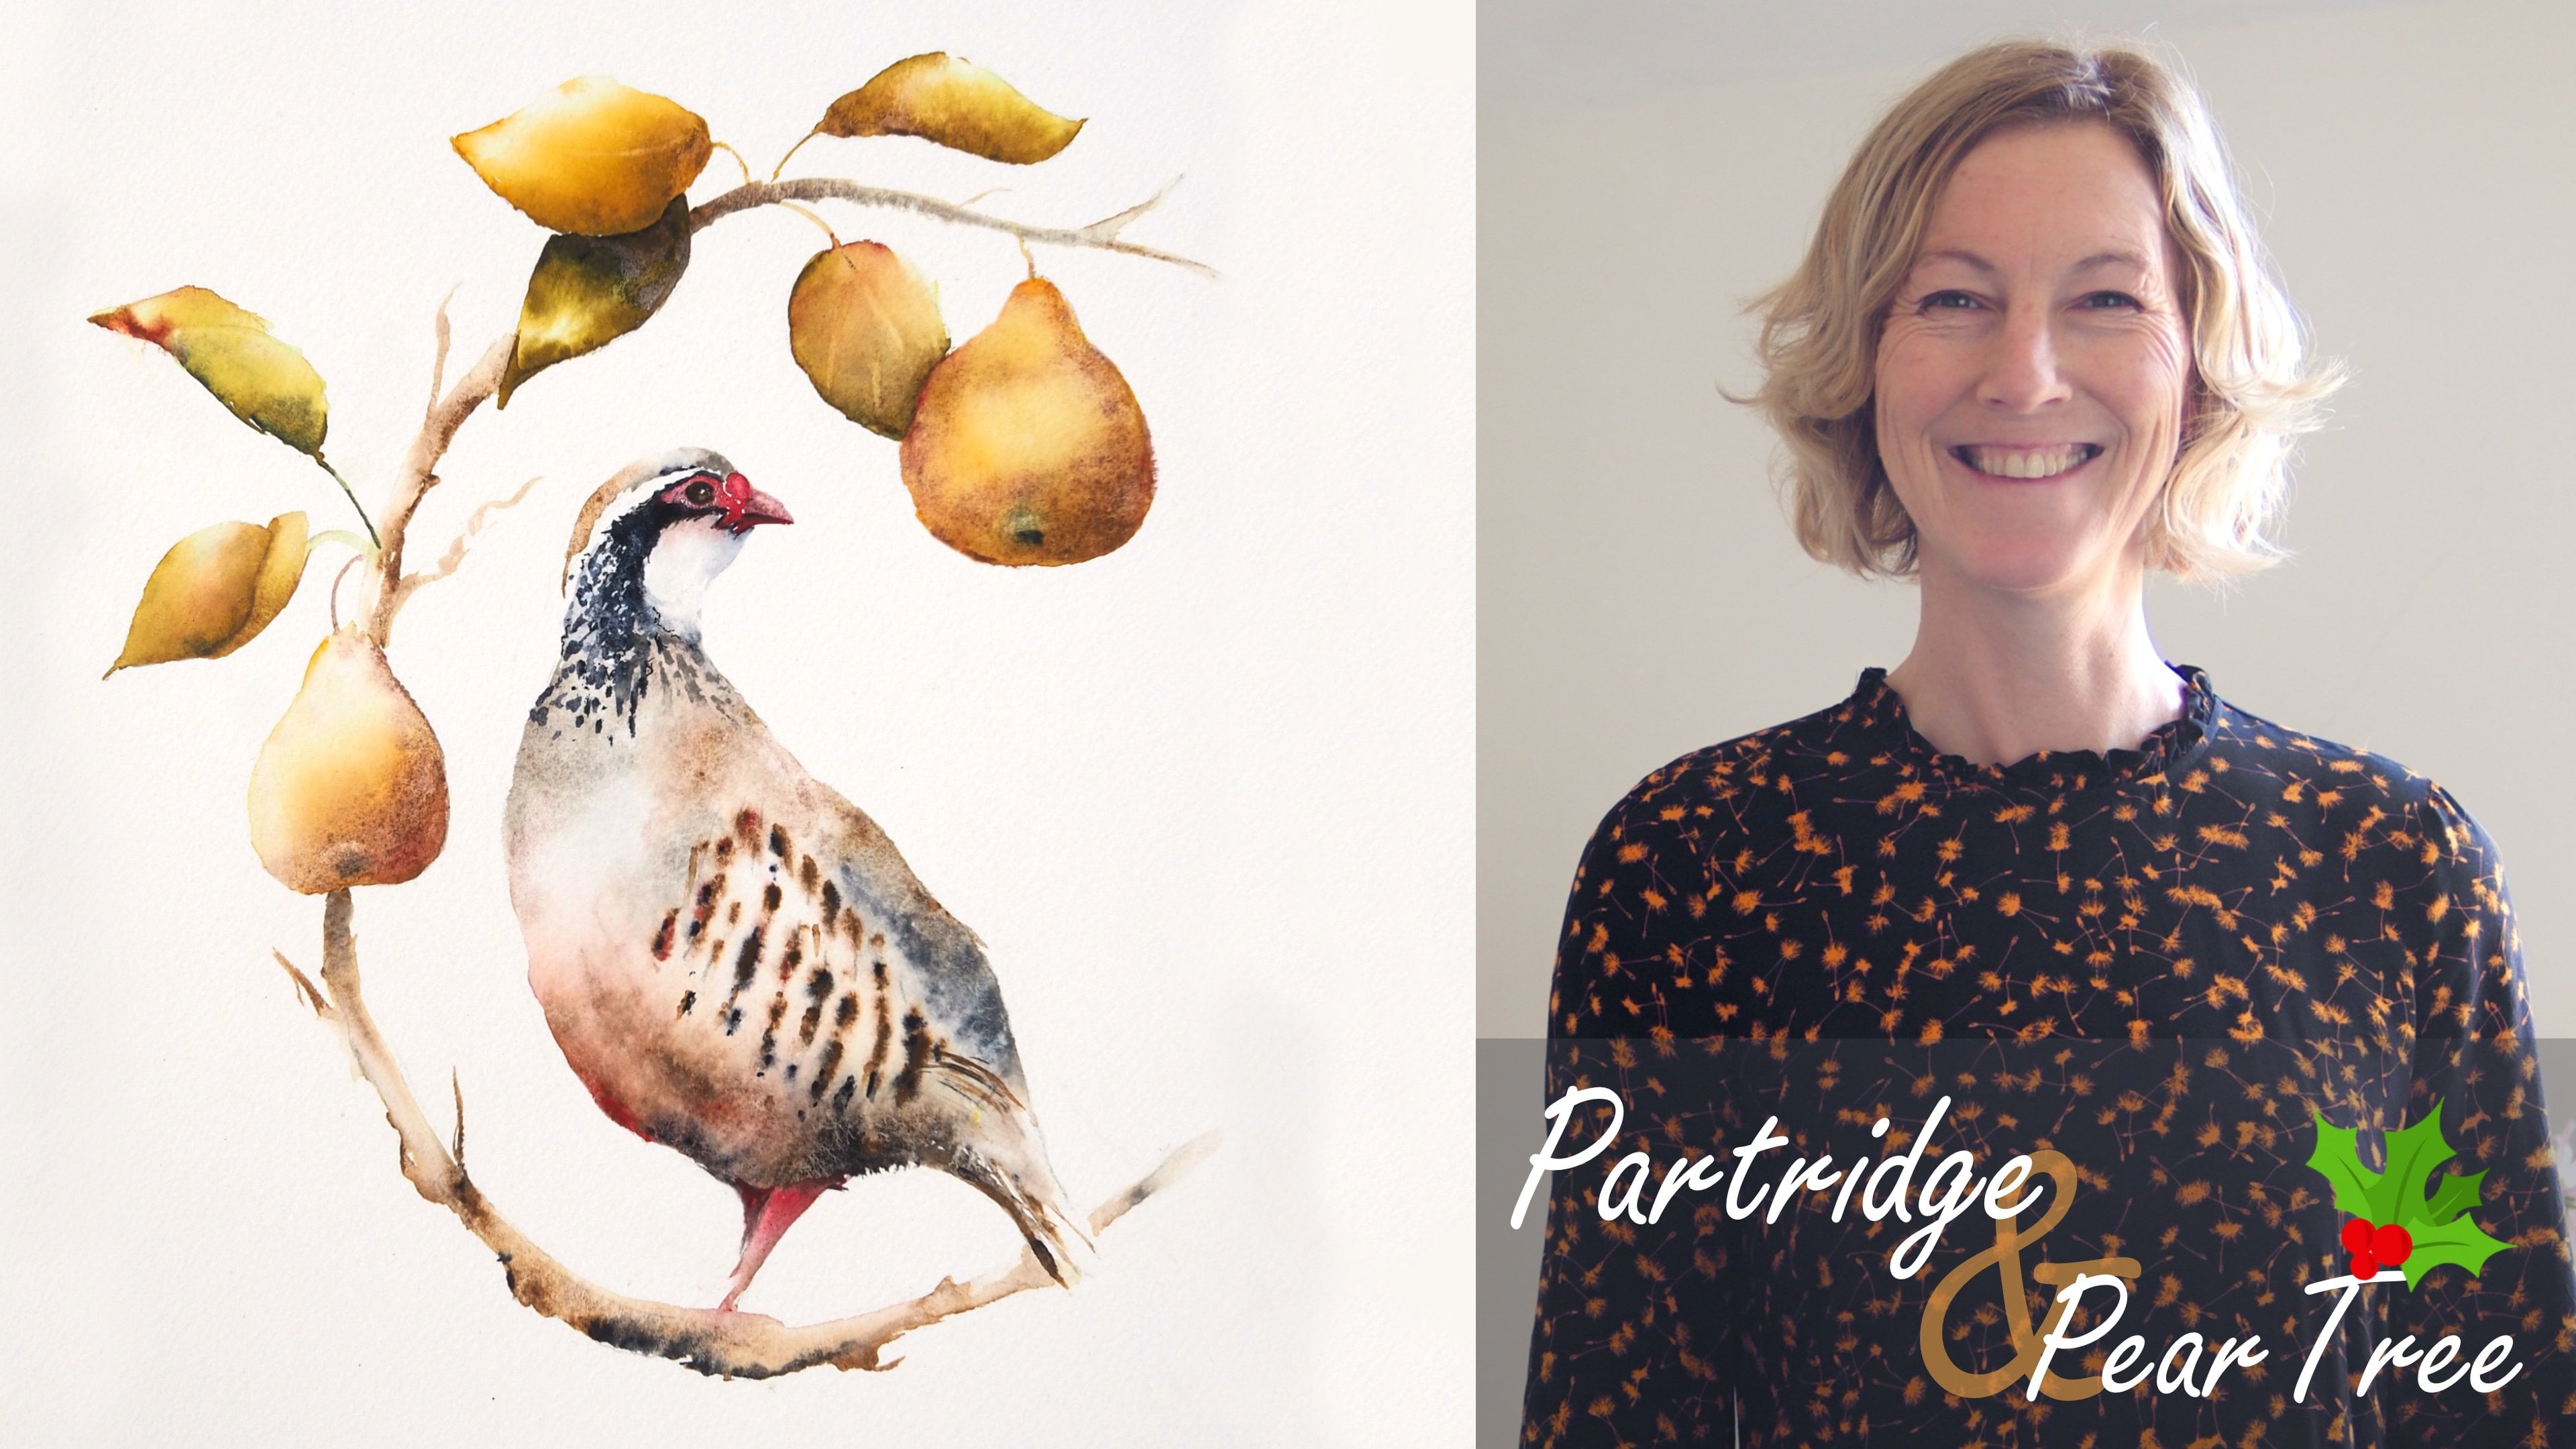
2. Materials: So welcome along to
this otter class. Wow, this seems a
while since I've been here doing these
Skillshare classes. And some of you may
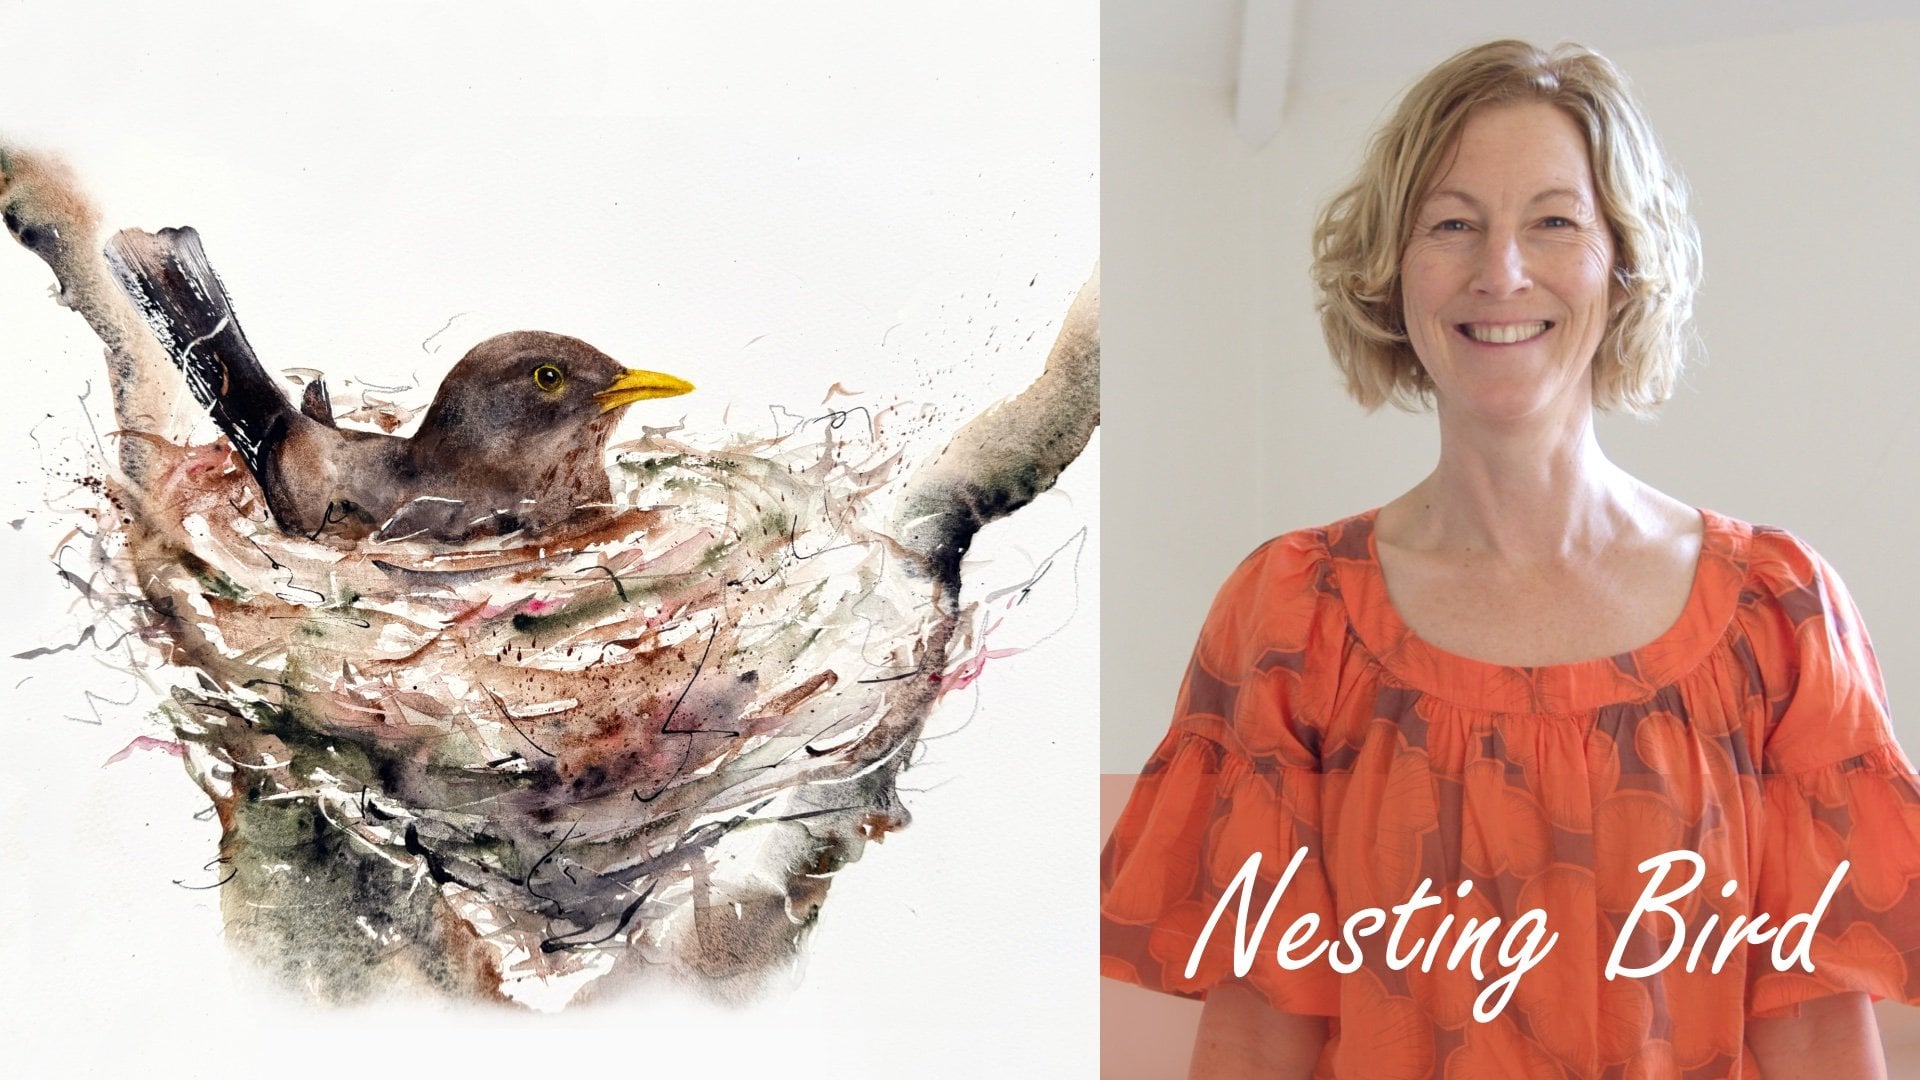
know there has been a slight delay on your next
class from the nesting bird. My dear beloved mother in law
passed away back in March, so that, obviously,
as you can imagine, sent us David is into
a bit of a flux. And this little otter
painting is a slight nod to her because she always wanted me to do a Skillshare otter class. She took great interest, actually, in my teaching. Partly she was very
encouraging of my art, and she was also a
English teacher herself. And she did take some great
delight in seeing your work, which I often share to her via emails and
bits and pieces. So yes, this auto class
is a slight nod to her. Don't worry. This is not
going to be a morbi class. I just thought I
would mention it and explain why I haven't
been here for a little while. I know some of you
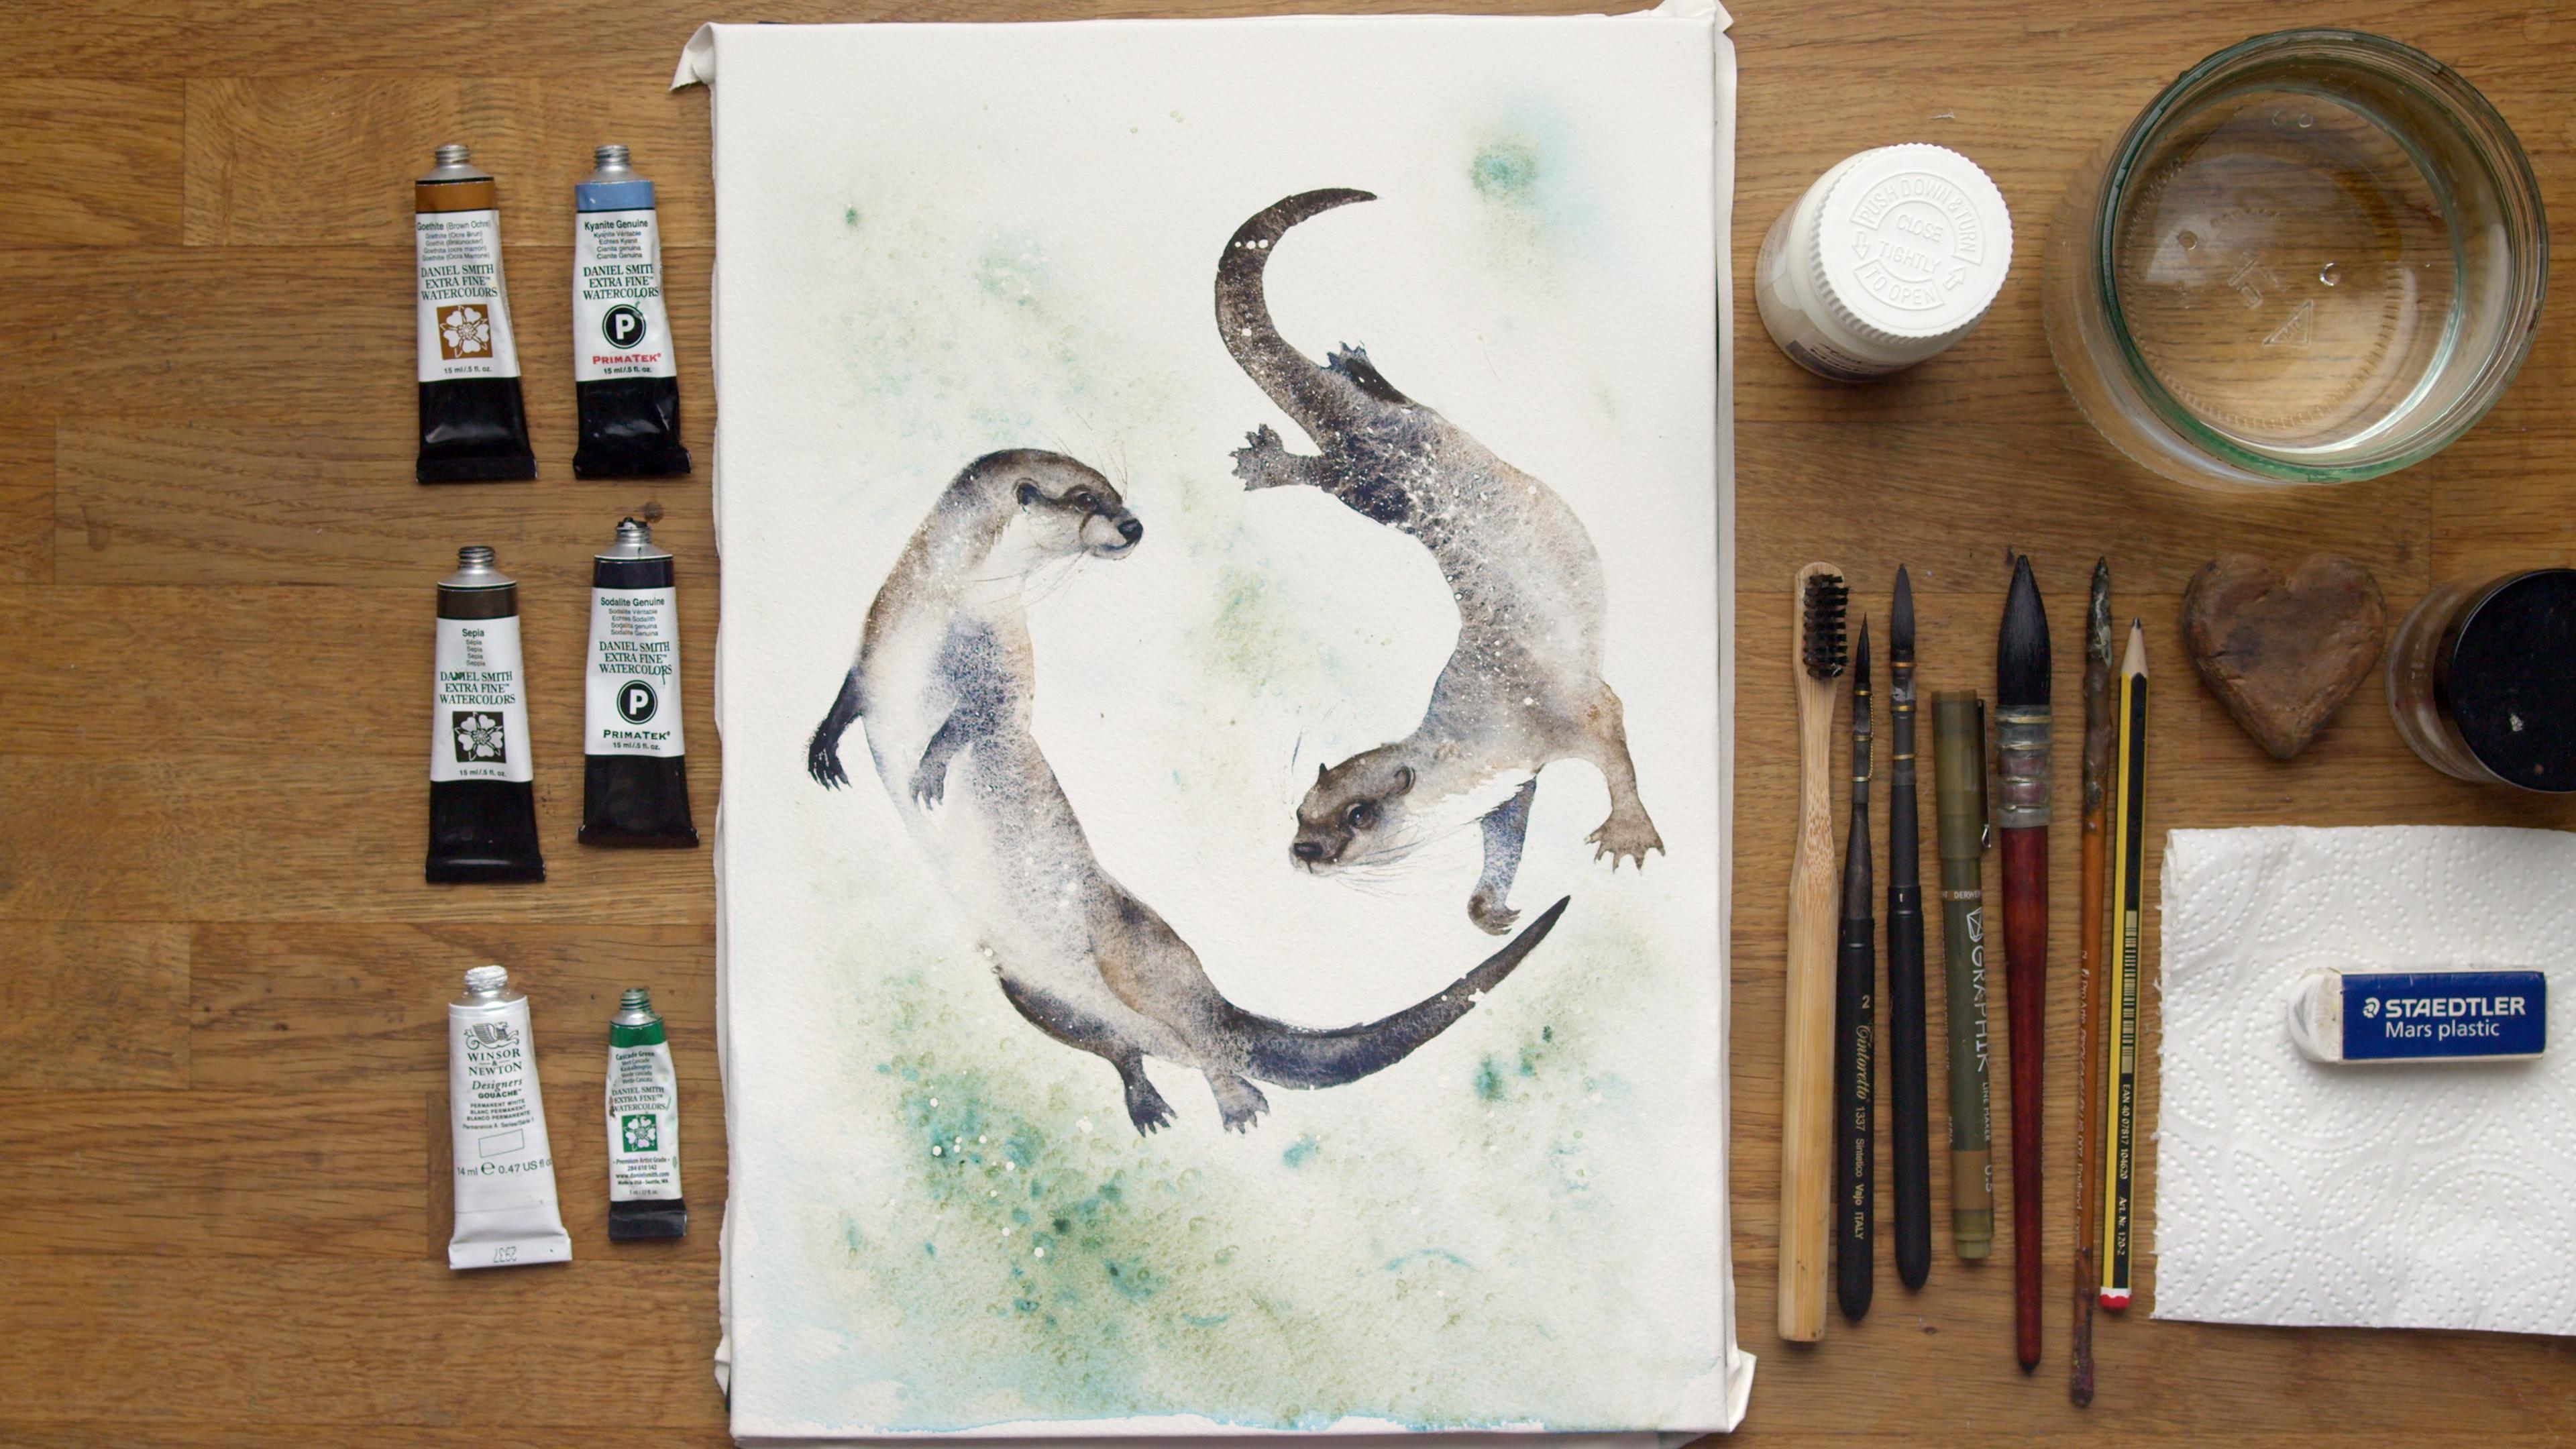
probably already know. So from the top, as ever, all these paints and all these
materials can be found in the projects and
resources pages that are all there for you listed. And if you don't have
these exact colors, like I always say, please don't worry,
you will have suitable colors in your art
collection. I'm quite sure. And sometimes people when
they post their projects up, have used different palettes. I'm like, Oh, I love that. Why did I not think of that? So don't be afraid to mix it
up and try different things. But these are some
of my favorites, and I use a lot throughout the classes, particularly
the Goethite. Kyanite I haven't
used a huge amount, but it does crop up. Sepia so like genuine game
firm favorites of mine. I've got Cascade Green, which has given you
this lovely background. It splits into a bluey green, although it hasn't done quite
so well on the class piece. Let me show you some of
the practice pieces. So as you can see, it's split
more into blue on that one, and the salt has
worked a lot better. Don't ask me why. It's just the way things go,
isn't it, sometimes? I have quite a little
bit of gothte, but I only use that for
the tiny catch lights. I have the paper
I'm using today, and I'm now actually can't
remember how to pronounce it. It's an Italian brand. There's this Magnani Pbbly
pronounced really awfully. It's beautiful. Oh. It's on the projects and
resources pages, so it's all there for you. It's an interesting
paper. It's very soft. It works really well with
these granulating paints. So yeah, it's a bit of a
favorite of mine at the moment. So even though I can't
remember the name, it's well worth
having a look at it. But it's been stretched on
a perfect paper stretcher, which I will pop a
link in the projects and resources pages
again for you. I have masking fluid, which is just for
these splatters, these little white dots here. That's great for adding
a little bit of texture. You don't have to use it if you don't like the
masking fluid. Also got pot of water, and
I've got a little bit of salt, which didn't work very well, but it can give you some amazing texture
to your background. I've got, it's my
little trusty heart, and it just gives my paper a little tilt to
allow the paint to run. So anything that's about an inch high will
be perfect for you. Rubber, kitchen roll,
paper towel, a pencil. I've got a very, very old brush. Believe it or not,
that was a brush underneath here just
for the masking fluid. So whatever you do, use your best brushes
for masking fluid. And I've got a toothbrush
for the same reason, and again, that does the
fine flicks for the back. That's quite handy. Where was I up to? I've got a big brush. It's just to wet down
the paper quickly, but if you haven't
got a big brush, it just take you a bit longer with a smaller one. Don't panic. I have got two little traveling tinto brushes
which are lovely. I got a lovely fine point, and they pack up
beautifully like that. They are really really nice. So that's a size six
and a size two there. And I have got them back
just a fine liner pen. This is actually a sort of
a browny sleepery color, but any fine liner would do
or if you're feeling brave, just a quick sweep of your fine brush or a pencil
just to do the whiskis. Now there is a hair off camera, which is handed just
for finishing off the last little bits
of drawing process, and there are some
lovely reference photos in the projects and
resources pages. Unfortunately, not a photo
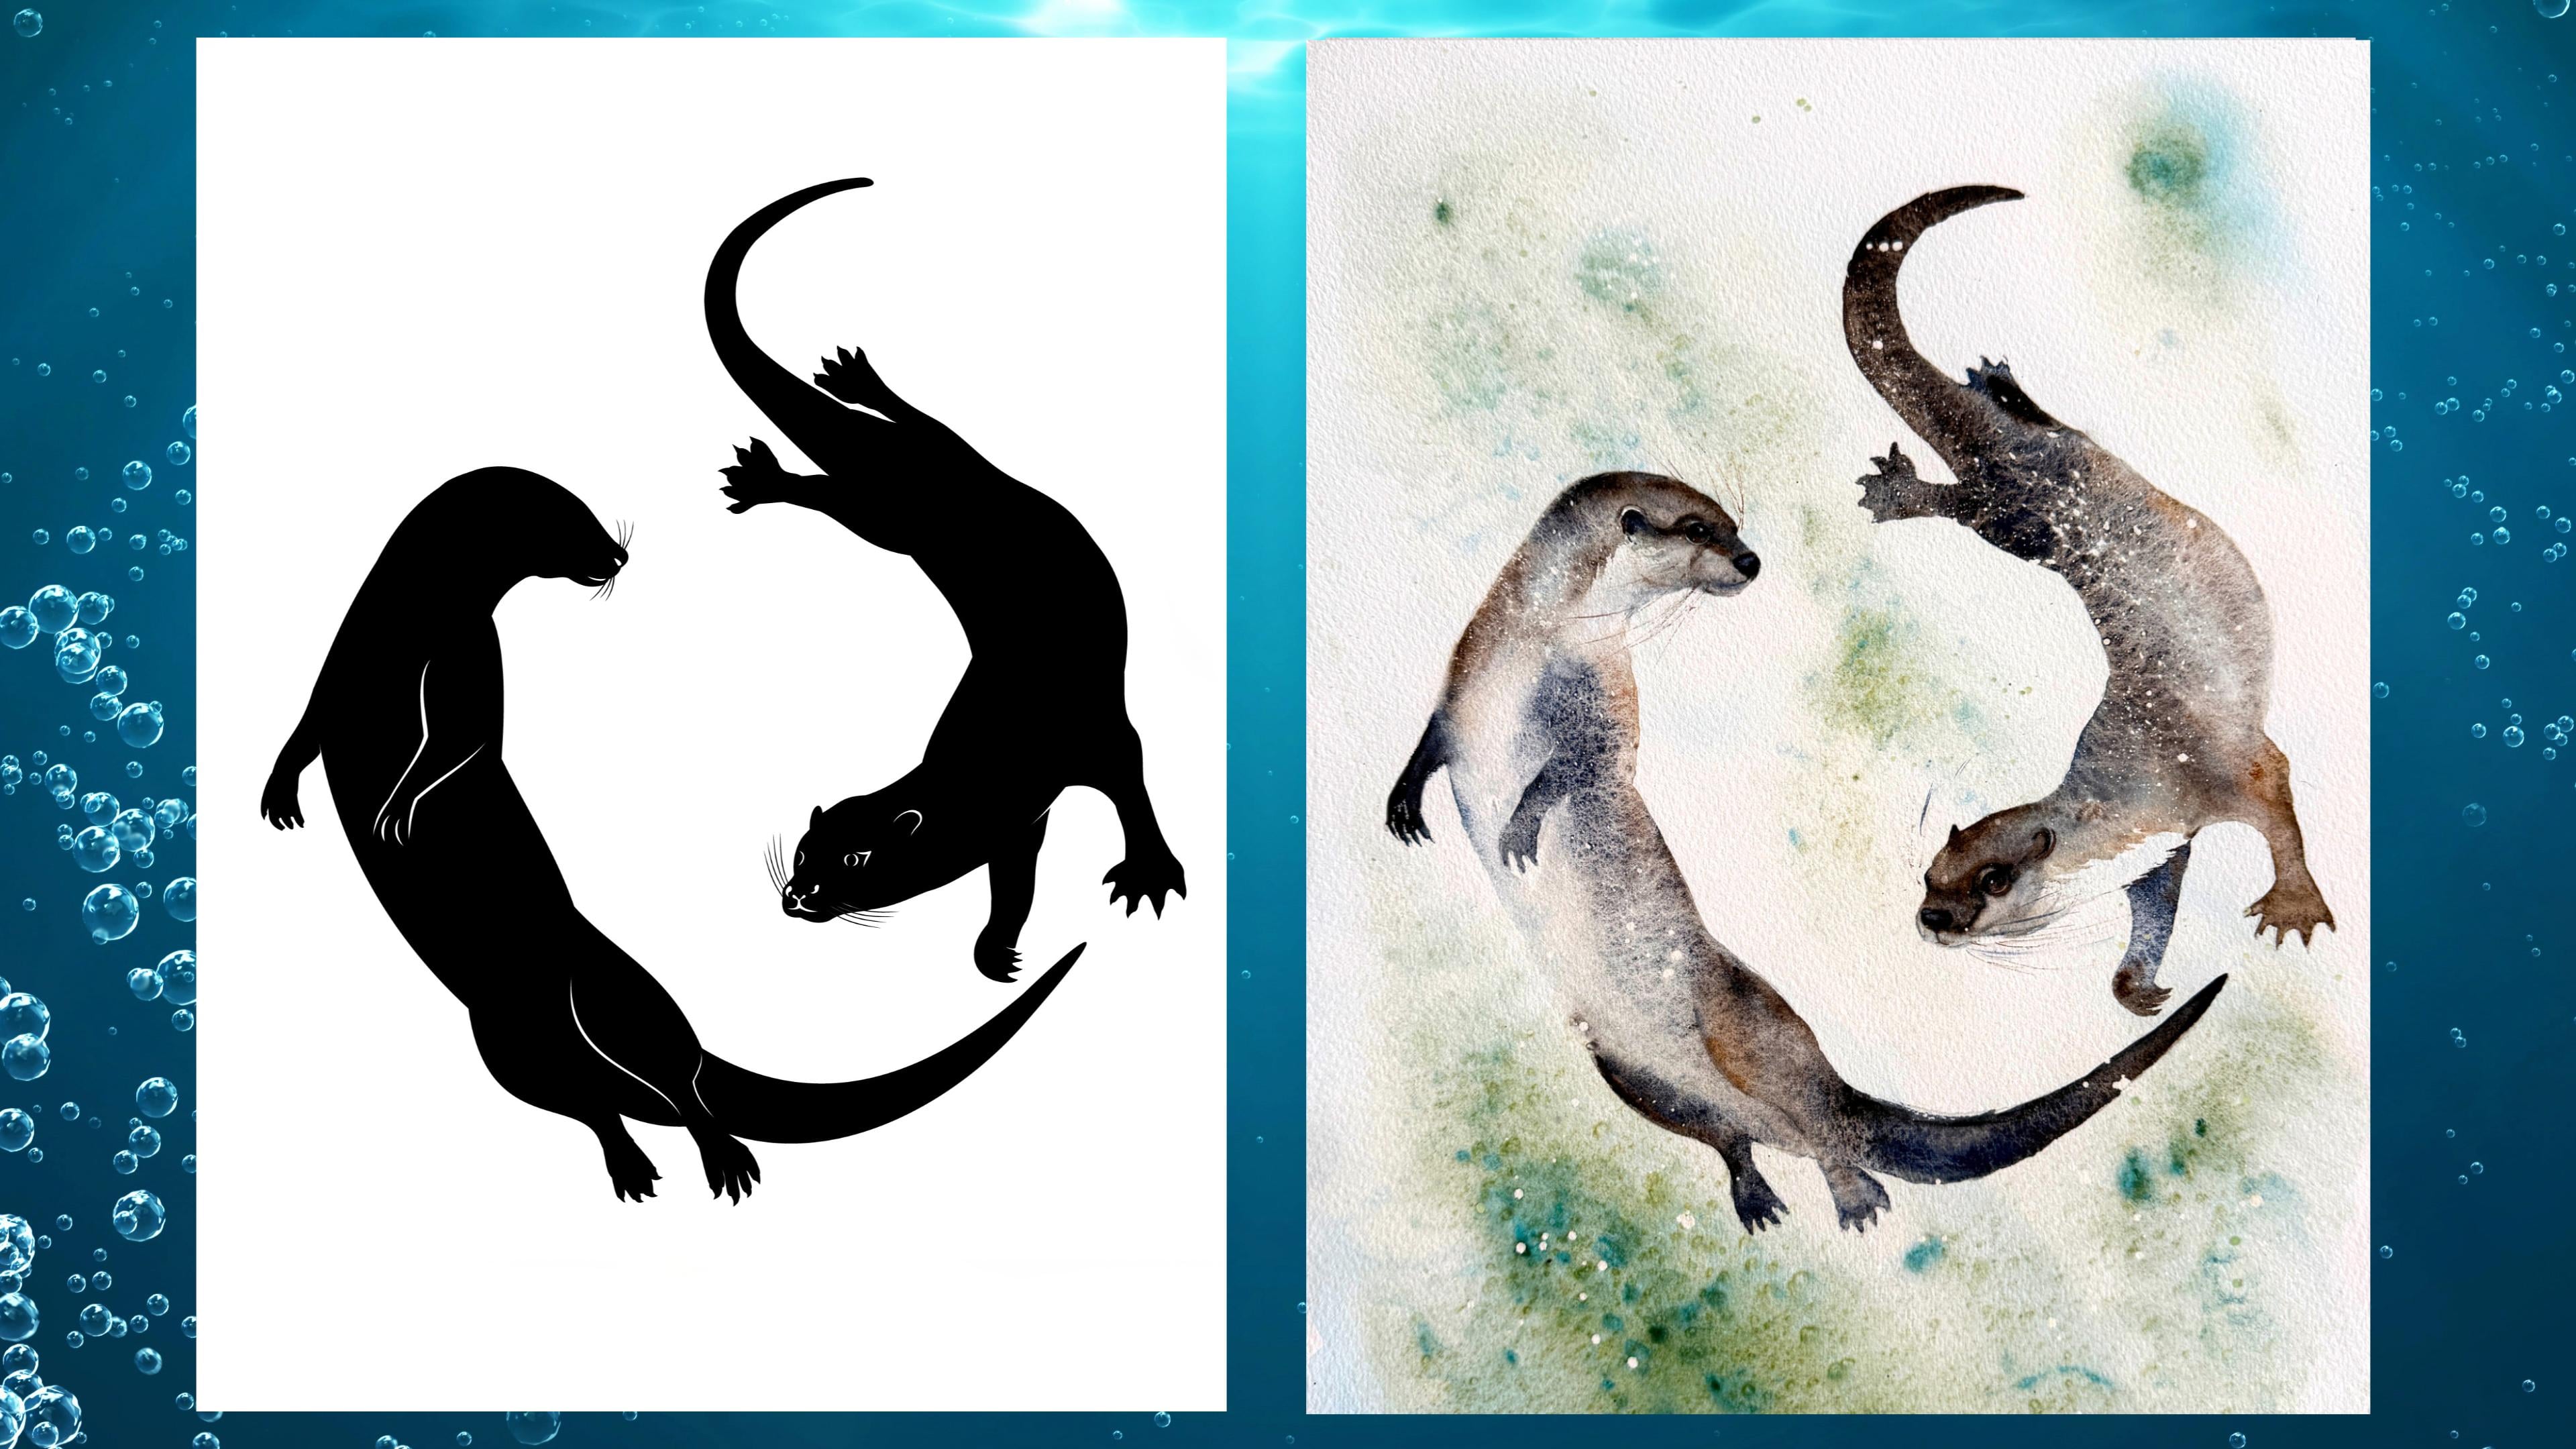
of the actual Otters. So these are just a silhouette, which I, they're
in lovely shape, but there's not actually
a photo of them. So I've popped some
other photos of Otters on there for you
to sort of refer back to, especially with their markings, which I found a little challenging to start with when
I was practicing them out. So it's worth having a
good old look at say, at the Otter markings
before you start so you're a little bit more familiar with them before you plunge in. Other than that, I
think that's it. So, come on. Let's go
and sketch them out.
3. Sketching Out: So as ever before we can
get onto the painting bit, we need to sketch
these otters out. Now you may realize
there's not actually a reference photo as such. There's just a silhouette
of these beautiful otters. So there's also some
reference photos of otters, so you can kind of refer back
to their markings because they're quite
distinctive, actually. They will make an otter
otter rather than a weasel because some of my
practice pieces were looking a little weaselly like. So take your time to look at those markings and
sketch them out equally. They've got a lovely ****.
I'll tell you what I'll do. Let's pop this
here for a minute. This is one of our
practice pieces. So they've got this nice
sort of white marking here. So we're going to make sure
we get that sketched in. And this is a really
distinctive little marking on Otters. So it's worth getting
those in before you start. So at least when you
come to paint them, you can kind of see
that where we're going to leave the white chest and where those
lovely markings are. Equally, on the silhouette
so I'm being mean, aren't I? So on the silhouette
reference, what image. I call it an image. It's not
actually a photo, is it? There's no eyes or such. So we're going to just
refer back to mine and pop them in on
the right places. Um also, just make sure you get the
line of the body in because, again, it's just a black
blob on that photo or image. So make sure you get those in. So kind of your back
leg is behind the body. And again, just as I always say, take your time with this sketch. A lot of this is about
the sort of movement, there's that lovely
sense of just flowing this as they're swirling
around the water. So make sure you kind of
get that lovely curves in. They're very subtle,
but it will give an overall appearance of that nice sense of movement that we're going to
try and achieve. So, yes, say, take your time
with that reference photo. Sorry about your sketch. Look at those reference photos and just check about those markings. And before we just finish
up this idtlem lesson, we're going to put
some masking fluid on before we do some painting, so I think this is probably the appropriate
time to add this. Now, with masking fluid, you want a really old really old brush or
something to apply it with 'cause you
don't want to use your lovely best brushes
'cause you will ruin them, and it's quite hard
to get masking fluid out, if I'm honest. So, give it a good shake. And the good thing
about masking fluid is when we put it on what's the child locks are gonna
gonna say my child. The child locks
are gonna fox me, but haven't got it off. Yes. Um, the good thing about
putting masking fluid down, you can be quite liberal
cause once they're dried, you can just rub out the
ones you don't want. Actually, I do know why
I haven't popped on my desk is a toothbrush. Si, toothbrush. Again, make sure don't go nick your
partners toothbrush will you. Make sure it's
This does actually wash out a little bit better maybe than your best brushes. So yeah, a toothbrush is
quite handy. It just gives. Let's try not to knock
the masking fluid over. It gives those refined splatters rather than
the bigger ones. So let's apply those first as I've got the
toothbrush in my hand. So dip your brush in there. Give it a little tap so you don't end up with lots of brobs. And you're just going to
put your finger along the bristles and just
flick backwards. I'm going to try and apply it. Sort of to the top
because they do go down with some bubbles
attached to them. So I really want to get that
sense of little light and texture and interest because they're not the most
exciting of colors, so we need to try to introduce something else to give the
painting a little bit more. Padaz I think is the word.
Let me put that to one side. I can give that a
wash off in a second. Then I'm gonna pick
up my really old, which was once a nice
brush, probably. I learned my lesson of not
to use your nice brushes. Then just was going to
tap. Some bigger bubs in. I say, be quite I would be quite liberal with these because
when we put this backwash on, it's not going to
cover the whole paper. And equally, like I said,
if there's too many, we can just get rid of them before we start
applying the paint so And if they end up
in wrong like I say, in wrong places, we
can just get rid. And of course, if you
don't like this effect, you don't have to put
it on there's no. It's just an added. And now
I did a little something. Right. I think I've got enough. That's quite a nice
clump up there. So I'm gonna put this
lid on carefully, and we're just going
to have to allow the little this
masking fluid to dry. It takes, depending how warm
you are in your studio. I takes somewhere like
ten to 20 minutes. So you can always tell. You can just put your
finger on there, and if it's dry and
it doesn't come off your finger, then
you know it's dry. So yeah, once that's dried, we can add that lovely backwash.
4. Background: Right, once you masking
fluid is nice and dry, so you can just give
it a little tap, and if it's not coming off on your finger, it's
pretty much dry. So just have a little look, see if there's any
you want to take out. Let's take that one out there so you can see they
come off really easily. And just for sake of showing
you, take that one out. I think the rest are
right a fun morning. It's quite often
you end up they go right over the aisle or
somewhere really inconvenient, so that's always nice
to build to take out. But yeah, no, I
think I'm happy with those where they are. So what we're gonna do,
we're gonna wet down the whole piece of paper. Over the otters, but we're
going to try and leave. When we apply the paint, we try not to add it on
top of the otters, but we're not gonna worry
if it runs over them. So with your nice
big brush excuse, if you can hear
scratching, that's my dog making herself a nest. She's obviously hearing the cues that it's time to settle
in, and I'm teaching. Right, say, big brush,
you don't nest. If you haven't got a
big brush, don't worry. It would just take you a little longer to cover your page. So it's only I have
a big brush to hand, so I'm going to cover the whole page
with nice lots of water. Now, you want it
fabuusly saturated. Because if it's not,
these paints or this lovely cascade green I've chosen isn't going
to move very much. And they're not gonna give you that lovely flowy appearance. So make sure it's good and wet. And if you're somewhere
warm and you've got a small brush and it's taking a little longer to cover the page, go back to where
you've started and just re wet it because
it's quite often it's got. It started to dry on you. So plenty of water. I always said no dry patches because you don't really want the paint running around those. You can quite easily tell you can even pick up your piece of paper and hold it
up to the light, and you'll be able to see
if there's any dry bits, or you can just sort
of duck your head and you'll be able to
see quite clearly. Now, you want, I say, a
good sheen not puddling. If it's puddling, the paint then just sort of sits and
goes, I'm not moving. It's too much water. You just want that nice
goldilocks in between. Sab can put that bun to one side and won't be
using a big brush again. Just gonna use my little trusty heart and give it
a bit of a tilt. Now, I might give it more exaggerated tilt
as it begins to dry, but for now, I think
that's probably enough. Gonna pick up my bigger
brush a little tap. It's just taking up a bit of the excess moisture,
so it's woken up. Really Cascade Green.
A nice amount. And don't be shy with this to get that
lovely you want that. And if you're too if you're too timid
with the amount of paint you put on your brush, you won't get that
lovely fliness. So be bold. I'm going to put some
up here as well. So, I'm not going
to choose to put it over the otters and say if it runs in, that's absolutely fine. Let's put a nice
amount down here 'cause this splits
into a lovely blue, but you do need a
certain amount. And we're going to put some salt over the
top of this as well. Fab. I think that's lovely. Right. Just give that a
quick clean for a minute. I'm gonna give a
really good tilt. Hopefully, we show
okay on the camera. And I will probably leave
it to dry at a good angle. I can give it a little
bit more til backwards and beginning to dry in this middle section here,
which is a bit of a shame. So slide that back down again. Just go to re wet
that a little bit. I just tapping. I think it's the character of
the Cascade Green. It quite often splits
and almost dries, so let's give that a bit of a I don't want to be too spotty, which is a character of the paint and I think
that you're doing. Let's give that one a
little bit move around. I don't forget watercolour
always dries lighter, so what you might think is
being somewhat boldened. Out there, we dry,
especially if you tilt it. And then you'll be left
with sort of nothing. Can you? It's a bit
disppointing, then. So I think the half
the fun of this piece is that lovely background. So, I'm going to give
it a little tilt. Just allow it to run and say, I just want that sense of water, and obviously, we've got water. But, yeah, by tilting it, we're going to encourage
that appearance. And I do need to make sure I put salt on at a
reasonable time, so let's start putting
some of that on. So the minute you get something
you quite like the look of and I would always let
things dry on a tilt. If you've tilted, allow
it to dry on the tilt. Don't lay it flat again because
it'll just sort of well, it will just run sort of back and you'll lose
that sense of movement. So I think I will leave this to dry on a more
exaggerated tilt. But let's just sprinkle
some of that salt on. Make sure. I was just
watching myself do that. You fingers are dry when
you get your salt out cause salt salt goes on
wet, it won't work so well. Right. I'm getting quite
liberal with this, I think. And I like how that. I like
the strength I've got. I think that's looking good. So I'll put the lid back on. And I say, I'm actually
going to allow this to draw at a more
exaggerated still. I might even have it
not quite horizontal. I don't know if
you can see that, but it's horizontal
to a vertical. And you can allow it to dry
at a slight angle, as well. All these things you can have
a little play rate with. And if you feel it's
running too much, it's always worth sort of watching if I'm
honest to start with, while it settles itself. Yes. I'm going to I'm actually
use that little salt pot. That's probably enough
of a tilt, I think. And I'm going to leave it so it runs sort of at an
angle going down. I hope this is still
on the camera. I'm going to leave it
balancing on there. Now, it does take
a little bit of a time to dry, especially
with the salt. That's why I said earlier, it's a really lovely class to
sort of doing sections, so you could do this
in the morning. Come back in the afternoon. This will have dried
beautifully for you. But, yeah, don't rush this and don't put a
hair dryer over it because it will just disperse
all that light color. So, yes, just be patient and get what you're
given as it were.
5. First Otter Body: So I hope you've got a lovely background that
you're pleased with. My soul hasn't worked quite
as well as I had hoped. I have no idea if
I'm totally honest, white hasn't be I put it
on it a little bit late. You see, this has just
started to work up here, so it could be that who knows? It's exactly the same
paper as some of my practice pieces such as this. Yes. So I hope you've managed to achieve something that's
lovely and to your liking. What I'm going to do
is just take some of the salt off these otters,
but be really careful. When you rub the salt
out, you don't rub out that lovely masking fluid. So we want to heat that
on for the time being. So I'm gonna leave that there, 'cause it's not
gonna make a lot of difference whether
that's on or off, and you never know,
as it stays on there. It won't make any difference. I'm totally honest with you, but it doesn't matter if
it's still on there. Right. I think that's lovely. I'm gonna start with this
little chap, this side first. So with my bigger brush, we're going to wet
down all this body, we're going to lead
the white chest. So I'm going to put
a tiny little bit of colour on my brush so you
can see where I've wet down, give you a little bit
of a help, I think. So we're gonna leave the
tail out from the minute. And I'm actually,
sorry, I mentioned. I've got my little
board on a slight tilt. Just again, just to encourage
that paint to flow. So I'm gonna very
carefully, do the feet. So be careful, stay
within those nice lines. We've taken the
time to get right. I'm actually gonna
leave the back foot there for the time being, swinging it round, put a bit
more color on there for you. Say you just want
nice clean water. This blue is just
so you can see why I've added the water. I'm gonna come right
down to the face. Go around the eye.
Miss the eye out. And I'm actually going to
miss out the little sort of white section above the eye, as well. I'm gonna
go over the nose. It doesn't matter too much. We're actually going to
miss the back foot sorry, the front foot out as well, actually, just
for the minute. Okay, I'm going to pick
up what have I got here? Let's pick up the three colors. A little more simple today. There's not so many colors. Now we're going to bear in mind, I'm going to put a
slightly darker, cooler on this side, a
little bit lighter here. But obviously, we're also
tackling that the Otter has sort of a whiter chest area, which doesn't matter
so much for this one, but here it got a paler chest. So what have I got
here? So like genuine. Be bold. Just like
the background. You know, we put a lot
of paint on there. You can see how much
paler it's dried. So just keep those nice lines. Um, yeah, nice and
clean. Nice and neat. Well, really I'm really
wanting to get that sort of sense of flow so the paint wants to look like
it's flowing down. I'll give that nice sense of movement. A little bit sleep. Let's have the Kyanite
as well. We've got it. Silly not to use it. Let's have the two blues together here. I'm standing as I always do, so it's always nice because
I'm on top of my work. I'm not sitting and sort of
clamping over the top of it, so I can get a nice
sort of overview. I think it stops me
sort of clamping up. Put a little bit
of colour across the body here just to
break up the line. Just tap and allow watch
out for any puddle. If you've got it on
a tilt, it does. Can encourage puddling. He put it in a little bit
of goth over the top. It's only I'm probably only
going to do one layer. If I can get this nice
and strong enough, I will only do one layer I want to keep this
as fresh as I can. There is always the
opportunity to add another layer if you feel
like it's got a bit weaker. But I would like to
keep it on one layer, so I'm gonna be a bit bolder. Actually just pop in that little ear there
while we're here. Just be weird mindful,
get that shape right. They have a little white
bridge where the nose is. There's a little
white patch there, so I'm gonna try not
to add too much color there.'s this is all
white still damp. You can still add color. Just be mindful once it starts
to dry, be careful. You get that kind
of middle ground where you don't want
to start adding paint. So if this was dried now, I could end up with a
funny little bloom and a water mark here,
if this is dry. So long as it's nice and wet, and if you want to do
a little bit more, it's still a little bit of
it's getting a bit tacky. You can always
load your brush up with water and just drop
some more on there. That's absolutely
fine. They say, Oh, we it's nice and damp. You can carry on fiddling. Right, let's do this backfoot before this dried, actually. They have got darker
feet and legs. So really careful. I'm bit of balled up
my normal excuse. I am a little way
away from this. So although I have
a pair of glasses now still I'm still a
little away from it, so I'm trying my best to
stay within the lines. Let's come down
there a little bit. I always add more water. If you feel like it's
getting sticky, I say, you can add more water, give
it a bit more of a tilt. Just be careful you don't have a run that runs off here because obviously the water is gonna be buddling there now. Let's lay that flat. I don't really need any
more tilting. Oh. Right. Well, this is kind
of nice and wet still. I can add a nice, nice, nice amount of
paint on my brush, and we can paint this
leg in and just allow any sort of blending and
bleeding into the body. Again, coming down, let's put a little bit more Sepia there, so we've got that darker leg. Get little feet nice and neat. Is painting it in. There you go. Look at that. So I still want to keep
that nice and white. We're going to leave that
as dry paper that chest. We can do some
flicks in a minute. But let's do the backfoot
while we're here, as well. And then we're going
to do that nice tail before the body dries. So again, I'm pretty
much painting this in. It doesn't matter. Sorry, that was a little bit
so light genuine, so I'm being very good at telling you the
colors I'm using. That's poll that down. Lovely. Right. I'm
going to load up so like genuine Sepia, and
I'm gonna do that tail. Just be careful that
you don't put your fist in the the leg. So we're just literally going
to paint this in because I want it to be really
dense and thick. Look coming down. You can obviously
turn your paper, but I can't do that here. So I want to try and keep a nice thick,
chunky tail they have. Bring it right down. Letting any paint blend. This is the point of
joining up at this point. I will hopefully add a
little bit more paint. A little bit of Sepia there, a little bit of
so light genuine, maybe a little bit
dark on the flip side. Okay. Say, again,
allow anything to run. Now, have a little
step away from it. If you are sitting, and you
can just stand for a minute, have a stand. See
how that's looking. Is there any more color
you'd like to put in, bearing in mind, we will try
to do this on one layer. I feel there's a little
bit here that just needs. It's always hard that
reference photo, no way of gauging how the light would be falling and how the
muscles would be running. But, you have to be a bit make it to say
make it up a bit, but be a judge of how you think that
light would be falling. I like that. I think that's
going to look lovely. Once that masking fluid
comes off as well, that will give a nice sort
of speckly appearance of those bubbles
sitting on the coat. I'm gonna make sure
these are nice and neat. We will do the nose later, so don't worry about nose and all those little finer details. But as long as you've got a
nice sort of strength there, so I'm going to swap brushes
I'm pick up my little one. While this is still nice
and damp, with my Sepia, I'm just start to build up
a little bit of definition. It's damp, so it's not wet, so it won't be spreading
quite so much. And plus, the Sepia is
a lovely color cause it it doesn't spread so much. It's a nice, sort of sticky
color stays where it's put. So take your time, go around, make sure you get that
tiny little nodule there, though the second eye would be we won't put all those little markings
on at the moment. That will be done later. The little the
stronger markings, but it's just to try and get
that softer markings in. And what we also
want to do now is to try and do some of
the little flicks, so we're going to just flick
into the into the white. If this is a little bit too wet, you might want to hang on. Might might be a tiny,
a little bit too wet. It's just a, it's it's just
coming out too easily, coming a little bit watery. So I actually might put
a little bit of paint on my brush. Flick those in. Okay, we might flick some
of these out as well. Almost can you bush. Drag some of that out, as well. Just using that as
a little bit of a reservoir, dragging some out. A tiny bit. The
kinite at the bottom. It's a nice blue. It's a bit softer, a bit cooler,
so you'll say. Tap. They're quite small
these little lottos and even my practice pieces
were tiny bit bigger. It's just fitting the board onto this work station and filming. So if you could do this bigger, I think it would be
quite fun, actually. Yeah, okay, take
your brush away, a little have a little look. Have you got these neat enough, and mine are quite neat enough. It's nice to do them while
the paints still wet. Right, we can just do this little back leg back front leg. So let's put let's wet
that halfway down, and let's put Let's do so
Genuine a bit of Sepia. Pop that on top. Can you brush. Let's wet the rest of it down
so that it just runs down. Again, just keeping those
larvly lines nice and neat. Pop a little bit of Sepia there, just on the just to
break up the blue. Otherwise it's all
gonna look a bit blue. Again, we can do some
while it's nice and wet. We can flick up. So it
looks like the cops. We'll see if he's coming down, so you want to make
sure if you can imagine the white chest hair
coming be flowing. So you want to pour
the dark color up so you create the
white chest hair. I hope that makes sense. The wedge throws me a bit this. Yes, let's have a go at
doing this again now. It's dried a bit. It's
still a little bit wet. Take the brush away, have a little have
a little look. I think that is that's
lovely for that layer. I say, we'll do all
those markings. Actually, we'll just paint
that in on dry paper, actually just soften the edges. So it's quite so scary. But, I would probably
say, if I'm honest, allow that to dry and
allow it to dry and it tilt because if you
lay that flat again, like with the background, it
would just encourage it to run back up and you'll lose
that nice sense of movement. So yeah, as I say,
this is a nice class. You could go away
now and do something else for you for
half an hour hour. You just allow it to dry. And you can always put so I'm just I see a big
bubble of water there, it's gonna take a
long time to dry. You can always put
a hair dryer over these once it begins to go off. Don't do it now because,
you know, at least on mine, it's still quite wet, and it will blow that pigment around and lose
some of that magic. So just allow it
to dry, are you.
6. Second Otter Body: So we're going to treat this
otter very much the same. Obviously, it's just
the other way around. So let me let me
do the same thing. Let me just wet down the areas
we are going to wet down. So I've sort of add a little bit of color where we're
going to wet down. So we are going to again, miss out the little chest area. No, it gets a little
tricky because, obviously, we've
got a white chest here, so I'm just going to go. It's a little bit too strong, but I'm going to go here. I'm just gonna very gently just nudge in just a little dry line. So I had a little
wet line there. Hope you can see that there. It's sort of bridging
those two white areas. Over the top of the head
like we did before. If you can get that close,
we'll try and leave that little white
patch over the top, but mine got lost
if and when it's done on that first tosser. Down to this. There's a little smile here, so we're going to go
down to that area there. So all quite dinking. If you could paint this bigger, I think it would be quite fun. I'll wipe down the little foot there we want this
little to flow here. We're going to miss that one out like we did the other one. And then we're
going to come down, put a little bit of colour on. You can see again keeping make sure you stay
in those lovely lines. We'll run down to the Back leg. We are actually just gonna wet. Underneath, it's sort
of somewhere there. It doesn't matter too much. I just I don't want
you to get too hard. So we'll wet somewhere there, and we'll allow that
color, and that will hopefully stay quite soft. I want to try and keep
that nice. Yeah, lovely. Obviously got a
creamy sort of chest, so I want to try
and reserve that. It's very easy for
that color to run in. Leave the tail out again,
so I just about to disappear into the tail
there. So leave the tail out. For the time being, we do this secosme and leave
that back for the minute. Right. As I say,
I've been chatting. And it actually quite
warm in this judio, so I'm just going to go
back, make sure that's wet. As I say, if it's not wet, you'll fine your paint will just stick we want that
nice, real nice flow. Hopefully yours isn't blue, but I've got a slight blue
tinge now, but doesn't matter. Hopefully, you can see
now where I've wet down. So I'm going to pick up my those three colors.
I've got Sepia. I've got the gothit and
the so light genuine, and I'm going to
start at the top of the head that's gonna obviously
allow things to flow. A little bit of so light
genuine bit of Sepia. Going to touch, not going to be wide too much where it is. A little bit blue, let's put
a bit more Sepia in there. Warn that up. Let's come round. If it helps to pick
up your little brush, then do so it helps to
stay a little bit neater. A little bit of go fight
on the back there. Obviously, because it
can't run at the moment, it's going to be a bit sticky. So I'm not going to try
and put too much on there. Run down boy got a darker leg, so I'm going to leave
that just for a minute. We'll apply the
strength in a minute. Let's get the Let's get some nice go fight going
on down the back here. A little bit of so like genuine. It's going allow
that all to run. That's perfect.
That's what I want. Well, Sepia heavy
handed, but so genuine. We're Sepia there. All right. I got a lot
of water sitting here. I'm going to edge
my kitchen roll, just suck that up. You see that then allows the
paint to run further down, as well, cause's not being held up by a
wet bubble of water. I go to make sure I've got
everything nice and neat. We can do a little
backfoot now if we want. Just be careful if it it's
a bit wet and a bit puddly. No, I as you're going
to do the tail, so all that can sort of
sort of flow back in. So so like genuine, bit of Sepia on my
brush at the same time. I just literally going
to paint this in. But what is really
good and thick. And if you actually,
when you're painting it, it ends up with a little bit
of it's not going to do it. I have a little bit of dry paper showing through, that's
absolutely fine. That gives you a
nice sense of light. So let me take a
bit of paint off, see if I can create that
fat little look there. That's lovely. Let's see if
I can keep that bit there. Add a bit more paint now.
Water is a bit sticky. Otters have got big old
fat tails, haven't they? Nice and dark, as
well. And we're just gonna allow that to run in. No, I can keep that
little bit there. Okay. Just make sure
he's nice and neat. A bit of a kink going
there. It's nice and round. I can see her. Because
it's on a tilt, I can see a big old bubble
of water there again so I can either do that with
the kitchen roll or bosh. Just make sure these lines join up so that it makes sense. The bottom here
runs into the tail. Have a little look.
Take the brush away. Let's have a let's have
a ponder, it's put. Let's have a little
bit of Sepia there. I'm gonna join this
up in a minute. I don't want to do it quite yet. I'm gonna join it up
once that paper begins to dry so it won't
flow quite so quickly. And let's do this front foot, so Sepia. So like genuine. It's not going to go anywhere here because that's dry paper, so if it just bleed here
doesn't that's perfect. I don't really want
it to sort of Exact. I don't want really a
really strong line now. I just want it all to be quite
soft and blending and fly. So by adding that now, I'm not going to get a very hard line where
that limb comes in. Bit of a Sepia there. Having a little squeet as corny as it sounds, it's
a very useful thing. I'm just going a little
bit of water there, moving quite a lot
from that limb. Though I don't want a hard line, I don't want it toube blended. Slight definition. Yeah,
that's looking right. I'm just gonna while this still it's still a little bit tacky. Let's go in and just do those tiny little flicks
into the white paper, so you're going to get that sent to the white hair coming
up, that Makes sense. I got a bit of a It's a bit of a bottle of
water there, as well. Don't forget we're gonna be
doing all those little nice. I make up sort of
markings in a minute. I'm going to do the
same as I did there. I'm just gonna brush
some of this paint over. Pop there is Kinte. A little bit of chinte
on the lower edge. A little bit of coolness, a little bit of definition. Tell me not to stick my
fist in the lower part. Right. And let me
just check that. Got enough strength, say, I would like to do
this in one layer, so strengthen that
top a little bit. I'll make sure I get
that tiny little node all so similar to this one down here. A little
nodule there. Helps make it in an otto
rather than a weasel. Yeah, I think that looks nice. So what we're gonna do go
back to the bigger brush. I've got my rubber
sitting there still. Just be getting it wet. We are going to wet the chest. Be careful not to
wet this limb here. I'll wet the chest
airy a little bit, and then I'm going
to join it up. So I'm joining up
that wet paper. So I have wet paint. And
wet paper, I suppose. I it's gonna draw it
down, so be careful. You don't touch that limb. So you can leave at the tiniest little white
lines, dry lines. I kind of come down
just owing that up. And if it runs and you're finely its you've been quite strong with your paint
here and it's running, you can always just very
gently sort of suck it up blendage But, yeah, they have a sort of light
colored chest area, but it does blend quite
quickly into sort of coats. There's no defining edge. It's very, very soft. A tiny little bit
of kine there just to give us an edge that there's something there
a little bit into shadow, and we'll do that
leg quite quickly. But let's do the
lower one first. So it's so like genuine. A little bit of Sepia, and
again, a bit of painting. Who knew I could just
paint onto dry paper? So let that blend cause
that's what we want. Oh, keep it nice and soft. Yeah. I clean my bush.
And use that come around and create that back leg a little bit more
colour, I think. It's just weak there. I'm so like genuine, I want to give the impression of that creamy
belly's running around, and this leg we're
working on now is behind. So to try and get that
impression, it's behind. Now, that's bleeding a bit much. So I'm just gently pull it down. S weak it that sort of sense
of line, but very soft. So we're trying to
avoid any hard lines. This feet are a
bit more feet like it bit more than this one. See I've still got a lot
of water sitting here. So m. Take your brush away. How is it looking? Oh, I think that's looking
quite pretty, actually. So let's do the last leg
before we forget that. So I've got Sepia and so
like Genuine same again. And same process. Start on the end. I know it's gonna join it
up and allow it to blend. At this stage, this should
be starting to dry, and it's just a
little bit tacky, so it's not blending too
much because it, I say, it's not wet wet, it's just a
little soft, a little damp. Just get nice little claws in. Sort of bear in mind, you know, he's pushing probably down to
get that curve of his body, so the little feet will probably be ripping this way or helps. Now, if this just join
this up very gently. So I'm just gonna wet that
line that we left to stop that leg blending into the
chest while we wet it down. So very gently
join those up now. Should be sort of dry.
Funny drop it here. That. Just have a little access. Wow, this is still nice
and wet, hopefully. I got a little bit of a
gap here, so let me just, that's me trying to keep that little sense of
dry brush mark there, probably, and just
pop a little bit of colour in there to jaw and
make sure that's joined up. It's gonna look like
it's got a funny tail. Getting a little bit of little whisky here 'cause this is actually
starting to dry. So what I'm going
to do because we painted it on rather than wet. Wetted it down. It's not
very tail wasn't very wet, so it's dried quicker. Halls, I really want to avoid any hard lines on this
painting. Yeah, that's better. Again, if it looks
like it's taken, you've lost some of that
definition of that leg. You want a little bit,
just copletely disappear. Um, in the tail line. Want Yes, that's it. You want a little definition, but I really want to try
and avoid those hard lines. Lovely, I think. This little one is done, 'cause always a rich with
watercolour, isn't it? Easier fiddle. Yep,
I've let's do that. Let's put this paint down. Alright. And so, again, just like this little chap here, it needs to dry, ideally, it's always better to dry
naturally on its own.
7. Eyes and Character Part One: Okey doke. So once your second Otto is dry, let's put this painting flat, and we'll paint the eye and get some definition in there and bring their
characters to life. So let's try and be methodical. Let's start on the
first one that we did. And I'm going to simply
paint the eye in. Now, if you like sitting, this is a lovely time to sit
cause you can get really lovely and close and get
that nice detail in. So, take your time. No hurry at this stage. You say nothing. We're not we're just paint
straight onto dry paper. There's nothing. Um, yeah, we're not having to
worry about timing or anything, so just
take your time. Simply as that. Now, if you were doing it a
little bit bigger, I would probably then
put a little bit of the so light Genuine on top, but to be honest with you, I don't think it's gonna
show at this stage. I saw it at this size
'cause it's too small. We just make sure you
get that nice shape. Realized I haven't got my
little bigger Kitchen roll. Bear with me a second. Not the prettiest piece. It's a bit crumpled, but
it will do the job. So from there, we would
try, we try, we will do. There's no trying here. We'll pop the little ear in
so it gains just painting in. We can take little bits
of light out in a minute. And then from the
edge of this here. We're just going to sort of
pull some of that backwards. This starting to get some
of that marking in now. Now, if it looks a little harsh, we can always just dampen
one of the edges down. It just softens. Fingers always great. That just, again,
gives it a bit of a squidge sort dampens
things down a bit. Look I'm going to come over
the top there's that nice, which I didn't manage
to quite reserve, but there's kind of a little
white marking above the eye, so we can kind of
get some of that in. And it comes down and we get that nice little
sort of grin almost. It's just a eye marking
more than anything. And then we'll put that nose in. Let's lose a bits like
Genuine here for the nose. Again, just painting it in. Take the time, try and get that. They've got quite big
old noses, actually, so you can see that's
starting to look a bit more like an otter
and we're starting to bring him to life. I'm just going to again soften those areas down, especially
at the top there. If you haven't got
this a little bit, there's a nice little ridge
that gives that sense of form and shape. So if you didn't get that
strong enough like me, let's just tap that in now. So that's almost on dry paper. A little bit damp, I've
softened some of the edges, but it's predominantly dry, just sort of tease it out. Just soften the edges. Keep an eye, I say,
we will start to differ on our pieces as
we work our way through. So I always say, if there's something that
if you get to a stage where you're happy with what
you've got in front of you, and I'm still playing
around, stop. Um Don't, um, don't
feel you have to keep keep up with me or do exactly what I do if you've got something in
front of you that you like. Just want to stop that a
little bit around there. Lovely. Clean brush. Let's have a little ponder. I want that I will take a
little bit of light out the top of the nose in a minute. But that needs to dry. Let's try and see if we
can get a little bit. A little line down there. Actually I'll see if
I can get a bit of so light Genuine at the
top. I can almost see. See the brown. I quite like to put a
bit of blue on the top, just again to make It's always such a lovely
tip, Amis told me. Always trying to
have a darker area at the top and lighter
at the bottom, and it really does
give that sort of three dimensional appearance. I'm just gonna come a little
bit of so light Genuine. Just gonna come underneath here. Gonna use it a little bit of
chinite as well, actually. We just pour some of it
out. It's very soft. Close that down so we get
the tiniest little lines. And how are we
doing? Strength and loss, some of that
over the top there. This is all bit of
tinkering and fiddling, dare I say the say the Word. There's nothing
wrong with a bit of fiddling at the end of
watercolour painting, 'cause this is where you
get that nice contrast. Lots of flowy paint
to start with. We were nice and loose,
lots of bold boldness. And now, as we draw to the end, we want that nice detail, 'cause that's a lovely contrast
between the two elements. I think makes
watercolor beautiful. So yeah, I don't think there's anything wrong with a bit
of fiddling at the end. I might leave this
one here for a minute a little elements are
going to need to dry. If I keep fiddling, I'm
going to be lifting up sort of paint from
the previous layer. I don't really want
to do that too much, so we'll see how that goes, and there'll probably be little
bits I want to take out, so we'll move on
to the next one.
8. Eyes and Character Part Two: Right. Same again, really. Little brush. We're
gonna paint in the eye. Just be careful because
we've got that one there, I probably should
have started that one that would have made more sense with me being white handed. But never mind. So painting that in a
little bit too wet, so it is quite dry now. My brush should be
quite nice and dry. It's a bit too wet. I don't know if you
can make that out, but it was quite a
bubble of water, and the paint was quite weak. So I'm painting
this quite strong. One of the reasons I like
painting straight out of tubes, I can get a really lovely, strong amount of
paint on my brush. It makes it nice and thick. Sometimes if you've
got it on a palate or you're working out of pans, you have to give it a good old rustle to
get that strength up. Right. And we're going
to do a similar thing. We're going to come out
from the top of the eye. I'm just gonna try and create that little eyebrow
over the top. And we're gonna run from here, let's do the note the nose. Let's do the ear. That's
got something to go to. Just a little horseshoe
shape for the time being. That's combination of the two.
Just go to pour that out. Up very quickly just
soften those edges. Come to the eye a little bit, and it comes around. Had this been a little
bigger, if I'm honest, I would have probably
added these details while on the very first layer we did while it began to dry, but it's a little fiddly. It's a little small. So
if I was to do that, it would have blended
too much and too quickly or not necessarily too quickly, so it just blended. It's too small of area
to work with really on wet paper to get that
definition of these markings. So I really have to do this on dry paper and then
just soften the edges. So we just kind of come to either side. And
then just soften. But that little kick around
joins up with the nose, that kick all tiny,
tiny little movements. With it tinkering, out, bit in. I'll take probably
a little bit off the top of that nose
in a minute once it's, the little light and then
that little gap, as well. But to get that color
down to start with. And then we can sculpt
it in a minute. It's a little bit of Sepia,
sorry, I'm standing. Standing a bit of a
funny angle here, trying to see properly,
not holding way. Paints up, so you can see. Again, a bit like I did before. We can kind of brush
some of that out just to get a nice
little bit roughness. Softlin over top of that eye, as well, 'cause
that's a bit stock. Get a bit closer. Managed to scudge see that's one of the flaws of working
out of the tube. We're obviously clutching
my tube too tightly, aren't I? Scudging out. I was gonna say,
put a little bit of so light Genuine right
at the top of that eye. It's all a bit of a case
of just putting it in, say, taking it out,
having a little look. What actually string from that. Got cross the nose like
we did here as well, just to get that form. So it's just using
a little bit of that painting from
the eye markings. Yeah, I think that's
looking right. So I'm going to go back
to this one in a second. Need to make sure
that's nice and dry before I stop
playing with it again.
9. Sculpting and Softening Part One: Right. I've checked
that sie and dry, so let's have a little
bit of a sculpt. So we're probably not going
to add that much paper. We're probably more taking stuff out and sort of softening. So I just want to soften this 'cause it's a bit
hard between the two. So that makes it automatically
look better, doesn't it? And I can also take a bit of the paint out that
just doesn't look so stark. Just wiping a little
bit of paint away. So instead of a
stark white line, we've just got a bit of
soft bit of softness there. Just a bit of paint taken away. These brushes are
very loving and soft, but they haven't got
much of a point to them to take stuff out with. Let's just take that
out. I'm not sure if that was quite right that
line in now I put there. Just let's take that out, try and see if we can haul back a little bit of the white cheek. Yeah, that looks a bit better. So, have a look at
those reference photos. I've popped up there for you, where you can actually see what their otters actually
look like and have a look at your own piece and where
you think you need to add the color and where
you don't need to add the color or take bits out. Soften out a little bit. Let's take a bit of light. Well, one there's light
on top of the nose, and one is a lighted area
anyway cause of their markings. Let's kind of get that out. To get that light
at top of the nose, it's literally just wiping
away some of the paint on top. He's coming, isn't he? Let's
a little bit of so genuine. It's not trying to
pick up too much. That's just to find
that eye a bit more. Say, I'm beginning to
fiddle with my own piece, and whether your piece needs these little bits
doing, I can't say, unfortunately, so I just
have to keep working at mine and hoping hoping some of it
makes it helps you, as well. Yeah, I think that's
looking right. I will probably, if I'm
totally honest with you when I can get a little
bit closer to my work, I will probably have
a little tinker just to shape up some of these, but it will be no different
than I'm actually doing. Here, just say just
toffling little bits, a little bit of my finger, just to scratch away. Let's just define that a little
bit more there, actually. So tiny bit of kinite. At the moment, we've got no edge there.
Let's make it look. That makes it
better. So they have got very bald little heads. But to the angle,
it's not so obvious, so try and get that in there.
Yes, that looks better. And we will put those
little catch lights in the tiny little
bit of white that id helps to bring these to life, but still a little bit amp, where I had a ad of
sod Genuine up there. Another little line there. Oh, I could fiddle. This
is proper fiddling. Right. Let's go we'll go back
to this one in a second, and I just need to make sure I think that eyes a little bit, wet, so I just need to
give that a quick dry.
10. Sculpting and Softening Part Two: Right. Let's have a so we can have a little
same sort of thing, just a little bit of
a sculpt, really, and take any paint out so we think we
didn't get quite right. So I think this has got a little dark here and
above that nose there. That light area above
above the nose. And again, I want to
soften that area over the top of the eye just so
it's not quite so stark. So by wetting that down, I've as some of the paint from around
this area is blended in, so it's just giving
it a softer look now. It's got a little
bit too bold there. So up cup there. Come up. Always keep taking
your brush away. So it's one of those things
that you'll suddenly go, Oh, that's right. That's okay. The minute you've
done that, as I say, if I'm still fiddling, you've
had that a half moment. And it looks like a
little ser then stop. And again, if you have
done this in one sitting, as much as you can,
just bear in mind, you've been painting
for a little while. So sometimes I find I can't
do much more than 2 hours, and I almost don't see
what I'm painting, so it's always better to stop and to come back
as corny as it sounds, and I know I say this a lot, but you come back
and you do look at it with a fresh pair of eyes, and it's such a
useful thing to do. I think I'm getting
to this point here with this one, as well. Yeah, we're very nearly there. I like I said, I probably have a little tinker, so if you look at this painting it looks
slightly different. It's just I've been
able to get a tiny bit closer than I
can at the moment, because this is quite small, and I've just softened these edges exactly what
I'm doing here. But we do need to put this little cachlight on cause that always makes a difference. So let's get those on. So a little bit of white
gouache that way that was off camera.
At the top there. Little Bush a game. And it's
quite nice, if you can. E's get a tiny
little white line. Sha down here, just a
little glinter light. It's tiny, and you can almost paint it in a little thicker
than it looks right, and then we can like that. I'll show you in a minute. Let's get that
little catch light in. That always helps. Look at that. Just makes
all the difference. Let's just do exactly the same to this little
one over here. Tiny little line
underneath here. You may end up being
quite thick like that. And what you can do if it's gone a bit chunky, pick up your. I'll probably go Sepia
because it's always that nice sticky, sticky color. And then you just
squidge it down a bit. You go either side of that
white line and close it down. So then you get left with a
nice super fine white line. And then just soften
any line down. Again, same with this one. Okay. And you can sort of reshape the eye in some ways, as well. Yeah, I think that's
looking right. Now, you can take
a little bit of colour out of these
tops of these ears, or you could add
it with a little bit of white gouache, actually. Let's do that as we're
quite small again here. Just paint it a little
bit, just a catch of light on top of the
ear, just like that. Now, we're getting there.
We're almost there. We need some whiskers on there,
and I want to get rid of that masking fluid
and any pencil mark. So I'm going to give this
really good hair dry so I know everything's dry
before I start rubbing.
11. Finishing Off: Hokey doke. Alright. This
is always the fun bit, so get rid of any salt. Maybe your salt has
worked better than mine. The little disappointing
mind hasn't done much. Mine. And then once that salt's off, you can card it in pap the
martin fluid off Thursday. Just go around. Then you're
knead it again, your finger. Quite fun, isn't it? It gives that sort of sense
that there's bubbles of Bubbles of air. Sorry. It's very
satisfying, doing this. Yes, little bubbles
of air on there. The hopes that
they've gone down, it's trapped between
their coats. So it's quite a nice,
quite a nice effect. Again, you can then
rub any pencil marks out if there's any
obvious pencil marks. I haven't actually got
that many of them honest, but if you have,
they're quite nice, especially any whiter
areas like the chin. I give that the rub out. Now, I quite like taking
light out with a brush. If I'm honest, there's
not an awful lot on this piece I would take out. But, for instance, if
you'd got this quite dark, you could then very gently just take a little bit of that layer off and just soften
it with your finger. I don't want to do it, because I say it's just about nice, I've got a nice amount
of paint there. If I take it off, it's
gonna disappear completely. Um, Again, if you've
got any little bits, they could be neat
and say if you were you missed going
outside some of your lines, that can be tidied up. So you can go around
tidy any of that up. Um, hopefully you've kept
ball neatly in your lines. And I think we're almost there. Just having a look to see
if there's anything else I've I'll tell you what I
might do on this piece. I've lost a little bit You know, although I said I really want this to be lovely and
loose and no definition, I've lost you know, you can't really make out
there's a back leg here. It's blended a
little bit too much. So it might be quite
interesting to try. I'm gonna wet this
back leg down. Very gently. And I'm just going to add just a
very soft colour, actually, a little
bit of gothite. Even a little bit of conite. Come around. Only adding to it. Even though all
this area is wet, I just want to add it
to that area there. The reason for wetting
the whole area down, it just allows all the
paint to blend beautifully. If I just wet that
little area down, I'm risking having, like, a water line and then giving a rather strange shape there, and it
wouldn't make sense. But if I've wet the
whole thing down, I've wet the whole leg down. That's the area we want to find. So, if it looks a bit too hard, then you've always dip
it with your finger. And for any reason, probably we should
have said this before you took the masking fluid off. But if one of your otters
looks a little pale, you feel like you should have
done, been a bit bolder. You can always add
another layer. You could wet down exactly
what we did before and just add a little bit
like we did with that leg. I wouldn't personally
add little bits of color like we have here because we needed these to
be quite defined. But if for reasons, you know, I wanted that darker, just to paint that
in it's gonna look like you've just
painted a lump in and you're gonna
lose that softness, so it's always better to
wet a large area down, add the little bit of paint
there and allow it to dry. You just need to avoid
those sort of hard lines that will break up that
nice sense of flow. Um, I think we're about there. I have some of them. I've
done little splatters. Let me find an older piece. This was an idea I did. It's a swirly round,
which didn't quite look. My husband said it looks like they're going
down the plug hole, which I think they
do all fairness. So we didn't go with
the swirly roundness. But you could add some flicks. I was going to show
you how to do. So you can either
do it with a brown, it just literally a bit of paint on brush and you just
flick backwards. So that's quite fun. Or you can tap, just like we did with the
masking fluid, really. Perhaps you could have done
it with your back color, whichever color
you decide to do. Again, it's just a flick. Sometimes that's quite
nice if you feel you haven't got enough
sort of movement in there. I don't think I'm going to do it to the piece I've just done, but it's an option if you
feel like if you like flicks, because it does add another
dimension to the painting. Um, other than that,
I think we are there. Yes, I hope you
enjoyed this class. And if you look
at this painting, it looks slightly different. I've just had been
able to sit down and get a bit closer
and tinker with those. But like I said earlier, it's nothing there's nothing I
haven't shown you how to do. Um, yes, please do put these on the projects and resources
pages. Any questions? Pop that again on the little discussions segment
on each class. So obviously, if it's the Otter, just add that to
the Otter class. If you're stuck on anything. Oh, I do know what
I haven't done. Whiskers. Before I go
into my uh, goodbyes. Now, these can either
done with a pencil, simply put in like this. Or if you've really brave, we can do it with
a little brush, and you might want to
try that on your lip. Scrap a paper first, just
so you get the kind of right flick cause these say, it's quite little,
so you can quite. You can quite easily end up with a pair of thick whiskers,
but let's have I go. Beauty fine. Or, if you've got a
little marker pen, that's quite good, too. I got a little marker pen. Just a little fine liner. Again, you can do
exactly the same. But bear in mind, they're coming through the water so to make sure you get
them at the right angle. Fab, yes, I knew there was something missing
there on that one. Where was I now? Yes, please, please put these on
the project resources. Any questions pop up on
the discussion section. And if you like this class and you're given
the option to do a review, they are I much appreciate them. They're always lovely to read. Yes, thank you for joining me, and I look forward to seeing
you in the next class.
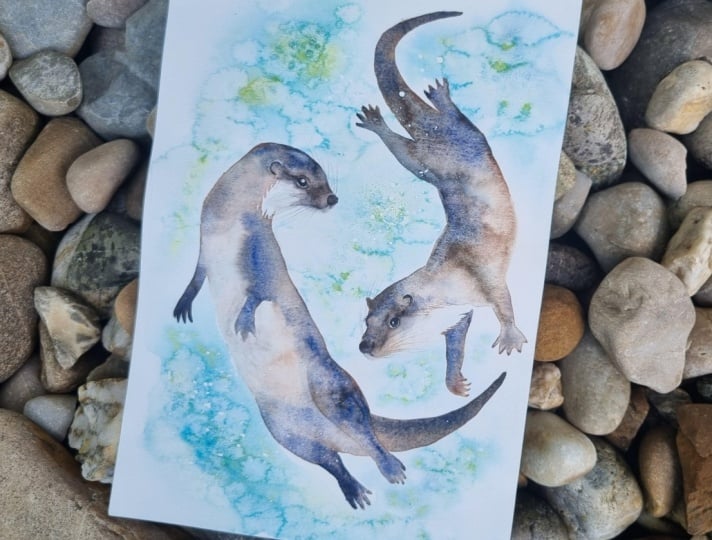
12. Final Thoughts: But I hope you enjoyed
this class and painting these fabulous swimming and
swirly otters together. How did your free
flow backwash go? Remember to be bold with your paint and water
and just allow. Did you enjoy painting
those little otters, adding the paint gently, and trying not to fiddle? Those bits are for alter. It's always satisfying painting
in those face markings. Remember, it's a little bit of give and take and sculpting, so don't get flustered. As I always say, it's
worth stepping away, calling back and looking at your painting with a
fresh pair of eyes. This simple act still amazes me. So we look forward to seeing
you in the next class.
 Jane Davies, Professional Artist and Teacher