Transcripts
1. Introduction: Hi, guys. Welcome back to learning one stroke painting. One stroke painting was developed by Donna Dewberry Onda. As the name suggests, it's basically using toward more colors, mixing them up on your brush. I'm creating something with that just one stroke. So, as you can see in the video, I'm doing one off the techniques off. One's took painting. It's mainly wished for floor floral paintings on a so go out look around you observed. The shapes of the leaves, though slumbered by tones, order different shades in the flood, the different shapes of the leaves, the different shapes of the flower petals. Get some inspiration on. Then we can go ahead and start. If you have not seen my previous video, I would suggest you go see that one force, because that is a simpler technique and we move on to more complex events. As we go ahead, I am re achieved strong bang Lord India on. I'm looking forward to teaching. You guys follow me on Instagram at Route 234 for low share, and I would love to see the work that you guys do. So please get in touch. I Let's move on to the next we do and start learning
2. Knowing the materials: Let's start by looking at the materials that we would require for one stroke painting. Um, firstly, we need the paints with charge Acrylic colors. Oh, you can choose any good brand off acrylic bottle colors on what I'm using is the favorite grill, Sunflower said. It has 10 colors in it. I've gone ahead and bought bigger bottles off you off the colors that I need. But the basic set has 10 shades. You can pick whatever brand is available around you. Next, we need tackle on brushes. I am using the breast row that loan brushes, which I've ordered from Amazon. We will talk about the brushes photo. Like I said, I bought bego Bortles of the colors that I need, which a crimson red on dlamini alot sap green on and wiped so you can start with the basic set and by the colors that you need. Once you get the hang off it for the palate were using and which P sheet, you can also use a plate if required, so you're basically need a lot surface where you are able to mix the two colors comfortably . The sheets that we would need I'm using. I ready sheets, but you can use. Initiate the charge smooth so that the brush easily moves over the sheet. Oh, anything rough will make it hard for the brush to smooth least light. And for the practice, more small cheats Better. We require water off course to wash your brushes toe smoothen your paint. So these are the basic. My TV is that you need gathered this and let's meet in the next video to start painting.
3. The brushes: Let's talk about the brushes. Like I mentioned, we are using the attack lone brushes again. I'm using the brand brushstroke, but you can use any other bland, which is labeled a stack. Loan brushes. So, firstly, I've picked out two brushes, size six and eight, off the flag on these brushes, tackling the specialities that when you dip it in water and you take it out, it forms a very shop. It, like you can see on. That is one of the important things in one's took painting. So even in that the brush, as you can see, it'll form a very shop. So it, by brushes and short that you have a shop lips so that you get a proper edge when you're painting next is their own. Brushes again have picked out two sizes off the round brushes. They are for any again. The same goes for the round brushes. When you dip it in water, you'll see already pointed. That is very import so you can order these brushes, the brush stroke back long from men's oh, not flip card or any online website. Or, if you're buying it locally, you can still mention that long brushes and almost all brands have them find your brushes on. Let's start
4. Loading your brushes: the most important thing in one stroke painting is how you load your brush. You need the correct consistency, the current amount of water on the small transition between the two colors, so you have to practice and get it right. I'm picking up the sap green on one edge of the brush on some lemon. Your law and order. I'm moving my brush a pen down. You have to dip your brush in water because before you start this Andi, you'll have to load your brush like this with the colors about 3 to 4 times so that your brush has enough color for you to start painting. Like you can see, there's lemony alone one side. There's a mix of green and yellow in the middle on, clearly agreeing on the right side. Use a little bit of water if required, but not too much. It has to be off semi liquid consistency. Andi, when you make your stroke, you should see a clear green line on top. A mix Sophia Loren Green in the middle and Lemonier Lu had the bottom try this month. Couple times it comes with practice, because only when you practice will you know how much water you would need. In my case, your I haven't really needed to use the water, but you'll see in the coming reduce that I keep thinking water every now ending to correct the consistency. So practice and let's meet in the next video.
5. The M stroke: hi. Today, we're going to learn how to do the EMS joke. So this talk, basically, you can use it to make floods. You can use it to make leaves on. It's quite an interesting stroke. It feels it feels like, you know, some sort of magic. So let's go ahead on and London Am stroke. It's simple. It's basically like writing and them. So you guys know how you write and m with a pen, right? We will be doing the same thing with a brush. Let's Lord a brush like in the previous we do using like SAB green and lemon yellow madding , A small amount off water toe. Get that right consistency. And once you've lorded your brush, place the tip on the paper. I at least press on right to come, continous em with brush. So, like you can see, I'm just writing the series off Kim's Andi. I lift off my brush from the again. I'm loading my brush on. You have to be aware about how often the brush needs to be loaded. So again, please, right EMS, and I want to feel like the brush doesn't have any movement. Lift it off again have not cropped any parts of the video where them loading the brush so that you know how often it has to be loaded and how much how many times to load it and whether water is required or not. So again, I've loaded my brush and let's try that one more time. Place a series off EMS I lifted off. So for every stroke that I make, I usually have to load the brush on. No way we're going toe again. Try a slightly different stroke. So as you can see, I'm making very minor moments for my M. So that gives a very different effect. So let's load up brush again and try that one more time. The moment is the same, but only the intensity and the movement is very little. So as you can see, and once my color is getting over, it won't come right. So then you have to stop it so you can probably load your brush again and try that. So we're going to do this one last time where we will try the EMS talk again, please. And the M stroke. Andi, lift off the so you guys can trade this stroke multiple times and it will definitely come with practice. Leaf is based on this stroke, Andi. So it's important you get it right. Try it. Give it a short on, then let's meet in the next week. Do.
6. The leaf stroke: hi. In this video, we are going to learn how to make the leaf. The basic stroke for the leaf remains the same. That is the M stroke. But we will be aware about the shape of the leaf. And how from of my door. Oh, but it narrows down towards the tip, so we have to be aware of that shape. When we're doing the stroke, let us start by loading a brush. Take out some color. If you're running out off color, load your brush patiently. I'm sure you guys have mastered that part off this. ID some water if required. I'm load your brush till you're confident that you can do this. Talk cleanly. Let's start so place your brush vertically. Start with the M stroke and as you go towards or photo rotator, brush slowly said step towards the end. It comes to a horizontal position. The tip. I will start from a vertical position, and it will gradually rotate such that towards the end. It comes on the horizontal direction, and you lift it off in that direction, so that will give you the proper shape off the leaf. Let's load the brush again. I've started loading it in a new place because the earlier position has sort of dry it off , and I feel like it's not loading it right, so place it were. Typically, I start with them stroke and you can see how my brushes eventually rotating on atones horizontal. Andi I lift it off the top. Let's try that a few more times. Lord, your brush again. Place in the vertical position slowly, gradually rotated such that it turned horizontal and lifted. See, I am not able to do more than one stroke with one loading so loaded again, please two dames talk, and as you do that, gradually rotate your brush such that it's horizontal. I'm lift it off the horizontal. I hope you guys are getting it. If not, keep practicing. If you have any queries, feel free to leave me messages and I will definitely revert back to help you. Let's try the leaf again, so now we'll do both sides of the better leave. Start with the stock that we just learned from vertical so slowly rotating such tight it becomes horizontal towards that. Now the same thing. We have to do a middle image off it from that same line, that might be a bit complex, and it might be hard because most off her hands are designed to be comfortable in one direction. But give it a try if you have to. You can rotate your book in whatever the opposition is comfortable for you. I feel like my upper part of the leaf doesn't have proper color, so I'm just going toe to worth stroke over it on and your my li fis Finally ready. Draw the veins in the leaf and we will have to tie that again. So load your brush. Start with the upper part of the leaf, so start article. Rotate slowly. Such started becomes horizontal as you reach the end of the lease on the same thing under our decide. So the other side is going to be complex and you will struggle. But the practice? It'll it'll come out quite good again one last time. Start work, tickle EMS talk and then slowly lifted horizontally again. And that's how you do the leaf practised. Try multiple times on Once you get it, let's make a small painting. From what we've learned,
7. The flower stroke: Hi again. In this we do. We are going to loan how to make a flood using the same basics off the M stock. It's basically the same stroke, but you give it more definition. You know how a petal is. It has a tip on the upper part is all flowy and open. We will try it. Start by loading your brush by now. I'm sure you guys are aware of how much and how to load your brush. You place your brush, Andi, do a few strokes off the pattern and lifted up. So you'll have fun. Call Murden Center point from which your stroke will emerge. In the previous line, you were doing an M stroke, which was in a line. Now imagine a point from which your M stoke is happening. So the lower part is the point. From there you are doing them stroke and then ending it right there again, start names, talk and end at the same point below. So from a straight line, you have to imagine that there is just one point, very your brushes riveted on. Then you're doing the M stroke again. There you go. Let's try that again from the one point I am doing the M movement and then ending it right dead. So, like you can see, it's from that one point again. This will come by practice, but a few have mastered the M stroke. This is quite simple to do. Now let's make a flood the same petal. Imagine the center point and you end it right now, using the same center, you can rotate your book, load your brush again on, then make the victim. Just ensure you maintain the same centrepoint. If you need a reference, you can mark it in pencil or pen and then make the petals around that center. So the same center and did. You can make four patterns. You can make five petals you're have done just for I'm adding the center later. Andi, this completes the flood. You can try this multiple times so that you get the hang off it. Andi, keep in mind it's the same stock, but from the centre. Have fun, practice on and see you in the next video
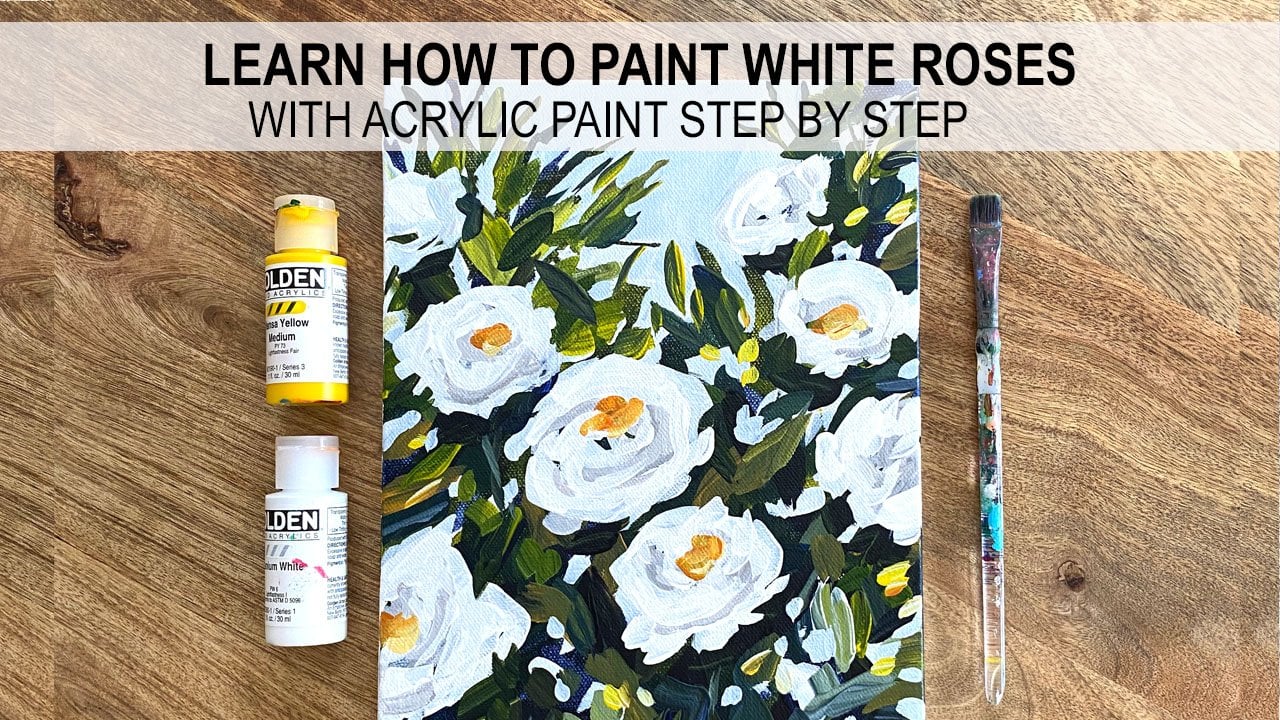
8. The painting: it's finally time to start our painting. I hope you guys have practiced the strokes. The leave stroke, the flower petal stroke. Andi hope you've gotta hang off it to some extent, at least so that we can make a painting for the small card out ofit. Get ready to take out your colas. Put them out on your palate. Whether it's a plate or in wet be sheep. I'm starting by using the focal owes that I had mentioned the crimson. Drink the lemon yellow, the sap green and divide So the yellow and the green is for the leaves, the crimson red right on the little better fear look. ISS for the floods. I've not got any part off my painting making process so that you know exactly how many times I'm loading the brush. How long I'm taking to load the brush on. I'm starting by using my number four off the flat back lawn brush. I'm lording it with sap green hand, lemon yellow. It's the first time that I'm lording it on a clean brush, and hence I'll have to do this multiple times. Still, I feel that I have the correct amount off color on my brush again to mention it, not corrupt, and you're fit so that you know that sometimes it takes longer than you think to just lord a brush have done it four times already. Um, using a little bit off water. The idea is that your brush shoot smoothly Move over the shoot. I I didn't little bit off crimson dread don't dark and the green slightly like you can see . My brush is almost ready and it's then lorded. So what I'm going to do is the central part will have flus, whereas that believes oil around it, from starting with the leaves, the basic and leave stroke. But I'm writing like a sort off him. Andi. As I come towards the tip of the leaf, I'm lifting it off. I think that again, that decide So it's possible that you're comfortable doing the right part off the leaf are not comfortable doing the left, but that is not sure because the Heinz I use a certain side again. Feel free to rotator paper in the way that is comfortable for you to make the leap. It's not possible to be able to do it in oil directions unless you have that much practice again. After doing the first leaf from again lording it find See, I'm ready for my next leaf, leaving the centre space for the flaws. You can start painting leaves all around like you can see in one lording you can fulfill or managed to do both the sides of the leaf again loading the brush I'm your comes at toward Leaf Try to get the point because like you don't most lives have that pointed again. Some leaves are there which are rounded shapes. But we learned that later. For now get the pointed shape I felt like I didn't completed this lift properly. So I loaded my brush again and painted over the So sometimes if you're brushed, runs out of paint and you need to do it again over it. Go ahead and wit. Uh, you're leave will still look fine after you do it again. Don't hesitate and just let your hind move. Let's were next leaf. You know the best thing about this technique is once you mastered the technique, you tend to realise that your hand moves so flexibly on you get such a good hang off using the brush that it helps and at the forms off painting. Also, it's like a practice for the other forms off painting with more free hand and more flexible , I would say, like you've seen this when I I did a little bit afraid to give that slight color of aviation. The slave is overlapping a little bit under the leaf, and like you can see, the previous one is a proper green. But as this has that reddish stone, so where the friend leaves can have slightly different tones by just starting a little bit off, they do it like you can see the Koukalova radiations off the two lives right next to each other, so feel free and experiment a little bit. Every leaf can have a slight different shades because of the amount off crimson drink that you would mix to it. Remember that for every leaf that you'd we'll have to keep loading your brush. I'm using number four brush because it's the most comfortable for me. If you want to make the girl lives, then you might have to use a bigger brush like six or eight. But if you're doing something on an A four or a three sides of people sighs off. A brush of size four would be enough. You can slowly start experimenting with your leaf like painted like it slightly bank like you can see how I've made my previous leaf. All this. As you practice you can do it, then come up with new New World things. But the important thing is the stroke him . I think I'm done. That leaves for now. I'm washing my brush so that we can go ahead with the flaws. No, the floods, like you know, they're using the same technique. I'm loading claims injured on white on my brush, you will have to do it about 3 to 4 times because it's the first time we're lording the brush with these colors. You can. I have a slight yeah, law. So you're right so that it forms a nice cream ish tone and we start with the floods. I hope you guys remember how we had done the patterns off the flags. So I'm doing a flower with four Patten's, but you can make one with five petals also or three petals itself. So, like you can see again, you can finish one flood in about one lording off the brush over and I couldn't finish it. So I have to again lord it a little bit. Find your is my foot. So this is one flood I'm going to make multiple off these plus and the middle Lord, your brush again carefully. Don't let the colors mix up like you can see. My never really started mixing up, but we can try to mix it in the correct position so that the colors are still listing ideal with three petaled flood. I'm doing it again over the first petal because I felt like a doors and proper country new making lovers like this in the center, you can probably make another three flowers. The best part about one stroke paintings. You can try this on glass and it looks beautiful. You can try it on. Would you can do it on glass. Some people do it on, then the else, too. But of course, you need to use a smaller brush for you can paint it over your hind. Told to you can make greeting cards out ofit. Personalized hand guard Off course. Very special. So, like you can see him alternating between three patterns and four pectorals, and you can do I can do one affect or you can do it off it. Or you can even make Cy pittance. It's up to you. Make sure toe overlap some off your flaws on the leaves so that the lives look like they're behind the flood and not at the same level or not about the flood. - Flordia brush again. It's very important to keep loading your brush. I'm just going to make a few pills because I think I filled up the central idea with enough loss. These are just free petals, which are there, like you can see in most of these. Plus, actually, in all the floods have kept the right in the center and the crimson red on the sides. Only these last two weapons have reversed the colors, and we're done with the floods. So I'm going to wash my brush. I feel like doesn't leave missing on the left side, so I'm going toe either. Leave with the sap green and the lemon yellow. Oops! Like you can see, my colors are getting mixed up on. This might happen to you, Walter, especially if it's your initial times, but it doesn't matter. It's OK as long as you try on. Keep take. Now we're going to pick up a round brush, and I'd a few stems toe these flus. Make sure you wash your brush before doing anything else, because if the color dries on your brush, 10 yard brush is going to get spoiled. So please, please, please, and show that you keep watching your brush. And don't leave it as it is like you can stay a minding stem to the laws. Guys. Very important every time you a picking up another brush and leaving or fried brush and showed that you put it in water and not just leave it because of the color dries on the brush. It's not going to come off and you're going to spoil your brush. So if you don't wash it completely, at least put it in water so that it's where 10 dozen dry off like you can see abided enough stems and all of that. Now we're going toe. Just use the back off a brush. I'm used drums and red in the middle of the floor, and there you go. We have done with the painting. Go ahead, sign your name on it. Andi, I hope you enjoyed learning this, uh
9. The project: So we finally come to the end off this section. I hope you guys enjoyed the class and I hope you learned how to do the M stroke in one stop painting on. I hope you've practiced the stalk and I would love to see whatever little you have tried or whatever you have managed to do. It doesn't have to be a proper painting. Even if you just managed to get the stroke right, I would love to see it from my side. The project would be that you make the painting like how I have made in my previous We do practice do your own variations on I would love to see it and everything that you try posted on Instagram Tag me a brooch 234 posted as a project to on I will definitely come meant and revert back to I'm any new radiations that you do I would love to see it and I would love to get ideas from it so that I also get today new things. I'm learning something in return from you days. So hope you guys have fun on and enjoy painting
 Ruchi Patel, Architect | Artist | Traveller