Transcripts
1. Class Introduction: You know you need a system
for planning your content. You've probably seen those
beautiful Notion setups all over Instagram and TikTok, color-coded databases,
perfectly organized calendars, everything in one place. It looks amazing, right? So you download a template, excited to finally
get organized. But then you open it,
and it's confusing. There are databases linked
to other databases, buttons you don't
understand and a layout that just doesn't match
how your brain works. So you try to use it for
a week or maybe two, and then you abandon
it completely. Does that sound familiar? You're not alone. Many people have been there, including me. Hey, there, I'm Kristine. And here's what
I've learned after years of using Notion
for Content Planning. The best Notion setup isn't the prettiest one
you find online. It's the one you
actually build yourself. In this short course, I'm not handing you another
template to figure out. Instead, I'm teaching
you how to build your own Notion content
planner from scratch. One that actually
makes sense for your workflow and keeps you organized without
the overwhelm, whether you're a
social media manager juggling multiple clients, a virtual assistant
supporting content creation, or a content creator
managing your own brand this class will help you create a notion system
that works for you. Here's what we'll
cover together, how to set up a content
calendar database that's simple and functional. What properties to include
and which ones you can skip, how to create different views. So you can see your content
plan from multiple angles, how to track your content
from idea to published post, Tips for keeping your
Notion workspace organized and easy to maintain. By the end of this class, you'll have your own custom
Notion content planner built by you for no more
confusing templates, no more trying to
fit your process into someone else's
system, a clean, organized workspace
that actually helps you plan and create
content consistently. If you're brand new to Notion, I recommend checking out my
Notion for Beginners class to get familiar with the basics. Ready to build your content planning system,
let's dive right.
2. Class Project: This is where you take
everything you learn from this class and build something
you'll actually use. Now, for this project, you're going to build your own Notion content
calendar from scratch. Are you ready? Here's
what you'll do. Step one, access Noson through your Notion app or
go to notan dot so and sign up for an account if you don't have one
yet. Don't worry. The free version of Notion
will work just fine. Step number two, follow along with the demo
videos I have here. You can pause, rewind, and build alongside me as I
walk you through each step. Step number three, customize
it to fit your workflow. Add properties that
matter to you. You can skip the
ones that don't and organize it in a way that
makes sense or how you work. Step four, add at least
five to ten pieces of content to your calendar. This helps you test
your setup and see if it actually
works for your process. Step five, take a
screenshot of your Notion, content calendar and upload
it to the project gallery. I review every submission and give feedback to help
you improve your setup. Now, here's my advice. Don't try to make it
perfect on the first try. You can start simple. You can always add more features later as you get
comfortable with no shot. The goal is to create something functional that
you'll actually use. Not something that looks
perfect but sits untouched. And remember, this
is your system. If something doesn't work
for you, you can change it. If you want to add something
I didn't cover, cover it. The beauty of building your own setup is that
it can evolve with you. I can't wait to see
what you create.
3. Getting Started with Notion: Now we are insidenson.com, and then you can either
choose to get Noson for free or choose the login button if you already have an account. Now, the free version
is totally fine, especially when you are just
getting started with NSHon. Now, you can sign up using your work email or you can continue with
your Google account, but it's definitely up to you. Now just sign in using
your Google account and then follow the instructions
on your screen. Once your account
is already set up, we can start with a demo. Before we start with the demo, I just want to quickly run through some notion
terms that we will be using throughout this demo so that you would be
more familiar with it. Everything starts
with a Notion page. You can either start with a template or start
with a blank page, which we will be doing today. Now, inside the page, you can add different
blocks or data depending on how you would
use that specific page. So in this example, we have here different
types of blocks, such as a database block, a text block, an image block, and an embed block. It's totally
customizable depending on the purpose of
your Notion page. Now, inside a database block, you can add a database view. We have different types
of database views, such as a calendar view, a list view, a timeline
view, and more. Then to further organize
your data inside database, we have what we call
database properties. Remember, everything
sits inside a page. Then inside a page, you can add different
types of blocks. Now, if you added a
database block, inside it, you can add database properties to further organize your data. Now I will show you my
course creator Notion page to give you a more
concrete picture of what I was talking about. I have here a calendar database
which is a type of block. This is my content calendar. Then on the right, I have a text block
for some reminders. Then here I have an embed block, and finally, I have an
image block down here. Now let's try to open up a content piece
from the calendar. So let's click this one. Once you click this one, it
opens up to another page. So you have here different data. This is what we call
database properties. These database properties help further organize the data
inside your database. So we have here the
date, the status. This one is a multi
select option. We have here a URL, the text database property. You can attach an image, and actually you can add more database properties
depending on your preference. If you need a last edited vibe, formula, an email, a
checkbox, totally up to you.
4. How to Create a Content Idea Bank: Alright, so first, I will
be teaching you how to create a content idea
dump inside Notion. Or we can also call it
as content idea bank. So basically, this content
idea bank serves as a holding space for all the content ideas
that pops into my head. So, for example, I'm in a cafe and I was inspired
with the place, and I have a content idea
that I wanted for my brand. So since I'm outside and not
currently content planning, I put that content idea inside this content idea
dump or content idea bank. And I fill this list so that when it's
content planning time, I don't start from zero. I start with a list. I choose from a list of content ideas that I
can do for my brand. Let me just quickly discuss
the columns that I have here. So first, we have
the content title, and then we have the category. Sometimes I'm talking about
productivity in my content. Sometimes it's about
digital marketing, personal brand,
influencer marketing. So it's not just one topic. So this categorization
really helps me into identifying what type
of content idea it is. And then I have here
a content brief. So basically, these are
just a few lines discussing what that specific
content is all about. The content brief
really helps me remember what I was going for
on that specific content. And finally, I have here a checkbox if that
idea is approved, so I just simply click this one. So there, basically, this
content idea dump is simple. It's just a holding space
for all my content ideas. So now let's proceed
with the demo. I will be teaching you how to
create yours inside Notion. First, let's create a new page. So click this plus button here. And then choose the new page. All right. So it
opens up like this. So the first thing that I always do when it's a fresh page, I always change the setting, so click the three
dots right here and then toggle on the full width. So we would occupy the
full width of the page. And then I always wanted
to change the font. So let's give this a
name, content idea bank. There you go. And then we
will start with a database. So press slash, and then let's look for database
by scrolling down. Or just typing it like this. Database inline. So the difference between the database inline is that when you choose
the database inline, it would create a database
inside this page. But if you choose a
database full page, it would create a database
inside a new page. So let's click this back. So this is your
database full page. But I want to create
something that is in line inside this
content idea bank. So let's move this
to Trash. All right. So now we have this new
database right here. We can name this as
content idea banks. Well, and then we have
here the first column. So this is the default items we have here if you
create a new database. So what we have is just a name, and then we can add
different properties to it. So first, let's rename
this one by clicking this, and then let's name
this as content title. Next, let's add
another property, which is the category, click Add property, and then
choose the select property. And then let's rename
this as category. And then to give it an option, let's choose the edit property
and then click Add option. So let's say you are
a fitness instructor. Sometimes you're
talking about health. Sometimes your content is about nutrition.Times it's about
your personal brand, and sometimes some of
your content may be about your journey in building your business as a
fitness instructor. So there. So you have different options
here or categories. You can change the
colors if you want. And also the order of the
options. There, let's try. So click this row
and choose Health. You can only choose
one option if you are choosing the
select property. Alright, so next we have
here the content brief. So let's add another property
and then select the text. And then just rename
this as content brief. So here you can add texts there. And then finally, we
have here the checkbox. Let's click the ad
property and then choose checkbox,
approved idea there. So you can click this if
the idea is approved. Now, let's try to add a content idea in your
content idea bank. Okay, so I want to rename this option because I think
this is redundant already. So let me click the three
dots right here and then rename this as
fitness or workouts. There. You wanted to create three quick workouts to
do during office hours. And the category is about
fitness and workouts. Add a few sentences to discuss
what you are going for. So let's say you wanted
this idea to be added to your content calendar
the next month, so just click approved idea. So the next time you
content planning, you would know that this
is already approved, and you don't have to go back again to check if this would fit your brand or the content plan that you're
going for for that month. Now, if you wanted
to add a new page, just click this button
plus New page to add more rows to your
content idea bank. Okay. So there you go. That is how you create your content idea bank.
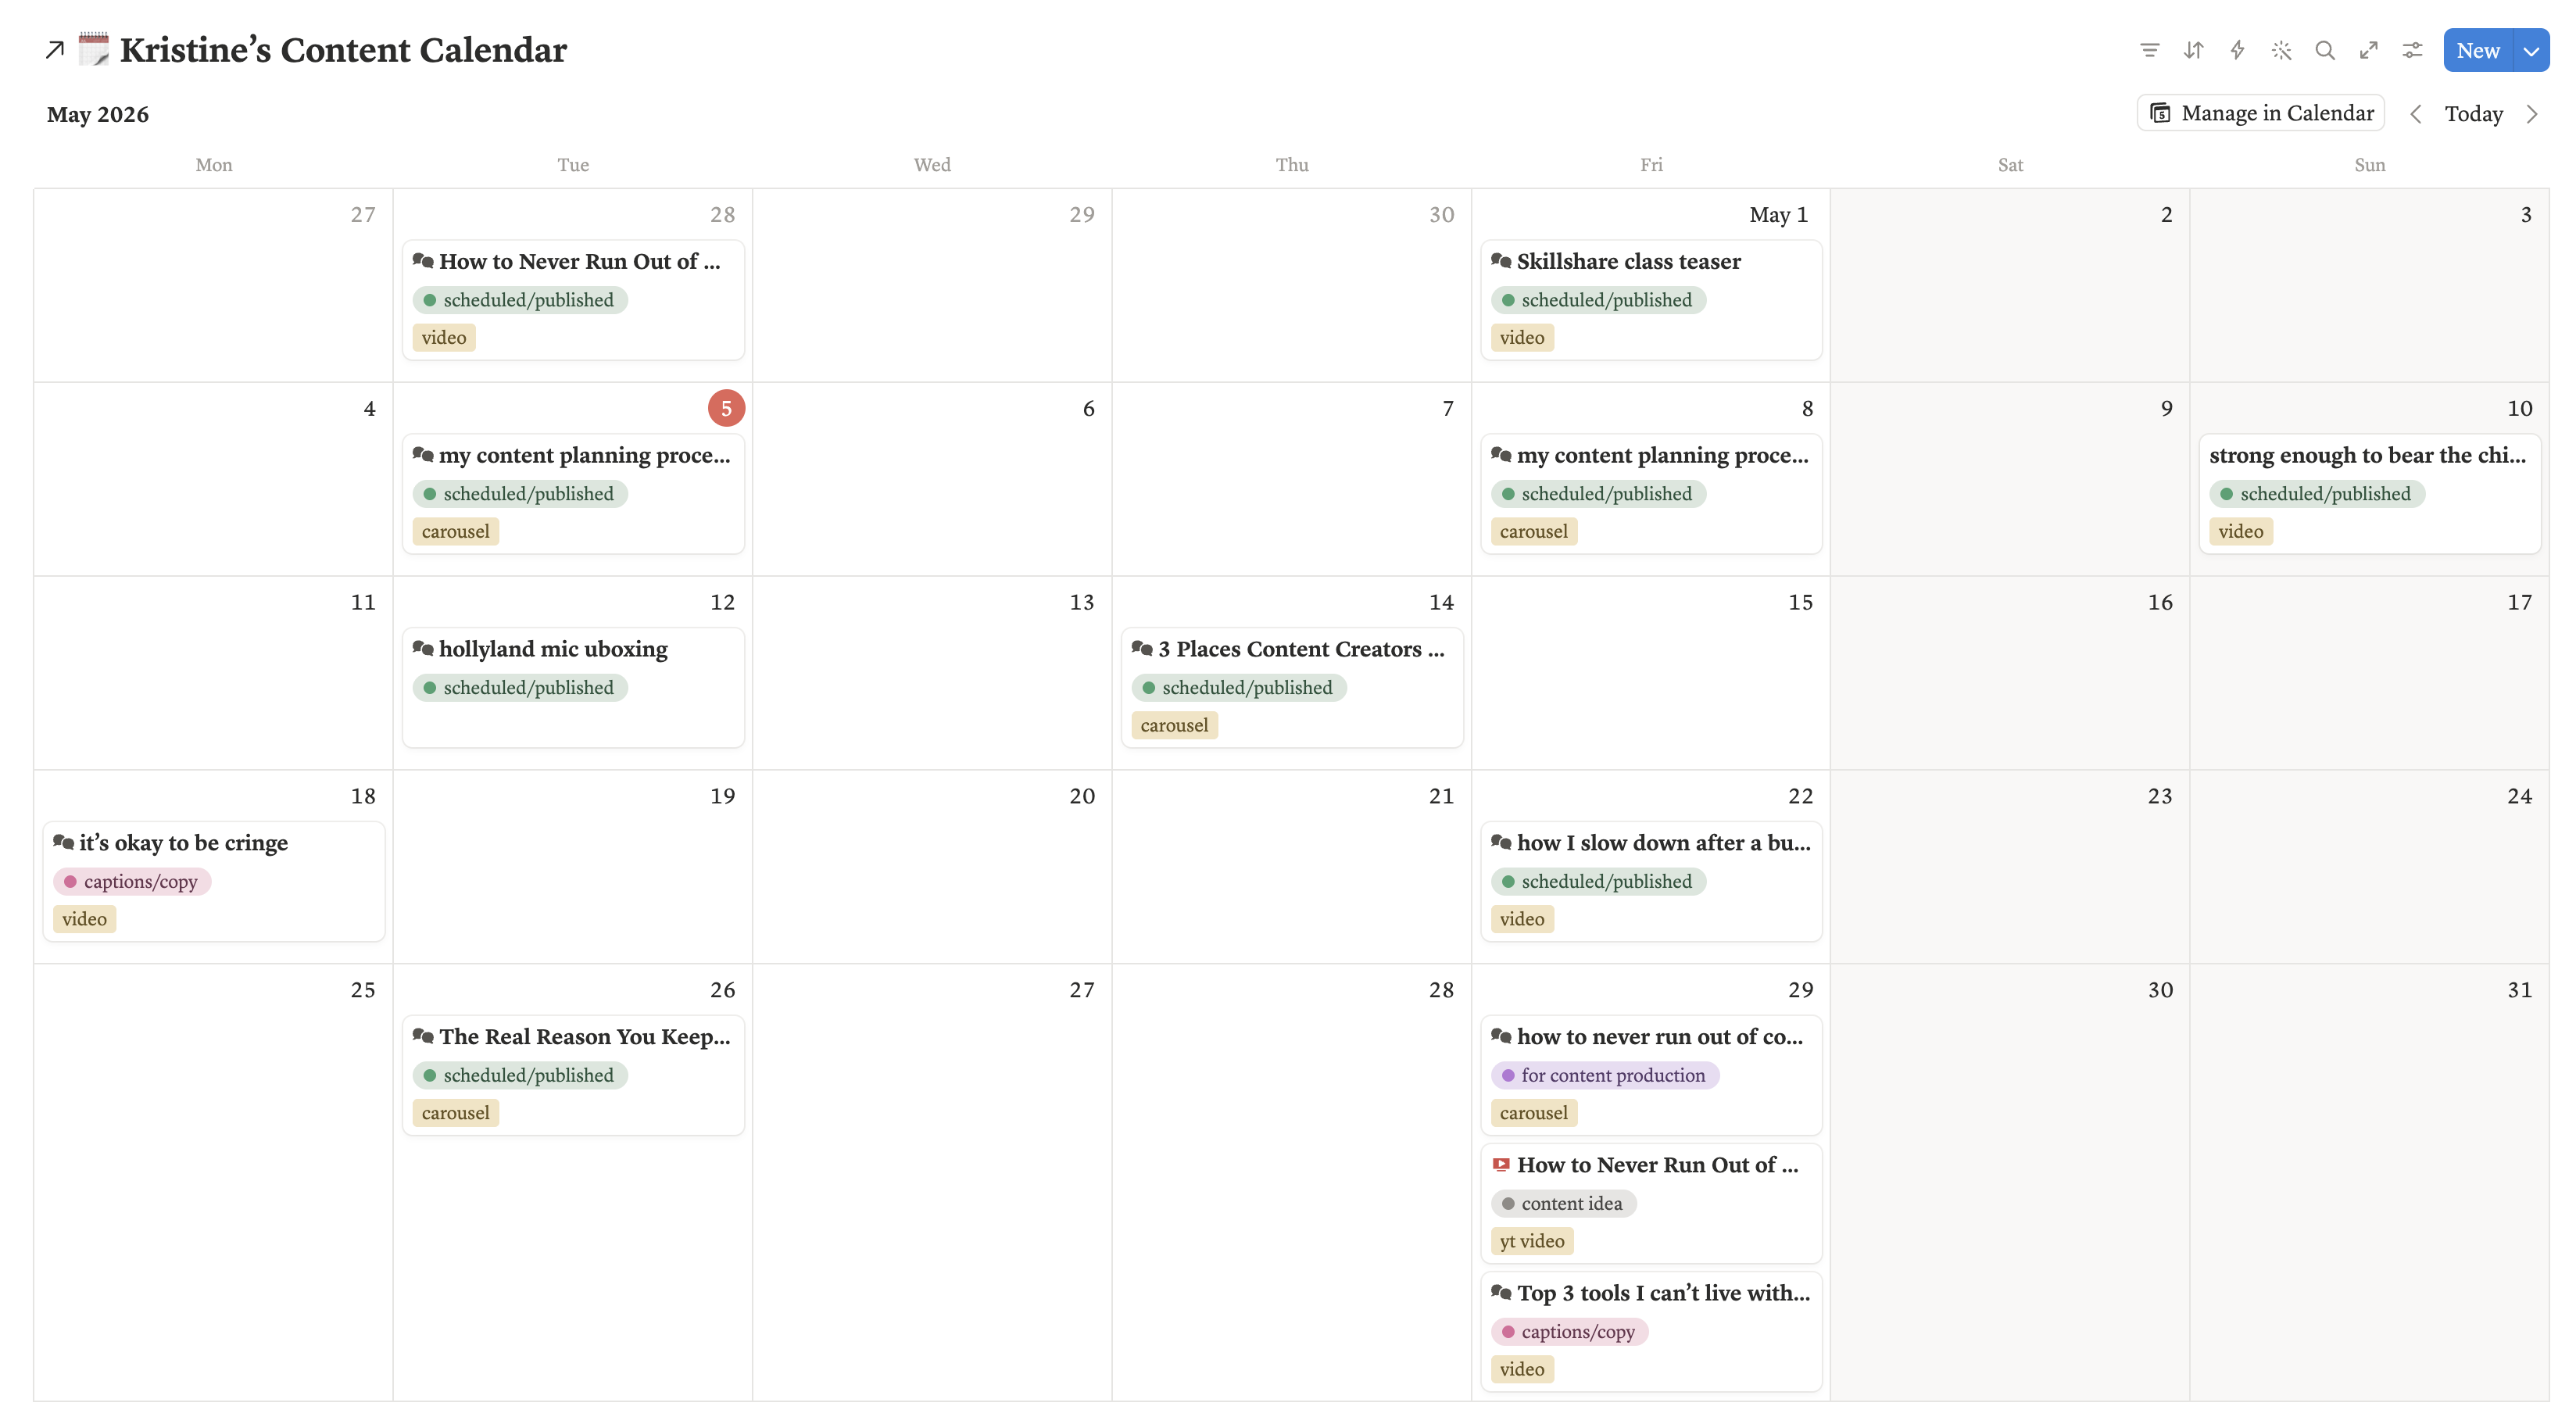
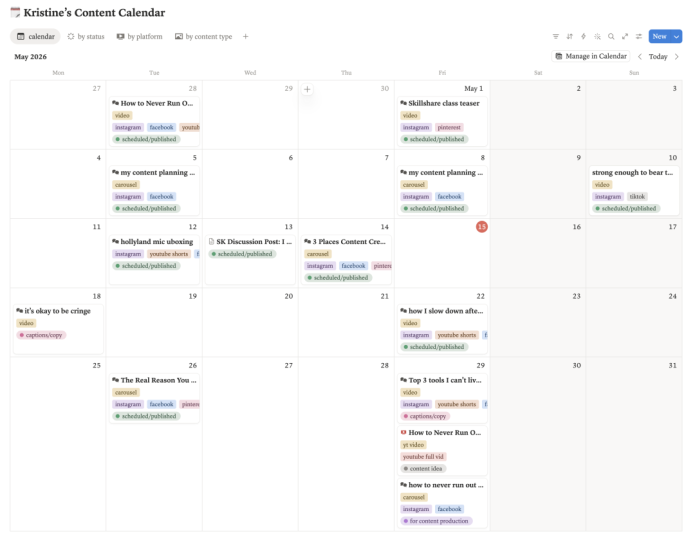
5. How to Create a Content Calendar: This is my current
content calendar, and it's really helpful for
me in planning my content. So as you can see, we have here some items already planned out, and you can see different
labels such as video, we have here Carousel. And we also have here some items are for
Instagram, Facebook, YouTube shorts, for Pinterest, and we have also
for YouTube video. And then you can also see
the status right here. So these are already
scheduled or published, and then some are for
captions and copy, some are for content production, and some are for edit media. So let's try to open one. So inside, you can see
the date, the status, the platforms, the content type, pots, and then some notes. And then when you scroll down, you have here information
about the content. So you can see a lot
of content already in here because this
is already done. So that is how I
plan my content. So I will be teaching you how to create your content
calendar inside Notion and all the properties that are essential
for content planning. So let's go to your
content corner. Earlier, this is
content idea bank, but I renamed this as content
corner because I want the content idea bank and also the content calendar
in just one page. So now we will be
creating a database. First, click the slash button on your keyboard and then
look for calendar. So there we have here the
calendar view of a database. So we have two options. First is to link this
to a data source. If you already have
a content calendar, or we can always start with
an empty or blank database. So let's name this
as content calendar. Now, so right now we are in May. So in navigating, you
have the buttons here. Or if you want to see
the succeeding months, you can click this
button right here. So these are
database properties. So now we will be adding these to our new content calendar. Open the settings and then
choose edit properties. So we have here the
default properties. We have the name,
date, and tags. So let's rename this
as content title. Date. So next, we
have here the status, so we will add the status. So first, let's click the
new property and then choose the status option and
rename this status. And as you can see, we have
here three categories inside. So it's default to do in
progress and then complete. So for me, these are the
status that works for me. So I start with content idea and then next for content
production to repurpose. So in progress, we
have the scripting, video shoot, edit media, captions and copy,
and for review. So these means that it is currently in
content production. And then when it's complete
this is my status tag, which is scheduled or published. So let's try to recreate these into our new
content calendar. Let's start with the
content idea. There. So I edited it by just
clicking this one. So you have here options
to revise the title, and then you can
set the colors as well for content production. Click this, and then let's
change this to purple. Then let's add the
last one to repurpose. Then press Enter. Then change this
color to yellow, and then drag this
status to here. Scripting. Let's
edit this one by clicking it and then just
rename this as scripting. Let's add another
item, video shoot. Next is Edit Media. Change this to color pink. Then captions Copy. Et's move it down here. Finally, we have four review. Change the color to orange
and then move it down here. So let's just rename this as scheduled slash published Enter. So let's try to see if what we added already works in
our content calendar. So choose the date you want
to add content and then hover your mouse to see the add
an item button up here, which is a plus button as well. It creates a new page. So we have here the date, and then the status. The default is the content idea, and then you can
change the status depending on your
content production. So there we already have the
status ready right here. So the next item
is the platforms, which is a multi select
property inside Notion. Click this add a property and then look for the multi select. And then rename this as
platform and then add an option if it's for
Instagram or Facebook. For YouTube for TikTok. There. So it's just easy
to add the options. You can just type and
then press Enter. Then you can also rearrange
by dragging the items here. You can also sort if you want alphabetical there or choose
the manual. There you go. I want this down here, so let's drag the
platform down here. So let's try. Choose Instagram, Facebook, Findest. There you go. This is a multi select option. Next, we have here
the content type. So some contents are
videos, static post, YouTube video or a carousel, so let's recreate this one. So this is a select property. So click the add a property
and then choose this one. Content Type. So in the content type, you can see it has
a different icon. So let's change that by clicking this and then look
for the camera. So just type the camera in your search bar and
then choose there. So let's add an option. Let's say it's a video. Video, a static post. So there are different ways
on how to add an option. So first is by clicking the Settings button
and then go to Edit properties and then go to the content type
and add options there. Another way is just by choosing this one and then
just typing YouTube short. Press the Enter
button or just click this create to create
a new option here. The final one is a carousel. There. Let's change the
color to yellow there. So now we have the
content type ready. Next, we have Content inspo. So content inspo
is A URL property. For example, I was inspired
by a certain creator, and I want to recreate that
type of content for my brand. So I just add content inspo
URL space right here. To do that, click Add a
property and then choose URL. And let's surname this
as content in spa. So there, easy as that. So captions is a text property. Just click Add a property, then choose text
and say captions. We can change the icon here. Then we can also add hash tags. So it's text as
well. There you go. Then we have your cover image, which means we can attach
an image on that property. So click Add a property and
then choose files in Media. And then rename this
as cover image. I like to do this
for my reels so that I would know which cover
image I would be using. This is also great if you have a client and the client wants to see the designs that
you did on Canva or which cover image you will be using for a specific reel. So when you click this one, you can upload an image or a
file on your Notion space. There you go. And then finally, we
have here content notes, so it's just a text as well. So if you need some
reminders for your content, you can put it right here. Down here, you can see
the comment section. Add a comment right here. For example, you're
working with a client. Both of you can
collaborate on this space. So you can mention people here. There. You can also attach a
file in the comment section. And then down here
is a blank page. Now, as you can see in
my content calendar, you can see different tags. You can see a video here, the status, the platforms. But on your content, calendar, you can
only see the status, which is a content idea. Now to change that, let's go to settings and then go to
property visibility. So right now, it's only showing the content title
and the status. So let's say you wanted
to see the platforms. There. Next, you wanted to see the cover
image, for example. So just click this
to n hide there. So it's up to you which way you are more comfortable in
planning your content. For me, I wanted to see in my calendar
what type of content, which platform it goes to, and then the status. So let's try to create an item. You can see here the
database properties that is very essential for
content planning. But down here, you can
see it's a blank page. But when you go to
my content calendar, and then when I click
a new content Idea, I already have a fresh template ready for me for
content planning, which makes my content
planning easier. So in the next video, I will be teaching
you how to create a template just like
this inside Notion.
6. How to Create a Template: This is my template
inside Notion. So I will be teaching
you how to create yours. So let's go back to
your content corner. So remember, we have a
blank space right here, so you can either continue with an empty
page or create a template. So today, we will be
creating a template. And one thing to know if you're editing a template
is that you will see a banner up here that says you are editing a
template in content calendar, which is your database. And you can actually
automate this if you want to duplicate
this every day, every weekday, Okay, so first, we can skip this table right here and then proceed to
the content idea notes, video script, design
brief and draft caption. So first, the
content idea notes, type it here, video
script. And then. So what we will do is to turn this into a heading
just like this one, and then change the color there. And then down here is your space for your
content idea notes. You can just simply type it
in here or create a callout. But you have a space
dedicated space here to add your
content idea notes. Then here is the video script. Turn this into heading as well, and then change the color. Then add a callout
so that you have a dedicated space for
your video script. Then for the design brief, do the same thing as well. Change the color to green and
then add a callout there. So you now have spaces
for your content. So let's name this as your
content, new content idea. There. Okay. New content idea. And then we can also add
an icon for it. So there. Alright. So when you open your page inside your
content calendar, you can either start
with an empty page or select from the
templates we have here. So let's try to click this one. There you go, and then add
your content idea notes here, your video script, design
brief, and draft caption. So every time you're adding a new item inside your
content calendar, just click the Plus button and then choose
new content idea. So you have a template ready
for your content planning.
7. How to Create Database Views: Now we will create different
database views for your content calendar to support you further with your
content planning process. Right now, we have the calendar
view of your database. Have your mouse right here
and click the add a new view, and you have
different options to choose from such as board view, gallery, list, chart, dashboard, a timeline, and more. So let's try to choose
the board view. So board view is like a Kanban
board of your database. So on the right, you will see
here the different options. You can select how you want
to group your board view. The default is they
are being grouped by status from content idea
up to published post. But when you click this, you can choose how you would
want to group your database. So if you want to group your database by content
type, you can do so. There. Next, you can also group your database by
platform if you like. So you can see that you have five items that
are for Facebook, for Instagram, Pinterest,
and then so on. You can actually hide some items if you
would prefer that. So you can just simply hide
by clicking this button. Or hide by clicking this. So let's try to group
this by status. There. You can see that two
items are for content idea. So items are for video
shoot, for edit media. So you can rename
this board view if you want to group
this by status. So let's try to add
a new board view, and let's say I want to sort
this by platform there. And then rename
this by platform. So that when I'm content
Planning and I wanted to see the items that are for
content production, I can just click this
B Status board view and then check out
the items that are currently for
content production. Next, I want to
add another view. Let's try the list view. So this is what the
list view looks like. So basically, from the items
from your content calendar, it just arranges it by list. So these are the pages inside
your content calendar view. Right here on your
right, you have options. Now, if you want to view
your content like a gallery, you can choose the
gallery database view. It shows up like this. And for the card preview, you can either choose to show the page cover or
the page content. So let's try to add a page cover for each one so that you would know how it
would look like. I go to layout, and then for under
the card preview, I choose the page cover. So this is a gallery view
of your content calendar. Now, if you want to
see a timeline view of your content calendar, just choose this timeline. View of your database. For example, you'll be having an upcoming giveaway that
would run for a few days. A timeline view is perfect
for this type of activity. I have here a giveaway
that runs for a few days. So just click an item. For example, we have
here an flash sale. So it will start on May 22, and it will run until June. So let's add an end date. So first click the date, add an end date, and then
choose the end date. Let's say, June 30. So you can also include
the time if you want, and also a reminder if you need a reminder on
the day of the event, Notion will send you
a notification on your email or on your phone
that you have set a reminder. Let's check out your
timeline view there. So your flash sale is there. All right. So if you
need to clear this out, just click the date
and then select clear.
8. How to Make your Notion Page Inspiring: So I just want to quickly
show you my content corner. This is what I call
my content corner for my course creator life. And as you can see, I have here a banner. So here, this is my
content calendar. And on the side, I have here
some motivational code. My inspo board is right there. So today, I wanted
to teach you on how to make your Notion space more inspiring for
content creation. So first, we can start
with adding a cover image. Just click the button here, when you hover at
the top, add cover, and then Notion gives you a
default random Notion banner, which you can change. So Notion has a lot of options
that you can choose from. I think this looks nice. There. Or you also have
an option to upload your own file so
that you can have a custom Notion banner
just like mine. So I edited this in Canva. Next is you can add an
icon on your Notion page. So you can choose an icon here or you can even upload
or paste a link. Have a good example here, which is GAF I found on a
website Giffi or jiffy.com. Just type in your
search bar. Let's see. I wanted to search for
Gib and then choose stickers and then choose from which stickers
you wanted to add. I think this is This looks nice. So click Copy Link. And then go back to Noon. Then click the icon and
then choose upload, paste, the image link,
and then wait for it to load. It
looks nice, right? Next, I want to see my content calendar first rather than the
content idea bank. So I'm just clicking and then dragging this
up here. There. Now, just like my
space right here, I wanted some ISPO
board on my right. So let's try to do that. Let's add two columns
on your keyboard, press slash, and then
look for two columns. So now you have two
columns one and then two. Drag your content calendar up here and then just
change the width there. Now, I wanted to add another
GIF on my content corner. Let's go back to this jiffy.com and then to
complete the aesthetic, let's search for Gib again and choose a GIF that you want. I think this looks
nice. Copy link. And then go back
to Notion and just paste it by clicking
Control or Command V, and then choose Embed Image. It looks nice, right? So I
want it to be a bit bigger. Then I wanted to add another
one, which is this one. So again, click the Copy Link. Then let's go back to
Notion, press slash, and then choose Embed, and then paste the link here, and then click Embed Link. And it shows up in
your Notion page. So there you can actually customize based on your
creativity how you would want to make your space more inviting and inspiring
for content creation. I hope you enjoyed these
demos and learned a lot about Notion and its capabilities to support you with
your content planning.
9. Final Thoughts: And that's a rap. You made it through
the entire class, and I'm so proud of you
for taking the time to build your own content
planning system using notion. When you started this class, maybe notion felt
overwhelming or confusing. Maybe you tried templates
before and given up. But now you've built your
own custom content calendar, one that actually makes
sense for how you work. The beauty of what
you just created is that it's not static. As your content process evolves, your notion setup
can evolve with it. You can add new properties, create new views, or just
simplify things as you go. It's yours to shape however If you haven't completed
your class project yet, I really encourage you to do it. Build that content calendar, test it out with real content. Then upload a screenshot to
the class project gallery. I personally review
every submission, and I'd love to see what your set up and give you feedback. Now, before you go, here are some ways to keep
the momentum going. First, actually, use it. The best system in the world does it work if
you don't use it. Start planning your next week or next month of content in
your new notion calendar. The more you use it, the
more natural it becomes. Next, keep it simple. Resist the urge to
overcomplicate your setup. If you find yourself
adding features you never use, strip them away. Simple and functional always beats complex and impressive. Finally, practice
planning content with it. Give yourself permission
to adjust your setup. You learn what works
and what doesn't first version doesn't have to
be your final system. If this class help you feel more confident using Notion
for content planning, I would be so grateful if
you'd leave a class review. It helps other students
find this class, and it lets me know what
resonated with you. And don't forget to hit
that follow button. If you enjoyed this class, check out my other classes, Notion four beginners, if you want to dive
deeper into notions, features and capabilities, plus more classes on
digital marketing, Productivity and creative
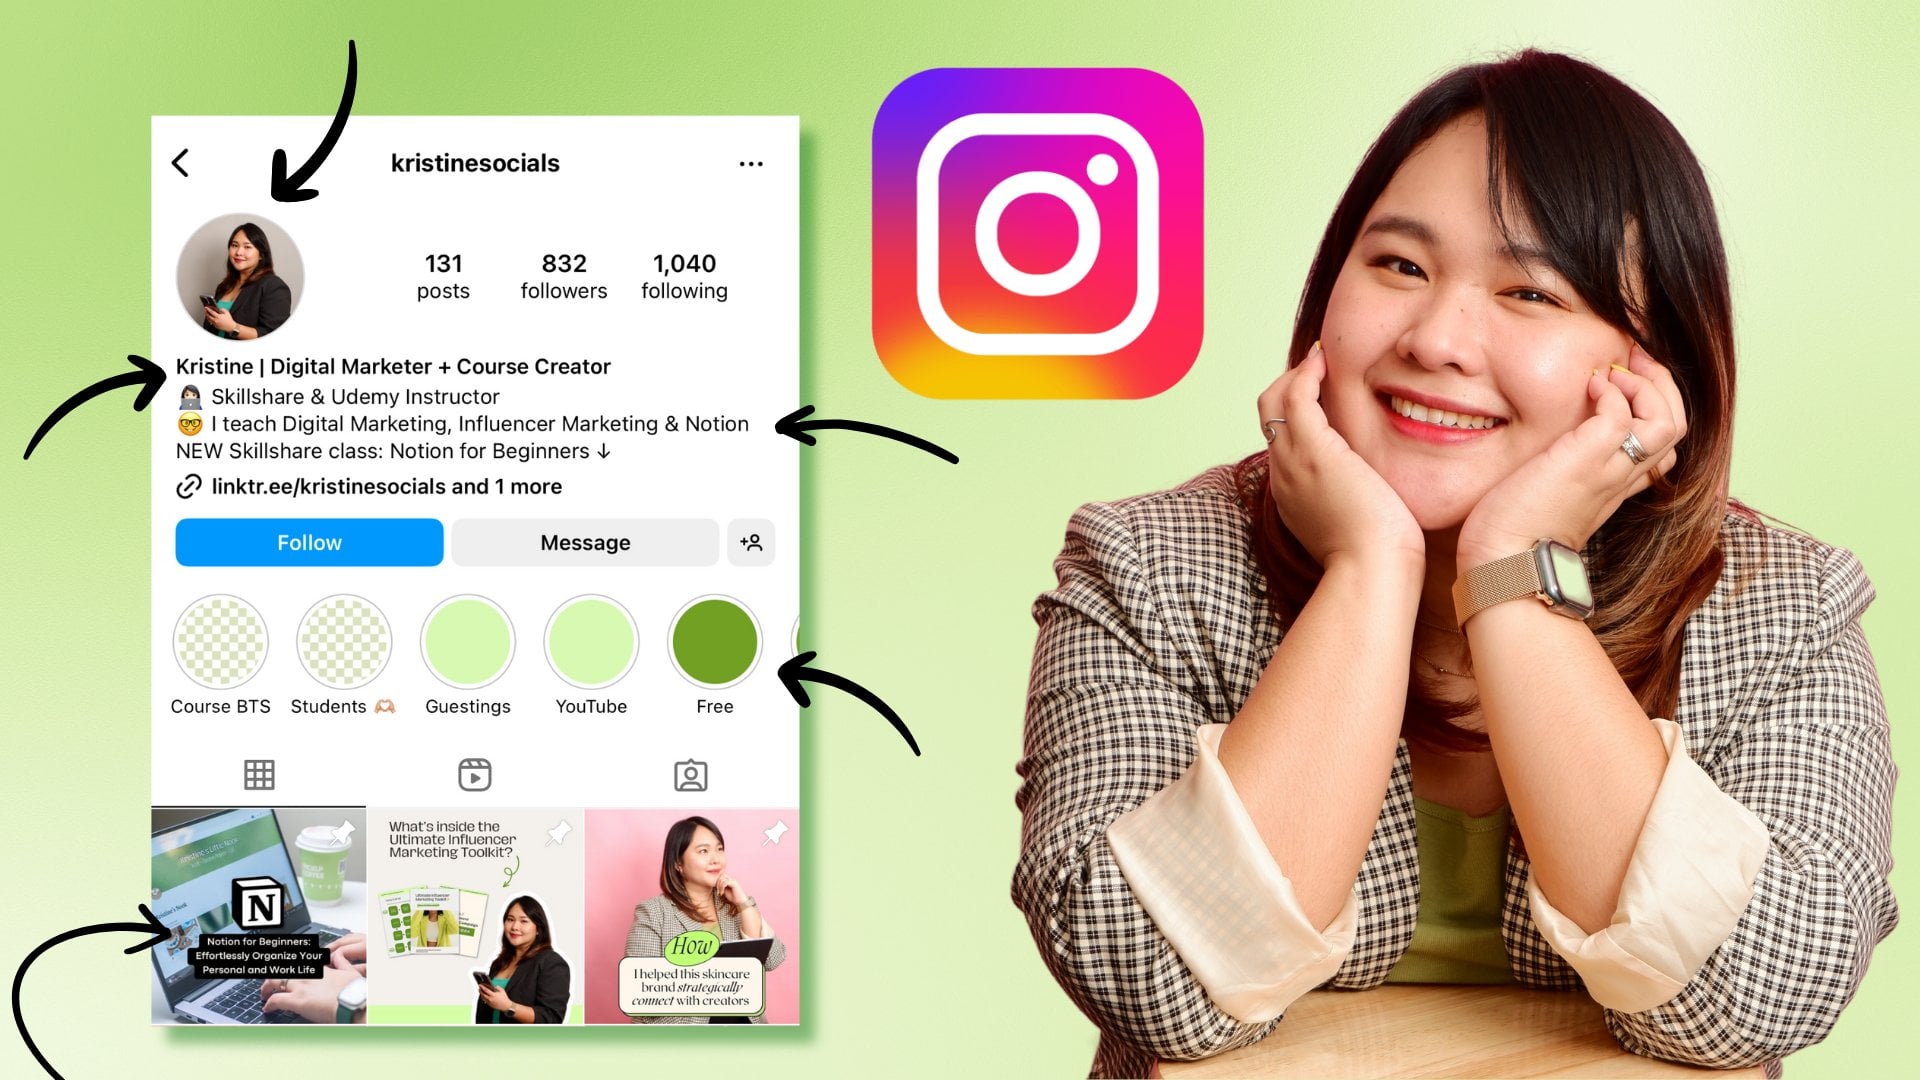
content creation. If you want to stay connected, you can find me on Instagram at Christine Social's
in At Skillshare. Alright, you've
built the system. Now go use it to plan, create, and show up
consistently for your audience. Your content planning
just got a whole lot easier with Noon
until next time,
 Kristine Sacdalan, Digital Marketer & Course Creator