Transcripts
1. Intro (Updated): Euro graphic is a process
created by Russian psychologist Dr. Paabo
*** grew in 2014, is very popular in the Russian and German
speaking countries. And its effects of
which have been well-researched
in sit countries. It is also an art
form that does not require any kind
of drawing skills. Basically, if you can pick up a marker or a pencil to draw lines in a
controlled manner. You can meet new graphic
art or neural art. The process of making
your art can have therapeutic effects and is excellent as a
form of self-care. To give yourself a
few hours to exercise some self-love as you
engage with the process. Neural graphical works
through your subconscious to help you achieve
what you have manifested in your artwork. In this course, I will
teach you the basics of neural graphic arts so that you can create your
own masterpieces. You will learn how to
draw new graphic lines. What do simple geometric shapes
means in your graphical? How to round and integrate
shapes, a few drawings, and also how to apply colors
to your line drawings, the neural graphic Guowei. Hello. My name is Charles lie. I am a certified new
graphic or specialists. I'm also a qualified
counselor where I live. I hold a Master's in guidance and counseling
and I'm trained in career counseling and
art therapy techniques. Additionally, I also
have a bachelor's in psychology in a degree in math. On the side, I'm a certified advanced
practitioner of longitude cytology and
the closet artists.
2. Tips on Choosing Art materials for Neurographic Art: Hello. So for this segment of the lesson, I just wanted to go through the materials that will be required for this lesson. You will need a few different sizes of coins. Some medium point markers do not use fine liners are fine point markers. For this lesson. You may feel a little overwhelming later on when you're actually doing your assignments of Project. If you're using a fine point marker or fine liner, you can use any color medium point markers that you want. Here, I have the zebra oil-based marker, even though it's listed as being fine point, the NAEP is not actually that fine. I find them to be about the right size. The right size tip marker should make lines around 0.7 to one m m. Alternatively, you may opt to use a art marker because they have more, some art markers have two tips for the ISS markers, there's a broad tip and then there's a bullet tip. So these, these tip will be good for drawing as well. So you can opt to use a art marker instead, but make sure that the marker that you're using the right size tip, otherwise, if it's too thick, you're drawing can look, we're next. He will also need some colored pencils for coloring is best to get a set. I'm only showing four here because I will be showing you why you need color pencils of a certain quality in a minute after I'm done talking about all the required materials. And instead of using colored pencils for coloring, you may also use up to use highlighters like these, but make sure you have a set of different colors. So you won't be looking at the same colors all the time. But color pencils will allow you significantly more control over what you can do when you are coloring. In addition to that, highlighters and art markers are not as light fast as colored pencils will be. Even colored pencils have different grades of light fastness pending on what kinds you are using. So enough about coloring materials for now, we move on to markers and Penn papers. So regardless of whether you will be using markers for coloring or not, you will need at least a few colored markers for drawing your few lines and your graphical fixation. We will not touch on what they are right now. We will be talking more about them in another later segment of this lesson. For now, just know that you will need some other colored markers for that. And you will not need a whole lot of different markers, but those two purposes, just a few different colors. Like maybe a collection of like six colors or eight colors should suffice all different contrasting colors. Even silver and gold is also good. Having a good choice of different colours would let you be a little bit more creative when you're working on your neuro graphic artworks. Last but not least, you need some thick. Drawing paper like these. Now, so your paper size should be at least before size. Yeah, if you're living in the country where you go by the international standard for Paper Size. A4 is the size that the smallest size that you should go go for. If you knew as the letter size or before, that's probably the smallest that you should go for. Your paper thickness should be around 200 GSM or more. You can get away with slightly less like a 180 or a 165. My experience has been that if it's if it's a 200 GSM or heavier paper, thicker the paper, they have less tendency of bleed through. Markers tend to bleed through in thinner paper. So Countries paper, it's really bad. Don't use cartridge paper for drawing with markers unless you really, really have to. And if you do have to make sure you have some backup cartridge paper behind as backing so it will catch the bleed through. So even with thick drawing paper like this, it's still good practice to have at least one sheet of cartridge paper behind to catch any bleed through if there are any. So but a money saving note here is don't use thick expensive paper for your practice of neuro lines unless you really can't find anything or inhibit or if it's something that you want to throw away already. This use cheap cartridge paper to practise drawing neuro lines and circles and shapes if you have too. So now let's go back to colored pencils quality. Okay? So I'm going to move these out of the way. Now with colored pencils, the brands that I've experienced with, if you're on a tight budget are Artesia Muji, favor Castile classics, hexagonal one, not the triangular ones. And macro renewal after four, Muji is probably the cheapest. The only downside with Muji, as you can see here, is that they're not painted. Pencil barrels are not painted. To choose the color, you have to look at the tips. Alright, so color selection may take a little more time. And on top of that, they come in a barrel like this. So it's a little hard to select the colors unless you pour all them out. And when they get too short. You can, you can see where I'm going with this. So, but the price that you pay for these color pencils, that pretty decent quality I'll show you later. You'll get to see. The demo. I'm, I'm the demo I'll be showing you with the color pencils. I won't be using the expensive drawing paper. So I'm going to put this aside. No, use this cheap cartridge paper and you can see how thin it is because at the back is the bleed through from some of my practice. So I'm just using that as a backing. So now, a decent quality colored pencil should allow you to layer, blend pretty decently. Obviously, the more expensive the colored pencils, the better, but not really the case all the time. One of the examples I gave you is Duran colors saf. They are not really good at layering and blending for the price that you're paying for them. Muji colored pencil actually does a better job at layering and blending. Then during colors are granted touring color salves, pigment load is much higher than the these colored pencils that I'm showing you right now. So I'm going to show you what I mean by I'm blending and layering. So it blending, what happens is, let's say if you have three colors, I'm going to lay down three different colors. So red, orange, yellow. Just so you know, well, I chose them on purpose because they're quite close. So when you blend, you color some of the color over. And you can tell right away that it's like the orange is fading to yellow. And then for the red part, I do the same. And that's what I mean by blending. So they layer very well too. So let's say grit. And so we all known that if you add red and blue together, you should get purple, right? So I have blue here and red here. So I'm going to layer, I'm going to go see what you mean. So you see how red and blue mix purple here. Okay. So that's what I mean may leery. Because if you want effects, sometimes let's say I have two new lines crisscross after round them. Doing this really quick. I know you all don't know how to do this yet because this is a basic lesson after all. So you learn all these later. So let's say I don't want to color the whole thing. So I just wanted to color a very light lightly and see even with one single color. I'm getting, I came to shading here. Now. Then that when I make this stand out a bit more, I'll just put a little blue here. Now remember this is cut paper. So you can't really layer a lot and catch paper because it's smooth paper. So you tend to at some point the papers and say no, I can't take any more color in that number's probably around two to three layers. Like right now, I'm already feeling like I have to fight it to get any color and the paper's sake, I The Press. Kind of hard right now. K. So but I'm just showing you what's achievable with a set of these colored pencils. Now, there is also the reason why you don't want to buy children colored pencils for children. And you know, those cheap, cheap colored pencils like a few dollars you can get. They don't layer or blend at all. It's one layer and that's it. You put that color down, you are locked in. So you see how well these color pencils perform. So this is what I'm talking about, that you actually have more control over what you can do with colored pencils. Now you can achieve a similar result with pastel and pastel pencils. Pastel pencils are just like pencil, like these, but you can blend with your finger. You can't do this with colored pencils. So the reason why I'm going through all these, I know maybe some of you are more experience coloring. And you're like, well, I know about this, well, this is a basic class. So I'm gonna go through this, give you a little bit of tips in knowledge that I can share. And then I'm not going to talk about it anymore in more advanced classes, which I have plan. So this is the end of this segment.
3. The Neurographic Line (Neuroline): Hello, in this segment, I'm going to teach you how to draw a real Euro graphic line, or it's called a neuro line. Okay, so I'm going to use a art markers show you because the lines a bit thicker and it will show up better on camera. As opposed to using these markers. I will save these markers for the art session labor. Alright, I'm not, I'm not going to use the coins because I have to show you two different methods. So in this method, what I'm going to show you is just using a marker and drawing a neuro line. Your graphic is about changing mindsets. So when you're drawing the line, you need to focus on where your brain is telling your hand to go. So by focusing on this, you slip into the meditative state very, very quickly. Now within, I would say within five minutes of drawing neural graphic lines this way or newer lines. Very quickly you find the brain quiets down and you slip into a meditative state. You have to experience this for yourself. So and you need to draw the mind slowly. In some instances I have mine be drawing the lines a bit quickly. That's because I'm been I've been drawing neural lines for like a year or two now, so I'm quiet experience a new drawing, neuro graphic lines. But you have to do this slowly. And the slower you do it, the better your neuro graphic lines would come out. So neuro graphic lines usually go from one end of the paper to the other or from a shape to another. So I will show you the shape part later when we get to join shapes. Ok. So first, you start by drawing a new line, by just start on the piece of paper and start drawing very slowly. Paying close attention to where your brain is telling you mind goal, innumerable line is a line is unpredictable. Okay? And you see I'm drawing these very slowly array and paying very close attention to where my brain is telling my hand to go. Okay, and I'm doing the opposite view this happens. You just join it up like that. Okay. Now, it can be said that, let's say if you were this was a pathway in a park and if you were to stand anywhere on this pathway, you will not be able to predict where you will go next. So let's start another line and slowly. Ok. Pay close attention to where your brain is telling your hand too though. And just do another way. So if my brain is telling my hand to go up, I can go left, down, right. Okay. So that's what I'm doing. Now. You see this part. I was going quite quickly because I'm used to it. So I had to actually exert some effort to slow down. Alright. So it's okay if your lines crisscross. I will show you later that we need to do something what we call rounding. I will show you how to do that later. Okay? Now, right now, so now you just focus on drawing lines. So a little trick that I learned about drawing newer lines is lift your wrist off the paper. So I'm gonna try this and show you at the same time we're drawing on ICT. Lift the risk after paper. Usually when you draw you do this. So instead of doing this, you lift your risk off the paper. So you hold hand is actually after paper not touching and then you draw a lines. So what this does is it causes your line to be unstable. Your line is not smooth and stray. It's curvy and there are no sharp kings in the lines. So when you have sharp kings like this, I will show you like k here and I just go down like that. Or here and I go up like that. There you see the sharp Kings. It's when when you have cases like this. When you have cases like this, let me get another color. Whoops. So when you have cases like this here, this here, this here, this is not so much. This is a bit sharper. These, these three are sharper. Ok, the rest is okay. Now is three areas. They happen because you have a sudden teamed decision. Like you are going this way and you may say no, you have to come down and you just pull it down. And here's the same thing. It's two-story. I gotta go up or something. And then suddenly you just decide, you jerk it back. And that's what happens. So if you draw a new rule lines fas K, I'm going to pretend that I'm going to draw this newer line very fast. I do that pretty fast. So you see what happens is the newer lines become very smooth. Okay, we don't want that. So this is still a new role line. It's a good, decent neural line, but it's a little too smooth. So u one a little bit more, you know, jerky. Like Something's vibrating and that kind of a feeling. And the reason I'm saying that it's because a neuro line represents a direction and it also represents energy, and it also represents a thought. Okay? So that's why earlier, just now I said, when you have sharp kings like that is because you have a change in thought. I'll show you again an example of what it means. A neural graphic. We have this thing called K. I'm drawing a circle here and we'll going ahead of myself because I need to show you something. You have to circles. We have something what we call empowering. The shape. Say this could be a resource. So you draw new rule lines on this circle. Right? Now. If you compare this to circle, which one seems like it would have some movement to it? The answer is very obvious, isn't it? So it's the same thing. If you have, I'm going to attempt to draw two similar neural lights, which is quite hard. Chewy. Okay? Okay. This is a pretty good example. I will tell you why they're okay. There are two things wrong with this dual line. One, it's two spoke to this a repeated pattern here. Ok? So when you have repeated pattern here means you are sinking back into your own thinking pattern. So this is a repeated pattern, is considered a repeating pattern. But let's ignore the fact that this repeating pattern for now, I'm going to attempt to draw another line that's similar, but with a bit more jerky. See the difference? Now you seem mean. Lift off the page here, but because I am actually lifting my risks from this camera angle, angle, you can't really see it. K. So now, now we go back to the fact that there is a repeating pattern here. So this happens when you're thinking back to your old thinking pattern. That's why you have this. And sometimes when you draw new lines, even having these two lines like that, it is considered a repeating pattern. There are cases where you would want this light double over, triple over, you know, like when you have, let's say if I was to really draw something here, and I did this, okay? Now I want to double and triple over a line. So say I wanted to double over this line. So I draw pretty close. Let's double or triple over. Same thing. It's similar but they're not the same lines. Okay. Now, see what I mean when you use thick lines attempts to be overwhelming a little bit. Now let me switch let me switch to a final one. This is about a half the thickness of this line here. So this, so now I'm going to double over certain lines over sum them. So this doubling over k. So I'm going to trip over this line. So you see that, you know, actually trying to trace the line, but kind of get it close. Okay. Tripling over now like that. And of course, if you do your surroundings and you see how beautiful that is. Now, later on when you're doing your neuro artwork, you can mix between fine lines and thick lines. So I've mentioned this before. That's why I said, yeah, you could use this because there's a point here and you can use, like in this case, if I were to do this chaos out show, I'll show you this again later. Okay, there are uses for this, this brought tip. There are uses for it. Okay. So now you see this and you see this. Ok, how do you fix this? You can, you just did a mixture that the third line you draw doesn't look like this one. Okay? So if you are into doing, trying to do your thinking pattern changing or, you know, mindset changing. You will have to watch out for this. So U1, Ru neural lines to look different. Now very quickly I also want to give you some examples of what new row line should be. Okay? So you know what an actual neural line should look like. Now, I'm gonna show you how new row line should not look like. Your new relying should not look like this. Okay? Now I'm going to use this. Now. Your new line should not look like this either. Okay? No. General rule of thumb. If you were to stand at any spot on one of these newer lines, you should not be able to predict where you're going to go next. Ok, in this case, you know that, oh, well, it's going to be like that. And this is going to be like that. And it also shouldn't be like this. K. No. Even like this. It still newer line. But can you see the repeating pattern there? So no. What's, what it should look like? That? Or it can, it can do this. You can do this. Okay, it's yet another piece of paper. That's my last piece of paper in the stack. So buried all the little dots from the bleed over. Take. Your newer line can look like this. Hey, could run through the whole page. That's a new line. Alright. In the next segment, I will show you something different.
4. What are the coins for?: So in this segment, I'm going to show you how to use these coins that I've mentioned during the material segment to draw newer lines. Alright? So the previous way of drawing numeral lines, it's really good for changing a set thinking pattern. This one would get you into a meditative state the same way that the other numeral lines do. But in a different way. You do it. You only get there when you are starting with this k. So when you're first learning how to draw neuro lines with this method, you do get into a meditative state. When after you get used to pushing the coin around, around with your marker, you start feeling that it gets easier and easier. And you just drawing the lines without thinking about it, without focusing on pushing the coin around. And you may not get into a meditative state as easily anymore. All right, but anyways, I'm going to show you how to do this as a way to learn how to draw newer lines. So we begin by placing the coin on a piece of paper and then using this marker. Push the coin around k. Again, lifting the, your hand off the page. And you just push the coin around like that. Okay, that's the heaviest coin I have here. So we're going to go with something lighter. I find, I find that the lightest coin actually gives you the best results. K, because the lighter Klein's tends to jiggle around more than the heavy coins. But you still get the same effect. Okay? Now, I'll just jump ahead to the smaller, the smallest one, the $0.05 coin, which is the lightest. And you see what I mean? See what I mean. The lightest coin tends to jiggle around more and it's harder to control weight once they go. Now, next, level up. You can try this. I discovered this in one of my experiment. Use two coins. Now the problem with doing using two coins is you may get some Draghi's, okay? Like sharp turns. See, that's one sharp turn already. Okay. So this is challenge or you can flip it around and do this. So the heavier one behind me, it's more stable.
5. Roundings: So in this segment, I'm going to show you how to do groundings. Why do you need to do rounding? Because it's smooth things out and it makes you feel better when you look at the drawing. And as I've mentioned before, or I mean, probably one of the reasons why you are here is because Euro graphically can help to come one down, has therapeutic benefits. So when you have sharp, pointy objects in your drawing, it doesn't feel so nice. Ok. So example I'll show you, let me show you rounding first and then I'll show you what I mean by that. Okay? Rounding. How do you do rounding? So I have two lines. I'm drawing the new rule lines pretty quickly here, so don't follow me. Hey, you need to draw your neural lines slowly. Now. I have a few crossings here. So what do you do with rounding is you draw a semicircle pointing towards the corner and then you round like that. Like that. Okay, so let me draw some more corners so I can show you in a bigger way, rounding, okay? Alright. So I'm gonna draw something bigger so you can see clear like that. And then colors. Okay? I'm doing this bigger intentionally to show you what rounding is k, like that, like that. Okay? So basically we have two things like that into grounding. Alright, so let me show you the reason why you need rounding. Ok. Now, if you have a show like this, alright. So now take note or how you feel when you look at this. Both are therapy and neuro graph. In our therapy is a method of cooling down strong emotions on paper. And you draw a really strong motions. You figure usually turns out like this. Okay? You figure what turn out like this because you've struggled oceans. So strong points in figures usually represent having strong emotions as opposed to if you have a figure like this. Okay? You see the difference. This figure resist this figure. This will probably feel more comfortable to you than this one. So now let me apply the neuro graphical method here. And then you will see how it feels k. So I will connect this to the edges of the paper. In your graphically, you should never have hanging. So like this object here in space, you would have to connect them to the edges of the paper like this. Alright? So I'm just showing you this is an example. Okay? Now around this and around the connections, any, any sharp corners. And then this internal sharp corners, you have to do something to. So what I can do is this, something like this. And then smooth all the intersections out with rounding. So with our Crocker is a two sided sort, so to say. Because on the one hand, they really think and it doesn't feel so overwhelming when you're starting off. But on the other hand, they tend to spread a lot because the alcohol-based aim to spread a lot. So now you see the effect of after I've applied to neuro graph to this object. So obviously after round this to is well, there isn't a few better than before. Okay? All right, so with that, I end this segment here.
6. Shapes and its meanings.: Here I'm showing you how to draw a circle, newer graphic. Now, it doesn't have to be perfect. As long as it looks like a circle, you could go. And it's totally okay. You make your circle thicker lines because it's easier to draw smaller circles than bigger one. The bigger you go, the harder it is to draw. And you don't have the joy it the way I do, you can do it like sketching, but as long as you have that circle, it's fine. Alright, so what I wanna do first is draw the circle. Teach you how the correct way is to draw a circle with the freehand. So what you do, maybe you want to warm up your hand by doing this circular motion before you actually draw the circle. And then you can keep doing this until it looks more or less like a circle. It's not perfect because it's so close. Pdb, we'd have a smallest c. So even smaller. It's how easy it is. And with a circle, you don't have to really do any rounding here. Okay? You just kinda have to draw connections to them, like like this. Now, with this a little bit tricky. Again, you have to do free-hand square to cave. It looks like a trapezoid. Again, you do the same thing you will do in the circle. You just keep doing it until it looks more or less like a square. A and it's okay if you're square, has thick lights. So it's tricky because you need to round edges. Remember no sharp edges in your graph. Into your pH like this. Again, you need to run all your connections or your pen or sections. So here I'm going to teach you how to do a triangle in integrated into the paper as well. So you have a triangle. Now. You have to round your corners. Always, always remember to run new coordinates. And then you integrate it to the people who make this square, except you only have three corners and do it with k. And then you do your rounding and your connections. Alright? So when you're drawing triangles, you need to be very careful with it because triangles are unstable shapes. So if you have a triangle like that, now, this is pointing up. So depending on what u1 this triangle to do, kay? Can, it represents action. Ok? So in this course we're not covering what you can do with a triangle in later courses. Yes, you probably will have to. So just be aware that viewpoint, the triangle like that. It's increasing something K. And if you did this, you are decreasing something, or even like that. Think of it as an arrow, whichever way you draw it. Okay. Now I can be to your advantage depending on how you use this by couldn't be to your disadvantage. Okay? To give you an example, let's say I have a circle that represents my, let's say my bank account or my finances. Now, of course everybody wants more money. So you add a triangle like that. You want to increase. Wherever you have. This is money. Okay? So by doing that, you're saying, I want the money to go to become more. But if you did this, you have a hole in your pocket, figuratively speaking. But let's say you drew a circle and says this represents your anger. You can then two, this means hw1, your anchor to less than, less than. Not less than. Alright, so that's just a very quick tip. So now I'm gonna show you one more thing about neural graphics drawing. Now, I'm not mentioned yet that neuro graphics are your graphics, are you or are you not? Restrict it to this one sheet of paper? Ok, so example, I'm gonna put down a few lines on this piece of paper to show you what I mean. K. So these neural lines actually do not end here the edges of the paper. You can tag another piece of paper on, on here and actually continue the newer line all the way to the other edge of the paper. Same thing with all these edges here. So now with that in mind, I know usually people don't like to do them, but you can, okay, especially when there are algorithms out there that actually encourages you to do that example, the Euro tree algorithms. Okay, so now how do I draw objects off the page? So let me first very quickly draw some regular objects in the paper. I'm not going to round them. Okay? Because grounding takes up a lot of time. So I'll just show you what I mean very quickly. So let's say this CH2 there, so that's why I have to join it. Alright, let's say you want a bigger circle here that this page doesn't cover. So what I, what I do is just show you this so that, that is a part of a beaker circle. So if I tags like another three pieces of paper here, I will be able to draw a beaker circle like here. So it's outside of this piece of paper, but it certainly doesn't stop there. Same thing with the square. Okay, let's say if I want to draw a square here, I don't want to try it there because D and C, a and a triangle, usually you don't draw that triangle that big because the triangle represents actions and change. And upward. Increasing or decreasing momentum. Usually you do not draw it, but if you have to, in whatever circumstances, that's the same way. Okay.
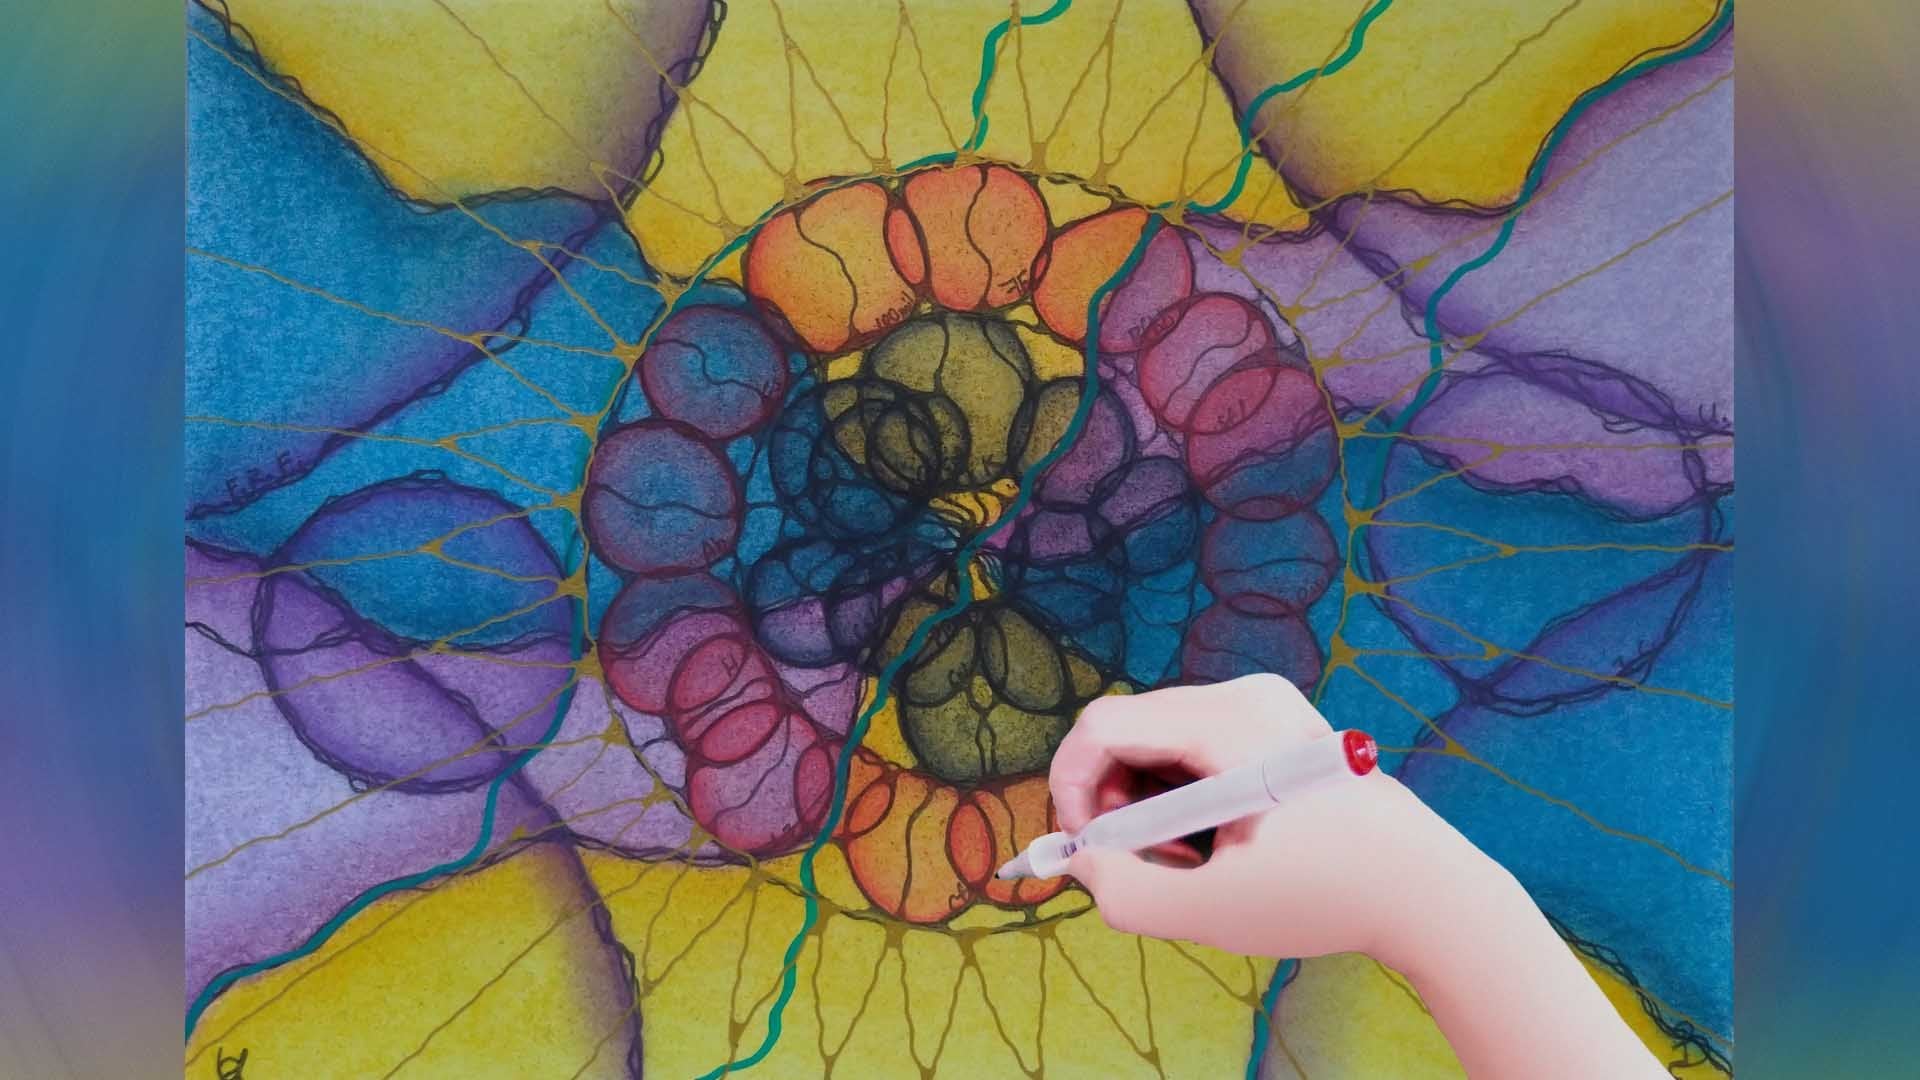
7. Putting down all that was learnt.: So in this segment, we're going to put everything together that we have learned to draw a new graphic art piece. So before we start, I would like to add, is in your best interest to play some soothing music in the background. So as you're drawing so that it would be a more enjoyable experience for you. Actually, this advice or recommendation comes with doing, doing any neural graphic algorithm or artwork. They issued clay, some soothing music in the background as you work on your art piece, it would be of great benefit to you. So without further ado, we'll start. So because we're doing the artwork, I am now using this blackout liner, which is the final version of this marker. So you've seen how thick this marker is. So I won't be using this marker anymore. I'll be using this black one. So we start off first by drawing neuro graphic lines. As angle on. You would do this that I'll be talking less and less because I will be slipping into a meditative state every so often. So you won't hear we talk much. And thus it gives me an opportunity to quicken up this video. So you have to watch me. So you won't have to watch me do everything in slow motion because it takes a long time to do all the round things. So you can draw graphic lines anywhere you want in any way that you see fit. Okay? What? Okay. All right, I think this would do it. So now I'm gonna do the rounding. I'll probably quick interactive video here for doing the surroundings. So you have to sit through probably close to an hour's clip on doing other rounding differences or large edges, two realm or love intersections to run. Alright? So I'm done with all the surroundings. And x is just a scan to whole picture to see if I missed any corners that I haven't rounded. And then after that is look at the picture as a whole and figure out where in this picture do I really feel uncomfortable about. And then I'm gonna draw a circle in that area. So just take a moment to look where. And I'm sensing that this area probably needs a circle. So I'm just gonna draw a circle in this area. C, you just draw a free encircle going round and round. It doesn't have to be perfect. As long as it looks like a circle to you. That will be okay. Alright, now I look and I'm feeling like this area requires a smaller circle. And this darkening the lines and that circle to make it look thicker. And then of course you have to do your groundings, but I'm going to do that off camera. So you will have to sit through watching me round the intersections again. So I wanna put another circle here. So basically wherever you feel uncomfortable, which area you feel uncomfortable about, you just put a circle and debt area. Make your whole picture look more comfortable to you. As simple as that.
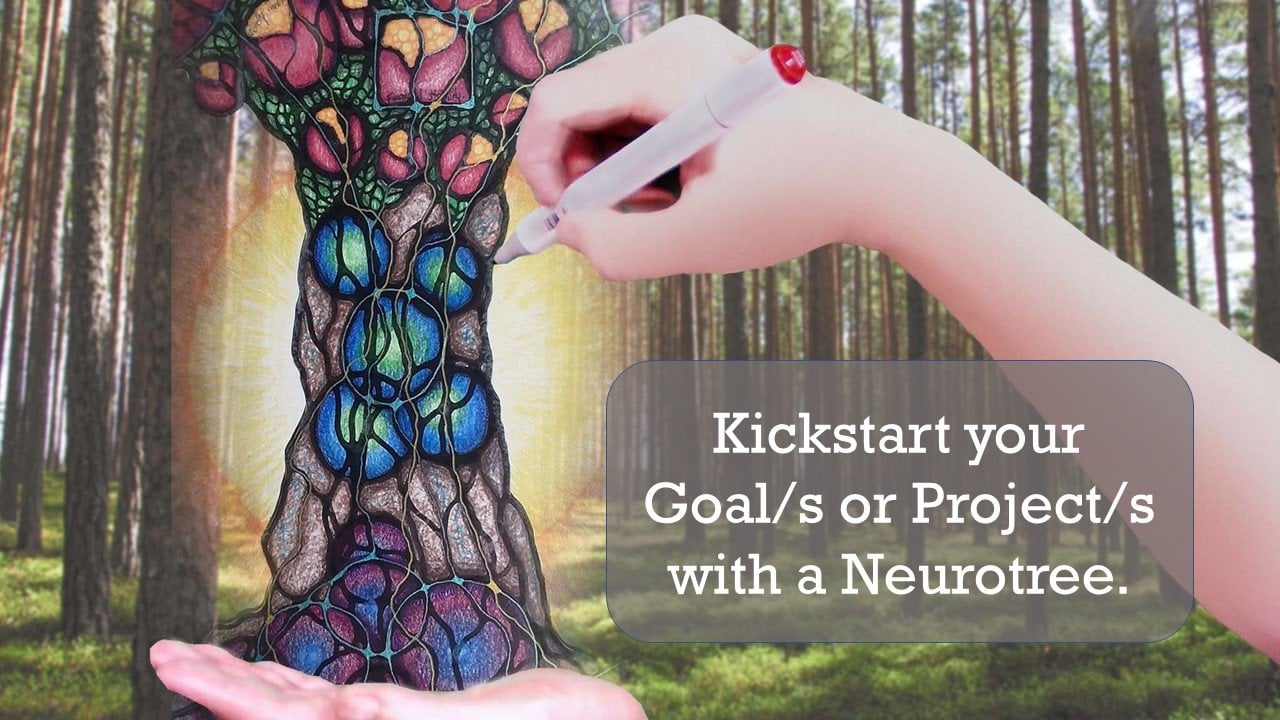
8. Rules of Colouring (Audio Fixed): So in this segment we're going to do colouring for your neural graphic art piece. And what you need to do is find four colors, okay, preferably contrasting colors. Now there are different ways of coloring, which we will touch on a little bit later. For now, just remember that the big rule of thumb for newer graphic is to not color your artwork like mosaic, euro graphic. It's about integration. So if you color your art group like Mozi is in like different colors for each sheep that you can find here, your graph gets an abstract drawing. But you have to emphasize on integration and how do you do that? So what you do is you color in groups of three or more. Okay? So this rule of neuro graphical do not come there your artwork like a mosaic. Second rule, Connor, in groups of three or more. Okay. So what I mean by three groups of three or more? 123, make them one color. Okay? You can have more. You can have maybe this whole patch here, one color, just as an example. Okay? So that's one way of coloring. The other way of coloring is flow. Fine. A group of shapes like for example, this flow here. Okay? Now you can color this whole stretch, one color. So I'll show you later, okay, or this whole piece here, one color. And fact. If you want to color this whole piece faster, the bigger number of groups that, of shapes that you have, the faster you're going to color it. Okay? Or you can color the shapes here. The squares, the circle and the triangle, all one color and the outside. You can do groups of three different color, okay, anyways, I'm getting, thinking I probably am confusing some of you. So let's recap. Colors in groups of three or more, or color in flow. Okay? That's, that's, that's the most important thing to remember. Second thing to remember, if you have a group, if you have a grouping of one color, let's say I color this section here, red. I must have another section of color somewhere else on the drawing. Okay? So if I color these four red, I'm, there must be another grouping where I have to color them red, say maybe here. Okay? So those are the two rules. So you have four colors here. So you must have at least two groupings of the same color in your entire drawing, at least two. You can have more, just like your groupings of color, like groups of three or more with one color. And you must have two groupings of the same color, at least two groupings of the same color on your artwork. All right, so in this demonstration, I am probably going to color one with a flow so you can see how it looks like. And one with groupings of three or more. All right? And then we'll see how that goes. This flow. Now, you can apply your artistic talents in coloring in any way you want. Here. The emitted by the restrictions that I have. This owl. He remembered this is your artwork. Make it as pretty as you can. So now, my experience with Euro graphical pretty Outlook takes a long time, can take anywhere between three hours to nine hours to make. So I have neuro trees that I've done that takes me about nine hours to color. That's an A4 size newer tree. So in the interests of time, I probably wouldn't want to record a nine hour video and quickening up for you all. So I'm probably not going to make it that nice or spend that much time doing it. So I'm just going to make color something to show you how it's done. And then off camera. You can make it as nice as you want on your own, for your own project or your assignments. So I'm just going to show you what I mean by all the restrictions that I've laid out earlier, those neuro graphic card rules, not my restrictions. I didn't make those restrictions on the fly. They are the rules. So, okay, you see this flow here. That's what I mean by coloring of flow. So now to balance that off, I have to find another flow somewhere on this page. Color with the same color. Okay, I think to this part here. Now you see that I am colony fairly lightly at the moment because I'm hoping to be able to go over it again and do some shading to make it look more three-dimensional instead of flat color in. So now let me, let me just say one thing, exceptions to the rule. If you have cases like this, say you have only two shapes here. That's okay. There's nothing you can do about it. So just go ahead and color those two ships in watercolors that you already have on your paper. All right. So in this case, I did leave for but you don't have to take that into consideration when you're coloring, is just that sometimes you don't think about it and then you just color. It turns out that, Oh, you have one shape left in. You know, you have like one shape. And you don't know what to do say, oh, well the rule says I need to have groupings of at least three, but I only have one left. Then you just covered that one in that color that you have already, one of the colors that you have already chosen. So I hope that camera's picking this up. Yeah, that's what I mean by flow. So now I have two colors to two regions of the same color. So I'm good with that. So now I'm going to move to using another color, say orange. Now I'm going to do them in orange in groups of three or more. So you can see the difference. So probably to this. So same thing. I'm doing it very lightly. Just incase 1872 more. If not, I'll just go over it again. That's why you get decent quality colored pencils allow you to layer. That's one of the biggest reasons I'll show you. Okay, so now I have one grouping of orange. And in defining another grouping of orange somewhere, say I wanted to do this circle and the shape. Now we're going to cover this whole circle, orange. I can do that. It's going to make it darker. So same thing with coloring is best, is highly recommended. Have music playing in the background when you're coloring purposes. But for this instructional purpose, I'm not gonna do it. Okay. So now I'll go and so this is what I mean. So now I'm going to cover another color. I'm going to use red this time. Let's say I'm going to color this whole circle. So this is where they say the ring colored pencils come in. So yes, by the way, you might have noticed that I'm using different colored pencils from what I've introduced earlier in the video. These are not the Muji brain. These are my own personal color pencils. I have like several different sets of colored pencils. I have one set Texan needed for client, for client use only or for my students to use. So the Muji color pencils set that's been vaccinated as student use or client use only. So I don't use that for my personal projects. I only use my personal color pencils from a personal projects and they tend to be of higher quality. These are our tes or color pencils are Tesla expert. So they tended layer and blend better. So you see now I'm layering, I'm coloring over the orange. Here. You see how the color change, changes. Okay, so now the finding that the area where I can use grid here. Now there's this thing called known as intuitive coloring. We don't just do, just don't think where you want to color. Pick the color and just go with it. So that's one way of doing it. And oh, yes. Before I continue on and forget about what I was going to say, you can, before you start. Turn your art pieces around to see if there any recognizable images. You can pick them out and color the image in one color. In this case, I'm not gonna do it. That is called graphical fixation. So at this point, I have all my colors in balance for the entire RFPs. So I'm free to use any color anywhere now. I'm going to go to town.
9. Rules of Colouring: Which we will touch on a little bit later. For now, just remember that the rule of thumb for newer graphics is to not color your art work like mosaic. Neuro graphic. It's about integration. So if you color your art group like mosaicing, like different colors for each shape that you can find here, your graph cuts an abstract drawing, but you have the emphasize on integration and how do you do that? So what you do is you color in groups of three or more. Okay? So this rule of neuro graphical, do not color your art, work like a mosaic. Second rule, candor in groups of three or more. Okay? So what I mean by three groups of three or more? 123, make them one color. Okay? You can have more. You can have maybe this whole patch here, one color, just as an example. Ok, so that's one way of coloring. The other way of coloring is flow. Fine. A group of shapes like for example, this flow here. Okay? Now you can color this whole stretch, one color. So I'll show you later, ok, or, or this whole piece here, one color. And fact, if u1 to color this whole piece faster, the bigger number of groups that have shapes that you have, the faster you're going to color it. Okay? Or you can color the shapes here. The squares, the circle and the triangle, all one color and the outside. You can do groups of three different color k. Anyways, I'm getting, thinking I probably am confusing some of you. So let's recap. Colors in groups of three or more, or cavalry and flow. Okay. That's, that's, that's the most important thing to remember. Second thing to remember, if you have a group, if you have a grouping of one color, let's say I color this section here, red. I must have another section of color somewhere else on the drawing. Okay? So if I color these four red, there must be another grouping where I have to color them red, say may be here. Okay? So those are the two rules. So you have four colors here. So you must have at least two groupings of the same color in your entire drawing, at least two. You can have more, just like your groupings of color, like groups of three or more with one color. And you must have two groupings of the same color, at least two groupings of the same color on your artwork. Right? So in this demonstration, I am probably going color one with a flow. So you can see how it looks like. One with groupings of three or more, right? And then we'll see how that goes. This flow. Now, you can apply your artistic talents in coloring in any way you want. Hear, limited by restrictions that I have. This the owl. He remembered this is your art work. Make it as pretty as you can. So now, my experience with the Euro graphical pretty outlook takes a long time. It can take anywhere between three hours to nine hours to make. So I have neuro trees that I've done that takes me about nine hours to color. That's an A4 size newer tree. So in the interests of time, I probably wouldn't want to record a nine hour video and quickly end up for you all. So I am probably not going to we get that nice or spend that much time doing it. So I'm just going to make color something to show you how it's done. And then off camera, you can make it as nice as you want. On your own, for your own project or your assignments. So I'm just going to show you what I mean by all the restrictions that I laid out earlier, those at the neuro neuro graphic career goals, not my restrictions. I didn't make those restrictions on the fly. They are the rules. So okay, you see this flow here. That's what I mean by coloring or flow. So now to balance that off, I have to find another flow somewhere. This page. Color with the same color. Thing to this part here. Now use the colony fairly likely at the moment, because I'm hoping to be able to go over it again. Do some shading to make it look more three-dimensional instead of flap coloring. So now let me, let me just say one thing, exceptions to the rule. If you have cases like this, say you have only two shapes here. That's okay. There's nothing you can do about it. So just go ahead and color those two ships in wonder colors that you already have on your paper. Alright, so in this case, I did leave for but you don't have to take that into consideration when you're coloring, is just that sometimes you don't think about it and then you just color. It turns out that, oh, you have one shape left in a, you know, you have like one shape. You don't know what did you say? Oh, well, the rule says I need to have groupings of at least three, but I only have one left. Then you just covered that in a color that you have already one of the colors that you have already chosen. So I hope that cameras picking this up. Yeah, that's what I mean by flow. So now I have two colors to two regions of the same color. So I'm good with that. So now I'm going to move to using another color, say orange. Now I'm going to do them in orange in groups of three or more. So you can see the difference. So probably to this same thing and doing it very lightly. Just incase 87 to two more. If not, I'll just go over it again. And that's why you get decent quality color pencils that allow you to layer. That's one of the biggest reasons I will show you. Okay, so now I have one grouping of orange. And in defining another grouping of orange somewhere, say I wanted to do this circle shape, color this home, circle orange. I can do that. It's gonna make it darker. So the same thing with coloring is best is highly recommended that you have music playing in the background where your coloring purposes. But for this instructional purpose, I'm not gonna do it. Okay? So now I'll go and so this is where I mean, so now I'm going to cover another color. I'm going to use red this time. Let's say I'm going to color this whole circle. So this is where they say nearing colored pencils come in. So yes, by the way, you might have noticed that I'm using different colored pencils from what I've introduced earlier in the video. Nice or not, the Muji brand. These are my own personal colored pencils. I have like several different sets of colored pencils and I have one set tax needed for client, for client use only or for my students to use. So the Muji color pencils set S been vaccinated as student use or client using only. So I don't use that for my personal projects. I only use my personal color pencils for our personal projects, and they tend to be of higher quality. These are Taser color pencils are Taser expert. So they tended layer and blend better. So you see now I'm layering, I'm coloring over the orange here. And you see how the color change, changes. Okay, so now the finding of the area where I can use red here. Now there's this thing called known as intuitive coloring. We don't just, you just don't think where you want to cover in, just pick the color and so that's one way of doing it. And oh, yes. Before I continue on and forget about what I was going to say, you can, before you start. Turn your art pieces around to see if there any recognizable images. You can pick them out and color the image in one color. In this case, I'm not gonna do. That is called graphical fixation. So at this point, I have all my colors in balance for the entire RFPs. So anyway, I'm going to go to town.
10. Graphical Fixation and Field Lines: Okay, I'm done with coloring. So this point is where you would usually do your graphical fixation. Or you can do it before you color. But this time around, you can do your graph Gf is fixation. If you want to wear, you find an abstract image of something that you can recognize, you know? And if you can't find an image, that's fine. And when, after you found in image, use a marker. Ok. Any color marker that you wonder would emphasize that image. Let's say for example, I don't see any image for me. Say, if I think this is a snowmen, okay, then I will use a marker to outline the shape of the snowman. Let's just add just for example, I actually don't see a single man there. But it was the closest thing that I could think. That's ok. That resembles snowmen there, you know, the head and the body. But actually I don't. So in any case, if you can't find an image, that's fine. Now if we this drawing where you don't have a topic, we're just art. If you find an image, then you will have to ask yourself, why is that image doing there? What does it mean to you? What's the story behind it that it's trying to tell you? Okay. That's for your own information. But because this is just neuro art today, I won't go into that. So for the more advance topics, I will get into that. So today and now the next thing that you do is drawing few lines. Okay? I'm gonna show you how to draw a few lines. I'm going to show you a few ways how to draw a few lines. So I'll show you the simple way, the simplest way to draw field lines. Not for this drawing because few lines are meant to empower your topic. Okay? Like if you, if this was a new row tree of a certain topic like You Wish Tree or something, then your field lines serves as empowering your wishes. You would lines you can think of it as connection to the divine. The Divine is touching. You join divine energy touching your triangle. The universe is touching your drawing to give it power to help you manifest whatever it is that you want from this piece of art. Alright, that's one of the properties of euro graphic. In any case, whether you believe it or not, it's not the point. So I'm going to teach you how to draw a few lines. First way is, for a piece of art this size, you only need three, between, somewhere between three to five field lines. Okay, so the first easiest way to draw field lines, and they all go in the same direction. One direction. Don't, you know, don't draw it this way, then draw it this way, and then they must all go in the same direction. Either they are called this way or go this way, or they all go this way. Alright? So I'm going to draw a few lines going this way. So I'll show you the easiest way. The easiest way to draw field lines is get a marker and just draw a few lines. Few lines are neuro graphic lines. They are more or less streets, so less curviness. Okay, this is fine. So you don't want stuff that goes in and come back and go back out, came no more or less Street. There are also new orographic lens and you don't have to do 100% rounding, but you do need to round certain parts of it to get it connected. Okay? If you wanna do 100% rounding, that's fine. But you don't have to. It only needs to be connected as, you know, wherever you feel it should be connected. Ok. So like for me, I feel that this is okay. It's connected. It doesn't have to be 102nd% way. Second way of drawing field lines is you can follow some of the lines here to make a few line and you can create your own like jump out. So I'm going to show you, let me make this thicker. So you can see usually you don't do this. So let's say if this line here we can see because of the camera angle. So I'm just going to show you and say here I will just jump out my own. And then we join back. Back again. Some thing like that. A, that will also be a field line. Right? Those are the two ways you can draw field lines. Now. You can also draw a few lines in the way like this, but using the same color. Let me see my blacks to his income. Not sure. So but you make it thicker. Now this one, I purposely make it the cursor you can see, but this one, you have to make it thicker. So this method you absolutely have to make it thicker. So I'm using like color here, the same color as my line's. A same method like earlier. Alright? You can do that too. So you have three different ways to draw field lines. Okay? Now, the first way you need to connect, the second way you don't really need to, because it's already connected. You're following some of the lines that you've already drawn. Same thing with the third way. Alright. So with this, we're done with this lesson. I hope you've learned some stuff and you'll be able to enjoy creating more neuro graphic art. Alright, thank you.
11. A little Thank you Bonus.: We have now come to the end of this course. Thank you, and I hope to see you again in the next course. So this is going to be a little quick bonus class that I decided to do. So what I'm going to teach you now is reprogramming your subconscious to be open to what you want. Say maybe in the next year or whenever you wanted. All right. So first off, what you do is you find a spot on the paper that represents you. And then you draw a circle there. So your hand across the paper and feel where you should be. So I'm feeling I need to be here. I draw a circle there to represent and 90 mil as such. Ok. So let's say I'm drawing my wishes for the next coming year. So what do I want in this next coming year? I wasn't stable and successful. Euro graphical practice. Financial stability, financial freedom. If your shapes are now connected, that's okay because you're going to connect them with newer graphic lines later. And then I wanna say, supportive friends and family. Hey, I need the support of spiritual support. Buddhas and the body site plan. Some of you may know that I am a pool this for over 30 years. So I like that a lot. So and then let's say, okay, this is what I need. So now what I'm gonna do is I'm gonna draw neuro graphic lines from the left to the right, connecting all shapes. You can use a draw it up. You just have neural graphic lines burning through. So what this is happening is now you're actually helping your brain to foreign new neurons and new neural pathways. Now, remember, during the lesson we talk about doubling and tripling over. This is where it comes in useful because doubling and tripling over winter, straightening your strengthening the neural connection between neurons. So yes, please do your doubling and tripling over, okay? If you want to, or even quadrupling over. This serves as strengthening your neural pathway. It makes the bond between two neurons stronger. Physio neuron walks like, works like this. You know, so if this is your new role and you know how your neuron looks, somewhat like that. Something like that. I can draw you run very well. K, right? Let's say these are two neurons. So when you make, when these neurons make a connection between the two of them, a. You'll make a connection when you learn something new and you create new ones. Or create new ones. If you learn new stuff, new neural pathways. So we knew double, triple or quadruple over a neuron line. You are strengthening the connection that's already made. And it is not a one-to-one relationship as in like one new row i equals to one neural pathway. Now, okay, that's not the case. It depends on What's being used to represent, let's say, in this case, let's say me, My name, Charles. So however many neurons that are use to represent me to store this information is being triggered. Okay? And then I, and then when I draw this square, I have stability. Associate that with another new concept, my neuro graph cut practice. So square stability, neuro graph practice. So however, many neurons that are being represented by those three concepts are being activated as I draw that. And when I draw a neural connection, when I draw neuro line across that, all the neurons that represent me and all the neurons that represent the square and all the neurons that represents the neural graphical practice are all getting connected. And when you double and triple over that, you are strengthening all of those connections. And that's how it works. So this, if you think of this as a cluster of neurons and one neuron, okay? You are connecting these three clusters of neurons together. And that's how it works. And it does a neuro graph cut does this subconsciously. So. And in a manner of speaking, they are actually trying to reprogram your brain by using art. Alright, so I hope you enjoyed this little bonus lesson, and I hope you can make use of it. Thank you, and I hope to see you again in the next lesson.
 Charles Lai, Counsellor. Therapeutic Coach. Artist.