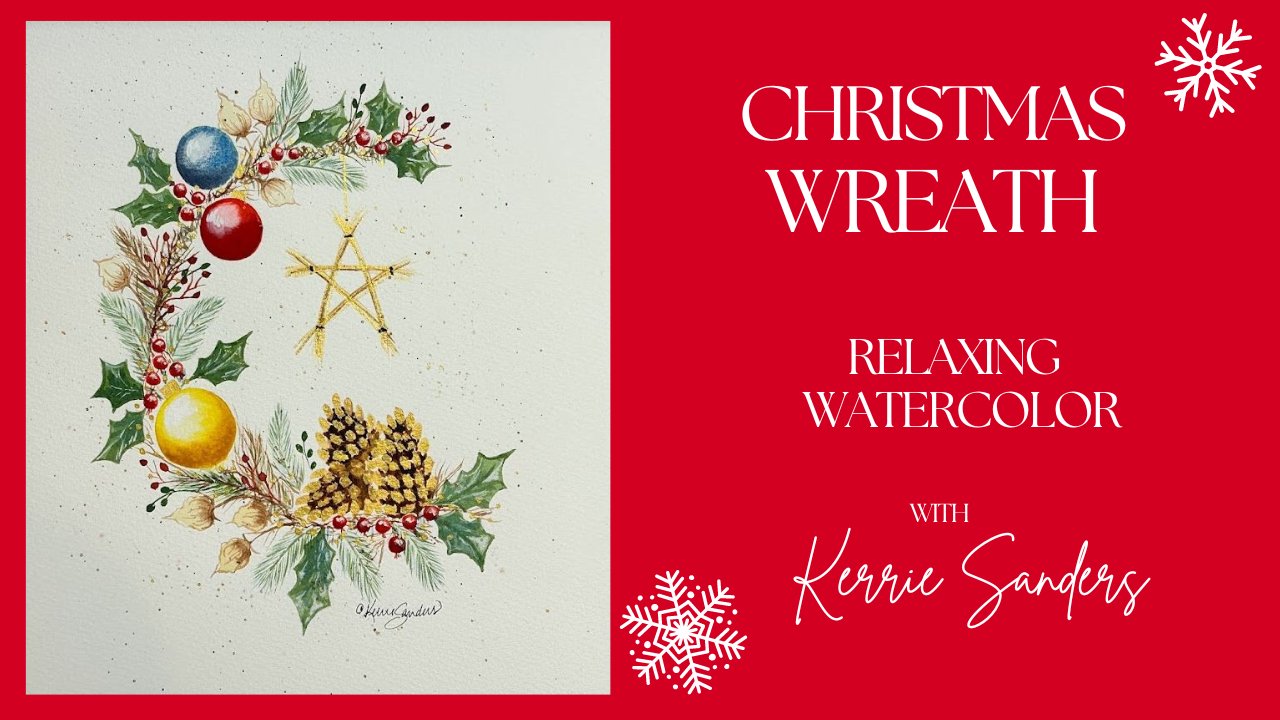
Mixing Skin Tones: Mini Class on 3 Basic Mixes + Secret Sauce for Sketchbook & Urban Sketching | Kerrie Sanders | Skillshare

Playback Speed


1.0x


  • 0.5x
  • 0.75x
  • 1x (Normal)
  • 1.25x
  • 1.5x
  • 1.75x
  • 2x

Mixing Skin Tones: Mini Class on 3 Basic Mixes + Secret Sauce for Sketchbook & Urban Sketching

teacher avatar Kerrie Sanders, Artist, Teacher, Creator.

Watch this class and thousands more

Get unlimited access to every class
Taught by industry leaders & working professionals
Topics include illustration, design, photography, and more

Watch this class and thousands more

Get unlimited access to every class
Taught by industry leaders & working professionals
Topics include illustration, design, photography, and more

Lessons in This Class

    • 1.

      Welcome & Class Project

      1:07

    • 2.

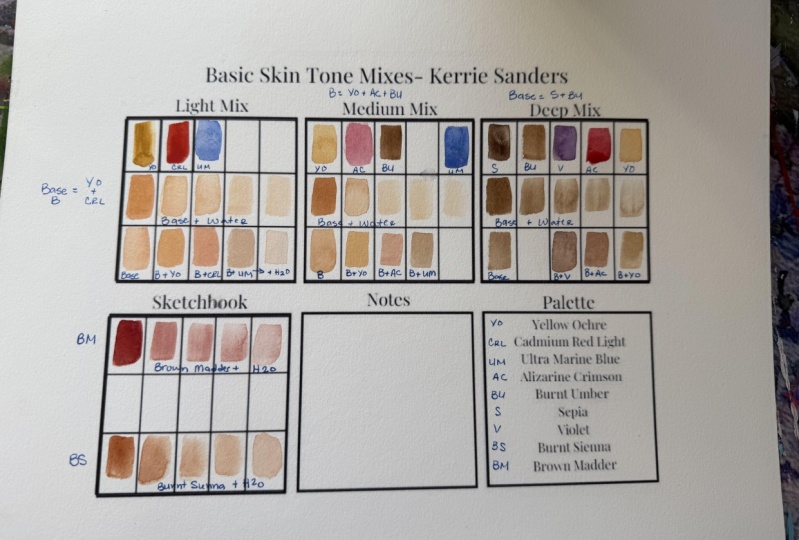
      Practice Sheet & Fair Skin Mix

      4:46

    • 3.

      Medium Skin Mix

      3:17

    • 4.

      Deep Skin Mix

      2:23

    • 5.

      Secret Time Savers

      1:51

  • --
  • Beginner level
  • Intermediate level
  • Advanced level
  • All levels

Community Generated

The level is determined by a majority opinion of students who have reviewed this class. The teacher's recommendation is shown until at least 5 student responses are collected.

62

Students

2

Projects

About This Class

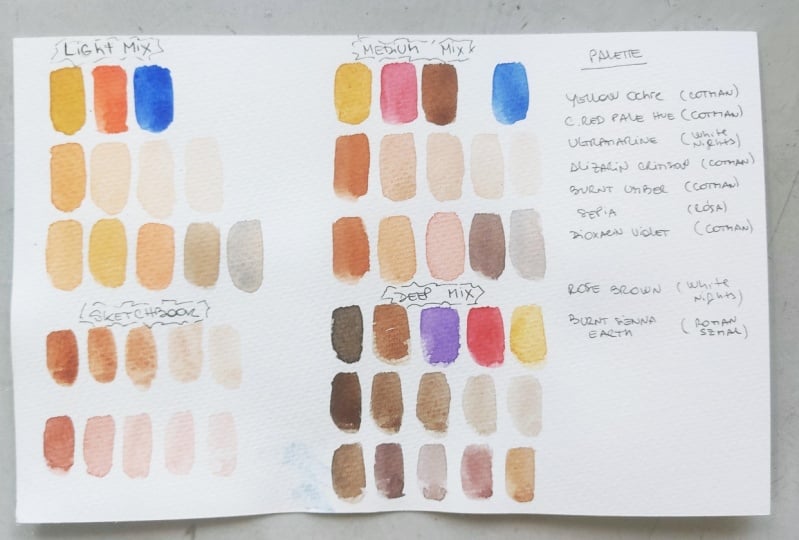
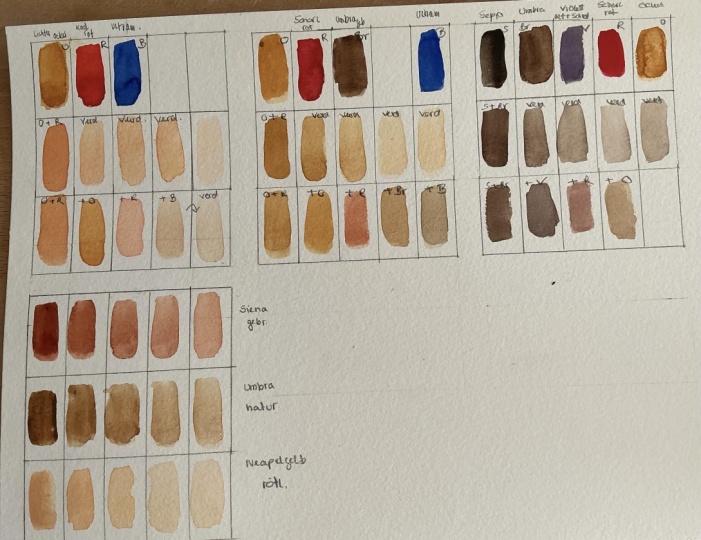
Join me in my mini class on 3 basic watercolor mixes for skin tones covering light, medium, and deep values.   Utilizing my favorite mixes as a base, we will then take them to a lighter value utilizing water on our brush, or change the value to warmer or cooler by adding an additional color to the base. 

By keeping our base mix to only 2 colors, sometimes 3, we can keep the skin tone beautifully luminescent and avoid a muddy look.  This translates well to the portrait you’re painting, offering a vibrant, translucent appearance to your skin for that fresh “skin that glows” look.

This is a great introduction to portrait painting, without the pressure of having to match an exact likeness. We know there are no 2 skin tones exactly the same, and lighting is not the same for every situation either.  This is why color mixing knowledge is invaluable and will take your paintings to the next level.

I will also show you the secret sauce used to save time when you’re urban sketching, practicing in your sketchbook, or just don’t feel like color mixing.  

While teaching I demonstrate, explain, and offer close-up videos in real time to assist in the learning process.  Feel free to stop and re-watch, and speed up or slow down the videos along the way, to complete each step and make your experience the way you feel most comfortable.   The skills you’ll learn will easily transfer to your future artwork and elevate your painting abilities, and boost your confidence.

WHAT YOU’LL GET OUT OF THIS CLASS

Throughout this project I offer many valuable watercolor skills and techniques.   I offer pro-tips in writing on-screen  to help you in the learning process.

Here are some highlights of the techniques we cover:

  • Base mixes for light, medium, and deep skin tones
  • Adding specific colors to the basic mixes for warm/cool undertones
  • Utilizing water on the brush to achieve a variety of values
  • Time saving secrets for urban sketching or sketchbook fun

WHAT LEVEL OF CREATIVE IS THIS CLASS FOR?

Everyone:  The videos are close up, clear, and concise, along with verbal explanations and written pro-tips.  Every ability painter can expect to end with a good outcome

Meet Your Teacher
Teacher Profile Image

Kerrie Sanders

Artist, Teacher, Creator.

Teacher

Hi, I'm Kerrie.

I remember at age 5 standing in front of an easel, picking up a paint brush, and I don't think I ever set it down. I have a passion for building others skills and confidence in art.

I've published pattern kits, a painting book, and I've taught workshops, classes, and many students over the years. I'm self taught but have traveled the world learning from talented teachers.

I teach my classes in real time which let's you be in control of your learning pace. You can speed up, slow down, stop and start the videos as needed to make sure you have the best experience possible.

I'd be tickled to be part of your self-discovery in the art world. Join me and let's have some relaxed fun learning together.

Kerrie

PS/ I now have an a... See full profile

Level: All Levels

Class Ratings

Expectations Met?
    Exceeded!
  • 0%
  • Yes
  • 0%
  • Somewhat
  • 0%
  • Not really
  • 0%

Why Join Skillshare?

Take award-winning Skillshare Original Classes

Each class has short lessons, hands-on projects

Your membership supports Skillshare teachers

Learn From Anywhere

Take classes on the go with the Skillshare app. Stream or download to watch on the plane, the subway, or wherever you learn best.

Transcripts

1. Welcome & Class Project: Hi, everyone. My name is Carrie Sanders, and I'm an artist, a teacher, and a creative. And through the years, my students have had a common question. Kari, how do I mix skin tones? And my answer is always the same. Well, it depends because everyone has a different skin tone, and the lighting is always different. So there's no two alike. Never fear because today, in about 10 minutes, I'm going to show you how to mix three basic skin tones, fair, medium, and deep that you can use with great success. And from those three basic mixes, you can take them to the warm or the cool tones or in a variety of values that will suit your needs. And in the end, I'm going to show you my secret that I use every time I'm herb sketching or just playing around in my sketchbook that will save you a lot of time. Your class project today will be to go through this worksheet with me. I'll be with you every step of the way and create this reference sheet that you can hang onto and refer to it time and time again. Oh, my gosh, 10 minutes, we better hurry. Let's get started. 2. Practice Sheet & Fair Skin Mix: The I've provided for you a PDF like this where you can do your exercises here and then keep this as a reference. And for those of you that aren't able to print it out on watercolor paper yourselves or take it to a local shop to be printed out on watercolor paper, you can go ahead and trace this onto your watercolor paper. So I'll just give you a quick review on how to do that. Just tape it onto your watercolor paper and slide a piece of graphite underneath and have your straight edge handy, and I'm just going to go over the lines using a pen, and those lines will appear on my watercolor paper, and Walla we'll be ready to paint. So I'm going to go ahead and speed up the camera and take that step. Let's go ahead and start by mixing our light skin tones in this first section. And we'll go ahead and place yellow ochre, had red light, and ultrain blue in these first three squares, and we'll just do it in their purest form so that we get a feel for what those color values are and how to use them. Now, our base mix is going to be yellow ochre and our cad red light. So I'm going to mix a little well so that I have some of that prepared and we'll be adding our values to it from there. Once you have some of this prepared, then we're going to just see what it does when you take it down values by just using water. So we're going to dip in and take it straight first. Let's go ahead and put that into our first square. Now, add just a tiny bit of water. And I didn't clean my brush off. I just dipped into water and you can see that it takes it lighter. Same thing again. Okay. Let's do it one more time. Dip it in. And you can see how it goes lighter, lighter, lighter just by using that same base mix and adding a touch of water to your brush, and you can get four different values. You can take it down another five or six level as well. Now, some people have a more yellow undertone to their skin, so let's take our base mix again and let's put that in our first square. This will just help remind us that we're starting with our base mix in each section. But this time, let's add a little bit more yellow ochre. Add that in. You can see how it adds that little bit of yellow undertone there. Now, clean your brush off, pick up some of that base mix. And let's say they have more of a rosy undertone, or maybe you're wanting to add a little red to their cheeks or the tip of their nose or something. So just pick up a little bit of that cad red light and add it to your base mix, and you can see that you get a little pinkier color. Now, some people have a bit of a deeper fair skin or a blue undertone. So again, come back to your base mix. Getting a little more in there, 'cause we're going to do two squares. Now, just pick up the tiniest amount of this ultramarine blue, and you can see that it deepens your fair skin, gives it that blue undertone. I'm gonna go it's tad darker. And let's put that over here. Beautiful. And you can also take that. Let's say you need a blue undertone, but you don't want it quite so dark. I dipped into the water, and I'm just taking it down a value simply by adding water to my brush. And we'll let that dry. Remember, everything dries one value lighter. And now you have a variety of ways to make your light skin tone simply by using two colors and deepening it with ultramarine blue if needed. 3. Medium Skin Mix: Okay. Okay. Let's move on to our medium skin tone, and we will start by putting in our first three spots, yellow ochre, a lizard crimson, and burnt umber. And over here, we'll put our ultramarine blue. Let's take it that far using just true colors, no mixes. Let's go ahead and mix our base mix for medium skin tone using yellow ochre, and then a touch of alizarin crimson. I just use the corner of my brush a little bit more. There we go. And a little bit of burnt umber. Again, you can see I'm using just the corner of my brush. Slow and go. You can always add more. But if you get too much, you'll either need to water it down or just add more of the other elements. I'm going to add just a touch more. This is going to be our base, and from here, we can go lighter and darker. So we want a nice medium value more. Okay, and we're going to go ahead and put that here. Good. Now, from there, let's tone it down. Just use water. We're gonna dip in water. I'm just getting excess off on my tissue here. And let's take it down another value, dipping in water. And one more All right. And then again, as with the light, you could take it down further with just adding more water if you wanted to. Now, let's go ahead and take that same base. And let's start here. Let's say that you have someone that has more of a yellow undertone. So let's add some of the yellow ochre to it. Now we have a medium base with yellow ochre. Let's say you have more of that red undertone. So let's add a little bit of our lizard and crimson. Just picking up with the corner of my brush, a teeny, tiny bit. Doesn't take much. Just to liven that up with some pink. And then let's go into our blue undertone. So I think I'll just leave that base there since this is the last thing we'll do. I'm just going to pick up a little with the corner of my brush. Bring that in. Leave bit more. There we go. You can see how that takes it to a deeper shade within our medium value. And if you want that blue undertone, but that feels too deep, you can dip it in your water by watering that down. 4. Deep Skin Mix: Let's go ahead and mix our deeper skin tone. We're going to use sepia, burnt umber, violet, Alizarin crimson, and yellow ochre. Let's go ahead and put those across our top row here and keep them in their pure form so you get a feel for those color values. Alright, our basic mix for deep skin is going to be sepia and burnt umber, so I'm just going to mix up a little well here. And probably a touch more burnt umber than Sepia cause Sepia is quite dark. It can take over fast. Great. And let's go ahead and put this base mix here in the first, and then we can dip in the water and dip in the water again and dip in the water one more time. Great. You can see the different values that you can get simply by taking it down with water. Now, let's use our base mix again down here at the bottom. And from there, let's say that you have someone who is a little more on the blue tone side. So I'm going to take this. And I'm going to add not blue this time. We're going to add a little bit of violet. Doesn't take much. You can see the difference there. You add just a touch more. Okay. Gives it a little bit of a violet undertone there. Actually, I should have put it right there. Let's put it here so we don't get confused. Well, it's under our violet. And let's take our base and add just a touch of lizard and crimson just to have a little bit of a pink tinge to their skin. And let's use our base here one more time and add some yellow ochre in case they have deep skin with a more yellow undertone. There we go. And you can see your yellow dotone. So we've got our base mix. We have our violet edition, our lizard crimson edition, and our yellow ochre edition. Awesome. 5. Secret Time Savers: When I'm out doing urban sketching or even when I'm just doing my sketchbook indoors and I don't want to worry about carrying and packing in a variety of paints, I'm going to show you two different paints that I love to use. One or the other. I don't use both, typically. This is brown matter. Let's go ahead and put that in full strength. So there it is in a pure form. Dip in your water. And dip again. And you can see it just makes a beautiful skin color that's on the rosy side. I'm gonna go one more time. And another one that is probably more commonly used is burnt sienna. Probably everybody has this in their palette. But let's go ahead and print burnt sienna down here in its pure form and then dip in water. And let's stick one more time. You can see that it will both of these colors will take you from deep to quite light and anywhere in between. So those are those are my two tips for using in your sketchbook while you're juring our urban sketching planair painting, and you don't want to pack in multiple colors.