Transcripts
1. Welcome: Well, hi, everyone. Welcome
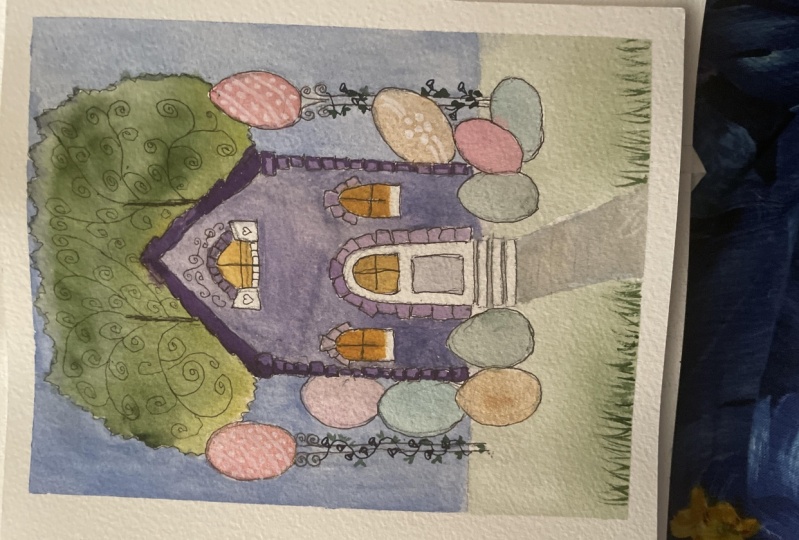
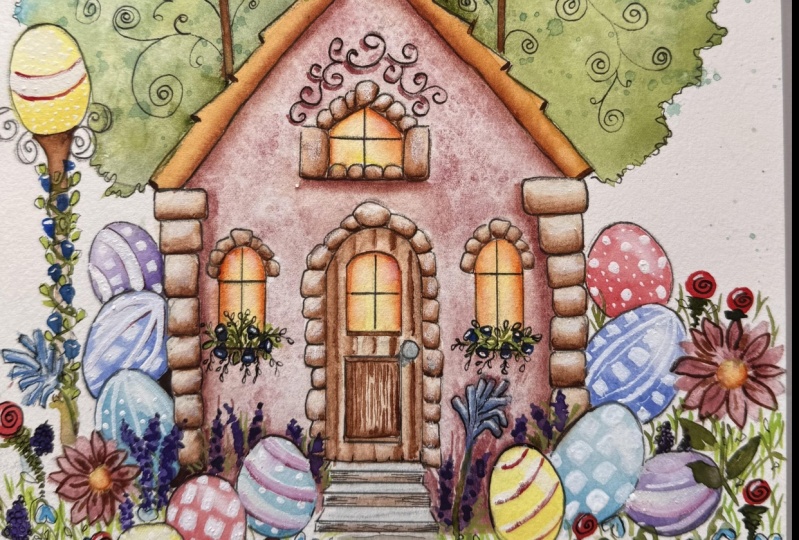
on into my art studio. My name is Carrie Sanders, and I'm an artist, a teacher, and a creative, and I'm so happy to have you join me today. I have provided for this class, a darling Easter egg house, and it's done in these soft
Victorian Boho muted colors. It's gonna be a lot of fun because we're going
to mix our own paint. We're going to be
doing splattering, glazing, highlighting, shading. We'll be lifting off paint. We'll be adding ink
before we paint, and some after we paint. So a nice mixture of back and forth there to
keep it interesting. You know, I have been painting
for many, many years, and I literally have had
thousands of students. And I do this because I absolutely love sharing
art, knowledge with others. Throughout the process,
you can start and stop my videos. You
can speed them up. You can slow them down because I've recorded them for you in real time so that it's
the best experience possible for you
as an individual. I think that's really important. I have had the
privilege of publishing an art boook and pattern packets and have them send out
across the nation. And I explain this simply because I have
such a love for art. I just really want to instill as much joy as possible
in your heart and in the hearts of others so
that we can all share in this fabulous creative process
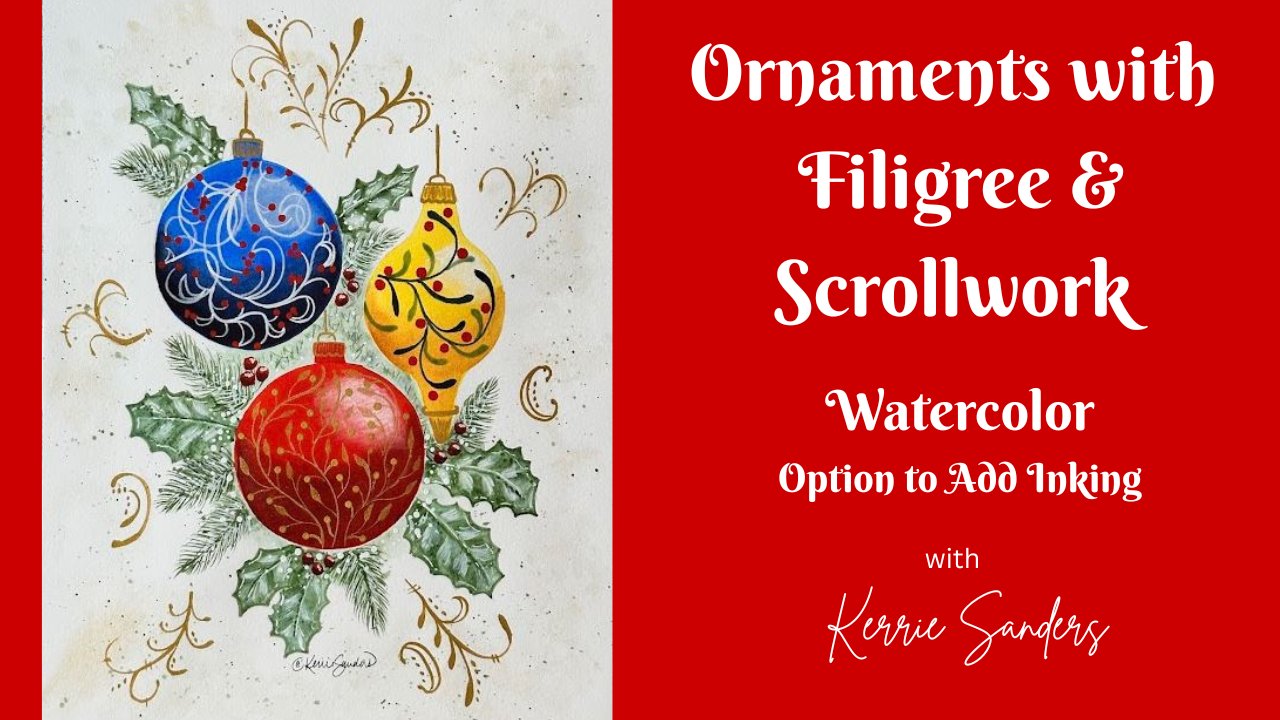
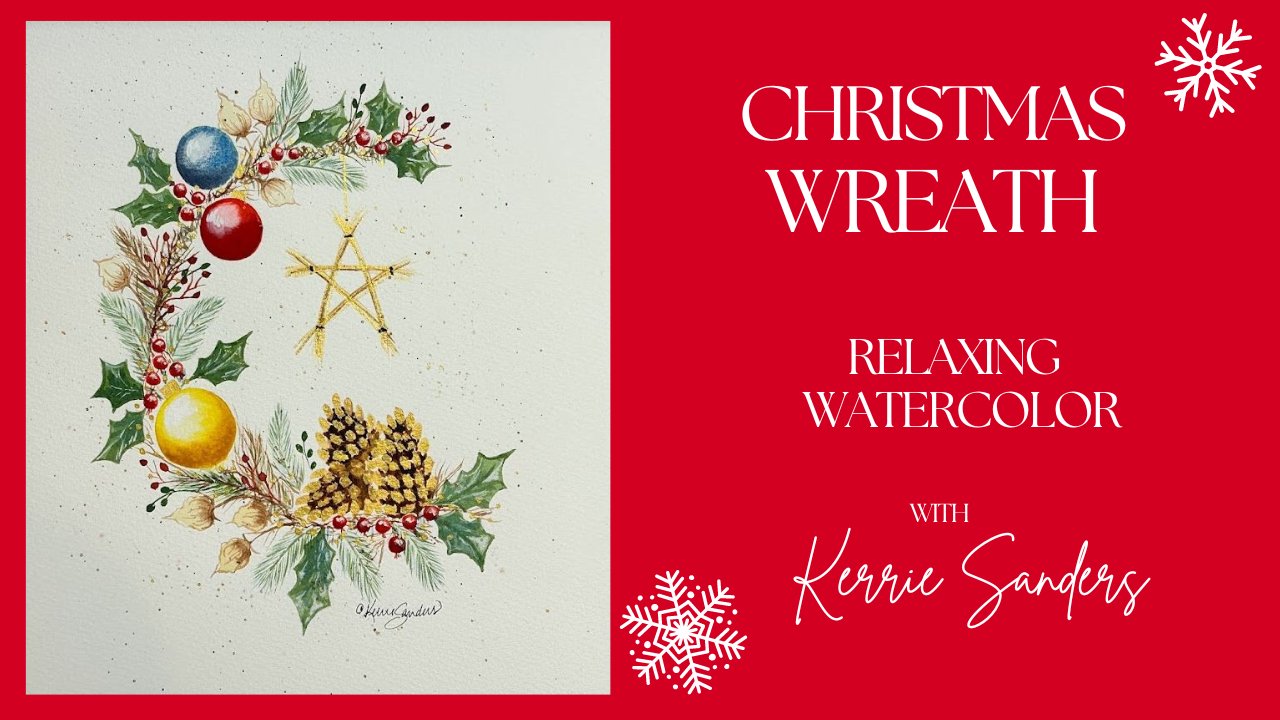
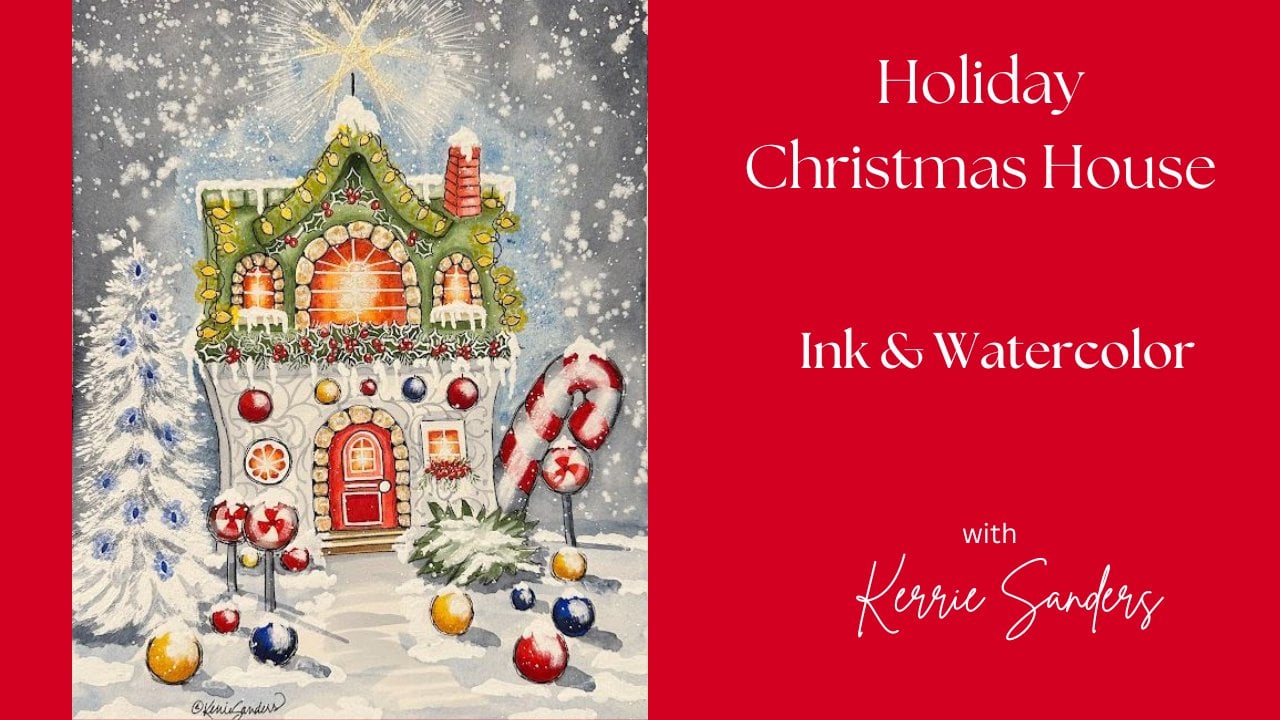
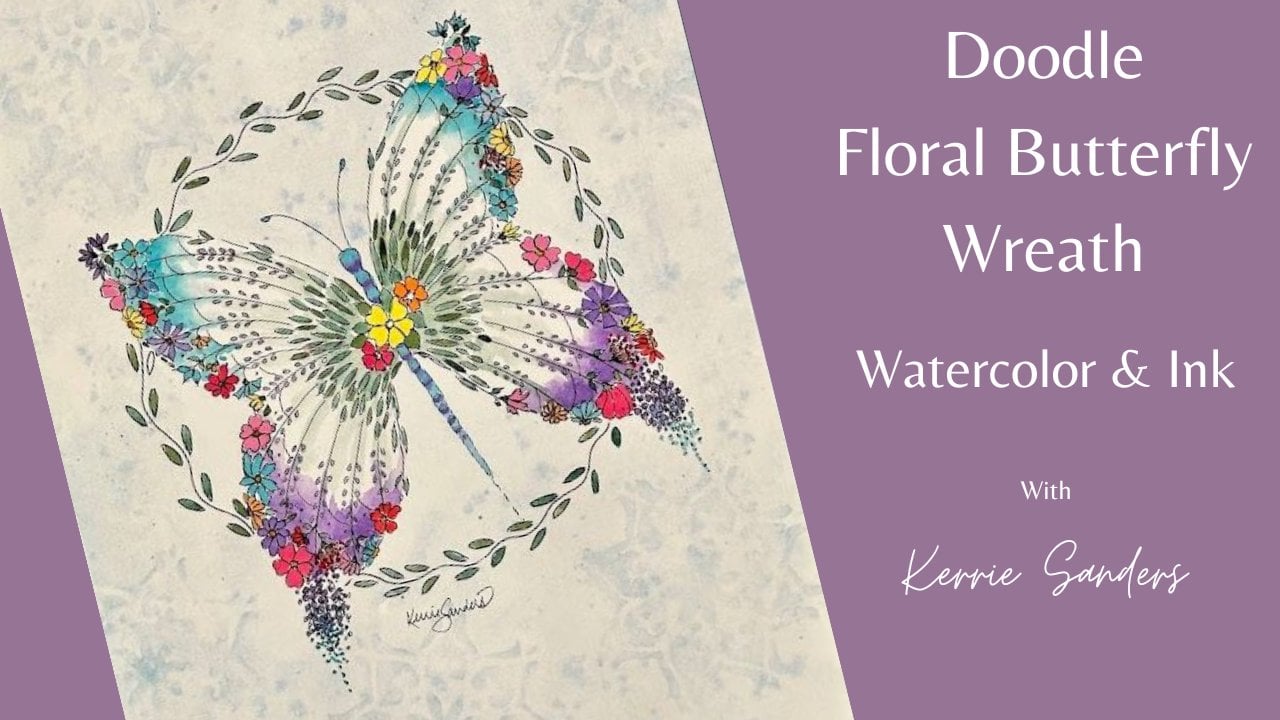
that we have together. If you would like to see what other classes
that I have available, here's a few samples behind me. But you can just go to
the top search war, type in my name, Carrie Sanders, and everything that
I have here on Skillshare for you
will populate, and hopefully something will
be of interest and we can spend a little more time
together. That would be awesome. Also, if you would look for this button and just
click on follow me, then you'll get a little ping, little notification whenever
I come out with a new class. And hopefully,
that would be fun, and we could share some
time together, as well. Alright, everyone, let's
go ahead and get ready for this class by moving into the next video where we talk
about supplies and paints, and let's get started together.
2. Class Project: Alright, your class
project is to complete one Easter egg house by following
the video step by step. And again, remember that you're in control with the
real time video. All you need to do is look for the button at the bottom left of the video screen where
you can stop and start, speed up, slow down, and make that video
experience the best possible for each of
you as an individual. That's very important
to me. When you have completed your project, if you can take a
moment to just snap a kick and look
for this button on screen here and you can upload it there in
our class gallery below, that will allow us to see what each other
has accomplished. And each of you is
so talented guys. Each of you has your own
skin and personality. You're unique as an
individual and an artist, and I would love to see
what you have accomplished. No judgment here,
nothing but love, so please take a moment to share your piece for all of us to
enjoy and make comments, click that little
heart button on. I would love to see
what you've done. Also, that gives me the opportunity to make comments on what
you've accomplished, and it's a great place
for us to communicate. You can ask me questions. I can answer them, and we can stay in
communication there. It's a great place for us. Alright, let's get started in the next video
on our project, and I can't wait to
see what you do.
3. Supplies: Well, hi, everyone. Welcome
on into the studio. Today we're going
to get started on this cute little Easter House, which is a watercolor
and ink piece. I want to go over the supplies real quickly before we dive in. Today, you're going to need
a copy of the pattern, which I have provided
for you on this page. Skillshare, print that out. You're welcome to free hand it onto your watercolor paper. Or if you're going to trace it, you'll need to print it out, and you'll need a piece
of your graphite paper, along with some tracing paper, and just trace that out, and then we will apply that
to our watercolor paper, and I'll show you
how to do that. Today, I am using 100% cotton, and I'm using a watercolor block so that it's already adhered. I don't have to tape it
down to a piece of board. This is hot press paper, which means it has
a smoother surface. I like to use a smoother surface when I'm using my inking. Makes it go a little
bit more smoothly, but it's okay to use regular cold press paper.
It doesn't matter. I do highly recommend
that you always use 140 pound or better
watercolor paper. It's really important to have a great a watercolor paper that will absorb the
paint and the water, it expands and contracts, does just what it's
supposed to do to give you a great outcome
with your painting. That would be really important. For the inking today, I'm going to be using
probably both of these. I'm going to use a NibalFne tip, and I'm also going to
use a Muji. It's MUJI. Both of these are
completely waterproof. And I don't care what kind
of marker or pen you use. The important thing is to
make sure it is waterproof. That will be the most
important things, make sure you test it out, like literally draw on a
watercolor paper, let it dry, and then put water
and paint over it, make sure it doesn't start
to bleed and spread out. That will be important for the success of your piece today. I'll also be using a stylus
to apply my pattern, and I'll tweak it up a little bit with my
favorite pencil. I love the black wing. You can see this
one's well loved. I'm going to use a little ruler, just a little plastic ruler
here. You don't need to. We want to have that
hand drawn look. But since it has so
many straight edges, I want to make sure
that I'm, you know, pretty much in alignment
before I start inking. And then for my brushes today, I'm just going to be
using a variety of flats, some very small ones to medium size and everything
in between, really. And then I'll be
using a mop brush to apply the trees
in the background. So you'll need a larger brush or a brush that holds a
lot of water like a mop. And then a variety of
rounds on the smaller side, so some fine detail work
that we'll be doing. And then my handy
number four, you know, that's always my favorite
round. It's very versatile. So I would say a four or six or even an eight as a fine
tip would be great. Handi andy tissue,
my favorite tool. You'll need some
water, a sponge, or a workshop towel is great. Probably some water just
puts on your watercolor, a nice palette to work on. And let's go over
our paints next. Let's do an overview of our palette so we can get that set up and
started painting. Before I tell you the paints, I just wanted to
point out that I did a soft muted color scheme. I wanted to kind of have
that soft Victorian feel, lots of cute little
flowers and detail work. And in order to do that, I did quite a bit of pink mixing with a muted
color to bring it down, so it wasn't a strong color. And that color is buff titanium. So if you don't
have buff titanium, this is by Daniel Smith. I highly recommend
that you purchase that for this piece because I couldn't find I researched
and couldn't find a way to actually duplicate it. You could try you could try a warm gray or a warm
blue that is very muted, very taken down to
a lowest value. But this is like buff titanium. You can see it's
just a very soft, warm, yellowish, creamy color. So this is what we'll be mixing with all of these as we
go through the piece, and I'll take you through
that step by step. We'll be using potters pink for quite a
bit of this piece. And if you don't
have a potters pink, you could use opera
pink mixed with buff titanium that will
take you to a potters pink. We'll be using burnt
umber, sap green, serlem blue, lemon
yellow, orange. You only need a teeny
tiny bit of this. If you don't have
it, don't go buy it. You can mix your red with
your yellow and be fine. Cad red light, yellow
ochre, violet. And then you'll need some white. You could use some
white gouache, or I prefer to use bleed proof white by
doctor Martin because it's more opaque and I
don't have to go over it multiple times to get
the strength that I want. So go ahead and gather
your palette together, and we will go ahead
and apply our pattern, and we'll get started painting.
4. Pattern Application: On this main page of Skillshare, I have provided
for you a PDF that you can print out
of the pattern. It's just a little sketch of it. I didn't put every
detail in because you're going to want to
freehand some of those things. But all you need to do is take some regular tracing paper and go ahead and trace that on. And once you have that, then you're going to take
your tracing paper and attach it to your watercolor paper
with a piece of tape. Make sure it's positioned
where you would like it to be, so be aware of the
top and the bottom. And then you'll take a
piece of graphite paper. There's a shiny
side and a mat side and make sure that you
have the mat side down, and you're going to
want to test it, make sure you have
the right side down so you don't trace it all, and then you're
like, Oh, my gosh. I didn't work. How
do I know that? Because I've done it, yes. Alright, so I'm just going
to make a little mark, just to test it out, lift it up. Okay, I have a mark.
I'm good to go. I'm gonna go ahead and speed up the camera as I trace this on because that's kind
of boring to watch. I am using a stylus, which has a round
knob on either end, and I'm using that so that it saves the integrity
of my pattern, and I can use it over and over. I don't have to redo it. And go ahead and apply
your pattern now. Uh huh. I have finished
applying my pattern, and you may have
noticed I did a lot of dash lines instead
of straight lines. And that's because they show up under your watercolor and
they're hard to erase. And so I only put in what I felt was necessary as
a little guideline, and the rest, we can refer back to the pattern to
add in as needed. So don't be afraid of leaving out some like the bottom
of this egg is missing. That's because I'm going to
put grass there, for example. So don't be afraid
to leave out some of the guidelines and
trust yourself. Trust yourself to be able to look at the finished piece
that I provided for you. And we're going to
do this together. I'll be with you every
step of the way. And go ahead and put in your pattern and get
your palette set up. And in the next video, we'll
go ahead and start painting. Oh, one other thing, sorry. I found this to be quite useful. If you are not happy
with the way I have set up the
eggs, no problem. I drew several sets of
eggs, as you can see here. And then as I was applying
and creating my pattern, I was able to just set
this underneath and go, Hmm, do I want a large
egg, a medium, a small? Do I want it tilted
a little bit? Do I want it on a side? So you can see that, you
know, you can play with it. In other words, guys, I want
you to make this your own. It's gonna be at your house. You get to enjoy it and make it. And so do what you want to do. But I found it to be
quite useful to just make several sizes and play with it before I
applied my pattern. So go ahead and do that if
you find that to be helpful. Mm
5. Paint & Splatter Trees: We're going to do part
of this piece by inking first and then painting and part of it by painting
and then inking. And I want to make
sure that you're using a marker or pen that is completely waterproof
so that you don't have it's a mistake that
you'll be really sorry about. So let's go ahead
and test it out. I have three
different ones here, and you can see that
they're all steadfast. So the way to test
that out, obviously, is just to I tested my Muji, my Nibal and a stdler. I don't think I
showed this earlier. But there's all different
types that you can use, test it out, use it, and then give it
plenty of time to dry. Muji takes a little bit longer to dry before
you can test it, and then just paint over
it and make sure that you don't get any blooming out,
and you're good to go. Alright, so I am going
to use my Muji pen, and we can go ahead
and Get started. I'm just going to use a
little motion that I like to use on trees when I'm
doing urban sketching. Just kind of a wiggle, wiggle. So in, some out. You can do loop de loop de loop. I think it looks a
little bit more cartoony than I care to use for my style. So use whatever's
comfortable for you, and we have our dotted
line to follow. And we're just going to don't press too hard. You don't
have to press hard. Just keep a loose grip and
just go ahead and get started. Go right over those lines. You can see. You
have some go in, some come out, especially
as we get towards the top. Give us some variety. Make sure you're keeping about the same space on either
side of your paper. I remember we have some
over here as well, and go ahead and put in
a partial tree trunk. And I like to go in so
light that I have to come over it and make it
look a little bit sketchy. If you like it stronger, that's okay. Go for it. Okay, and that's as
far as I'm gonna go. I'm going to do this inking
after we've done our wash. So we're gonna let
that dry completely. And then we're going to use
a wet on wet technique, which is what I'm going
to use this mop for. So let's go ahead and get
out our Cerleian blue, and we're going to need some of this sap green I'm just going over any lines that might be showing
from my graphite. Because once you paint over them, you get to live with them. Okay. So make sure
that when you're erasing on watercolor
paper that you're using a nice soft rubber eraser or a kneaded eraser so you don't damage the
surface of your paper. And we are ready to go now. Let's go ahead and we're going to I'm just going to
work on sections at a time. We go ahead and just add water. Remember that paint flows
where the water goes. So be careful where you're
putting your water. That's where your paint
is going to end up. And we're just adding
water where we want that beautiful serlemblue and
sap green to end up going. And sometimes you
have to kind of tilt your paper a little bit so
you can see where it's going. It's gonna go about halfway. Going really careful
around this egg. Just go right over the scrolls
at the base of the lamp. That's okay. And I don't
want to go onto my roof. You go a little
bit, that's right. It's not the end of
the world. Go right over your tree
trunk. That's okay. Alright, so about halfway. Great. Now, I'm
going to start with Cerlean blue because it's
kind of towards the sky. Just pick them up, touch it in, and there it goes. That's the fun part. Oh,
just has a life of its own, so we're gonna let
that bloom out. And if you need to help it towards some of the
edges, that's okay. And while it's all still wet, let's pick up some of our
sap green and same thing. Let's let that
start blending out. Really careful with
this around your egg. And rinse out. And then let's get those
two blending together. It's so dry here in Utah, it dries really fast. So sometimes I have to help
it with a lot of water. I want those two to blend. And I'm going to lighten the value by
pushing it with water. I don't want it to be too dark. Shing. This is just
water on my brush. Push that paint over. Isn't that pretty? Okay, I'm gonna bring some
more blue down now. Notice I did not clean
my brush that time. I just want it to blend. I want it up a little more blue. Now you decide how much blue
and how much green you want. This is your piece,
how you like it. Yeah, that's about
how I like it now. I'm using an up and down motion, which you can see it makes it so it's not as smooth surface. With the paint it
puddles a little bit, which I like for
texture for a tree. Now, before this lime
right there dries, let's quickly add some
water to it and keep going. Don't care that my brush isn't totally clean
at this point. It does not matter. Just trying to get
water on my tree. And in this center section, I chose to add a little bit of yellow ochre just
down here in the middle, which I'm going to do
now, just a tiny bit. 'cause I want it
to blend with this while it's still really wet, so that's why I
want to do it now. Then we can come back
over here, add spring. There's adding site
or water over here. If you're in a more
humid climate, you probably don't have
to work quite so fast. But if you're in a
more deserty climate, like I am here, you got
to work pretty quick. Oh, that's pretty. Okay,
picking up some serleim blue, adding it to our water area. Now I'm gonna drop
it down a little bit here I want more of a
true blue at the top. I was just my
preference, though. I think it's because I'm not
actually painting in a sky, so I kind of want sky peeking through these leaves that feel. Great. Ooh. Now, if it goes onto your roof too
far, touch it with tissue. All right. And I touched
it with wet paint. Touching it with water
here and a tissue. One of the reasons
I like keeping tissue in my hand. Great. Good. Okay. Bring that down
with the roof line. Okay, if you want a little
more yellow ochre over here, Great. Let's see how shiny it is. So this is still a little
shiny here, but it's a mat. It's still wet, but
it's a mat finish. So it's just right. We're gonna splatter
water on it. I'm gonna use my number four. Round, picking up some water. I go to tap once
over on my palette, and then I'm going to
start tapping over here. What that's going to do
is lift off some paint. Oh, you can already see
it starting to work. And that just gives
it some texture, makes it look like
there's some air coming through your leaves. But it only works once
that big shine is gone. So it's still too wet here. It's too shiny, but I can
go ahead and do it up here, and it's up to you how
much you want to do. I kind of like a lot 'cause it's just a fun way to
add texture to your leads. Great. Let's let
that do its thing. This is something you
can't use a dryer for. It has to do it by itself. This is now completely
dry. Isn't it fun? How we have all those
wonderful textured marks. Now, I'm sticking
with my number four, and on my palette, as you can see, I have mixed some serleim blue and some sap green and watered
it down quite a bit. And it's probably a
50 50 mix with paint, 50% serlem, 50% sap. And then I've just added quite a bit of
water on my brush, and we're going to splatter. So I don't want it
to get on my house. I'm going to use my handy dandy tissue and just lay it on there, and I'm going to basically
cover the bottom half. And I don't want it to
get on that egg, either. So I'm just going
to fold this fairly tight and just let it
kind of cover that egg. There we go. But we do want to go ahead and I always do
the first tap on my palate. And then I go ahead and just kind of add some fun sparkles. Just add a little sparkly
flatter coming above the tree, around the tree over here on the side,
but not on our egg. And now I'm going to add
a touch more depth to it, so a little more serlem so
it's a little bit darker. I don't think the green
would show up very well. But I'm gonna do it
on the tree itself. Again, do it to
your liking, guys. Make it how you
want it. Always do the first one on the
palette, and then yes. Oh, isn't that fun now added to our watermarks that we have. This is adding some
really beautiful texture. A lot of fun liveliness to it. It's whimsical. Okay, now carefully. We'll lift those out. Now, just as an example, if there's something that's too dark and you don't like it, then while it's still wet, you can just touch it with a tissue, and it lightens right up. Same out here in the border. Or if you want,
like, a mixture of light and dark, then
you can do that. Before it dries,
you can do that. Now, there's a spot here that I would kind
of like to get. So I'm going to have
to be really careful. But it seems a little
bare right there. Probably because
I was covering it with the egg for the eggs sake. There we go. I just needed
a couple right there. Now it's part of the family. Alright, let's let that dry.
6. Inking the Trees: This is completely dry. Let's pick up some burnt number. I'm using my number four round, and this is probably
80% paint, 20% water. So quite strong. I'm gonna go
ahead and fill in my trunk. I'm not worried
that it's perfectly straight, it's a trunk. Now, before it's totally dry, I am going to lift out
just a little bit, just to give it some variation. Lifting by using water on your brush and just touch and you can see I
touch my tissue, and that paint comes right off, but see how it gives
a little variation, and that's what we want. Good. All right. Now, let's go ahead and do the inking on the tree area
before we move on down. I'm going to go back to my Muji. I'm going to go
ahead. Just freehand. If you need to practice
some of these first, then do it so you get comfortable
because the secret to, you know, a smooth round
circle is to just keep going. Don't stop. Don't do it too
slow. Do it kind of quick. But it's just kind
of fun, you know, let's just listen to the
music and get in the zone, really getting your right brain and experience, your creativity. If that's dry, then
you can go ahead and outline it again
if you need to. I'm just adding kind of little
bark to it, so to speak. Now, I'm going to
avoid the center until I've done the
outside of that one, and then I'll join the
centers appropriately. There breathe. Did
you hold your breath? I know I do sometimes.
Take a deep breath, and let's move
over to this side. I don't forget, we have those scrollies that come in front of the tree here under the egg. So be aware. Always be aware of
your pattern or where you're headed. Okay. How you doing? Take
a deep breath. Okay. Almost done. Now, these I kind
of want to mesh. So I'm gonna do a few long ones. I don't want it to
come out right there. I want it to kind of
zipper, so to speak. I kind of come this way. Gone like that? Yeah. And then maybe I'll
come up from here over, you know,
doing the air first. Sometimes I draw in the air. No, I don't that's too
long. I like that. Um Yeah. Yeah. Same thing. That's a big one. And here. See. Yeah, like that. Down in that more this way. Good. Okay, step back six feet, take a look at it and see if it's complete the way
you want it to be. And if it is, we're
gonna move on.
7. Inking the House: Continuing on with our inking. Now we're going to ink
the outer edge, the roof, outer edge, and then the
window, window, window door. So basically the whole house Notice I use short strokes
instead of one long stroke. I just want it to look a little less cartoony and a
little more drawn in, hand drawn, and short strokes will help give you
that appearance. Okay. Go down the outer edge. I'll be doing the same
thing with these bricks. You'll just see me
do uneven strokes. I'm not trying to make
them the same size. I am rounding all the corners. You know, I'm not going
to do the bottoms of my windows just yet. So hold off a second. Make sure you're
rounding that top center one cause it's the top
of the door there. Remember, these don't
have to be the same size. Next, we're gonna grab our
pencil and we're gonna grab our little ruler and just
a little trick that I use. You can see how
sharp my pencil is. Pencil sharpener
only does so much. And so I like to use these
art sandpaper guides, and you just roll it. And, boy, does that give
you a nice sharp tip if you ever want a
really good sharp tip. So I'm just going to make sure this is where I
want to make sure that my windows and door lines are nice and proper before
I hand put them in. You can see how I've
gone outside the line. And so I just want to make
sure it's lined up pretty. That's a technical term, pretty. So I'm not really measuring. Same holding my
thumb, so I'm just lining it up with the
bottom of my page, and I'm just
straightening it out, not being all architectural, other than to say, now
I'm gonna line it up with my pinky finger over here so
I get a nice bottom edge. And then I'll feel
better about it. Yep. Doesn't that look better? Okay, you can see how
kitty Wampus I went here. So yeah, do the same thing. And I want the top window to line up with
the bottom window. So I'm planting my thumb down
here to hold that ruler. That gives me a
nice straight edge. If you don't have
one of these little plastic rulers, oh, it's like, the best $2 you can invest. I have many. I have about three or four. Okay. And same thing. Yes. Alright. That feels much better. Okay, I did the same thing
for my window lines. I don't know what they're called in the middle of the windows. And it looks like I missed
my little tulip cutouts. Now, even though we have these awesome straight
lines, again, we're looking for that
homey andron look, so I'm just doing short
little lines here. And I'm just gonna do
kind of a dotted line. It's gonna be
covered with bushes. And I'm only gonna
I'm gonna leave about a quarter of an inch where I don't bring
that line all the way down. Let me. I always turn my paper
when I'm doing arches. You notice that your
hand, the human body gives you a natural arch, a quarter turn right
there with your wrist. So I always turn my paper
to make sure that I'm comfortable doing that and that it does a
better job for me. Just let your body do its thing. I'm going to do a double
line on the bottom here. And a dotted line
across the bottom over here and leave about
a quarter inch there. Okay. We can go ahead
and put our steps in. This is the bottom
edge of the door. Great. Look at us. Wow, we're flying. Okay, I had forgotten to put
my lines up there, so just make sure
that it's lining up with the house, sorry, with the door underneath, so it doesn't look
funny and add those in. And then once your ink is dry, please give it time to dry. Then just come in
with your soft eraser and erase any marks that
might still be showing. And I know you can't get all your graphite
lines to disappear, but you can soften
them quite a bit. And we're gonna go
ahead and paint but that beautiful potter's pink.
8. Washing in the House: Coming over to our palette, I've added lemon yellow, and we still have our
yellow ochre or umber. I've added a touch of orange. We have our potters pink, and then of course, our cerulean
blue and our sap green. So let's go ahead
and get started. We're going to begin with, I'm going to use my number four. And let's go ahead and lay
down some yellow ochre. And I'm going to go ahead and
just fill in the roof line. Hey, while that's still
wet, pick up a little bit. Touching my paper.
Little birt number. The bottom. It on the inner edge. Just using the tip of my
brush 'cause you can see it's gonna bloom out 'cause
it is wet wet on wet. You see how that
adds a nice shadow. I'm just going to I just
have water on my brush, smoothing that
edge a little bit. Sprints out. Okay. I'm switching to a flat. This is number ten, and I'm so excited to dive into
this potter pink. I am going to lower the
value by adding water. This is probably a 9010 mixture, 90% water, 10% paint. Quite thinned down. And I'm going to start down
here just to get a feel for how it's
gonna behave today. You never know the
humidity in the air. I always like to test
it out, so to speak, being careful not to get
it on my egg. Great. And I think I'd like it to
be a little bit lighter, so I'm actually just gonna
go over that area with water on my brush and
just bring it up. Just share the load. Just smear that paint around. I'm gonna leave it darker
down at the bottom. So I'm gonna push
some down there. That would be in a
shadowed area, anyway. And now this is just
water on my brush. You can see how that lifts out. Yeah, I like that.
Okay, coming back. Let's add some
more. Ooh, pretty. Alright. Okay, you can see, I'm not
too worried about getting it on top of my stones or
the wood or the roof. I mean, I'm being careful, but I'm not being meticulous. It's all gonna be okay. I
don't want you to stress. This is a fun, easy,
light hearted piece. And you should just enjoy the process and not stress
out over every little detail. Now, I'm adding a little bit of texture to it almost
like it's kind of a stucco or a plastered look where I'm just kind
of bouncing my brush. And then here and there,
I'm lifting off with water. I like that. You can see
how it's dark and light. I don't know what's
going on right there. There we go. Okay, let's
pick up some more. Just keep working
your way up and over. Oh, I love this color so much. This color speaks to my spring, my inner spring side, spring
on spring and summer. It's been a long winter. Okay. I'm gonna. The key is to work quickly so you're unable to
see where I stop and started. And that's if you keep it wet, then that's how you do that. There won't be any lines showing where you stopped and started. Remember that
watercolor always dries one value lighter than
you're seeing it. So after it dries, if you're like, Oh,
shoot, it's too light. I needed it darker. That's okay. Just go in and just wash it with a light glaze. No need to worry. No stress. Ooh, I like that. See how it looks all different
values? I love that. Now, I'm kind of leaving this
area open for my flower, but I'm lightly going over it. I'm not totally locked
into a shape, so to speak. But I know that I'm gonna put
that big blue flower there. Yeah. It'd be fun to have a white area so that
I have true color. And now I just want to go
carefully around this egg. Beautiful. There. Great. How'd you do? Take a big deep breath. And we're on to the next area. Our roof should be drying out. Well, I'm coming back in with
my number four and number, and this is gonna be probably
85% water, 15% paint. I'm just gonna keep it on the
tip of my brush, basically. And I just want to accentuate I'm gonna soften it. I just
have a water brush now. I'm just gonna soften that
a touch on a hard edge. There, I love that. You
see how dramatic that is? It speaks a little bit stronger. Same thing on the
other side now. Mm. Oh Now, water on my brush. Soften. I like leaving that highlight on
the top of the line. Softening. Okay. Beautiful. Okay. And the last thing
I'm gonna do there is add some depth right here at the bottom,
at the bottom. Something to touch. That needs to dry
to touch longer. While that's drying,
let's bring out our buff. This is gonna be the
star of the show now. Yeah, let's come
back to our flat. I'm going to use a
medium range flat. This is number eight. And
I'm gonna take this buff, I would say a 9010. If you're saying, Carrie, I don't have a
small enough flat. Instead of using it this
way, turn it sideways. See how I turn my brush, and that makes it
smaller, whiter, smaller. Okay. All right, so that's
now filled in nicely. While our buff is drying, let's pick up a little
bit of lemon yellow. This is going to be more
like 95% water, 5% paint. It's really, really light. Even though it's yellow,
it has a lot of pigment. I'm gonna leave that
bottom quarter inch. Going back to my number
four, number four brush. I'm gonna pick up the
tiniest amount of orange. This is gonna be 95%
water, 5% orange. Sorry, I don't know if you
can even see what I'm doing. Put it this way for a minute. Tiniest amount of orange
here on the tip of my brush. And just on the outer
edge of these windows, I'm gonna give it a little
little kiss of orange. Is that a technical term? Oh. Alright, now, I don't want it to
look like an outline, so I'm gonna pick up some water. Puts on my brush. Dab
it off a little bit, so just a clean water brush, soften that edge just
a tad, noodle it. Nice. See how pretty that is. And later on, we'll come
in with some white in the center and make it look like it's really glowing.
It'll be so pretty. Alright, so about
95% water again. Same thing here. Let's
bring it down Partway. And let's noodle out
with some water. Nice. Ponge in. In part way. I forgot a window, didn't I? And you probably beat me
to this one. Good job. Oh I'm bringing this in a little more intensely
because it's the main window, you see when you
walk up to a house, you know, I want it
to look really cozy. So in other words, I'm just bringing the
orange in a little bit further and letting it be
a little more intense. Okay. Yeah, this one's a
little too watery for me. So once they oh,
that's too dark. Once they start drying, like I said, everything
dries one value lighter, you can start to gauge
if you need to add more. I like starting light. I can make it dark easily. It's not as easy
to lift off color. It can be done. It's
just not quite as easy. Alright, I am done.
9. Shading Bricks & Door: We're gonna go ahead and
take some of our bird umber. 95% water. So super thin. I'm gonna stick with
my number four. We're just going to wash
in these little shutters, and I'm doing it in I'm just doing it kind of stroky because I want it to look
like pieces of wood, and we'll add some pen
marks to indicate that, but always paint it as the contour of the
piece you're painting. So if it's round,
paint it round. If it's square, paint it square, if it's Woody, paint it
woody. Does that make sense. Okay, so, same
thing on your door. We're gonna just we're just
gonna throw in strokes. Now, if you end up painting in the whole thing, that's okay. I'm going right
over my door knob. Alright. We're gonna come in and shade this and do all
kinds of things with it, so this is just
getting us started. Now, while it's drying, let's stick with
our number four. We'll stick with our 955 and we'll start
enhancing our bricks. And I like to start by
just touching them. And I just kind of flick
in a little bit of color. And after I get about
three of them in there, I just come back to
water on my brush, and I'll just soften
here and there. And leave some hard lines. Great. Let's do the other side. Great. Okay. Alright,
let's keep it going. Let's let those dry. Now, we're gonna be a
little more careful, just because it's
a smaller space. I mostly like to stick
to the bottom and the seam where the mortar is
between the bricks on these. That way, I leave the
top for the highlight. The water on my brush. While I'm here, I'm
just gonna add a little more on these shutters. Again, I'm just making
it look like pieces of wood by putting streaks. Love it. Okay, fun fun.
Whoops, I picked up. I got carried away. Got all excited for a minute. Oh, dear. We don't want them all
to look the same, right? So we want a little difference. Okay. And we can come in. Like I can tell, this
is drying too light. I'm gonna come in and just add a teeny bit here and there. But that's what it's all
about, guys, is being patient, adding layers, and that gives
it depth and dimension. So even though we're doing a
fast piece that's, you know, mostly defined by its ink, we still want it to look great and have some dimension to it. I'm gonna keep letting that
dry come down with the door. Before we go the other
side, I need to it. Hey, how are you doing?
This goes fast, doesn't it? This whole piece
goes by really fast. Go ahead and add some let's add some
wood to our door here. Okay, let's come back
up to our window and that 955 should be dry. We're gonna add a second
layer of just This time, we're just gonna noodle
it here and there. Just a little ear. Now, we come across the bottom of
what you got these shutters. Great. Okay. Let's go down. Here. See how that makes it
look like it's modeled, like it has a textured surface. Nice. Okay. Is
water on my brush. You can see the
difference between having that second
coat second coat here, not here. Great.
10. Shading House & Inking Eggs: Let's go ahead now and do the bricks on the
side of the house. Then we'll be finished
with all our bricks. So this is gonna be pretty much the same concept as our windows. Only, I'm going to concentrate
just here and there, 'cause we've already established pretty good base. Good. All right. Let's come here. Alright, behind this egg is
going to be pretty shadow, so I'm gonna fill
that in pretty good. Alright. We're done
with the bricks. I am going to add a
little more depth to the wood coming into
the burnt umber. Probably a 70 30, 70% water, 30% paint. Like that. Okay, same thing
up top with our shutters. Good. Alrighty. And we're
done with our roof line. You know what I feel like? I want a shadow
underneath these rocks, and then I'm going to add
a little more wood look. Yep, I like that. Just felt like it needed to be tucked in. You see how it tucks it in
behind the beneath the stone. That feels so much better. It just wasn't setting
in deep enough. Okay, we're going to add
some shading to the house, and we do that with our
potter pink and burnt number. I notice I just pull it out
on the side because I'm not sure what mixture yet I need. I want it to still
look quite pinky, but it needs to shade. Et's take a look,
see how it looks. I think that's gonna be
pretty good right there. So, test it out, see
how you like your mix, and add quite a bit
of water to it. And we're gonna start down
at the bottom. Oh, yes. Now, what is this? This
is a shadow from plants. So do we know where
plants are gonna be yet? No, but we'll just
pretend like we do. And we'll test it down here. Again, we're gonna have
shadows of plants. Okay. And now we're gonna come around
the door. Not super far. Nice. Now, see how having a shadow makes your
highlight on the stones pop. That's perfect. That's
just what we wanted. And that's nice on
the sides, too. Okay. Let's finish up here. No, it's okay for your
shadow to have a hard edge. Shadows have hard edges. I didn't do under
here because we got flowers, so it won't matter. I think we got all our shadow. Okay. Okay, everything should be completely dry and we're
going to do some inking now. I've taken a pencil
and just drawn in the little design that I
want to have above my house. And I know we free
handed up here, but I just didn't want to
take a chance of a mistake. Since, at this
point on the house, I couldn't really, you know, fix it if I wasn't happy. All right. And now we're
gonna continue on. I took an eraser and
lightened my lines. We're going to do our
eggs, not the flowers. So just, just do the eggs
and on the lamp post, I'll show you just one moment. Now, the eggs, I'm not
doing short motions. I'm just making it a nice smooth edge 'cause
I don't want to distract from the beautiful design that we'll
be adding to them. But don't worry if
they're not perfect. That's not going to matter. We're going to have this design, and it's not going to show. Alright. On the post. I have a dotted line already. You might have a solid
line. It doesn't matter. But when you're inking, go ahead and put a solid
top portion in and then do kind of a sketchy dotted because we're going to fill
it with flowers and vine, and you don't want
to have a solid post lined in or it's going
to be hard to cover up. So just kind of stagger that. Just kind of leave it. It's kind of, like,
about right there. You can go ahead and put in the scrollis that
hold the egg up. Scrollis is a technical
term. Come on. Nice. Alright. Now, I'm
going to start in the back. Notice I don't always
start at, like, the top center of an egg
'cause if you do that, what I found is you end
up with a pointed egg. At the bottom here, I'm going to do kind of a dotted line. I can change that
later, but that allows me to put flowers and
leaves and whatnot. This one, I'm not even
putting a bottom in. Hey, over to this side. I only placed our big flowers, but I'm not going to pin them in until after we painted them. I'm going a little
flat on that guy. I don't think
anybody's gonna note, though. Alright. How'd you do?
11. House Basing in Eggs: This is so exciting, guys. This is the really fun part. We are almost to the end, but this is where it
really gets lively and takes on character
and a lot of life. So let's pick up
some of our buff. I'm using a medium flat.
This is a number eight. And come over here and I'm going to pick up
just a tiny bit of this red. Now, these colors you mix
to your satisfaction. Remember that? It's going
to dry one shade lighter. I put this in the
back. Oh, I love that. I like using a flat when I have a round surface because a round edge I can get
right up next to it. And I don't have to worry
about going over the line. Hope my head's not in
the way of the camera. I just need to be able
to see up the side. Sorry. Buff is a great mixing color to get all of those beautiful
Victorian boho type colors. All right. And I'm gonna put another one right
in the front here. Flat brushes are great
'cause you can use them straight down like
this for stroking. You can use them straight
up, if you need just like a light chiseled
edge like that. And you can tilt
them on the side, if you need a thinner edge. I mean, they're so versatile. Alright, and down
here where we didn't ink we're still gonna
bring that color down. Dipping in water.
And I'm just going to I'm turning my brush
up on the side here. I'm just softening that edge. I'm gonna let that kind of
ease in to the grassy area. It's there, but not there. And then we're going
to cover it up, and it's not gonna matter. Now, while we have
water on our brush, we're going to do a
natural highlight. Let's start up here before
this one gets too dry. I'm just have water
on the brush. Like, I'm going to
use a smaller brush. I come to a smaller flat. And just touch and press in a curved motion because we have a curved
surface of our egg. And there we go. Just pull up a little bit of a highlight. We will come in with some white or some white mixed with
buff and emphasize that, but let's give it a good start lifting
out that highlight. Great technique to
use in watercolor. You can see that
come right off onto my tissue and leave us
a beautiful highlight. Again, it's curved. Is down a little bit. Great. Now, if you
wanted a stronger, you could touch it with
your tissue. Like that. And see how much
stronger that goes, I didn't necessarily
need it that strong, so I wasn't doing
it, Okay, very good. Now, let's let's
do another color. Um come back to our bigger flat. Okay, grabbing some Cerim
blue and some of that buff. Great. Okay. I am
a big blue fan, so I think I'm gonna do several. Now, I do have this flower
I'm being aware of here. And same thing that we did
over on the other side. We're just going I have
water on my brush, and I'm just juging it a
little bit, softening that. And I'm gonna do this big guy right here around the corner. Sure to not touch your red
if your red is still wet. Do this big one right here. I'm just soften
that soften that. Great. Okay. Now, let's
pick up some of our violet. Isn't this fun? This
is the fun part. Get it to the value that
you would like it to be. That's pretty good. We are going to come in
and shade these. Sorry if you can't see my work. My hand is in the way, but I got to be careful around that blue. I'm up on the chiseled edge
of this awesome brush. There we go. Before I
do the next purple, let's come in and lift out
our highlights in our blue. There we go. Just a
little one on the top. Almost waited too
long, almost forgot. I got yackingTin too much. Now we better do our purple
one while we're still wet. Nice. Okay. Now, let's
mix up another purple. Yeah. Hey. I'll take out
the highlight here. Break. All right, a
couple more to go. Let's do yellow ochre. Alright, mixing yellow ochre
with some of the buff. Do this guy over here. Okay. And grab the
big one up here. It's like, Is it
a lamppost or so, is it a light bulb?
I don't know. At first, my first rendition, I did have, like, shining light, which was kind of fun, but it was too involved
with the tree, so I'm like, Oh, just make it more of an egg. But it's on the lamppost
'cause I like the lamppost, so I don't know. That's why I'm keeping
it this color, though. I am gonna keep it this color. I have a nice highlight on it. Low I'm gonna put
big highlight on it. All right. And we still
got a few more eggs. Oh, we haven't been
yellow, have we? Remember how strong
our lemon yellow is. Lemon yellow. But we got to
tone it down at our buff. There we go. Now, it looks like our soft
Victorian yellow. Great. Okay. So I need to pull out
a highlight here. There. Hey, how much you do, guys. Wow, that sure added
a lot, didn't it? That was fun. Alright, let's throw in our lamp
post real fast. Just gonna pick up
some of this umber, probably a 955 mix,
so super light. Just gonna use the same
brush that I've got here. Just a small flat. I
want this really light because we're going to put flowers and vines on top of it. Just taking some water,
lightening the inside of it, just leaving that outer edge. I'm actually gonna strengthen it a little bit right under me. Top. Great. Alright, I'm going to add a couple of blue flowers, and I'm using a small flat. This is number two flat. And I picked up some
of the mixture of our serlem blue mixed with buff. And we're actually
going to use kind of some will be lighter,
some will be darker. You don't want every
petal to look the same. And this is probably, oh, 85% water and 15% paint. So we're just going
to start with a few. And I'm keeping the tips
its outer edge here square And then I'm gonna pick up maybe some that are a little bit darker and go in between
the different lengths. And then maybe I'll
go darker, darker. So I'm gonna come over here to my Ceron and just add a
little bit here and there. So you just see a
variation in petals. Come over to my lightest mix. Illim blue and buff. And this one is kind
of going this way. Now it's come to
more of a medium. Okay, fill in with a few. No, not dark enough. This is
on top of our potter pink, so you'll have to adjust
what you did before. Better. We just don't want
straight serlem. Make sure everything
is tempered down. We're going everything
with a little buff mixed in so that we're all in the same family of
colors, so to speak. Everything's muted. Love it.
12. Laying in Flowers: I think, well, we have
this in our hands, let's add some little
cutie Btutis in the front. And I just kind of use I make
them kind of heart shaped. So I just touch and
press touch and press. And I do them all
different ways, you know, so that
they are facing all different directions. And then we'll add
leaves to them later. We're kind of heart shaped. These are going to be ink,
so don't worry about getting a super distinct
shape or placement, you know, the fillers. Okay, we're coming I'm
using my number four. We're coming into
our potter pin, and we're going to
do our flowers. And I like to just start at the outer edge and pull
down and pull down. Come down. That's why we
have that circle there to remind us and just kind of
fill that in a little bit. And I don't always I don't
always enclose the top. You can. You can enclose
the top if you want. But I just try to make
them all different. I'm just gonna add a second
roll. Keep the other one. This one I am just
doing a sharp tip. On the edge of the flowers. And I'm leaving a space. I'm going to add a couple
of rows, actually, behind maybe a
really full flower. They all need to attach. Okay, now that this is more dry, it's coming in with
darker potter. It's more like a 70 30. It's pretty Potter
doesn't go on very thick. It's pretty transparent anyway, so just using the
tip of my brush, emphasize some of these petals. Definition. Same thing over here. Everything behind it's
gonna be lighter. Now, do you need
to do this step? No, you don't have to. But it's good practice
for line work, and it does enhance
your flowers, gives them definition,
erection, depth. All the things. Lighten this
up again. Adding some water. I go little bit in the back. Kido. We are going to outline this in ink. Blue instead. Just
go to emphasize a little bit on the blue there. Great. Now, I'm gonna
take some of this violet? Oh, man, I love this
color so much. Gonna add. Oh, my. Okay, we're going to add some hyacinths back
here. No hyacinths. Lavender. So they're
fairly thin. You just kind of
wiggle your brush. And let's have some
that are on an angle. Not all of them are gonna
be straight, right? You and now aren't you glad you put those
nice shadows back there? Showing some plant shadows. Worked out great. Okay? So
we've got some of those. In the front, I want to put some I don't know
what they're called. Hyacin Maybe these
are the hyacinths. They're kind of a cone and low to the ground, and they
have a really strong, sweet smell. The yummy. A hyacinth. Anyway, we're
just starting to fill in, is what we're doing, guys. So do what floats your boat. Uh too far. I just got water on my
brush to take it off. Here we go. I wanted to put in some
fantasy round flowers, and I kind of wanted to
use this roly colour. Um, so just gonna
throw a few in here. Don't worry about getting
things perfectly round because I'm gonna ink them. Let's take a little bit
of our yellow mixed with our buff and dab in the center on our flowers
so it can get drying. And while that's still wet, let's add just a
touch of orange. If you want to,
you don't have to. But I think it adds
a little spice. We can all use a little
spice in our life. Just a little on the average. Could always use burnt Ember, but I didn't want to
use something bit dark. But
13. Adding Greenery: Okay, let's go ahead and add in. Let's take some of our blue. We're gonna add in some
flowers on that post. I'm going to take these
actually to a darker value. So I'm bringing it down to where we have it
mixed with our buff, same family value that
we've been using, but I just want it to be darker than these flowers in the front. And these flowers,
they're just whimsical, but just kind of make them
like a little triangle. I do a little wider at the
top and then pull it down. And then what I'm
going to do is add a white dot and kind of a
circle around the top of it. So we're going to just put
these going every which way, every different direction on. I just kind of like that,
just a little triangle. So in the middle,
some upside down, just as you would
picture growing on a vine and we will add
the vine and some leaves. It's up to you how far you
want them to push out. As I've painted
this several times, I've done all different ways. So I've decided to hold
them fairly close to the pole because there's
so much going on already. Okay, good. Those are gonna
make sense in a minute. They look kind of look a
little funny right now. And we're going to
do the same thing here with the windows. This will just kind of tie in the ones that
are on the post. I like to have one or two
that are hanging down. I can't did that one backwards. Okay. We're going to need to
prepare lots of green, and we'll be using a variety of values
lighter and darker. Let's take some buff and
some of our leaf green. Oh, yeah. That looks great. I'm gonna add some buff on the side here so I
have a lighter value. Okay, good. So we have a
light. I've got a medium. I want to have kind of a darker. But again, I still
want a little bit of that buff mixed in. Super. Now, we're
going to add in. Let me bring this over. Just
a whole variety of greenery. And the secret to
this is to be free, fast moving, and also to
use a variety of brushes. So I'm going to bring over
my smaller liner brush. This is a f vat. I'll be using that. I'll also be using my longer
line of brush. This is a number one, and
I'll be using my number four. So you don't want to use the exact same brush
for all of it, or they'll look
too much the same. You want a variety of greenery. You need to use a
variety of brushes. And so here we go. I'm
going to start over here on the post. I'm going to start with
our lightest green and just gonna lay in
a few here and there. I'm not gonna worry about making them a perfect leaf shape. It's not gonna matter, trust me. Little great. Now, while we're over here, let's work on this guy,
our little blue flower. I'm going to the
medium green first, and just put that little bud underneath where it
attaches to the stem, bring that stem down. And while it's still wet, go into the darker,
go even darker still. And touch it 'cause
it's still wet, so that'll just go poop up. And that gives it darker at the bottom, lighter at the top. I'm gonna let that
come down the stem. And then I'm gonna juge out some some little fake
leaves like that. Perfect. Okay. Now, let's just stick to this
while we're over here. Let's go ahead and
add some more. We need to add some leaves
to or other pieces. We need this one,
this one, this one. And we're gonna make them
all different lengths. So this one's obviously
tall. Short, short. On this one up here, I'm gonna h out a little bit
underneath it. Remember, we're
going to ink these, so don't be too nervous. These little guys,
I like to have them droop over quite a bit. Like, these are our low
to the ground fillers. Sometimes it helps to
just have them in first. Kind of gets us going
in the right direction. This is our lavender. They're just long and flowy. We're not gonna see
much of those stems. That's okay. Now
I'm gonna come in. Runs out. Come in with my smaller one. A
little bit darker. And just kind of fill
in a little bit. M It doesn't matter on the shape too much. Don't worry. We're it. Otherwise, you'll
be here all day. I'll see you tomorrow, guys. That's the way that'll go. All right. Great. All right. So,
we still need to do a stem on this one,
or big flower. For the rest of the
greenery over here, I'm switching to my number one, and I'm going to use
a variety of greens, and I'm going to pick up
a little bit more buff so that I have some
light and some dark. And this is going to start
putting in some grass. And some will be straight,
some will be bent. Some will be tall,
some will be short. Just do whatever you want to do. These are all kind of dark, so I'm going to stop and
add some more buff and get some lighter grass coming in here and switch to
a shorter brush. First, I want to throw in this sidewalk as
I was doing the grass, I thought, Okay, I think
I need a sidewalk. So I'm gonna pick up some
of the serllim and buff. And we're just going to throw in a little bit here and
there on the cement. And we're gonna create
a little pathway here. Now, you try not to have a road, a creek, a stream, anything comes straight directly at you. It makes a more
interesting piece if you have it going somewhere. And as it gets move,
I will purple there. As it gets closer to
you, it gets whider. Mm. Okay, let's come
into our bit umber. And quite watered
down, 95% water. And we're just gonna
add a touch of shading here on our steps. And then we'll just
add a little bit here on our sidewalk. Alright, now we can
continue on with our grass. I'm gonna switch
to this five out. And I'm gonna got this
nice milky green. I'm gonna go ahead
and add a stem for these round ball flowers
that are coming. Now we want to come put
some on the side of the path. Some that
are bent over. I'm just putting
a different color now onto the vine here. The vine will actually
draw in with ink. Oh. I think we can do
the other side now.
14. Greenery & Shade Eggs : Alright, I realized I missed a stem over here.
This little guy. Same thing over here. We start with that little
cap on the bottom. Bring it now. Add a little
bit darker right there. There we go up. Okay.
And let's go ahead. Wow before I forget this time, let's go ahead and
add these stems in. I guess we can't see
the stems on those, but we can see them on these. Okay, all our cute
little hearts. I'm kind of crossover. Okay. Can add some grass here. Some taller grass mi here. Great. Okay. Alright, let's put the
stem on that larger flower, picking up some darker green, adding it to our buff mixture. And let's add this here. And Okay, great. And while we have
this dark mixture, we can add a little here and
there, mix it up a little. I like it there,
and there we go. Oh Now, if you want to, after we finished the eggs, you can come back
in and add more. You noticed I've
avoided putting it on top of the eggs just because we're gonna come in
and decorate them, and it gets a little bit
tricky to avoid the grass. So I kind of left it
alone for a minute. Alright, I think we have
used all of our brushes. We've got a good
variety of grass going. And I just as soon
as I said that, I saw a spot I miss. I like having some tall shoots up around this
beautiful lavender. Oh Great. You got to finish these windows. So first of all, let's lay in just a little bit or that's
what I want. A medium flat. And I'm gonna pick up
some of the screen. I'm gonna mix it with some blue. And I'm just gonna lay in
a little bit of a base of a window box we aren't really
painting one in, right? But we're just gonna kind
of just kind of dab in. I want it to be quite green
so that it looks greenery. We can add a little more green now just to make it
darker here and there. Or you could use blue. You see how that gives
it some more texture? And then we can take
our little liner brush. Let's just pull out
a few a few vines. And that will give us something to put some leaves on with our ink. Crissy Crossi. Right. Okay, liz let that dry. Okay, we're going to
shape the eggs using the color that we painted
the egg without the buffs. So for example, up here, we have yellow ochre and buff. We're just going to
use yellow ochre. And this is probably 90% 9010. Is gonna come across the bottom, following the
contour of the egg. And then I'm gonna pick up water and I'm gonna soften
that upper edge. That leaves a beautiful shade, so it's light and
it gradiates down. Okay. So we have another
one over here. Same thing. Picking up yellow ochre. And this is why I didn't
want to do a bunch of grass yet. Okay. And you don't have to be super cautious about this 'cause we're going to add to signs on top of the eggs, right? So don't be worried. Just go quickly. Picking up Cerleim blue so I can
find a clean spot with no green on it. Alright. Great. Down behind that yellow. It across. Softening with water. And I've got one more. It's really tucked
away in a dark spot. A lot of shadow area here, so just touching it in with the chiseled
edge of my lap brush. And you can see that leaves
a nice shadow. Very good. Okay, let's go on
to our I would. I almost used too much violet. It's I want to lose
our vintage look. I'm softening it down further. It's a little strong. A a touch of buff. Putting it back where
it's supposed to be. So if you do what I just
did, and it's like, Ah, it's too violet, just go over
it with the buff mixture. And it'll take it back down. That's better. All right. Well, then I'll use a
mixture I just made. Sorry, I keep turning my page, but when I'm doing a
round contoured surface, it's easier to just
turn the page. A little bit darker down here. Pretty shadowed area. Good. Nice gradients there. All right. This one is pretty shadowed. Both of these are pretty
shadowed already. I'm gonna leave them alone, but if you need to
make yours darker, just come back to your
mixture over here, use some of the darker red. And the yellow definitely
needs a kick on mine. Beautiful. Okay. Is this
do water brush now? Hey, um, I would like to add just a touch of blue
on some of these flowers. Really lost my flowers. Alright. We need that to dry completely before
we can decorate.
15. Decorating the Eggs: Okay, let's slide this silver. We're going to use
a lot of buff, and we're going to
add some white. You can use your whiteh. I'm gonna mix the
two together here. May feel like it's
still quite white, but it's not. Here's
your quite white. And we want to have quite
white still available to us. But I wanted to start
with just a medium. So we have our dark
medium light, right? I'm going to start
with our yellow ochre. Sorry, I'm going to
turn the board again. But let's start
maybe over here in the corners, while
we get comfortable. I'm using a flat number two. And I'm going to take
this pretty much across curving there we go, and do I think I want it a
little bit brighter. Okay. I think that this
one just to help me. I mean, this is gonna mark
where I want to start and end. So I don't go crooked.
What? Me go crooked? Yes. That happens all
the time, of course. 'Cause you want it
to curve, right? But it has to come back up. Let's do it on our
purple friend. Sorry, I keep turning
the board on you. I really like I'm lawn is. That's pretty. Okay. And I think on the blue, I think I'm gonna
go two stripes. Now, you guys do
whatever you want. There's no right or wrong
here. This is where you really get into your right
brain and have some fun. Okay. I'm going to
use my five ought. Let me pick up a
little more white. Wow. Isn't this fun?
This is the fun part. I could just doodle all day. This is there's no right or wrong, so just
have fun with this. Now, I'm adding just
enough water to make it flow easily on my brush. So I don't want to give you
a ratio because it just depends on what medium you're using and how thick yours is. You just want it to flow
nicely on your brush. That's that's all
I can say on that. Alright, I think I'm
going to add just, like, a little thin
stripe above this one. Oh, yeah, I like that. And I think on the purple on the back. I'm going to add some stripes. And I think this
cute little yellow. It's just gonna be stripes. Now, what I'm going to do
is switch to my small flat. I have a flat.
It's a number two, but it's very short. You can see how
short haired it is. So it makes cute
little squared marks. And I'm gonna use
straight white. Just gonna put some in the lid. Uh Oh, that's pretty cute. All right. Win a squirrelly one. You go across the bottom here. Okay. I kind of using the corner of the
brush so I get tiny ones. I do. Oh, that's fun. How
are you guys doing? Are you having fun with this? Oh. This is the fun fun part. This is the payoff for
all your hard work. Okay, I'm gonna come
to my really thin one. This is my number one round. And I'm gonna put a bunch of
thin stripes down this blue. Oh, yeah. But I want
to do a bunch of them. Yep. Like that. I'm not thrilled
about this color. It's too muted. I'm gonna just maybe
outline it or something. Lift it up a little bit. I like that better. And
same thing over here. I think I'll just give
it a little boost. Great. Alright, now we need
some poka dots. I've switched to my
number four round. And I'm going to
add some poka dots. Okay, it's time for
us to do a bit of inking. Let's grab our pens.
16. Final Inking: Alrighty. Now, I'm gonna be really careful because my
dots are still wet. It might be a good idea to wait. I'm just filling in the corners. I'm just going to add a few
contour lines on top of that. And then I'm going to
just on these blue. I don't know if you can see
that very well. Here we go. So I just do the B and a circle. And we'll come back and
put a white dot there. Now I'm gonna put in a vine that just kind of wraps around. Just like that. You could
outline your leaves, but I'm not going to. It just seems like a lot. A lot of detail that I
don't want to go into. Okay. Well, here's our
big beautiful flower. I start by putting in some of the back and add some
of the front petals. Okay. Great. Now for these round
ones, it's much like those. We're gonna put a
white.in the middle. And then these cone hydrangeas, just kind of go an outline, and then I just put
a few bumps on them. Lumps. Okay. And then the center, just kind of a jaggedy edge. Maybe a few dots, we're gonna put some
white dots in there. It's up to you if
you want to outline the back petals.
I'm not going to. I think they already
speak for themselves. Cute. And I don't do
every blue flower. Oh All right. Just checking. I'm not gonna do anything
about our lavender. You could highlight, like,
one or two like this. Yeah, that one stands out now. So you could do depends on how much you want to
do. Are you a doodler? You could just doodle away. Or if you're done, you're done. I'm just gonna do those three. Just remember to work in
odd numbers 357 is great. Alright, I think I'm
done with that side. And I'm gonna come up
to these little cuties. Okay. Now, I am going
to take some of these. Remember, we had some
of these droop down. So I bring them down, and
then I do add little loops. I'll show you this
my pins in the way. Little loops around them. Like that that hang
down. Look how cute. And a couple I don't go nuts
so with the ones at the top, just a couple indicators. And then we'll put white
dots on those blue ones. Alright. So I'm just looking. This is by the door, so
I'm going to go ahead and emphasize that
piece of lavender. And on these steps, I'm just going to
emphasize the shading with little contour lines
here on each side. I just gonna fade out as
they get closer to you. Alright. And then I just want to emphasize the door inlay. Mm. You can see that. Nice. Cuter. And same thing on
the other side. Great. Beautiful. Okay. Okay. Now we've got these cute
little heart flowers here. See how they just blend in the background, but
they take up space. They add a pop of color. Or a little hyacinth. No see how you have this opportunity to reshape your petals if you need
to, which is really nice. Oh, maybe take a closer look. That's usually something to see. This is where you really need to step back and take a peek from a few feet away and see if
you're missing anything. I'm not gonna put
much grass in ink, but just a little indicator
partway down the path here, just in keeping with
the rest of the piece. Maybe a few pieces
here in the grass. In front. Alright. If we have
finished our inking now, there's just a few little
touches with our white, and then we will wrap it up.
17. Final Highlights & Signing: Keeping my white out.
This is the number eight. Dry it off pretty
good. We're gonna do a little bit of dry
brush highlighting, which means we're just
gonna pick this white up. And we're gonna wipe
most of it off. And then we're gonna just
add a stronger highlight. Yes, can you see that? It's subtle, but it
makes a difference. And it's called dry brushing because we're not
picking up water, and it just goes on
kind of dry like an old barn door or a fence. You can see how that just adds such a beautiful highlight. Love it. So everywhere that
we lift it out, you just want to
touch it with that white and let's finish out over here by adding
some white highlights, same as we did on
the other side. Oh, that makes such a nice
difference, doesn't it? And then there's one other spot that I want to give
a highlight to. I'm going to come
back to a small flat. I want to make it quite dry. And I'm just going to highlight the very center of each of these bricks and
maybe a little bit on the side here and here. Yeah, just to make those just to make those pop a little bit. Okay, I'm gonna step
back six feet and take a look and see if there's anything else that
we need to do. And here we have
it all finished. I hope you enjoyed this piece, and I want you to know
how proud I am of you for completing this and
making it your own. And I hope that you
learn something along the way and that you
will join me again. I know your time is valuable and I hope I made it
worth your while. You are talented.
You are creative, and I love you pursuing what you enjoy doing
here on Skillshare. So thank you again for
spending your time with me. Let's go ahead and always claim your artwork by
signing your name. Always sign your name and be
proud of what you've done. I'm going to go ahead
and sign right here. Display that proudly and with great love and
joy in your home. Alright, I'll see you
in the next video, and we'll wrap up.
18. Congratulations & Bloopers: Well, congratulations.
You did it. You finished your piece, and I'm so excited for you. I hope it was a great
experience and that you learn something new or sharpen
your skills along the way. If you found this class to be a benefit and you know somebody else that
might feel that way, then all you need
to do is look for this link and send that to them, and both you and
your friend will benefit from Skillshare, which
is kind of a cool thing. Also, if you would like to
take any of my other classes, just type my name in on the
top on that search bar. Carrie Sanders and all
the classes that I have will appear for
you on the screen, and you can see if something is interesting to you to take, and I would really love to
spend more time with you. Remember to snap a pick of your finished project and upload that into the class gallery
by looking for this button. And I would really love to be able to go in
and see what you accomplished and
add some comments to it. Nothing but love. And I would just
really love to have that opportunity to see
what you've finished. Lastly, if you'd
like to follow me, all you need to do is look for this button here on this
page of Skillshare, and follow me, then
you will receive a little notification
just a ping whenever I send out a new class, and we can take that class
together, which would be fun. Okay, guys, thanks again
for spending time with me. I know your time is valuable, and there are some fabulous
teachers here on Skillshare. And so I feel really honored that you spent this time
with me. Thank you. I guess that means it's time
for loopers? Hippiyhppiy. Okay. Which side? Which side? I hope that you will
follow me here. I hope that we can spend
more time together. I hope that you are interested
in this class today, and you can just I hope
that What am I hoping for? There's a lot of hope going on. Hippy, hippity
Easter on its way. Don't sing, Carrie. It's
just not good. Don't do it. Happy Easter.
 Kerrie Sanders, Artist, Teacher, Creator.