Transcripts
1. Introduction to the class: Hello everyone and
myself, richa, a mandala and watercolor
artist from India, not only passionate about
creating beautiful Art birds, but also share my expertise
is an Art educator. Today, I want to
welcome you all in my Mini Mandala class where
you're really learning to create four beautiful
mini Mandalas exploring the beauty and intricate
designs in a simplified way. The lets unleash your
creativity and M, That is the word of Mandalas. And this class, let's begin our journey in the beautiful
word of Mini Mandalas
2. Art Supplies: Hello everyone. So
let's check out that Supplies we
need for our class. We needed 200 Jason
watercolor paper in a5 size, Fine liners 0201 and color
Fine liners of your choice. Then tip marker, ruler, pencil. It is an protect the door. I will suggest you to
use these Art supplies, but if you don't have the
internet's completely fine. You can use whatever
materials you are having. Okay. So without any delay, let's get started with
our Mini Mandala class.
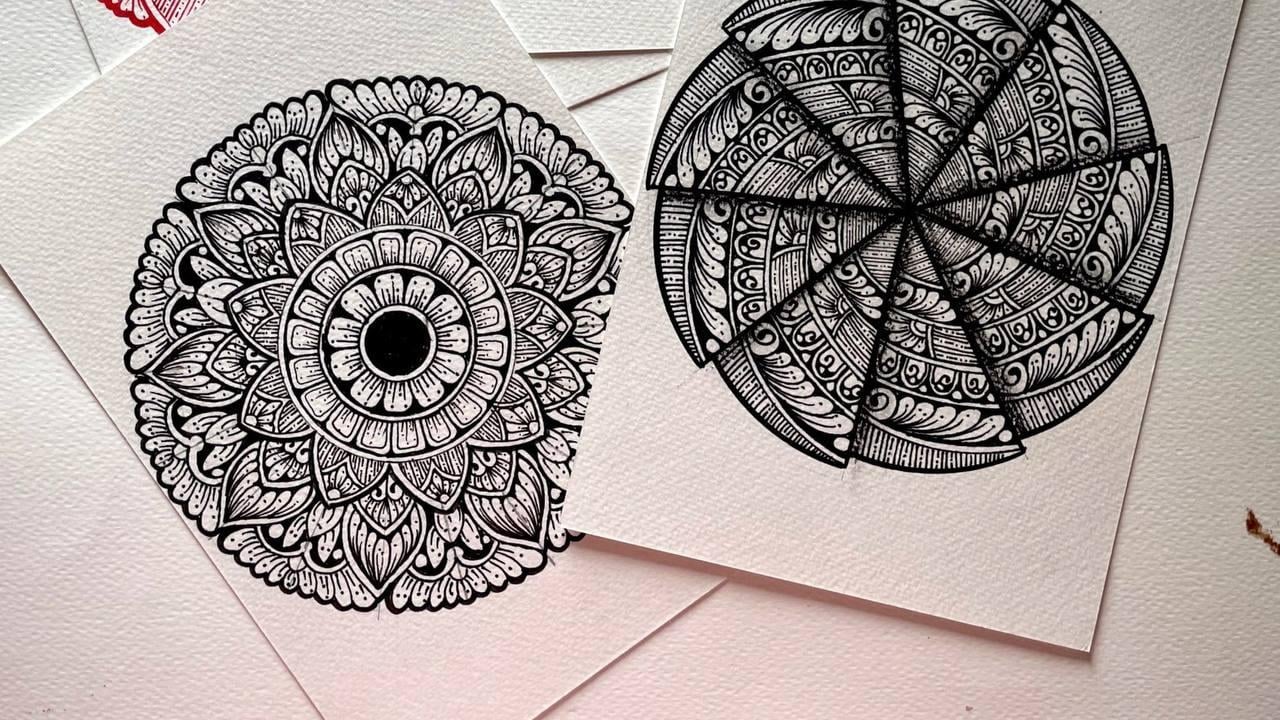
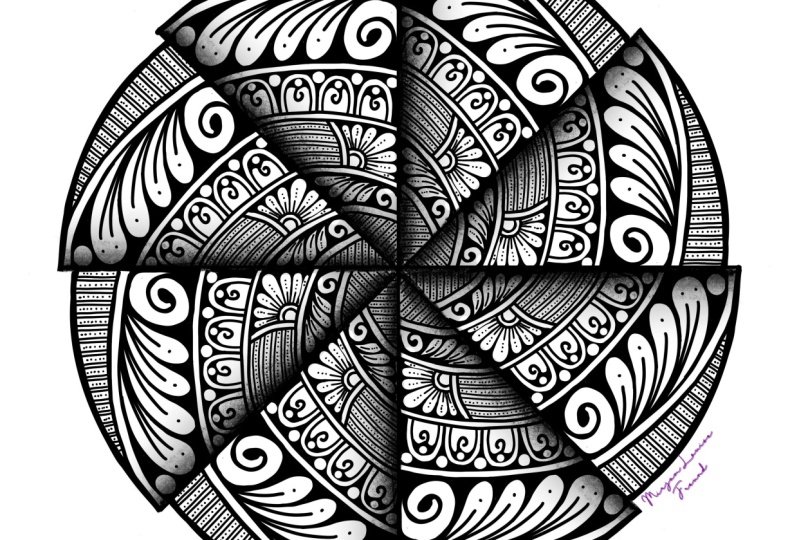
3. 3d Spiral Mandala: Hello everyone and welcome to the first chapter of
our Mini mandala class. And in this class we
will be the thing. This chapter we will be
creating a 3D mandala. So I have taken the
center of the page and I have marked angles
at a 40 degree. And we're going to
create nine sections. From the center to the edge. I have already marked
my 40 degree angles, and now I'm just mocking them. And once it is done, we will join these
lines to the center. Okay? And the length of these
lines are seven centimeter. It has to be equal because we
are creating a 3D mandala. So we're not creating
the traditional grid. This grid is a bit
different from others. Now we will create
concentric circles at a gap of 1 cm each. Once you are done finishing with your lines to remove the
excess part of the life and with the gap of seven centimeter from
center, draw a circle. So this will be the
edge of our mandala. And we have to double outline. Now, I am creating concentric circles at
a gap of 1 cm each. Now I am marking wine
five centimeter from the, on the first concentric
circle from top. Okay, So this is the point where we have to create our Art. So here what I'm doing is I am tweaking the point from
one concentrates of good and to the point of
the concentric circles that is below down of the
point that we have taken. Okay? In this way, we are creating a
Spiral mandala. And this will convert the
Spiral mandala into 3d $1. And this is the last layer of the grid that
we are creating. After that, I'm
going to use it take tip marker to create the
boundary of our mandala. Okay, So it is just because
to give it a bowl loop. And once we're done with a grid, we will move forward
to the next chapter where we'll be adding the
details to our mandala. Thank you so much guys for
joining me. Means a lot. Thank you.
4. Lets add some Details: Hello everyone and welcome back. So let's start adding the details and our
3d Spiral Mandala. Whilst I'm gonna do the double
outline and the design, the fillers that
I'm going to use are the lines and the dots. Do that as know
that designing and coloring mandalas can serve
as a tool of self-discovery. Also, the choices you make regarding colors,
patterns, and symbols, but then the mandala that
you are creating can reflect different aspects of
your personality, emotions, and desires. Engaging. By engaging
in mandala practice, you may gain deeper insights
into yourself and develop a greater understanding
of your inner work. Now we will start
adding details in the second layer of our mandala. And the pattern I'm using are the simple one of
Switzerland tree leaves. And yes, these are the most
often patterns that I use in my mandala because
they're very easy and easy to create and
looks very beautiful. So that is the only
reason that I then do use these patterns more
frequently than any other. So now let's start
our card layer. And the third layer, we are going to first double outline all the sections
in our mandala. So for the third layer, I have divided this
section into two parts. And in the one section, I will draw the lines and dots. I will read the
first pattern that we have created in
the first layer. And then I will fill up the
second part with the leaves Mandala practice also stimulates your creative thinking
and imagination. It encourages you to explore different
color combinations, patterns, and design elements. And as you experiment
with new ideas, you strengthen your
creative skills and you broaden your
artistic thinking, which can have a positive effect that extend beyond
the mandala practice. Because creating
mandala as required, a certain level of focus
and concentration as you immerse yourself in the intricacies of the
design and curling, you train your mind to
stay present and engaged. And over the time this practice can improve your
ability to concentrate and hence your
attention span and get it over to other
areas of your life. Remember, the benefits
of practicing Mandalas can vary from
person to person. Each individual's
experiences unique. And the positive effects
may manifest differently for every and each and
every practitioner. It is quite important
to approach mandala practice
with an open mind, allowing yourself to explore, experiment, and
embrace the process. So with this, we have
come to the end of this chapter and I hope
you guys have enjoyed it. Thank you so much for joining me in fuel guys in the
next one in which we'll be doing the final details in our 3d Spiral
mandala. Thank you.
5. Doing Last Layer: Hello everyone and
welcome back to the last session of
this 3d Spiral Mandala. And we were doing the
backers and the second, in the third layer of a mandala. So let's finish it and
then we will move on to the second Last Layer, Mandala. The last year is complete, and I am dividing this, the notch clear into two parts. Okay? So for one, I am creating the F1
part with a 0.5 or 1 cm, whatever you feel like, because you can decide
your own details. And in this BOD of mandala, I am just simply
creating the U-shapes. Don't fill up this
section of our metadata. Know mandala as
average historian, found in different forms
and contexts, worked fine. They have been used AT tools of meditation and
spiritual practices, healing, self-expression,
and also through. So creating and conduct, contemplating mandala
can be a transform and meditative experience in number of benefits to my audience. But because it creation of $1 in was a deliberate
and mindful process. Starting from the center and working out was
split interrogate, that does shapes and some books that very
carefully added, often following so much
sugar or radial structure. And this act of designing
any coloring allows our focus or nation and can induce us in a
state of relaxation, concentration, and
calmness and peace. Mandala. Now also a deep
symbolic, clean meaning, like the circular shape
represent the cycle of nature, the internal rhythm
of the universe, and interconnectedness of all. The old one. The often incorporate geometric
shapes such as foils, string, which carry their
own symbolic significance. So mandala can It takes them both from D to spirituality and
culture traditions, each getting its unique
meaning and intention. Because engaging with mandala
was it promotes relaxation, stress reduction, and
mindfulness and help us to come. And my dad got a sense of inner peace that we have already talked about in the session. Only when Alice can be enjoyed by people of all
age and artistic abilities. To practice mandala,
you don't need specific that off treats
or set of artistic skills. No use, just need the and taught to pursue this
meditational Art Form. So he was seeking relaxation,
a creative outlet. I transformative
evidence of beauty. And to Mandalas a look
mandala and allows them anxiety on a journey of self-discovery,
mindfulness and close. And started the large
Layer and mandala. And I'm repeating the same
pattern that we have created. And secondly, and
this time this is only the bigger version of it. The last section,
again, I am back Receive that did that we
have drawn into flows here, that these are the
lines and dots. Now I mandala is complete. Now take a dark pencil and just shade the edge of every section
like the way I am doing. And smudge it with the
tip of your finger to give it a shadow effect
that every layer is, each layer is overlapping
the next one. So in this, we
created 3D effect. As you can see, I am progressing
through the end. It is just looking so
beautiful that every layer, each and every layer
is overlapping. The next one to it. So let's finish it and
mandala will be complete. I hope you enjoyed and by joining this
session and creating this mandala with
me and thank you so much guy means
a lot. You guys. And the second chapter
of class. Thank you.
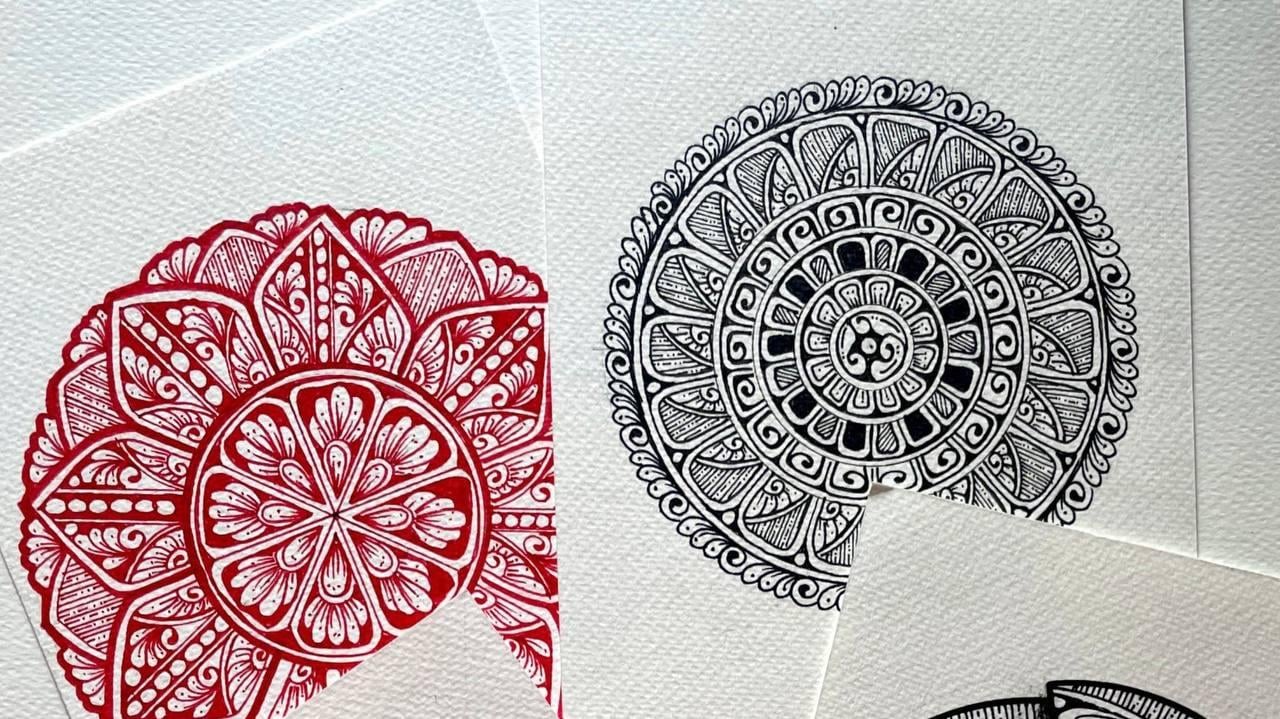
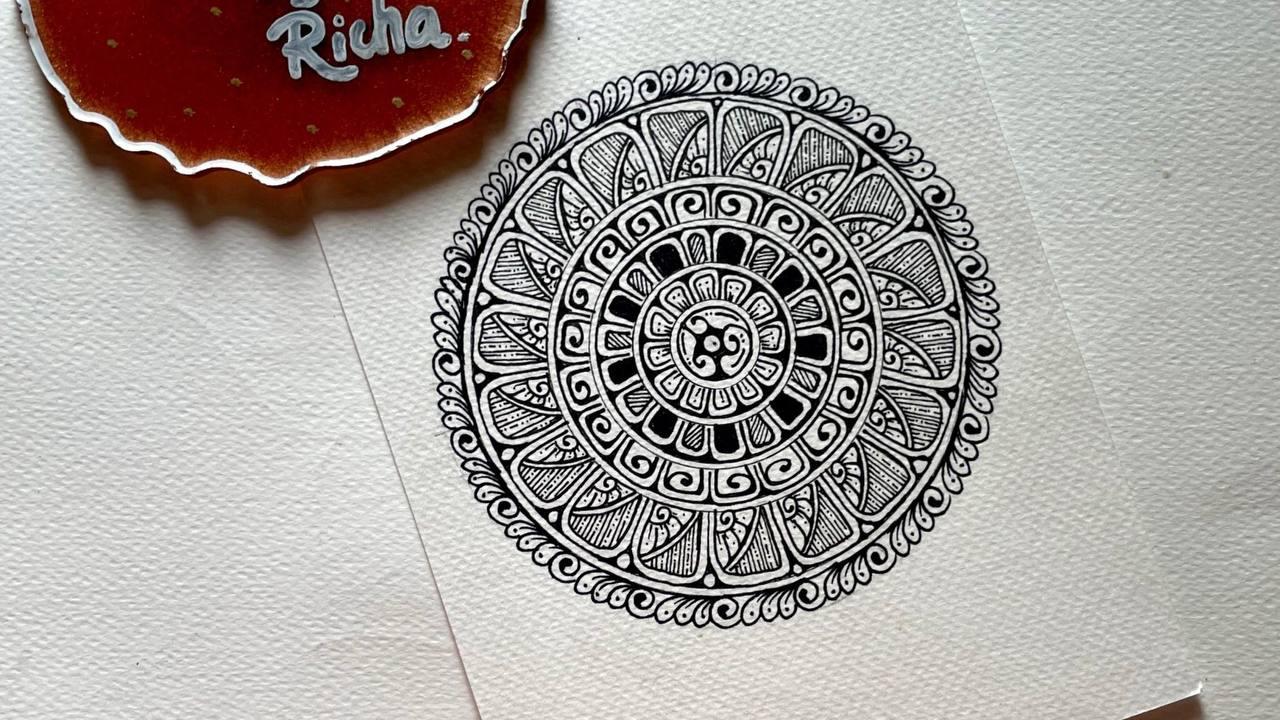
6. B&W Mini Mandala With U Shapes: Welcome everyone. And today we're diving into our second
class project where we will be creating a
mesmerizing Mini Mandala using U-shapes. Okay, So let's begin V have
find the center of our page. And now I am using
my campus with a mechanical pencil to draw the random
concentric circles. The circles that I am drawing, I'll add a gap of 1 cm
and 1.5 centimeter. Okay? So once it is done, it will start dividing our mandala into 20
degrees of anger. You truly what we do when
we're creating a mandala grid, the US tend degrees of exile, but we want to create
something different. So that's why we are using
the 20 degrees angle. So the protector I am using,
It's around predictor. If you don't have this one, you can use your normal,
usual work, right? So let's mark the angles and
then we will join the dots to the center Through a straight line and that
we will form a grid. Now, as we have Martha angles, I am connecting the dots to the center to
a straight line. And let it be done. Once we will complete it, then we will move on to
the next step where we will be creating
shapes on this grid. And we will be outlining our concentrate circle
that we have created. I am using 0.2 Fine
liners hair to draw the concentric circles and make sure when
you're inking them, you do the double outline. It will give you clear and crisp factors when you start
filling up all that. Okay. I am using 0.3 fine liner to
draw the shapes. We will be using u-shaped as the
foundation of our design. Okay? So we will start join small U-shaped in the
center of our pizza. Okay? So we will be using
only U-shaped in different sizes to create that flow and balance
of our design. What you can do
is you can create symmetrical or asymmetrical
patterns which ever suits your artistic
version of this mandala. Once you draw all
the U-shapes and all the layers of this mandala. God filling up the blank gaps, the negative gaps that don't
live between on the top of the Your sheets to your
shifts between two U-shapes. Okay? So that will give a
fuller effect to our mandala. Now the social Last year, we will be creating the
kids to U-shape. Okay? It's a very simple shape
that I have chosen here. Mini mandala creation The delightfully
portable practice, unlike larger mandalas
that we create, these smaller versions
can be easily read in a small pocket
sketchbook or in a bag, allowing you to infuse
your creativity. Very, very useful in
your own daily lives. But a, you are on a break
at work or waiting for a brand or simply seeking
solace in point moment, Mini Mandalas providers, soothing, portable,
creative outlet. Okay. This, in this way, you can draw your Mandalas
anywhere at any point of time where you want to
create something for yourself to give me a mind, a sense of calm and peace. Okay, so now we are
on the Last layer, and I have decided to use the fact and a
sweater lender 3d. It is quite a beautiful
border and I use, I use it very awfully, very frequently in my mandala as well as the border
pattern because it just gives pupil to the
whole artwork of fuels. So the details that we will be doing in this pattern is in the tree leaves will be drawing a line and a dot on top of it. We have completed our pattern. I'm just doing the
details in the leaves, like a line and a dot and
one could be complete. I will draw the
baseline on the line on which this pattern
has been drawn. I draw that line with
a thin tip marker. So whatever the negative
space we are having there, it will be filled
with black color. And this chapter is
almost complete. Solver will move forward
to the next one. There we will be adding details to the mandala
grid and U-shapes. See you guys in the next one.
7. Lets add some details: Welcome back everyone. So let's start adding details
to our U-shape mandala. And first we have to do the double outline
of all the layers. This is the last layer
that was remaining to do the double outline and I am
doing it one cell complete, I will start adding
the details from the inner most layer
to the outermost. The details that I
am using here are slant lines and I
am doing it leaving one empty in-between
two U-shapes because we are going to color
them black as it will give a contrast
look to our mandala. So now we're going to color the empty space
that we have left cleft between two shapes
with black marker. In the third layer. We
are going to add sweater. Sweater. Okay, so
what I'm going to do is I'm not going in
a rotational week. I'm drawing it one
Spiral on left and the next to it facing
towards the right. As you can see.
I'm drawing it in a combination of two
facing each other. Now onto the Last layer, I am dividing this big use
shapes into two parts. I'm drawing OK, in-between the shape to divide it
into two equal parts. So there is no measurement
how to equalize it? I'm just drawing it
randomly from one point to the next point that
is just supposed to that point from where we
have started drawing an ark. The pattern that I
am creating here is Switzerland leaves
in the corner section, I have drawn this sweater
and I've drawn leaves, five leaves on top of that, it is not necessary
that you have to draw the exact same
number of the leaves. You can decide the
number of leaves as accordingly to
the space that is available in the pattern in the main shape there we
are drawing the pattern. And the second half that
is left empty there, I will be doing
the same pattern, the lines and the dots. Okay, So two lines and one line with dot
and similar like that. And do upload your projects and the Project section because I love to share them
on my Instagram. And if you're having any
questions or queries, please post it in the
discussion section so I can help you out with
every, everything or anything. And secondly, if you're not having these Art Supplies,
that's completely fine. You can draw these Mandalas with the basic supplies like pens, paper, and you geometric box. That is all you need. To pursue your Mandala journey. You don't require any
specific set of skills. You just required a Z urge to learn something new and be
creative in your own way. And then we'll Nala
is almost complete. I'm just doing the
centered design. And once it is done, we will do some final details
and a mandala will be done. I hope you guys have
enjoyed this session and thank you so much guys for
joining me. Thank you.
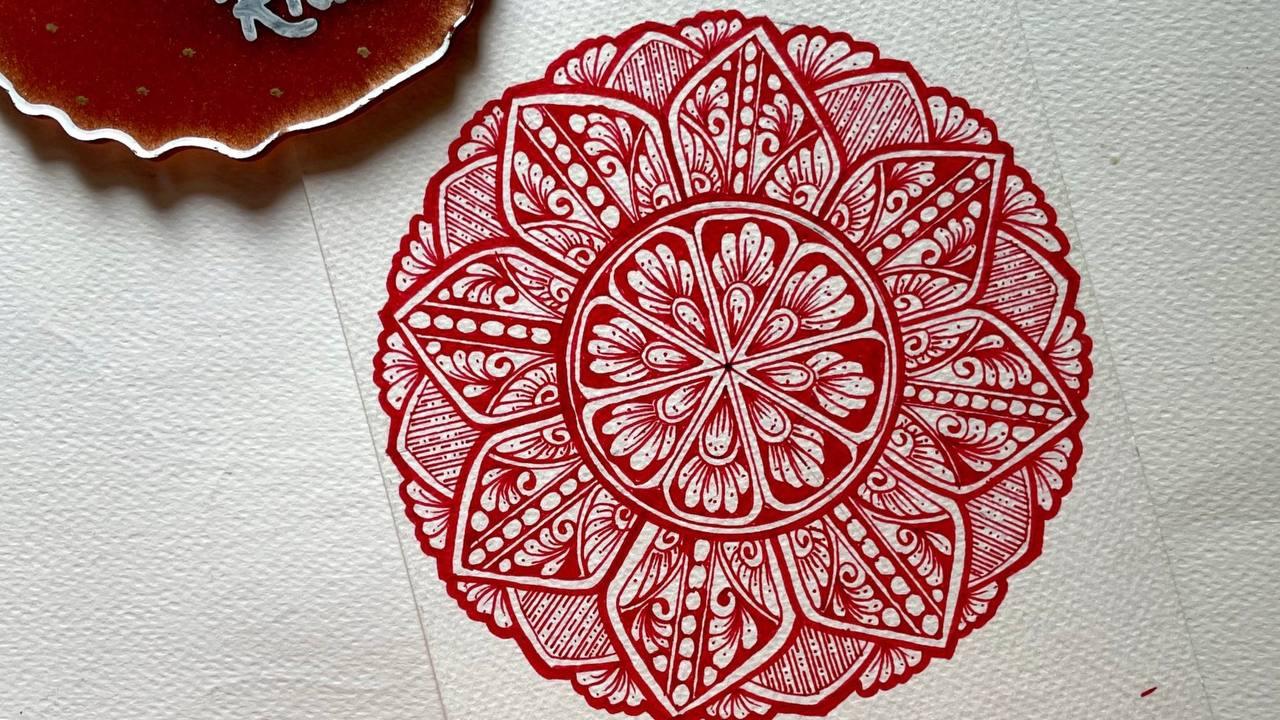
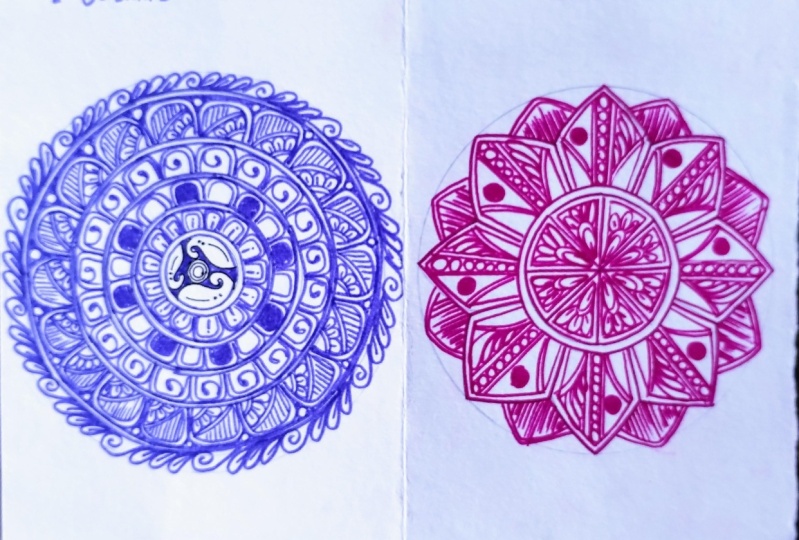
8. Red Mandala: Hello everyone and
welcome back to another session of
mini window class. And in this, we will be creating a bright red mandala with the
help of a twin tip marker. That doing tip marker
is a marker where on the one hand we have a fine tip liner and
on the other hand, we are having up take tip. So I'm gonna start by drawing
the concentric circle, the center of my page. And here I am taking a
four centimeter gap to create my secondary
concentric circle. And I'm gonna repeat
this process. Okay? And once we are done with creating
concentric circles, we will start adding details and creating
shapes on a grid. For this mandala,
we're gonna divide US goods into four
equal parts, right? And then afterwards
we divide every part, one of the four parts. We have to divide it
into 45 degrees of angle so that this will divide
our whole so good. It equal bunch. So this is a twin tip marker
I have from steadily, and this is the fine liner tip and this is the thick
tip I'm talking about. If you don't have this marker, then it's completely fine. You will see you colored Fine
liners and you'll sketch pen in collaboration
with each other. So there we have to you, I'm using tip tip. You can use your sketch pen and when I'm using fine liner, you can use your
colored fine liner. I have started drawing my soccer's and double
outlining it altogether. And once I will be
done with this, I will start adding shapes
to add grid formation. So whenever you want
Drawing mandala, you have to break down
the process, right? You have to, like, you have to divide your whole
mandala process and steps. Like for first step, we will draw the grid on second, we will draw the outline. On third, we will draw
the shapes on forward. We will start adding the
details on fifth and so on. So it will give you a better understanding of
the various stages that in world and provide with a
roadmap to your practice, to your successful
completion of your mandala. Venue or creating different
kinds of Mandalas. Challenge yourselves
by exploring different techniques and
approaches of creating Mandalas. Okay, like in this one, we're using two
different types of EPS to use to
create our mandala. You can try stippling, hatching,
crosshatching, shading, or you can try watercolor
mandala as you can try different textures
into your designs. Because experimenting with
new techniques will expand your artistic capabilities and help you discover in
your own unique style. So it is quite important when you are practicing mandala as or any other Art form you have to experiment with new things. Don't be afraid of
the failure that We'll try something
and it formed workout, that's completely fine. It happens with a 3d1. The, the point of
whole process of creating and practicing
mandala is to achieve that sense of
peace and calmness in yourself and to develop yourself into a
better human being. So venue was starting any Art from beat
mandala, speed Doodle. Then Tango, tried
to explore the work of your fellow artist and
observed the techniques, styles, and the use of colors,
patterns and compositions. Take inspiration
from the work and try to create something
unique in your style. So rather than
aimlessly doodling or creating Mandalas
without a purpose, set goals for you. Set small goals for
your practice session. Like, for example, for a day like you have decided you have to focus on
improving your linework. And the next day
you have set a goal like you have to experiment
with new patterns. Because Papas, full
practice will give you more significant results
and progress over the time. We're almost done with a
double outline of a mandala. And after that, we
will move on to the next chapter
where we'll start adding details to
our basic shapes that we have drawn
in this chapter. So see you guys in the next one. Thank you.
9. Adding details to the shapes: Hello everyone and welcome back. In this, we will be adding details to our
bright red Mandala. And I have already started it. D, D is the pattern that I am using is it is a drop
in on top of that, I am using a floral
partner, okay? So when you start
your mandala journey, create something mandala
is with fewer elements and focus more on mastering the basic shapes
at achieving symmetry, as you gain confidence, you can gradually add more complexity to your
designs in tricky sees. So when you're practicing regularly, Drawing
Fundamentals shapes. So good Squires, lines,
triangles, hexagonal. These shapes form the
foundation of your Mandalas. And monitoring them will help
you create more precise, balanced, and intricate work. So far, this battle, I'm going to divide my
shape into three parts. Okay? So in the center, I am drawing a straight line
with the help of ruler, and I am double outlining it. After that, I will divide both the section left and
right side of lines. I will divide it with an odd. Okay? So firstly,
we have to draw so good in the gap that
we haven't created. The lines we have clean. Now I'm drawing it. Ok, and here I will
draw a sweater loudly. On top of that, I will repeat the same pattern but within different variation. Then you are practicing mandala is utilized
guidelines and templates. Domain deals, symmetry and
proportion and you mandalas. Grade compass stencils can be
your best friend to assist in creating consistent when structured mandala
compositions will keep. So when you are
creating patterns and big shapes like
here we are drawing, please focus on the symmetrical
aspect of your mandala. Because we always
create the guidelines, the grid that we have
created in the beginning, that is the core of our mandala. So when you are dividing your shapes into
different forms, always maintain
that symmetrical, that pain in your Mandalas from where you are
starting one shape, the second shapes
should replicate that thing in that
particular portion. Okay. Extraordinary front
line thickness and patterns like
in this mandala, I am using door tips. One is fine liner
and one is a TikTok. Okay, experimenting with
different line thickness will add depth and
variety to your mandala. Try using thicker lines for outer boundaries and thinner
lines for intricate details. You can use different lines
patterns such as Dawn, notches, VB Spiral leaves. The patterns they create visually a very
interesting effect. One of the most important
thing in learning $1 is to learn the color theory. Understanding the
color theory is essential for creating
beautiful mandala and get yourself familiarized with concepts like
color harmony, contrast, and color psychology. Experiment with various
colors combination and valid to make your mandala
more beautiful and vibrant What inspiration
you give me long. For various sources like
nature, architecture, extra textiles, and
cultural designs. Like me, I can seek
inspiration in pigs. And in architecture. There are many different
things from which you can be inspired and incorporate those elements that correlate with you in your own creations. Because exploring
different cultures and traditional Mandalas and bad does it will be really helpful for you and
your mandala journey. As we all know that Mandala Art as a meditative and
calming practice. The process, and focus on the present moment when you
are creating your mandala. Don't rush because patients
and mindfulness will allow you to pay attention to the Details and create pure, full, harmonious and
intricate conversations. And I details on this
mandala is almost complete. So let's go want
them next ship in which we will be adding
the last year to mandala?
10. Adding Last layer Details: Hello everyone and welcome back. So this is the last
layer of red bandana, and I am double outlining
the Last layer. After that, the pattern
that I have chosen for this layer is straight
line and lines with dots. This is very simple
pattern that we have already practiced
earlier in this class. And if you want, you can create floral pattern, lake of floral pattern
with five leaves, one in the center and two on
both of the sides, right? Let's get started
for that button. So if you ever feel
stuck on ideas, like ideas on how to create
different kinds of Mandalas. Take a step away from
the traditional method, that is paper and pen. Ok, and try your Mandalas
on different surfaces, like stones, seizures,
Sweden, or a Canvas. This will help you, given extra layer of interest to your mandala
Art bug because of the unique texture of the self phase or the medium
that you will be using. Details are about to done. This is the last thing
that I am adding that is I am drawing three leaves and
I will redrawing these leaves on both
sides of the Last layer. The last leaf pattern where we have drawn the lines and dots. Because I am having
a feeling that that's peace is looking
empty and negative space. I wasn't liking much, so I decided it to
fill it with leaves. If you want, you can add swirl
also sweater with leaves. That is totally up to you. Just experiment with new ideas and patterns while you are
creating your Mandalas. It will definitely help you
out and you mandala journey. And let's finish this one. And after that, we will move on to create a
new one for you guys. And thank you so
much for joining me. Thank you. Interlock
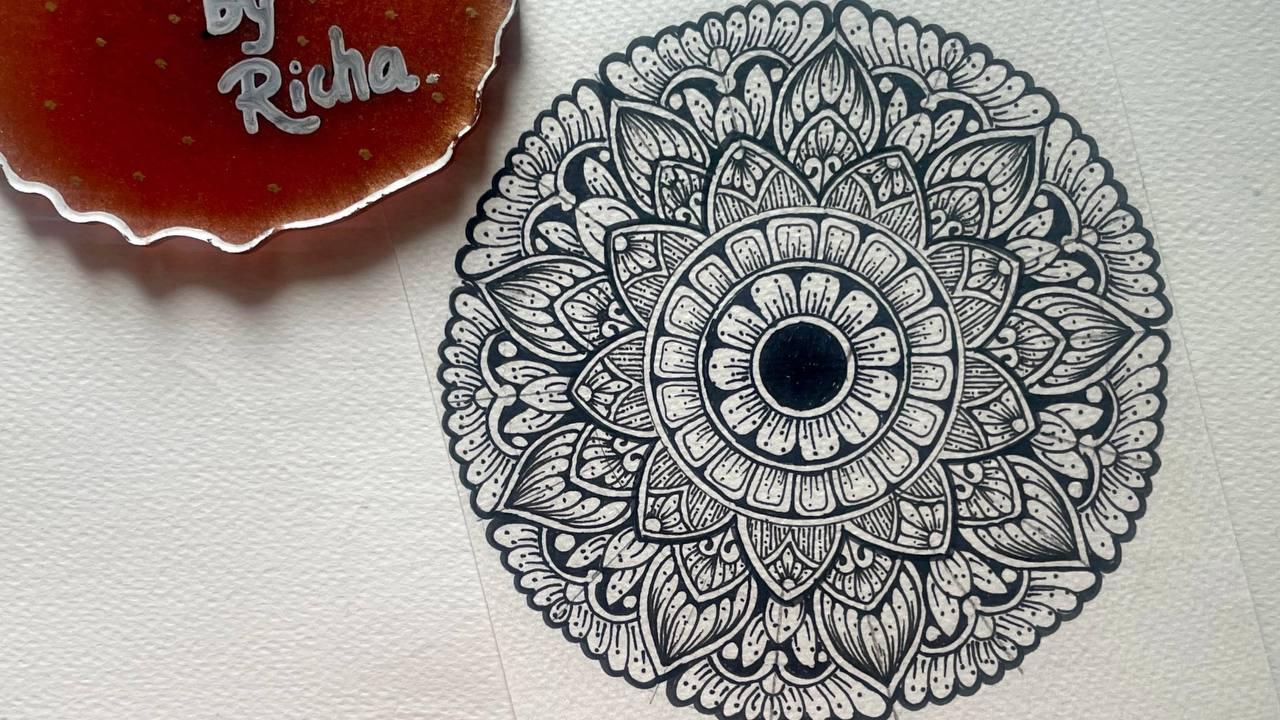
11. B&W Mini Mandala Magic: Hello everyone and
welcome back to another amazing session of
our Mini Mandala class. And in this, we will
be again creating a classic black and
white mandala with a bit different and
easy patterns to do. So, I have taken the central, the page and create a
concentric circles, have a gap of 1 cm. And we will Inc. the linings. And then we will start
creating the grid and creating shapes
on the, okay. Let's start adding
the shapes on a grid. And the first shape that I am
drawing that is a U-shape. And after that, we will draw two or three multilayers
of leaf pattern. We are creating the shape. It is kind of
pointed leaf pattern that I'm creating here
because previously we have created bag leaf and then a small one in the gap that is that between the
two big leaves. So whenever you are doing
the shapes on your grid, make sure you have
to double outline. I've already mentioned this
in my previous sessions. Also tag. It will give more for nice and more publicness
in your mandala. When you are doing the double
outline of your shapes. This is a Last layer
that we have drawn. And once it is done, we will start adding the
details in our mandala. I therapy is a
therapeutic approach that utilizes the
creative process of art-making to
promote self-healing and self-expression
and personal growth. Meditation purposes. And through the use of various add materials
and techniques, individuals are encouraged
explore their emotions, hot and life experiences in non, in a non-verbal and
non-judgmental be. And I'd therapy can
be beneficial for people of all ages
and backgrounds as it provides a safe and
supportive environment for self-discovery
and self-expression. So now I am dividing
the biggest a leaf, but done in our mandala
into two sections. So I'm going to draw
from left to right and right to left to divide this
into three equal parts. And as you can see
that I'm drawing the line patterns on the
that I have created equally. And on top of it, on top of both of
these sections, I'm creating a floral pattern. And this is a pattern that we are going to repeat
it in this Layer. Know that engaging
in art-making with therapeutic context can
help people gain insights into their inner
world and process the difficult
emotions and enhance self-awareness and develop
coping skills also, the act of creating Art, can we get parodic and
empower them and bubbling? And the transformative
also allowing people to communicate and connect with themselves and others
on a deeper level. And therapy embraces the belief that the creative process
itself is a healing. And that engaging in art-making and boost your personal growth, resilience, and
overall well-being. Let's talk about
the significance of different patterns and shapes that holds symbolic meaning
and depth to our mandalas. Okay, so far as we
talked about sockets, the circle is the foundation
shape of a mandala represents unity,
wholeness, and eternity. It symbolizes the
cyclical nature of life. That what it is one has
come to welcome to an end. And the interconnectedness of all things and the
continuous flows off low of energy.
The second shapes Use our squares or rectangles. These Shapes often represents stability, balance,
and grounding. They evoke a sense of structure and order
within the mandala, providing a foundation
or the other element. The third is triangles. Triangles signifies how many
valence and divine trinity, depending on the orientation, they can represent elements
such as fire, water, air, and triangles pointed toward upwards symbolizes essence
and spiritual growth. And downward pointing triangles signify a grounding
and stability. The fourth shape that we often use in a mandala is Spiral. It's patterns are ancient
symbol of growth, evaluation and transformation
presents a journey of life and the cycle of
birth, death, and rebirth. Spirals can also
symbolize the unfolding of consciousness and
spiritual awakening. And the fifth. Like we, almost, we
like to use floor, florals and patterns
in our Mandalas. Plural. Patterns and petals are often seen in mandala
as representing beauty, growth and laws make. Each flower carries
its own symbolism, such as the lotus symbolizing
purity and enlightenment, or the roses representing
love and passion. So now let's talk
about mandala as within $1 nested
mandala as well. Smaller one are contained
within the larger, like the one we are doing in this session represent
the interconnectedness of various levels of existence. This symbolizes that
microsome within the macros. And then the idea that everything is connected
on multiple levels. Sacred geometry is very oftenly used in mandala as in geometric shapes
like Blogger of life, Mediterranean skew
on the SRY on. These patterns carry deep spiritual and
metaphysical significance, representing the
underlying order and harmony of the universe. And one of the most
commonly used symbol in our mandala world
is Yin and Yang. The Yin and Yang symbol with its contrasting black
and white halves represents the balance and
interplay of opposing forces. It symbolizes the
concept of duality. The idea that
complimentary forces are always interconnected
and interdependent. The meaning of
mandala is not fixed, but can be personal and subjective differentiating
from person to person. Ultimately, the significance of different pattern and shapes and mandala lies in that
individual's perception. The intention
behind the creation or the contemplation
of that mandala. We're almost done with a
beautiful Mini mandala. And I hope you guys have
enjoyed this session. And you must have gained some insights and
the word of mandala and do share your views
in the comments section where we can discuss anything and thank you so much
guys for joining me.
 Richa Saxena, mandala & watercolor artist