Transcripts
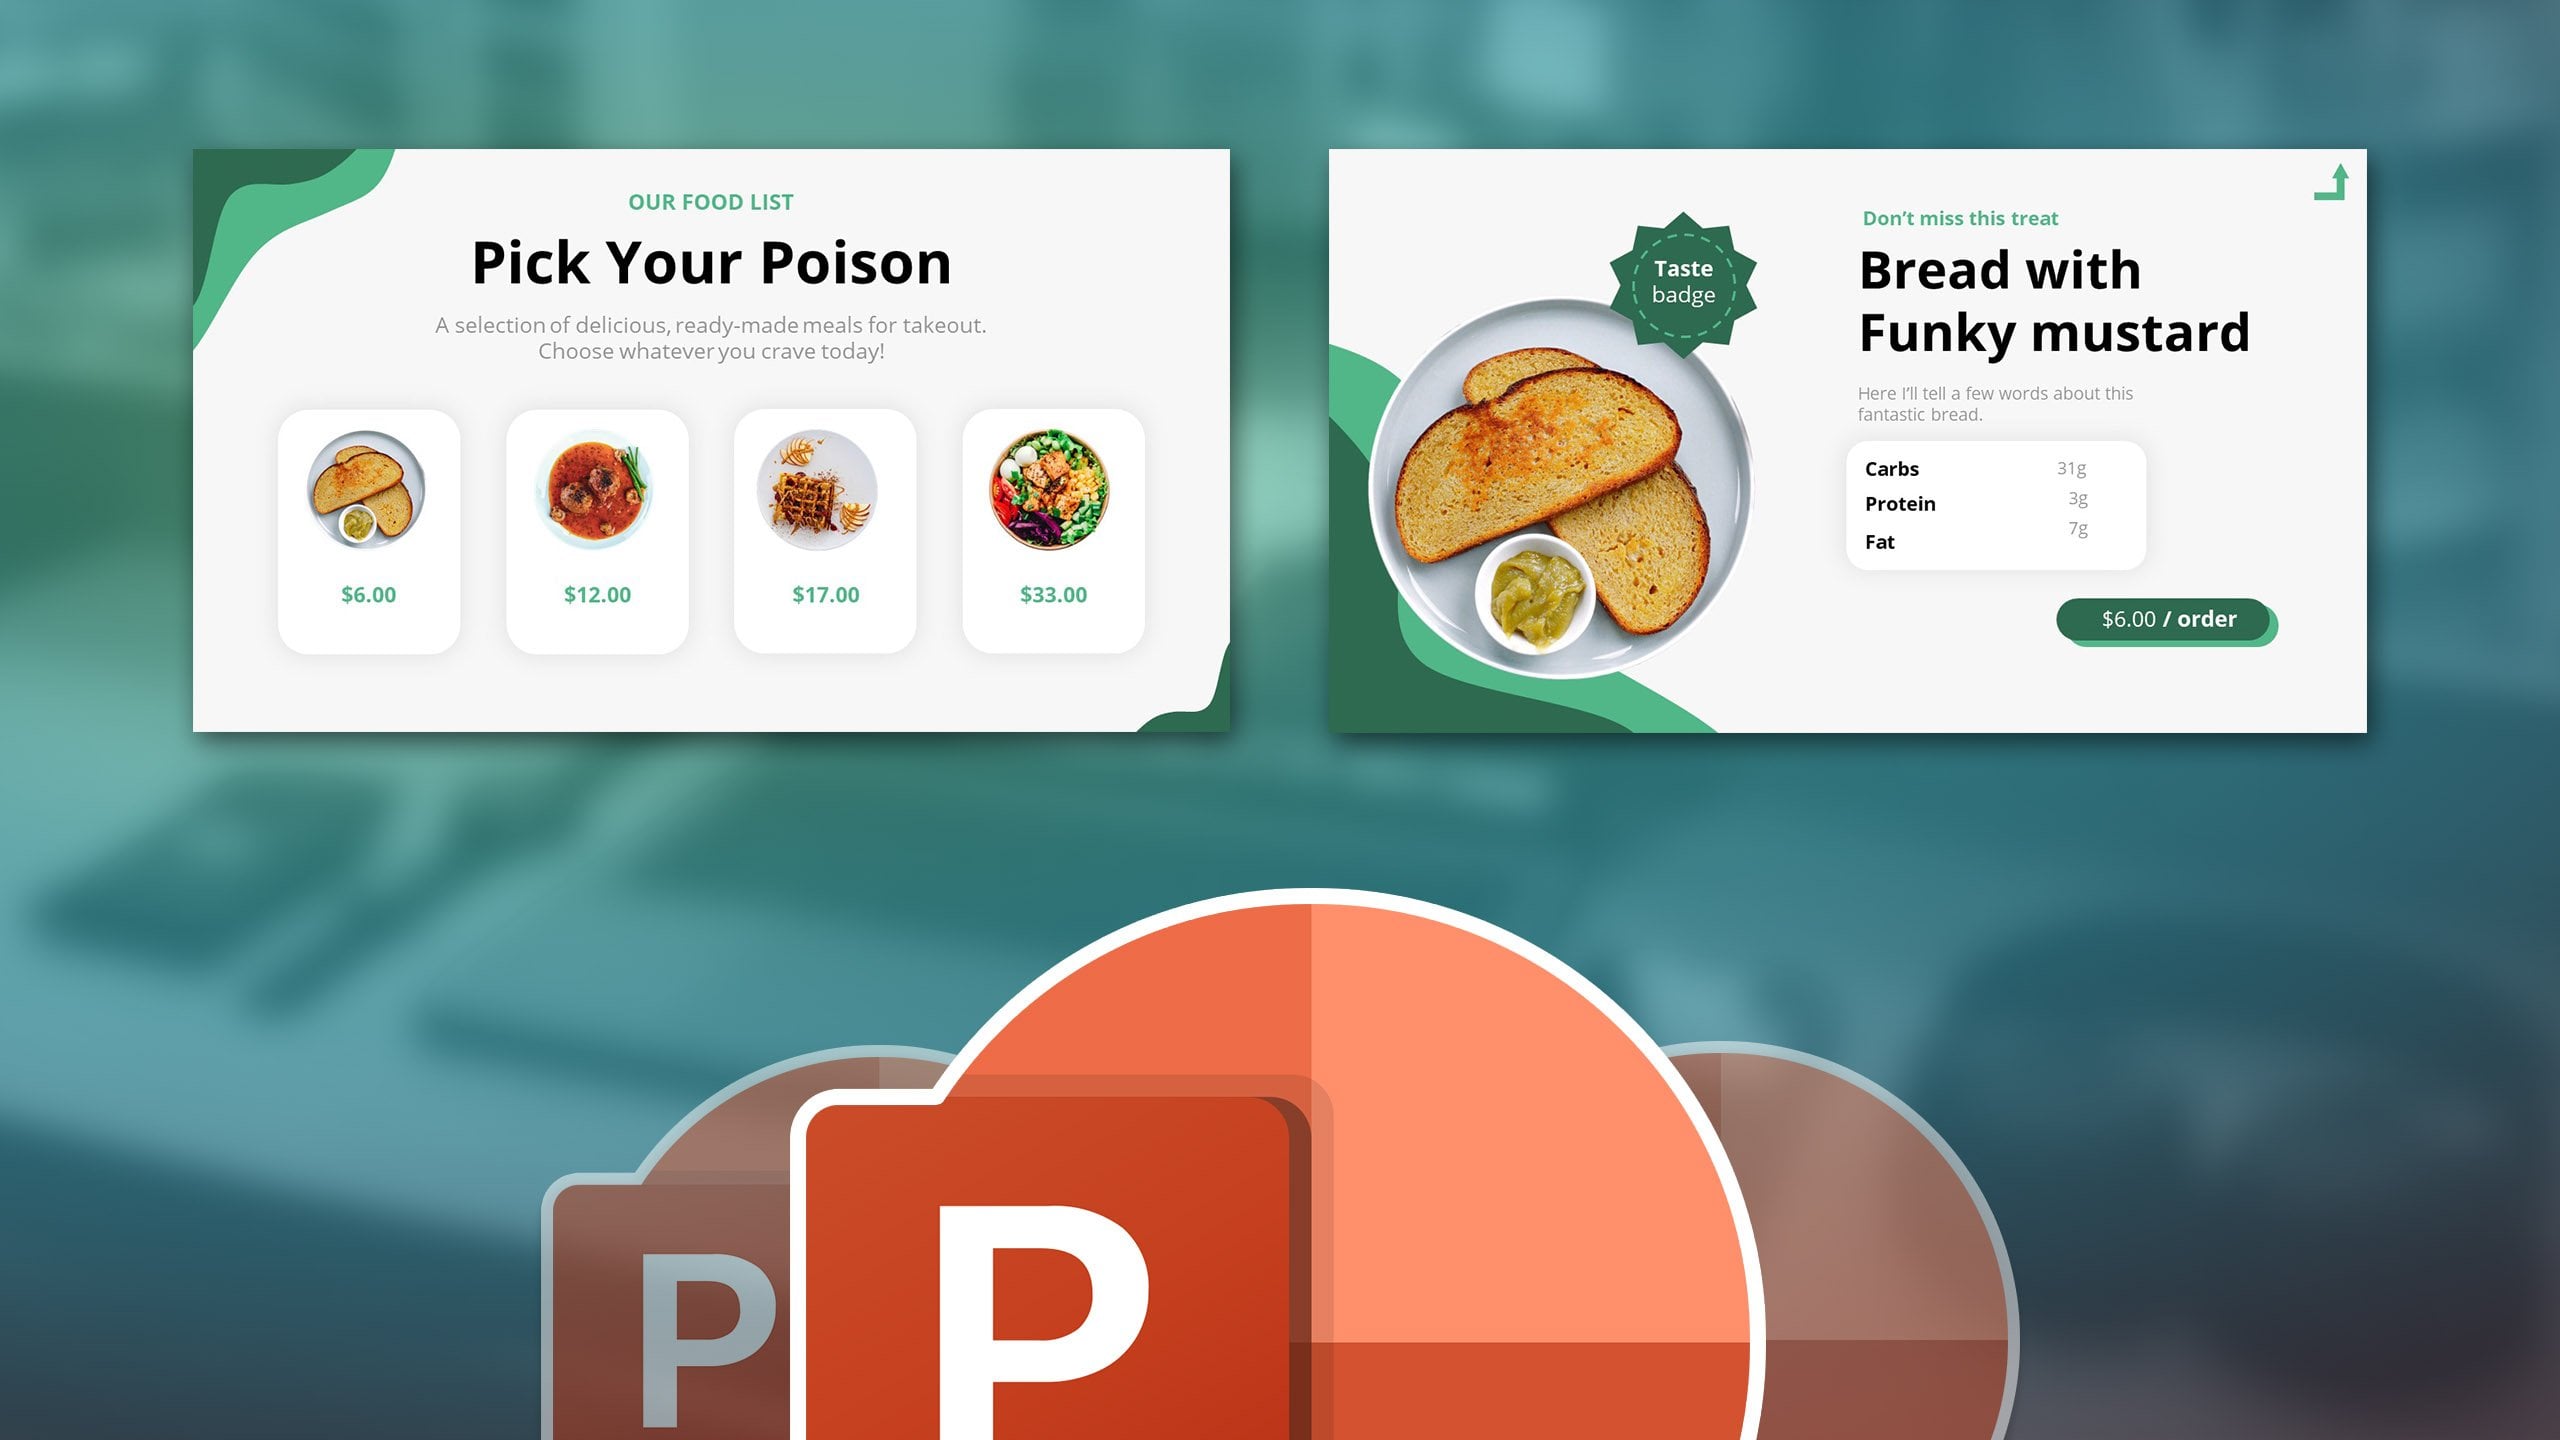
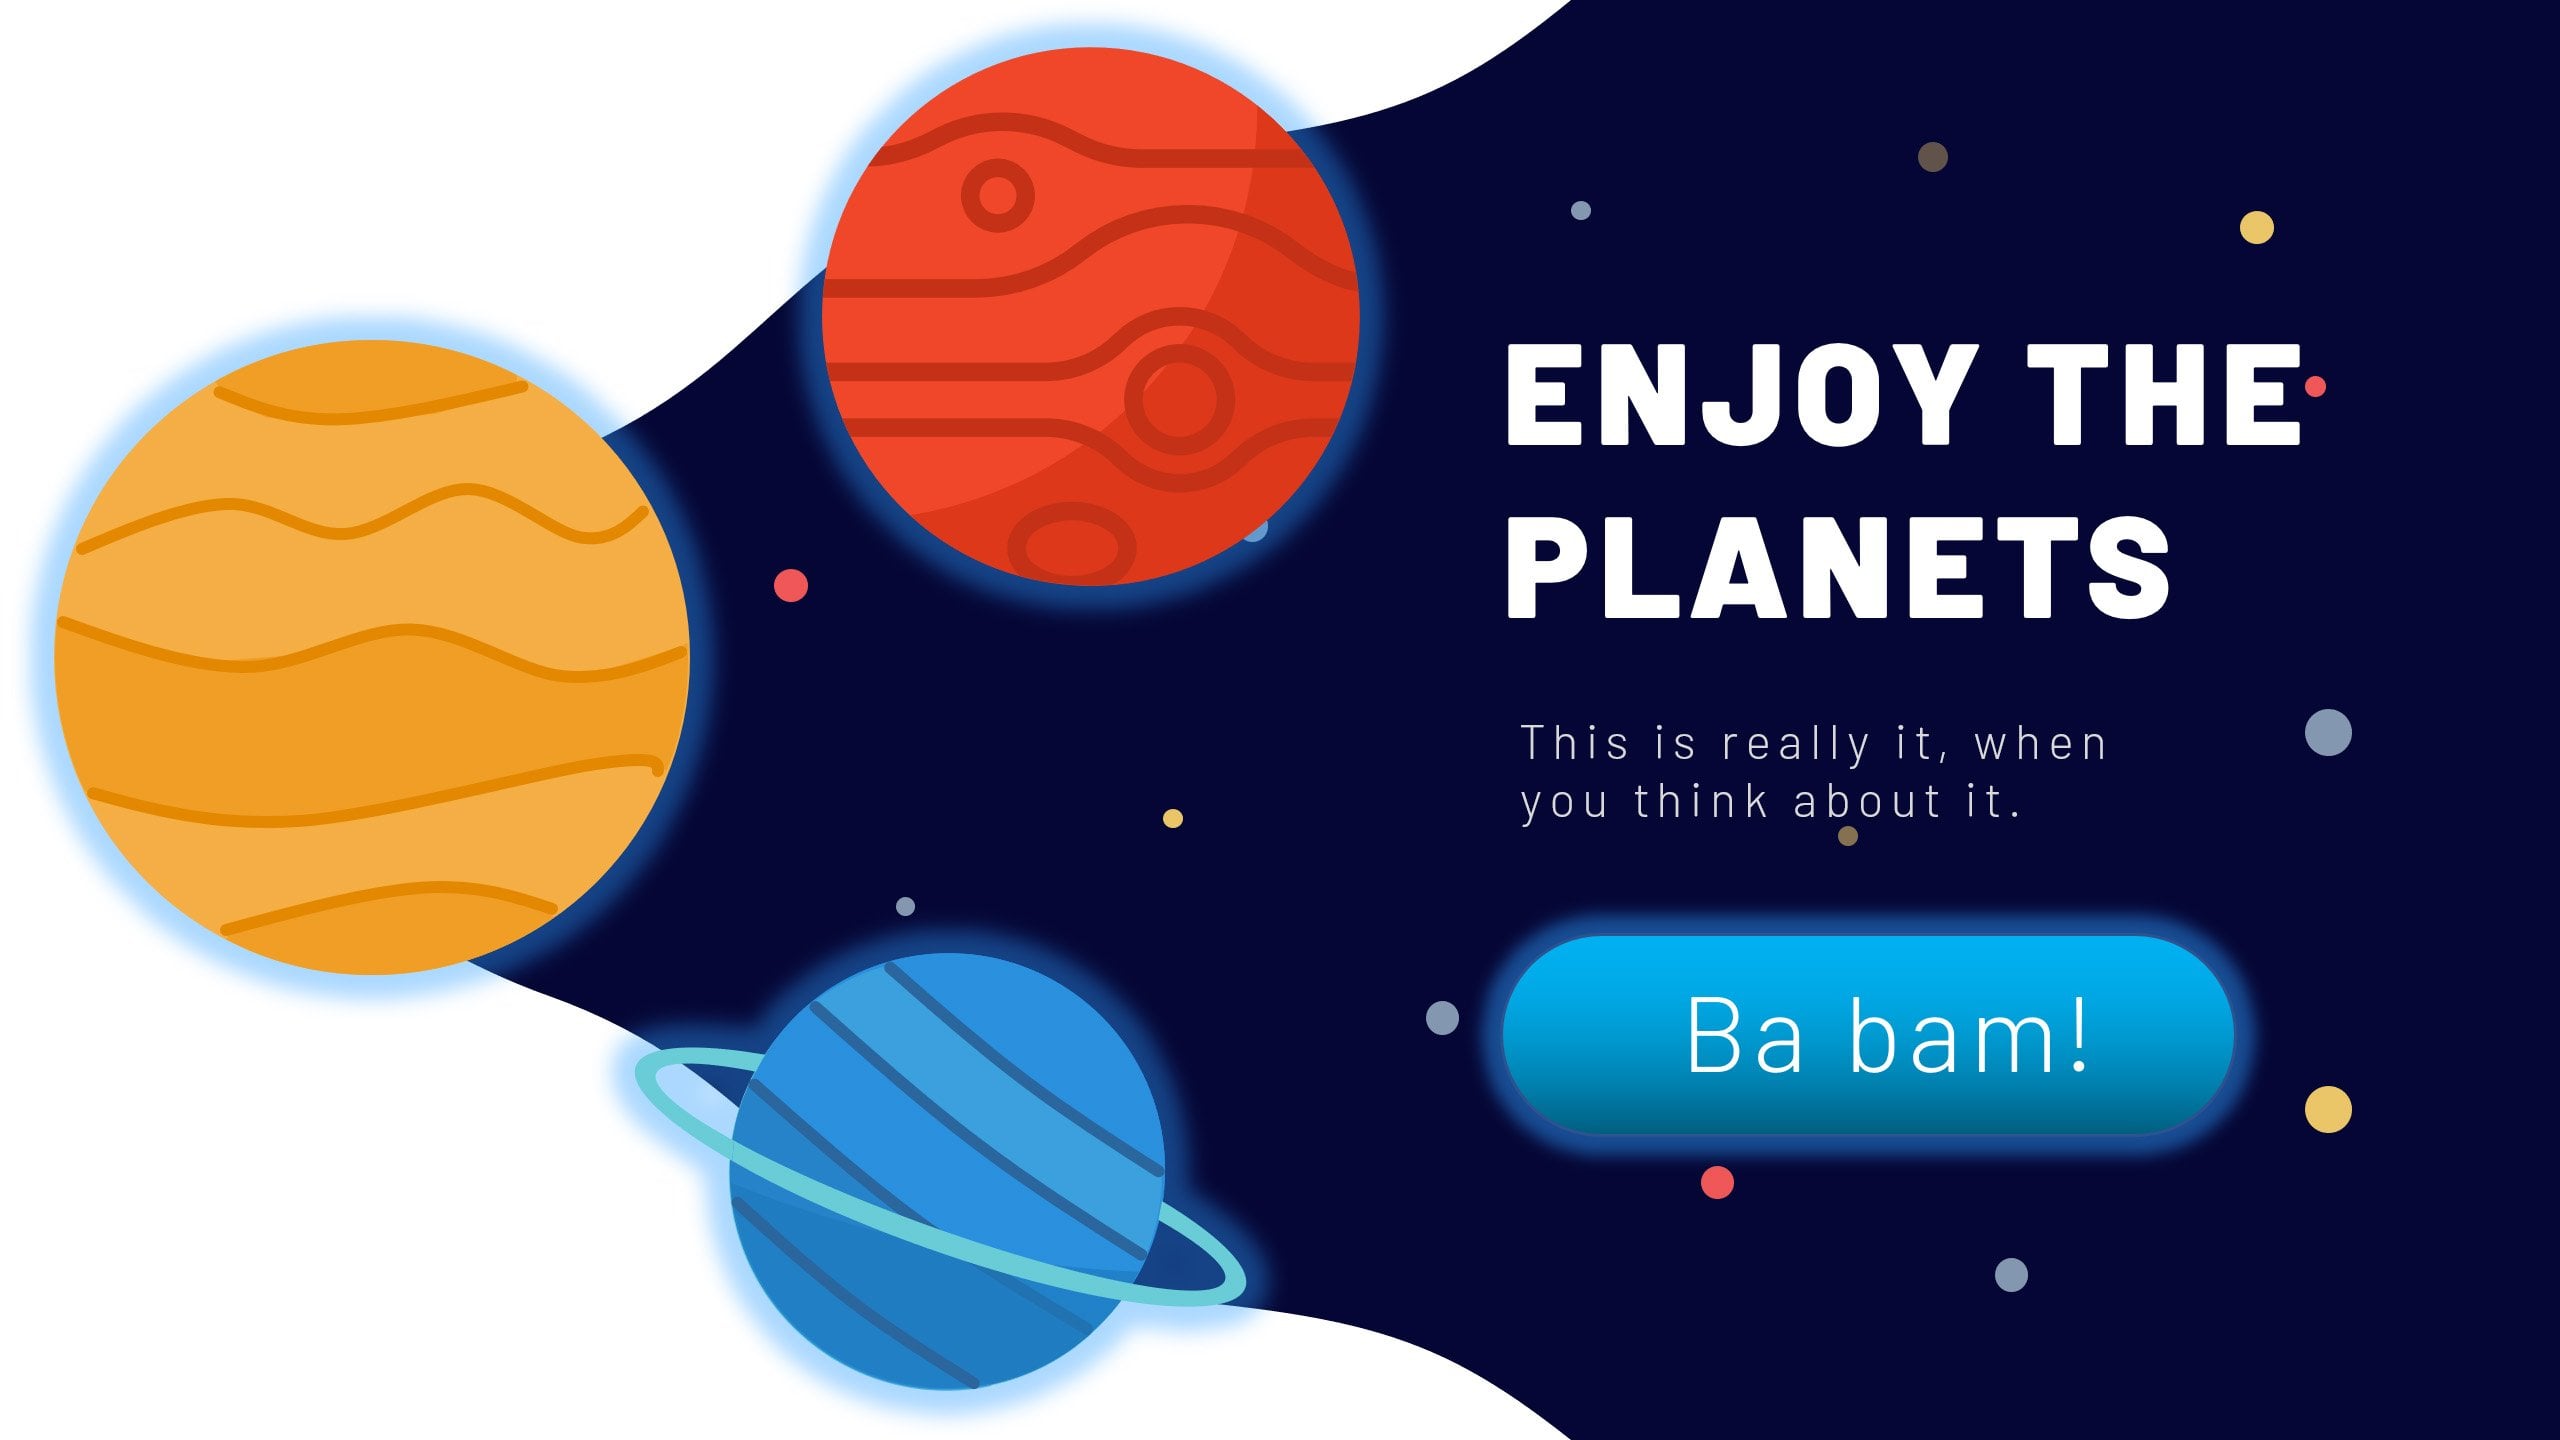
1. Introduction: Hello and welcome to my PowerPoint master class, where I'll teach you how to design professional PowerPoint slides and how to animate them. This is the main topic, but we will also talk about kinetic topography, making templates in PowerPoint, and creating videos out of presentations. Additionally, we will learn many tricks which only professionals in PowerPoint use, like creating overlays, painting the format over, or using trigger animations. It will be helpful if you already know something about PowerPoint, but if you don't, you can also work slow and you can go through the entire content, learning all the things that professionals should know. I wanted to show you a few of the slides we will design and animate together. So you'll have a better idea of the quality we are aiming for. After this course, you will be comfortable boat with designing in PowerPoint, animating with PowerPoint, and creating videos with PowerPoint. We will not only have fun together designing in PowerPoint, but you will be also granted all the templates. And I've also prepared a reward system that will grant you vector icons and vector maps in PowerPoint. Now it's time to make your decision. Do you want to keep guessing or do you want to learn in an engaging, fun, and professional way? I hope we will see each other inside. I'm waiting, prepared there for you. So see you inside the lesson.
2. 01-01. Your Instructor and Resources: This is a pretty big moment
for me because I'm recording this lesson as I'm already
done with all the content. Hey, my name is Andrew pack
and I'd like to quickly, very quickly introduce you to the course content and who I am. You already now know my name. So why should you trust me as a designer and know that I
will teach you something? My daily work consists
of freelancing, preparing online
content, and publishing online material, mostly videos. The majority of my
work is done with Microsoft PowerPoint and
Adobe After Effects. To reinforce what I'm saying, I'm also running a
YouTube channel, it free and educational content. I'm also a freelancer at Fiverr. I'm rated as a
top-rated seller order, and I have already
3 thousand reviews, which is about 4 thousand
completed jobs for clients. It's not the numbers
that matter, but what matters is that I've worked with over a couple
of thousand clients. I've published a couple of 100 videos and I've
created online courses. All that made me realize
what are the weak sides of students weren't are the
strong sides of designers. What could I teach? What should I teach? What people want to
know and what makes their design an overall
careers and lives better. That's why I feel I'm
very confident going into this course because this will be a PowerPoint masterclass. I will not go over the most basic element
unless you told me. So, if you will have
basic questions, I will of course answered
and an icon even record a new section for you regarding PowerPoint specific basics. With here in the
course I've prepared, currently, the setup
looks like this. The first four sections of content are there to
prepare you to the work. You will search for
photos and icons. You will learn some
basics about PowerPoint. Then I'll teach you
advanced PowerPoint tricks. Let me show you later what that is and how to animate
in PowerPoint. This will make you completely prepared for the bigger section, which is slide's design and then animation
of those slides. We will start with the first
slide and then we will continue in the next sections
with the other slides. Since this is a masterclass, I'm also explaining
how to make videos with PowerPoint which would be ready to publish to YouTube, or how to create complete
explainer videos from scratch. And also how to create
PowerPoint templates. What would be a masterclass without telling you
how to do this? The very last thing I
would like to inform you about is how to
download the resources. There'll be one file or multiple files depending
on how I set this up. All resources and
shortcuts I mentioned are also available in
the PDF I'm attaching, which is that quest
and shortcut list. You will have all the resources. And if you would like to track your progression in
their course, you can, for example, print this out and track what lessons
you completed. And there are small tasks to
perform after each lesson. This is also completely optional for those who would
like to gamify the content a little
bit and make the course more enjoyable when taking it. This is when it comes
to my introduction. If you have any questions, please let me know and I'm sure we will work something out.
3. 01-02. Please add a project!: Hi, it would be amazing. And you can help
me on Skillshare by starting a product
for this class. Nice. At first, it doesn't have to be the ready product is go to the
Project and Resources tab. Hit on Create Project. And right, You're
welcome message. Later on when you create
slides from the lectures, you can share a
screenshot of that slide. You can do this by going to File Save As Selecting Browse. And you can select to
save as a JPEG there. By saving JPEG, you can select all slides
are just this one. Then you can come
back to the project, select Image and to just add
a slide that you created. I will be really happy to see it and it will also
be very helpful. Please start the
product right now. It will take only a few clicks and helps me a lot
here on Skillshare.
4. 01-03. Dig Into PowerPoint Right Away: hello and welcome in this hands on warmup lesson. I'd like you to learn something in Power Point within the first few minutes off the course , so let's get right onto it. At first, I would like to enter the picture into this design. You can use your own picture or you can open. The resource is the presentation files, and I'm attaching also older pictures I've used. So I'll use simply the first picture and let's do some photo manipulation. Let's assume that I want to fill out the slide with this picture, and I would like to change the color off this guy. Now, how would I go about this? At first, I would click on the picture. Please go to the cropping options. Click on crop. Try to extend the crop area to the entire slight. Now, you don't have to extend the picture because Power Point can do that for you. Please click on the drop down button and you should have Phil and fit. Please select Phil Boom, and it will automatically fill the entire area with the picture. We select it, I'll pick crop and now I'll show you a very cool trick. I will press insert shapes and I'll insert a rectangle shape well later. Or do this as well many times. But I would like to show you how to create those overlays. Greet a shape like that. Once you have it, please click on shape, outline and select no old line because power point adds an outline here around automatically. Okay, Now, this blue color is pretty ugly. So please selected right click and opened the former shape options in the form of shape options. You need to select the Phil and you need to go over the Grady in film. Now you might think, Why do we need a gray? Didn't. Well, actually, we don't need a Grady int. We need the transparency options because those are very amazing. And you need to remember about them when you work in power point at the beginning, we have four colors. Please delete health of them because we only need to off those colors, select the last color and make it completely transparent. Now you understand where I'm going with that. I will select the first color and I'll select the core. I would like that overlay to have So let's maybe go for something crazy like this. Burgundy Red, The star Great. I'll select Dark Red. Now you can see it's pretty crazy, but I can adjust how crazy it is that the most important thing is that I can adjust a transparency off this very color. If I make the transparency a bit higher, the red color suddenly isn't as strong anymore, and I can make an overlay over the sky off this picture very quickly. We created an overlay on this picture, and we will definitely do this in this course because overlays are one of my favorite things to do in Power Point and I could also call this photo manipulation Power Point will never come close to photo shop or adobe light room when it comes to photo editing with the basic things like clicking on the picture, going to its former and clicking on the color gives us access to at least a few color options like grace scaling the image or selecting a few car overlays for them. So as you can see if I would, for example, select this yeah, this yellow kind of looks cool, and I would combine this with my overlay Look how cool oven effect I can achieve. I can off course change that. I can change the color. I can change the grade and I can change. Sorry, I'm not precise. Here. Let me go back to the form and shape another Golding. You can also adjust the brightness. The rightness makes how warm the color is. You can make this red color brighter. Orders red color darker. So as you can see, we kind of have a few options. And it's really fun to do those in Power point. We can adjust the great and as we want, we can do custom overlays like that. And with help of that, we can become Power point magicians. This was a first introduction. Every lesson I hope you did already learn something in Power Point, for example, like making those overlays or cropping pictures immediately to a felt. By the way, you can also crop two shapes like crop to a triangle, and the picture would be a triangle. But this all will come later. I'll expand upon the knowledge we are gaining here. That's completely enough. When it comes to the first lesson, we need to prepare ourselves as professional designers do so we will need to research some images, some icon, some colors and later on we'll work on a real life presentation.
5. 02-01. Gain Inspiration: Hello there. What a beautiful
start into this course. At first, I'd like to go about a few things every
designer should do, especially before a big project. If you are aiming to do
a high-quality product, you would at least need a few minutes to look
over other projects. What people design currently? What is trending
to not copy them, but to inspire yourself for great design in order to
get good in PowerPoint. Powerpoint can be used as
any other design software. And in my opinion, if you want to be
a good designer, no matter which tool you use, this time you will
use PowerPoint. This will be your tool, but you also need to
be aware about design. I'll make here a
game plan for you, which you can do step-by-step
exactly as I do here. Two gain quickly inspiration, and then we will head right
into PowerPoint. At first. It depends if you are doing
a business presentation or just a free
product for yourself. You can write, for example, business brochure
and go to Pinterest. I wrote business brochure, but you can also
write poster flyer, website, presentation,
design, inspiration. I've listed those tax here, which I think are very
relevant to everything. And right off the bat, I just wrote this here. And I have my first two links. I go into the link, for example, business brochure, and
I'm gaining inspiration. Now. Already. I'm setting myself for a color. I think, oh, this blue
design looks really good. What if I created something
similar in PowerPoint and just with a stronger
blue or this red one. Look at those brochures. They look totally beautiful. I really liked the designs,
the funds, everything. And as you can see,
my normal game plan includes getting inspiration, selecting colors,
images, icons, and font. For the sake of this course, we'll go over all of them. Each of us will
select a few of them. And then it will get
into your workflow, your blood, and you will
aim for better designs. And if I see those design, my mission is to make a design which will be not
worse than that. Because right off the bat, as I look at those designs, I see they are clean,
well-prepared. Obviously. They are
greatly presented here. And I wanted to show you
a few websites like that, the same deck which you
will use for your project. You can write the same
things on Behance. You can simply click the Search. The same thing goes for dribble
and for another websites. So at B hand, we have this Adobe's website and people have
their portfolios. You will need to click
over a few things on those websites to soak those graphic designs
a little bit in. Okay, we need to move forward. And the very last thing I want
to show you is SlideShare. What is this last? Not first. I'm sure you most
likely already know it, but slideshare is about
sharing presentations, PDF slides, and information
from companies. And you can even upload
your designs here. But what's more important, you can also gain inspiration. I'm placing this as the last website because
those are presentations, but they might be not the
most designers presentations. You can get inspires how a well-prepared presentation
should look like. And since, for example, this is a high
training presentation, you can think yourself, well, something must be done
right in this presentation. If it's trending, maybe this
person has a big following, or maybe this presentation
is that good? As I see here, it's
pretty well-designed. It's not outstanding,
but it's a clean, nice-looking
presentation which I could eventually gain
some inspiration from. Okay, this will be
the first step. After each lesson. In this section, I'll
give you a small quest. And you can probably anticipate
that after this lesson, I'd like you to visit all of those websites just to get
a habit of checking them. Please go into the first
website right here in your tech and your
selected type of design, for example, brochure,
browse to all of them. And you will know a
bit more about design, a bit more about those colors. And you will get a little inspired before we move forward. I hope you'll have fun. I
always loved to watch designs. Let's move forward
in the next lesson.
6. 02-02. Select a color: selecting a color scheme, and I want to say something that I didn't say previously. We can select colors. We can select images, icons in front, and still, when we'll design, it can change. But if you like, come more prepared, it's easier to switch out colors than to start without nothing and go buy or got Go by what you like, and those color schemes will make sure that if you use those multiple colors together, they most likely will fit each other. You can off course tinker with colors yourself. If you are a super design design mind, and you have this art is, um, in you. Yes, you can, of course, select any colors you're like, but I really love working with color schemes and what I often do. I can, for example, print screen this and paste is in tomorrow, my power point, so it's easier for me to work. You will have three main websites off course. You can have your own websites, but I usually use them and obi call RCC. It was previously called Adobe Cooler. It's most likely the biggest website and the most popular one, which has a lot of use a lot of new incoming color color schemes, so it's definitely one to watch. I'm setting all dealings here in this product file that I'll share it. You colors adobe you consort by most popular, most used recently and so on and so on, so you can browse through those colors. The next little website will be color hunt. Color hunt has also very nice color schemes, and you can as well use the heart, the popular or some random ones. And those color schemes are also really beautiful. And as you can see, we have the Heck Scout. We can click here and we have a bigger we can print screen. We can use this anywhere, and also it tries to show us similar colors called similar color schemes to that which is a great kick start for us. That hurt and is also like my favorite website to use. You click only explore and what's great here. You can browse it with your keyboard. If my website will be smaller, this will get smaller and I can right click and browse those colors. This is really beautiful. I believe they also have an extension, which you can insult until you're you're Photoshopped programs, sadly not into power point, but that's no problem. We can simply copy the colors over from here. As you can see, you can view we can export and weaken saved them to a PNG which is perfect for use. So this is it when it comes to selecting the color scheme. Your quest for this lesson will be to visit all those websites. Please visit those three websites and get familiar with their interface. For the beginning, you should select at least one color scheme that you really like and would like to use in your presentation. See you then.
7. 02-03. Select Images: All right, let's say that we previewed a few designs. We have some inspiration, and we've selected a color scheme. I'll for examples like this one. I'm not sure that we will stick to it with. I really like this set up, so I'll just saved it in the background. Your next step would be to select a few images, and you can say No, I won't use images in my presentation. I'll use only icons or I'll use only text Well, it's important when you do a product and you wanted to be professional to have a few fall back plans. If something is not working out, you will have always. Those few photographs and those photographs can be either selected complimentary to your to your color scheme. Or they can be generalized photographs in the same fashion and type off the presentation you are creating. So depending on what you need, I would like to tell you about a great website. Library stock. This is a website which accumulates all free photo sharing websites into one search. My favorite website with free photographs is on slash dot com because those photographs here coming very high quality, but the advantage off library stock. If I, for example, select MM People People office. Let's say something like that and look at that download at stock snapped pics. Obey picks up a picture of a barn. Images Exel's. These are all websites. Find the photo. These are all websites with free photographs to use free off charge. So it's totally awesome to use this website because we can use free photographs in our presentation we can use. The photo is we can recall or it later, and then it will enhance our design. I'm usually going to an splash that come at first to see if I can search for something fitting because it's so amazing that detail in the quality off those images is out off this world. It's like 5000 pictures for 2000 pixels. Those photos are even too big, so I always go to photo shop and make them smaller. You just click Donald Free Boom and it downloads on other websites. For example, picks, obey or pixels. You can change the size off this, and this is important. Creative Commons zero Creative Commons zero means free for commercial use without linking back so you can of course, appreciate this design. Thank this designer that you don't have to attribute him at all, even in your commercial work. So even if this is a product you are doing for your client, you can use this image and it's no problem. That's why those images are so amazing, so great. And I've used them several times, and I'm always satisfied with them. So this is it for this lesson. I'd like you to select at least five images and download them to your product folder. So now we will have some inspiration, some colors and a few images to work with. Off course as we create. The presentation will download new images when we'll revisit this websites. But I wanted to make this one comprehensive chapter where I show you everything step by step, which you can follow and replicate. So this is why we select the images before we start the work. A few images I also download now five of them. I'm not entirely sure if I want to have people images or animal images, I don't really care. I'll select a few of them and we'll see what we come up with later. OK, Let's get it on for this lesson. You know your quest, select five images, download them and have them proper for later work.
8. 02-04. Select Icons: Now we finally get to my personal favorite spot. Aikens. I really love icons. I think they do a lot of work and presentations, and I believe you can create outstanding designs using just icons. For example, I would like to introduce you to two websites. Or maybe you know them. I confined her and flat. I can that come flat. I can, and I can further are both great. For example, you can select another like search for person. Aiken. You have those premium Aikens with You can purchase and you have those free icons and look at the left side. What's great here. You can select any or vector you can select, for example, only Free Aiken's, and then you can go one step forward and select no link back. This would be totally free icons, which you can use for any type of project. And look at how many are here. You can really get outstanding Aikens and what I enter a Nikon. I can not only change the size if you want a bigger print G to download, but since sometime they have added I can. Currently, it's a new feature, but you can click boom you can change the color of the icon right away. Okay, so I can find her has become better and better over the years. The same thing goes for flat Aiken. And in my opinion, this website is top one under icon website. Not only Great Aikens, they are not completely free. You need to link back here, but you can also purchase like a 10 bucks a month and you can use all selection without credit. But what's great here? You can not only search for Aiken's, you can click on the menu and you have top Icahn's latest icons. You have packs and this is so amazing. Look at that Essentials at 380 Aikens in the same fashion in the same style designed the same way I come here, I have a pack off 400 similar design icons which I can use from right presentation. How amazing is that? And not only that you remember that we've selected a color scheme click on download pack, you have the free download and the premium download. But before I don't know them, I could click here. Boom, boom, boom, boom. I select plenty off those icons. I for example, select all the icons I want to download. You can see on the right topside. I have the icons here, so I've selected like on these are previous icons I selected. So I have 60 icons here, and I want to change their color. You want to download all at once, and that's so amazing. I click here, I said, Paint collection. Boom. I select my color scheme. You remember we had the colors. Previously, we just select the right colors. Boom, for example, Red one, and you select and download 60 icons at once or even more. Aiken's in all the colors you need. You select those now knows collection free Boom. You go to paint collection, you select the Net scholar you need. And now you would have Aiken's in several colors preferred for my work. How amazing is that? I'm always so happy to see that that those websites work so well, and I can give them credit any time, for example, at the end of my presentation, because they provide me with such amazing tools and the designers gain as well because the designers can make money by uploading icons here and designing for this website. So it's a win win situation. I give them exposure. Designers have a place to work. The icons are really perfect. Just look at them. They're beautiful. Why not use them? So this will be your quest for this lesson you can use Either I confined there. You can, of course, use other websites. If you know websites with icons, I just personally thing flat. I can is a great website which we all can use. And this is from the free pick family Free pick is also a great place to download free material for your graphical projects. Okay, this is it for this lesson. We've learned really a ton of ratings. We gained inspiration. We selected colors, images and some icons and we're nearly done. The last step will be to somewhat tinker with the funds with That's just a smaller step. I'll show you how, when and where, and we will see each other in the next entertaining hopefully lessen
9. 02-05. Select a font: there. We arrived here. My second favorite thing when it comes to designing is selecting funds, and the good news is for power point and overall for presentations. I wouldn't extend over to funds. You can select one good fund and roll with it until the entire presentation. Or you can select two phones, which will be complementary looking with each other where you use one fund for titles and the second for the main text or text boxes. Overall, I think I don't have to show you those website, but I will go over them. Doesn't that come? 1001 Funds 1001 Free phones and fund squirrel. All of those websites accumulate plenty of funds, and you don't have to serve so much because you have, like top list or top fund deal oil deals. Not with the reason and the hot phones and some say, funds, which will be always good. For example, one of those phones is definitely open sense, open sense and what's even better about this font? It's a fun family and you have lied it our exam abled, bold, extra bold and let me say you that our but isn't perfect with funds. Some funds will not work properly in Power Point, and Power Point has its own front list, which it draws from windows. So not whole phones were worked perfectly. As you can see, for example, I have obviously also open sense installed. And when you go here, I have only a few of them. Why is that? For example, we don't have open sense bold. This is because PowerPoint as a software reads that you can bolden it here with the normal Windows options. This is a little downside, in my opinion, because, for example, Adobe software like Photo Shop, they read all the funds you've installed, and you have all off them here with Power Point. It's a bit tricky, but as I said, you can select those say phones. I've listed a few of them a few good friends here, which I believe will work for any presentation, always like Open Sands Monserrat Lata Fund. These are totally awesome phones, but you can, of course, search for your own, and I think that you should select two funds here. Go around makers, research and insult to funds if you will have troubled to select proper funds or they will not appear in your power point. You need to exit and open power point again because it loads the funds from windows, and it needs to reload them if you just installed them. But if you don't want to search for them just instant open sense or let off on or Monserrat . These are great phones, which will 100% work properly in your power point. If you want to be a bit more advanced and you want to explore a few funds, please search for some top funds or new funds and make sure they are free. For example, here we have free for personal use. We can also select 100% free phones, which is even better. Baba's knew that totally, totally beautiful fund. You should also have it installed. It's like the go to phone as a designer, for example, or another fund. I want to show you off course. You know it already. Lobster fund. How many designs that you see with this fund? It's because it just works. It's a great front, and it's just something to know about as a designer. That lobster found is also very popular and it will always make a great design. I hope this part off the course wasn't boring for you. We didn't need to go over this because I couldn't live with myself. If we would go forward with the design without knowing what we do well regarded from and just randomly using images, photographs I need to have everything structure to be prepared to like have a portfolio off resource is which I can go to. And once you are from in there with those websites, this is really all the arsenal you need. You will go fluently through them. You'll select quickly a color scheme and you will normally go right into the design. Okay, I will leave. We are more than enough prepared to start creating off course. Everything will unravel and unfold as we proceed with our work with. For now we are prepared. I hope this was enjoyable for you. You like those tutorials? Let me know if all the lessons are okay so far. And if yes, let us proceed
10. 03-01. Brief Overview: Hey there. I'm so happy to open up this chapter. Now, in this lesson, ID like this will be the most basic lesson off this entire course. I'd like to give you a very brief preview off power point and just to compare it to other Softwares, for example, you have photoshopped, you have a layer, you create a new layer. You, Adam asked, Do it. Once you've established the mask, you add an adjustment channel. Then you add effects. Do it as you add effects to those shape layers and you create a clipping mask of it, for example, like that, then you group it. You would have no way of knowing what just happened if you are not a photo sh abuser, because I would call this software very advanced, and you need some time to practice it in order to get familiar with all its features in Power point. In my opinion, it's different power point. It's a program where you can jump in and use it properly right away. The menu is very intuitive, and it's definitely helpful. If you already used some Microsoft Office programs like Excel like Word and Obviously Power Point and you are a bit familiar with the ribbon system. In this course, I will not go over each single thing, like telling you that these are the front options. It's obvious that you can bold a phone that you can like justify the font. Then you can. It'll like them. You can underline them. You can change the fund, you can change the font size, and you can make it bigger, smaller like that. These air obvious things, which I want you to also explore while working because we will use them over and over again with this lesson. I just wanted to tell you that in Power Point. In case you don't know since 2007 we have the ribbon system. Terrible System is a great feature, which groups similar editing options in tow. One big container. And that's what I really like about Power Point. And it makes our workflow well, pretty much easier because if you click on an item, you get this additional former tools. And those former tools are especially here for the object you selected so it makes it easier to edit object. It makes it easier to edit pictures. It makes it easier to edit text like here. I simply go to this former tap, and I'm 100% sure that I will work with this very text. This section is here to teach you the totally essential things important while working in Power point and having a good work. So I'll show you only the important stuff. And I want you to definitely get ready to work. Now, open up. Power point. Please create a few slides. Slides obviously can be created by right clicking and selecting a new slide. They can be rearranged freely, so you'll have much freedom in your work. And it will be helpful if you would drop some icons into Power point and an example image just to get a hang of it and know how to work with this software and get a bit around and you'll see in a moment how easy it is to edit, to change, to reshape Everything will go over those important options. All right, this was the brief overview. I wanted to introduce you here with that, and in the next lesson, we will right away at just our shortcuts. Can't wait to see you there. Your little quest for this lesson will be to open a power point and drop a few items into it.
11. 03-02. Adjusting our shortcuts: hello. Back again in the work. Now, this will be something super important because you can see on the very left topside. Probably if you had your great in power point last time, you will have out of sight here. We will, of course, delete that. But basically, this is the quick access toolbar. The quick access to over allows you to quickly grab certain options from power point here and what's cool about it. You can bring up with the left old key for probably the option key on Mac. This little shortcut buttons. Now, as you can see, for example, at eight in this case, I have the textbooks. I distressed old Cypress eight. Boom. I have my textbooks. I wouldn't have to goto insert, click on text box, click here and then start typing. This is very effective when it comes to working in Power Point and I want to teach you how to use that. I am not sure that the older versions meaning 10 4007 or 2013 could do it the same way. But here in the newest version of Power Point, which is 2016 you can simply right, click and at too quick access toolbar. Most likely, you can do it exactly the same way. If not, you can always click here, select more commands, and then you can search for the appropriate command and place it here. It takes a bit longer because, for example, you select all commands and this is a lot of commands. But you confined your important ones. What I want you to do here, in this lesson is toe at two important shortcuts. Inserting shapes and inserting text boxes. Because this is like the bread and butter off power point work. You can do everything with those two options and it will take you unnecessary. Timeto always cook here. I'll do this myself. Right now I'll select more commands. I will delete everything here, maybe apart from creative video, because I like it very much. I removed everything I select. Okay, and I want you to replicate my steps now. Please go to insert and consider adding shapes and textbooks. I will right click at two quick access toolbar, right click Add to quick access toolbar and I have both my shapes and my textbooks. I would like this to be my number one and two, and as I click my left old key. Now I see it's number three and four. Well, it depends. How handy are you? How do you remember those shortcuts? But basically saving saving isn't as important because you can always press control as to save. It's a very common shortcut. You don't need to have it here, but it could be more to the rights. And that's why I will customize my quick access to a bar and let us make shapes the first ones and inter textbooks. The second once or even insert textbook will be number one, because it's such an important feature now. Each time you work in power Point and you create something you alter one boom a boom old too. You select the appropriate shape old to you, select the next trip old to boom and the workflow get quicker. Because of that, you can not only use this road cuts by clicking old, you can get in the habit off inserting something else. It takes a bit longer, for example, if there is more than one letter like I did here for a simple oppressed and and I have a one you need to press a. Then you need to press one. This is something that you need to remember, because if you have more than 10 shortcuts, it will place a 010203 and so on. So you can remember old. And if there are two letters, you just need to press them continuously as three well, three D models and Power Point. This is a new feature. I don't quite like it because, well, it isn't harmful, but it's, but it isn't as necessary in the software like power point. All right, for this lesson, this is it. Your quest is to add those two short cuts, insert text boxes and insert shapes. In the next lesson, we'll go over the selection pain, which is also very important, and not everyone knows about it. So see you, hopefully in the next lesson ASAP.
12. 03-03. Selection Pane: Hello and welcome back. There is something in power point that is being overlooked, Just as in order graphic design software is like photo shop. We have layers here and we see all the layers we are working on the same way we have our selection. Pain in power point. Please go to home and under very right side. You have editing, click on select and click all selection pain. I know there was a little problem because in power 0.2011 for Mac version, I guess we couldn't access the selection pain. I'm not in the area. Shorebird. I know that some features in the power 0.2011 Mac version aren't there but power 0.2016 for Mac has this implemented? Definitely. So my students reported So we have this selection pain. As you can see, each object which is here is listed in the selection pain, Each picture we can de select it. We can rearrange it. For example, this one This is now under this star. But I can take it. Place it at the very top side and it will be over it. So here you can not only select items. If you have troubles grabbing them, for example, one is very big, one is smaller and you can click on it properly. You just de select other ones. You click on this one and you have it selected. You can also work with the visual hierarchy, meaning which comes first, which comes last. Another great thing to remember about selection, pain. And really not everyone uses selection pain, but it's such an important feature because we can double click and we can rename layers. Why would be that important? Well, later on, I'll also did you about animation, animating elements and overall, working with this this tap. So in the animations, we can make a brief stop here. We have the animation pain and just look at it. I animated this Aiken and I animated this. I can and I animated everything else. Now you have no idea what this picture 12. What is textbooks? Eight. What is auto shape? 100. But you will remember what rename waas because we just renamed it. So this is important because depending on how you name those objects in the selection pain this way they will appear across animation, pain and everywhere in Power Point. You don't have to precisely remember everything about that now because I'm just making a brief stop here to show you. Yes. This is something we will work with. You just need to memorize somewhere that I was talking about this. And once we designed our slides, everything will come come natural to you because you already know that there is something like the selection pain. If you are using the selection pain Right on. Spot on. Well done. That's the way to go. Okay, this is it for this lesson. I'd like you to have power. Point opened. I'd like you to goto home, select selection pain, open it up and click around with this object. Make them invisible, reorder them, check their hierarchy. And overall, try to rename something so you'll get in the proper habit off using the selection pain. Once he will be done with that. I want to show you something cool. With the format options off each and every object in power point
13. 03-04. Format Shape Option: okay, we will already talking about quite a few things. And this may seem a bit chaotic for you because I'm not going over everything step by step . I'm just showing you some important things which we will definitely use in this course and in our workflow. The next thing I want you to remember, because I have several questions of students how to get this this tool bar on the right side is the format options I want to show you. This is a simple image or, for example, this is a textbooks. I go to the textbooks for my options, and I have. It's Phil, Meaning this shape, Phil as I as a If I click it, I get this orange color on the left side and on the right side, I have the text feel options. We have options like changing the color, using another color with the eyedropper. This option was also not available in the older versions of Power Point, sadly, but in 13 4016 we have it. We can select the Grady in a texture. For example, when we go to the shape outline, we can select the weight off this outline. But students also reported to me, Hey, I can't make it more than six points and I wanted a big outline here, a bit weight off this outline. What's happening? How can I change that? This is because here in this part of power Point, we only have limited options if you want to get to the details options. Well, I wouldn't call them advance because they are simply a bit more details. You always right click and you select former shape everything. Which is he here, like changing the shape? Phil, Changing the text field, changing the size off this little object. Everything is available here, meaning we have three boxes and two options. We have the shape options and the text options, just as we have here the text options and the shape options. But here they're far more detailed. I select my shape options and I have my bucket fill. I have my effects, which I can add. The effects can be also applied here shape effects, but here it's kind of more professional because you have, the priest said. You have all the options available, and here it's a bit more difficult to work with the options because here, for example, I can only click a shadow. I was here. I can change the color of this shadow. I can change the size of this shadow, the blur. I can change as you can see everything in this options. You have to remember that if you want to work with the size with the position or with the Phil options, it's a tiny bit better to go into. The former shapes your quest for this lesson because I can explain this to you that this is a waste of time. If I would say, Look, this is transparency, this is color and these are line options off course. I will go over that once we will design slides, but for now, your request will be to insert a shape. Hopefully, we'll do that with hold on to You will select a shape. You will insert it, then click on it to conform its shape and play around with the film and the line options. I was talking that we had only here in the shape outline. Wait. We can only go to six points here. We can go in the line options to as many points as we want. As you can see, we can make it even 20 points big. Then we can change the compound type two, for example. Those two lines, the dash type can be changed so you can see how many important options are here. And only some of them are here. You can see we can change the dashes. But what about the compound type? We don't have it because we need to go into the line options. We can even use Grady it lines which we couldn't access. Here. Here we can only select a line and nothing else. Here we can select a cool radiant. We have a few presets while those reefer presets aren't so perfect, but they can get us going. Okay, so this is your quest. Please. I'm telling quest because this is more RPG like I like like this word. But this is your simple task for this lesson. Police right click, former shape and play around with those options. In the next lesson, I'd like to go over cropping and coloring. This is also a completely like, different topic now, but it's also super important and it's important that you will have that somewhere in your mind. So see you in this next lesson. I am waiting for it because this will be a cool one. So see you there.
14. 03-05. Coloring: Hello, a very important topic about icons and images in general against Victor Aiken's. These are images, the same as picture are. For example, those are PNG icons, and if I make them bigger, you can see they lose quality. Vector icons, however, are made off points and vectors, so no matter how big they are, they are mathematically calculated, and they will always remain crisp. So this is why, when we use Vector Aiken's, we can select former shape full and we can change their color because they are like power upon shapes. They can be simply filled with any color with images. Images like like this PNG Aiken or this normal picture in the form of options have picture options because these are simple pictures and some student were asking me they have a Nikon . Why can't they changed it to any core? Because this is an image. And these color options are only here to adjust certain color values off the color channel of this object The same. Yes, I would click on this picture. I'll click here and in the color options you can see. I can get such an effect by addressing, for example, the hue and saturation or the RG or be color lowering one color, extending other colors. And this is what this function does. It doesn't recall her to to any color you want. Sadly, this should be an option in PowerPoint, but we still don't have it. We should have an option like color overlay, where we can recover everything to any color we want. But sadly, we don't have it in PowerPoint. That's why you need to consider if you want to use Vector, I comes like that, which are a bit harder to obtain and harder to import into power point or, if you want to go it images. If you go with images, I'm suggesting toe recall or them even on other websites, or re coloring them on other graphic design software's so they are prepared for work. For example, you have a color scheme made of five colors, and you're recovering them properly before you start to work Else, you are doomed for the power point options, and you can only change the color slightly will. Perhaps in this case, in this case, I can make it to a white icon perfect, but that's not always possible I would then right click and send that to back, and I would have this icon in front and white, okay, but I had no guarantee that in those color options I'll have my white color. But when I used the vector Aiken, there's no problem. I just go to former shape Phil, and I make it white. If you don't know what I'm talking about, you should read it up on the Internet. What are PNG and bitten up images and what our vector images, if you'd like I can offer explained that to you in more details. But for this, Listen, I wanted to make you aware about the options which we have for the picture tools, as you can read here and for the drawing tools. Since this is a shape it can use the drawing tools. This is it for this lesson. I'd like you to import an image as your quest, go to former and play around with those options, at least to know what effects are possible. Like the mosaic effect, What corrections are possible and what color options do you have? They are limited to those options we have here, but still Hey, we have something. We have something to work, and this has to do it. We don't need more. We can do still great designs with that.
15. 03-06. Cropping and changing shapes: another very important tool we have is the cropping option. You have an image, a big image, but you only wanted those rocks to show here so you can position the image. You can go to its format and you can select crop crop is great because we can crop it like that to the size of our slide. Then you can hit crop to cut it off. You can hit them again, crop or or do it Previously, you can see that you didn't destruct this image. You still have the full image here and if you need to, if you change your mind or you need to adjust anything, you can work still with the image. What's also great in the crop options you have corrupt to shape an aspect ratio. If I wanted to make a perfect rectangle old of it, this will be no problem. I would go to crop to shape, and I was selected a rectangle to or a perfect circle. Maybe a circle will be the better example, because we already have in the rectangle crop, corrupt the shape circle. But now it's totally ugly. Don't worry about that, because you can always go to crop aspect ratio and select a square. This way you will get a perfect circle. So this is something to remember for our upcoming work that in the cropping options, not only can you simply crop the image like like people do with my shift key off course, because I want to remain in constant proportions. If you hold down shift, you will make it like that. You can click crop, but you have also cropped to shape and aspect ratio. And why am I talking about this? This is a feature of Power Point, which repeats itself. Let's say that we have our inside shave. I'll entered another rectangle, but then I think them I didn't want it to be a rectangle. No problem. You go to its former settings. You go to edit shape, change shape just as we had in the cropping tools. And you can change the shape to a circle. Now, if you want it to be a perfect circle, you make the height three with three enter, enter Boom. We have another perfect circle. If I hold down my shift and left control key, I can move it outside this middle point and we have to perfect circles made with, like power point options in the murder off radius seconds. As you can probably guess, your quest for this lesson will be to insert a shape, insert a picture and crab them properly. Two circles This is great practice when it comes to designing, and it will definitely be useful because circles like that and elements will be definitely used in discourse later. Okay, slowly will close out the sections maybe a few things more. But I only know I think you are getting prepared to the work because you've already here about the most important options. You are fluently inserting text boxes shapes. You are working with images, icons and eventually also vector icons, and you can crop on reshape elements. Basically, you are ready to work so soon we will start the reel design. Can't wait for that. So see you in the next lessons
16. 04-01. Merge Shapes Magic: Welcome to the Ninja Power Point tricks not everyone knows about at first ID like to show you the merge shapes. Normally in Power Point. We are kind of limited when it comes to the shapes to those that we have here. We can, of course, led their points and adjust them a little bit. But basically, it's a bit difficult to get something quite unique in Power Point. What if you want to combine multiple circles to create something of a bubble or just something like that were? Luckily, you can select everything. You can go to the former options, and on the left side you have merch shapes. This is another feature which wasn't available in the older versions of Power Point, I guess in the Power 0.0.2011 Mac version. It also isn't available, and in the 2000 maybe seven But 13 4016 definitely have them, and all newer versions, of course, will have them. You can emerge certain shapes. You can union, combine, fragment, intersect or subtracted, and look how amazing If you union this this becomes one shape. So if you feel that with the picture, it will fill right as we have it here. And this is a great feature because we can get some unique things. Like, for example, we would like to have something crossed out here. It will be difficult to make normally, but if we use our shapes, we rotate them. Or we would just like to have a custom line here, going from the right bottom side towards here, you select the 1st 1 you press shift, you select the 2nd 1 you go to the firm it and you can intersect or subtract those shapes. It depends which object is clicked first. This is the way it will work. If I select this ledge first, for example, pick, shift, pig. I go to merge shapes and I subtract. It goes like that. But if I select this object first in this one, the second. If I click merch trips subtract, it will work like this. The way this is used will be explained later when we design slides. At this point, I want you to be our off the murder trip options. I want you to open a power point to add a few elements and try and merge them into one element or try to subtract them from each other so you can see those custom results. This is now a shape. It's great that we can still reshape and reform it it the way we want, and it has a custom, unique design and look.
17. 04-02. Adding Vectors to PowerPoint: all right, importing vector files into Power Point. I want to show you how it's done. It won't always work 100% perfect. But let me show you. I'm, for example, using free peak and backed easy to get a few vectors And let's maybe make an example off two vectors. I wrote school and I would just select any design. For example. This looks quite complicated, so let's try to import it into Power point. I was like, free download and I don't load the vector onto my PC. I do the same with those icons from free pick. It requires me to attribute this and I'll do this right now and overall. But we will delete those icons. I just want to show you how to use them, how to import them. And I'll check if you will be able to do this. Okay. I did unzipped both files and perfect one this E p. S. So we can check this out and wellness ai, Let's first select the AI. I'll select okay, and I'm using Adobe Illustrator CS six for dead. That's the downside that you will need some vector softer. You could eventually export those files with some cloud converting software. But this may not work, and I have reports from students that it wasn't working always for them. This is because we need toe export this file this designed to e. M. F. Let me just quickly check the layers off this design. I can see it's on one layer and and before I export this file, what I like to do is to release the layers so the file is easier to read. You can click here on the layers, click here and to select released two layers. Now each off those is a separate layer. I'll also select them and make them equal with the very first group because the 1st 1 was just a group. So now it's an empty layer. I can even delete this, and I have 24 layers because I deleted one. It's a very simple vector, Fiallo. I go to file, I'll go to export, and I will save it simply as an enhanced meta file e M f. Because this is the file which Power Point is able to read, and this is the most crucial moment. We can't get a 100% sure that they will work because this is only a converted file. I'll open the next file and I'll do the same. Let's maybe this time not release the layers and see if that will work. File straightaway. Export enhancing meta file 2nd 1 and safe. Okay, I'm arriving at Power Point. I will select the 1st 2nd 1 I'll click a new slide and I will select the 1st 1 So this is basically my vector file. What do you need to do? In order to work with this vector file, you need to right Click Select Group and select on Group PowerPoint is asking if you want to convert it to a Microsoft office drawing object and it is the moment where it turns creditable in apartment. Yes, I want to do this once again. I will select group on the group and this text is really making. And you see, first problems arise. This was so much text that it couldn't be released properly once again on group. Finally, I got all the object and this is a really crazy file because so many items air here. And for example, I wanted only the buses, so I would need to somehow click and select him. Okay? The background. You can see it's not perfect, but I would need to select control G. OK, select the bus. Select this bus control G. Take it away. Okay? Nothing else is important for me and I was somehow able to use this vector. It was a bit tricky, but we were able to do this. Let's no go over the Aiken's. Is this working right? Click group on group? Yes. I want a drawing object. Right Click once again on group and boom there we have it. So everything worked perfectly. Even I didn't release the layers here. But I just like to do this to make the conversion to MF a bit easier. Okay, so this is it. The last step I would like to take is because now I have so many objects here. I would just select this icon control G boom. I have this unnecessary background. You always need to remember that sometimes the background is another layer control G control G control G. You need to do this step. But right now look beautiful vector icons within Power point Former shaped Phil and their color can be changed. They are vector. Everything is working great
18. 04-03. Adding Vectors to PowerPoint on MAC: all right, Mac users. I have a good information in about information. They got information. It's somewhat possible to import vectors into your Mac PowerPoint software, but it's farmer difficult, and it doesn't always work. Students have troubles with that, and we I wouldn't say that we came up with a solution, but I was ableto track down a few solutions from the Adobe forums and from discussion with other students. How toe eventually import vector files into your Mac version of PowerPoint. Basically, if you watched the previous lesson, you do everything the same until the exporting point from illustrator Again. You need a vector program like illustrator or like sketch to export it to the IMF or at least two PdF. But there's another step necessary. I have here three work around, which I'll off course also share with you here using illustrator and library office free software, open office and adobe across it. This is possible with some pdf exporting and I have everything explained here how to do this step by step, and I will simply require you to read all three off those solutions. Maybe also, you will come up with your own solution because Basically it's doing the same. Exporting your vector s svg or e m f. Then going to another software, inserting this image here and then select picture erratic and break the picture once the picture is broke like broken up in pieces. You can open this file in Power Point and it will be easier to import. The same goes for those options. They are very similar. You again have to use this office and then break this picture. The TERT option seems the most reasonable for me because you can go into Illustrator. You can export your file s adobe pdf, which is a very normal former and then going into adobe a crow. But you can goto file open you open the pdf you created and you go to file export to Microsoft Power Point. This should eventually work, but I cannot guarantee that the vector you used will be perfectly imported into power Point . Just look at that. We have one vector file we exported as a PdF or another former. Then we need to break it somehow and then were imported into PowerPoint. So many converting steps that something might go wrong with layers with colors with the actual vector so I can carry into your results. But from what I know, it's possible people are doing it. So please try to do the same on your Mac version, I would know ask you, please watch the previous lesson. Do know how to download your example vectors, download them and try to replicate the steps to get your vector image into power point. For the sake of this course, we will not necessarily need to use vector objects. This is just for you, for your future projects. And if you'd like to use vectors within Power, Point is difficult, but it should somehow work. And I'm also confident that the Microsoft developers will make it a bit easier and future versions and implement the vector features even better into power point.
19. 04-04. Editing Vector Points: If you manage to get those vector icons into Power point, you can edit their points. And this is amazing because you can right click and select edit points here are you. Click on this object you goto former, and you have added shape on the left side. Normally, you can change the shape, but here you would like to add it. Its points, as you can see. For example, in this vector object, we have a a lot off point. You can. Still, if you are precise at new points, you can adjust them and you have three different types of points. It's a matter off clicking around and using them a bit around, but basically you can smooth this out. Or you can corner out those points you can right click, select smooth straight or corner. If I click corner, it will snap back to being a perfect corner. If I make it smooth or straight. Boom. I have a nice line like that, so it depends on what do you want to achieve, but there is no perfect way to use it. It's a bit clunky, but I wanted to show you with that that even if you insert any given shape. For example, you have a shape like that with my shift game. Make sure that it's on perfect proportions. But you would like a little change here. No problem. Right? Click Edit point boom at point. And that's the problem you sometimes click away with. I'll just go back At this point, I wanted to at another point, boom. Make it a corner point boom. And in a few mouse clicks we made something like that. We change this shape and, well, it's not perfect. It's a bit difficult to work with. That in Power Point and Power Point is definitely not the perfect software for vector objects and editing those points and adjusting them. This is not illustrator, that it's possible, and at least we have the possibility to to do something. At least we have that we can edit points. You can, for example, make this whole. We can delete points not like that. You can, of course, rightly, and the lead points if you want to make a bigger change their object. I would need to adjust this a little bit, but it would be possible to cover this up in great just by clicking and removing some point . This is something very important to remember. We might use that as well when we edit RR slights later on. So be prepared with that. In this lesson, you should grab a shape ended a few points of this shape for rep a vector I can and edit a few points off this vector. I can Thanks for your attention in this lesson. I hope this was helpful and informative and we will see each other in the next one.
20. 04-05. Aligning and Distribution: another total ninja trick will be the alignment and distribution. Now let's say that you have more Aikens. I will select a new slide. I would lead everything, and I want those icons to be perfectly aligned next to each other. I have a lot of them. Sorry, I'm using only two icons, but you have so much going on on your sleight and you would like to categorize this somehow . Okay, this is too much what I want to show you. You can select all those objects you can go to form it, and you can select the Align panel. It's something super important and very nice and power point that you can align to selected object, which will align to the first and the last object. Or you can align to slide, which will align to the beginning and end off the slight. Let's elect a line selected objects and let's distribute them horizontally. You may not know what's going on, but they have equal spaces between them. In order to make them in one line, you would need to click a line and also a line middle, so they are all in one line, and you can see how quickly we distributed them properly. You can see there's not enough space for them. I will space them. Have been out this a bit to the left. I will select them. I'll once again go toe the line and distribute them horizontally. If I would be to distribute them vertically, it would distribute them from the most top item to the most bottom item. Now look what happens. Select all of them former online distribute vertically. You can see it can have a small error. This is because it mathematically count how it should be distributed. And aligning is another thing which I would suggest to add to our shortcut box. You can right click on the line at two quick access toolbar, and I would like it to be more command number 123 Okay, so that way we can always select old tree and select something else. At first I would like them to be aligned to slide old tree. Now I can again aligned them middle old tree, distribute them horizontally boom, and I have them perfectly aligned. The same goes when you use shapes and objects. You can select a new slide. You can have shapes. And you would like to have those circles perfectly aligned. Now, if you do it like that Power point is helping you with that. But sometimes you don't get the possibility to use that. And, for example, I will show you another little trick. If you want to align them here, that they will finish here. You know that it uses the first object and the last object you can control. C control V at a new object here. Control C control the at a new object. Here, select all those objects. Old three. Make sure there are a line selected objects, So oh, and old tree distribute horizontally h Now I can delete the most left object the most right object and I'm sure they're distributed here perfectly. This is a mother off clicking around. So your quest for this lesson definitely will be toe at a few elements Go to form it, click on the line and click on each option once so you will understand how that works. You have those little icons and they help you a lot. That's a little downside. If I press old tree, I don't see this icons, but basically very often used Ally Middle and distribution, so I automatically remember where they are and I click on them and aligned to slide aligned . To select the object. You will need to get familiar with those options because this is something amazing and you'll most likely used it throughout your power point career and overall and design. This is something to know about.
21. 04-06. Format and Animation Painter: you are nearly equipped with all the knowledge and tools to start the real design workflow Until you do, I want to show you a last supercool ting in Power Point, which also not everyone uses. I've probably said that a lot, but that's simply true. You are editing right crazy. You did change the color off the text. Let me go to format. What did I want to do? I have orange text. I have it felt with a ugly yellow background. I went to home. I made it bigger. I selected this object and I did change the phones to, for example, by bus. And I have it like that and I want to repeat that. Repeat that I don't want to edit this object. I want toe paste the farmer off this one to the first text as well. Look how amazing I can click on this object clicking here because this would only select text. I want to click here so the entire shape is selected. Go to home, former painter and boom. The entire formatting options are painted over to this object, and this applies as well to shapes. For example, you have a different color off this shape home, former painter. Boom. One click and you under. Later, as we will explain animations, the same thing is possible with animations. You have fate, you at animation. You fly in your at animation. You pulls, you add animation. It fights off four animations at once, and I want that those animations to be as well available for those opt. No problem. You click on the Shape, which has those animations, animation painter, boom animation, painter boom. All animations would be applied to the other object as well. So this is another cool trick. Former painter and animation painter allows you to quickly paint the former over to another object. Okay, this is it. Your equipment knowledge. Your last quest here will be to go to home and use the former painter to paint one former over from one object to another so we will know how this option works.
22. 04-07. Change the Aspect Ratio: all right. In this course, we are definitely working and focusing on presentations on the 16 per nine former, which is suitable for video and for most off the screens. But if you like the design, a poster e book cover or something else in Power Point, you can be aware that on the design tab, and by the way, I don't recommend those basic designs because everyone is using them and they are overused . You have the slight size options in the slight size you can go a standard for by tree or the normal white screen, but you can also set a custom slight size. You can select any size you want to have a few pre defined, like a four, which will be a normal day for screen. Of course, you can adjust the wit just the height, the number of flights, obviously landscape portrayed. The way you want it, you select okay, you can maximize or ensure fit. It doesn't really matter. It will just automatically adjust the size of your objects. Just make sure you hit portrait if you wanted to be differently, okay and you're fit and boom, everything is a dusted and I have a four images here to be prepared. You won't use this perhaps often that this is definitely a possibility in Power point and in Power Point, we can export files toe PdF's two images. So you are covered. You can create a pdf if you have no advanced knowledge in other Softwares, you can create a pdf right here in Power Point. You can rest old one you will have. You can add text. You can add images. You can add any designs you want here, and you can basically even create an e book right within Power Point. This is just something to remember about. It's not a super common practice to do this, but if you'd like, it's possible. And it's something to remember for future projects you might eventually want to do in Power Point.
23. 05-01. Types of Animation: Hey, finally, we are going to talk about animation, and this will be the last step which will prepare you for the real power point work. Okay, then, animation. Our entire point off interest will be in this tab. The transition step in Casey Wonder is the transition between one slight and the next light . This is the transition step, but the animation step allows you to apply animations toe object within power point. Okay, As you remember, we can press old to to quickly create a few elements. And I'll just create just a few say we'll see what's going on. All right, we have three object. We can click on any object and we can go to the animation step. Once you click on the object, animations become available. If I have nothing selected, I can even open the animation pain. I see nothing. Is there what you need to do? In order to add animations? You always need to have an object selected. As you can see, we have a menu. We can enlarge this menu and we have a few animations here. But we have green ones, those yellow ones and those red ones, and also motion pats. I'll show you in a second what everything is. Those are in animations. Those are emphasis animations, and those are exit animations. Of course, in animation is when the object will appear. Emphasis innovations. I can select any. For example, polls will be the emphasis effect and the third, let's select an exit animation fate fly out or float out. Okay, we can have a float out. You can see. As I click on it, we get a brief preview off what will happen later on? We'll talk about the animation pain. Okay, I'll press shift at five, and I have three types of animation. My first click makes the animation in my second click will make emphasis on this out act, and my third click will make this to get out of this lot. As you can see by color, I applied three types of animations to those objects. Let me add another object, for example, another circle and we have 1/4 type of animation, which is motion packed. Motion parts are similar. We have, for example, aligned movement, and we can move this object wherever we wanted. With this animation, however, you see this start point and endpoint. I can adjust the end point, but I can also adjust the start point. And it's a bit tricky because this object is here. But the information is no. Here, look what happens. Okay, The 1st 3 intimations and it snaps to this point and it animates. So you need to be very careful when you work with those motion pads. Because if you have an object and the animation starts somewhere else, the object will magically fly through there. What you always need to do or what recommend that is to start from the same position and just adjust the endpoint. This way, we'll have an animation like this. No problem. Looks cool and deserted. Basics about animations off course you request for this lesson is to add four elements and apply one animation each each type of animation to one object. So you have a total at least off four animations. Go ahead, open power point and create those for simple animations.
24. 05-02. Add Multiple Animations: we already know the four types of animations we have in this lesson. I'd like to show you how toe add multiple animations to one object. Let's say that I have this first object selected and I would like to have fate and, for example, wipe on the same object. This won't look good, but I want to have it. If I click on it, I'll just replace the order general animation with Why? But I wanted to have fading as well. For example, an exit fate. In order to do so in power point, you need to select at animation. This option allows you to at multiple animations to one object. So I have one animation here. I will go at animation, for example, the exit fate, innovation. And now this one object, as we can see on the timeline. And it would be good if you have the animation pane opened so you can click here and open it and I have to animations under to your directory object. Another thing to know about is that this is not all. PowerPoint is not the perfect animation tool, but we have a few more animations than we confined here. by clicking more, more entrance effect, More emphasis effect. More exit effect. Right now we have about 10 of them here. But if I select more entrance effect, I have the entire list off animations and or the school. If you have an object selected, you can very quickly preview all those animations. This is all I wanted to tell you about in this lesson. They will have actually two quests here. One you should at multiple animations to one object to see how that feels, how that looks and how to overhaul. Do it in power point. And you need to click here on this little button more select more entrance effect and preview all the animations you have here. I hope this will be okay for your please do so and then you will be able to move forward with animation. And later on, as we design, we will be able to make a lot of cool animations into our presentation.
25. 05-03. Effect Option: Hey and welcome again. Now I would like to talk about effect options off our animations, and this is something which you will learn over the time working with Power point, as you can see. For example, if I were the simplest innovations appear, it has the effect options great out. We have nothing to change here. But for example, if I select something like flying the effect, options become available and we have two types off effect options. We have this button with effect options, and we can manually go inside the animation. Since this is a fly in animation with the effect options, I can adjust from which site it comes in from the top side from left and depending on the animation you've selected, you either have or have not those effect options. If you go, for example, to the float in animation like I did here we have another effect. Options float up and float down, and you can wonder, Why did the Microsoft developers not give us float from left float from right? Well, that's why I'm telling that PowerPoint is not the perfect animation software We have to work with what's available apart from the effect options What we have here. We can also double click on the animation in the animation pain to get a few more advanced options. I said. I book leak. I have my timing options, which is the same which we have here. We have the effect options because we can add a sound when this thing appears. We have also a few basic sounds here in Power Point like applause and a few other stupid ones. And we can select what should happen with this object after the animation place we've got, for example, height after animation I could select okay, And after animation, this object would be hidden. Well, it isn't the most useful function, but it's possible to get an animation and them this object. Afterwards, you could say we can do the same by clicking on at animation and clicking, Disappear or fate. Yes, off course we can. This is just another way of doing it. Let me go back here. Here we have only the normal timing options, but here we additionally have a repetition. We can repeat this animation like three times select Okay, and you can see it looks a bit different on the chart. This represents the loop. How long one loop will take in this case. This would now animate like this three times. You can again say that's not the best option, but it's possible to make something like that in PowerPoint, and that's super important. We have also text animation options. I'd like to speak about text to you in the next lesson for here. For this very lesson, I'd like you to at least search for one or two animations, which have affect options. Basically, it would be best for you if you would click split and take it out. Why? And check it out. Just get familiar with those animations. Just check what is here and you will know a bit more how to approach animation later on when we designed something. This is it for this lesson. In the next one, there will be something super important and interesting. So stay tuned and let's each other in the next one
26. 05-04. What about Text: what could be so special about text. And basically, when it comes to animation, I want you to remember that the fate information can be the most powerful animation off course we have all those crazy animation like zooming in wiping and whatsoever let me show you what difference taxes. And this is another super power point, Rick, which not everyone knows. Okay, let's say that this is my beautiful textbooks. I'll even make a few spices. So I have more text to work with before we identified, and we achieve animation like that. Here we can click on the text or on the tax books. We can select Fight, and we have another super simple animation. Let me make this the first animation and look as I double click here. You remember I had those few options. I have the actual effect options, the timing options and the text animation, which applies when they have a bit more text and a few paragraphs. Then we can animate the paragraphs kind of separately, but on the effects type. I don't know if you noticed we have animated text now, and that's something beautiful I can animate all at once. I can animate by work or by letter, and look how beautiful it looks. We have also the percentage of the delay between letters. Maybe let's make this a slow 15% animation and look how amazing. Yes, the information will be long now, but it's super beautiful. It's not a simple fight. Let me go back to effect and select by Ward. This will be a bit quicker, beautiful, maybe too quick for my taste. I would make the delay to 20%. Okay, and what's even more amazing? Other animations, I believe not all of them. But for example, the white animation looks also cool. A normal wipe animation on the object itself looks pretty bleak. But if I double click here, I go to my effect animate text, for example, by letter. So we see it better. Select. Okay. Did you know that something like that is possible in power point? Most off users do not. So this will be your advantage knowing such animations and for this very lesson, obviously your quest will be toe at a text box. A big textbooks click on those animations, open the animation pane, double click here and try to apply text effect to it. This is amazing that a normal fate can look much better when it's applied to text. It's basically the same animation from the same option, but if we adjust its effect, it looks totally different. Thanks for listening to this lesson. I hope this is a good information for you and something new, and I hope we will be able to use that a lot in our presentations.
27. 05-05. Animation Pane and Timing: I wanted to clear out all topics before we moved to the animation pain and its timing. This is the most crucial part when it comes to designing the animation. In my opinion, the timeline could be on the bottom side, but on the bottom we have seconds, and here we can work with how the animations fly into the entire design. You probably noticed this timing tab were each animation. Each generation separately has its duration, which we can extend, and it's delay, which means how much delayed the animation should play. So, for example, on the second mouse click, this animation will not play until two seconds will pass. We have three types of animation we can right click on each animation and select on Click, which will be with my mouse click with previous, which will start together with the next animation or after previous, which will wait until the animation finishes and then it will play. For example, I want to mouse clicks here, and the rest should happen immediately. Afterwards, I would leave the first mouse click. I would leave the second mouse click with all other animations. I will select this animation holding my shift key The last animation right click and select with previous you can see with previous looks like that. And if I said after a previous after after after and we have this little line you can see a line between, For example, this yellow button here this line represents the after previous Also, this little icon informs us that it's after previous but I wanted to start it with previous right click with previous And my only downside here is that all the animations will happen simultaneously. What do you most often do when you use with previous you selected, you delay it a bit you selected You delay it a bit and you could tell now Well, why don't you don't simply use after previous because after previous is limiting me to have it exactly after previous I want those toe overlap, but just a tiny bit like that. So they still start together. But they're a bit late again. Delay. Okay, like this f five. So first like means the first innovation which we had previously. And with the second click, everything else should happen two seconds past. Boom, boom, boom. Okay, all those crazy animations I know this looks now ugly. It's completely out off schedule and everything flights around as it wants. But this is how editing animation in Power Point works. We can also click here, but that's inconvenient. For example, if I want to say that this yellow sometimes I select this yellow sometimes I extended, so it's easier and safer toe work with the delay. You don't have to increment it by 1/4. I can also press 4.1. That's no problem. You can move it later. You can move it every year. This is just animation editing, but you can see our point sometimes resets those animations. So it's really difficult because I have selected with previous and now, since this emission is later, If I move it down, it also gets later. So basically, it's the simplest if you select with previous and you just work with the delays in this tap . Now your request for this lesson. I know you may not get everything here now, but don't worry about that. As we create real projects, read slides and create real animations for it, everything will become clear because as you work with that, you slowly learn a few things, and then you will be very fluent when it comes to working with those animations right now, I wanted you to learn the types of animations that they can be moved around, that they have their timing, that we have affect options and that basically it we have the play from to preview it. We have the preview were also here. That's basically the same. And this is how you work with animations. That's also this tape isn't complicated. Okay, for this lesson, your quest will be obviously to the edit animations, right? Click and train their type change toe on click. Change it to wit previous tainted toe after previous. Then just start this light and to see what happens. It will be also helpful if you work with dead allies and duration to get familiar with all those options. All right, that's it. In the next lesson, I'd like to briefly talk about transitions, and then I believe we can finally move forward.
28. 05-06. Transitions Tab: since you are already a power point animation master. Now, I want to briefly touch about transitions. As you know, transitions are simply transitioning between slides. I can select new, slight new slight and depending on the transition on this light, this is how they will fate between each other. Right now, if I select a five, I selected shift at five. Okay. Those stupid intimations this light go across. Okay, so he seed a bit better. As you can see now, the slight simply go between each other. But if I select this light, I go to transitions, and I select, for example, wipe. And here I said I split. Boom, boom, boom. This is how those slight would appear. Why slide super beautiful? Okay. And the cool thing here is that on the transition step, we can select two types of transitions. We can sell it on our mouse click, which is the most often used because as I end my slight I present something or I just want to proceed. I click my mouth. You can select also after five seconds, for example. Now, as I start this light as five seconds will pass, it will automatically move forward to the next light. You have no control over that. Why is that helpful? You can have pre recorded presentations or if you export them to video, the video will remember that this slight should be shown for five seconds. That's very important, especially if you want to use power point for creating videos or if you have perfectly set timings. Another useful information is that transitions are secondary. In the important, the most important are animations. For example, if I want to transition this light after two seconds, what you say, will I be able to do that or not? I'm telling you know, until all the animations finish, then we have two seconds to fade It. Let me make it shorter right now. Animations. So until those animation finished, for example, let me move the oval to take about five seconds to play. I'll go into the slide. You can see the oval moves for five seconds. Now only the slight can advance. It wanted to advance desperately after two seconds, but it had to wait under the last animation will complete. Then it could finally transition. This is basically it when it comes to transitions for your quest. In this lesson off course, you will have to create transitions between a few slight at, for example, first light at anything on them. Like I did hear those super advanced boxes blue boxes and I tried a few off the transitions between them. Some of them are super cheesy, like this one, but okay, they are. They're in Power point. We have them since many years. So people need to have them. But the flight trees, for example, much, much better. Off course, the normal fades are great. Bush, wipe. Everything looks kind of decent that you need to know. A few of those transitions in order toe also effectively work and power point and close up your presentation and make them a bit nicer. A very nice thing is that once you have a transition established and you want this transition to be for half a second, you can apply that to all. All slights automatically will get this transition. All right, this is it for this lesson. Let's move forward in the next one and start designing practical products
29. 06-01. Design Warmup. Create a Safe Slide: hello and welcome in the first lesson off the design practice part in this course here, we will work on a slight design. No matter if you want to design videos. If you want to design presentations or you want to get overall battery graphic design, this section will teach you a lot about working in Power Point and overall, getting your designs done as you can notice. I have my color scheme here. This is a simple picture I took. It's a bit cropped. I prepared myself a lot of icons just in case. So I have enough to work with. And, of course, those pictures which we were talking about. I have some pictures now how to start the presentation, how to start designing. I would like to show you something which I'll call a safe slide and which is a design warm up. I call a safe slide something if I have completely no idea for the design. There's still something I can always make, and this will always look decent. All right. At first I'd like you to delete the original boxes, go to your pictures and select a picture which you like, preferably with a person on one side. Okay, This looks very promising. All right. I'll place this picture on the left side using my safe slide concept. I want to press old and too and create a very simple erecting. Okay, this rectangle will go from the right side. About 80% or 70% of this line. Okay, create something like that yourself. Now I have this object and I want it to be white. I will go to its form. It shaped Phil. Select White Off course. We also need to click shape outline. No old line, because by default, Power Point does this ugly blue outlines. Okay, now, I would like this to be a bit cut down because this is a rectangle. It doesn't kind of look so so designer ish. So I right. Click here and I'll select edit points. I will take the upper point, and I will just drag it over to the right side. Exactly. Something like that. And we do not need more. You can see this already looks promising. Having the rulers opened. I know that this is the end of the slide. Now this person is too far on the right side I want to take this person, hold my shift key and try to position the person kind of in the middle of this part off the slide. I can see I'm far above the slight now, just in order. So I know where the slight end, because it's better for visuals. I'll goto former. I'll go to Crop and I'll corrupt this image to the end of this light. Okay, then a click crop again, and I have the first part off my slide preferred. Okay, old one, and create a textbooks for the title or some title. I'll click on this box and I will change the phone. Two months. Sarah. I definitely want this to be bigger and eventually also bowled it because this is my awesome title. Now I can have more text boxes here or more icons here with my colors, and that's the beautiful part. Let me select three icons like this. Note this circle and this pencil or this drawing board. I don't know what this is. Control C Control V. I'll place them here, and now comes the advantage. Sorry. Now comes the advantage off having vector Aiken's. My advent of here is that I can. It s so hard. You need to click on the icon. You need to click shift. Yeah, And look how difficult it is to select the icons. That's the little problem when working in Power Point. OK? I always select the background. That's also a downside off what I made here. And I want to select this color. I go to form it shape. Phil. Eye dropper. Do we want this presentation to be read? Or do we want this presentation to be blue? Let me maybe start with this red, because I really like this this deep color. And right now I will just click here. Control C control V Control C Control E Control C Control V. But obviously this fund should be smaller and different. Shift click here. Shift click here. And in my case, I will change the fund to my writer. I'll grab some. Laura made some text, and now this would be a matter off, making everything precise as you remember. For example, I want to justify oldest boxes, not this box. Justify it, maybe make them a bit smaller because they were too big, in my opinion. And now I would need to place everything properly. I can select them like that. Press control G press like that, Control G first like that, Control G. Now shift, click, click former line and distribute them vertically, so I'll know that I have equal spaces between them. This will be your first design practice, creating a slight with Aikens an image and overall working with all the tools we already know. And in the next life, we will try to create a consistent presentation and a few interesting slides.
30. 06-02. Slide 1. Title: I'm revisiting the front options and I went to Google phones and under left bottom side. You can compare to funds together. And in my opinion, I found that Roboto in black and Latino irregular together, work great. At first I want to use and create a title slide. Let's do that together. We will definitely use an image for that. And I was thinking something like something like this, because this gives us much freedom or something like this or a city is also great for for those title backgrounds, I'll place that in the design. I will make that bigger. I'll position that properly. I'll go to Crop and I'll crop that to my slide. Okay, I want to make sure now that the image fits Okay, we still see the sun. I could crop. This is the background, but I want to click on this image. I want to select color and I want to take away its color because I would like to overlay it with one of my colors. So I was like this second option here, which is gray scale. All right, then I go toe old too rectangle and create a rectangle above the entire design. You can see that's totally ugly now. But don't worry, we can right click. We can select form and shape. We can go to fill and we want to select a color eyedropper. This one I can use the transparency and see what happens. I could even select radiant. Delete a fugue, radiant and select eyedropper. First color click here. Select eyedropper. Second color. This seems to look OK. Now you want to change their direction to from left to right? Because I wanted the colors to be like this. Because we have the tree and the sun on the right side. Click on the first color. Transparency Take on the second color. Even more transparency. You can adjust that. But I believe we have a really nice color scheme. Okay, I click on it once again and in the affirmative I make sure I have select old line. No old life. Okay. Perfect old one. My text box. What I wanted to say here our design. Well, that's not much, isn't it? Make it in the middle. Make the text white and select Our black phoned I told you are you will decide for the robot a phone roboto. But I want to make sure that from this fund word we have it. I wanted the black one. Okay? I wanted bigger our design. That seems interesting, but it still lacks something, so I want a smaller box on the bottom. Control C control V. Okay. It's always hard to select and better that are designed control A. And we can use a shortcut control and the left bracket key to make this smaller. Okay, I make it on the bottom. And you know that the second fund I wanted to use was latter, not black, a normal latter fund. Still, I wanted to be smaller and maybe the white color doesn't work. So perfect now. So I'll go to the colors. I'll make it a bit gray. Just so it's a bit darker or red. Okay, this red seems to work fine, though I really want them to be upper case. I want to select maybe sentence case. Maybe better presentations will look a bit better. And on top, I could eventually select an icon which would complement this entire design. You know that I have so many icons that I can use them anywhere I want. So I take this rocket, I make sure it's in the right place, and I make sure that I use the proper color. I have my former shape options open so I can select just eyedropper. And do we want it white? Not in particular. Maybe read. And as I see it, I believe we shouldn't make a space here. We should make it like that. Okay. The rat on the bottom. I can somewhere on top of it. And we can decide if we made the colors properly. Maybe I can Could be a bit bigger. The red overlaps a bit. So I will click on that, and I place the red on the right side and the blue on the left side. Will that look better? Well, it definitely does. I would even maybe get rid of their red or just change the angle. So we have less red. All right, I'll make this even more transparency. 30%. This one. Yeah. Let's leave this Read a Some off the red can be here, all right. And this would be our titles Light. Now your quest, obviously, Will it create something similar? And power point that picture in the background and overlay and a few boxes And eventually and I come
31. 06-03. Slide 2. Exciting Grid Picture: Okay. Welcome in slight number two. We need to create something which will be ableto often. Copy, Create a new slide. I would lead everything and I'll come back to take my text and the secondary text. I'll go to the slide and Helpers Control V. Now I need to select the 1st 1 and I need to select maybe the dark blue car. This could be like the main color off our presentation. And this could be a complimentary item, maybe to a very light gray like to tagline off this slight I have click on it. I will justify it to the left side. So align left. And with my control and left bracket key, I'll make that of its smaller. Okay, since we selected letter for our tax control C and control V it, I'll acknowledge that this is text by your hashtag control be and I'll make it bigger. Okay, this is just supposed to be an icon. Perfect. Now I'll copy the text once again. You can see I'm working on the items I already have. And now we need a textbooks. I would like to come to the first light because I have the alarm Epsom copied here. I would like to take a few lines out of here, all right? And this is a normal, solid, dark background. Just what we need to do. We need to select Latell found for I will justify the text. I'll take a brief look at the other lot of funds Hair line light where light is also cool. Medium, semi volt, thin. Well, maybe the light one, the light one can be useful. So let's have it somewhere here. And this would be like the base layer off our design. The base layer off our standard very standard slide will not are designed like here comes the title. I would like our presentation to use a lot of images and I will definitely need to select more and download more images as an example. I want to, for example, select this one. I'm not entirely sure that this will look cool, but I want to show you what I'm about to do here. Crop Just a quick crop. And now comes the fun design part. If you have no idea how to make this more interesting old to select rectangle, let me work with such rectangles former shaped Phil White shape. Old line, no old line shift click. Rotate them, Will 45 degrees. All right, maybe it's a bit too big. It could be a bit longer. And let me start. Design Control C Control V. Who control C control v boom Control C Control V and boom. Now all will depend on the picture we use. But look, what can be achieved with such simple things Now it may be Doesn't look amazing. But wait a second. I won't again old too. And I want to get rid off this part as well. This will be the entire customization off this light, and I will select a suitable object. And of course, you can always rely on those rectangles because rectangles can be simply turned over. Do you remember? What do we learn previously? Click here. Former painter Boom. I don't have to do it from scratch, right click send to bag. So it sent entirely to the back and click on this image. Right click sense to back. Watch what happens. And I believe this part is should be also cut down. Shift a five to preview what we achieved. Well, my screen is a bit bigger, so you don't see the right side. But I can see that those lines I make them too big. And here it doesn't look consistent. Take this one. Control C control V. Place it here. Make it like that. Okay, so it's evenly cut. You want to have even spaces here everywhere, and maybe I'll make those a bit smaller. I will goto for months, and I won't do it to be 0.3 everywhere. I'll make sure it's equal one last time you want here. Sent to back and on the picture sent to back. Now every time I want to change the picture, for example, I would like to have this one. No problem. I delete the old picture. I place this sense to back and I just crop it from the left side. Okay. Like this she's here. Crop doom. We have a completely different design and I just need to make sure that I use the crop properly. Well here. No problem. It could be a bit wider. That's really no problem. And this picture isn't perfect for that because the face is invisible now the face should be revealed so I've selected everyone. Picture. I can see that. You maybe think What the heck is going on here? What's what is he doing? But look on the left side. Don't you like the look and feel off this time? They'll And if something is lacking to you, like for me, I like the red color and I like something on the bottom. In my opinion, this light would be done. And if you don't like what you see here, you can always click on this object, right? Click edit points like you could at a point here and simply make it like that. Now it's a bit more cut off and you will see perfectly where this light is finalized again . At point. Make this smaller at point. Make this smaller. And okay, now this light looks a bit better. I look close, this design here, I want you to become as good and designing as possible. So watch this slide. Try to create something like that. Eventually rewards the lesson, and I'll try to make some simple, slower slides in the upcoming lessons
32. 06-04. Slide 3. Connected Picture: Okay. How to make the slide more ordinary. Click and you slide Once again, I'll copy the title and the tagline Because fighting that's essential to our design. This time I'll put it on the right side. Okay. I'll make sure it's aligned to write and a swell Align this to write press old too and select another shape. This time we'll select the rounded rectangle And let's create something like that. But we want to opt around this because this would be too blocky. I want around us like this. Control C Control V. You want a few of them? Maybe make them equal control. C control V Control C Control V. Okay, this last one could be again bigger Or maybe control C control V the 1st 1 Select all of them and we will fill that with a picture. But before we do, we definitely we have to press control. G if you don't press control Gee, you can also right Click group and Celik Ruby. I want to fill this with the picture and I'll show you a picture or texture. Feel select file. I have my pictures and maybe this time we select something like that you can see if we have it grooved. The pen goes like that with If we right click group on groups, the photo tries to be placed in each design separately. So control Z and you have something like that. It's totally great if it's group not Look at that. It seems like a completely custom design. And I forgot about something. I should click here. Go to former. No, old line, No line, no line, no outline. All right, now it looks perfect. Maybe the picture isn't perfect, but it looks okay. The downside here is that we can't use the cropping tools now to make this light of it different. I want you can copy my color scheme because I want to make sure that we use the red one. And since this is rounded, I was old. I pressed too. And I select a circle. Maybe you select to I consider control C control V make the 1st 1 Former shape Phil. Red shape, old line. No old line home. Form a painter and paint this former over American place White icons. Here. I'll go to my I can slide and this seems interesting. And this planet seems okay. Control C control V. I'll place them here and for their fill. I want them to be white. I want them to be white, like this perfectly in the scoops, trying to make it perfectly in the circle like this. And maybe just taking a small description. I will take this box because I don't want to always create it from scratch and make it a small description off this item. Okay, We would have a small description here. A small description here. Old too. Another rounded rectangle shape. I would like to have filled box here. Round it. Goto former select its color eyedropper, the darker one. Okay, this was Well, do I need to add something here? I got ended like that to make it a little underlying, or I could, for example, create a fill out off it by making it a bit smaller and selecting the next color in line, shape filled eyedropper like a skill set or something. You can notice how interesting that becomes off course again. Former. No, old line. That's so annoying. But you can see how easy this decreed a progress bar like that small progress bar does control G Control G because I believe they are too big. That should be smaller Control G under Progress Bar Control C Control V a Progress bar here . And I believe we created a design which looks consistent. I could even make 1/3 1 because this somehow would look better. Try to place everything a bit better because right now it looks a bit clunky. After positioning the items a little bit and changing the picture, everything looks more clean. Especially when I see the time nail. Everything is more balanced, looks more natural, and I'll stick with that for the slight. This is it. Try to create a similar slight, especially this right side where we produced the icons and the Progress bar. Because this might be useful knowledge when you create a slight. Only with that
33. 06-05. Slide 4. Picture with Lines: okay. I want to slowly close the first part off this template design and I'll once I can create something with a picture, it would be something similar to that. I mean, we will use the text boxes because those can be really useful and fill out our slide. I'll select and you slide. Boom. I'll delete everything because I want to create it from scratch and I'll place those basic text boxes, maybe deleting the icons. And how do I want to proceed here? I will use an image as the background, and I'm slowly running low with images, so I'll maybe need to download more. But that's no problem. Okay, take this picture right, click and send it to back. So we have the text in front now able to select old too toe, insert the shape. And I'll maybe used this shape because this looks promising. And it has such a nice option because it already looks like a ready slide. So I a place it like that. And the perfect thing here is I can adjust this corner. So depending on how much text we have, that much we can cut off this corner, let me go to former shape Phil and select White off course shape boldly, No old line. And once again, I would need to send everything to back send back sent to back. Now, this seems like a ready slight to me with maybe this bright part is a bit boring in order to make it less boring. And since this is a such a pointy style and place this lower so the viewer, if you see this light what you immediately see the middle of the slight grabs your attention. So here I would like to create maybe a bit more off something just here to cover up the picture, because the picture now looks a bit empty. Okay, Now we will have a few steps, and after each step you should pause the video and recreate what I'm doing. I would like to have some lines here, so I press old, too, and I select our familiar rectangle. Please create direct angle. The car doesn't matter, and it should be a narrow rectangle like that. I will rotate it all right, and I'll try to make it as close as possible to this line. Maybe I select shape, fill a red color, so it's better visible. I make it a tiny bit bigger. I come closer and I start the rotation. I worked on the bottom side. I worked on the topside, and this seems pretty equal. Okay, I'll know. Make this closer. I mean shorter. And now I'll control C Control V and I placed them very close together. Control C control V and I'll try to fill the rest of the slight like that. Once you fill them out, please delete every 2nd 1 of them starting by the 1st 1 because I want equal space is to be here. Okay, the second step. I would like them to go equal with this line. So if you have powerful in 2013 or 2016 you will have the combined options and fragment options. You don't need to do this that you can do this by hand by adjusting the length of them. But if you don't want to do that by hand, I can show you another trick. Please click on an object control C control V and rotate this object. I want to make sure that this object will be perfectly aligned with this line now. Okay, I made it too big. Let me try to align it like this here, okay? It doesn't have to be 100% precise, but I want it to be pretty decent, okay? And make this object bigger. You can see this is the line where we will cut if you have this red object selected breast shift and click on Boom, boom, boom, boom, boom boom Holding, shift. Click on all of them. Now you need to go to former. And this is why I told you that you need purple in 2013 0 2016 Because we need the fragment option. You will click on the fragment option. And now you can delete this big object. Delete those smaller objects and we have a perfectly equal line here. It goes really well along now. I less adjustment would be to select those shapes. Go to form a shape, food, white shape, old line, no old line. And this would be it. If you want to be super precise, you can also cut the bottom side. You should select a rectangle for that. You could create a rectangle like this. Then again with shift click Select everything apart from the background and now it probably will also change the color. So this was my mistake, that I made them white before I did this. But basically I am done with step number two. If you would like to have those lines also on the topside, you can click on that. You can press control C control V but you see, it doesn't fit here. I would need to right click form a shape, go to the third box to the size options and open up size because we need the scale, height and the scale wit. We have 100% here and I need to rotate it to the left side. And I need to make sure that it's 100%. OK, now I know that boat are equal. If I have it like that, you can simply click here, select your shift key Turn is perfectly around. Place it here and Voila! This is it. When it comes to this slight. I hope you were able to replicate older steps and had fun designing this with me. Let us work on more interesting designs
34. 06-06. Slide 5. Our Services: Okay. We started a new section which will be called services. How could he start? At first, I would definitely like to borrow a few of those text boxes. One shift click. Next shift. Lee Next. And I want a few off those text boxes to be here. Now I can start my design. I'll make that smaller because I just want a small description here. And definitely the text is also too big. So I'll try to make the text, maybe even centered. And here on the bottom, I want three off those text boxes because I'd like to display three services. Now, how to make sure that you have equal spacing between them? You know it, right? Shift shift, former and I, and distribute them horizontally. They are aligned to selected objects, distribute horizontally. So the middle one is no perfectly said, Okay. And now they're in the middle. This would be one example of stating how perfect our services. A line line center. Okay. And this also home. Ellen, Center. We have to decide if you wanted to stay red, but I think this is pretty OK now the design is pretty empty, but I would like to use our color scheme. And I've selected a few new images because I wanted to have a few more images. And I think something work related like this, or like this should be perfectly OK. I'll make the image bigger so it covers the entire screen. And of course I'll goto farmers and crop it to a smaller picture. I want something like that in the middle. Well, this is kind of small, so I need to fit the picture. I think the hands will be important. The keyboard crop and perfect. We haven't image like that because the images kind of empty and kind off without feeling. I would need to borrow overlay. We already did. I want to borrow the overlay and then I'll try to work with the colors we have. Okay, this overlay is really beautiful and it's great, and you can simply use it by copying and pasting it. And now we need to decide if everything is distributed properly. In my opinion, those textbooks is take a bit much off our space, so I will make them a bit smaller this a bit higher. This is all because I would like this image to be a bit bigger. I can go back to crop. I want this image to be a bit bigger, so we have some space. This overlay is no problem because I can always recites this overlay instead of having that here. Other controversy and control v it and place it here. Service like service ones, heiress to and service tree. I think the service looks a bit better and what we like, we like some Aikens. I would like to press old and too and select a circle, maybe three big circles for our services. And those circles would follow our color scheme Control C control V OK, In my opinion, I made them a bit too big. And what's great, I can with shift, select everything holding shift. I can make them smaller. But if I additionally press control, you can see I can make all of them of its holler at once. Perfect. Now I need to select the 1st 1 former shape Phil and select our collars boom former shape ful, eyedropper and select the next color shape ful, eyedropper and boom. No old line, no old line, no old line. And I'm sure that those colors follow well along I'll crack on the Grady int And I believe this red could be also this blue because they're at somehow doesn't work on this overlay here. Now, this would be a matter of having some fun with them. Maybe maybe this time we want some overlay. I select poultry shape, Old line, Wait like maybe three points. Shape old line white. Well, this white doesn't work here, so I'll simply recall or this box to read. Wow, now it's really better. Then I can select the line here so old to a normal line and try to connect the line. One object with the next object. One object with the next object. Select those two lines. Shape old line white. Wait. We had, like, three points here and there's a great connection. Of course, I would need to connect it a bit better and this light starts to become viable. I added a few text boxes. In my opinion, this slight is finished. If you want toe, reconsider anything, you can simply select it. Resize it, change it as you want. Now, try to create a slight like this on your own, and in my opinion, this is a great design about our services
35. 06-07. Slide 6. Overlapping Circles: this light can really represent anything. If you need to change this light, you can simply delete anything. You can change the overlay. You can change circles, and since they are connected with this line, the line will go together with it. And in a really few mouse clicks, you can create a completely, completely different slide, which will suit the design you're making. Look at that. A few clicks and a completely new slight. Okay, I revert my changes, and I will make another slight like that which can be used for anything. Right? Click news, light, delete copy over those element boom, super fast designing. And this is it Good job you've agreed to dislike? No, no, of course, we will create a few things more. I want to show you another. Well, can I call it the trick? I want you to always keep in mind the background because using the background can make some unique designs, letting press old, too, and select a circle a simple oval created pretty big like that. Or maybe I overdone it. I'll make it a bit smaller. Former. We also need our color scheme, and this time we'll work differently. we'll need the outline. Let's make the outline rat. At first, let's go to right click Former shape in the film and in the line. Options make the wit pretty big. I want the weight to be really big and you'll see in the moment why, Okay, now you can see that I have a red outline and if I make this outline toe white, we don't really see it. But we can cover up one image with another image, and they look as they would be connected. You can see what I'm doing with that. I have the same outline color as the background color, and now they get a completely different look. Okay, I'll select both of them. I may be. Want them to be a bit bigger because I want to place a picture. Wyndham. I want them to create a design like this, the entire middle off my slide, and how many off them do I want? Well, I want maybe four or maybe five. Let's stick with four. Let's select all of them and let's place them in the middle of this light. I would require four off those textbooks is because I want to have one textbooks under each of them now. It would be better off placing everything properly aligned, selected objects distributed horizontally. Now I'm sure that they are distributed properly, and now I could work with those services. At first I would click on this object. I would go to the fill options and out select picture or texture field. Since I have some pictures prepared, I'll just click on them. And we can still use former color and de saturate the pictures so they will all look equal . And the last one picture file. I would select a different picture. Now, obviously, I would need to click Crop, and maybe the pictures are a bit distorted. I would need to crop and properly place the pictures. This will take a bit time, but, hey, if you want to designed to be really well done, you can take your time, all right, and make those little adjustments. I really like that we're able to use the grayscale because this makes our entire design consistent across all of those Aiken's. The last thing I would create in the middle would be an icon. I would select those Aikens I had come back I would make sure that everything is properly distributed. I would click on the red or on any color you have and again line solid line. And I would make the wit bigger. Now, this would be a pretty unique design. Of course. Well, this is too small because I want to have a bit more off the Carl or given the size of this object and make the wit have it smaller and basically touch it here. Okay, this would be about the designer and to achieve maybe going to form a shape Phil and selecting the different color. Now it looks a bit more real. I did change the icons. I select all of those objects and I press control g to have them consistent. If I need to shift him around or, for example, spread the move it It's no problem. I can do this with one mouse click. In the end, if everything is properly placed, this light well, look like that. Now try to recreate it on your own and use those interesting circles with their outlines.
36. 06-08. Slide 7. Simplistic bulletpoints: Okay. We are making everything pretty complicated. But what about very simple slides? It could be used if you really need to just quickly communicate something. I can give you another idea. For example, we have five colors here. You could select that you could write hashtag one or or simply one an adult or just one. It really doesn't matter. Just make a big number out of it. Close that down. Well, maybe I made it a bit too big. Cypress old too. I select the shape. And what shape do we want? Maybe we want this shape because they're creating is that he can shift it. And be careful because if I pursue old too and I selected here somewhere here we have the same object. But this is a flow chart Floater data. And this is a pearler of probable. I can't even say this word. It's too difficult to pronounce for me. But if we select that one, we can do nothing. But this one can be changed. As you can see, where I'm heading with this is to create a very simple boxes shaped fell eyedropper and used the color scheme. I already have shaped outline off course. No old line. I would make the smaller to the size off this letter. Okay, well, it doesn't have to be perfect, because I want to make it pretty interesting. Shift click control G one to three. And very quickly we have a super interesting design and we can stay with this color. We can change each color separately, for example, selecting the ID over and this one selecting the eyedropper. And this one Right now, I'm having some doubts about the color scheme I selected because this base one doesn't perfectly fit here. But, you know, we don't have to use all those colors. We can also create our own cars. Let me see. Maybe I'm discrediting this color too much. It looks fairly decent. And for the last color will. Since I'm changing the color over and over again, I would select more fill cars. And what would work with that? We have some blues, maybe a yellow for an orange. Maybe let's go for an orange and orange. Should have also a darker tone like those colors, in my opinion, looks average, but it's it should get the job done this way we could communicate another five things around on our slide in a very simple and consistent fashion. Maybe. Let's call it service here and maybe the red one. Well, that's a bit too much of coloristic. This is why I will go for this blue or for a black wall text. Phil. Well, this blue also let me select a simple black color because I want everything to be cleaner on this slide Control C control V Control C Control V. You can see I'm just duplicating those objects. And now it's a matter off shifting those letters around those icons can placed above each other or they can stay like they are. I would need just select everything control G control. G grouping is also very important when it comes to animation because if you animate something, if its group, it animates together, if it's ungroomed, you need to select an animation for this. For this, For this and for this now they are grouped already together, so I only have to animate the letters and the text. But this way it looks a bit more like consistent and easy to read it. If I need to place them somewhere else, Maybe I should place three on the bottom and two on the top side here. But, you know, I've made it like that and I'll stand by my decision. If we create other slight, like total freestyle, you duplicate any slide you delete like the half off the things you have. You come back, you select that and you see if this fits here, maybe maybe you can place it on the bottom. And right now, for me it looks better than the services we had. So it's very useful to have such slight. And if you create something new, look how easy it is to make a slight, more appealing, more consistent, more appealing a bit difference. The design is a bit different. So this is something to remember when you create slights and for your lesson, your quest will be to create a slide like that. We also did such hardcore and difficult slides that this one should be enjoyable, easy and very simple to create for you.
37. 07-01. Slide 1. Bouncy Text: okay, we have to start somewhere. So in this light we will prepare these simple animation for our title. Now this section has its good site and his bedside, because the good site is that animation is super enjoyable in Power Point, and it's made very quickly. The downside can be here that it's a bit tedious because you basically repeat the steps each time you make approximately the same things over and over again. I want to avoid questions how toe animates, like to how to animate slight seven. I will simply animate all slides one by one, and you will decide if you want to watch and work together with me or you would like to skip some slight. I will, of course, encourage you. Design each light with me, try toe, animate its light with me and I'll off course. Start with our title slide. When trying to apply animations, you need to consider how many elements you want to animate. Obviously, on this life I want to animate those three elements. The background is okay. It doesn't need any man animations, so let's hop on. Let's click on the first object. Yeah, and that's the problem in PowerPoint. Sometimes objects are hard to select. I'll goto animations and open up my animation pain. Those animations should start automatically and for the rocket, let's select a fly in because this is a rocket. And here, right off the bat, I want to show you a cool trick off course. I want this rocket to flying from left side, so effect options from left. And right now the animation is a bit boring, but the grating areas that on the fly in animation as well you can double click here. You can select effect and you can smooth, smooth and bounds. Smoothing makes the animation, like start slower and end slower because right now we have one motion. If we smoothed the end toe help a second, it starts quicker and then fate a bit off. But at the animation was super quick, so let's make it one second. Now you can see it already looks better with for that animation. I didn't want such a big smooth. I wanted to have a small bounce. Now it resets the smooth because you can have either bounce or smooth Look at the bounds. I want a bounce to be about half a second, and it bounces a little bit at the end that something a very fun in power point and right click select. With previous this way, the animation will start automatically, and since we are flying in from left, I would consider making the same for those ones. Fly in effect, options from left longer, right click with previous and delayed by half a second. Right now I have to animations do do. As you can see. I should adjust this animation as well, so I'll double click on this animation. I'll go to its effect. We have also those texts, animations, But this would look very bad because the first word on the Second World would fly in separately. We want a small bounds as well. Maybe is your 0.5 the same way? All right now everything will happen after each other. So since I decided to make the same intimations, basically, and now you can see where it gets repetitive because we are basically doing each time the same thing over and over again. But it's still enjoyable. I do like to make those animations for the last part. Click on the second text select animation painter and pain is over for this one because I believe it will look really well if we have the slight animated like that as I see it now, I don't like the flying. I would select both text boxes and I would select wife instead of the previous. So wipe from left duration can be 0.75. Right Click with previous. Always make sure they are like that. Delayed a bit, delay it a bit and play from okay, play from the first too slow. I will take away to delay. I will take away the delay here and now. This should look perfect. Now you can see the continuation on the slide place. So the rocket comes in and the text fate nicely in afterwards. And since I selected wipe here, most likely I will select wipe as well later. Okay. The first lesson was the longest because I wanted to explain you everything. Now create your animations on slight number one and we see each other in slight number two
38. 07-02. Slide 2. Strips Ownage: for the seconds light. We'll make those simple text animations, but they still look awesome. And Tilden introduced the rest of the text also with a very pleasant animation. Okay, Hey, animating slight number two in slight number two. Obviously, we want to animate those elements because definitely we don't want to animate that. That's custom made totally. Customers. You can see everything is preferred especially to work with that. And how do I want this? At first I would like to group that control G because this should flying together. This can be separate. This can be separate. And those icons Oh, I have them at once. Well, that's pretty OK, now, as you remember previously, we made the text with wife and I would like to make an overall animation for the title. Maybe the fate and nice fate, My work. I want to see how this will work with this text. So I've selected both text boxes. I did click Fate and now I can double click on this animation I will go to effect and I love any mate by word or by letter. Let's set by letter maybe 7%. Wow, that's really beautiful. And I can't imagine a more beautiful animation. We have someone animations, but just look at that. Does that seem right to you? Well, even if we select for example by letter, this will look totally crazy. Well, it is something unique. I will give this intermission that it's pretty unique that we can do something like that. But I can't wrap my head around those animations because they don't look as cool as the fate. Innovations. Totally ugly. I'm sorry I have to go. It failed because I want to be as clean and as professional as possible. If this would be a business presentation or something for your online marketing lessons, I would rather want you to create those fate animations. But keep in mind, nearly any animation can be set to effect that animate by letter. Okay, we were at 7% and I believe this look awesome. So I'll start with previous, so they will start automatically. I would delay the second line of it. That's just amazing. I want to have those animations exactly like that. And for the text for the main text, we could select this little button, select more entrance effects and eventually preview If there will be sounding better, I know that the strips looks really good and I would like to animate it from top to bottom . So I will select that. Just out of curiosity, I will select a few more because sometimes those animations look well with some elements. But here we won't reinvent the wheel. Oh, no, that's this would be okay, but no. Let's select the strips because it goes from corner to corner. Since this is like skewed as well, I would like to follow this this style on this slide. Oh, I headed here as they can see it now, affect options from right down. You can see we have it on click. I want this to happen automatically as well. Or you can decide that you want it to be animated after you click your mouth. Then you just up the duration and it should stay like that. Maybe those icons should also animate together with that, why not make the same animation go here more entrance effect strips and hear from right side to left bottom effect options left down. We have it already properly selected. I will select with previous up the duration because I do not like when the animations have super quick like like quarter a second and it's over. I'll delayed of it. And now I press shift a five to play this light. Look, the title comes in. I'm explaining this light to you, and now I would like to proceed to the text part. I click my mouth and it beautifully animates onto this light, and I can finally talk about the main topic off the slide. That's really well done animation, in my opinion, because we introduce it slowly and we then proceed to the next part as well, Very smoothly. I hope youll have fun animating this light like that. As you can see, we have a total off four animations here.
39. 07-03. Slide 3. Swirly Progress Bars: slight. Number three will be very simple again. Text animation on the top. Then we will swirl in those progress bars. I will teach you how to do this. Welcome in slight number Tree innovation. Since we already have the title animated, we can always go back Control See Contrave. That's my little trick for the future because if you copy text the text has already animations on it. We can click on the first text Goto, Animation painter and click here we can select the second text Goto Animation painter and painted over here. Then you just take those text boxes and press delete. Now you have those animated in like 20 seconds. Boom! Everything is perfectly prefers Now when it comes to those bars, how do we want to animate them? And let's make something new. Let's make as maybe a swirl animation on the icon. We have three elements here and as you can see, we have the element three time. So we will basically just repeat those animations. Let me start with the Eiken Grow in turn. Yeah, this could be something for us. More entrance effects. Where do we have it? G like growing turn well, kind of too slow. I wanted to something like a zoom, but I would also like it to rotate. Do we have something like that here about no bounds? These are exciting animations, at least so they say Spinner. Exactly. This is an animation which I wanted, and I don't have to connect to animations because we have something like that. Spinner. Let's take the spinner. And this animation is particularly good for ICANN's, and definitely we want it to be on a click, because on my first mouse click, I would like those three items. Two and mate, the animation could be off course one second long. Now is for the text. The text. I don't see any reason why I shouldn't click on this select animation painter and paint this animation for this text. They happen together. That's perfect. Maybe this could be a eight quicker. I'll double click here. How Select Effect. And instead of my letter, I'll go by Ward. I wanted it to be a bit quicker him and maybe like 6%. I want this to be a quick animation, a swift animation. All right, we have this. You can see the number one Number one. So this is the first click. And now this bar this bar. Okay, it's made together. Yeah, definitely. It would look weird if this wouldn't be animated. And definitely I want a wipe from the left side and you can see we have those few basic animations and they are basically good for any type of object. Definitely the wife. It's something that you want to use often. And definitely I wanted to wipe from left because this is just such a universal animation and it should be with previous federation Half a second is okay. The delay could be a big bigger You can see. We did animate all three items. I want to copy those animations over. Please tell me if you have it the same way. So you have the first text animation. You click and this entire box beautifully animates. I really believe those swirl animations give it the fine tuning. We want it. And I love click animation painter Paint this over click animation painter painted over. And you could see what happens to the animation. It has the same delay. It has the same duration. No, the bar animation painter boom now the last one. I saw it. I wanted to select the 2nd 1 Animation painter painted over animation painter, paint, animation painter painted over in the last one. Animation painter. Paint it over. This slight is no perfectly prepared for presentation. Let me show you. I would explain what I have on this light. This picture isn't relevant. Remember about that. I want the text. And now I would like to show you some progress which I made on the first part. I made progress like that. Next click that next click that so beautiful. I really like how we did those animations. So police try No, you replicate the steps, replicate those animations and make good Use it off The animation painter. You can probably anticipate where I'm going with that. Yes, you should right Click And you should add it to the quick access toolbar. If I'm making this animations, let's go toe more commands. Let's take the animation painter and place it above here. Now all tree will be the animation painter. Super quick, Super efficient. This is it for slight number three, we see each other in slight number four
40. 07-04. Slide 4. Clean Zoom from Middle: slight. Number four will have one of the most simple animations because we will just do something different than you did previously. And we will make some zooming in animations from the middle of this light and some other fancy elements. Three animations, foreign nations, even more innovations. I hope it will be simply or here. And as you can see, this light really requires no splendid animations. We have the titles and we have this textbooks. But off course, if you would like to learn Oh, you weren't supposed to see that. And if you want to learn no problem. Let's create something. Maybe this time float in. It can be beautifully floated in and I would like it to float slowed down or floater thought up. It's OK. I want this to happen automatically. So I will start with previous, rightly with previous I will select the second animation which is supplied to this tagline and I will delay it by 0.75 because I want this animation to be nearly finished before the tagline comes in. How will this look? Oh, and I made a mistake. This should be first. This should be second, so you can just take this animation, grab it over, select the 2nd 1 and delay it if they see it. No. Well, those two animations do not work together as good as they should. So for the second for the tagline, I'll select who may be a simple fade right click with previous duration up delay up. And let's preview that now. Horrible. What am I doing? So it appears that the float up doesn't work as well as I would like it too. But this is a matter of making a good animation. You have to preview everything several times until you have something suitable. Why don't you use something else for the 1st 1? Because it appears that the floating doesn't work. Okay, to split wide. And how can I not use the wipe? It it is, does the best information out of them. Well, okay, those are not as bad. Then I will select the zoom. I believe the zoom looks as well. Okay, right. Like with previous play. All right, now this is something I can accept. Since I've selected the zoom, I'll press control G to group them, and I'll once again select Zoom, you can see we have some effect options. Here. I'll click on it. Slight center or object center. Now, this won't make a big change. If I select objects enter, it zooms in here. If I select slight center, it zooms in from the right side and this looks a bit better. Make declaration one second. We don't need any delay because we are and the way taking So shift five. And if I click my mouse or keyboard, the text zooms in as well. We are done with this light. Three simple animations. They're a bit different than the previous animations. But why not? We wanted to make something different and make it more interesting for you. You did learn a few new animations. You did work around in Power Point and now try to create those animations on your own.
41. 07-05. Slide 5. Connected Lines Love: slight. Number five gives us so much space because not only we can animate the text, but we can animate each element separately. I will teach you how to make an animation like that. With each click, we reveal another thing. Oh, yeah, We are getting in those interesting slight And I can skip, for example, animating this topside because you already know that I can, for example, control C control V It enters press click on here, Old tree boom. Click on the next on old tree Boom. And delete that because this is the main part and this will be something interesting. How do we have it here? Okay, this is separate. The Texas separate. So I want to control G control. G shift, big control G those lines. Well, I will decide if I want to animate them as well. At first I would like this to maybe common, like from the corner towards bottom. And as you maybe remember, we had already animations like that select here, select more entrance effects and maybe the strips year they really look perfect. Effect options right down. So this is my first click with the mouse, and I want something else to happen. Maybe this text should also come in together with this circle. So I will what I need to do. I need to against select this old tree. And in case you don't remember, poultry is now animation painter. It's this button. I'll click on it. Okay, This is one group because I did a right click and selected at too quick access toolbar so I can quicker animate this entire presentation later on. If I don't use it anymore, I can right click and remove from quick access tour. Okay, This group animates together with this circle. Let me preview it. I have my title. And as I click my mouth, their 1st 2 objects appear and this is perfect. This is exactly like I envisioned it with my second click. And this will be tricky. So watch closely with my second click. I want this line and those objects to animate. You can see the first click two objects. The next innovation will start with the line Select wipe and select wipe from left. You can see that the line is growing since the line did grow. Now here you want to select this object old tree Click here, Click on the bottom side on the entire box. You can select it like that. You need to set the entire box old tree boom. Now come to the right side. We have straight connector, second click and you have a group third click. But I want this to happen automatically because I want the line this object and this object to happen one after another after another. So I right click. I can select either with previous or after. Please let me show you after previous this time, right click after previous Because I would delay it anyway. So it's the same if you said after previous or with previous and make a small delay. Okay, let me press shift at five and see what I did. This is my first mouse click. And now comes my second mouse click. I'm astonished. I really loved those animations and you don't have to think about it twice. You just click here, old tree. You try to be precise and select this line. Perfect. I was able to click it. You see, like this old tree boom, It automatically gets the after previous here old tree boom ready. This light is animated. Now, your request will be off course to create an animation as bad as this one. I hope it's good. Not bad. Shift a five. Let me preview this one last time with the first. Like I would explain you my first service with my second click, I would prepare an animation like that. And with my next click, I would make this animation. Now, here we are, slowly going in tow video explainers. And this is what I wanted to teach you that it's really better if I serve information one by one. Slowly, slowly, Well timed animations like that. Okay, I hope you did enjoy the animation off this light. And I will see you once. You've animated this light in the next one.
42. 07-06. Slide 6. Dissapearing and Growing Boxes: At this point, you already know how to create some simple animations. So I will do something different here. We will not only animate the text, we will grow the elements. And then we will make them together disappear Something unique, something different. So you will learn more PowerPoint tools. Oh, them it gets better and better. Now this light will be Superfund. How do we want to animate that? Because look at that. Okay. I made this one consistent group, but eventually I could animate separately the background and separately deciding if I want to take it to the next level right away. But since this is so much animation, I don't want to make you discouraged or make too much on the slight for the viewer. So I'll animate this together. At first I want to animate the title. But the title I will definitely not make this from scratch. I just place control C control V, take the 1st 1 Old tree Boom! Take the next on old tree. Boom! Okay, shift shift, delete. And we have the title for this entire circle. And now I'm glad that I did group It is this group as well perfect. Everything is very nicely prepared for animation work. Maybe we will use this time also those post effects or those grow shrinks effects. I could think of something like that. For example, let's select grow shrink. You can see it's a bit odd, at least for this animation. So let me find unit. Let me select adoration one second, Let me double click on it. And in the effects pain. We have size 150%. You can click on that and you can select one 1 15 and press enter. Remember that you need to click here and press enter because this can sometimes get weird. We don't need any balances. Just select okay and let's see how the innovation looks. And I believe this is completely enough for my taste. Now we have so many ways off animating this slide. Now you click on that and click on this with my shift click I'll at animation and at the fade off. I know I'm getting crazy here, but I want to show you really something different. We have three innovations here. Let me press shift at five. The first animation happens, and if I click my mouth. This gets bigger because I want to communicate to you that I'm animating this slide. Then as I click my mouth, it will disappear and this one should get bigger. This would be a way off explaining things and eliminating the old things. Select this old tree and copy the animation over. And now be careful because we have so many animations, it can very quickly get very messy. And I'll make this very slowly. I love play this old tree click on this and before I proceed, I want to make sure that copying it over makes it exactly the same. I believe it does shift a five now. The title animates my first click my next week. And this should happen automatically. And this is my first mistake. Click on that. I want this and this to happen together. So the yellow grow shrink right click with previous. Now, this is the tricky part. Look what I mean. I'll explain it to you with the first click. I want this to get bigger. And with my next one mouse click, I want this left side to disappear and the next object toe automatically get instantly bigger. This is no perfect apart from that that I don't see the service. You can see that those advanced animations can cause some problems. That's why I will select that right click and I'll bring them to front just so they are above the images. Okay, now I can again old tree duplicate, click on that old three duplicate, and I can go from here. I can press shift five and I want to make sure that all animations worked properly. My first click, my second click, my third take, and my fourth league is not yet copied, but I see everything works perfectly. I'll click on that old tree boom old tree boom. And I will say you that this is the most advanced animations with it. Until now. If you will have troubles, please go very slowly over this tutorial. Or just try and watch my thought process because I already know how to work with those animations and I can eliminate my errors. There is one more thing I would like to say you if you have troubles animating what I just did make it simpler for you. The problem is that I designed advanced light in my opinion. I designed very complete slight. But if you would like to train, don't do it the same way. Just delete the top part, delete the bottom part or just duplicate the slight. You know that you can click on a slight and press control de to duplicate it and just work on those objects. If you will learn how to animate those objects properly like that and you will have no problems adding more animations right now, I just wanted to achieve a bit off a custom effect here. Okay, you get it. I hope this is plenty of fun to us. Well, and we see each other in the next lessons.
43. 07-07. Slide 7. Dim the Lights: You probably thought that nothing will come here because this is simple textbooks. Some simple animations can be a flight here. Yes, they will be simple. But I will show you how to dim elements as we progress explaining this slide. Okay, you talk to yourself that you will have no more fun in power point because you know everything. So forget about that. I only copy this title. But here I would like to show you something not advanced, but something different. And this will be really something cool, which I've worked with several times. And it always has a little wow factor. At first, I'll copy their first few animations. Old tree boom old three. Boom. I'll delete that. So I'll have my first part ready. Goto animations open the animation pain to see what is happening and how toe animate that. Yes, of course. We could animate this box. We could animate this box, but I will actually group them with control G. So they are consistent boxes and I would like to progress from one to another. But this later on to be a bit dipped. How to make that? I will show you a simple trick. Press old, too. Click on the rectangle and create a rectangle above it. Person shaped Phil White. So it's consistent with the background shape. Old line, No outline. Okay, now, I'll right. Click in open format shape, and I want to work with the transparency. You can probably see where I'm going with that, because we will repeat those steps. But I want it to be just slightly invisible. Okay, I have about 22% off, not invisibility off transparency. And I'll copy this object over each Off those boxes. Control C control V Control V Control, the perfect. At first, they should all be invisible because I want them toe slowly appear on the screen. So I will select the 1st 1 I'll goto animations and I will select maybe a simple fate. Now you need toe. Imagine what happens at first. This is invisible. But then these books fates in Look, shift a five. The entire text I'm explaining to you at the beginning is visible. But if I click my mouth, it gets a bit darker. And I would like to replicate those steps for each off those objects. So simple yet so effective animation painter, which is our old tree boom Oh, all three, boom. All three boom, super quick, nothing difficult and now previewed Shifted five. You know that I will explain five points here. I did explain the first point to you already. And with any click this will be like I'm done with that. But you can still remember what's here because if I would simply fade it off, you wouldn't see anything here. And you would maybe think I wanted to look what was previously explained in this case. In this light, I met the animation like that Click, click, click, click, Super Original, yet super simple. How long did it take? We created the box. We made transparency and we did click fate with the mouse click. Nothing easier, noting harder. And in my opinion, we are done with the first part of the animation. In this presentation, we did animate the 1st 7 slight. It was super enjoyable. And now we will continue the design. Okay, this is it. For the first part of the animation process, let's continue with the design park now
44. 08-01. Slide 8. Six Picture Equal Portfolio: Our next little section will be about our staff working with pictures like creating portfolios, images. And I want to show you one way of doing that. Right. Click and create a new slight and let us create the slight from scratch again. For this light, I would like to use six pictures how to quickly make a portfolio off six images When you have so many different pictures. One is a rectangle. One is more off a square when this horizontal on this vertical we have different dimensions . 123456 totally different pictures. I'll drop them all at once in power point. Now we don't really see them, but they are here. Okay, in order to group them and resize them in one second altogether, I'll select all of them and in our form, a tap in the picture tools we have picture layout. Picture layout allows us to quickly lay out everything we have in a similar fashion. You see where this is going? For example, this one this gives me rectangles. I'll click on that and you can see I have this PowerPoint smart art. And I don't like the smart arts because If I make something bigger, it re shaves. It changes everything. But I am using this only to make the pictures perfectly, even No, I can convert, convert to shapes. I have a shape. Just as we used factors, I can again, right Click group on group and you can see I have many different items. Let me take the pictures. Let me place them on the side and let me delete everything there was before. I'll take the pictures again. I'll place them back and Voila. Perfect. I have six totally equal pictures now. It would be much, much easier for me to create a portfolio slide. Let you maybe place them together like that. Six of them to gatherer. Okay, now they're perfectly equal. I'll try to control Gede. Um and I want to extend them to the entire screen. Okay, One pixel up, right click group on group again. In my opinion, they are a bit too high, but in the length they are perfect. How to quickly adjust the crop. The problem is that we have to crop everything separately. I will click on crop and I'll cropped the image like that. I would need them to reposition the image, but that's no problem. Then I select the next image crop and I'll try for I'll make it perfectly equal drop. I had little mistake here. It tries to crop in both dimensions. It shouldn't All right, take on the next image and try to crop it equally again. Click on crop and we have our pictures prepared. I would need to do the same for the bottom pictures. They also had an outline, but right now we have a perfect portfolios light. We could, of course, take our title. We could place it on the bottom and I'll cold is my first portfolio. Off course. We can play some icons here. The icons should be a bit different, but okay, I will select those that we already have. I'll tries to place them properly and of course, next to the icons there could be some text boxes. But this is just a matter off, copying something over, placing it and adjusting everything. If you believe that this light doesn't have enough style, you can always take the overly just in order because right now we have six canary photos. They are equal in size and in color. But if you place an overlay like that on one picture, then you take the overlay in place a similar over there on the next picture, it gets a bit more off design. Maybe this time a blue overlay. Off course. You need to justice, transparency to the amount you want and the right we have this light preferred. We have three different overlays here. And what's great? We can use this overlay now. If we work with others lights, I will leave. The transparency isn't enough here because we barely see the photograph. Okay, I've adjusted everything and I've created my first portfolio slide. Now it's your turn. Create six images. Try to make all of them equal. Take those overlays and eventually finished the slight with some icons, some text and a title for it.
45. 08-02. Slide 9. Display with Four Pieces: all right. We used the title every time. So let's create a slight just with pictures and with information. Without a title, I will select a picture. Really, Anyone from the pictures? I have, for example, this climbing guy. And at first I would like to inform you that we will use four pictures here. I wanted to be equal. That's why in the crop options, I'll goto aspect ratio and I'll make sure it's portrait, maybe to the tree. It appears funny enough that this picture is exactly like that. Okay, let's take maybe this person. Maybe those lamps and this office desk and place them in. I'll click on each of those pictures. Crop aspect ratio portrait. 2/3. Okay, I'll drop them. This will make sure that I have equal pictures. Do this on all four of those pictures. Now, I know that those pictures are perfectly equal when it comes to their aspect ratios and sizes. So I want to make them smaller, and I want to distribute them on the slide, as I have all of them selected. A line maybe aligned to supplied and align, distribute horizontally. Okay, they overlap each other so they are still too big. I wanted them to be a bit smaller and I want a small gap here and small gap here. So maybe aided a small mistake by making them aligned to slight. Okay, Right now there should be. Okay, I will once again select a line, align selected objects because I wanted to be aligned to the first and last object. So only the middle objects will move a line, distribute horizontally while still to be because I still have no spaces between them. Okay, Now, finally, spaces should be here online. Distribute horizontally. Okay. Everything is pretty nice. So this is the top site off my slide. Then I would like a box to be under them in this darkest color. Old to rectangle and create the box to be equally distributed here. Perfect former No old line shape, Phil. I dropped her and select this color. You can notice how important the I robberies and an older version off Power point. I believe in 2010 or 2007 those persons didn't have the eyedropper. This was a pain, really a big pain because eyedropper is so important. And if you don't have eyedropper. You always need to go shape, Phil more for course, and you need to fill in our G B values. That's pretty annoying and pretty slow. We're getting closer with the design, and I still want to use my color scheme control C Control V and placed on the top here because this will be like the title of this image or the title of this box. Select their colors and select their transparency. I will set the transparency too. 40% about 40% control C control V Control C Control V and Control C Control V. I believe I made a small mistake here. Just not it down a bit with the arrow keys and select appropriate colors. Colors. I drove her next one, but that's no problem. Eye dropper to blue. Just make the transparency about those 40%. 20% 24% and we have this light. Neary Papert. Now, once I can copy those text boxes because I want a bit more color control. C Control V. I'll place them lower, maybe on the bottom or about here, and I will make them but smaller by selecting my shift key. My left control key and also my left all key in order for them not to snap. Perfect. Now I have those boxes. Only the left box is invisible. So what you have to do you need to select a different color. You need to set a transparency for it. I should also change the color here because I want to be consistent across the entire design. And this slight is prepared. The last thing we lack is text boxes. But you already know that you can press old one and create a text box. I want to give you like more freedom, more working with pictures and more creative ideas. So you will learn all the power point tools. This is it when it comes to this light. And I hope we can create more exciting slight like that in the upcoming lessons.
46. 08-03. Slide 10. Staff Members with Overlay: We created a few portfolio slights and those lights are about only working with images because power point design can be much like survival in words. We need to know our surroundings. I'll create another's life. This time it will be about our staff, our team. But we will still work with photographs because I want to show you something amazing. And this time I want again for images similar to here. But I want those images to fill out the entire screen. I have my pictures. I have a few person picture because I knew that we will create a slight regarding persons. So I will select 1234 an allergist. Place them inside the design. Okay, beautiful pictures. Each picture is different. Each picture has other size but I want them to be distributed equally as four. Look on the topside. If you don't have rulers go to view and select Ruler. I would also select guides because guides give us these lines. We can, of course, switch those lines and as new ones. But this is just one example. Now look at the top, the right side and the left side is about 6.6. I guess these are inches. I never really talked about that. And I will select those four images. Go to former and you can remember that the magical number here. As you can see, one site is 6.6. So 3.3 trees tree is like the magical number to make everything equal, select all four images. Go to former and place 3.34 maybe four. So incremental upwards. All right, Now I know that those images are perfectly equal When it comes to their wit. I need also to adjust the height, but this will come in the second. Okay, let me place the first picture of here. Or maybe start with the middle. But start with the middle Here, start with the middle here, then take this picture and this picture everything is well placed. Now you need to crop the persons. And if you don't want those guys anymore to school to view and de select guides. Now I click on the first picture. I go to form it crop and I crop it to the bottom. So I have such a big box and I make this image bigger. Ok, I make the lady big because I want those images toe kind of look equal, and I take the next one crop it to the bottom, will crop it. Actually, I'm extending it and make the picture bigger, as you can see. Well, the better the pictures that easier. The work is okay. Now, this guy looks great. The next guy crop boom making bigger. And I need to make them bigger so they look at least equal. I may have trouble with the last image because this last image, this lady will be really big in the image. But that's the photographs that I have. I need to work with all I have. Sometimes your clients require really crazy things, So you need to adapt and work with what you have. Okay, Crop and I've perfectly cropped those images to be equal and distributed across the slide. I will leave. This already looks great, but I want to show you something amazing. That will help us later. This would be simple. Just press old to create boxes or you can even copy boxes from the previous slide and place them here near to the person I have those boxes and I'm selecting that. The color from the actual image. Some I'm dropping What colors are here. And I'm setting the transparency to 30%. This way it will all look consistent because it will not go outwards off this photograph. Okay, Transparency Authority. And now I'll show you the trick which will help us later. I would like to take the overlay we created before. So take the overly for example From here. Take it here and control. See in control of it. I would like this overly to cover up our images. Transparency is too strong. So lower the transparency Because I want those images to be barely visible. Okay, this looks right. Control C control V. Then click on it. Control C Control V Control C Control V Control V again, Angela. This would be our finalized Slight. Now, later on, if I teach you about animations will create something outstanding by going to animations, adding a faith animation and adding them faith in animations. And we will create a very interesting animation. With each click, we will reveal one person. The next click will make this person disappear and the next person appear. But that comes later when we talk about animation and this is what I'm teaching you. Boat slight design and animation. Because once you learn all that, you will have no problems creating such sliced such portfolios. Such videos. And it'll be really Superfund work, and I can't wait until we start. For now, let's design a few slides more so we will be more complete as designers, and I'll see you in the next slight design lesson.
47. 08-04. Slide 11. A single Expert: we were introducing multiple staff members. So let's introduce one now old to and create your first rectangle. My first rectangle will be on the left side to show the image off the person shaped outline off course. No outline shape. Fill off course, our darker color. Which person do we want? We want Tom, Maybe this person, because we didn't use her earlier, she has turned to the side. This isn't quite inviting, but let's use it crop to shape. Maybe her personality shines fruit aspect ratio. Select a square 121 yuan the square off course to be small and her to be smaller, maybe as well. Okay, but we need to keep in mind. Add, We need to crop the photo properly and we are limited here. I would try to do that. Okay. I'm selecting crop and way have the first part done. The next thing would be to put a few stars here just so we know that she is a top not professional in our staff. And at least those stars are well prepared by Power Point and the Microsoft developments Former shape fill something golden like this shape old time No old line. Make it smaller. Control C control V. Maybe five of them will be proper. 12345 Ok, on the very right sides on the very left side. Okay, take those three in the middle. So left the left one selector Select the right one Former airline distribute horizontally aligned Middle and I have it. Ok, those five stars look really okay now probably we should fill this light of it. We could fill it with some text boxes. Do we have some more text And of course the title. Okay, I'll take those three boxes. I come back and I paste them in off course. The title should be here in the middle but the text could be here on the left side. The text can be white or a bit great. So it isn't as important as it looks. OK, take the text, make the text smaller and I believe we have the left site off this slight report. Now when it comes to the right side our expert let's call it like that. Our expert Take the tagline. Maybe I want attack going to be as well in the middle. And this in the middle. Okay, this will be easier to work with. Perfect. I have the top off this light as well. Prepared to finalize my idea? I would like a small tagline. I'll goto old too. And I'll select direct and direct and go like that. A small one. I will hold my left, Old key. So it doesn't snap to anything like that, then old, too. And select a few circles now, depending on how many items you want on the timeline. Former, please know old line control C control V. Maybe one more item in the middle Control C control V and one on the right side. I would like ingredient to go through this entire design, but at first I would need to combine the shapes because now each shape it separately. Former merge shapes and not combined. I wanted to union. Now I can go to Grady and Phil. And on the left side, I want my red color on the right side. We can stay with our bridge darkish cold, and you can see how the time line nicely progresses now, from red to this darker color, this was a matter off adding a few text boxes is copying the text over and making it the same color as the top text on the bottom. We could maybe select some skills like three progress bars with skills. We've already created the Progress Bar previously, so I will just take it control. See Oprah's Control V here and you can see already all the colors. Everything is consistent, and I really like the progress bars we did. They could be, of course, made a bit different. For example, this middle one, for example, this middle one could be a bit smaller. It could place it on the left side. I could extend it. I could come closer, even closer and extended a little bit. But this isn't important. It can stay like it was before here. I would call the skills and maybe at some icons to show some percentage like here. I'll write photo shop like that and do we need more? We simply extend them a little bit. We come closer, we extend them just so they cover the middle of the screen. I'm trying to place them or in the middle. I think those I place them as well equally. Angela, we have one person plenty of information. I would say even this is too much of information because we have both a timeline. We have our skill sets, but I wanted to show you what's possible, how you could approach that and how to make a slight, really complete when it comes to introducing a person.
48. Leave a Review, Please: Hey, it would be extremely helpful for this
class if you go to the Review tab and click on leave a review and
write something there. If you don't see
this button yet, you need to watch a
few more lectures and it will become available. Sculpture now requires that classes have recent
reviews on them. So it would help me greatly. You just click here, you tell if you'd like
to class or not, and you write a simpler
view and click Submit. I would be very obliged if
you can do this right now. Thank you so much
and see you soon.
49. 08-05. Slide 12. Starting a Vertical Timeline: I hope you're not exhausted off this timeline design because now comes like the final Boss . The timeline design in Power point. We need to think about if you want a horizontal timeline or a vertical going from top to bottom. I also liked the horizontal line. And since I do not need so many place for my text, I'll maybe placed a picture on the left side. Let me simply grab any picture. I want maybe more of those landscape pictures like we have here. Take it, crop it, crop and place it on the left side. I would like to have some space for my timeline. Okay, The picture is cropped crop boom and this would be perfect. Now we could create an overlay which would inform the user which year we are talking about . Because timelines are most often about years, the way I would approach this will be very simple. I will decide if I want to stay with the color, but I definitely want an overly I want an overlay. I want to copy it over this slide. I want to write a year that I will currently added, I want off course to select my latte off Latell fund. Maybe make it in black. So it's big enough and I want to turn it. Do I want that? Yes. I want that to be turned with my left control key and right bracket key. I want to make it bigger 2017. And now I need to decide if I want the photo like that, or I want to click on the photo, former color and gray scale the photograph because this will look a bit stronger. Now, the caller can be stronger because I want more effectiveness here. Okay. Like that. And this would be the beginning off My timeline. We have to somehow start is timeline, and I could off course select a title for it. Control C control V timeline here. Okay, this would be like a title. And here we will start our design old too. Select a circle and create a little circle. This will be like a bullet point on our timeline. Guilty for mitt shape, Phil, Do we want a shape, Phil? Maybe this time. No, Phil and select outline outline. Maybe this darker one because a rat one could be a bit to intensive. Since I have my right. Like former shape opened. I can adjust the weight off my line. I'll make the week bigger. Okay? Not going too much. Five points. Yep, that looks pretty decent. And I'll place it on the left side because we still need a place to work with. Now I want a gun principles to and select a line. I will connect the line. And with my shift key, I'll place it on the bottom off the slide. I will take its color to be like that. I'll make it thicker. Well, four points. 4.5, right. It looks pretty decent. On the right side. We would definitely need some text. So either grabbed attacks from another slide. For example, this should do control C control V And this would be like the information What happened here? Off course. The text could be a different color, so I'll make a Maybe the Arab occur Gray. Okay, let's make a bit less tax because who would like to read that? And this would be the very first information. I believe this is too big. Now I'll make it more on the bottom. This a bit closer, and this could be our first step on the timeline. We could still at the title here, and I will do this. Maybe we want to write their year here or the events that is happening. Like maybe let's call. Oh, we have the year on the left side. Sorry, I forgot. What what happened? What happened in this year in our company for what are we explained? If it's not about a year, you can off course, right march here, or any month or anything that this light is referring to. This is just the way of starting things and introducing people to what is actually happening. I'm not grouping those things because I want them later on to have separate animation. But I would like to group that Maybe maybe I want the group that because those things could appear at once together and then the line would animate separately. The next lessons will be quicker because we already have the majority off the design pre pert. So let's head over to the next lesson where we will try to finalize this timeline
50. 08-06. Slide 13. Continuing the Timeline: going forward to the next light. Replicate the left side of the slide because we don't need so much space. And as you can see, I did create a box like that because a normal textbooks was kind of empty. Let's place to those 19. Let's change the color to this bluish wrong work again with the transparency dropping another photograph. Take out the color click on crop, crop it to about the same amount. Okay, this would be all fine. Now I'll take the crop. I'll take the crop and reposition this picture. Those least looks suspicious, but I let it fly. Okay, We have it like that. Maybe here, I overdone it. No problem. So this is our next slide. Once you have that ready, he want to grab all those important items, including the line and place. It s well here. It's important. Control. C control we that you start with the line on the top of this design. Okay, I'll start with the line. Then I'll take this design here so it has enough space. All right, now, I'm sure that I am doing it properly. Let's make this not as long control. C Control v duplicate this object and you can probably know what will happen next. Control C Control V. We need to end this light by clicking the line here, taking the line to the bottom of the slide. I'll just make sure that everything is positioned properly. Maybe disobeyed lower. Just look at the visual hierarchy. We, of course, need to change the color, but right now it looks really promising. I would change this box, change its color to the blue 10 I have a great And here, that's no problem. I can just double click on those colors and I will have the blue on. So the second slight will be blue. The first was red and had one item. The second is blue and had two items, and the church light will be like a reverse slight off that starting from the top side instead of the bottom side. I believe you are ready to also create a turn slight, so I'll leave that to you. If not, I will make a simple lesson when I create the last slight and we will be done with our beautiful timeline
51. 08-07. Slide 14. Finalizing the Timeline: This should be very simple. Now, I can even control C and Control V this entire slide. I will delete everything that I have here, meaning the text. And I'll place this line on the topside. I'll place the text somewhere in the middle because I only want to have one item here and again. Connect the line. No. We need to select the third color and which card I want either this dark one or this base. Let's maybe try with this one because we didn't use it much in this presentation. And let's make it transparent. It actually looks pretty OK. When it's transparent, you need to select another year. 2022. All right, we are going forward with time. Now. Change the color again here for this little block. Exquisite. I hope I wrote is properly and this would be our next light off course. You also need to change the pick for And which picture do we want? I've selected a few new pictures when it comes to those landscapes. I believe this is one of the new ones. Yep. Okay. I'll try to place it here. Now. I want to make sure that I have it equal. So I select crop. I crop id like that. If I haven't already equal, I crop it here. I cropped it here. I repositioned the image. I want to have it perfectly in the middle. Well, it doesn't have to be perfectly crop color. Grayscale, Right click sent to back. So it goes under the previous photograph. Select and delete this one, and we have our timeline ready later on. If we animate, this will be so much fun you'll really gain some interesting knowledge how to make it everything properly. But right now, I wanted to show you a continues way off, presenting like, bullet points or something of this sort. Because normally people make really text slides. They're pretty boring. With something like that, we can catch your eye. We have all those Those leaves doesn't work here because here I have a city here. I have so mountains and I should change this photograph. Oh, yeah, a bit better. How boring. And my only mountains. But this is the concept off this presentation and those images are really not harmful. They are pretty neutral toe watch, and they always look cool. Let's each other in the next lesson. And for now, design and timeline like that and I will see you later
52. 09-01. Slide 8. Continuous Picture Animation: Oh, yeah, This will be juicy because here I want to show you how to animate images. We will create a very crisp animation like days Who's so much space for a nice animation? I see this light. I am happy that we did design it so well. And I'm happy that we have so many items here because look at those photographs, photographs and overlays. Each of them is separate. So I would like those images to like to appear on the screen and then the overlays to appear as well. What would be the quickest way to do so? I would select everything as ones and I would make one consistent animation. Let me select the simple fate. Right now everything fades together with one click. Okay, that's pretty acceptable. I will. Right click. And I'll make it start with previous. So all of those animations start together at first. Now I need to make sure which one of these are those overlays? Okay, The last three are the overlays, So the overlays become delight. Definitely. Now I would like to randomize this animations. I want to randomize it like that. Delay, delay, delay More 0.40 point seven one second and 20 0 75 and something similar with those overlays later on. 1.80 2.1 2.3. As you can see, I staggered the animations a little bit randomly across the slight press shift of five. And as I see it, I would like them to progress. Like more consistent. I would like the first image. Then the second image. I'll place it here. I know that the rectangle 28 is now the 2nd 1 So I have the first. I will delay it a bit. Okay, then I want this image, which is rectangle 24. All right, Rectangle 24 0.75. Now this one. I wanted to make it random with it appears that it doesn't look as good. Then this one and then the last delay it more so. I tried to be super creative and create something out of the ordinary. But it happens then it didn't look good. So I'll make a more consistent animation. I can see I have a bigger break here which can eventually work. Let me preview that something is missing. 1st 2nd 3rd Okay. Yeah, This is the first. It can get a bit delayed. This is the second, and you can see how many mistakes can be eventually made. That's no problem. That's the name of the game. And I could even make those delays bigger. Half a second, half a second, half a second. I don't like that. This is taking so much time out toe to adjust. But you need to take your time on your animation. If you want it to be really something, something better, something more something more exciting. You need to take this few seconds to animate it. OK, shift a five. But yeah, those last ones go a bit too slow. I see they overlap each other here, but basically this is the top part animation I wanted to achieve since, in my opinion, this is already much off animation. We wouldn't need to animate the bottom side off course. Oh, they are grouped. That's perfect. Off course you could shift, click and animate also those boxes, for example, with a simple, like float in with a click. So right click on click. But this wouldn't be necessary. Right now, the animation looks as follows. I believe this is really beautiful. And eventually if I click if I click if I click, this can be also here. But you could also completely skip animating the bottom part for the slight. That's completely enough, and you should to the same. You should work and focus on those pictures and and made them, so they make a nice continues animation.
53. 09-02. Slide 9. Consistent Teeter and Pulse: or write something different here. I will show you how to animate one box, create something very custom so it will pop up. And then we will continue that to the other elements and just replicate the animations we already have here. I can really imagine how I could animate this. Those boxes are separate. So why not? I don't know. Maybe let's group this group this I will try to select those ones as well. Shift click Contra Gee and those four, maybe let's animate the 1st 1 and then copied this over. So you need to focus on the bottom side. Here. I will flick on that and I will make it float in. Some of the button gets in his position. This will be the first innovation, then the text. What do we want with the text? If I have no ideas, I can always select more entrance effects and just quickly select something that might work in this case. Actually, the diamond doesn't look as bad. I will write, think and started with previous because as this box appears also the textbooks and appear. But two seconds is too long. I'll make it also been delayed and just in case I double click, I go to effect And I can also animate little diamonds by award. Let me see how this will look pretty okay, pretty unique. And let me select shift of five. So I'll know what's happening here. I'm clicking my mouth also, the text appears beautiful. We really don't need more. I won't know this button. Is the text together? No, the text is also not together. I'll press control G and now you are seeing What's the problem with having something grouped or having it ungroomed? Select this box and I would like a small polls or a spin or a teeter or polls and teeter. I like both of them. So I will select boat at first a little Paul's, but it should happen with previous It should happen together not too much of delay, maybe a bit more, and then select at animation to add another animation. The teeter. Because I would like you to click here again, right? Click with previous and delayed a bit. Now what? What happens with the bottom side of this slight shift? A five. If I click my mouth, we could also animate this in because it happens that it's visible right from the start. So I'll again at animation because this one allows us to add new animations. If I would fade it in, everything disappears. You need to be aware of that at animation, fate as well. The fate with previous and the fate has happened before. Those teachers may be a bit dilate. Okay, shut the five once again clicking my mouse. Now the polls happens too quick, and it's a matter really off watching those mistakes, delaying them a bit. And you need to remember now that this innovation takes about three or four seconds to play . So you need to be talking, at least this time about the first part. Beautiful. Now I want to copy everything over. But this wouldn't be a problem, would it? Old tree boom old tree boom old tree boom. Three items. You can see plenty of animations, so this is where it can eventually get complicated. But those animations were so simple it only looks so difficult. But if you do this animations one by one, and especially if you intend to replicate them, that's a perfect workflow. What I did now did save me a lot of time because I animated the first part and I copied everything over. Just to be sure, shift at five. And this will be your task for this slide. Not only you had so much work designing the slight. Now you have to animate everything. I really am stretching it. Am I? I hope you are enjoying those animations. And with each click, I'm introducing something new. The little emphasis effect off course. We could change those emphasis effect like maybe delaying them a bit differently. But I want everything to be like, consistent and have the same animation. So the viewer knows what coming up next. This also focuses come enough and lets him know what will be coming next. This is it. When it comes to animating this light. I hope you did enjoy it. You had fun. And now your task will be to do the same. So I'm waiting for you.
54. 09-03. Slide 10. Reveal People One by One: get prepared because with each click you will reveal another person. I did wait so long for the slight because this is so simple yet so beautiful. I really love when something is dimming, fading, making itself visible in power point. And that's what I want to teach you. Also, I like this slide because it's clean. It has no titles, no unnecessary text, just pure visuals. As you remember, we did designed those overlays and we will only animate off overlays. Take on the first overlay and now you need to know what will happen. You know that it should fade off because you want it to be visible. So this is like counterfeiting. Would you normally do? Because normally we fe things in, but this time we'll go here and we will fade it off. This fate off should start automatically because this is the first picture. So I'll right click and select with previous, because if I start to slide, it should disappear right away. Next up, this one should disappear and this one should appear again. This is the tricky part. Click on this overlay and now it'll work on the first mouse click when you click your mouse . You want toe at an animation, and this can be fade or anything else you would like, of course, but I'll select fate because I want this to be super clean. Make it faith. And with the same mouse click, this should disappear. You can probably see where I'm going with that. I'll click on this. I'll go to my animations, click here and make it fate off, and it has a mouse click, which is wrong. I want to select right click. I wanted to happen with previous. Now each step of the way you can preview. If you are doing everything properly, shift a five. My first mouse click will make something like that. My next. Mostly we'll go to the next light because we didn't copy those animations Next up, You want to reveal this guy with the next week, So click here. You can see those animations, but I'll make this one by one because I don't want to get confused, and I'm not sure that it will probably copy over with my mouse click. I want to add animation. Fate. Yes, it is a mouse click, and now I believe the slightest ready Animation painter, Old tree boom. Old three. Boom. Now I want to make sure that I did everything right. Shift a five beautiful, super simple animations. You can always go backwards, and you can switch between those people so simply by going to right, right left just introducing one after another. This would be also a cool way off showing, for example, this portfolio if it would cover the entire screen. This is one way of doing this animation.
55. 09-04. Slide 10. Trigger Animation that Will Blow Your Mind: Hopefully, this will blow your mind. I will select all those overlays and I'll place them a bit lower because I need to know how those pictures are cold. Go to home, Select selection pain. And if you have old version of PowerPoint and don't have the selection pain, well, you just have to remember and try it one by one I'll cold is picture one this pic church too. And now will come the crazy part. Look at that super simple. I've selected all those overlays. I'll go to animations at animation Fate All right, we did fate. Everything is on the same information. I also like the first part. It's rectangle 45 so I'll double click on it and you can see on the bottom here we have triggers. I'm not entirely sure that all powerful inversions I mean, the older versions that have triggers, but the newest versions definitely have them, but I believe the older as well trigger animate this part of click sequence start effect on click off select start effect on Click off and select Rectangle 45. Now you know why I hated renamed of pictures. We are slowly getting there. OK, rectangle 45. Ok, select the second picture. It's rectangle 46. Click here. Trigger start rectangle 46. You can probably see where I going with that. We have triggers here. And triggers are also something super amazing. And power point. Now, this guy 47 trigger, start select 47. Now this one double click trigger start 48. Okay, 48. Okay. Now, before we proceed, I want you. You can see it's a mouse. Click, Chris. Shift of five. As I hover, my mouse, You can see it's clickable. Look what happens. Boom, boom, boom, boom! As I click, it disappears. But now, as I click on those photographs, I would like them to appear back How to do this. Select all of them with the shift click at animation. No faith in. And this is why I wanted to know that this is picture 1234 Because I will select that one. I will select the 1st 1 trigger start effect on click off picture one. Okay, Now you see where this is going. This one on a click, Select the one animation trigger on click off Picture two. Select this one. Animation trigger on click off Pay for a treat, The last one trigger on click off picture for um, it difficult, but look shift of five. I click here. I click here again because with Click, I'm revealing this object. But with click on this picture, I'm making this object appear back again, and I can play with this around as I want. You can see the possibilities that lie here, and this is something outstanding that really will distinguish you from a super professional and power point and a normal designer who does random slight. This is knowledge, which not everyone knows, and I really do love how it looks and I can work and play with the overly. It's the same way as you have in home insert and links and actions because actions are triggers. For example, if I hover my mouse here, it will take me to another slight. This is the same. Just triggers are for animations. I hope you did enjoy this tutorial is well because we know animated this beautiful slight twice with totally different techniques. I like both, and I think that you should know both as well. Now your turn is to make triggers on those. And if you have any troubles, make it easier for you. Make only two images here and try to work as long until you get those two.
56. 09-05. Slide 11. Simplified Wipe Animations: so many complicated slights. Let's make this simpler. Let's make an animation like that. And with each click, something different appears. My idea for the slide is toe animate everything which is here from left side and animate everything which is here from the right side. So we have a nice visual experience. Click on the photo right away, go to animation. And I would like it. Yeah, I wanted to fly in. I would like it to actually float in, but the floating can be only from top or bottom, so the flying will be more appropriate. Click on it Effect options from left. It would be a bit boring like that. So I will double click. I will make the duration one second and I'll bounce it a bit at the end. Perfect. Maybe this animation is a bit too long. 0 75 I can proceed to the stars now. Those stars, I believe, should be grouped. This will look better flying as well from the left side with previous delayed a bit make it a bit longer and now it could decide effect after animation. Don't them bounce and, well, maybe smooth and will be more appropriate here. Yeah. So currently, we haven't information like that. Maybe even too slow after another. So without any delay, and in my opinion, this should take one second, and this should be delayed. This will make the animation a bit more consistent. And this? Yeah. Click on those stars. Animation painter. Or I should select poultry. That text like that as well. I was delayed a bit preview. Okay. Very simple. Very clean. Very nice. 40 I. And now I could proceed to the right side. This should be here right from the start, because this is only a title. I believe that could come in right away. You can see we have six text boxes and this this middle object here, this middle object can't fly in from right side. This would look weird, but I will select it and I will split it. And that's the beauty Weaken. Split it towards the middle or outwards. The middle effect options vertical out. Yeah, the outward looks pretty beautiful. Make the duration one second because I would like to enjoy the view. Yeah, and then boom, boom, boom, boom, boom, boom. Those can appear together. I will consider even pressing control G shift, click control G shift, click shift, Click Control G. Okay, because they can simply appear together. So I will click on the 1st 1 What do we want? No, A floating isn't the best. A wiping with the click. This has happened as well. So I will select with previous I will delay that and I will select options from top beautiful duration a bit longer and shifted. Five. What do we have? We have the left site with one click because we would like to gain some information about this person and then we proceed to the right side. This appears automatically This got a pure after a plague and this good appear also after click Select this object which we already have animated. And it's set to with previous old tree here an old tree here. But those two should appear. I will select with my shift pick again. Both right, click on a click because I don't want all tree off those boxes to appear at once. I want this line to appear and then first the second and the third. What do we want here? I believe we have already enough animations, so I'll group that control. G control. G control G. I will select the 1st 1 and I'll continue with my wife animations If there is a line, a big box or something like that, which is long? The wipe animations are perfect effect. Options from left. This will always work. Now if we have this old three Boom, all three Boom, This is it. Seven mouse clicks. That's plenty off mouse clicks. But look, how much information do we have here? We could also make those three appear together because we don't need those clicks. So I was like with previous with previous, I'll go back to animation, I will delay it. This is just cosmetics and aesthetics, and it depends on how do you want this to work? Police Try to animate this on your own now, and I will see you in the beautiful timeline animation. I can't wait for that because this is also something Superfund. When it comes to animating in power point
57. 09-06. Slide 12. Timeline Animation Pt. 1: the final, Boss The timeline. I love to create those timelines and I'll teach you how to make a progressing animation like this. Hey, and welcome in the timeline animation. I'm so happy that we arrived here because I was waiting for this moment for so long because those slight are like essential toe advanced power point design and advanced PowerPoint animation. I will start right away. I have already animated the text now going here. This is one text box or one box with elements, and this is the other element. It will be very simple because this can be animated at once. So I will maybe make a simple wipe going from the left side to the right side because this seems natural to me. And this will be the first mouse click affect options from left. Maybe this can take a bit longer, because now it animates too quick. All right, after this is done with my mouse click with the next, most like this could come in. They're slight, should progress and the next animation will start. So select the line again. Select wipe to be consistent. And of course, you can imagine wipe from top to bottom. So effect options from top. Okay. And this will be the second mouse click. So pressing shift at five. Animating the first light. Or I could even make this automatically right. Click with previous and just delay it a little bit. Because why wait? We need to show something on our slide shifted five. So this would be the first animation. And if you're click your mouth, you'll proceed with the line. The first part is done. I'll proceed no to the second slide in the next part.
58. 09-07. Slide 13. Timeline Animation Pt. 2: Okay, let us continue our animation journey. This light should happen. The first part should animate automatically. This will make those slight continues. So click on that select Wipe Integon wipe from top. Then select the first box. The first box should also animate automatically. We'll delete this unmasking later. We had to wipe, right? Okay. Again wipe this time wiped from left. Select both animations and right click with previous this way, when we animate the previous slide we click on it. It will automatically make this animation and we should do a the second animation. So make the second animation longer and the late what else is super important here? We didn't do any transitions previously, but here we definitely need a transition. And this is what makes the entire power off this animation press on transition. You can see wipe, you can see push. And those are great animations for that. Select the second slide Press that Bush animation and select effect options from bottom. Now I will just copy over the animations this wipe animation goto animations and continue those here Animation painter, This one. This should be our next mouse click. I will select on click, then this can be copied over old three. To that, it's perfectly delight. And then the last line can be also old tree, our last click. Okay, we have the push animation I will select on Mastic here. It depends on how they wanted to play out and let us preview the animation. I press shift a five, and we have the first part. The first animation. As I click my mouse, the line appears as I click again. It nicely progresses until here. That's super beautiful. And we want to continue this animation here with the next click, and the next week it will go here. Here. We still don't have the animations. A little problem off power Point is, if I select after zero seconds here that it should progress automatically. It overrides the click that I have. Instead of waiting out until I click it, it was goes automatically. I don't quite like this from the Microsoft developers, because if I select after zero seconds, it should still wait until I click. But that's just how it works, and we can't go over that. So this is how you would make the animation on the second slide and in the next lesson will very quickly show you how to finalize this entire animation. And we are done with this animation part in this course. Aren't you happy? Well, I am, But I would still like to animate more.
59. 09-08. Slide 14. Timeline Animation Pt. 3: until this point, You are already an animation beast. So surely know how to animate this one If you are lazy like we are, so just copy that over. Come here and we will be able to copy over this animation. By the way, I'm holding my control key and my scroll wheel to zoom it in and out. Okay. Basically, I wanted to animate this. Do the line old tree boom. Delete what we imported here. Animations, animation, pain. I want to make sure that this is the 1st 1 And it should start automatically with previous , then the 2nd 1 Well, maybe not so delayed. Let's play it from that. Looks really okay. And you can see we can duplicate the slights and make more off them. We could make an endless timeline like that here we only to remember about the transition again. The bush transition from bottom pushing to the next one on mouse click. Ok, let me preview that shift. A five. I'm having the first animation click. Next information take click. Everything works perfectly. Maybe this line was a bit too quick, so I can select the line and make the duration off the animation a bit longer, so it looks nicer for the viewer. This is it. When it comes to the second animation part. I'm really happy about what we did. We did learn about triggers. We did learn how to make multiple animations at once. We did learn how to animate a timeline. And if you were following what I did on those slights and if you did it on your own, you are really a big step closer to becoming a real power point guru at Power Point Master . And you will be really able to use the software to your advantage, not just struggle against it. I would like to still continue the course and teach you some more important animation, some more important things that I belief are relevant to the program. So see you in the next lesson. Please stay tuned and we see each other in the moment.
60. 10-01. What is Kinetic Typography: hater and welcome to this little section related toe kinetic typography. But first things first. I'd like to clear out what kind of ex typography actually is what motion graphic is, so you will work properly on the stopping very quickly. I'd like to go over what actually motion graphics is, and on this mo website, I found a very simple explanation. Motion graphics as a composed word, means graphics and movement. Almost everything that moves and that involves a graphic element is motion graphics. On another website, we can read another very simple explanation. Motion graphics are similar to infographics, but they use video footage or animation to create the illusion of motion. I wouldn't agree with the illusion, because motion graphics are nearly all the animations we confined on the Web like commercials, normal animations, lower turds, everything would just moving graphics could be explained as being motion graphics, another user said. For me, motion graphics is the satisfaction off executing an idea that moves people. That's more of a philosophical approach, but it's also a great explanation. When we go to the more educational resources, you can read something like digital footage or animation, which create the illusion of motion or rotation. This is a very simple example. Off motion graphics You can see animated graphics on the screen knowing what motion graphics days, or at least understanding that it's related to animation. And it's basically animation weaken, distinguished from it. Kinetic typography, kinetic typography. It's just one element of motion graphics, one type of doing motion graphics, which involves text. When we again read some description, it can be explained as moving text as we see on the example on the right side. Now your quest for this lesson will be to write in Google kinetic typography examples. Watch a few videos, please. Just what a few off kinetic typography examples and be aware we will not be able to do most of them in Power Point Power Point is not the perfect motion graphics tool, but why do I even touch on this topic? I do touch on this topic because in Power Point we have this fund attack. We have the animations. We already learned that we can do something with text animation, so why not try and make some kinetic typography intimations? We can watch a few examples, but those examples are pretty advanced. And as you can see those neat motion graphics software like Adobe after effects to be to be created like that, that's very advanced innovations. But in Power Point, I can try and approach a few kinetic typography projects together with you. I hope we will have a lot of fun, and we will bring power point to its limits because we will really have to work out of the ordinary here. Let's start with the next lesson and do some simple, kinetic typography products.
61. 10-02. First simple project: I want you to start simple together with me. Why? To overcomplicate it. So we have this textbooks. Let me go to animations. And if I would press fight Can I call this kinetic typography? Well, to some extent, but this would be too simple in order to make this a bit more appealing. Just a bit more interesting at first. But I would think off I would press control C and control we to duplicate this entire object. And I would remove the top text here. Press delete. And I was removed The bottom text here. I will have no more control over the animation because I have this text separate it for the first lesson, I would go for something simple. Let me take the first text and make it animate from left site. And I'll take the second text and enemy it from the right side. For that, I can use my not wipe. Not well. I want my fly in animation. You remember the flying. And this is where it comes very in handy because we have to affect options and you can set it to come from left. All right. A bit of a boring animation. Then you select the 2nd 1 We select again, fly in, but this time fly in from right. I'll open up the animation pain and right now look at those animations. They are super boring. I want to select boat. I want to right click and select started previous because I want to have complete control over those animations. I'll nudge it a bit to the left side because it's not centered. Okay, those animations I'll select with the shift key boat I definitely want them to take at least maybe 1 25 The second animation could be a bit delayed. Let me preview what happens now, Okay, a bit slow, but we slowly get it to be a bit better. Now. I want to double click on this animation. I want to go to its effects. I want a smooth start and or a bounce, and now you can select if you want a smooth end or a bounce, and let me select the smooth and first, maybe on the first text. Yeah, it beautifully smooth into the design, but on the second text, also like bound, I'll compare boat animations and then I can decide which one. I do like more small bounds for maybe half a second. Well, the bounds most likely will win. But let me preview that. Okay? The bounds comes in quicker, but it's a bit more appealing. The smooth ending would be better if there would be more more text. But if we only have two words here, let me select the 1st 1 Let me double click on the effect and also select a bounce half a second of the bounds boom perfectly. I want to select both animations again because right now I believe they are not too slow. There may be too quick Now I want to show you another trick. I'll press old too, to select a rectangle and I'll place a rectangle here. Oi! You wanted a normal rectangle, but it doesn't matter. Shape, old line. No old line shape, Phil. Make it the fill off the background this time. White Control C control V. You can barely see it. I can't even see it. Boom! And we will not see the text unless it comes into the screen. Not so close. Okay, Look at that. Something completely unique. We wouldn't expect this from Power point that we can cover up the left side and cover up the right side to make this text fly in starting from here, we will use this trick very often. Now let me select a better color scheme for this entire design. All right? The colors are a bit nicer. Those boxes are still here. And I delayed the first animation of it and I make the second animation longer. That's it. This would be my finalized first kinetic typography, animation, Something like this. Very simple yet very effective and very good looking When it comes to Power point animation . I went by the way, If you want a custom transition, let me control See in control videos Let me make this super big so it will be able to cover this kind attic text. I will select animation. I will select lines and with the reddit dot I'll cover this up. This should happen maybe with previous but I need to delay it and I need to lower generation now. What? What happens? A beautiful transition covering up the entire text. And you could, for example, at new text above it now
62. 10-03. Advanced Minimal Title Reveal Part 1: At first I want to quickly show you that it's not my imagination that I just take those animation I was doing research in after effects, and I have a little title animation sequence here. I have, like, 30 titles here, and this is how you can gain inspiration. You can preview those titles, and you can think what would be eventually possible in Power Point. Well, most of those Imation's would be very difficult to make empire point. But I saw this one, and I believe we should be able to do something like that in Power one. It also looks super advanced and high quality, especially those two lines which spread from the middle. Look cool, all right. And I'm trying to recreate something like that here. In this lesson, we are going to create this very animation. So how did I go about this? Please open up a new slide, delete everything and go toe insert shapes, and you can select a rectangle or a line. Let's make a line. It might be easier to create and work with that, and I'll create a line which will be long like the entire slide. Okay, once I have the line. I'll goto former online A line center so it's in the middle now I need to work on the car island shape, Old line black. I'll click once again on shape. Old line The weight and I'll select about three points. Should be enough. My first intimation as I opened my animation pain should be a simple zoom onto this object . Please click on the object, select more animations, more entrance effects and select the very basic zoom. All right, this looks very decent. So we have this first animation which happens on click. I want to set it right away, right? Like to start with Grease. When this happens, I would also like this to turn clockwise. So how to do this? Because I can select at animation and I can select spin. But if I do this, this entire object Spain's around well, you probably can imagine that not only I will set it with previous with I'll double click. I'll go to my effects options. And instead of 3 60 clockwise, I want to select 1/4 of its been because I wanted sideways quarter spin. Okay, let maybe smooth the end. Oh, this animation is too long. Let's press OK and definitely click on this animation invigoration. Maybe 0 75 Let's see how this plays out. Okay, Beautiful. A very swift, clean and quick animation. I'll double click just to make sure that I have my smooth and okay, I could smooth it even more. Basically, we can smooth it to the maximum amount. So it gets a nice smooth at the end. I can eventually take it and make federation one second. All right, My next step what I wanted to do and this will be super important. Look at that. If I select the line as it happens here, I would like it to go up and down. And now we have to use our imagination. Please. Once you have those two animations, click on at Animation and Ed Line. Why am I telling you that you need to use your imagination? Look at that. We have this straight connector. I'll once again right click with previous. I will lower the duration to about half a second because I want this to be a very quick animation. I will set the delay to 0 75 So it happens after those two animations I go to effect. I'll make a smooth and and no, listen, I need to remember that the second innovation is turning this object clockwise. Since I added this animation, you can see I have a green and they red dot They start indicate where this object should be . Afterwards, you can see it looks as it would not turn. But you need to remember that power point is showing us the preview off the actual object it has. Since PowerPoint has this object, it will not show us the turning. Let me show you. So I just need to remember that wants that those two animations finish This object will go to this point. In my case, this point will be a bit above the original point. Just a tiny bit like that. And now watch what happens. Boom. And we have it that how we create the first part of this animation. Now you can click on the line. You can press control C control V to paste it. You want to make sure that you will place it exactly in the same place. You can do this with the keyboard and you need to remember that in the red animation you need to place it down. It should happen to the bottom notes to the top side of the personal shift key. And now I want to make sure that this object former and I a line center. This is a very tricky, unique but still very advanced part which much people would have problems to do in power point. But surely, if you go slow about that, you will be able to replicate the steps. Won't you finish those two lines? They should have an animation like that. I'll press on the first. Imation and I also liked play from Beautiful and I'll control C and control Vida Slight. And I'll continue my work on to the next light because I would like to have a safe copy off this because this is such a cool animation.
63. 10-04. Advanced Minimal Title Reveal Part 2: okay, here will come The far easier part press insert textbooks. I will select old one. My shortcuts and maybe minimal. I need to change the phone immediately. There's something different because this looks completely ugly. I'll click on that. I'll make this a bit bigger with my control key. Maybe even bigger. Okay, let's do it like that. And I want separate boxes for each text. Minimal title open there. All right, it's getting somewhere. So I have those three text boxes I want to select. 123 I want to go to animations and again select Fly in off course. I would like them to fly in from the top side so Alsek affect options from top. Now I can go over to those animations, right? Click with previous. When it comes to the delay, it depends how you want it. 0 75 09 and 1.1 so they'll have a small delay between them. You can then double click on it effect and again smooth the end. In this case, I'm always smoothing the end to the maximum amount because I really like when the animations slowly fade into their place. Okay, this would be how this animation currently looks really beautiful. And you can imagine what we will do next. I want to cover up the part insert old to insert erecting like that. I want it just to cover the text shape. Old line. No old line shape, Phil. Exactly as the background. All right, but now we don't see those lines. I just need to remember where everything is. I also like this big box, right click sent to back, and now everything would be okay. Also, the text needs to be behind the box. So also the text. Right click send to back. Right now, I can preview the animation. It starts to get beautiful. Maybe dis a bit higher, maybe. And this is just a matter off simple adjustments. I'll go to animation and maybe with Moshinsky, make the animations tiny bit longer because they were happening too quick. And I wanted also to have lines on the left side. Let me preview what we did before. Yeah, those lines nicely spread out the way I did this. I selected a simple line control C Control V. I made the line smaller. I'm keeping the same with and I placed it here. Now I want to delete the straight connector animation and this yellow animation, and we have the base Exume. But you know what? I will select a split animation. I'll click on effect options, and I will make a horizontal out. Look at that. Very beautiful. Now I can simply delay it may be raised adoration, and it should happen somewhere, together with the text boxes. Okay, it's too slow and too late. Make it less the late. Make it quicker. You don't have to make the animation exactly like this. I just want to show you how I'm approaching to create this. All right, it's nearly there. I'll make this a bit longer. Control C Control V. Try to place it in the same way that on the right side, and now it's a matter off playing everything through visible. In my opinion, those kinetic typography products in Power Point aren't difficult toe make, so it's a matter off making a few mistakes. But you can start slowly with eggs, for example, making those lines, which is the most important part of this animation. It's the most difficult part, and what comes next is just adding the text covering up with this big box and those elements on the left and right are just additional elements to give everything a bit more flavor. Let me know if you would like this product and I'll see you in other lessons.
64. 10-05. Sparkle Animations: another very popular thing in motion graphics and connected with kinetic typography. Free can be creating motion elements, motion shapes. This is an example off a little motion animation, and I was once doing a bigger project about kinetic typography in Power Point. And this was the animation. I included it in one off my courses. And just what at those elements on the left side, we have a normal text. But boom! If we at those little sparkles on the site, it gives it that nice little flavor. How to do something like this in Power Point. Let me show you in this lecture you could create those shapes one by one and just copy them over. But you can also use something different. I'll press hold to and on the bottom. We have stars and banners, and you can use any star. Let's do something with maybe, Do we have 10? Okay, let's create is with 10 and you may think, What the heck How could this look like the sparkles? I did show you? Well, it's simple. You just drag it down and you basically have it ready Now if you want them to be wider or bigger. They can stay like that. But if you want them, you just take the outline and you change the weight off the outline. You can see that. Okay, I'll make this a tiny bit bigger. Well, do we need a shape, Phil? We can select Nofal shape outline. Let's make it maybe yellowish or let's make it green just for fun. I want to make sure that it's in the middle, so Alliance center and align middle. Now, when it comes to the animation, I won't go to the animations. I want to open the animation pain, and I would like to enter a zoom here. All right, we have this nice zoom. The zoom alone like, isn't enough to give it a little flavor, so it also should grow a bit when it gets zoomed. That's why I will select at animation and I'll try to select over the grove. It doesn't have to be so weak. I'm definitely double click here. Go to effect, and the size could be like 110 on 115. Maybe. Let's stay with 110 l select. Enter. We want a smooth yet I always want this mood you can see now it gets a bit better also like both animations, and I need to make them very similar. So I said, start with previous, I'll make the duration health a second. No delay. All right, this will be the information. I have pretty nice. Have it too quick. But usually those sparkles are really quick. Let me go for one second back toe aftereffect. Maybe I don't want those circles. I just want those sparkles to be seen and you can notice that sparkles appear and they already start to disappear. So this is just a quick, swift animation like and you want something like that in Power point. But in order to do this, I would control see in control Venus object. I would place it on the same place and I would go to former edit shape. And I would change it to a circle because this circle will be the same size you can see some of them are bigger, so I need to take the circle. I need to press my shift, my control key and also my left bulky, and I want to make sure that it will cover all of those elements perfect shape, Phil. Make it the feel of the background shape. Old line. No old line. And you can see it's nearly perfect. A bit bigger. And it has the same animations because I copied this object with what you need to do. You need to go to animations and just delay them a little bit. So they happen quarter a second after each other. Okay, basically, this will be the animation and you can see my little mistake. My little mistake is that the zoom animation I used Let me go to animations. I used this zoo, but we have two types of zoom. As I select more entrance effect, we have zoom and basic zoom. The zoom also does a little fading, but I want no fading. I want a basic zoom which will be the color in 100% capacity along the way. Okay. I did change the zoom now I will delay it. How was it before? Like that? Okay, play. Now it's a matter off adjusting older durations and you can experiment. You can lower the duration here. You can delay it or without delay and let me preview it All right now I have a very slight delay. 0.1 delay between them and the animation would look like that. That's one way of doing very simple sparkles in PowerPoint. We could do the same with circles. I hope this was informative and very useful to you. See you in other kinetic typography products we might explore together.
65. 10-06. Multiple Sentences Animation Part 1: in this two part lecture, we are going to prepare this animation. Okay, Before we start, I would like you to prepare a slight with four text boxes. Place two very big text boxes in the middle, one on the top side, one on the bottom side and two text boxes on the left and right, one higher and one lower. So later on, they can appear together. Once you have everything done, select their middle text boxes go off course the animations Let us open the animation pain and let us prepare the first animation. At first, I would like the flying to happen on the top one. I would like it to fly in from left, so I will select affect options from left and on the 2nd 1 I'll select affect options from right. You probably can anticipate that the quick adjustments we want to make is right. Click with previous, maybe extended aeration and maybe double click go to effect and make a very small bounds. For example, 0.2 seconds should be completely enough. This is okay. I'll double click the second animation 0.2. I'll select. Okay. And this is the first part of the animation part Number two will be to add another animation to them, select again, vote off those text boxes select at animation and place. Grow shrink because I would like them to get smaller. I don't want them to grow. I want to again, right click with previous I want to make the duration. Maybe 1.5. This should be completely enough. Maybe we lowered this anyway, and I'll double click on the animation effect. I'll click on the size and I wanted smaller. If I select smaller, it will automatically change it to 50%. We don't need any balances over smooths here. L select. Okay, and I'll double click here and I'll do the same effect. Size smaller. Right now we have to animations here, fly in and grow shrink. Police said at the first innovation and select play from to know what is happening here. Okay, everything is basically okay. But later on, as they shrink, they are too far apart from each other. Look at that. There's such a big gap here in the middle. How could we adjust that this would be very simple because we can again select the top text warns against elect at animation and at another Imation. This time I owned the lines. Yeah, this is going into the right direction. It is just too far. I want it a bit lower to about this amount, and I cannot exactly anticipate where it will land because it's shrinking in the meantime. So once again, right click with previous and I need to delay it because right now all those animation happened at once, and this would create an error. You can see that. So I won't this to start after the green ones. The green ones take 75 to play, so it's nearly a second. So I delayed by 75 I make the duration. Maybe to also 0 75 Let me preview that. Yeah, and now the movement is happening When it's shrinking. I would like to do the same on the more text so both text will move towards each other. So select the more text and select the third animation for it, which will be also lines Take the red dot places with higher and now and that's a little problem. It iss snapping. If there is the problem that the animation will snap where you don't want it to snap. You can always pressed the left old key, and it will adjust as you want. Fe. I'm really not precise here. And I would like those animation to start the same way. And I'll hit Blaine. Oh, okay. Too close together. I'll just place this a bit lower. Beautiful. It's somewhat okay. And this will be the first part of the animation play from the finalized animation should look like that. You should have three animations on the first object and three animations on the second object. This will teach you a lot about working with text and animations with text. The little problem. I see what the lines look at. That if I try to adjust the lines, it always snaps back to the beginning. So I have one shot at making this. Well, okay. This should be okay. Boom. I have to stay with it now, because else I have to do this from scratch. And the animation looks now perfect. And in the next listen, we can continue and finalize this animation
66. 10-07. Multiple Sentences Animation Part 2: Okay, let us continue the design when this animation finishes. I would like this to fly away and then you want to fly in. So let me start working on that. Go to animations and look how crazy we are. Adding 1/4 information to the same tax box. But this will be the last one. I promise. Click at animation and in the exit effect you wanted to fly out. Since it did fly in from the left side, it should fly out to the right side. So I'll set of affect options to right. I'll select with previous. But I immediately will delay it by a lot because I want a few seconds for people to actually see the text be able to read it. Liberation, however second, is pretty OK now the second text at animation fly out and this time it will fly out to the left side effect options to left quit previous and automatically it snaps together. Let me preview that. OK, Perfect. We have a bit of time in the middle, maybe even too much time. So I'll lower the delay because this is just an example. Now I want this to fly in exactly as they start to disappear from the screen. So I will not at an animation. I will simply make it fly in from left. And I started with previous. I'll do the same For the second text, I can click control and with my mouth Well, I can zoom out Power Point. You can also do this here. You can use the zoom out like that. I'll go to animation Painter because I am lazy. I'll click on it and I'll just change the type of the animation to be from right. Okay, let me preview now what is happening on the screen? And if I need any adjustments, okay. And you know what my problem is? Yeah. You can probably imagine it should be here on the screen, because if it is supposed to fly in, it has to fly in from somewhere. If I don't want to use flying, the proper way of doing this would be select animations, lines and just place it like here, like that. This way it would appear on the screen, but this is the problem. Power point is snapping to object. If you don't want power point to snap to objects, you have to always go to home. Select selection. Pain. I would need to de select something text it waas textbooks, textbooks night. And now I would have freedom, and I could place it where I want. So this is a little problem with PowerPoint, so I will not do that. I will stay with the flying animation, and I can see that I made a big mistake. Yes, we have the flying information, so I just have to take those text boxes here. The second textbooks here. I can position them exactly as I wanted them to be. In the beginning, I can no preview the entire intimation. Boom. Okay, this one is wrongly said it should be for Mitt. It should be animation because I pressed control Z a few times from right. Maybe I'll delay this just a tiny bit. So they are. They will have some space, and I'll give it a smooth end. The 2nd 1 as well. Smooth. And maybe also here on the red ones. Smooth end effect. Smooth and and Okay, this should be the finalized animation. Let me preview that. Beautiful. I believe now, as I see it that we do not meet the delay, but it depends. Let me see. While beautiful is really beautiful, I won't extend the duration toe one second because I believe they were a bit too quick. Superb. And if you will have troubles changing the text because right now I can select attacks. But it might be difficult to select some text boxes in case you run into trouble pullers go to home, select selection pain, open the selection pain and you can de select certain objects to access other off just easier. Right now, everything works perfectly. This is a Rupert kinetic typography template. I hope this was plenty of fun to design for you and please try it yourself and create such a kinetic typography animation.
67. 10-08. Testing the waters with MORPH: Later on in the course, I will teach you about
the Morph transition, a transition that was added
in the PowerPoint 2019. But since we are doing
this kind of animation, I want to show you how you would approach something similar
using the Morph transition. Here, I would
duplicate this slide. And on the second slide, I will take this text. I would go to home.
And I will make this smaller just to show
you what will happen. Let me briefly align
them together again. Go into the middle. And if I would go
to transitions, and I would press morph. The Morph transition
takes information from the previous slide and tries to move everything
to the new slide. If I would come to
the previous slide, I would put this text on the left side and this big
text on the right side. Now going back to the next
slide and pressing more just to preview what happens with this kind of transition. You can see it took information
from the previous slide, ended, morph this
into this slide. Now, what happens if something isn't on
the previous slide? It will simply fade in. So we need to be very
careful when using more, because if you want more
of to look really good, you need to have the same
things on the previous slide. This is not an animation, this is a transition. Later on in the course, I will explain you
more about that. I just wanted to highlight
that in certain situations, you can make very similar
animations to what I did with the line animation with a simple morph transition,
more on that later. Don't worry about
this. Right now. I'll teach you everything. So stay tuned and let's see
each other in next lectures.
68. 11-01. Introduction to this module: welcome to this essential module about master slides. Master Slight are all about two things master slight and their layout As you click in Power Point I right click I have my layouts Those layouts are created in the view in the very slight master which we know and those slight are masters light There's big ones and those small ones are layout. We can add additional layouts here and we can fill out those long hours with placeholders. We can select content placeholders which will be for everything we can select. For example, picture placeholders which will be only for pictures and those create drag and drop objects within our Power point presentation. I can, for example, copy to several times. I'll know close my slide Master, I want to get out of it back to my presentation I want to create an example New slight and I wont select my layout with tried Just created. So there you have it. End of following lessons. I'll explain you everything about how those are set up How example Slights can be created I want you to only know one thing before we start. Not everything can be created within slight master. So masters light and their layout are mostly set up to create blank spaces for images and for our text. Eventually, for content like videos or charts, the rest should be designed in Power Point. So stay tuned, because this will be really cool, important and very fun lessons. See there.
69. 11-02. What are Master Slides: hello and welcome today in this model were we'll talk about Master Slight in Power Point setting up template because this is definitely a topic we should know about. We should take a look on and I will explain you what you need to know to create effective presentation templates and ultimately become better at power. Point off course, I'll show you a bit off theory. Then I'll show you off course examples on a real life presentation. The presentation, which we did weaken off course, make it as a template as well. You know that I personally like to start from scratch by deleting everything and having a blanks life and setting up my layout from scratch. But we could do the same with help off Master Slight by defining a layout which we don't can use repeatedly in other slides slides in the presentation. So as you have parchment opened as you right click, you have something called layout. Those nine are set up in master slides, so I have those nine layout. They're pretty finally out, but we can also delete at a just and, of course, create our own layout by using master slides. So let me show you all examples and explain what I'm talking about. They think we will be talking about is going to view and using sleight. Master, this is something very important because in this light, master, all the slight layouts funds are determined for the entire presentation. Now, most of the times we use the basic PowerPoint lay out. But if we want to set up a template for a company for for our client, then we should use this type to prepare for everything. Okay, I'll go back to my power point presentation by default. As you can see, as I create new slight, they inherit the layout which I used as I right click and I go to lay out its called office theme and I have nine layouts. Okay, now I'll go to view slight master, does everything make sense? I have one master slight and nine layouts light, as you can see as I delete several off those slight and I close master view as I write like now I go to lay out and I have only those two left so you can notice that the master slightly out determine how many layers I have here to use what's cool. I can go to view. I can go to Slight Master and I can set up multiple new layout or multiple New master Slight. On the very left side, I have insert master slide and insert layout. So this is what I wanted to teach you. In this lesson, you can insert Master slight. As you can see, a new master sleight has appeared with new layout. Well, it used the basic nine layout. We have that we can off course again. Delete this leave only to lay out and show to our client or boss. Hey, I have set up for layout to here to here so you can select whichever you like. So depending on how many masters like you have that many custom designs you will establish and of course, layout. Now why? Layouts are so cool. Layers are cool because I can, with one click at the graph at the table at the chart of the picture, a video or just by Dragon dropping it Here, let me show you an example. Example. Photos to use city photo boom since thank you. Power Point sayings. This was a pre defined box for an image or any other thing, it automatically snapped, which would not normally happen like that with our label. Okay, this is a brief, brief introduction to the master's life. Now I'll finally go in the next lesson and show you how, when, where and what can be done right now. I showed you that on the view. Tell you have a slight master and you can add master slight and lay out depending on how many layers you have. If I have a bunch off different layout with different setups like this box would be different, everything will be changed. It's a club master view. I created a new slight because I'm working on something, and I remember that I had the school out. I just right click layout and I find my crazy layout. It was this one Boom and I have a pre defined presets light to work within Power Point
70. 11-03. Layouts: All right. So we're
off to a good start. You already know what
masters lights are. Master slides are those
like big upper slides, which applied to the
entire presentation. But apart from that,
we also have layout. By the way, if you are using the Mac version of PowerPoint, I think you don't
have the layout here, but on the home tab, we have layouts as well here. If you can't find the
feature on the Mac version, you can always google
PowerPoint for Mac layout. And there is actually a
support article for that. If I navigate down a
little click on MacOS, either the older
or newer versions, I can see that in normal
view on the Home tab, we have the layout function. You should be able to
find it as well here. Layout or the more useful
things here in PowerPoint, template creation,
because you can always go to View Slide Master. And you can create as
many layouts as you want. You can, for example,
insert the layout. And what's great about layout. You can decide if you wanted
the title to be included. You can decide if you want
the footer to be included. Because in the footer you could
make the number of slides you could place the
company website, you can place the date.
What's also interesting? As I told you that no matter what you insert
in the master slide, All Layouts, those
little poor layouts always inherited this stuff. But there's a little trick. On each layout. You can select, Hide
background graphics. Those background graphics from the master slides
will be hidden. So if you select this, your layout, we'll have a
little bit of independence. All right, let me delete this and what is being
done on a layout. Layouts. 90% of layout
consists of placeholders. You are using layout mostly for picture and
texts placeholders, all graphics, all designs
like we did here, or icons, background colors. Everything is done
within PowerPoint. Only text and pictures
basically are done with layout. So going back to
View Slide Master, I have this empty layout. I can select,
insert placeholder. And the multiple
choices placeholder is content where you
have like tables, graphs, photos, texts, no matter what
you start doing here, this box will adapt. But more often in
the Slide Master, you are going to
insert placeholder and you want a picture or texts. Those two obviously
our most used. So if I select a
picture placeholder, I will duplicate
it multiple times. And I can set up a couple
of layouts for me. What is a very convenient that you can click
on this layout. You can control deed, and you can make multiple
layout for your presentation. And this is what template
creation is all about. You would normally
put them here. Then you would again
duplicate this slide. Of course, this would
need to look better for me and it's like completely ugly now would, it
doesn't matter. Then you would create
a layout like that. For example, with four pictures. Then you again duplicate this. You again press Control D
to make another layout. Control the width, like six
pictures or eight pictures. Let me be at least a tiny bit professional here and had
me make them smaller. Let me bring them
all into the slide. Shift, deselect, shift click
the Select and shift click. Okay. I've created an a 1234
layout for my presentation. I'm closing the master view
and what is the actual usage? The actual usages. If someone takes this file from me and someone creates a new slide and he
doesn't have an idea. Well, what can I do
here? What can I design? It can always right-click, select layout and preview
what layouts I have created. I can of course also
named with layouts. And he can see, Wow, there's three pictures, three pictures, there's
multiple pictures. I wanted to create a portfolio
slide. This is perfect. I select this. And without any work, of course, you can resize those
elements. Without any work. He has a slide with given
elements on the layout. Right now, you would be so happy because he would just
take multiple pictures. We have eight pictures here. He would just drag and drop those pictures with perfectly aligned to the
placeholders we have. Pretty convenient in the design
ideas from PowerPoint or even helping us to
set them up good. Let's use a placeholder. You most likely to not want
to use the design ideas. Alright? Another very interesting thing is if you have another
presentation like here, I have a presentation
with layouts. Let me delete everything. Let me right-click layout. And I saw another template like, wow, this layout is so great. I'm selecting this layout. I'm taking this slide Control C, and I'm placing it
in my presentation. Control V or Command V. If you're on a Mac, there's a good chance that the
layout copied over because PowerPoint somehow has
to display the same slide. Right-click layout. As you can see,
PowerPoint imported this layout from another presentation
into my presentation. So what do I have now? I have an empty slide, yes, but I imported a
layout very quickly. All right, This is it When it comes to teaching
you about layout. Remember, layout are added
in the View. Slide Master. Just as Mr. slides, you can insert
layout and insular an unlimited amount of
placeholders into those layouts. In a couple of lectures, I will show you advanced
tricks which you can apply to those layouts
and how you can make, for example, this picture
layout to have a custom shape. In the next lecture, we will firstly go about XML files and th MAX files because
you also need to know what this Design
tab is all about.
71. 11-04. What are themes, designs and thmx files: Okay. Hello? Hello. Hello. Welcome back. I want to show you something super important. Perhaps you didn't know about this, so we have our slight in our presentation. Now, you know that Power point has a few basic templates we can use go to design. A few years ago, I thought to myself Wow, how do they set up those good looking templates in plantations where there is no trick to it? You just go to view. You just go to slight master and you have everything laid out. Um, let me delete those things. As you can see, a new slight muster has appeared. Okay, let me delete the empty one. And this is the slight master, and this is all they did. Basically, they just took a graphic. They put it in the presentation and boom, They have attempt Lee. They made the color green or any color weaken select here. Or any color fund and effect. We can select your in the theme and this is basically it. If I delete this one object this one object here. We have no presentation at all. Only this layout has it set manually because perhaps they wanted to have a title slight, which has it also hard coded. But basically all those PowerPoint templates are simply set up like that. If I go to teams and I change the team, it's the same. You have an object on those slights and an object here. This is just designed inside the slight master. The funds are changed and the title slight looks like that. They even made a white background here, so they didn't even have to do it. But maybe they wanted to be a pure white design on the first light. Now OK, so this this is a PowerPoint template and something that is possible. Well, I don't really use it often, and perhaps it's not used because if I create the presentation, even if it's set up with Master Slight, it's for the case off. One presentation you really safe templates to maybe only if you sell them. If you prepare those templates for sale for clients, yes, you can save a template. And at the template to this bundle, let's say that this is my layout. I changed here everything. I prepared everything. I have a bunch off layouts ready, which I would like to sell to use apart from this because this looks really bad. Then I can go and save this theme in the team's. You can browse inside the current e. I will save it as an example theme. Now, if you have a new presentation, I have fought, for example, presentation like that. I will create a new slight and then I will know that I am. I wanted to use that template. No problem. You go to design, as you usually do in power point and you have those templates now you will also have your safe's template. As you can see, one new custom templates has appeared. But if it wouldn't appear, I let me delete it. If this design would not be here, I just browse for themes and I would need to select the place where saved it. But if it wouldn't be here, I would need to select the place where we're save it. I would need to go to that place as I could simply import this team. So if you ever wondered what theme X Files are as I can save you, FEMA X files are simply themes for power point, which you can import and they will appear in the design tap. This is what Masters Lights are all about by setting up templates with several layouts. I think layout is the most important thing. So let's go finally to a real life example. In the next lesson, I would like to show you how I would create this slight in our master templates.
72. 11-05. Real Life Example - Benefits and Disatvantages: Hello. Welcome back. I would like to tackle with you how I would create such a slight with master slights. And what are the difficulties? What are the benefits? Let me show you on an example. So I have a photograph here on the top side and this photograph is covered by such a overlay box. So we will try to create a similar design which will be easy for us to replicate. Let me simply create a new slight and I will try to create layout for it. I will go to view. I will go to Slight Master. I will even create a new layout. So I have my clean lay out. I didn't need a title. I didn't need footers. But I do definitely need people you know a bit difficult because we will have toe jump around. We'll need a placeholder for the photograph which you can automatically add. We can decide if we want also those icons letting may be copied us over so I don't have to design everything from scratch. Go to view again to slight master And let's continue the design on our placeholder. I'll answer the placeholder boom and I'll inside the picture. I want to insert a placeholder for picture. It was about off this size whom perfect now will place control V and I'll place my icons here. And let's say that this slightest set up to have different Aikens, Can't I click them? Okay, I can. So I leave placeholders just for my Aiken. Now, my little problem here is that those items were grouped, so I'll go to group on group and I'll, of course, delete those objects. Okay? It's really goes well, even better. Even better yet. I'm perfect at that. Well, that's the problem. Group on groups. Sorry. I am having so much troubles here. There will be a time where I will be able to click that. Okay, those icons, We are nearly done. This group One group. Okay, so this light is nearly complete. The picture should be to this extension. And on the left bottom side, As you couldn't remember, we had text No problem view slight master. Our crazy slight and insert the placeholder. And this time, a text placeholder. This place holder was too about this size. Now edit Master textiles We can set up manually or we can go to slight master funds, and we can set funds for the entire presentation to be used here. Now I'll try to set it manually by selecting open sense as we had. Okay, the last thing I remember it was this orange color which was used for the text. I don't think it's the same, but let's do it the same. Okay, so I have my layout ready, and you can notice that I could design that straight in sight of Power Point. Or I can set up this layout if I think that I'll use this layout several times in my presentation. In my case, it's not entirely true because I know that I only have one slight like that. Okay, go to slight master select close master view, and I'll try to create the same slight I'm adding a new slide, and this is not the layout I want. The layout I want is the custom layout. I said, Okay, boom. You can see I have the same layout and what's great here. I can drag and drop the image. I can start writing the text and it will immediately look close to that. So I forgot about this title, but that's not important. I wanted to show you how I would set this up to have it to use in my presentation. And what are the benefits? The benefits are that I can use any photograph. I just drag and drop it. And boom Power point snaps this photograph here. And this object is an object merged into this very layout. So my only adjustment, which I could do, is to delete those objects because the box is perfect. I have text here. The text is orange. Their pictures also Okay, But then again, this little object this overlay had to be placed inside here. I couldn't make that in slight mist because if I would go to view to Slight Master and I would put this overlay here like I put those icons here, let me delete them. Close master view. I could not move it, not change it. It would bring me nothing. So this is why on the beginning, on the off the lesson I wanted to show you what are the benefits off using slight master and layouts and templates and what are the disadvantages? The disadvantage is that everything placed here is non movable. Only those placeholders. So you should use a slight master and set up template only by using place holders as you can see in the site. Master, this would not be a way to go. This is okay. And this place holder is perfectly OK and what's cool here? This would be a very clean slight, which could be adapted. So as I close my muster view, I have a new slide. I said, like, this custom layout created and this can be changed. And this is how I lay out. Should be Okay, let's say that I wanted this picture to be like this on the left. Maybe I wanted the picture to be like this on the left side. I wanted the text to be bigger. This can be addressed and this is perfect. Usage off layout in power point. In the next lesson, I would like to start to show you advanced PowerPoint tricks which can make your templates amazing and how professionals designed advanced template inside powerful by using sleight, master and all its features
73. 11-06. How Colors Schemes Influence Shapes: You don't have to do anything
within this lecture. I just want you to understand the principles where
PowerPoint takes the colors from and how do they actually influence
the shapes we have. Okay, I have inserted
four shapes. As you probably notice, always when you insert a
shape into PowerPoint, it's a blue shape,
but why is that? This is because the
default theme color has the first accent
color set to blue. If I click on a
shape, shape format, Shape fill those are
the theme colors. So we have text colors, and then we have those
colors x and one, x and two, and three, and so on. Below that, we have
shades of the same color. So actually, we only
have those colors, But the colors on the
bottom here are simply lighter and darker shades
of this particular color. Now, the first one is blue. This is why the shapes
always turn into that color. If we go into the design
tab, open the variants, colors, and we
customize the colors, we have access to the
actual accent we have here. And let's say you have
a presentation and you would like to
everything turn green. Then you can change
those accents to, for example, more colors, something like this,
accent number two, I'll do it a more green color, and accent number three. More colors. I will
give it something blue. Okay. So I have three new
accent colors. I perceived. You see everything has changed
to the new color I have set up because if I click
on a shape shape format, the new theme I have used for this presentation has those
three colors I have set. So what happens to shapes if you recolor them to either theme
colors or custom colors? This is what I wanted to show
you within this lecture. Let's say I'll select
color number one here. And for the second shape, I'll select another color
from the theme colors. For example, this
last color here. Okay. But for those shapes, I'll set a completely
different custom color. I take my pick whip. I can go to Shape
Phi eye dropper. I click with the eye dropper, and I pick a color that I've
imported into PowerPoint, a completely different color. So PowerPoint doesn't
know this color. It's a new custom color. It's not on this palette. It's a completely custom color. And for this, as well, I select Shapefil
more fill colors, and I'll select a
completely custom color, which PowerPoint doesn't
have in our basic palette. Now, what will happen if I change the color scheme
of this presentation. Let me show you. I
go again to design. I open the colors. Oh, sorry,
I opened the template. Variance colors, custom colors.
Now watch what happens? If I change the accent one and I believe the
last one was green, so it is accent number six, I change it to a yellow color, and c number six, I change it also
to a yellow color. And per s. You can see
those two changed it, but those two didn't. Only the shape outlines
changed. Why is that? Because here, PowerPoint knows that I'm using from the shape
format, colors I have here. So I only changed the
physically the color, but it's still for PowerPoint, it's accent number one
and accent number six. So PowerPoint knows
that PowerPoint should use this color for this shape, and this color for
this first shape. No matter what color that is. For the items on the right
side, on the other hand, I have selected custom colors, so PowerPoint cannot
change the color of those. There is no right way to
set colors in PowerPoint. It depends if you want to use the basic themes or if you want to change
the colors later on, or you want to go for
something completely custom. In my opinion, it's very convenient to have a
color scheme here, and I just click on a shape
old Tree boom because I have my eye dropper set on
old and a tree shortcut. So I can always very
quickly change the colors. On the other hand, it's convenient that I do not
have to do anything. Only go to design, variants, and depending on how many
color variants you have here, the first two shapes will change because I have
different accents here. Thank you very much
for listening. I hope you understood what I wanted to get across
here, and if not, please ask me some questions
and we'll see each other in other tutorials
very similar to this.
74. 11-07. Advanced Template Creation: Hello. I'm so happy that you arrived here. Now comes the real meat. There really advanced content which professional template creators and power pointers like you very soon should use. Okay, I want to set up an entire template with rounded corners. I have a concept for my entire presentation that it should be a little bit rounded or pictures or items. Everything should be on rounded objects. Let me go to view and select and create one new layout. This layout will show you all again benefits and problems, which you can have while working in Power Point. I'll insert layout. And on this layout I want pictures to be shown eventually a bit off text. I don't want any title or footer because it will only crowd my slide. I want to go toe inter placeholder and insert to picture placeholders. I'll select my shift and I will select one on the left side. Control C Control the one on the right side and I want to show you the troubles which you can face. So I wanted rounded corners here. This doesn't look like it, but you can click on this place holder you can go to edit shape in the form attack, change, shape and select any shape you want. So I wanted this rectangle, this rounded corners rectangle to be used here. I can even a click to adjust it a little bit. Okay? And this is what I was Half the little problem I have with PowerPoint is always when I click on it, it shows me the rectangle placeholder. Only if I d selected. It shows me the actual object which will have here at. But I wanted it to be like this. So how could I do that? So I have good and bad news for you. Depending on what PowerPoint version you have, you will or will not be able to do this. So I wrote it is 45 degrees because I wanted everything to be set up in such a style. And as you can see, the picture is not as cute. Now we'll see how this looks in the presentation. The good thing is that you can use subtraction to create any shape you like. And this is the best trick in PowerPoint you can possibly imagine. Let me show you insert shapes and I could insert for example the same shape. I agreed the shape like this with my shift key not controlled shift, I would make it round it. I would rotate it over. I had put it here. And as I believe, power 0.2010 didn't have subtractions. I'm not entirely sure, but I think that PowerPoint 2013 off course without in 16 and all newer versions have this . So if you have powerful in 2013 you are safe. You can simply click on the picture shift, click on the object. And in the former top merch shapes just intersected. Boom! You have this object preferred. And now look how beautiful this light could be set up. I could have several off those here like this, and we have a beautiful, slight set up. I will close my master view and I'm creating my presentation news site. And I know that you want to have pictures on this slide. You just right click your wrist layout and you just select your beautiful layout. Now imagine if an entire presentation would be set up like this. It would be really beautiful and easy to use. So let me know. Select any picture and show you this example. Boom. I have the water, this water, a flight here. What happens when I put it here? Boom! And now you see the problem with the skewing The problem curious that I had do rotate this object. And here this object was cropped. So I definitely, definitely definitely recommend cropping objects to the little object you want to have because this is a no go. You can't use photographs like that. Only if you really, really want them to look like that. But this is a little problem we have in power point off course. You could try to to create a normal image, then create white shapes here to cover this up. This would be super difficult. This, However, we can't change the format off this object and we can change the format here. So again, I want to always show you advantages and benefits and disadvantages and those those bad things which masters lights sometimes help us, and sometimes they limit us in our design. But basically what you want to do you want to create layouts like that where it's super simple. And now I could create several very similar slides by, for example, just selecting new slight and any new site. I add the room boom. It will always use the last layout used. So if I change my layout, I selected a new slight. It'll have the same layout, but since I wanted toe set up several slight like that, for example, this would be slight one. This would be slight, too slight to would be entirely made up off images. So I'll make it like that like that like that. Since these placeholders can be copied, we only can use as many as we have in this layout because I can't press control. See Contrave. It doesn't work like that. Sadly, we can only create photographs and duplicate those photographs. Boom, boom, boom. But sadly, we cannot duplicate those objects. We would have to go to view to slight master, duplicate this layout and make, for example, a few more boxes, which can be used later. Okay, beautiful layout and who you would create a newsnight. I would write me clay out, and I know that to custom layout is the crazy layout with older images here and I'll to use them. I a place him here And this is how you use effectively. Slight Master, how you operate on templates, how you prepare templates, how you create entire presentations with a consistent design. Now, if you have a low, let's say that this is my company logo I go to view. I go to slight master and I know that this logo has to be everywhere, absolutely everywhere. You just go and paste it onto the slight master. You place it here, you make it small and this little object would be on the entire presentation no matter what you do. So this is how operating on slight slight masters and templates work. I hope that this tutorial was really beneficial for you. And you learned a lot how to set up custom shapes for your super cool presentations.
75. 11-08. How To Design Slides within Templates: Okay. I see you are on fire today and you would like to learn even more so how Professional template creators are creating templates. Now I'll show you a real life example how I would set up a slight with the picture, but not adding too much into this light. Okay, so I'll combine working within Power point and working within master slides. So I'll create and you labeled Go to view Select Slight Master, if you would like to create the same thing that I am creating, so I will select new lay out. Okay, I'm inserting it and I want to create text boxes within PowerPoint but the picture placeholder within this masters light this will be also without any title or footers because I really don't like this crowded set up. And I will go to insert placeholder Answer picture, and I would insert the picture if you would like to follow, please do so. So we will create together a slight with slight master. Okay, take the picture and resize it to the left side off the screen. You can select a size if you wanted to be big or not too big. Ok, I have the picture. Now I'll go to insert shapes and I'll simply insert a dark shape. Okay, I'll place the shape here. I'll make sure that the shape is the same size as the victor. Okay, It's nearly s. I will go to shape old line. No hotline. I will. Not it a bit to the left. I will resize it. Okay. And this is the left side off my slide. Now I'll take this object. I'll select a shape Phil and I would select a color for my design. Let me go to more phone calls and I want something darkish darkish blues like this. Okay? And I have my layout prepared. I close my master of you, And this will allow me to create things within power point without having toe always go to slight Master. Now I'm creating a new slide. This new slight should have my layout, which I preferred right now. Okay, this is the layout and the rest would be created here within power point. So I go within power point to create insert shapes or I mean textbooks and create text boxes here. Here I will select what they cooled. Template. I click on that I would make the text white. And of course, I wanted to use open sense because I'm using open sense in this presentation. Okay. Selected like that, Control V. Then this will be the main color here. Let's say that it's yellow or something. And I'm adding those text boxes inside the normal PowerPoint Creator because I already have my layout. I want this box to be always here, this picture to be on the left side. But those things can be added separately now can migrate somewhere. Example Text. Yes, I can. I mean, maybe even the entire one. Okay. Argentina. Maybe the text should be white here around. Okay, This actually, it looks really cool. So I'll copy also those here whom Okay, this is making up my slight. And then I want maybe two icons like this and this boom and those icons would be here on this site. Then I would select the main color insert shapes, maybe circles for the icons. Maybe some texts. I don't really know. I would select both. Now you don't have to follow my steps. Exactly. I just wanted to show you how I would set up this template and I want actually this yellow color boom. Then I would select text off course. The text is, like, now invisible, but I would make it visible by making it black and big. Okay, control C control V and Wola. There you have it. This would be a template which I would create within power. Point off course. This should be grouped. This circle should be smaller because it looks a bit weird with this. I can Okay. And this is somewhat how I would go about this. Now, if I select this templates to to use, I can also create new slight with the same layout with similar design. And if someone were to receive this presentation for me, if someone would like to change this design, no problem. You can delete that. You can delete that. If you want an image, you just go. Here I take my example. Image boom. The mushroom, for example. Boom. I have to image. I can even go to crop and move the image here. Crump, Boom. You are ready with the slight. I see. I wasn't perfectly precise here, but this can be easily adjusted. And this is how I created a template for my PowerPoint presentation and new layout. And if I would follow this color, perhaps all my layouts, which I would create, would have a similar color. Another layout view. Slight master. For example. Copy this existing layout and place the picture on the right side and this object here, you close everything, and you have already too cool ales to use quickly in your presentations.
76. 11-09. When and why to use or not to use Master Slides: Hello. Welcome to the summary lesson where I don't do quickly round up what we learned. So now you have a little bit more understanding about Why did I create this presentation? By always creating a new slight and deleting everything versus creating a template which you can sale or rent or anything. So the basic differences If you create a ready presentation which you deliver as a ready file to your client, you can create it without without master slight because you're delivering a ready product which he will use if you however plan toe sell. This presentation s a template. Basically you go about it very similar. Only each photograph and each text You want to be added within the presentation you create with placeholders. This is the more professional way because if you are a company and you will use this template over and over again and you just wanted the template to be consistent in terms off coloristic design and the style off the photographs, you would like to have it super easy. You would like to have this place holder you. If you are not tax savvy and design savvy, you will not resize this you will not change this presentation. You only want to drag and drop a photograph. Start typing or pasting your your text and you want to be done with your presentation. The company logo is already here, which is also cool. And this is it. I would be super happy if I would get a templates from you like that, because I can create my slight within seconds. So it all depends on what are you up to end. How do you agree on the work with your client? I hope you did learn a lot about master slides about setting up templates and saving those templates, because this'll is a fundamental part of knowledge. But it doesn't go much further beyond that, because if you learn how to set up slight and design slight, you'll most likely not have big troubles working within the master slides. Now it's a matter off you going in there checking everything options out, and basically templates are set up in the slight master 10. This is the most important tap. The rest is just that normal transitions, insertions and home tap, which we do adjustments as usual. But this light master allows you to select the placeholders, which are on the slide. The theme can be saved. What What also saved is the colors, phones and effect. I have, for example, here custom funds like I would use Open Sons and Helvetica is my second, or babbles and babbles new as my main text. So if I click that every text would be now with this phone, and you can set up funds very easily, it is customized forms or or create new ones. Customized Select Phone number one, Select Phone number two and Crazy Fund. Set up whom? Safe. And as you can see, I have my new crazy fund set up the crazy fund set up Boom. It's inserted in the presentation. Thank you so much for watching this part. Those lessons. And if you have any more questions or would like to know something else, I'll try to add additional ones to round up this entire content and make it even better for you.
77. 11-10. Custom Bulletpoint lists: You can change PowerPoint fonts with one-click. This is the nice trick I found out with slight master and layout. The way you can set it up is by going to View opening slight master and creating a new layout below the title slide, for example here. And creating a new text placeholder, I'll right-click, Rename this layout due to tutorial fonts. Then I go to insert placeholder. I will simply insert a text placeholder, which is usually the base of any PowerPoint slide. All right, we have the text place holder, and as you can see, by default, we have these super boring bullet point list. What I'm doing here is selecting all six levels. Taking all six levels here to the beginning. So they are all in one line. And I'll also go one step further. And in the home, I removed the bullet points because I prefer to have a clean look like here. Now, what you want to do, you want to increase the size. Let's say my default size is 84. All the levels, I do not need the next level to be smaller because this is not the style I'm looking for. The last thing I wanna do, I want to adjust the actual font you see here to achieve something like this, where I set up big bulky fonts for myself. And each time I went, I wanna use them. I'll just select this layout. But we are doing this year node. So the first text, it doesn't matter how much text. I can even write text here, it doesn't matter. Powerpoint will recognize this as a separate level. What I'm doing, I'm just selecting big fonts I like and I probably will use in my presentation. Of course, do not go crazy. Just set something you assume you want to use and you want to have it somewhere close. Montserrat luck. Yeah, perfect. This is a great font. I will most likely use an I remember that Monserrat is on my level four. Okay. Once you are ready, go to Slide Master and simply close the master view. Right now, each time I select a new slide, and I remember that I wanna use Montserrat or another big font. I just right-click. I select layout. And I make sure that I select the layout I've created, which is tutorial fonts. Okay, tutorial fonts for there was the first 1, first font. You know what? I don't like the first font. I just go here and I change the level of this font since I have four levels specified, level number three, level number four, we have Montserrat with a couple mouse clicks. No need to change fonts here to search them around. And this is a super convenient way if you want, you can enable bullet points again, because we have specified on this particular slide within this particular text layer that bullet point should look like that should have one of those funds. And they will always stay at the beginning. They will not move with each level because we have specified them to start and be adjusted to the left side. What's even more amazing, you can take this particular layout, this, I will call it tutorial fonts, layout Control C. Take it to another presentation, make sure this line appears control V, and this layout is now in another PowerPoint presentation. This is how you can utilize the slight master even further by using different fonts for different levels specified in your text placeholder, remember, you do not always have to use those default bullet points.
78. 12-01. Creating Presentations: Hello, and welcome in
this lecture where we'll talk a little bit about
Microsoft copilot, which is Microsoft's
AI assistant. I'll give you a general
overview and understanding. On the home tab, in case you
have a license for copilot, on the right side
next to designer, you'll have the copilot icon. Since a couple of
months, an icon like that is also available
above the slide. This is called by the
Microsoft team the Skittle. You can open the skittle and there's another way to
create a presentation, create a presentation
from file or ask copilot. On ask copilot, we'll simply
open this right window. In this right window, we have a couple of sample
prompts you can use. We have the area where we
insert our actual prompt, and we also have a library of
prompts which we can open, we can preview, and
we can click on them directly to add
them to our box. Let me now show you
how copilot works. Copilot can help you create a presentation.
Let us type in. Create a presentation about the evolution of smart phones. I'll hit Enter.
Copilot will start generating a presentation from the prompt that we entered. It will be working for a while, and it will create a standard
PowerPoint presentation. Currently, the first
slide is animated. If you go to Animations and
open the animation pane, you see the title and
subtitle are animated. On most of the slides, we have an image, we
have the title, and we have underlying text which explains the topic
that is presented. The presentation
was created with a template that PowerPoint
selected for us. There are a few Microsoft
templates that he automatically uses when we start creating a
new presentation. You can see most of the
slides look similar, so it's a great
starting point for you to start diving
into a topic. Once a presentation is ready, you can right click
layout and see what type of layout from this
presentation was created. It has used the
two content layout for most of the content slides. By going to home
opening designer, you can get variations
of this slide. If I, for example, click
on this variation, I right click layout, you can see it is still on
the two content layout. So this is the same layout. What PowerPoint did, it moved
the picture somewhere else. In this case, it made
the picture full screen. I moved the title
somewhere else, and it moved the
text somewhere else. You have a few different
types of slides that Microsoft designer can help you achieve with the
standard design here. Those are the basics
about Microsoft copilot, its capabilities, and
what it is creating. This is one way
Microsoft Co Pilot can help you to draft or
create a presentation.
79. 12-02. Copilot Narrative Builder in Microsoft PowerPoint: In this lecture,
I want to explain the Microsoft narrative
builder to you. A few months ago, Microsoft added the create a
presentation about feature. This is the Microsoft
narrative Builder. It starts with create
a presentation about, and I will continue
with the same topic, evolution of smartphones because I want to show you the
capabilities of this feature. This feature doesn't create
the presentation right away, but it starts with an outline. You can move things around
within this outline. You can delete existing topics or you can add topics
in between them. For example, you think that
for the smartphone history, tell me something
about the displays of phones and how they change. I would like this
topic to be included. Microsoft will
think for a while. I will add an outline, and now I can generate
my presentation. I'll select generate slides, and this presentation
will be a bit different because it will
start with a title slide, and it will have
an agenda slide. Then it will have
different sections. Each single section will start with one title
slide for the section. As you can see, PowerPoint
works really quick with that. So let us preview in a
second what he creates. This is one of the most
important features that have been added. Very soon, Microsoft wants to
add a feature where we can add individual slides and select different
layouts for them. Let us now preview
the presentation. As I said, it has the title. It has the agenda, and it
has titles for each section. All the sections
have three slides to have a standardized
design. And look. You can see we have
slides with pictures. Again, we can either select
a different layout for them. But since this presentation doesn't have a lot of layouts, we basically have only
this two content layout that looks promising. You can always use designer to change the design
a little bit, or you can, of course,
do some work yourself. This depends on the
template you use, but Microsoft is selecting
the template for us. Some of the slides are
created with a Smart art. You can use the Smart
art or I like to do, I like to group group
this smart art, so now I can move
individual objects a little easier because if this is a smart art and you resize this, everything else is
resized as well. Now, how does Microsoft
select which template to use? At first, Microsoft reads your prompt. It
creates the outline. Then it generates content, and at the last step, it selects the
appropriate layout. So if there is a lot of text and PowerPoint
needs a lot of space, he will select a
template that has enough space to fit
everything he wanted to say. There are many more
things you can do with copilot, like, for example, inserting a picture
or insert a slide about Let's say that I want to insert a slide about Sony Ericsson and I have
selected this slide. So PowerPoint will now
quickly create a slide about my desired topic and
insert it into a presentation. This is some basic
editing we are capable of and can do with
Microsoft copilot.
80. 12-03. Custom Template Usage with Copilot for PPT: In this lecture, I want to show you custom templates that can be used for Microsoft copilot
and what is the end result. This is a template I created. I selected a different font. I selected different colors, and I have a couple
of layouts that I know Microsoft copilot
will understand. I have a title slide,
an agenda slide, a section slide, some content slides and
conclusion slides. Now, if I this time
create a presentation, create a presentation about the rise of remote
work, for example. Since I have prepared
this template specifically to work well
with Microsoft copilot, because it has this title slide, it has the agenda slide. It has content slides, I am certain that this
presentation will look well. If you want to use
custom templates, it's a bit complicated
because copilot doesn't always know which layout
to select for which item. But if you name your
layout, specifically, title slide, agenda
Content and section, it will know that
it should start the section with
this type of slide, and it should showcase the
content on this type of slide. As you can see, this
presentation looks a little better than the stardard
basic PowerPoint template. What's even more important
that I can right click, select layout and change
from content to Content two. In one click, I
have the picture on the other side because this is how I designed this content. Microsoft Designer could
help me here as well. Based on the layouts
that I have, it will select one or the other layout and try
to make the best it can. But Microsoft Designer
will be a bit limited because it always takes a look at your layouts and it tries to select a different
layout for your slide. Those are the key and
most important things I wanted you to know about
Microsoft copilot. I will share this file
in the resources. You can use it for
whatever you want.
81. 12-04. Copilot Class: If you would like to know
more about Microsoft copilot, how to edit your presentations, how to use those
custom templates, and what he's capable of, I've created a separate
dedicated course about Microsoft copilot. It's not very long. It
is about 1 hour long, but this is the
place where I can share all the changes
about Microsoft copilot. Just go to this link.
I'll put the link to the course in the resource
file if you need it. Why do I have a separate course? Because I want all users of all my Power
Point courses have one place where they
will learn about Microsoft copilot because there will be updates to
Microsoft copilot. I cannot possibly upload those updates to every single PowerPoint
course that I have. This is while this will be the one master place to show you updates
about Microsoft copilot. The benefit of my course is that I'm on the Microsoft
Creators program, a dedicated program for a select few PowerPoint
users that can directly speak with the
Microsoft team and give direct feedback about co pilots
and PowerPoints features. I can also tell
you that I will be one of the first few people in the world to know about new and upcoming
co pilot features. And the moment
Microsoft allows it, I will be able to share
them within this course. If you need to learn more about Copilot, I
invite you there. For now, let us continue.
82. 13-01. Hidden Recording Tab: this section will be also something super amazing, because I want to basically teach you how to make explainer videos and how toe overall create videos with Power Point. Yes, it's possible it's possible to create courses to run your YouTube channel or create any type of content regarding video using only power point. At first, I would like to show you something which also knows every part on user does know about. It's not super important, but I want to get you to another level. So as we have our ribbon system here, we can right click on any option and customize the ribbon. And as you can see, I have already the developer tap here, which normally isn't here because we have a few additional taps here in Power Point. I like to draw tap order, recording that for the sake off this section, I want to utilize the recording tap. It's not super important. We can still find the options which we have in the recording tap somewhere around Power Point like in the slideshow, for example, the recording and here, If we look for those functions separately, not popular, let's for examples. Say we want to search for all and they are here. I'm not entirely sure that the older versions of Power Point also do have to step. But if you don't have it, it's not super important. I just wanted to show you that it's possible that Microsoft will now and in the future as something here and you might not even know about. For example, the draw type or the developer tap. No one even knows about that. So recording I've selected recording and a new tab has appeared, which is called Recording. What this tab does it aggregates older, well, approximately necessary functions which come close to a video creation. The most important here is the record slight show about which we will talk in a second. But the records slideshow is also to be found here. Record slideshow in the recording. Just as we have export the video, we can simply goto file export, create a video. So dysfunction is here. So as you can see, those functions can be found somewhere around power point. But if we open the recording type, we have everything in one place. This is how I wanted to start this section. I wanted to show you this tap and I want you toe localize the screen recording options again. I can guarantee that you will have this option because I'm using the newest Power Point version, PowerPoint 3 65 and some functions. Some options are added in the newest versions of Power Point. I have no way of looking into the older versions of Power Point because I don't use them anymore. So but I believe. But most off, the functions we confined here will definitely also be in their 2013 version and in the Power 20130.2016 for Mac version. The only problematic versions of Power Point are PowerPoint 2011 for Mac and those older like 2007 and 2010. For Windows. Those didn't have some functions. Like, for example, some don't have the former painter. Some don't have the eyedropper. When we said a color, some even I guess the Mac version doesn't have the selection pain. So this is often a problem. All right, back to the recording in the next lesson will start and explore our functions
83. 13-02. Screen Clipping: let me briefly explain the screen clipping to you. So in the recording tap, we have this screenshot in the background. I have two pages open. I have even at three pages open. But let's say that these are two active windows. If I go back to Power Point and I click on screen Shot, I have two options here. I can either quickly screenshot those those entire pages by clicking here, and I have a screen shot off this screen, which I have opened. And as you can see, well, it's kind of weird because it clips the entire page we have. So, in my opinion, the better option here is clicking on the recording, clicking on screen shot and clicking screen clipping. You will need to wait and their grace out, and now I can clip the part of the page. I would like like that you could say that this is a built in function and power point, but you can also do this differently, and I'll show you how in a second. So I have now a very clean screenshot in my power point slides. So I did clip the screen only to the amount I need. All right, So this is one way of doing this. If you don't have the recording tap and can't find a screenshot, please go here. Select more command. Select ball command and press s screenshot is very close here. I have screamed clipping like here, so you can very quickly find screen clipping and add it to your power point. This way, even if you don't have the recording tap, you should be able to access this option. What else can you do like this? Well, it's pretty obvious I can simply open this page and press print screen on my keyboard. I don't have to do anything else. I go back to Power Point. I can, for example, click a new slight and Cyprus Control V Control V brings me my entire screen. And then I can simply go to Former Crop. And as we did crop our photographs, I can crop it like that if you are creating some online content or are working constantly in pages and you want to pay screenshots, So PowerPoint gives you the tools to do so. If you don't have the tools, just press print screen on your keyboard and you condone easily. Copy and paste the screens inside of Power Point in one click. That's what I wanted to show you about the screenshot option. It's just a bit more convenient if we use those options instead of print screen, because we can exactly instantly clip the picture to our require size.
84. 13-03. Screen Recording: Okay, These are just appetizers. But power point now can also allow you to record a video of your screen. But be careful what I'm doing now. I'm recording the screen, for example, with a program called Fantasia, and you have many off screen capturing programs which are professionally equipped for that . This screener, according from Power Point, is a very simple screen recording. And as you can see, I can use audio. I can record my pointer. Let's say that I'll select the area which should be recorded. I hit record. PowerPoint is telling me how to do this, so I'm recording a video now. This will be a very simple and slow working video, and as I finish, I select my shift Windows key. Que and I have the video finished. I wouldn't recommend this as a basic tool to record your entire screen cast because, as I said, it's pretty low quality and screen recording software like, for example, I'm using here works way better way quicker that, as you can see if you only intend to have a few simple elements like you don't have, I have, for example, purchased contagion because I needed professionally with But if you are just starting out on YouTube or with content creation, you don't really need expensive software. You have power point. You have all the tools you can take screen shows. You can take simple screen recordings, and you can face them right into power Point. This video, as you can see, has video tools. We have the former, which will form of how it looks, and we have the playback, which will which will work with the playback options like it can be a bit faded in. We can start it automatically. We can insert some elements and what's very important? What I wanted to actually say you in this in this part of the presentation, this element is an animation. Remember about that, because we can go toe animations, open up the animation pain and look. That video should start playing. Will it? Oprah's Shift a five. You can see the video place automatically. It's kind of slow because it's low FPs, but it gets the job done. It works its place. I'll exit this light now, and you can see we have triggers. I have a quick trigger which will stop this video. So if I click on this video, it will stop. This is a simple animation. We already did Learn about triggers area, so you should know what's happening here. I can now immediately see trigger clicking. My mouth will trigger the stop. As you see your animations not only fades flies and so on. We have media animations so you can add a play, a pause and a stop animation, which is not an animation but command for this video. Let's say that you have no animation, so now the video would be inserted, but I would have to click play. But just a simple I can click on the video, and I can add a clay animation to it. Right now, the play information is happening on mouse click, and when I click my mouth, it starts to play for the entire 13 seconds. I wanted to start automatically, so I said, right click with previous, So a zero appears, and it starts as the first animation who the video starts playing. So as you can see, videos are not only possible to record in power point, but they have all the animation tools, a flight as any other object. So a video is basically an an animation in power point. Remember about that, because this is something very important, especially regarding what we will learn now.
85. 13-04. Recording Slide Show: now comes the absolutely most important function in this section. And that way I opened our previous presentation. We have this presentation preferred. We didn't at transitions, but we have transitioning on mouse click. We have all animations on those slight and I would like, for example, toe record my presentation. You will normally go to slideshow and click on record Slideshow. You, of course, know that we have also record slideshow here in the recording type. But let me select the standard function slideshow and work with record slideshow. I'm suiting up to full screen according because I want to show you all the possible functions. Let me go to the first slide and let me record my slideshow. Look what I have. Some students have reported to me that they do not have this entire option. Once again, there's nothing I can change about that I have powerful in 2016 from the office 3 65 subscription and it gives me this screen. Some of you don't have this black screen around and do not have the same options. If you have another power plant vision, just don't worry about that record slideshow should work similar I have really no settings . Apart from changing my microphone and my webcam and on the right bottom side, I can select if I want to sound be recorded. And if I want my my web come to be recorded currently, I'm using my webcam to record this video so I can't open it. Obviously. Okay, if you record your presentation, I, for example, start my recording. And this is serious business. This is basically how you create your animated videos, your explainer videos, which you will expert somewhere. You remember that we have innovations here. I can see my timer on the left side. We are already using this record slideshow option for a couple of seconds. As I click my mouse, our animations will simply play so I can click my mouth. I can explain and I can go forward. If it even needs more explaining like I have the first point. I have all my tools here. I can select a rat pointer. No, sorry, I can for example, do something like that. Do something like that and this will be recorded. This will be on the video. So sometimes you need your razor too. And you need to erase those air. 11 things, what you did. But currently I'm just proceeding with the animation. I'm explaining you this video and let's say that you've preferred super professional presentation. Who drilled like to upload to YouTube? You are recording your slide show. You are going on going on going on your recording since I had my microphone opened. Everything is there right now. Recording. Okay, let's say that I want to stop it. This light. Let me take a breeder. Let me take a small breath by hitting pause. All right. I could have a few seconds for myself, which wouldn't be recorded. I can then continue the recording. And if I finish everything, I simply take my mouth and I select Stop the recording. Currently, Power Point is taking the recording and power point Did make a sound file out of that. Let me exit this tab And look what happened on the first light. We have my recording. On the second slide, we have my recording and on the next flight we have my recording. We stopped about here. Right. Okay. So still, we have the recording here, but here we don't have it. What's the amazing part that I wanted to show you with this recording. Look, for example, at slight one, I was explaining this light. I have this recording and in the transitions tab, Power Point has automatically said how long this light should take. And this is super relevant when it comes to video. I have made my recording for, for example, for six seconds here. So after those six seconds Moon, this light goes forward. Why is that important? It's very important because I want to export this to video power Point. I'll explain video exporting in a second with Power Point will use those timings to determine how long the video should be. And you probably can imagine that. What is that? This is just another object as this is just as videos, sound files have their playback options and they are simple animations. Go to the animation pain. Look at that At the very beginning of this slide, the first animation is this sound. So Power Point is just saving us time because it takes the sound file. It records it, and it is putting the sound file as the first animation since this is the first animation this light will start with my talking. I don't want toe overlap there talking right now, and I have my speakers set to zero volume so we don't her anything, but they are recorded. Everything works. We can even mute or loud in the sound, depending on how you want the video to turn out. So that's why I was telling you that the record slideshow is super ultra important when it comes to video creation. This is the most important lesson in this section and let me build up on that and show you have few things more.
86. 13-05. Links and Actions: all right, since I'm teaching you how to create online videos with help of power points when we go to the beginning off our presentation, like, for example here and we have our insert step here we have our link and action buttons and in my opinion, they are very important, especially when you are a content creator and create something with videos are and overall with such things. Let me maybe select a slight number tree. And this is one object. Just imagine if this would not be a picture and for example, the first picture will be go to slight five go to slight seven go to slight nine. Why not do so on group? I have four only pictures. Now go to slide five. This is just an example which I want to show you. I'll click on that and I can link. I can insert a link to an existing website on the web. I can make a link to a place in this very document which I want to do. In this case, I just wanted to show you how links work, but I can link to a YouTube video to your website to your Google account or toe anything. You want people to go by clicking here if you want to make your elements interactive or or just make those slide shows kind of work for you. If you are explaining something, for example, you have your own links here and you would like to quickly show people if you want, I can show you my website or where I got this information from. Boom! You click. You go Placing this document in this case I would like to go to slight five by clicking on this object. Okay, shift a five to show you I have this light. Everything works as it did work previously. But as I hover my mouse here this is one big link click boom and I'm on slide five. That's pretty beautiful. Let me go back here. Go to slight seven. Yeah, go to us Life. I don't care. It can It can states life. What I also wanted to show you is not linked, but action. I believe action is even more amazing because it's again triggering the presentation. It's not about being triggered is about triggering certain actions within this slight. Let me take connection. Look what we got here and your quest with me to run through this and select every object and just select what you can. You can select elements on mouse click, which would be basically a link click or on mouth over, which is even more amazing. Action Almost over. Hyperlink to slide number seven I own slight number seven so I can select slide you Earl and show custom show last life. It's super amazing that we can do so many actions with dysfunction. I want to slide and I want the slight to be seven. Right. Okay, slight seven. Okay, Run! Program Run, macro! Object Play sound Well, this gets a bit more advanced. But basically those hyperlinks are super amazing. Now shifted five. If I just come close with my mouse here boom, It automatically takes me instantly to slight number seven. How amazing is that that we can make our presentations? Are videos so interactive and work for us? This is for us, for content creators, all the possibilities because we can Yeah, of course. We can also sell Exume. But this is a function which only the newest power 0.3 65 version has I maybe will record another lesson about that, because zooming option is something completely new and you can drag and drop a slight here , and this light will be available to click here. Booth, that's something something new. And I can, of course, explain that to you. But this will be for another last. Here. I want to teach you about links about actions and the zone. Feature the news and feature if you have it. If you have the office 3 65 subscription, it will appear here as well in the length section. So this is it when it comes to those beautiful options which will really help us content creators to create videos straight out of power point going, play around used boat, the links and the action on any off the items in the presentation.
87. 13-06. The Zoom. Not There Yet: okay, Since I did show you a sneak preview off how the zoom option works, I have to continue and explain it to you. But I do not like to explain things which are not available to everyone. And this time, this function, as far as I know, until now. And it's late 2017 is not even available for power 0.2016 users only the power 0.3 65 subscribers have this option and they didn't properly inform about that. They made a video under YouTube channel somewhere that the zoom option appeared. And I basically randomly hear us a pop up box that, hey, it's a new zone feature. But this is a totally great feature, which should be maybe more deeply explained and showcase. Okay, let me select a simple slide or I even will create a new slight. Now, as you saw as I direct, my slight here in it was available here. I can drag and drop slight right away, and they will be clickable links. This is good, for example, to create a slight wage which has all the slides, and you want to quickly browse between them and you have quick links to those slight. You can also change the image, which is this late here, like I could, for example, right click change image. I could, for example, changed the visuals here so it isn't displaying this. It should display for examples like one. It's like to fly tree and those will be clickable links. What else do we have? You can see I did sections here and sections are very simple. You just read, click and create New section because I wanted to distinguish between the portfolio slide, our staff slide, the timeline slides and the zoom feature can link us to sections. Look at that. We have a summer resume, we have a section zoom and we have a slide zoo. The slides, um, is something you already know. We just select a slide, and we put it here. The summer resume is a few connected slights. For example, let me summarize quickly what I want to show you. I just wanted to show you the first, the middle slight and I can slide insert, and this would be a new summary slide. It could be at the beginning of the presentation or at the end of the presentation and this would work like that. I can click on those very slight boom. And the problem here is that I need to use a shortcut, which is shift and left click to go back so I can click here and I can click left to go back to those slides. That's super beautiful, because I can very quickly navigate through the slights. I have my normal animations, but as the slight finishes it continues the presentation. That's a bit of a problem. So I need to press shift. I need to press left to go back to the place I were. This is the last light, so it will progress naturally. Here. This is your shift. Click left and I can go back. Okay. The last feature I wanted to show you would be the summary, not the summary. It was the section. It's pretty obvious you just select the sections, which or this is now a new section summary section Power point automatically addis it. But I want the sections that I already had in this presentation. Insert. Look at that. Totally weird. We have six sections. They are completely weird inserted here. I wouldn't even know that these are sections that delete the background and those are normal. Clickable, slight. This will be good if you have a presentation and you want to quickly jump to the presentation Or do you have any questions to me? If you would be my audience? Yes. I would like to ask you a question about the portfolio. Slight. No problem. Wait a second. Let me go here. What questions do you have about this light? And I can simply navigate through it. And as you can see, the presentation is progressing. And if I am finishing explaining this to you, I need to press shift left to go back to the state. I work. You probably remember when we had questions in our presentations. And someone asked you at the beginning of the presentation and you were like, Wait a second. Wait a second. I need to go there. Which light are you asking about? This life? Right. Shift the five. Okay. What were you asking about? This is unprofessional. This takes time. So I would recommend using links, or I will recommend you using the zoom feature if you have it. I don't want toe explain more about that because there's nothing more to explain. This is a very beautiful feature, but in my opinion it's not yet properly implemented into the power point workflow. I'm explained this because I want you to be the best possible and professional power plant user there is. So you need to know about that. You need to be aware that such a feature is around and maybe in the future it will be a normal study work for to do this. But currently I wouldn't call this a super standard feature that everyone has everyone uses , especially the older versions of Power Point and from my experience, even it's 10 years later. People still use power 100.2007. So definitely it will take a lot of years around off time until this feature will be a standard. We can make it s standard if we will use it and implement in our presentation. But kind of we are not everyone else, and everyone else doesn't know about that. I don't want to overdo it here. Let's leave it like that. Let me continue with the section because I want to show you how to finally create a video out of the the elements that we all put together. And then I'll show you a study workflow how to create your content easily in power. I hope this lesson was also very fun and informative for you. I was just talking. But you don't have to do any quest here because the quest is obvious using the zoom function. But if you don't have it, then sorry, I can't do anything about that.
88. 13-07. Exporting with Create a Video: Hey, you know, finally, a simpler and more pleasant lesson about creating a video. Creating a video is very simple and power point once I have everything, especially the timings, because the timings in our transition tap is very important. But let's say that you were either Let me go to slighter either recording your slideshow or rehearsing your timing's. Creating a video is very important and easy. In the recording tap. We have your export to video. I have it added here because I believe this is a very important function and I have a dead file export and create a video power 0.2013 had only this option. 12 80 by 7 20 in my opinion, that's this. Quality is not good enough for current standards. Luckily, Power 0.2016 is now updated and has now 9 20 by 10 80 which is full HD and perfect for YouTube for publishing videos for producing content for creating videos for our clients fully, Judy is good enough, and I am very happy that Power point did the site to put this resolution natively in their exporting feature. The exporting is very simple. We export either toe MP for or W M. V. File. Of course, the MP four is the golden standard. And look at that how important it was that we had our timing's use record the timing generations don't use recorded timing. Generations second spent on each light. Five seconds. How would this video look when each light would have five seconds? Well, it would be good to show you the presentation just how it looks, But it wouldn't be any good if you would like to read, to listen and to to take something out off this video. Really? And the vesting here is off course. I will select use, recorded timing and narrations because I have recorded my timing's. I have recorded my sound. I have prepared everything. Toby exported the video. I have beautiful animations. I have nothing to be ashamed off. I would create this video by clicking here, and this is just a simple exporting. And before our W M V presentation itself animated, this is how my presentation is cold. I would press safe and on the bottom it's creating the video, so basically it is now rendering your presentation. It's pretty quick. As far as rendering goes. So Power Point is a very efficient and easy tool. Bear in mind that this will be not the highest possible quality in the world when it comes to creating videos. It's not 60 FPs for K quality super sharp video. It's 25 frames. As far as I know, it's a normal, simple export, but it's still very beautiful. And this is a good way off, creating videos and content and power point in the upcoming lesson. I would like to show you the process. For example, we will take a few slides, will record the slides, and then I'll export ready video. And this video could be exactly ready to publish on YouTube or anywhere else. This will be a practical example.
89. 13-08. How to make a Complete Online Video: Okay, Hands on real power point video creation. Now I will select maybe the two nicest sliced We have the very beautiful people's light. Our staff with shift click. I'll select boats. Lives help wrest control C and create a completely new video of them. Let me press file new and select a new presentation. Let me place it properly. Just cultural V. Because I want votes Lights here. And those lights are very similar. So had me maybe quickly changed the color off those. So I'll know what's happening here for Mitt Object. It was the fill, right? The Grady infill. Okay, let me selected to be a bit more red. That's perfectly enough. I just wanted to have a possibility of distinguishing those videos. All right, I'm prepared for the recording, recording or slideshow and hit record slideshow. Currently, we have after zero seconds, no transitions are recorded. I don't video to take about one minute or 40 seconds. I don't know. We'll see how this will turn out. And what you need to remember. The first animation press shifted five. The first animation will happen automatically, so I need to bear in mind that she will be visible instantly. Slight show records, slight show. We don't see it on the screen. I'll hit record and I'm preparing for my super first recording. You don't see it, but the first animation has already happened. Well, it happens that this is the part of the recording, but the first animation she is already being revealed. This is a power point error which the Microsoft developers should know about because the recording is very important. And as I keep my mouth instantly, he's being revealed. I didn't notice that she was revealed, but I know. Yes, they're recording, and Power Point has an error. She was previously already visible because the first animation happens automatically. Okay, I'm blabbing around. I can even write something, but I don't really want to. I want it to these. Introduce Tom to you. Penelope is also a part of our staff, and she's super effective at working at what she works on. I complete You don't know what she does. Okay, let me proceed to the next light. The next light could be explained just as this like before I'm blabbing away and I can reveal those people with those super clicks. If you did like my content and the way I thought this tutorial, you can always subscribe to my channel for more. I am enjoying to create those videos. So I hope they are as well beneficial to you. And thank you very much for listening and for staying tuned until the end. See you in the next video. Bam! I would know. Stop the recording press. Stop. Let's say that this is a good take. I am a least assuming that I'll close my recording. You can see Boom! 40 seconds. It's a bit more than I wanted here. 50 seconds? Yeah. And this is when you are creating one minute videos, they turn out to minutes and you're blabbing around without an unnecessary information. I can always go to play back. I can trim the video and I can say to myself, Sorry. This video was supposed to be one minute long. I will cut down the last 30 seconds which will in this Kate make it will make no sense. Okay, 30 seconds. The problem will be the transition transition. After 30 seconds, no more nor less. The same goes for the second slight. The limit was 30. I want to be super precise here. Okay, 39. Let it be her tonight. Playback trim audio. I'll trim the audio 39. No matter if I cut myself into speaking and that's it. I have two slides. One minute and 10 seconds. File export. Create a video and we see each other in a second when the video is rendered. All right. It was rendered in no time. We have a ready video. I can click on the presentation, and the completely prepared video is here. Okay, I will make this not as loud. We have the video, and after the 40 seconds, I am cut down. And the problem is that I was still recording about that. And I did click on those pictures a bit until I proceeded. So it takes the fully 50 seconds to play now the next light boom. But basically, we did create a video from scratch in Power Point we did use to slight. He did record are sound. I can still recommend you to use third party software to record your screen to record your videos to record your sound. Because PowerPoint isn't the most powerful sound recording device or video exporting program. But as you can see something like that, if you are starting out, can be done. You can make explain your videos. You can make simple bullet point videos or informational slides. If this will be connected with well done designed, then I am ready to watch your videos. The problem with people who own these par point is that they make simple text slides. They make just bullet points is informations, and the design part is completely flat, completely left out. Just simple, simple designs that place their logo and it's ready. In this course. I did teach you a lot of design, a lot of ideas and practical appliance off those lights, so I hope you will follow those guides. Follow those rules and we can still continue on other designs as I'll add new lessons here . But for now, this is the topic off recording lessons in Power Point, and I hope this is super enjoyable for you.
90. 14-01. Looping Video Background: hater. If we are going to talk about video at first, you need to learn how to make a playing video background. Now, in my resource is I have a few looping videos and a few normal videos. I'll select any off the looping videos. Let's, for example, use their bloodstream. All right, I want to position it in the middle of the slide. Okay, now we have this video exactly in the middle of the slide in this video. What's cool about it? That it looks. Which means that if the video ends and it starts, you don't even see that because it is a loop ical video. Okay, you can find those on Google or you can purchase videos like that. You just type in Lupul video. Okay, how to make them play properly. Please go to animations and open up the animation pain so we see what is going on by default. If we enter a video, PowerPoint will set it to play on click and stop on Click. But actually, I would like this video only to play automatically so I'll delete. Vote off those Imation's here. I'll click on the video and I'll click play Okay? Right now, it would play when I click my mouth, but I would like right click to play with previous. So I have a little zero here. And if I played a slight, this video will play. Let me preview that. I'll even show you with my mouth. Okay. The video slowly is The video has nine seconds or about 10 seconds. So let me wait. Okay? And you see the first problem. It doesn't look. So where is the mistake? Click on the video. And the next thing you need to set properly is the playback options. When we go to the playback auctions, we have the video options available. Yes, it is starting automatically, but we also have to set loop until stop. This is a very important feature. Okay, Perfect. Now this video would play and play and play, and you need to keep something in mind on those light. You can place anything you want. For example, I will take the element from our original presentation. I'll place them in the middle of the screen and they will work. You just need to be aware that if I added something here, I replace it. I work with the iPhone. Sometimes you can click by accident on this background because this is a big item in the background off your presentation. Now, actually, this looks very cool. I really like this. I'll play this presentation at five. Totally amazing. A video like that in Power Point. And this video is playing. And soon it will loop and play from the beginning where we saw this brief stop. This is because PowerPoint needs to render for quarter a second and that it plays the video again and again. You can very seat right now. You didn't see it because my computer already has that in his memory that it should replay this video. This is it. When it comes to creating Lubell videos and Power Point, you only have to set two options. You need to make the animation start with previous you need to go to the playback options and remember to set loop until stopped
91. 14-02. Playing and Advancing Multiple Videos: Okay, let me go. One step forward. Let's say that I have my looping background already here, and I want to videos to play on this video on the left side and on the right side. Kind of like a YouTube ultra or something like that. I will go to my example videos, and I'll simply take two videos into the design. At first I need to make those videos smaller. Okay. Like that. And this one as well. I would like them to be the same size. Okay. Perfect. Now I have two videos here. At first, I would like to make them simply play automatically. For that, I'll go to animations and I'll click on play. This will automatically override all the animations I can no right click and select with previous I will delay them a bit. And now you need to remember what is happening. This video in the background is looping. Those videos would only play ones and they would stop. So you need toe very carefully. Take that into consideration If you want to play them automatically If you want to play them by clicking on them, it all depends on what you actually want to do in this video. Okay? I had to change the video, but both off those I press shift a five to start. From this slide both off. Those videos will start to play. After a few seconds. They will not loop. One has stopped. The second has already stopped. And if this would be a presentation, this would be okay, because I can click on it and this video will repeat. What if this would be a video for you to pour something like that? I would rather want of videos. I would click on them. I would click on playback, and I would perhaps loop them until they are stopped. Because it depends how long you won't dislike to play. Then I would go to transitions. I would transition to slide after a few seconds and everything would be OK. Let me select a new slight here just for example, and let me see if everything will work. Now you can imagine another problem. And this is something I can you know. Tell me, why did it take more than five seconds? Toe advance to the next light? I've already talked about this animations come first animations are higher in the hierarchy when it comes to power point, so animations need to finish, and then the transitions can kick in there. Five seconds have passed about here in the middle of the video, but the slight could not advance until this video stops playing, because this is the entire animation, and this is another problem. I know with videos that they have only display button here, but actually we need to remember how long they are. This video is eight seconds long. This video is nine seconds long, so I need to bear in mind that until this time passes so 9.4 seconds and an additional delay, which I said, I said 0 75 delay. So it's about, well, 10 11 seconds before this time passes, the slight will not advance to the next light, no matter what options we have. This is something to keep in mind when working with videos in Power Point
92. 14-03. Changes you can make to videos: Okay, this was maybe come on, knowledge. You probably know that you can add videos. You can add videos, inter videos and render them together like I did here. But did you know that this video is an object like every other object? Let me do something cool here, which rarely anyone does. Let me go to the former window. And now I can explore a few options. You can see I have those basic design options for videos and for pictures. Well, they are not the worst, but the more advanced, the intense they are called here. Intense are the little three D options and they start to make this video really cool. Let's, for example, select canvas like that and what's cool about this? I'll close the animations because this is not my focus in this lesson. I can right click on it. I can select former video, and I have all the sizes and proportions available here so I can go to the size and properties to the size to the position. Not only can I change the position, I can also change the rotation on this item. Let me go to the effect and we have the three d former and three rotation. Those effects, those skewed effects are related to treaty. And you can see we can adjust the bevel. We can adjust the depth we can adjust the material on. Which is, it said it means the sites here with I love the rotation. The rotation is completely awesome because it creates a very unique effect when it comes to designing and power point. How often do you see videos like that on youth, for example? I want to up the perspective a little bit. I would like to take the home, form a painter and paint this form it over. I would just like to turn this insight. So let me change this. I can also use those buttons. I will change this video. All right. And look at that. I have two amazing videos right here. And this is something completely unique. I can even go higher than that. You could click on this video in the normal form attempt. You can do this here, but you can also do this on the four month and home tab. It depends on how do you like to work? You also have the solid light. Let's maybe create something. Red room. We have a red line here. You could make this bigger to create a completely unique effect. You could select ingredient line. You could do a different Grady in, which would be, well, maybe more connected with those colors, which we already have in this video. Let me select with the eyedropper something like that. And look how cool that becomes. Not only that, not only those borders are cool, but you can do every other affect the rays you can go to effect. You can go to shadow. You can also make the shadow red just to make it a tiny bit more, more crazy, more advanced. Now I'm giving it too much options, but I'll go back to the shadow and I blurred the shadow you can see here in the background . It's barely visible because this comes in place, so you need to keep in mind and you have those all those presets. All those effects are available. You can simply click on the preset. Then you change the color of the preset and you get something completely different. I'll close the shadows and maybe I'll go to reflections. You can select a reflection and you can train the sizes here off the reflection. But this is too much of options. You can change the girl or the glories or so cool. You could select a big, big clothes. You could make this glow red and look at that. We would have a shadow, a reflection, a glow. And something like that is very rarely to see, especially in PowerPoint. Now, helpers shift a five and look at that. Those videos are still normal videos. They still play normally. Would you have completely different boxes? This looks like a high quality TV would be set here. Well, I don't really like what I did on this object. The border is too crazy, but I just wanted to show you the possibilities that those are not only animations and power point, but these are simple objects. They're not in different than a normal walks. A normal box can be given a new call or you can go to the shape effect. You connect those effects glow reflection, shadow. But you can do the same on this object. You click here, you go to its former. You have the video effect. You have a shadow. The reflection glow the soft edges. Well, the soft. I just make it a bit blurry on the outskirts of this video. It isn't so cool, but it's all possible. You can access this boat here in the former tap or on the right side of the video, and it works really well.
93. 14-04. Placing Videos into Mockups: for this lesson, I revert a couple off more cups. Now, you may think that this is irrelevant. What I teach you here. But how could we place a video inside those boxes there A couple of ways we can do this. These are normal images which are imported into Power Point. You can find more cops like that on the Web. You can download them and you can place them in your presentation on an any off your works . How could I placed a video here? I would take my video, for example, my rocks and there would be a couple of ways how I can do this. At first, I would make the video a bit smaller. I would, of course, turn it over so it looks a bit better inside the screen. Then I would click on it. I'd click on crop. I would try to crop it just a little bit. So it aligns a bit better crop. I could eventually go toe right click former video. I was close everything, and I would select my effects tab under effects that you have all the options here and you can select treaty rotation and you can for example, rotate the video a little bit, so it will look better on the computer screen the other way around. Look at that now. Well, it's not perfect, but at least it looks fairly decent of it's cute. So at least it's a bit aligned with the video screen. Maybe I turned that aside and I'll show you another trick, which I often use if I want to do a markup. I press old to to create a shape. I press a rectangle, and I placed the rectangle here. Since my shape options are already opened, let me close the line. I owned the transparency. I'll come closer now. I have this here and I'll try to align all the corners. This is very simple, because on shapes I can right click and I can select edit points. Now I'll place this point here, this point here and the last point here. Beautiful. What you can do now you can click on the image you can with the shift key. Click on the new object we preferred. And on the former tab you have merged shapes. I will simply subtract. Um so now this video is empty insight. You can see that. And this is a perfect set up because now I can take the video. I can right click on the video and I can send it to back boom playing video within the laptop. Now how do we crop it? It's a matter off a few adjustments, but remember, you can always click on the video right click former video, and here you have the effect options. Sometimes if you open several boxes at once, it's hard to find. What do you need to edit, so always, always close everything. Now it's easier to find. Okay, I wanted the treaty rotation. I'm watching the video. I'll rotate until I see. All right, this looks good. Then I would go to animations in this part. You are already familiar with it. You go to the animation pain instead of those animations you click on play. If you want this to be looped, you goto playback and you loop it until stopped. And if I would like to selected to be bigger, I would select everything. I would press control G. And with my shift key, I would make it this entire design bigger, so it still covers my slide. Once I have the size and the animations, I would press shift a five, and I would have a playing video background in the back off this laptop cool technique. Something useful to know about. And I hope this lesson they teach you a a lot of useful power point tricks. And just by the way, you can do the same on the phone. You could make phone. You could make the video play inside of it because I've cut out the middle of the phone. Looks very cool, completely unique. And no one would believe that we did this only using power point.
94. 15-01. Kiosk Presentation - What is that: Hello and welcome in this little section where we'll talk about a kiosk presentation. What is a kiosk style and type of presentation? Basically, this is something which you see in shops in little mark herds. When you wait in some que basically everywhere when the video repeats itself, this could be a video, but this can be just as well Kiosk style presentation. Now this plate straight from power point. And this presentation repeats itself until I stop it. If I would have a display and I would like that the video behind me would be rolling over and over and over again, I could use Power point and I could set the presentation to be a kiosk type of presentation . You can say that you can do the same with video. Just you'd take a video and you loop the video or you just repeat the video. Yes, of course. But I will soon explain the pros and cons of using video versus using the kiosks type presentation. I want to show you the features that come with power point that allow us to do so. What problems you may face when you create us. Basically, there will be no problems if we set it up properly. These are the basics about a kiosk style presentation. Now, I would like to go in depth and explain you when and where and how does that everything up to work properly and how to make something like that out of the presentation you already have out of a template or any project you have prepared and you would like to repeat itself on one of your monitors.
95. 15-02. Problems with Transitions: Okay, Awesome. We already know what a kiosk presentation is and we have our entire presentation ready. We have some animations here as I go to the animation tap and open of the animation pain I see we have some animations. Let's just copy a few slides 123 and create a kiosk style presentation out of it. Now let's say that this will be a product. I would select your my product. It's features and here, a contact page. Contact me if you want to know more about this product, and this would go over and over and over again. In this lesson, I want to show you how to set up a Q s presentation and what problems do arise when we use transitions. And this is very important. Accuse presentation is very simple to set up. You only hit slideshow. You select set up slide show. You click here and look at that. You have three options option number tree browsed at a kiosk full screen. You just select that and automatically the loop continuously until escape is selected and we select on which monitor it should play. I have only one monitor of connected so Obviously this will be my primary monitor. And here comes the first cool feature. We can downscale it toe any resolution we want. Obviously it will run smoother on slower machines and it depends on the display. You are displaying it. If you have a video, for example, at your shop. And this this monitor doesn't have full HD size, so it doesn't have this resolution. But its native resolution is 13 60 by 768 You could select this and it would automatically downscale the presentation to this resolution. In my case, I don't have to do this, so I will select the full HD. All right, now, what problems do we have? We need to consider both the transitions and the animations tab, and I'll explain you everything in the transition step. This will not work until you place after. If it's set to mouse click, let me show you Shift a five. This is my keys presentation. Basically, it stands in place. What's even worse? I can click. I can click on my keyboard. Nothing happens. So unless you don't use the transition step and you don't select after you can select after a certain amount of seconds or after zero. It doesn't really matter. It depends on how do you want it? I would like this light to go forward after four seconds. Then the next light again. After four seconds, we have another problem here and the last light. Also after a few seconds. But I just wanted to show you this first example. Now, as I play this light well, the first animation isn't playing. But you can see this slight finally goes forward. The next light also was forced to go forward after four seconds. Even the animations didn't play out. And this is the another difference. The key is presentation forces the transition hard. It doesn't even mind the animations. But we have to somehow deal with that. You can see here we have another problem. But this will be explained in the next lesson.
96. 15-03. Problems with Animations: all right, going forward with the queues presentation. Not only do we have problems with transitions because we have to select after, but we also have problems with animations. If animations are set toe on click, they will not proceed properly unless we have to. After selected here, I have after three seconds, and this is far too quick. As you can see, it doesn't even have time to complete all those innovations, so I would have to select, like after six or seven seconds. Now everything would have time to play out. What we witness here is that the animation isn't progressing when the animations are set to on click. So just to be sure, if you set up a presentation with the kiosk style, you basically do not want to use on click animations. Yes, of course, I can select like give it 10 seconds and it will have time to play out and it will play. And after those 10 seconds, the animation will proceed forward. But it would be a bit easier for us if we do not use those on click animations, because they will happen automatically. If you want full control over what's happening the most proper way to set up a kiosk presentation would be to select those animations, for example, instead of on a click. I will select everything, and I will select start after previous, because I wanted to spread them out of it. Once a new group starts, I want to go to animations and said the delay. 123 123 Look at that. I have that number. She's until here. Start 8.1 and you can. You cannot see this because this goes above the screen. And 8.6, all those animations will take 8.6 seconds to play out. So if I go to transitions and I have 10 seconds here, I'm completely sure that all animations will play out. But I want to leave people I would dislike for a few seconds. I want them to have time to read it. So in order to make everything properly, I would select 15 seconds this way. I'm sure that both the transitions and the animations are properly set up. Yes, of course, you can skip this step, but in my opinion, this is the more professional way to go about this. Because you have more control over what's happening now, this entire slight with play in my Q X type presentation, I would hide my mouth and I could be secure that after 15 seconds, this slight will disappear and it will go forward to the next light. Now this kiosk presentation is almost perfectly set up because everything is progressing automatically. I don't have to hit anything. I don't have to click. I don't have to wait. Everything happens automatically and the presentation place properly over and over again. I'll compare it to a video in the next lesson because this is also something very important for you to understand in case you plan to use those types of presentations.
97. 15-04. Kiosk vs Video Exporting: you could ask me, Why would you use a kiosk style presentation or a kiosk style showcase instead of just exporting this entire designed to video and using the video? There are several up sites and downsides when using a video. This is a power Point presentation. I can hit a five, and this kiosks type presentation will play immediately. I don't need to render it. I don't need to prepare anything. And if I want any change really entertained, for example, I think all this Texas appearing too quickly and this one is disappearing also too quickly . No problem. I go into the animation. I give it more duration. I give it moderation. I go to transitions and I make it a bit longer. Boom. Five place again. But when I exported to video, I need toe always export it. I need to always preview it, and it isn't even that great. For example, this is just an example. For example, this is their presentation exported his video. I have to loop Set. This is in Polish loop off Virginia means repeating. So if this video place and this depends on my video player, the video player shows its logo in the middle. Yes, of course, you can find a video player, which doesn't do this. But if if you have the opportunity to use power point behind you, then I would prefer to use Power Point. If I have it on a separate computer or on a laptop or in your work or in on the university , where you do not have your power point behind you, then you can export it to a video, obviously, because a video only requires Codex to play and you can double click and you can play the video anywhere you want. While with the presentation, it will be a a tiny bit more problematic. So now you know my opinion about that. And one more thing would you can do eventually. If you don't want toe waste your time rendering video product, you can always select file safe as you can browse, and there's another option. You can save it as a Where is it apartment show, which is another extension and yeah, here we have it. Power Point show is something very similar to a Q s presentation, and this is also an option which not everyone uses, but it is possible to use it. You just safe a show. If you remember to select this option, Luke continuously until escape. Even if you save the show, it will repeat itself. So this is a very quick way off exporting a video. So this will be the perfect compromise between exporting a video and using power point straight away to play the presentation. And it's basically a Power Point presentation that you do not have those old off editing options. It doesn't open power point. It opens only the preview window, and it starts playing. These are the upsides. Pros and cons When it comes to using video versus using a Q S presentation now, both are viable Both our options. You can, of course, use, but depending on the situation you're in and your capabilities if you have power point at your service or if you do not have power point installed on the computer, you want to play it. This will be the decision between using a video and using the presentation straight away
98. 15-05. How to Set it Up Properly: All right. This lecture is here. Toe. Reinforce everything you did. Learn about chaos. Presentations. If you would open Power point and you would like to quickly create accuse presentation If you have your designs prepared, let me quickly recap how to do this. I would take my designs, I would go toe slideshow, set up slideshow, and I would make sure that the third option is selected especially important here, Luke, continuously until esque until escape. So this is the most important option. When it comes to the chaos presentation, you select a resolution, you want the video to play in. It can even be a low one. But I would most likely stay with the native one, depending on what monetary use I would select. Okay, Then I would make sure that I make Guti's off transitions and animations. The most important here is to have, after a certain amount of seconds, selected in the transitions that I would just quickly go over each slide after after it selected on each light. So everything is preferred properly in order to to know that this is enough time. One you have to preview it to you have to make sure that the animations have enough time to play off course. Not only animations count. If you want people to actually read what you have here, you need to give them a bit more time. You can simply test and practices while working in powerful. You just preview you expressed a five. You see this light anyway, and you think about. If you did give people enough time, I will also go to animations. Open the animation pain and I repeat the steps. I'll select the first light, the second slide start half a second and 1.5 right click. Make it after previous. Give it a bit time. Take the next one. Give it a bit time. This will be the textbooks or the Aiken's, and it's easier to read if you have all animations after previous or with prove years instead of on a pick. Five seconds. Six seconds is the end of the animations. How long do we have for this slide? Take the second slight 10 seconds. Perfect. Maybe let's give people enough time, so people have six seconds after that to check everything out. Proceed to the next light boom boom boom animations as long as about 8.5 seconds. Transitions. 15 seconds. Playtime. No problem. Perfect five. Congratulations. You're kiosk. Presentation is set up. This is how you properly go about this. I hope this was helpful because those kiosk presentations from time to time make it useful . Okay, thank you very much for watching this tutorial. I hope this section was useful for you and see you in other sections.
99. BONUS 1. Reduce Presentation File Size: Let me show you a quality of life improvement and reduce the file size of this presentation by reducing the size of the pictures. This presentation has eight megabytes of size with only two simple frames. What we have here, our custom fonts and big pictures. If you have a lot of pictures in your presentation and they might be high-quality. You can click on a picture, go to picture format. And if you know that you will not use them anymore, not repositioned and anymore, you can go to compress pictures. You can select already selected, depending if you want to apply this options to the entire presentation, or if you want to apply it only to this picture, I want to apply this the entire presentation with one click. And I also want to delete my cropped areas of pictures. I want the picture quality not to be too low, so I'll stay at 150 PPI, which is still a very good quality. You barely, we'll be able to notice the difference algebras, okay? This option has been applied to the entire presentation, which is two, those two pictures. If I save this presentation, the file size will be considerably reduced. You can see from eight megabytes, we went onto one megabyte. Another little thing is Fonts take up a lot of space if they are embedded in your presentation. Even if you have those fonts installed on your PC, you need to make sure that if you know that you have those funds, just go to File Options. And someone who share this presentation with you might embedded the fonts and the file. If you do not need Embedding because you know that you have those fonts on your PC. You just deselect this. You press OK. You save it again. You check the file size and it will be again, considerably reduced. How to know if you have those funds are not well, you need to know the funds you have on your system. Then you simply go to home, replace, opened the drop-down, replace fonts, and just check what fonts are included in this presentation. By default, PowerPoint uses Calibri, but in this presentation I used chunk five and doses either this, so I know that I have those funds. So I do not need embedding into this file because if I open this file on my PC, that funds will be perfectly well displayed because I have them. Those will be two simple tricks to reduce your presentation size. I hope this is a very helpful and it is little quick tip will reduce your presentation sizes.
100. Thank You!: This was so much fun. Thank you so much for working through this course with me and for creating the presentation . I hope you did it. You did create the presentation and you did create those animations. I would very much appreciate. If you'd like to share a positive review for this course for me, This will help me as an instructor here on the platform. And this is a way off knowing that I did a good job. Hopefully I did. I do want to teach you as much as possible about Power point as I can. If there is anything unclear, you can quickly go to the Q and a section. You can ask the question and I will try to answer it right away. As good as I can. There's nothing else left for me to say. Then congratulations on arriving at this point and thank you 100 million times for spending the time in learning with me. That's a great feeling. And if you'd like, I have plenty off other power point and after effects courses which you could explore and learn with me. I hope this would be something for you. I can't wait to meet with you another time and see you in other tutorials.
 Andrew Pach ⭐, PowerPoint, Animation & Video Expert