Transcripts
1. Soft Monochromatic Leaves - Class Introduction: Hello everyone. I'm thin Bihar. And for this class I'm gonna
teach you how to paint sock monochromatic house
lands in watercolor. This class is intended
for beginners, as we will be focusing on mastering a single
watercolor technique, which is a graded
wash technique. Don't worry as this
glass won't involve any color mixing or any
complex painting that this basic watercolor technique will allow you to
create smoothly transitioned reagents
that will help you achieve a stuff effect
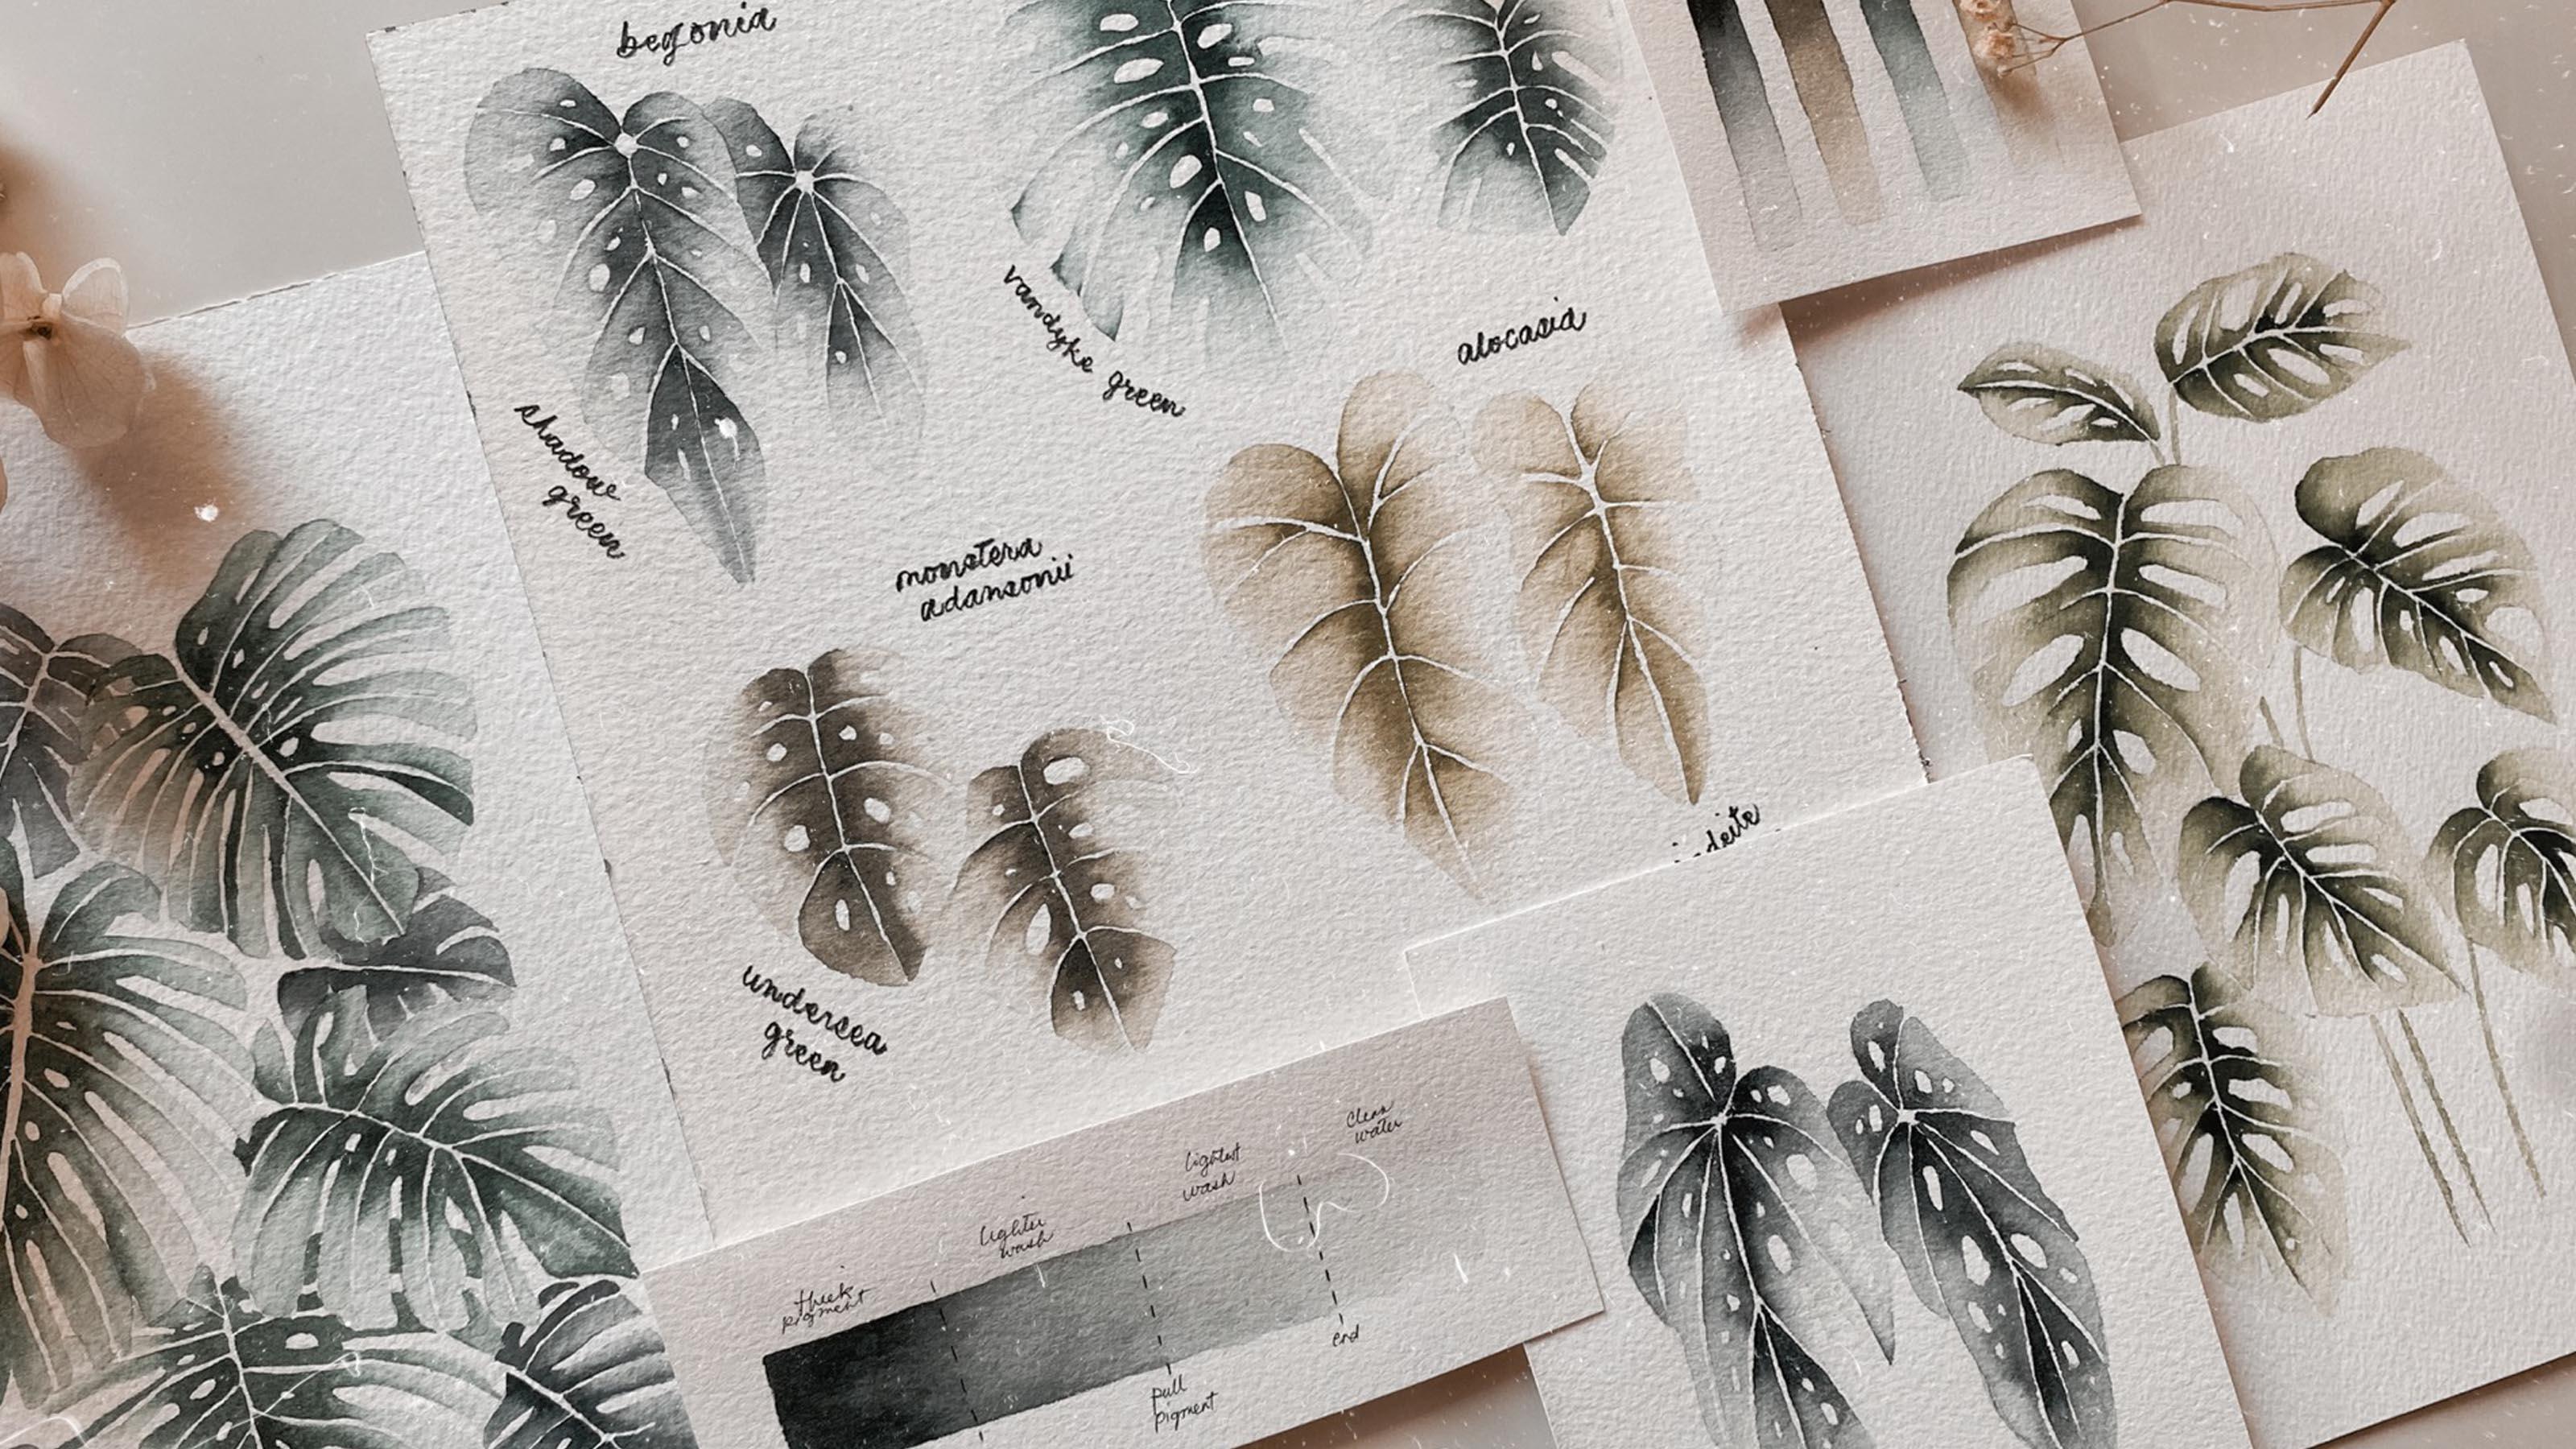
your illustrations. In this glass, I've prepared an exercise sheet
to help us further hone their mastery in building
this type of the ink. I've come up with
guides and hacks to make the process easier
for you painting enthusiasts and begins these through practising using
Psalm painting entries ices. I'm sure that by the
end of this class, you'd already know how to create these
beautiful gradients. I'll show you tips on how
to create your painting. It meets that in your pigments
and proper water control. This class will contain
multiple demos. I prepared a step-by-step
process in painting a simple composition
of begonias, many startups and allocations. Hopefully by the
end of this class, you'll learn how to paint these vivid illustrations
that you can use as a Britain on the artwork or for any type of merchandise. Get your materials
and see you in glass.
2. Mastering the Gradient Wash Technique - Exercise Sheet: Start by sketching
rectangles that would serve as our exercise
sheet for this glass. Guides will also be available
at the resources section. Growing some rectangle
width deficient, and some leaves
sketches with holes and partition might look complex, but it's actually easy as
long as you understand some fading concepts and apply
some of my painting hacks. Now I will show you how
I'll be using my guides. As you can see, I have divided our rectangles into
four quadrants. First quadrant containing
the second quadrant for your lighter wash, and third for the lightest don't brush the fourth quadrant, however, be just for Dean water. These two vertical
lines will indicate on where we will stop
applying our washes. This will also serve as an indicator on where we
will start blending washes, creating a beautiful
gradient for us to master in practice
a graded wash the feet. We can start off by using a rectangle with guides
for us to practice under painting transitions
as preparation of using a pipette to
add water to my wealth. And on an empty well, be preparing a
very thick mixture to start off with a graded. I'll be using Daniel Smith undersea green for
this exercise. However, for the brushes, I'll be using 21
small round brush in bailing are thick mixture and the bigger round
brush for blending. Now let's start by
painting our brush and loading it with a
very thick pigment. Although it's thick,
we have to ensure that it's wet enough for us to spread it and blend it on paper. I'm gonna stop applying the thick mixture with
the first vertical line. The next is we move on
with our next quadrant. I'll be using a
different gosh and use clean water to
soften the edges. As you can see, I'm just slowly pulling pigment from the
edge of her first quadrant, creating a liar mixture
of undersea green. As you can see, we're able to show a smooth transition
between the two quadrants. We're gonna apply the
same technique with the third quadrant by pulling pigment from
the second quadrant. This will somehow create a
transparent wash. Of course, on the last quadrant, which is the lightest one, can be empty as we apply
clean water with it. Okay, let's try it one more
time out started off with a thick pigment and add clean water to bold
some pigment from the two quadrants and apply
it clean water on its end. The next rectangles will try
to do it without guides. But the idea here is to create a gradient
that is basically dividing our painting
surface into four sections showing
our transitions. As an additional tip. We have to ensure
that our mixture or wet so it can bleed
across our quadrants. If you tend to use
a dry mixture, we will not be able to pull the pigments across
these quadrants. Thus, we cannot create leaf smoothly
transition gradients. As you can see,
we're able to show a smooth transition
from dark to light, creating a beautiful gradient. For the next set of rectangles, Let's try to use a
different color. This time I'll be using a
different shade of green. Then we try without
the guidance. Following this
type of technique, we created a gradient
with dominant highlights. Third, fourth quadrant, mainly creating a soft effect
where illustration. Just continue practicing by applying techniques are curves. All of their tango sketches. Exploring layer down by using
multiple colors of BIM. For these remainder ones, I'll be using olive
green and shadow green. Will try to paint vertically
this time as this will be easier as a mixture flows
from top to bottom. This technique allows you
to practice softening your mixtures in order
to show smooth blending. It's basically adding a thick mixture and
continuously adding more water to lessen it's colored richness and created
mixture in lighter tones. Then some final practice with three horizontal
rectangles. For the next part of the
exercise will be applying or graded wash technique into
some of our leaf elements. Let's start off with a
small leaf spots in it. So we'll start off
with the thick picture at the bottom
following my sketch. Ensuring that the paint on the small oval that
we have drawn. Then let's add water to
start creating our gradient. On the topmost section of the leaf will be
applying clean water. Now I'm going to apply
the same technique on the other side. Ensure that you leave a gap
to serve as heartbeats. Next is a big golden. Yeah. I do recommend you use a smaller brush to prevent painting the holes
of the sketch. I'll be using shadow
green for the Schwann. Be really cautious and bade
the thick mixture using the just the tip of my brush to prevent myself from
painting the holes. And continuously at clean water following the partitions
that I've shown earlier. This time that's tried
to paint with veins. Basically I'll apply
the same technique, but still leaving a thin line
gap between its sections. I'll be applying the
graded wash technique in all three sections
of this leaf. On the top part is where I'll
be applying my highlights. For our last leaf practice, they tried to apply
with a bigger hose, same with the Monstera
didn't show any air plant. This is how we'll be applying the graded wash technique
into her illustrations. Choose among
painting a begonias, a monstera, or an allegation. Step-by-step process will be available on the next lessons.
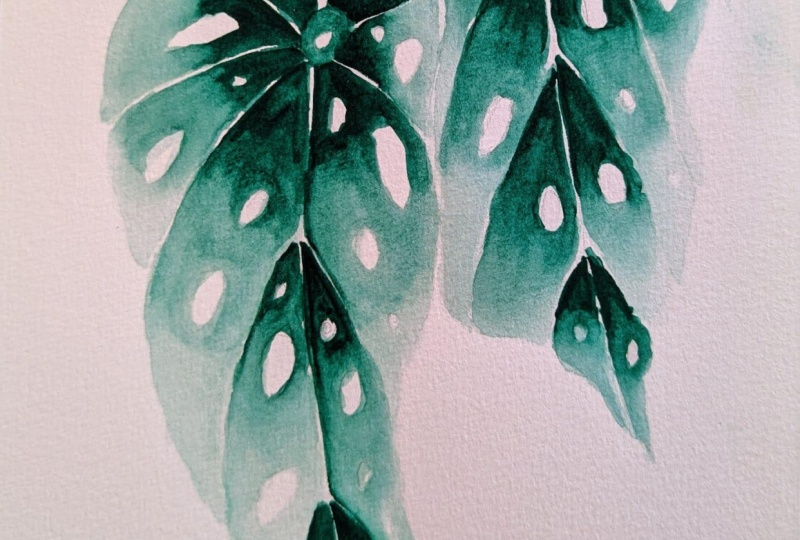
3. Painting Demo #1: Begonia Plant: For the next four lessons, I'll be showing you the
step-by-step process in painting least IV illustrations will be creating the soft
monochromatic houseplants using the techniques
and tips that we have applied from
the previous lesson. I'll be providing sketches in the resources section
of this class. So make sure that you download
and have your sketch. Before we start this lesson. You can choose which leaves
you want to try painting, or you can just meet
all of these four. In this lesson, we'll be
painting a Big-O new plan. I'll be using shadow
green for this plant. This plant has small
spots and veins, so I'll be using a
small round brush, preferably in number two or number four brush before
we start painting, ensure that you leave out
the thin gap where the veins are objective for
this plan is to create dark sections
and the middle. So basically you
will start creating gradients from the middle
vein of our big on him black. Same as this illustration. Convening shadows at the
middle and soft highlights in the outer sections
of the leaf. Don't paint on the vein and over sketches to show the
texture of our plan. I'll start by painting a thick mixture from
the middle being. I'll then get dean water and pigment from our thick
mixture of undersea green. I'm using the tip of my brush
and applying my mixture to prevent myself from painting the veins and oval sketches. For the third section
of our gradient, I'll be adding clean water, creating my lightest wash. Then finishing it off
with some clean water. Then we continue applying it. On the next section. I'm usually painting on the right
side of the burst. And as you can see as I
paint the next section, I'm slowly In adapt, following the veins sketches. It is essential that you use a small brush with a fine tip. As began, your plant is
as potted plant and we did not want to paint
over or oval sketches. Continue applying
the same technique on the other sections
of the lead. For smaller sections, you can divide it into just
three sections. As you can see, where we're
able to show shadows, creating tonal values in
deepness or illustration, making it more realistic even if we're just using
a single color. The outer section, however, shows a very soft
effect to where leaf composed of
dominant highlights. Then we move on with the
left side of her leaf. I'll start with the
bottom section and create my thick mixture
of shallow pain, then gradually blending or
a mixture with teen water. To be able to control water. I usually dab it and at the shoe before blending and
pulling my pigment. Then again, keep applying the same techniques across
your Baconian bled sketch. Now it's time to do it
on the smaller sketch. You can use a smaller
brush for this. If you start to get uncomfortable
in using a number two where in number
four brush asked, the divisions gets smaller. I normally just create
two or three sections. One for the pigment and the ladder would just be
for the light washes. Use the tip of the brush in
order to successfully add mixtures without bending over
the veins a small ovals. Same with the earlier
sketch and start painting undergrad side of human theme, showing shadows and highlights
to achieve software. Then start banning on the
left side. There we have it. We have successfully applied
your graded wash technique, showing shadows at the
middle and achieving self monochromatic
style by maintaining heavy highlights at the
outer parts of her painting. As a last step, once your painting is
completely dry it out, get an eraser and remove
or pencil sketches. This is to eliminate
the outlines that would definitely make our
illustration appear softer. So there we have created their first soft
monochromatic plane. You can now move on with the next lesson and paint
them and started and Sonya.
4. Painting Demo #2: Monstera Adansonii: For this portion of the glass, we're going to beat them
on steroids and Sony. Same litter first initiation, I started off with
a thick mixture starting from the middle. Then I'll add in some water
to create a lighter tone. I'm still using a
number two brush to prevent myself from painting
the veins and ovals. I'll be focusing first on
the right side are fully. Before painting the left side of the insurer that he leave out the thin line gaps to signify the vein over Monstera
at that Sony a7 III. For small sections, you can just divide it into
three sections. One section, thick, big men, the ladder for the
lighter tones. You can also use a smaller
brush to make you more comfortable in fading
this small illustration. Apply the same
technique and don't forget to be cautious and ensure that you're not painting over the veins and
the overall textures. Creating these pigeons,
we were able to show softness or illustration
and your present being shy, those at the middle for a better representation
and dimension. Now we move on to the next leaf. Predict quicker
painting process. You can apply thick wet
mixture on multiple sections, then quickly apply clean
water to blend it. It is really essential that
these mixtures are wet. Dry mixture won't allow you to blend and soften its edges. Then lastly, applying clean
water for yourself. Finish. Then we'll proceed with
the left side of the leaf. I'll be applying the same
approach in creating gradients. Applying a thick mixture and slowly blending it
with clean water to finish off and
achieve more softness. Again, we'll be using artery, sir to remove the outlines
and her pencil sketches. There we have it. We
can now move on to the next lesson on painting on when
stereo, that is Joseph.
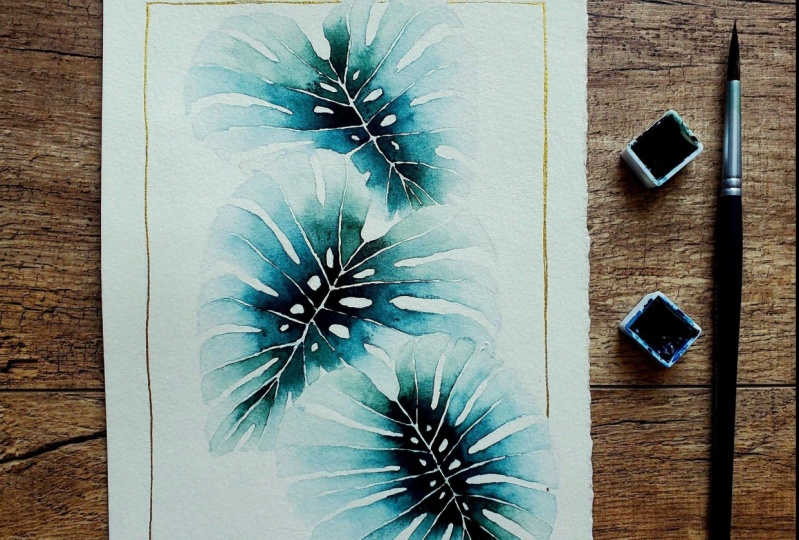
5. Painting Demo #3: Monstera Deliciosa: Now let's paint another type
of moments there, a blend. This is going to be more complex compared to the previous
illustrations that we painted. As it has natural leaf holds, split leaves and veins. We have to be really careful in painting section this leaf. Again, the schedule
is going to be available at the resources
section of this class. For this painting, I'm going
to use Van **** green. Same, we will be
applying shadows in the middle and some highlights on the outer part of the leaf. Using a number to small brush, I'm gonna use the tip of my
brush to care for the paint, my mixtures and not go over
the veins and oval sketches. Attempt to paint with thick
mixture of Van **** green, again coming from
the main middle vein and gives a different brush
to blend it with clean water, creating our lighter quadratic. Apply the same technique on painting the remaining sections of their loved one. How my shadows appeared
for this illustration. I loved the transition
that I created in here. So I hope you can achieve
the same effect on your end, achieving that very soft monochromatic painting
illustration. Then we move on and apply the graded wash his feet on
the left side of the leaf. Then lastly, let's move on
with his mother and Eve. Again, you can switch was
small brush to make you feel comfortable in Bailey
least types of illustration. I'm going to speed up
the painting process here and apply a thick mixture
on motherboards sections. Again. In this process, you should ensure that it's wet for the mixture in LOTRO dry up. Again, the blending
it with clean water. Again, I'm switching with
two different brushes, one for the thick pigment and another one for
Dean source of water. Continue applying
the same technique all throughout the
Monstera illustration. There we're done
painting the leaves. Wait for it to dry out and your base outlines
and pencil sketch it. Now you can move on
with the next lesson.
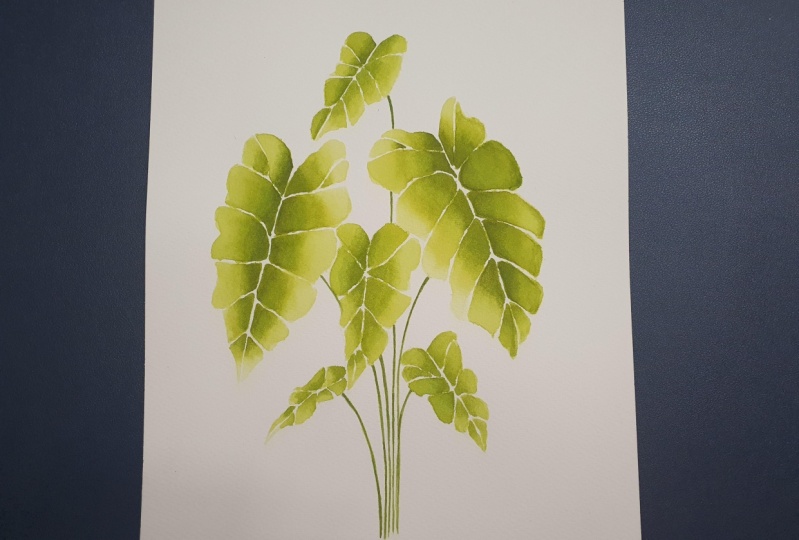
6. Painting Demo #4: Alocasia Plant: Now for our last house
plant illustration, we'll be painting
an allocation plan. Sketch is again available at the resources section
of this glass. For this plant, I'll
be using sap green, these leaves and
not harvest spot. So it's gonna be less
complex to paint compared to the
three illustrations we have painted earlier. Though, I still
recommend for you to use a smaller brush as an education plan tends
to be extra veins. Most still start off
with a thick mixture to signify the shadows on the
middle section of the leaf. I'm going to work with
dual leave sections, add the width thick
mixture of sap green and quickly blend
it using clean water. Gradually add Dean water
as the highlights. Ensure that you leave
out thin line gaps. To signify the veins
of this illustration. I'm going to use a
quick banding approach and add the thick mixture
done multiple sections. This is instead of bending
gradient section by section. Continue to achieve
these gradients by ensuring that the
mixture or wet enough. So it's easier to be booked
and blend with clean water. Continuous with Chen from
two different brushes. One for the pigment and another one for clean
source of water. Again, if you want to better control the wetness
of your brush, you can dab it into what the shoe before you apply
it on the paper. Continue applying the gradients
on the auger sections. I'm assuming that by now
you've already mastered how to achieve these beautiful
differentiation gradients. Use a smaller brush if you're uncomfortable and using a number two or number four brush. Let's follow a similar approach in painting the other leaf. Again, I'm going to use a
quicker approach to this and add thick mixtures to
multiple leaves sections. As you can see, I'm not
allowing it to dry and habits quickly blended and soften
the edges within water. As I create these exposures, I basically positioned as to how and where my
shadows would appear. Then same process, complete the graded but some teen water. There we have successfully
painted and allocation leave with thick shadows at the
middle with soft highlights. And lastly, to better
soften our illustration, let us get her research
and teen some outlines and pencil markings.
There we have it. Or for soft minute dramatic
illustration of a begonias, a mustard and Sony I would stare at it is USA and
an allegation of land. We can now move on to
the class project.
7. Final Project: Thank you so much for going
through all of the lessons. I hope you enjoyed
taking this class. I really look forward
to seeing all of your soft monochromatic
houseplants in watercolor. Before jumping into
your final project, you can practice your mastery under gradient wash
techie by creating multiple gradients and
painting leaf elements through the exercise sheets. Ensure that you represent
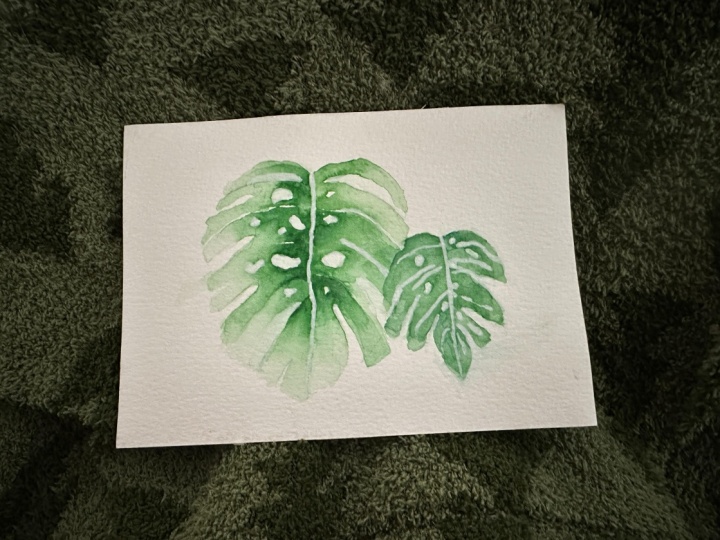
your dark tones, lighter tones, and highlights. For the final project, you can paint something
similar to this. You can choose by
either painting a begonias stereo
or an alopecia, or just challenge yourself
and simply paint them on. You can either create artworks with simple compositions
like these. This marks the end
of this class. Thank you, and I hope
you enjoyed this course. Don't forget to follow me on Skillshare and upload
your projects so I can comment and aid you in feigning your version of the soft
monochromatic husbands. Once again, thank you and
see you in my next class.
 Tin Bejar, Watercolor Artist