Transcripts
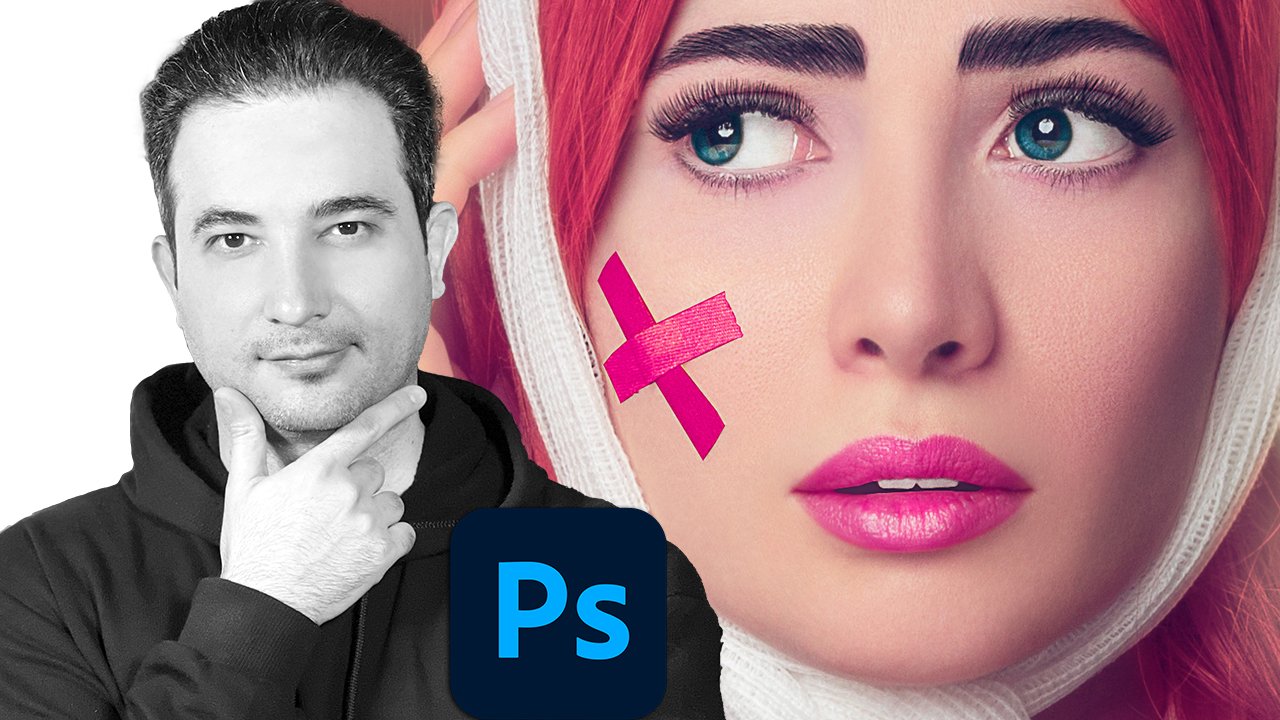
1. Intro Video: Hey guys, and welcome to Photoshop, master of portrait retouching 0101, the Ultimate Guide. I am slowly art and I'm the art director of dense who advertising company. I've done a lot of creative artwork for many big brands like Sephora for American Airline, big dancers, big portfolio for a lot of models and so on and so forth. You can control my artwork and you can see a lot of amazing and creative stuff at 500 pixels.com dash soon. In this quick intro video, I'm going to take you to my special process. Well, actually my secret of portrait retouching one-to-one, which means if you are a beginner or even an advanced level and retouching, you can follow the process easily and in 3.5 hours, you can create your own creative portrait. Now I'm going to take you through the process. This is before and this is after, before. After. Alright. Media start with adding some exposure. Then we do some cleanups. The dodge and burning. We go for spatial, frequency and suppression. Then we add and create the liquified. Then we go from t. We fix the eyes, actually draw the eyes of our eyelashes. We recreate the eyebrows. Then we go and add some hair. Let me do some cleanups. We add the hair color, will go for neck color, face color, lips color. We add some makeup. We go for general color and at the end, Vigo for sharpening. And at the end of this tutorial, I'm going to show you how you can create an especial and pop photo for your Instagram and social media. By the end of this course, you will be able to start earning money from your Photoshop retouching skills. And I will answer all of your questions until you get your first job. A promise. After purchasing, don't forget to leave a comment. So that's inspires me to create more amazing video. All right guys, let's get started.
2. How and Why to Do CleanUp First in Retouching: All right, Let's drag the image. Put it in there for Russia. Just wait for the camera. The first thing we do, just click down here and this link. Then this pop-up is just going to show up. Make sure this is checked open in Photoshop as Smart Object and the depth is 16-bits. Press Okay? And open object, we don't do anything. Just open it up. Now, if you see my background, the canvas is white. Make sure you click the move to just right-click and set a custom color. Make sure you put it under white and click. Okay. By default is going to be like this, right? Right-click, select custom color, make it white and press. Okay. This is for Instagram peppers. Then you see the image perfectly. Right now, right-click on the layer and click on New Smart Object via Copy. Now presume keyboard and drag it up. Now we'll just double-click here to bring back the camera option. Open the basic good exposure. And just, I'm just going to zoom to see exactly. This part of the phase is I think we can bring up the exposure to see more of the face. That's the cool thing about the camera. Then we can bring back the light, the quality that texture everything. Now I'll press OK. And it's going to zoom in a little bit before we do anything, we have to clean up. You have to clean up these little blemishes. You know, there's some ugliest button the face that you have the fixed doubt. Go to new layer. We call this clean up. Press S on your keyboard to bring up the colonist outflows here. Now, make sure this one is current and below. So we can break up the sample from the layer below it. Plus z, which I'm just going to zoom in a little bit. It Control plus. Here we go. And if you hold down Alt, just gonna circle next to it the same color and paint over next to it and paint over sub-index. Right? You should be very close and be careful about the texture. We don't go too far. We're just going to copy the small little things. The biggest stuff like this, 1. First, I'm just going to go over it next to it, very next and holding down Alt, I'm just clicking around, coping, Alt, click and copy. Small little things. Here we go. I'm just going to serve but two or three times because here the light is different. It's going to check here. Don't worry about this stuff. If we go through this, it's going to copy this back. So sinner, it's easy. Just copy next to it and paint over it. This one is little bumpy, just going to fix it. So don't worry if we go through and do crazy stuff. It is going to fix everything. Just going to copy. So here is why it has this dark what to do? Press J. So we're going back to the healing brush. Right now. We're just going to copy this part. And the cool thing about healing brush is if I'm just copying the edges, copying C, everything is going back. If we go through this one, copy this one here. This one here, this one here as the Healing Brush Tool. Copy this one here. Copy this one here, copy from here to here. But be careful. We don't go too far. If you go too far, it's hard to get it back. Right. I think this is cool. We're going to fix this spot here a bit ugly. Very cool. You see? So when you are doing this, you have to be very careful C, and we're going to various loading. And I'm checking to make sure everything is copying from the same color match colors should be matched as that's the key. If it doesn't merge, we are going to change the shape of the face and we don't want to do that. See the cleanup. See this small little things. See here is very ugly and see what we have done with the cleanup. Just going to zoom in here. Press J, copy here, copy. Same here. Okay, cool. All right, let's go back. Lice. They're nice. Small little thing that the blemishes just going away.
3. How to Do Dodge and Burn in Photoshop: The next thing we're gonna do, we're gonna do the dodge and burn. How to do it? Let's go to Adjustment Layer and click on Curves. Bring up the mid-tone first. We call this dodge. So press control or command. This is for Dutch. Good adjustment layer. Again, care of now, bring down the mid tone to make it darker. Right? This is bare controller command. I write what is dodge and burning. The metadata I'm just going to show you, is the most commercially used techniques used only by high-end professionals. It's simple, but needs a lot of practice. So what is dodge and burning? With dodging, we are brightening the dark parts. We bearing. We are darkening the bright parts. And the cooling a barrel is skin texture does not affect it at all. So first, you have created the Dodge v curve. The brightness is up, the burn, the mid-tone is darker, right? But we mask it out. We're just going to fix it properly. I'm just going to show you why we did the mask. Then I'm just going to click Control and group it. I'm just going to call it dodge number. Which America? Now, we need the help layer. We'd help me. We can see it properly. Exactly. We have to do the dodge and burning. Now, let's click on Adjustment Layer, go to solid color. Make it gray. Put the B on 50, and then press Okay, this is exactly 50 percent gray. Right? Now, put the blend mode on color. This is the proper black and white. Now let's go to adjustments with the curve. Bring down the shadows, and bring up the highlights. So we can see the ugliest stuff. See this is dark, this is bright. Here is dark, dark, dark. So the neck, we can see the dark and bright side properly. If we break it down, we can see more or less. So you can see why we are doing this, why the healthy air is going to help. So just going to group these together again. Call this help. All right, let's go to dodge. Dodge means bright ending the dark parts. So let's zooming. Or dark parts are here. Press B for brush. Make sure the flow is VO1 percent and small the price size, the hardness should be 0. And start click the dark side. We smooth it out. What we do is slowly, I'm just going the dark part to make it brighter, to make it match the color beside this, not totally match. We don't want to make it flat. You just want to make it very, very genetic gradually from dark to white. To get this one. I'm dodging right? Foreground color is white with white I'm coloring and the black. Basically for dodge and burning, there is a better technique. The technique, there's a trick. There's a lot of small detail, but I'm just going to get distracted. Which part exactly I should dark which part exactly I should write. Tear off the healthier for a moment. After clean up. Create a new layer. Then Control Shift Option or Command E, copy all the layer below it, copying everything that it can see right now. And the Dodge and Burn was part of it as well. So it's okay. Let's make this blur, filter blur and Gaussian blur. 3.7. We don't want to see a lot of texture is fine. Now, check the head layer. Now we can see the darkness as a general, this is dark, this is dark. It should be fixed. But when we do it, I have this. And there's a lot of small little details that we're just going to distract us right now. Then these are named layer. The layer help. Let's call this exposure cleanup layer. Now, let's do the process. Open the Dodge and Burn. Click on dodge and start brushing. Here. See, now, we don't get distracted slowly. I'm just going to go over dark parts. The good thing about Floyd's, it's, um, as long as I'm just moving my cursor around is going to build up bins, is just going to beat up gradually until I get what I want. Slowly and gradually. We don't wanna make it perfectly equal to this one we use will make it gradual. Write this one as well. Very cool, very easy. Here. Here. Small little detail here, here. Here. I'm just painting on the dark parts. That's all I'm doing. Okay. Right. Do you guys want to see what we have done so far? Just going to Control minus ten of the healthier, ten of the blur help. And let's see, before, after, before, after. How cool is that? Now, let's go to the neck. You see the line. You need to dodge this to again, put up there. It's very distracting. You just need to see the slide that, so it's very easy. Just put some music on and enjoy dodging and burning. I enjoy myself. It's really fun to do because it will exactly what you want to get. Just going to be something super crazy, something inspiring, something that when you see it, you enjoy, well, I have created this is, you know, is, is that I'm just clicking on the dark parts to make it brighter. Didn't know that it is by painting and brightening the dark side. You can fix your image. Right here you go. More deployed away. Now we need some burning. Click on Berlin. Is it this part's see here. See here. Put an L there. Which part is brightening here? We may have to do dodge and burning many times during the project. So it's not just what is the process. So based on the timing, you have to do it many times. All right, Now, let's stop the dodge and burning and check off this layer. So, so far we have done this. How cool is that? Nice? Let's take that on. So the next step is to do the famous and the secret of frequency separation.
4. How Everyone Does Frequency Separation 8 Bit VS 16 Bit or Raw image Process: Alright, now let's do the secret of frequency separation. What is the secret? Why they are not showing us the real way until now. I'm just going to show you how to do proper way the way the professional agency do. All right, let's do it. The first thing for frequent suppression is just going to create a new layer, press Control Shift Alt E. So we duplicated all image at one, is F or Control J. All right, Let's show what they do now. The way that they teach you in YouTube and in love, online social media, they tell you to go to filter blur and Gaussian blur there. And you see even the texture is not showing. Here. Press Okay. Now, good enough, because this is 16 bits. Go to Image, Apply Image. Go to the layer below it is low EF. Put this on ad, invert. This is to produce 16 bit. This is the way we do it, the layer it should be the layer below it. The blending is an ADH escape is too upset is off. Make sure the inverse is checked for only 16 bits. Okay? Now put in normal on linear light. So just going to click here, group them and just call this F S frequency separation. If you check this off, go to low f or delta, it doesn't matter the riskless rate. Why they don't teach you the proper way. They ask you to go to lasso tool and just go around the area. Press Q, go to Filter, bilayer and gij MLM. Now it's blurred, Q back, Filter blur and Gaussian blur. Now, bring this up until it's smooth. Okay? If you have to do this process again and again, I'm just going to show you how to do it. Just gonna go, Gosh, I mean by this is a really big process. You have to do this again and again. Until all isn't. I have to make sure that always I do the Q part and go to Filter Blur, Gaussian Blur there, okay, Q back, Filter blur and Gaussian blur. Guys, this is okay, but for the people that the new want to create something extraordinary, something fantastic. Why I'm showing you the proper way. If I want to shape this, if I blurred this part, see what happened. Right? Just going to blur this part. Again. Q. Peter blair, diameter. Just bring this back butt epitope. Okay, this is fine. Qt again, Filter blur and Gaussian blur. Press Control or Command D, look, the shape is gone. I don't have the shape anymore. But if I want to create a shape here, I want to change the phase. I want to create something more dramatic. Something look, you see, you have the chin and the chin is very professional. Look. I killed everything. I killed all the lines. That's why when we do these frequency separation, like Blair and Guassian blur, everything is a smooth, everything is flat. It's not like the professional version of what we see in the Internet. Why? I'm just gonna tell you the secret. What is the proper way of doing the frequency separation? I'm just going to call this old and turn that off. Now, creating new layer Control Shift Alt or Command E to copy abduction at the top. So I just copied everything. Call this low FFA. It shouldn't be the same one as this layer. All right? Again, Control Command J. Call this high F. Click a low EF. The secret is critical low EF go to Filter Noise and median, filter noise, median. Then we don't see the texture. And we only see the lines. Click. Okay? All right, let's do the same thing for high, high F. Let's go to image. Apply image because it's 16 bit. Make sure the layer below it is low FFA, this one. Blending, add a scale to offset 0. Put a normal on linear light. Right? What if your image was 8-bit, that 600? What if your image was not Raphael? Because the only Rafael are 16 bits. I'm just going to bring an image, an eight-bit image into Photoshop. Control or Command J, LF, HIV, then that off, Filter Noise and median. The same way. I don't want to see the ticks. You just add lines. Click, Okay. Good. If now image, apply, image, invert anything, we just put the merge on low EF. The name of this layer blending should be on subtract to scale, offset one to eight. And just click OK. And make sure you put this on a linear line. The same thing. Control G to group them, they're off on. It shouldn't change anything. It's the same way and the process is the same. And I'm just going to go back. So that was four 8-bit. This is 16-bit. This in process.
5. How to Use Clone Stamp Tool for High Frequency Separation: S for Clone Stamp tool, Alt, select, and coloring. There are some part, there are some luscious and we're going to remove them. Now. Let's close, get closer for this small little blemishes. But the clone stamp tool will be going and you're in a high frequency separation. So we can work on the texture very easily and very smoothly. We are fixing every single detail and the face because this is the sign to get rid of everything that is not pleasant to the eye. And it's really fun. Because until we get too far to create this, these are beautiful techniques. You see we have a lot of big bumps here. Small little detail can get from The next to it and fix them. You can just let it be or I don't really like them because it's kind of distracting, too big. So I'm just getting copying some texture from next to it and copy it over it. Until I get a very, very perfect and beautiful skin. It takes time. So you can fast forward or just enjoy. Just do it with me. All right, I'm just going to always keep clicking Alt and just keep eight. So you can fix all of these small detail. Small, this kind of a big hole in the face. And you can fix them or at least very quickly in a lot of time. But at the end you have a perfect image. Then you can sell. It can enjoy a good memory for you. Because sometimes you go back and you see, wow, have done this job. It's perfect. Now we're going under the eye, very gradually discovering from next to it and am going forward. See, very nice. Awesome is going to enjoy. I don't know about you guys because this is fun. It's fun to do because look at this. Magic. It is magic. What does good the magic. The faster your hands and getting used to it and you go faster and faster each time. Especially under the eye, should be very careful. Then you have a bigger area. So then it would be easy. Nice. Seriously. So very gradually you have cleaned and it still has the texture, you know. But let the eyes very small texture and get rid of this big texture as well. Look how smooth that is. You see an image and a cURL. How cool is that? And she's so pretty. But we have to look it up. Okay, I fixed that. And it should be in a way that nobody knows because it's kind of advertising. So the picture in the adequate should be promising, should be something that everybody believes it. Nobody just see that, wow, it's Photoshop. If you do a perfect job, nobody cares if it's production because, you know, because it's beautiful. It should be beautiful, should be awesome. What do you do? Have the discourse? Should the amazing, everything you do should be amazing from now. Because right now you know the secret. In a district, right? How to clean the perfect skill. And then we go for colorizing and we do a lot of dodging and burning again. You see how we can fix this with dodging and burning, but it's the same process. So, you know, both of them. We can brighten the dark side and we can go through the Dodge and Burn. But I guess I can do it faster this way. Or maybe a good used to cloning, going to injury cloning. And right now, it's gonna keep doing this forever. I don't know about you guys, but until I get the perfect skin, I'm just going to keep doing that until I die. Just kidding. Let's let i just going to go, my life is married and it's gonna have fun. That's the cool part about cloning. Sometimes you get crazy. Most of the time. Sometimes. Just figured out them target. Which is a good thing. Let's go to this side. Okay, Cool. Very nice. Slowly and gradually I'm just gonna getting getting under the eye. And you see, if you pick the closest area, you're good to go from. Very, very cool. Very nice. Okay. Nice. Very interesting. Yeah. I mean, you're cleaning. I'm just going to tell you sometimes you have to come back and see it as a whole. Sea. Zoom in and zoom out. If you see something crazy. It's beautiful. This part, I'm really enjoying my job. Let's get into it. If I do it really fast, you can do the whole image in 23 hours. And trust me, It's leave me, it's worth it. Everybody, this Instagram or social media are going to enjoy this. Keeps telling you that, wow, we have that a beautiful job. I don't know, I don't care about other people's, but I really, really enjoyed myself. I'm doing it for myself actually. Because as long as I think it's it's cooling, let me zoom in. So magnesium, this part is a bit messy. Cool. Now see, I get into every single detail and I fix it up. And only anything behind item. Just zooming in, zooming back and see. Not going to say okay, it's fine. It's not fine. You have to fix it right now. And just keep saying that you have to do this or do that. Or I'm just gonna do it later. It's better to do it now. Transmit. It's easier to read now. All right. So far so good. Small little detail. Let's press Control S save it. All right. Now it's time to fix the lips.
6. How to Use Mixer Brush for Low Frequency Separation : Click here to group them. Make sure you call this f s Frequency Separation. And let's call it secret, this secret. The secret. And what is the secret exactly? Let's go to F and turn that off. What is the low F? This is only shows the color. It means we separated the color from the high F, that texture, texture. So we have two layers, that texture is on top, the color layer below it. And with the color, with the low F selected, we can change the shape. What does it mean? If you go to Blair law, right-click and choose mixer, brush, tool, make sure this is turned off. So this one is transparent. That is until load 30 mics 30 and low. Float at all is on 30, 30 percent 00. The sample or layers off. And click B on your keyboard. If it doesn't show Control J. I mean sometimes the brush cursor and put it on normal brush and just go back. So what we do here, just gonna bring it up. Right-click. Hardness is on 0 here and start brushing, start brushing. But before we do that, we need another layer. So right now, because we see a lot of color, we get confused. To fix this. Let's go on the top. Adjustment Layer, Solid Color and solid carrier, putting on 50 and hue 0. Click Okay. Now, put the normal on color. Just going to drag it outside this FS, the secret, right? This was the black and white or black v w. Let's go to Adjustment. Taken care of. We create an S curve. Care. So you want to see the shape of the face. So you see the shape. Right. Click and group them together. We call this help, again. Help layer. Now, critical low-flow, low FF color. And turn this off. Now, everything is a smart. We see only one color, which we are going to smoothly join them together. First, we're just going to work on the right side. So let's go back to the layer. Click on the curve, bringing this up, bring this down. Let's make it a smooth. You want to see up. You're gonna see the bright side and dark side to get there. Then we can smell it perfectly. Right now. We see the bumpy area. Now it's okay. Let's go and select the low F. We have the mixer brush, everything is 130, this is off, and let's start. Now. Slowly. I'm clicking right or left, like that. Up or down. Everything should be smooth. It shouldn't be a very hard edge. That's the tip. Slowly. So under the eye should be a bit white, right? And mix. Doc what we are doing. Gradually. Mixing beyond change the shape. It just one. Everything should be smooth a bit. Bright side to the dark side. Look, what we are doing. This is proper way of frequency suppression. And you see why? Look, if I click and drag, I can look, I can change the shape of the face. But proper way. But with that one, we didn't have much control limit. Let's, let's do it properly. Precisely. Again, put your music on. Make sure you're enjoying this moment. Because after this, you have a beautiful and very awesome portrait that we are created on matching the colors. If the colors are bright, just going to from the other side, right direction. Now it's very smooth. Let's see what we have done so far. Let's help the high F texture. You see, it's beautiful. Now let's take this off. Was before. After looking at the shape, Look, you're shaping the nose everything. This is the proper way of doing the frequency expression. Now let's finish it up until the end til unhealthier. And let's play around with it until we get a perfect match on everything. We try to split this part too much. Let's be careful. Match everything to get him. Okay. All right. Now, the right pi, all right, the right part, right, the right side is OK. Now let's go to the left side. For that, we need to change the head layer, the contrast part. Again, Let's go up. Let's go up. Here I can see the shape black and white. Okay, let's go back to the low. If, if color low-frequency. Again, let's smooth them together. Without the head layer. We don't get this kind of control. And precisely, right now we can see what the are changing. Let's go to the eye. This should be 23. Blend in to get there. Okay. Same thing. Yeah. Okay. Perfect. Awesome job to myself. All right. Now, let's turn this on. Check this off. Beautiful. Awesome. Cisd. Now let's do for the next part, check this off and gradually, let's see what we are doing with the corner. Make this very gradually, very smoothly. Now, let's check this off. Ten is on, click on S. Now if we go for the texture.
7. Problem Solving & Fixing the Red Color and Texture around The Lips : This is the only way that we can fix this lips, right? It's very hard to copy that texture here. The best way is just select the low EF color. All right, That press P, click and click and drag. Hold Alt and click here. Click here and just drag Alt and click here. Click and drag. I'll click, click and drag. Click, click and drag. If I hold Control again, play around with this. Make it equal. Alt, click and click at the end, and drag Qu, right-click and delete Make Selection. But the feather and two radius and press OK. Now, if a press V on your keyboard, my keyboard and just paint is just going to paint inside. Press Control Z or Command Z. I'm just going to paint outside. So if I go to select and inverse, now, make your brush smaller. Turn off the high F texture and is slowly with your brush it mixer brush, paint inside. But pick the color from above from here. Because we need the shape. We don't want to change the shape. Look, we're fixing the color issue problem. If I go in and out, it's just gonna miss equals visit. Commands it from outside. I'm just dragging in. And because we selected the lips, the lips is not going to be affected. You want to see what's happening. Then under IF look at fixing this part and then that off. We turned it off because we want to see the color. You don't want to just everything. This is the shadow part. Look. So the very slowly drag it in. Keep the shadow part. We will add some shadow, right? You just need to change the color later. All right? Very gradually, very slowly. Look, it takes time, but a promise. You're going to enjoy this. Really. See what's going on. In mixing this and texture is just there. How cool is that? Funny is that it's awesome. Now, the press Control D to de-select it. Now, let's go back to texture part S on your keyboard. And let's paint the part that doesn't match. The process. Again. Look. Make this part very, very cool. Again, don't go too crazy. Do this slowly. I know sometimes it's tempting. Let's do it fast there, but don't please. If you do it fast, it's not going to be inspiring. Trust me. Just is really just enjoying. I really enjoying this cloning. The part that you don't really need. Because we are cleaning the face. We're going to create an angel funder. So you just go to sleep. Just keep doing. You can do you can make it happen. Just turn on the music. I can't put a music Android down because I'm recording. You guys definitely do it. After you finish this. You can learn a lot of things. Trust me, this is one of the best way of doing retouching. I don't think it's a better way of retouching at this. You guys know everything you don't dodge and burning. Now, you know the secret of Frequency Separation. They didn't noise and median. You don't need to go through the Guassian blur and stuff. You know, sometimes people say, We don't want to show us our secret. Everything should be high. Sometimes you need should hide the secret. But I don't believe that. I believe in you have to share you have to share it somehow so that other people use it. And if you teach, then more, because it's kind of if I teach you guys something, I'm just going to learn something more. Or one of you guys going to teach me something else? Know what else? I'm always learning. Loaded Photoshop and the UI UX photography is always newest of the layer. And you know, when you Google something and you see there's a lot of crazy people out there that do crazy stuff. Right? It's fixed. This part, this part is a little bumpy. Guess. Texture doesn't match me, fix it, get Dodge and Burn again. Yes, again. Or we can use cloning. This is the cool way of doing this. Let's go back again. Yeah, part here that you have to fix a very slow process. If this is this part. Now, let's go to brush. Let's fix it up. There's a match properly. That's why whatever we do, this affects right now. It's okay. Maybe we can do something more. See the problem was, whatever I did, it doesn't match the brightness and darkness. It doesn't match. It means it doesn't mixing properly. I think this is cool. Let's go back. Now. I can just click here and paint. So let's go back to this part. It less clone stamp tool. Yet. Sometimes, you know, getting too crazy. Just fine with us. I hope you guys enjoy because I'm really enjoying it as I'm talking to myself. So when I'm talking to answer, it means I'm really enjoying. Let's put something from me here. This part, Let's see, Let's try. Please. I can put something. No, it doesn't work. What about something from here to here? Yes. Much better. I think we're missing some texture here. That's why I'm just going to bring it back. Bring the chin up a bit. Same thing, this is very nice. Bring up the kingdom bit. If this part should be part of the chain. This part, it's a shape of light, right? So I'm just going to go back here and put the B for brush, make it up. Pit is going to play with this till I get the perfect shape. So anything it's with the layer below it. We created something very, very cool. Now if this is too much, always can go back and put something more, more, more flat. Very nice. Now let's do something knows. B for brush. Next, fix this part that because Let's hear it again now. Let's soften the edges and look. Again. Very nice. Nice. Spit in some lines. Let's go back. See. Nice. Very nice. Now, let's it closed. Let's see what we have done. Go here. S was clone. Let's call this area as well. On the left detail as a whole, if you see. Because we have done too many things that are similar, look how cool is that. We are making something beautiful. Very nice. Very cool. If I see something big that I don't like, just gonna go over it, or that it mean this one. Nice. Wow. Nice. Collect everything, nice. Everything is smooth. And I'm just going to zoom back and see what else we can do for finishing the frequency separation. I think the neck and here also it doesn't look right. S for clonus them we're just going to clone dismiss. All right, Now it's good, but doesn't have any texture. So it means we have to add texture from this part, probably E. Let's go see what a git doesn't work. You always have to go slowly. That's a tips. Let me put some shadows. Shape of I think this is a very, very nice and we have the line too. Maybe it's still much you have to care with a bit. As I said, most of you guys don't need to do this because I just clean the area around the lips. And this small derivatives let you guys don't have to do this week is probably going to want to have Missy lips. But I do. So because I choose the very, very difficult image to fix. So you guys can learn everything that it's possible to happen. Possibly. There are some images that you guys want to do but difficult, but I don't think there is that any image that more difficult than the source because we probably did a lot of stuff on this image. So I think everything is good. No, Let's finish and go to the next level.
8. How to Use Liquify Professionally: All right, Now it's time for liquefying. What we're liquefied exactly. The lips, the nose, the shape of the face, and eyes. All right, let's do it. Click on new layer and press Control, Shift Alt E, name it, Lee. Qualify. Press Enter. Now, let's go to Filter. Liquify. Press Z to zoom in. All right, Very cool. Let's click on the face tool for now and bring up. Click here. Upper lip. Bring up. The lower should be, shouldn't be too much. And from the side, make it more. And here I'm just going to bring this down a bit. And for the expression mean is it doesn't look right. And if you move it up a bit, very little, very little is just this part. It's like she's smiling or she is seeing somebody right. Now to bring this down, Let's go to the packer. Just click here, click there, and see. This part is a bit down, Right. Click and drag. Make a brush brighter. Click on this Forward Warp tool and just make it close it down. And the whole part should be just come to the right a bit. All right. Just got to say Everything's good right now. But this part, I believe we can fix this. Let's go back and see it as a whole look. And which color is that? Right? Very nice. I think. It is cool, but let's go to this one and thank you. Debit. Or bring this up. I think this is cool. Make it bigger, bigger. Very nice. Let's see what this before, before, after, before. F there. I can do this and many times guys, wow, this is so-called. All right, so okay. Very nice. And that was the liquid fat part.
9. How to Draw and Whiten Teeth: Right now is the time to adding some teeth to our image. Let's do it. You just click on a new layer. Call this. This. Right? And let's zoom it. Before brush. Make the floor a 100 percent. Hold down Alt to click here to put a circle and start painting. If I right-click, my hardness is around 60 percent. So it's not that soft. Like this. This, we want our owned, want to create something for us self. Right? Now. We don't have sets, right now, we don't have a teeth. Let's fix that. You can draw it yourself. It means here, put before your brush, and you can come here and start painting if we put x. And really you can just create your own, which is not really that hurt. And you can add another one and the same thing. Or it's going to do this. You can go to files and this is a mouse. Just bring it in, then drag it and drop it. Just going to go back, make it a bit small. Just press M on your keyboard or click the Rectangle Marquee Tool, select around this and Command or Control J to copy it. You don't want this. It's off. Now we have this one. Now. Press V on your keyboard for move to zoom in a bit. Bring down the opacity. And press Control. T. Just make sure you following the lines right on to make this exactly right for these teeth. Big hole. Right? So right. Just put it in the center and play around with it. Right-click, make warp. Click around this one. I'm just going to align this to this and align these two data1, but this is going up. So bring this town, play around with it until you get a perfect match. Up, down, up. Cu. Now C is totally match. Press Enter. Bring up the opacity to a 100 percent hold down. Alt giga mask is no longer available if you want to make it happen, bring it back. Make sure the foreground color is white. Press B for brush tool flow a 100 percent and starts painting. So we are bringing back the teeth very slowly, very gradually. Over this extra part, I'm just going to zoom in. Control T. Right-click. Warp it around this handle. It's going up. Now. Let's begin your keyboard, X4, searching for black and go for clean. This part is going to clean this part to think they can just too much. All right, Now press Ctrl T, right-click for warp. And the handle is just going up. This way. Let's match. This ended up perfect. It's perfectly matched. Right? Now. It's not totally a teeth though, because if we go back still Duke, right? It's why it is so gravity and it has a field, right? Let's fix it up. Let's create a new layer. Press Period keyboard. Again, X to switch. This is black. And make it small. Let's zoom it smaller and make this straight rabbit anymore. All right. It's a bit edgy, so let's go to blur. It is small. Now. Let's zoom back to see if everything is okay. All right, cool. Now let's add some color to it. If it is under their lips, should be a bit reddish. Know, I'm just holding Alt and adding some these lips color, but the flow of 25 percent, look, just going to go around. If we go outside is fine. Just going to erase that. Well, I'm just going to break down the opacity. So it's gonna go away. Right a bit. And press E and UI UX for eraser. And let's clean this middle that it's here to just quickly that part. Let's break it up. It's fine. Create a new layer here again. Switch with this, is going to be white. You get a smaller. This is what's happening. For you. Could be a new keyboard Flow 100 percent. Should it be a 100 percent? It should be around 50 percent. Is here. Here. Here. Here. Should be something like this, right? Then I'm just going to filter the layer and they're cool though. This and this, these two. Now I'm just going to create a new layer on top of everyone adding some black to it. And this switch this to this color, press I on your keyboard. And this black plus bn your keyboard up. And the flows too much down to 10 or 30. All right, let's just paint over this and look what has, what's going to happen. All right, now let's double-click here. Hold on Alt and bring this to the left. So gradually, everything that goes together, cool is that and create a mask. And slowly start cleaning this up. Because this shouldn't be too much. So we added the dark part to dark part and this bright side is just going to stay at this. So minus, look how it goes. But It's, again, it's still much brightness. Here you go. You go to fleet her layer and there. Again, smooth that part bit. Look at it. Let's go in. If I press go through GAN and make this 8% control minus to zoom back. Year you have a lot of shadows. Even for this one. Tennis up. This crazy, crazy shadows here. So you have to remove those. Again. This is real rarity, nice. All right, Let's click here. Let's do a bit. I think it's still much still filter. There is time. I think it's okay. Trust me. They're nice. All right. That was that these parts and we created a very cool teeth.
10. How to Draw Eyes in Photoshop: All right, Now it's time for the eyes. Let's zoom in a bit. All right, Now create a new layer. Press Control Shift Alt E. And let's, for now, you don't see these eyes much, right? Let's go to Adjustment Layer. Click on care and bring it up the midterm until you see the eyes properly. Now I can see the eyes properly. Now, press Control or Command I to inverse the selection. And right now, just see, I'm just going to press B on my keyboard, right? And make sure it's white, the foreground and just paint over. Make sure you don't go outside. And you don't care about try it right now, just the left part because you see the texture is off right now. It's pixelated, so it means it's not usable. So what should we do? Let's go back to this layer 6 and pick up your smudge tool. And it's slowly go over. These areas. Is still have the color, right? But it's not pixelated anymore. I will slowly go and left and right until I get a very, very perfect color. All right, this is cool right now. So what should we do right now? The best way to do this process is let's go up and create a new layer and pick up your Elliptical Marquee Tool, hold down Alt and Shift. And from the center just click and drag. I'm just going to put this in the center. Right? Now. Go and select and inverse selection. Let's switch this one. I'm just going to press I on my keyboard and pick up a bright color like this one, and come back, click on this one. Let's go up to the same harmony of that color. Was just going to pick up this color. Maybe you go to the left to right. Correct. Okay. Now, press V on your keyboard and make your brush size exactly one pixel, the Hardness 0. Let me explain one thing. The direction of the light, if it's coming from this side, is coming to this direction. So I have the color, I have the bright side to highlight is here. So it means this side should be brighter. This is kind of the photographer basic. Now. I'm just going to create these kind of lines. Like it clockwise lines. Because the light, it should cause straight. Right? Just keep doing what I'm doing to Ambari. You don't make a mess. We create something very, very crazy and extraordinary. Coup. Make sure you have, you keep the circle. Very nice because it's also a silicon, right? Right, So far so good. Now, let's go to filter, blur and catch. I'm gonna make it a bit more, a bit more, maybe less. There we go. This is cool. Right? Click. Okay, Let's do it another time. And another layer, one more time. And here is going to click. All right, now let's add some dark side to it. Press I on your keyboard and pick up a dark color. Press B again. And let's go between them. Like here. Because we also have dark. And this kind of directory, like at the bottom, it's wider. Right? Again, press I and pick another color the same as B. And you're just going to extend this one and this one simply around it until I get something perfect. Now I'm just going to go to filter blur and Gaussian blur. We less, more Cu plus on your keyboard and cool, but the sooner the time. So we do this process to a few times until we get what we want. And again, press I on your keyboard. Click this be. Let's go to filter blur and Gaussian blur. Less. We want to see something like this. Now, it's time to create this edge. I mean, at the corner you have some darkness. Add in a layer, Elliptical Marquee Tool. Hold down Alt Shift. I'm just going to go in this for maybe create another one. It became one. Right? This is cool. And let's press B on your keyboard. Make the brush a bit bigger. Bring down the flow to 5%, 3 percent. And it's going to go around this. Look, what we are doing. It, keeping the shape nice and perfect. And this part shouldn't be much less because the reflection is this side. Look what we are doing. Keyword and go to filter blur and Gaussian blur. So the corners should be a bit softer. Now let's go to second. We added another layer and make the floor a bit sharper. Right-click, the hardness is 0, fine. Let's Control plus zooming. And slowly, gradually, or these areas look very nice. And this is the switch, press X on your keyboard switch. Like annoyed, I'm just gonna make this small. I'm just going to go over the high-tech. Look. This is perfect. Now, let's add a layer mask plus B on your keyboard, make it a bit bigger. Black, and it's too much right? Flow. It should be 1%. I'm just going to go over until it's not that sharp. Like a cool look in we have creative, perfectly amazing. I but these areas are too much. I just click, this area is too much. So it means we have to get in, press X, press D on your keyboard, and the flow, one person is fine. This can go gradually. I'm just going to go over this part. Shouldn't be here. Actually, we don't see this because the shadows are too dark to see any. Let me just increase this. Nice. This is the reality of this. I mean, let's just go back. Very nice. Cool, right? It takes you off, on. And let's mask mean yet it too much. Let's go back this. Now it's adding, it's perfect. All right, now we created one eye. Let's do that and add it to another one. So it means I'm just going to click here, hold down, shift, click here, press Control or Command G to group them. It's going to be left eye. Awesome.
11. Copy The Left Eye to the Right and Adjusting it: Control or Command J to duplicate it and bring it here. Let's zoom in. I'm just going to put it perfectly. Let's see. Let's see perfectly. Yeah, that's cool. Now let's go inside. Let's rename it first through, right. But i and it's not carpi we don't copy in Photoshop. Right. Okay. Now, this part, it just goes away. Mask mean the circle. And I'm just going to get smaller. It's going to paint over this. To bring back the highlight on the right. Let's make this brighter and late makes these darker. Or let's see what we can do with this one. If you go inside, if I click and this one, it's the one right. And just going to maybe just duplicate it first concert command J. That maybe one more time, Kentucky I and j. Alright, let's, these three are together. Let's Control Command E. So make it as a one. Now, because you are Blair and let's Blair, these bits shouldn't be that sharp edge, right? It's going to be, should be like this. Let's go do the same thing that this one. Click this one. All right, let's pick up the player and there it out. That's the reality. School back. I think it's fine. And let's also do it here too. Let's click here. I think is this one, right? And blair it. Now we have the ice screw up. This left and right.
12. How to Clean and Change the Eyes Color: Which can zoom in a bit. Add a new layer. Let's see. This one is too sharp for think. Maybe bring down the opacity a bit. Much better. All right, let's add a new layer. I'm just going to clean this mess. Good to telling brush. Put the more than Brighton Alt and just copy it. Copy from the bright side. Easy and cool. Is that right? We can clean and fix everything in Photoshop and we can create something crazy. I think I'm really enjoying this, you know, let's see. And you see the color adding as with the other one, is carping very fast, very quickly. And ongoing. Join. Just put on some music eyes and enjoy this. The lighting is only lighting the dark side. That's the point. That's why you put it on lighter. Because we have some dark side and reversed. And you want to just lighten that part's not the bright side right? Now, the next thing to do is add a new layer. Press B on your keyboard for brush, switch to white and just paint a 100 percent flow away. Do not to worry. Let's zoom in. This part is crucial because small, very small part. Look how accurate we can go. All right, Now let's put it on satellite. And that's, it. Sounds like these parts maybe we can mascot, press B union keyword. And this part is a bit too much. Look, I can do that. Let's go inside. All right, now let's add a new layer B on your keyboard and start painting in this manner. And the same here. Again, see this part. Right? Now, put it on soft light. Again, we can mask this park. Again. If I'm clicking and mask, it would be awesome. Press B on your keyboard to switch this and this part. And this part is a bit messy. So it means we shouldn't do too much. All right, cool. Now, if it's too much, I'm just going to select both of them and bring down the opacity until I get a perfect match. Specific. It's going to zoom in on this one. Look, right? Plus b should go in with a very, very small brush. Again, Control Z. That's it. Let's go back. Nice. I think the curve, It's not perfect. This one. Now it's nice. Let's go back. Right. Now. Everything is okay. Now let's colorize this too. I'm just going to add both of them, put them on a group. Cool. I'm just gonna call the eyes. Let's the adjustment layer. Hue. Bring it up. Bring it up. Just looking for a very nice yellowish color. Bluish, blue, bluish, much better. Now, controller Command I to inverse the selection, press B on your keyboard. Let's zoom in and just paint over with white. Nice. How cool is that? All right, Now, let's zoom back of it and click on the hue. Now, bring down the saturation. I think this is perfect. Awesome. So we have done the eyes.
13. How to Draw Eyeslashes: All right, In this lesson we're just going to fix the eyelashes. So before that, let's group all this. They get a little messy. I'm just gonna hold down shift, click here, press Control or Command G. And you have a group of eyes. Let's create a new layer. Let's zoom in a bit. Let's see what we can do for fixing this eyelashes. I'm just going to be on my keyboard, right? And just go to window right now click on brush setting for breast sitting. I'm just going to, I'm using a pen pressure tablet. Just make sure the shape dynamic is checked on control is on the pen pressure. Make sure the transferred is on Pen Pressure 2 and the buildup, it should be a check on, right? And let's make it just right-click on your keyboard and put the brush size and five and z, I'm picking this one. Right now. Just look, if this is totally black. I'm just going to click and drag like, like this. See, the edge is and it's a bit care of ish, right? Just going to press Control or Command Z. Look, I'm just going to follow the eyelashes line. But if I go too far and this could press Control or Command Z to come back and just follow the line. We can also use eyelash and brushes, which you have in your palette. I'm just going to show you. You can use those as well, but it's very simple. We can draw it ourself. Just keep doing the doing very slowly, very gradually. And you have to be careful. Just follow the lines. That's the secret. Just going to follow here. Is Control Z just to get too close. And let's go up a bit. All right. Let's see before and after, before and after. I close that. Now, for the inside we have a care of these angles should be like this. Click and drag. And we want to color beat dark. It's shows better because it's going to make the eyes pop-up that we're not going to go to close a bit here. So it's gradually disappearing. Now, let's go for the other side. The same. Just click and follow the eyelashes to get too far. Just going to go a bit far. Too much. Right? Now here. That's it guys. Let's take a look. Just going to clean this mess. At the end of the tutorial. Just going to go back and fix a small little things, smaller details. So that's it. We're just going to call this eyelashes. And show you another way of doing that. Let's turn this off and create a new layer. Just press B on your keyboard right-click. And let's go to this little icon here. Import brushes. I have some brushes for you guys. I'm just going to click on the five plasma here. Now, let's drag it down. Go to the last one. It says eyelashes soviet file. And open it up. You see if a click and you see there's a small little details. You can click one-by-one. We can add one by one, like if you're using mouse and just you can add one mobile or can come down and there's a small little things. I mean, you can use all of this. I mean, here you can just press Control T, break it here, make it smaller. Make it a little bit smaller. I'm going here, right-click orbit. Right now press Control or Command J to duplicate it, bring it this side. And this is the other way you guys can do this. Just going to This E and C before and after. You can play around with it. You can just warp it to make it the same. Look as this one, like this. Look now it's totally matched. You can use this method as well. Maybe it's very nice, but I prefer to use the handwriting, eyelashes. I think it's more natural. Right, cool. Now let's select this to press Control or Command G to group them. We call this eyelashes. Right now, we easily fix the eyelashes.
14. How to Use Pen Tool for Cleanup: Alright, Now's the time to fix the hair. See, the hair is messy, is not as trade in. It's going all over the place. How to fix that? Let's create a new layer and press P for pen tool. Let's go inside and let's start. Do some stuff exactly like what I do. Then Alt, click, click and drag, hold Alt and click. Here. We just following the feather. If you're going to select them and get rid of all this stuff, it's very difficult to do this. Let's press Control Z, Z, well done, Alt, click, drag, hold down Alt, click the plus sign, holding Alt and click here. And so this will go like this. And click this. Click and drag, hold down Alt and click this click here and drag. Click, drag, click and drag. Drag. That's all right-click and make a selection. Press. Okay, now I'll press S on your keyboard to pick up the clone stamp tool. And we're just going to copy the same area, like hold Alt, click here. And let's copy that area to here. We want to take the exact same color and texture. We can do this with a brush, but here it is much cleaner and more professional way of doing stuff. Control D or Command D. Now that sign is fixed. P Again, let's go inside. Let's create some stuff. Again. Click and click and drag. Click and drag, click and drag. Here. Now, click and drag. Big-time or Alt. Click, click here, click here, it's okay. You are going to fix and draws on here. Right-click and make a selection. Okay? S for clonus down to Alt click and drag. Just going to paint the same area. Hold on Alt click here and do the painting. There's a trick you can do the control edge to just disappear the selection control edge, but sometimes you forgot to bring it back, so we're just going to keep it this way. But there is an option because sometimes seeing these lines and selection is very distracting. So that's why I'm just, sometimes I use light. Here we go. Let's concentrate and less talk. That's why I have to listen to the music right now, because music is very inspiring. Control Command D to de-select and z. Let's go back and we are here. After we just draw some hay, we can go back and clear all this messy here. But right now I'm very excited to just draw some hair.
15. How to Create Hair Brushes for Drawing Hair: But we do, right, let's create a new layer. Press V on your keyboard. Let's go to Window and brush presets. Here, if you're using a pen tablet pressure shape dynamic should be checked. This brush tip shape makes sure the spacing is on. One. Shape dynamic is should be on and pressure and scattering should be off. You don't need a transfer pen pressure and build up this all you have. So make sure this one is spacing is unwound. That's important part. Right? Right now, if we go to our brushes and pick up this one, Let's go back and hold on Alt and click. You can draw some line, right? Sunlight. But it takes ages if you go one by one. So what we do, we get a preset. Let's get Ctrl or Command N on your keyboard. Make sure the width it two by two inches, the resolution 300 press Okay. And we can come here and just make sure this is black rectangle, Elliptical Marquee Tool, hold down Alt and let's create a new layer. Alt, Delete, Control J, V, Alt, come down. Make this control T, make it a smaller wing it here. Again Control J or Command J of come down, make it smaller. We have just three sides, right? And we can put all that old legal now and put this all over the place. And the spacing is should be equal center. But you don't need to do that because I've created something exactly like this for you guys. If you go to your files, files, and here we go, Hair Brush Preset, just click, and this is the preset that I have created for the hair, right? Then you have to just come here to Edit and Define Brush Preset. I'm just going to call it hair 0, 1, Udemy. Cool. I'm just going to press Okay. Now my default is exactly like this. Look same thing. Just going to go back to.
16. How to Draw Realistic Hair: By file. And make this small Look. I'm just going to hold down all pick up the same sample and dry. That's all I'm doing. But before that, it is going to move this around. I press R on keyboard, this is going to appear. Then I'm just going to drag it to lift the right to the right angle with my hands. So press B on your keyboard. Make the brush size again. And just going to draw can make the brush larger. But if I go closer, you see it's kinda scattering. So I'm just gonna go back to my brush presets, make sure the spacing is un1. So I'm just going to delete all of these, create a new layer and make sure this is small. Zoom back a bit. And let's keep drawing. Smaller. Highlight is correct, is the one. That's, the lines are straight and restrict. So let's do this one. Now. It's okay because the pen pressure is not because I want to control it, get my pressure. If I press too hard, I'm just going to go and I click, Okay, that's cool. So it can be luck. And here we go. Let's go. I'm just going to put some highlight here. So after some white, just gonna do some highlight. Small brush. I liked White. Sure. Sure. You go too much crazy. It should mean basically is that we are really trying some here and I'm just going to follow these lines is not going to be always straight, right? So you do need to just go and clear all these small little detail because we can paint over it and just pick up the same sample. And that's all. If you want to see what we have done. So for press R on your keyboard is that the view is Z. Let's go back and he'll go before or after. It is cool. But they need some highlight here. Are on keyboard. Come here, be white, highlight, color. It can be smaller or larger. You have to go over two or three times until you get the perfect match. Exactly like painting transmitter. Actually, we are painting. We eat, add some more. Even in the face. Be happy at some finite. Didn't go with white on top of it. To make it more realistic. Now it's gonna realistic right now. Just so you're doing a very, very good job. Yeah, adding some hair guys, guys, be happy. Trust me, this is so cool. Finally, there is a course that we can get everything on it. I mean, all cause in skin retouching is just some funny skin retouching. But this is a very, very proper way of doing skin retouching. Hey, retouching, creating eyes. I mean, you have done so many things so far. Sure, Very cool. Too much. Let's put add some highlight. And now we can go right on it and make it more natural. And reset the view. Wow, how cool is that? It inhibits? Or we can make this nicer. B for brush. At some finite nice. R is much better. Now let's go to the other byte is part as cold as our rotate B and it's too much. Make sure adding hollered and dark side all the time. All a switching is not just one thing. And trust me, this is a very simple way of doing this. And there's a lot of ways, but this is the easier one so everyone can follow just the material. So even the beginners, or when a kid just make it can do this. It's very simple. We just need a preset and that's all you need. I think some highlights, some very cool stuff. I'm keeping the air. And here we go. Okay, If I go top of it, and we'll build up from this part. Too much of color. It's not good. Don't go. As we are getting out of this. Too much light. That's why we need some highlights. Why do we can go on top of it to fix that? And trust me, guys, we are doing we're very good job. It's great what we're doing. And if you are using, how easy is that you just, just keep drawing. Let me just keep pushing your pen pressure going down. You can always use your mouse through. So it's not difficult to do. Always remember to add highlight and pick up the color from different side. Because just going to crop this image, we don't need to plus R. And is it do you need to go inside to be for grafting so far is good. Maybe this one can come in every night. Let's close. And here we go. This is the part that you have to fix. It should be showing this way that the hair is coming through this. All right, Now let's get unmask. B on your keyboard again and to black, and let's print that out. Wow, x. I'm going to go back, go back and forth until we can put Clint just going to clean this area. X paint. All right. I think this is a very, very interesting. Again, I think this should become this way. Let's go back to here. And I'm painting, right? Select the fire. Idiot. But I am going to use to do a good job. Well, I'm going to match up the new limit. All right, Now let's look, is the same thing. Or I go find milliohm to fix it. I mean, B for brush it this way. Okay? And B, select and mask the switching. Be X can fix this part. Now, finally, done with the hair. And it is beautiful. Look at it, guys. Look at it. Awesome. It's perfect. You don't believe me, just take a look. What was it before and what is now. Now, we create an agile.
17. How to Do Hair Clean Up: All right. We fix the hair and right now you have to do some clean up. But before that, risk and click Control and click and select this one, Control or Command G to group them and call this hair. Now, create a new layer. Let's zoom in and do some clean up. This extra hair here and there. All right, press G on your keyboard and pick up the spot healing brush. Now you have to be zoomed in and very slowly and gently. Just go over the lines, right? So Photoshop can understand this part very slowly, very gently. We are smoothing, say, very gently. Fix it. So again, we're just going to come back and put some hair here, but that's all right if you just want to get rid of the smaller details here and there, just go over to three times a day Photoshop understand perfectly. All right. As I said, we're just going to go back again and paint over this part. We just want to make more care to the hair. This is the process. We do it two or three times until we get the perfect match. So I'm just gonna painting or this lines and Photoshop eventually. We'll fix it. And it's very minor detail so you don't really see this, but you want to be perfect. Always. We do something very, very perfect. It should be. Because you are a perfectionist. You don't want people say anything about our job. I mean, anything bad. Of course, in that's why we do what we do. We do something very inspiring, very crazy. Everybody keeps saying, how do you do it? And you see the process. It takes time. But because we love what we do and we really enjoying this, we can create such a perfect creature in now. This is a new creature. I mean, it was a huge difference from start to the end. Started with small and little things. I could give you started with and let us say ugly phase. But because of the makeup, it was so scary. So right now we have created an agile. So, you know, there's a lot of difference that plus j. Let's fix it. Then. We're just gonna go back and do some hair. Again. Photoshop is so amazing interests than everything perfectly. I don't know who was the creator of Photoshop created this beautiful software. I mean, how's that possible? You guys are so, so, so crazy, so smart. I know it was a process. It wasn't like this first, but, you know, they build it up. Every time new version, every version new updates with creative features. For here because we're losing some texture, is going to go to link bridge pickup, this one. Start painting. I'm just holding Alt. Just going to tell him pick up the right side because now it till what to pain is much better than men. Coming to the texture is Spot Healing Brush is not a good option, guys. Always change it to what you guys think is better. And that is the healing brush. Is it right? Is it easy in here and there? And you don't really see these things, but we tried to fix everything. Even smaller detail. Okay. I'm just gonna concentrate because it's a very, very important point, is close to the face. We shouldn't mess it up. And I can see we can put some texture here as well. I mean, anybody who has it, the MSM, like hey, rest of the lips. Let's go back. Is better. Right? Now. We want to do something, but here I'm just going to maybe bring the heavier bit inside, I guess. So I'm just going to click it, create a new layer B for my brush. And let's make it a smaller rabbit. And here, I need a proper care. Right now. Looks better. Nice. So what do I get closer? It is a small little haze coming inside. Now it looks natural and make it small. Small little line. Nice. And you can follow this. And this is cool as well. All right, awesome. I'm just going to hold down Control command G and call this cleanup. And here we go. Maybe there is another one up here. Let's see conflicts. This G is going to pick up line here. Smaller detail. All right, Nice, Very, very nice guys. We have created such a beautiful thing, right? The cleanup is over and now the eyebrows.
18. How to Draw Eyebrows: All right, Now it's time to the eyebrows, right? How we do it? The eye abroad is under the hair, right? So we have to be below the hay right now. I'm just going to come to the eyelashes and create a new layer. Then I'm just going to click Control or Command G to group them. And I'm just going to call this eyebrows. Right? Now, click the layer. Let's zoom in a bit. And you can see that if ten of the here, this is the area for Barbara. I'm just going to turn it on now I know where as it press B on your keyboard for a smaller brush, right? Small brush like this. And let's pick up a color like this. 2 E, 3, 7, 4, 6 should be around this area. I'm just going to press OK. Now, slowly follow the lines, follow the lines of rows. Shouldn't be too much, very little, right? Slowly. And we don't even see that part. I'm going to click OK. Now, let's go to the other side. Here. We can add more. Like a cool. Maybe we can change this birth as well. Okay, Now let's go to the other side. Very slowly. Just follow the care. Too much. If we see some area like the yellow rose, It's fine too. So very gradually. Now put too much. Let's go back. Right? I mean, and I'm just gonna getting into here. Because this one is click on the mask and plus B on your keyboard. To switch. Let's go back. We want to see the hair, the proper Ambrose. The leg is okay. I guess the proper Ambrose is nice. You can see them. Totally. Okay. I guess it does that the mask. I'm just going to come back here. And here it is. Okay, let's go to eyebrows. And it's going to paint small, bigger. Let's think. I think it's much better. But here I think it's too much here. This B on your keyboard. And this go to mask. And let's make this bigger or smaller. Must out. Again, this is cool. I think this is much better. And gradually like this, too sharp. And you want to move perfect. You have to put some times and effort. You have to create something extraordinary. Let's create another layer on top of it. Now let's add this part to it. So here it's more buildup. Buildup. Okay, cool. I really like it. Right? We've finished their fibrous.
19. How to Change The Hair Color: All right, Now it's time for colorizing. So let us start with the hair. For that, just click at the top button and the cleanup then go to your adjustment layer and click on hue and saturation. Okay? Now, drag the saturation to the right for now. Then drag this around until you get something bluish, but it's not going to affect the white color. Now, check on the colorize. Now everything has a color, so it can bring up the saturation and bring this dry to live until you get something that you like. Something bluish, I guess maybe more. Maybe this goes down to see some dark areas. And I guess this would be nice. Okay. I'm just gonna bring this back. Not too much around. Fish would be fun and it's okay. Now, just Control Delete, which means we don't have a mask. Everything is black on the mask. Now, pick up your brush tool. Press B on your keyboard. Make sure the floor for now is a 100 percent. All right-click with the mouse and start painting. Just go and paint over everything. And you see this kind of flat. But if we change the blend mode to multiply, see what happen. We have some depths, Qu. So let's put it on multiply and I start painting all over the place. I mean, just on the hair. Okay. And this is cool, but don't paint the feather, you know, if you want to keep it white, just get closer, not close. I'm just going to zoom in a bit Control Plus to zoom in, I'll right-click. And I can go exactly inside. In ice. Here we go. Don't worry, just the big thing. Then you go a bit closer and we do a small little things that you see. Let's right-click. Make this larger and small things very slowly, very gently. Cool. Because we want to crop it until here. I don't need to paint after this, we're going to get close to this dot. So that's all I need. And here I'm just gonna press X and love. And let's go into here. We don't need to paint the rest because we want to crop it. Let's go to the right side. Plus B on your keyboard and start painting. And do not worry about anything. We're just going to come back and fix a small little details. If we go outside would be fine. Just going to fix it later. All right, here and there. Now, let's fix this part first. I'm just going to get closer a bit. And again, press B on your keyboard, make small, make your brush smaller and smaller. Here we go. Until, because I want to clean this, but definitely is too much put the fur there are 62 and it is fine. Do something like this. If it is coming from that angle. And here we go. Just going to go over it and start painting. Smaller. For these corners. You have to be very precise and very patient. If you want to do something crazy, something amazing. Yes, you have to be patient. You have no other option for perfection. You have to put time, effort, and patience and practice. You know, these distinctions, small little details. We need a lot of practice. Everybody looking for what is the fastest way to do this? There's no fastest way. There is always a small little details that you cannot fix. There is a lot of tutorials that it's the best way, an easy way to clean the hair and a lot of stuff. But for certain things and some areas, I mean, the real life photography, we cannot do always that kind of stuff. Yeah, it's going to help but estimate it's not going to fix the problem. So again, you have to come back and do the dirty stuff. The dirtiest off means that you have to come close to the thing and do small little thing like close up brush and use your pen tool to fix something. Go over things many times until you see it's perfect. What do I do this faster? And be faster if I can. So this is very, very cool and very, very interesting process. And I always enjoyed painting is kind of fun for me. Now for this part, it's a better way to do that. Right-click and pick up your hair brush again, make it smaller and make sure the flow is around six is two would be fine and slowly start painting. For these areas. This is a better way for painting because the brush is going to be difficult with the round brush to paint these small areas. So we have to be very precise and very accurate. So that's why we are using this brush to also paint. And make sure you're going with this same direction is called, right? Maybe a bit here and there. We don't want to see some white areas, but right now we are so close. So if you go back, you don't see much of this. As is too much. Sometimes you have to keep it white. These areas would be fine. So that's y. And here is a bit. Let's go back and we're just going to come back and fix it. Areas As well. Some areas like it is very interesting. This area is a bit more now it's more realistic. It's going to come back and see it like this. I believe this area needs again, come brush and make your flow with lower, make this smaller. And we don't want to see these small areas. I mean. Very small things like a highlighting these white areas that is kind of distracting us from thinking that maybe is Photoshopped. But it's not 30. This Photoshop, but you shouldn't think this Photoshop. If you think it means something is wrong. We have another we haven't actually, it means we have not done a perfect job. It's our fault. That's why every time you just do this, it should be perfect. Now it's much better. Wow, so-called circle. Now it's time to clean these areas. This area should be blue, right? So you ready? It's going to be a long time to fix this, but it's going to be fun guys. A 100 percent. And this is X4 lag and start painting. We are going to fix every single detail that is on top of the hair. So I mean, all these ammonium that is kind of a avant-garde, kind of a makeup or dress. So we have to fix everything. Wasn't there. Right? Make your brush smaller until you can just follow these lines. And if you have to go over all of them, it takes time. But for perfection, if you're gonna do something great, something amazing, you have to actually make time for that. Nothing is easy guys. And especially when you want to do something different, of course, not all of the retouching files and photographs have the same thing like this and the head, but don't be scared to clean up. I can fast forward this for you guys. I'm putting on some music. But still you can see the process, what I'm doing because I don't want to waste your time. And actually it's kinda fun. Make sure you always follow these lines. This line is coming inside, then you can fix all of this. Okay? Hi. All right. Now it's finished and I'm just going to go around. See if everything is messy or have a problem. Or I think everything is perfect. So far so good. And that's it. We have painted the here, so this is part of the image, so I'm just going to keep it that way. So we have painted this area perfectly, but I think we can some hair in this area as well, so you don't see this much. So what we can do is let's go to clean up. And here we go. Click new layer B for brush and pick up your hair brush. Make it a smaller click up here. And I don't like to see these kinda step press R and here is 10 is off for a moment. And just imagine we don't have the colorized hair and P on your keyboard. Let's paint this area when this is jagged. So it means you have to go to your brush settings and this brush is spacing. I'm just going to fix it. That's all you have to do. Zoom back a bit so we can see more of it. Which is going to cover that area. Small little beautiful hair. And we can add some highlights like this. Make the brush smaller, very small, and add some black in between. So it's not gonna be so cool. Adding some dark areas to the hair so it will be more natural. Let's press R again and reset the view. How cool is that? How cool is that guy's very, very nice. Maybe we can add some more you ever, but I think it's fine. It is fine. We can add some more here. Nice. Okay, cool. Let's put up this one and we see this one is not selected, which means we have to go to our brush B and make sure it's right and start painting over this area that we just added. Pictures, painting, race. Nothing more really fancy. Just painting indeed closer. Because B and paint over the hair. How easily record those areas that it was kind of ugly. And within a legate, we just painted with the hair, does technique coming. Painting hair and creating hay. But yourself is amazing, is going to help when it's going to save your life. A lot of times. Plus b again, n, bring down the flow for these small little areas. So we can easily add some kind of highlight to it. Let's go. Let go. Now we have to add some depth to this hair. So how we can do this? The first thing we have to do is make put this layer into group, press Control or Command G on your keyboard. And select this mask layer and drag it and put it on the group. Which means everything inside this group is going to be inside this mask. So for example, if I go to adjustments and put the curve layer with this one, I don't need to put another mask inside and paint again or copy this mask many times. Everything inside this group has this mask. That's all. And simple. Drag this up a bit, the light and the shadow down. So we put some depth to our image C. And also later, I'm just going to come back for colorizing. I'm just going to go to the red color and add some more colors to make sure all the phase and the image is colorized. So for now I'm just going to keep it this way. And later we're going to come back if we needed it and fix their everything. So hair color. All right. That's done.
20. How to Colorize the Neck : All right guys. It's time to colorize the neck. So how we can do that? It's very simple. Actually. Just go to your adjustment layer and click on Color Balance. Just bring the yellow to the right side and maybe bring to the left is say around and just leave it there for now and press Control or Command I. And just press B on your keyboard and start brushing. Brush the color. Make sure the flow 100 percent opacity, 100 percent. So that would be easy. I'm just gonna go here very easily and very fast, very quickly. For now. Just until the edges. Then you have to go zooming and do the EBIT hard worker. Like, Oh, very nice. Here we can also do the hair coloring, so I'm just going to finish it up and then go back and chlorides the neck. When you get closer you see a lot of stuff that you haven't done and that's part of the job. Sometimes you miss something because when you watch for 23 hours something, sometime you couldn't see a small little things and you forgot because you're thinking for the next level, what is going to be the next move? Then you don't see the real thing, real stuff. Now, Let's get closer. Please be again, just gonna make this a bit smaller and rush this over. Smaller x. And the cool thing about it is, is always going to come back here and just brush the hair. I mean, this part is missing, right? So I'm just going to brush it out. So that is it. Well, it's not that hard, you know. Just be careful. Smaller and a bit zooming more. Rs is going to be very precise because this is very close to the face. As bar again, and listen to you. You're going to get closer. Be an airbrush and just here we go. Press and brush this back. So let me zoom in and out. So until you see everything is going to be perfect. Now. Nice, very clean. And very nice. It's called this neck, the neck part. And let's call it net new color. So now for this parts, I'm just going to press B and make sure you're selecting the mask, right-click and pick up your hair brush. Make it smaller. And slowly just paint in. Make sure your brush is wide. So I'm just gonna painting because of this small little lines. I'm going to align it perfectly. Look would be something like this. In this zone inhibit its being here. Smaller. Make sure you painting one. That's a good point. Because sometime you just pinging or something and you're thinking, is it painting or not that well, that's the time that's not dating. Which means you have to switch these two things. So I'm back maybe here. This small little detail which makes your work perfect. So going back a bit. Here we go. If you want to see if everything is perfect or not, hold on Alt and click here. Then you see it is not perfect. Right-click and click on the rounded brush comeback here. And make your brush bigger. Let's hold Alt and click paint here of the sphere. Okay? It's okay. It's going to measure. So it is fine. Maybe this part, press B on your keyboard and start painting. This part. Here you go. We kind of we didn't paint here. And small little details here. So you should various lowly, I'm just going over this part. Maybe we turn this clean, this area. Again to switch and end. We're just going to come back and always see if there are some parts that are missing. So don't worry. If you miss something, you always can come back as Photoshop. I don't really like these areas. I mean, I don't know. Is clean this first area and let's go back to the here. And this part. See if we can pin this out. This area. Now. To fix this, I've been resurrected and pick up the hair brush, make it smaller. And here we go. Now this is coming to this part. To Mac. Now is much better. Now I feel better about these area. Okay, very cool and very interesting. We just finished the neck, but let's make sure the color is totally perfect. Still didn't match with the hair color. So let's drag it to the left, that bit. This one to the right. And I guess check here is 100 percent. This one. This is very close. Maybe this one. All right. This can leave it this way and if you don't really like it when you can always bring down the opacity, play around with it and make it perfect for your color. And I'm just gonna leave it at a 100 percent. I can always come back and fix it right before we finish it. I can see some parts here. A year is too strong, here is not going to get zooming of it. And press B on your keyboard, make sure the mask is selected. And I'm just going to press over these areas. Let's zoom back a bit to see better. This is better. Now it's color kind of matching. But before that it was like it was too much color. Let's clean this. So that's really cool. It's better to be very, very light. It's kind of distracting. X. Alright, I think that's much better. So we finished colorizing the neck.
21. How to Makeup and Change the Face Color: All right. We finished the neck. Now it's time to go from the face. Let's press Control or Command G to group this. I'm just going to call it Nick color and close this down. So for the face, the easiest way to add some pop up, do it. I'm just gonna go to Adjustment Layer and click on hue and saturation or WACC. Let's add just some saturation. I mean, that's all, that's all we do. We add a little bit of saturation for this image. Press Control or Command I to remove the mask for now, press B on your keyboard and make sure that it flows a 100 percent. Go just under face by rows would be fine to face eyebrows. Very gently with a slowly the ellipse, It's okay. If you go even inside the lips would be fine. Okay. So we're just going to colorize it later. Okay. So yeah, How cool is that? We add some more pop up to the face. We just increasing the saturation. The face, the neck, the hair, and every single part has his own different color. And we try to color match all of these together. So for now it's a bit dark. So how we can fix it? Let's press Command Control G to group this hue. I'm just gonna call it face color. Alright. Now let's go to Adjustment layer and add a curve. From here, from the highlight. Just bring it up. Okay, CU Control Command I. Now press G on your keyboard for gradient. Make sure this is selected, the radial gradient. So make sure the radial gradient is selected. Now, come here. And just from here, various model is small little thing. Can you see there of R? We add more light and more saturation to the face. And look, how different is that. Very cool. We're just going to come back and fix the lips and under the eyes, everything. Right. So we finished colorizing the face.
22. How to Change The Lips Color For Advertising: All right guys. Now it's time to change the lips color and go round eyes and do some makeup. So press Z on your keyboard and get closed ellipse. All right, plus P on your keyboard for Pen Tool. Or I can just come here and right-click and select the Pen tool. Click here, click and drag. Hold on Alt or Option. Click here. Click and drag. Just be careful around the lips exactly what an altar Option. Click here. Click and drag. Nice. Auto doping. Click, click and drag. See it's very easy actually to do this process. I use the pen tool. Here we go, and that's it guys. All right, Cool. Just right-click and select, Make Selection. Put it on failure to for radius and click. Okay, right now, let's go to Adjustment Layer and go to solid color. Right? Now, pick up something like around bluish. We can change it later, don't worry. And press. Okay. Let's go to Blending Mode and put it on soft light. But right now you see inside the leaves also are getting the color as well. So it's very easy. Pick up your polygon, a lasso tool, select the mask, and let's zoom inhibit. Bring down the opacity to see exactly where we're going. And I'm just going to very, very quickly select inside. It's very easy and it's very simple to do. And we have a selection, bring back the capacity and the mask is selected. Before we do the Alt Delete, we have to right-click feather it out, make sure it's 50 to export it to, okay? And delete. It's soft edge right now. We can also come back a bit plus B on your keyboard. Make sure this brush is selected. X on your keyboard switch, make it smaller. Various loading abuse convergently is gonna go inside to make sure the lips are perfectly selected. Nice. There's a Mac. Alright. Now we zoom back a bit. It too much color, right? So let's click on the color picker and we change the color. We make it a bit brighter. Yes. Purplish. Look. Yes, Very nice. I like this one. And press. Okay. You see, we just colorize the lips. And it was very, very easy.
23. How To Change The Eyes Color: Now, let's go around the eyes command or Control G. And we're going to call this ellipse color. Close it down. All right, next step is go around the eyes and add some color to it. All right, let's do it. I'm just going to good adjustment layer and add some hue and saturation. Just play around with this and this one as well. It's all right, just click on the mask, Command or Control. I. Press B on your keyboard. And very slowly and very gently go round eyes. Don't worry, we change the color later. It's going to go here to the year. Let's do this. Make it larger. And this one as well. To just mix the color to the exactly skin, we have to put it on. Multiplier. Will now select the color, play around with it, see what color you really like. But normally the opacity should be down. Something around here. Around with this. I'm looking on the right side first. I'm just going to add some color that it's similar to do. Here. I think this is nice. Just going to add some dark side to it. It bring down the opacity. Click the mask. B for brush, change, switch the black, bring down the flow. And gradually and small side. This is too much for this. So we can clean the makeup. Here we go. Nice. Very nice. You see how easy and cool is that maybe this one should be a bit darker, a bit. Have a light over there. Now, bring down the opacity of it. Let's go inside and make it a bit purplish. Let's bring up the saturation. Play around with this until we get something like purple. Yes, something like this. We can bring down the saturation. Now, let's see, without it, with it. Now the eyes are popped, right? We just finished the ellipse color and around the eyes.
24. How to Make Your Image Pop: All right, Now it's time for general colorizing. Alright? Alright, now it's time for general co-arising and then do the sharpening and cropping and finish the project. But before that, let's click on here and saturation here and press Command or Control G to group them and call this makeup. All right, I'm just going to zoom back a bit and do some cleanup. Maybe for these color here, I think is not that sharp. If I go to the hair, hair color, you go and press B on your keyboard. Zoom back, and I'm just going to sharpen these areas. Just going to get more attention to these small little things that you didn't pay attention during the project. Alright, that's cool. Then. I'm just going to click at the top for general crisis. I'm just going to zoom back. This is going to be our crop, right? Then. Maybe the lips we can fix it to be, it's going to go back and forests and see which part we can fix and make it better. Here, make it brighter. Thing is too dark too. I think this is cool. All right. Now the other and so many things and it's time for generic arising, which means we're just going to combine all the colors together. How click at the top, go to Adjustment Layer and click on Selective Color. What does it do? Exactly? It's going and looking for the same color and the face and just going to pop it up, right? For red. I'm just going to pop the red a bit. So drag it to the left. Then I'm just gonna go look for blue, pop it and see if I come back to the left. Everything is blue. It's just going to change to a different color, but we're just going to keep it. Lou. All right. Then, neutral colors. Neutral. It means that it is going to affect all the image at the same time. All right, let's see. If I go left or right. See what's going to happen. Is it's just the CEO. So it's just going to add mention that all the image. So let's see if I turn it off and on. Everything is just going to combine as an image. And let's go for yellow. Maybe a bit bluish. See, It's too much. Can go to opacity and bring it down. See, before and after. Now it looks better. Maybe bring it up if it can do 80 of our, alright. Now everything is perfect. We can see that and everything is nice and smooth. The next thing we do, you should add some highlights. So how we can do that, it just press Control or Command G to group this. And I'm just going to call this general makeup. Just go to Adjustment and click on care of Gillick and the highlights and bring it up. And get up and riskier. Now, Command or Control, I, press B on your keyboard and let's see. Press X to switch the brush. Still we can paint on it. See guys, I'm just going to paint and these areas, but flow should be higher. Then see what we can do. We're just going to pop Java, just some certain parts. Like under the eye, most of the time gets light. So we're just going to brighten this part. You have to see it as a whole. Then you realize that this is very, very important. All right, cool. That we added here a bit here. Bead here. Everything has light on, it means very little, a little, a small little things that you see have light in it. All right, Let's come back a bit. Let's go to the ellipse. Plus B here. Here and there. Spoken not a detail. Is it? There are some highlights that I'm just going to add some light to it. If I go back, sit before I left there, see what's changed for after, before. So you shouldn't affect this part that is contained on this part as well. Comeback plus B on your keyboard switched x. I'm just going to clean this part. All right, let's go back again and see it as a whole. F of c. Let us small little things that just going to change and bring the image to life. What else? Let's go around as you some highlights. Press B on your keyboard, X to switch to the white. Just go around the hardest case. Git add some depth to our image. Look very nice. Zach guys. Some shine to it is here. This is too much risk or switchback. Very little smart limit, touch that too much. But let's see, before, after, before, after. How cool is that? Alright, this was the general makeup, so everything is cool. But I think when we just color the phase before got to color the skin tone here. All right, let's go back to the face color. Good too. This level things. They've been DU part. If I tell it off, see what's going to happen. And let's go to the Mask. Press B on your keyboard. And with a white brush, I'm just gonna go over these areas with the flow of 100 percent. And this part should be read two. That's why you have to go in and go back and zoom in. Zoom out. Routine should be perfect. There's a small little things that, I mean, here. You have a problem. The hair part. Now let's fix the color first year. Then. One by one. You can fix every time. I call this B again, and that's it. Let's click on here. Then right-click for the hair brush. Make it very small. And come here. Let's bring the flow very low. Just start painting. We want to make it blue, but very light blue because it's a very, very small liver here that are coming under the skin tone. Right? Look, we're going to fix everything. Before we do the sharpening. Everything should be perfect before the sharpening part. All right, cool. All right. I believe there is something here, right, Let's finish this first. So flow should be five. Very nice. Qu, easy-peasy. Okay. Now we've finished the hairs, but I think we have something here. I think it was for deface, right? So press P on your keyboard, right-click, change it, this one and start clean these messy areas. Very cool. All right, I think we are done.
25. How to Do Sharpening in Photoshop: It's time for sharpening guys. So how did the sharpening? I've just clicked on top and create a new layer, press Control Shift Alt E. So we make all the layer as one top layer is sand image, right? The same image, the same thing that we see. The first thing you have to do is go to Filter Convert for Smart Meter. So we can change everything later. Then we go to Filter and camera raw filter. Let's zoom in a bit, taken basic, and bring up the texture a bit. You want to see before and after. Click on this little icon and then check this one. So sometimes you have to switch between these two so we can see these before and after. So this is the, the abdomen, right? So I'm just going to zoom in so you guys can see, just look the eyelashes, right? So bring up the texture first. So look at this skin tone. Look at the texture here. See how much sharper is that? And we can, we can increase the clarity a bit, very little. There, a little. All right then that's all we did for this part of sharpening. Then press OK or down Alt and click on the Layer Mask. Let's zoom in. Press B on your keyboard, switch the x. And just certain parts should be sharpened. Bring up the flow to 60. Make it smaller just for the eyes. Just look at the eyes. How pop is that? The eyelashes. Some areas here. Here. They get their areas. Just a bit of lips. The light parts, bring down the Florida 19 and just beat here. Now the next part is the hair. Make a new layer. Control Shift Alt again. So make another copy of this one. Let's go to Filter other and high-pass. Bring it down around 1.21.700 and this area would be fine. Then press Okay. Now we have the blend mode and put it on overlay. Well, the Alt click on the Mask. Press B on your keyboard. Again, we do the same parts. It'd be chopping here. We should have Floyd's higher goo, goo that the ellipse this time just IS, That's all right. And this was the sharpening part. And let's see what we have done so far. We're going to hold Alt and click on this bias. Are you guys ready? See the before and after? Before and see the magic and after.
26. Post Your Photo On Instagram With Best Size and Quality: Thank you very much guys. You come so far and we are very close to post this into Instagram and make it ready. So how to do that? First of all, we have to crop it for Instagram. Let's go to File and Save as, save as this image. First. The JPEG, we call this original file and save megawatt maximum. Again, press Okay. I'm just going to drag it and put it into Photoshop again. All right. It's time to crop the image. So how we do it? Just put a C on your keyboard. Go to this area. This panel is gonna give us the exact same thing. That is, the garments is going to be square, or it's going to be four by five, which is what we do, is going to crop it, grab it. This is the point, is, put the eyes of this corner develop third in there. This is for photography. Make it a bit smaller. Again, adjusted until you put this, make it a bit smaller. A bit. There you go. I want to lose this hand that all up. And that's it. Now, press Enter. This is going to be our image. But for Instagram, we make the image a bit Popper than this. I mean, the color should be Webern's. What I mean is I wanna go to Adjustment Layer and click on vibrance. Let's bring up the vibrance and saturation. All right, press Control or Command, Delete, pick up your brush, make it a bit larger. Bring down the flow. And this area should be a bit more colorized. These areas. All right. This is too much. This area should be floor less and clean. X again, very little gentle. And this area, the nose, a bit, eyes, sea ice. Just a bit of the face, That's all. See. The before and after image is Popper. But this area, I guess this is a bit too much. Just going to pop that off. And this is it guys. I haven't. Now's the time to save this file. To save this 54 Instagram, the best ways click on Control Shift, Alt and W is going to bring up the Export As This is the best way to save our file. Right? I'm just going to zoom in, see the quality. But it on JPEG quality a 100 percent, and that's all. And convert to sRGB is active. Click on Export, name this file, final image, and click on Save. And that's all. So let's bring up an image. See what you have done, guys. Let's get the original file. See it again. Hold on Alt and click here before and after. If you really liked this tutorial, give me the Firestore, give me the good comments. So I really need this. Thank you very much. Thanks for purchasing this course is going to help me a lot to create a lot of stuff for you guys. I hope you guys enjoyed this tutorial and really wait for the next and the next tutorials.
 Soli Art, Content Creator | Digital Artist