Transcripts
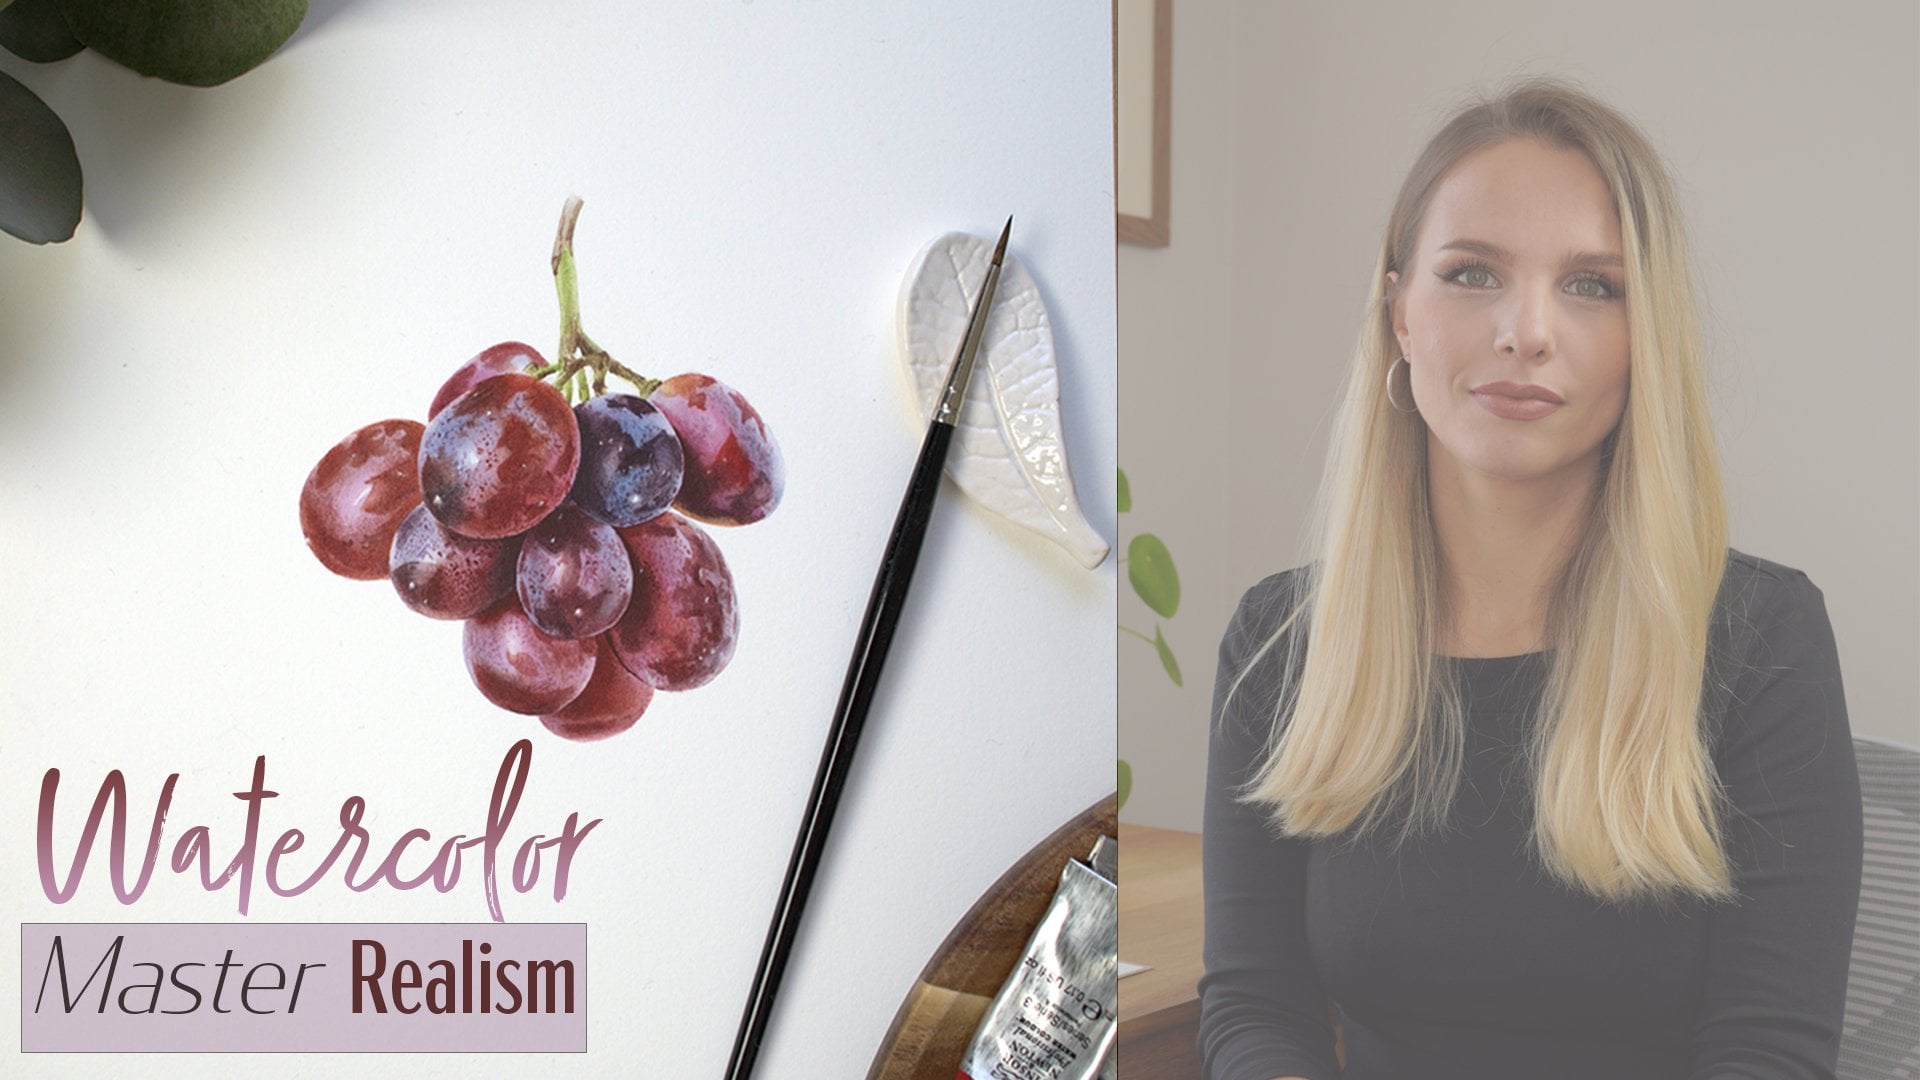
1. Introduction: Hi, my name is add a
little color and I'm botanical watercolor
artist based in England. Watercolors, my favorite medium. And I'm mainly known for very realistic and detailed
botanical paintings. In this course, I wanted
to share with you all my basic main techniques that I use for every
single painting. So those would be like
wet on wet, wet on dry. And most important for me, the dry brush technique. I have many projects planned
for my Skillshare community. And so I wanted to have some
basic technique classes in one place where I can
refer my students too that are not familiar
with the basics before I attempt all the more
challenging watercolor projects. So without further ado,
let's get started.
2. Materials: So for this class
you're not going to be needing a lot of materials. What you will need
is watercolor paper. If you're using heavier
than 300 grams, then you are ready to paint. But if you're using
300 grams or ladder, I would suggest you
stretch them onto the board to prevent
it from Brooklyn. For that you will
need come tape and sponge to apply your
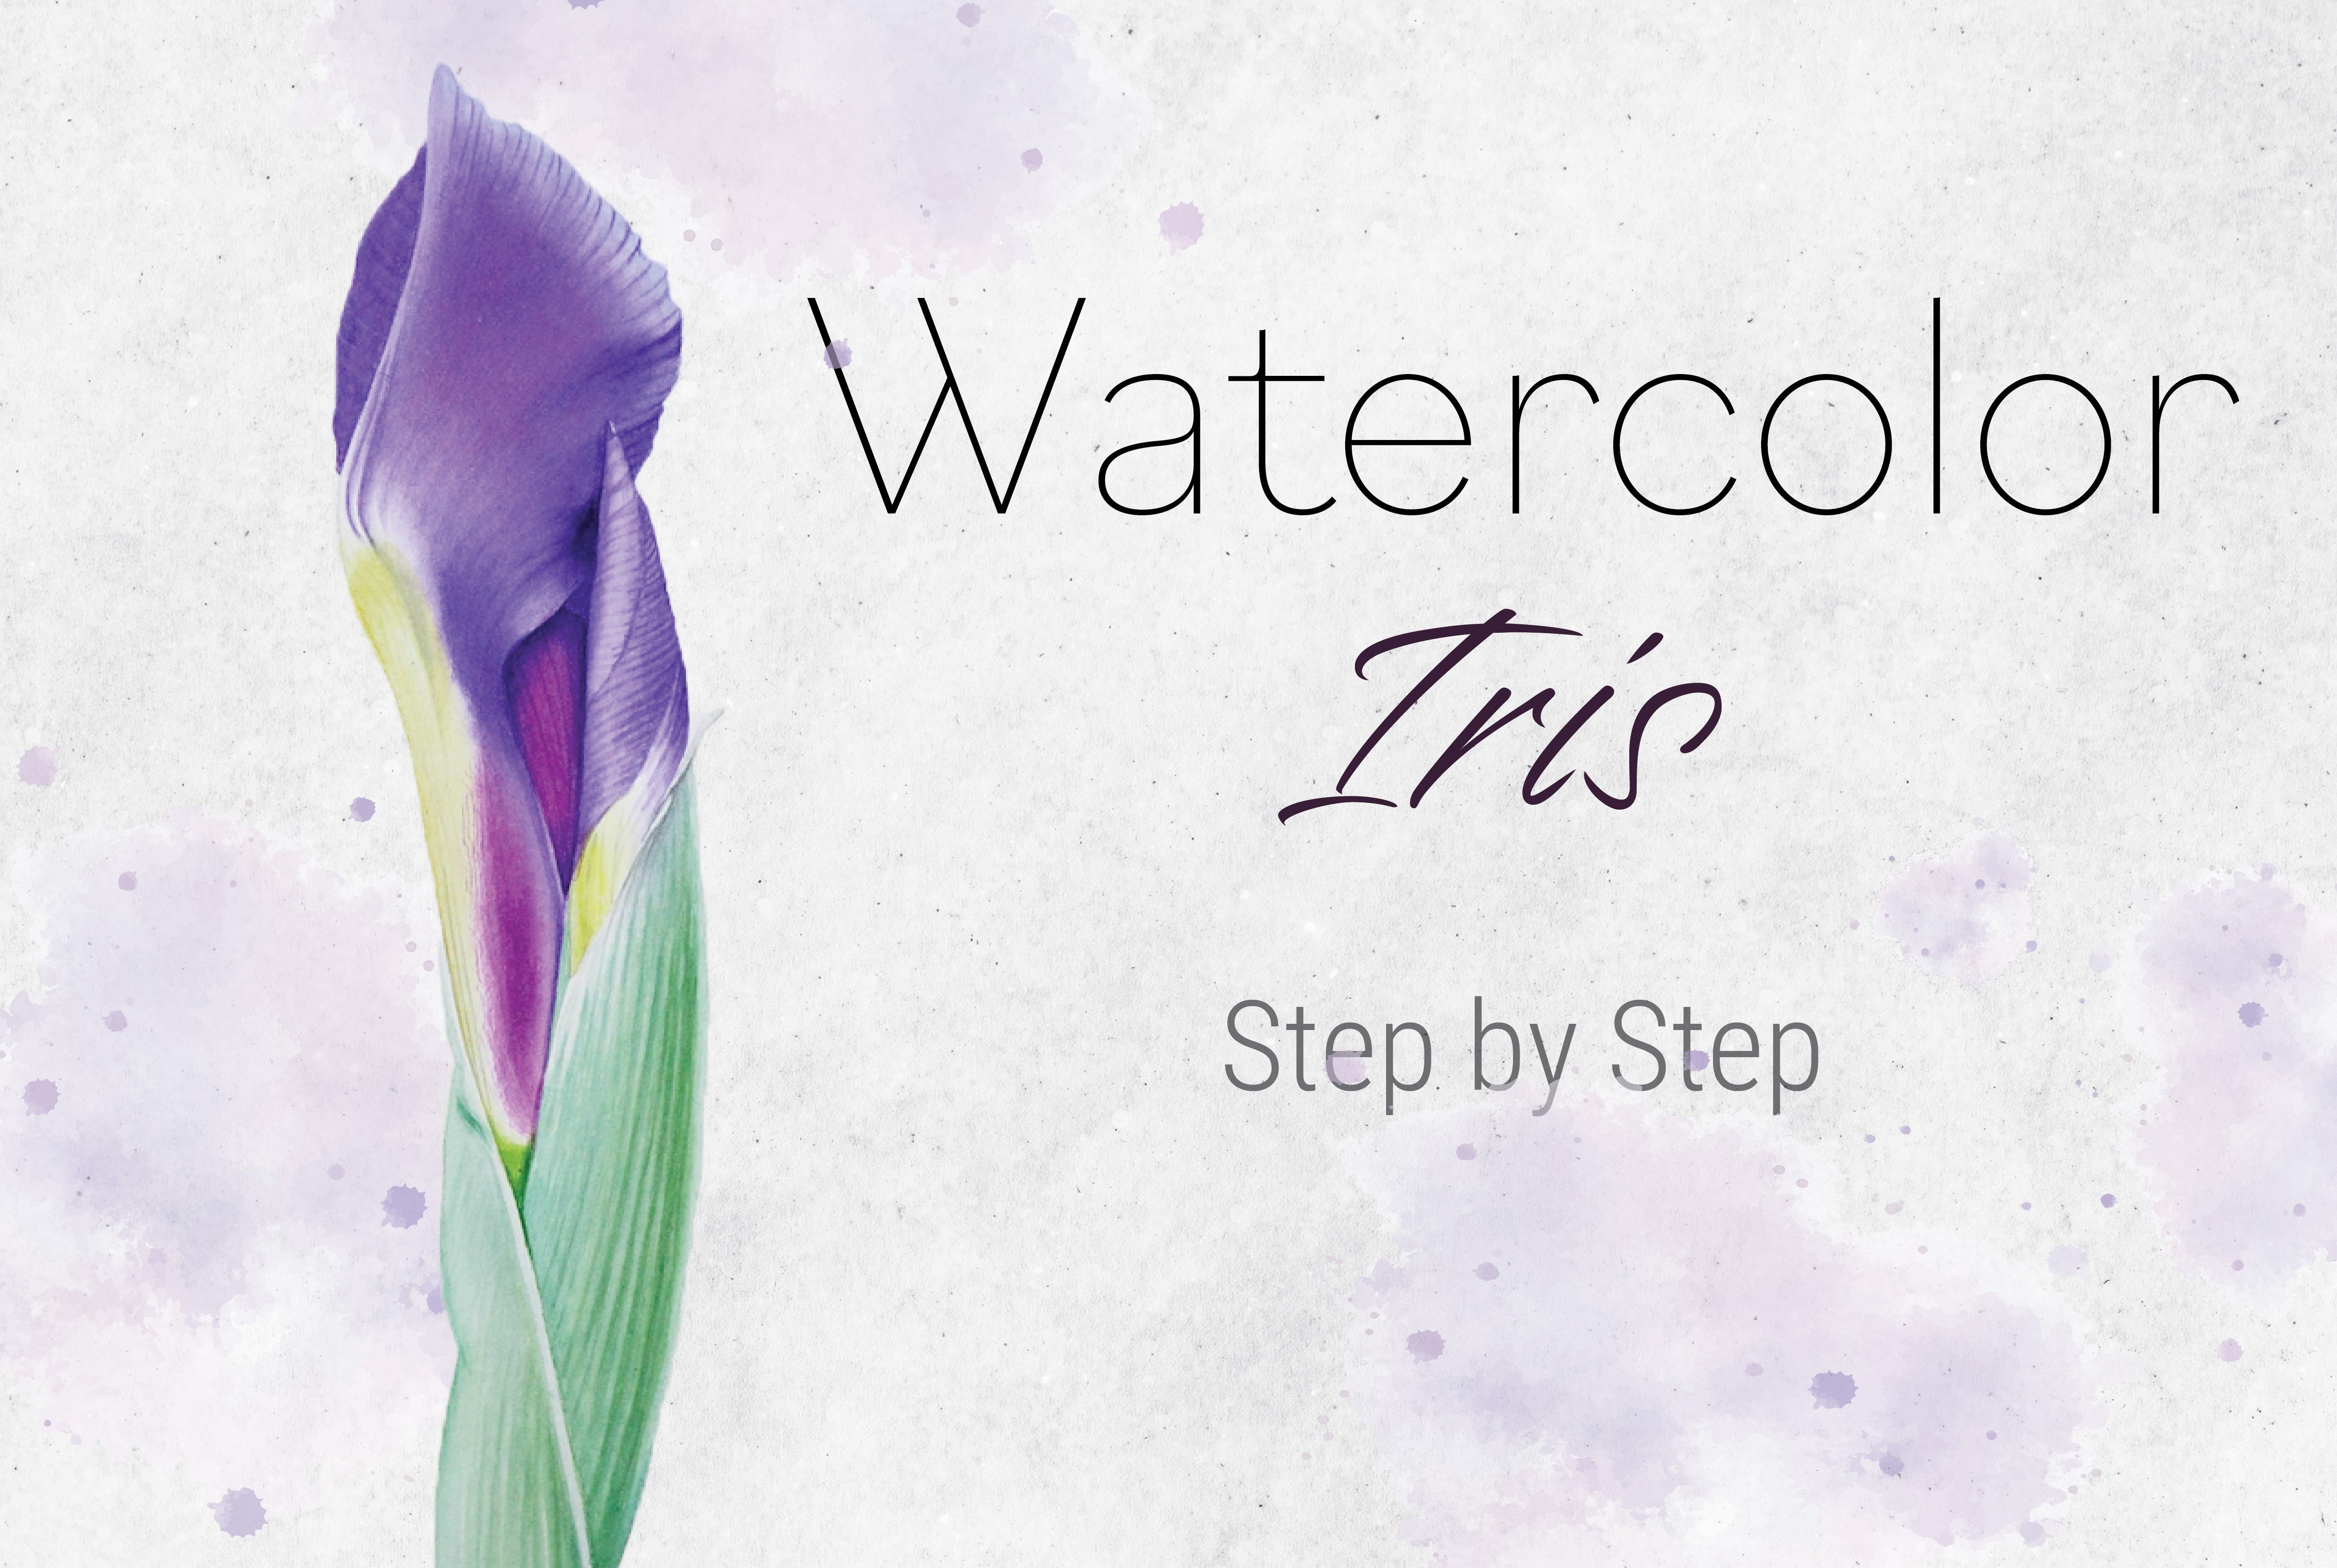
water onto the paper. If you would like to
know how to stretch your watercolor
paper on a board, go to my first-class,
watercolor iris, but where I show you how to do that and choose the
class accordingly, then you will need a
pencil, hey, eraser, your favorite brush,
and your palette. You can mix a color and
then any pigments you would like because this class
is for exercise purposes, so you can use any
pigments you want. I will be using some philo blue and some green. So
let's get started.
3. Wet on Wet Technique: So I would like to start with, most widely used
technique is wet on wet. And that is technique
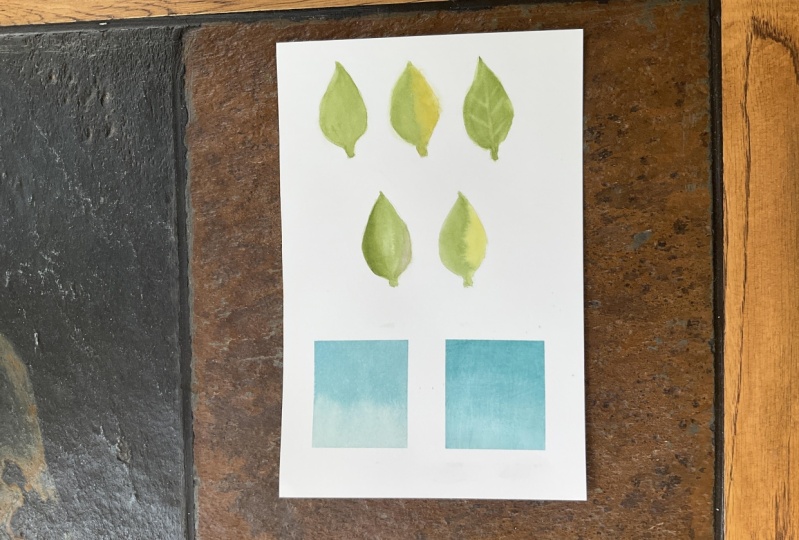
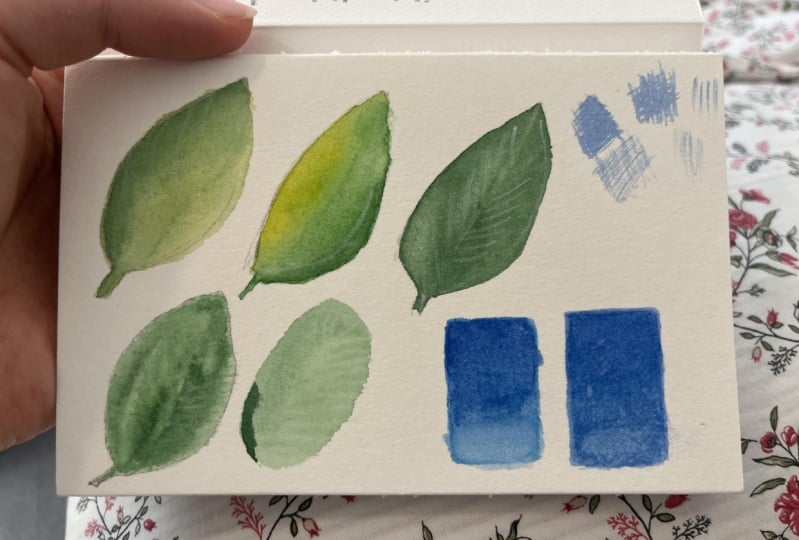
when the paint is applied onto the wet paper. So grab your favorite brush with good point and draw
a few simple shapes. We can practice this technique. So on the first leaf, I would like you to
show a very simple wet on wet with a single
pigments technique. So first of all, the way we
start is load our brush with clean water and then drop it straight in the
middle of our shape. Lots of water. And then I'm using
the tip of my brush to push that water up
to the pencil line. The most important thing
when painting with wet on wet is to have
a very even glaze. Meaning there are no
puddles collecting in either size of the shape or
there are no drying patches. So you always want to make sure the entire shape
Glisson's evenly. The best way to avoid it wants to cover your entire surface with clean water. Just like so. Then dab your brush
onto the kitchen towel or towel they use for your painting to take the excess amount of
water off your brush. And then just sweep through
the shape to collect all the excess water that is on the shape and
at the same time, re-wetting the patches that
might be starting to dry. So you want to have an even
just like so glistening. And usually before
I start to paint, I let that water to soak into
paper just a little bit, just for few seconds. Because if you come with
a color just to quickly, your paint might just
run into the edges and you might end up
with very hard outlines. So to avoid that, I
let the paper just to soak up some of that water
and keep looking at that. That's shine. Any
patches started to dry? I just run my ****
brush over those parts. But if my Glaser still seems to be evenly glistening and I can see the texture
of the paper. And so I load my
brush with pigment. And again, as I did with water, I drop it in the
middle of my shape. And then as they have a little bit less
pigment on my brush, I run that brush along
the edges because I noticed if you start from
the edges with a pigment, then you might end up again
with very hard outlines. And I personally don't like it. Of course, you can always remove those hard edges once
the glaze is dry. But just to avoid it, you can just start
from the middle and run around along the edges with a little bit less
pigment on your brush. And so you cover entire shape
nicely with the pigment. Then again, I dab my brush on the towel just a
little bit so that I can collect the excess
amount of paint on that shape so that I end up with even glaze and tidying up all the edges and just
very light flickers while the glazes damp. And that's it. And now we can leave
it to dry completely. Once it's dry, you can paint on that area again and
layer your pigments. So on the next shape,
I would like to show you how we can do wet on wet
with more than one color. So I'm going to use
two colors and see how those two colors join each
other on that wet clay. So again, as we did
on our first leaf, we load our brush with clean water and cover
our entire shape evenly. I dropped it in the middle of my shape and then I'm pushing that water up to the pencil line with
the tip of my brush. It's important to cover
the shapes evenly and nicely all the way
to the pencil line because the pigment
goes where water is. So if you went over the line, that's where the pigment
is going to follow. So you always try to be precise and within
their boundaries. So I covered my leaf with water. Now I dab my brush on the towel, take the excess amount of water, and just sweep through gently to collect all the
excess amount of water. And all the petals. Can see it listens
evenly a nicely. Now I load my brush with pigment while I'm letting the water to soak into the
paper just a little bit. And I will imagine
that this leaf has a shadow here on the side. So I will put a dark
red on half of my leaf. Again, I'm putting in a
middle of the 1.5 that I want these colors to be a
little bit short of edge and then with a little
bit less pigment on my brush, then I move that paint all
the way to the pencil line. I'm not doing to the other side. Just letting that pigment
to flow into the leaf. And then painting wet on wet. I apply no pressure whatsoever. I'm just letting
the paint to fall off my brush very gently. No pressure needed. If you apply some pressure, you might start maybe lifting
the paint off the paper. So now I clean my brush and I pick up my second
color, lighter green, and do exactly the same
thing in the middle of that shape that is
left and painted. And then with a little bit
less pigment on my brush, I run it all the way
to the pencil line. And then very gently
letting that pigment to meet the other color.
I clean my brush. I take the water out very well of my brush
by dabbing it on the towel and then just flick it through where those
two colors meet, letting them join each other. Very gently. Decided a
little bit more pigment to cover the white spots. And is Flickr again gently with the tip of my brush.
And that's it. And now we'll leave that
shape to dry completely. And that is wet on
wet with two colors. I'll see you in the next video.
4. Wet on Dry-Glazing Technique: So on the remaining leaf, I would like to show you
a wet on dry technique. I normally use this technique to layer the pigments in order
to build the tonal value. The way this technique
works is you pick up the pigment and start
painting onto a dry paper. What you will notice is that
when you paint wet on wet, the pigment dries lighter than as it looked
when it was wet. Wet on dry, the pigment
will dry darker. Therefore, I'm using
more water and mix, so I water my mixes down when I paint
with this technique, you need to have a little
bit more water ratio on your pigment then when
painting wet on wet. So I started with loading
my brush with pigment, a little bit more
water, watery pigment, and start from top
to the bottom, and constantly dragging that wet paint across the entire
shape before it dried. If the pigments starts drying, you will be left with
lots of watermarks. So you want to keep
pushing and dragging that paint while it's still
wet across entire shape. Don't let it dry. You need to keep moving. So using this technique, you need to be very fast. That's why I don't use this
technique on big shapes. I usually use it
for smaller shapes or I'm using it to build a
tonal value on my paintings. So I would normally start with wet on dry as my initial layer. And they build a tonal value and color saturation
with wet on dry. And shortly I will
show you what I mean. Right? So we've covered
the entire shape and now we have to leave it to dry. We don't want to
do anything to it. When painting with
this technique, you need to completely let it dry before coming
in painting again. So this was wet on dry. So now I would like
to show you how I use this technique to build up my pigments and tonal
value on the paintings. And I will show you
that on the first leaf where we painted wet on wet, because that's how
normally I would paint. I will start with initial layer using wet-in-wet technique. And then I would build that
color using wet on dry. So I load my brush
with watery mix of color and they glaze
over a little area. Let's say, I think this leaves top part is in a shadow and then I need to
build up some color. So I make a little
glaze just like so. And then quickly clean my brush, take all the water out of my
brush, dab it on the towel. And then I run across the edge, just with the very tip
of my brush catching the edge of that glaze so
that it appears softer. And I'm left with
very hard watermark. Just keep softening that edge. And so I would do that
over and over again until I'm happy with
the tonal value of it. Here I'm doing the same
thing on another leaf. Little glaze of wet on dry. Then cleaning my brush, taking all the water out by
dabbing it on my towel, and then running that brush across the very edge of
that glaze to soften it. And if I want a darker
while it's still wet, I can add a little bit
more color into it. And then again, running
along the edge with clean damp brush to
have a soft transition. Here my first glaze have
dried and I can glaze over again with pigment on dry paper and then
softening the edge. And so that is the
process of it due to layer my paint and to build up that saturation that is
wet on dry technique. So draw a few
shapes and practice this technique over and over again until you
feel comfortable. In the next video,
I will show you my favorite
technique, dry brush. So see you in the next video.
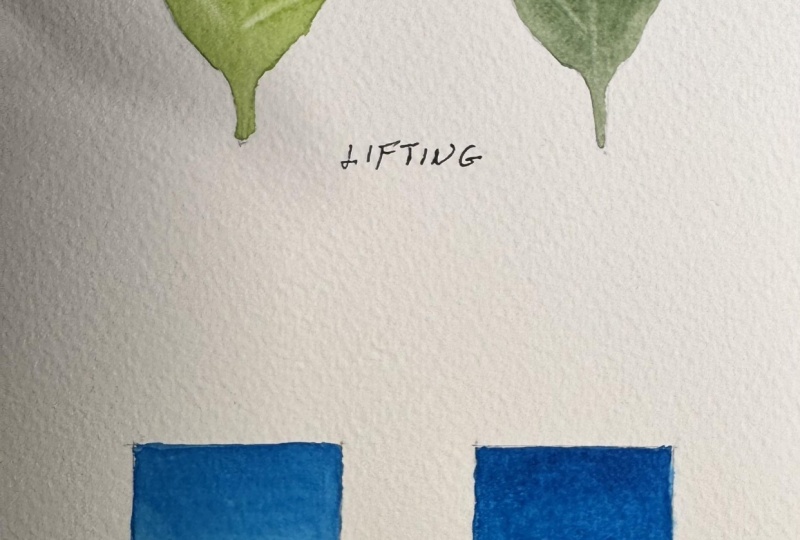
5. Lifting highlights Technique: In this class, I will
show you how you can lift your highlights
in two main ways. So first would be while
the glaze is still damp, meaning when you
paint wet into wet, while the glaze is damp, you
can leave some highlights. Or the second way you can
leave some highlights once all of your glazes and layers
are completely dry. So demonstrate the first
way we need to paint in. Firstly, if wherein, just as
you would do in a painting, you lay a nice even
glaze of water and you apply paint onto damp surface, spreading it nicely and evenly
across the entire shape. So if want to lift off
some soft highlights, you do it at the beginning while the glaze is pretty **** so you can reveal some soft highlights. Let's imagine this is the highlight where
I want it to be. So first you clean your brush, you take the water
out on your towel. You need to clean damp brush
and then just press it down and with the belly of the brush, collect the pigment. And you can see your brush
soaks up some of that pigment. That's what the brush
has to be drier than the glaze on a paper. And you collect some pigment
to create a highlight. And then you create those kind of highlights,
softer highlights. You need to press the
brush down and just apply a little bit
pressure and collect that pigment with the
belly of the brush. And the pigment are
going to run into that highlight again because
the whole glazes dam. So you will have
to keep an eye on your highlights throughout
the painting while the glaze is still
settling to see if you need to sweep one more time. And as the glaze is
drying and settling, you will be collecting
a sharper highlights. So I'll do one in
the midrib as well. We can see if you don't press your brush a bit more firmly, you don't really collect any pigment while
the glaze is wet. To really need to press it down. And with the belly of the brush, you will collect the pigment. Now, if you want to create sharp thin highlights
like for example, veining, there's
a specific window at which you can do that. So when your glaze is almost to the point of
completely drying out, but it is still a little bit
them that's when you can create those sharp
waning highlights. So what do you need to
do? You need to wait for the glaze to
start drying out and lose that shine that you
can see at the beginning. It's really is a little bit hard to know when that time is right. So you will learn with experience and he will teach
yourself that instinct. But if you're not
sure whether it's time now to reveal
those sharp highlights, you clean your brush, take all the water out
and you just test it. Just try to make
a couple of lines and see if it's happening. Although I can lift off
a little bit of pigment, It's not really the result
that I'm looking for, so I need to wait a
little bit longer. I'm going to keep trying. And you can see
those highlights. I just not popping up and
the pigment is way too wet. So you need to give
another few seconds. You have to really make
sure that you don't bring any water into the
settling ways because you can see if my
brush was a little bit too wet and had some droplets at the very end of those strokes
I the water kind of bleed. So you need to make sure your
brush is clean and damp. You need to take the excess
water out of your brush. So as my glaze is drying, now you can see I
can create sharper, thinner highlights and you have to clean your
brush and take all the water out after
each or one or two sweeps. Because if you can do it
with the dirty brush, you would be contaminating the glaze and you would
be bringing their colors. So you can see as
the glaze is drying, we can create sharper
highlights and they don't bleed to the sides
as those first ones that so that way you can create nice veins while
the glaze is still wet. And if you want to
create a little bit of texture, on the other side, you just flicker like so quickly and it will create
a textured surface. You can do a very similar thing. Once your glazes
are completely dry, those veins dog gonna
be much sharper so you can really create soft, thick highlights,
but you can create some veining and you can
lift off some veining. So I have here a glaze that Let's completely to dry. It's completely dry. And so now I clean
my brush there, called the water out and again
with a clean damp brush, I can gently just
scrub the area that I want to have a highlight. And then I have a kitchen
towel in my hand. And I dab the area
that I just rubbed off to collect that pigment
that I have lifted off. So you might need to have a little bit wetter brush than
what you did when you were lifting highlights on
our wet glaze because moving that water
on a glaze is what starts lifting the
pigment of the paper. So now, when doing so, pigment and paper plays a role. Some pigments are very
heavily staining, so they wouldn't be
lifting off very well. But greens usually are quite
forgiving and paper as well. Some papers that
have a little bit, a heavier sizing would be
easier to lift off pigments. So we need to really
be for each painting, each project, you need
to test your paper, your pigments to see if that is the technique
that you want to use on that particular paper and those particular pigments. So we need to always
test it out to see if this is going
to work out for you. You also can to lighten up
some areas on a dry clays. It's already, for
example, right here, the very top will
show you it won't be as light as you are to lift
off while the glazes well, so, but if you want to
lighten up just a little bit, just a tonal too,
you can still do it. So I load my brush with water and they glaze over an area that they
want to lighten up. And you can see now I have quite a lot of
water on my brush, so I will let that water sits on that part a little bit
and you can gently scrub, but I'm not sure how easily
it's going to be lifting off of this particular
paper with these pigments. So I'm not scrubbing too much. I'll repeat process once again
if it is not light enough. So couple of few gentle sweeps. And then I will be dabbing with a kitchen towel to
collect that pigment. And you can see it lightened
up just a little bit. And if I need to lighten
up a little bit more, I just repeat the process. And this time I can rub a little bit harder
because I'm using here sound disorder
foot pit paper and it's not lifting
off as well. If I were to use Melinda
ROI for example, it would be lifting way easier because of
its heavy sizing. So now I'm applying a little bit more force
and I'm scrubbing a little bit harder
than the first time. Again, I'll dab
the kitchen towel to remove all the moisture and the pigment I lifted off
here go so it did the job. But mostly when you need to reveal any highlights
is better to plan ahead and to either collect them
while the glaze is still wet or paint around them
to live wire of the paper. So you need to always think about your highlights
before you start to paint. So yeah, so those
are two ways you can leave some highlights of your glazes and I will see you in the next video. Bye bye.
6. Dry Brush Technique: Welcome back once again. And the last technique I wanted to show you is
that dry brush technique. And this is a technique I spend most of the time
using, I would say, and it's my favorite and I think is the one
that really transforms the painting and really can
just bring every painting you have to the next
level because not only it's smooth
all the surfaces, but it also sort of fixes
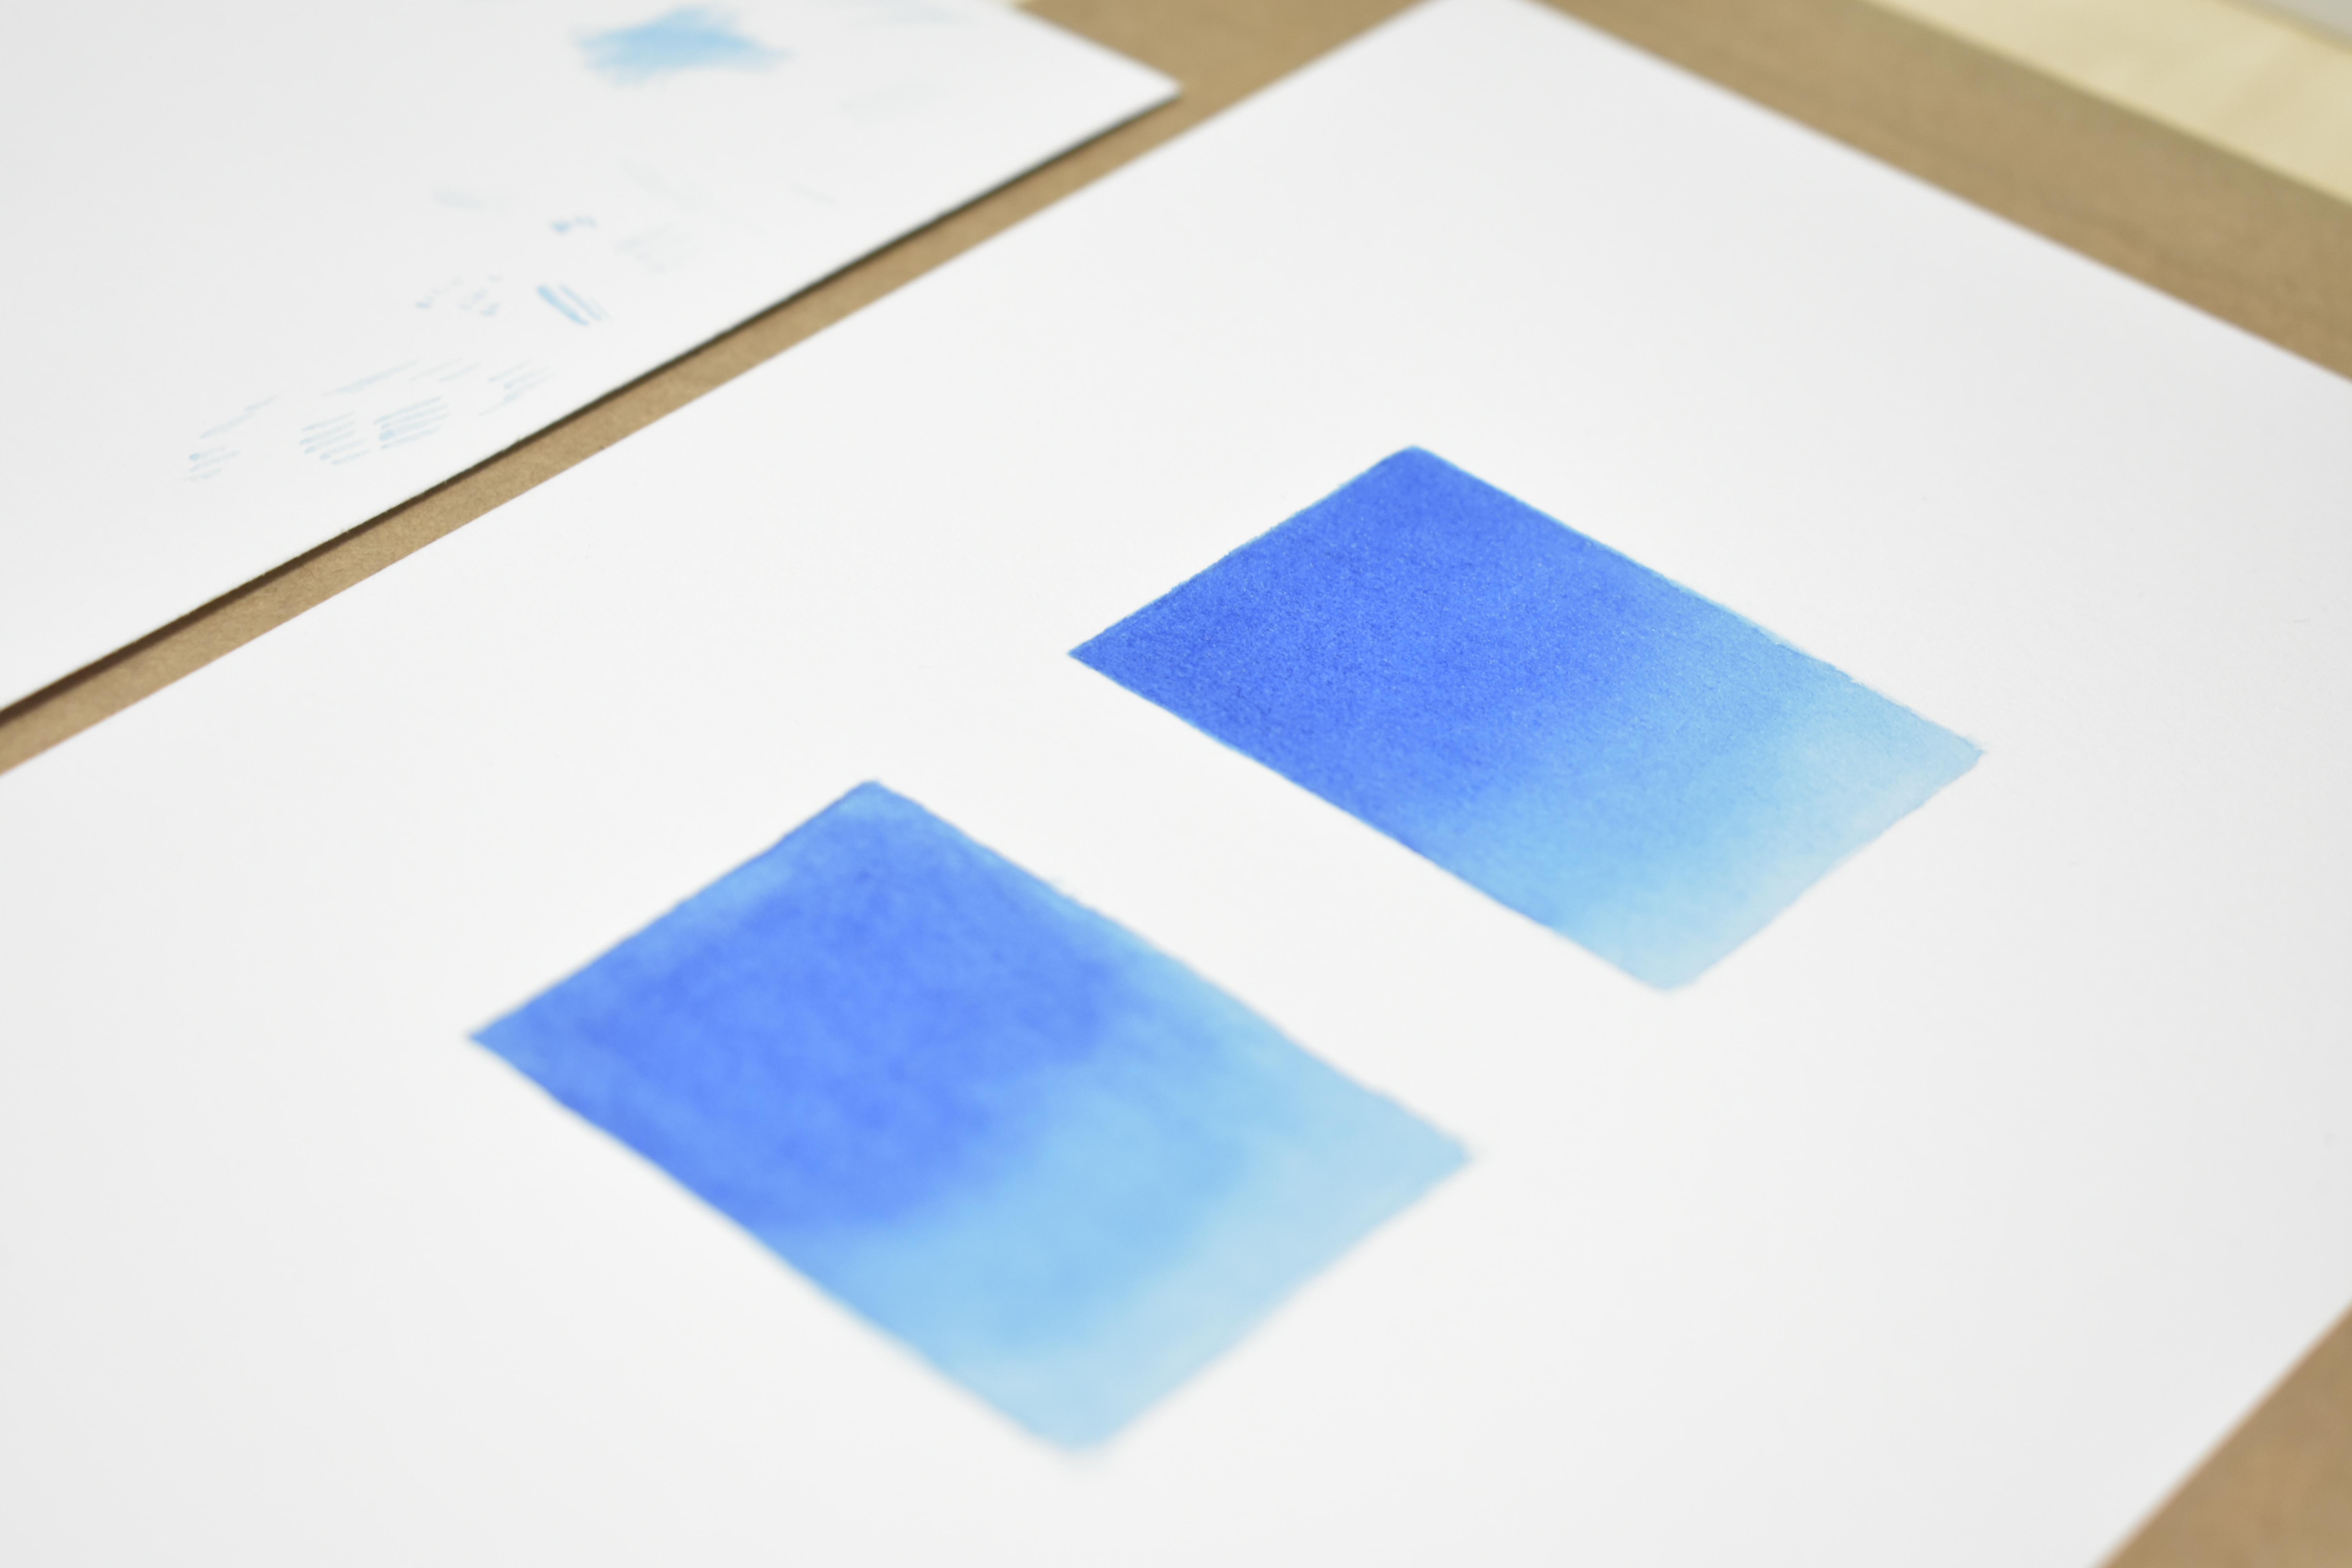
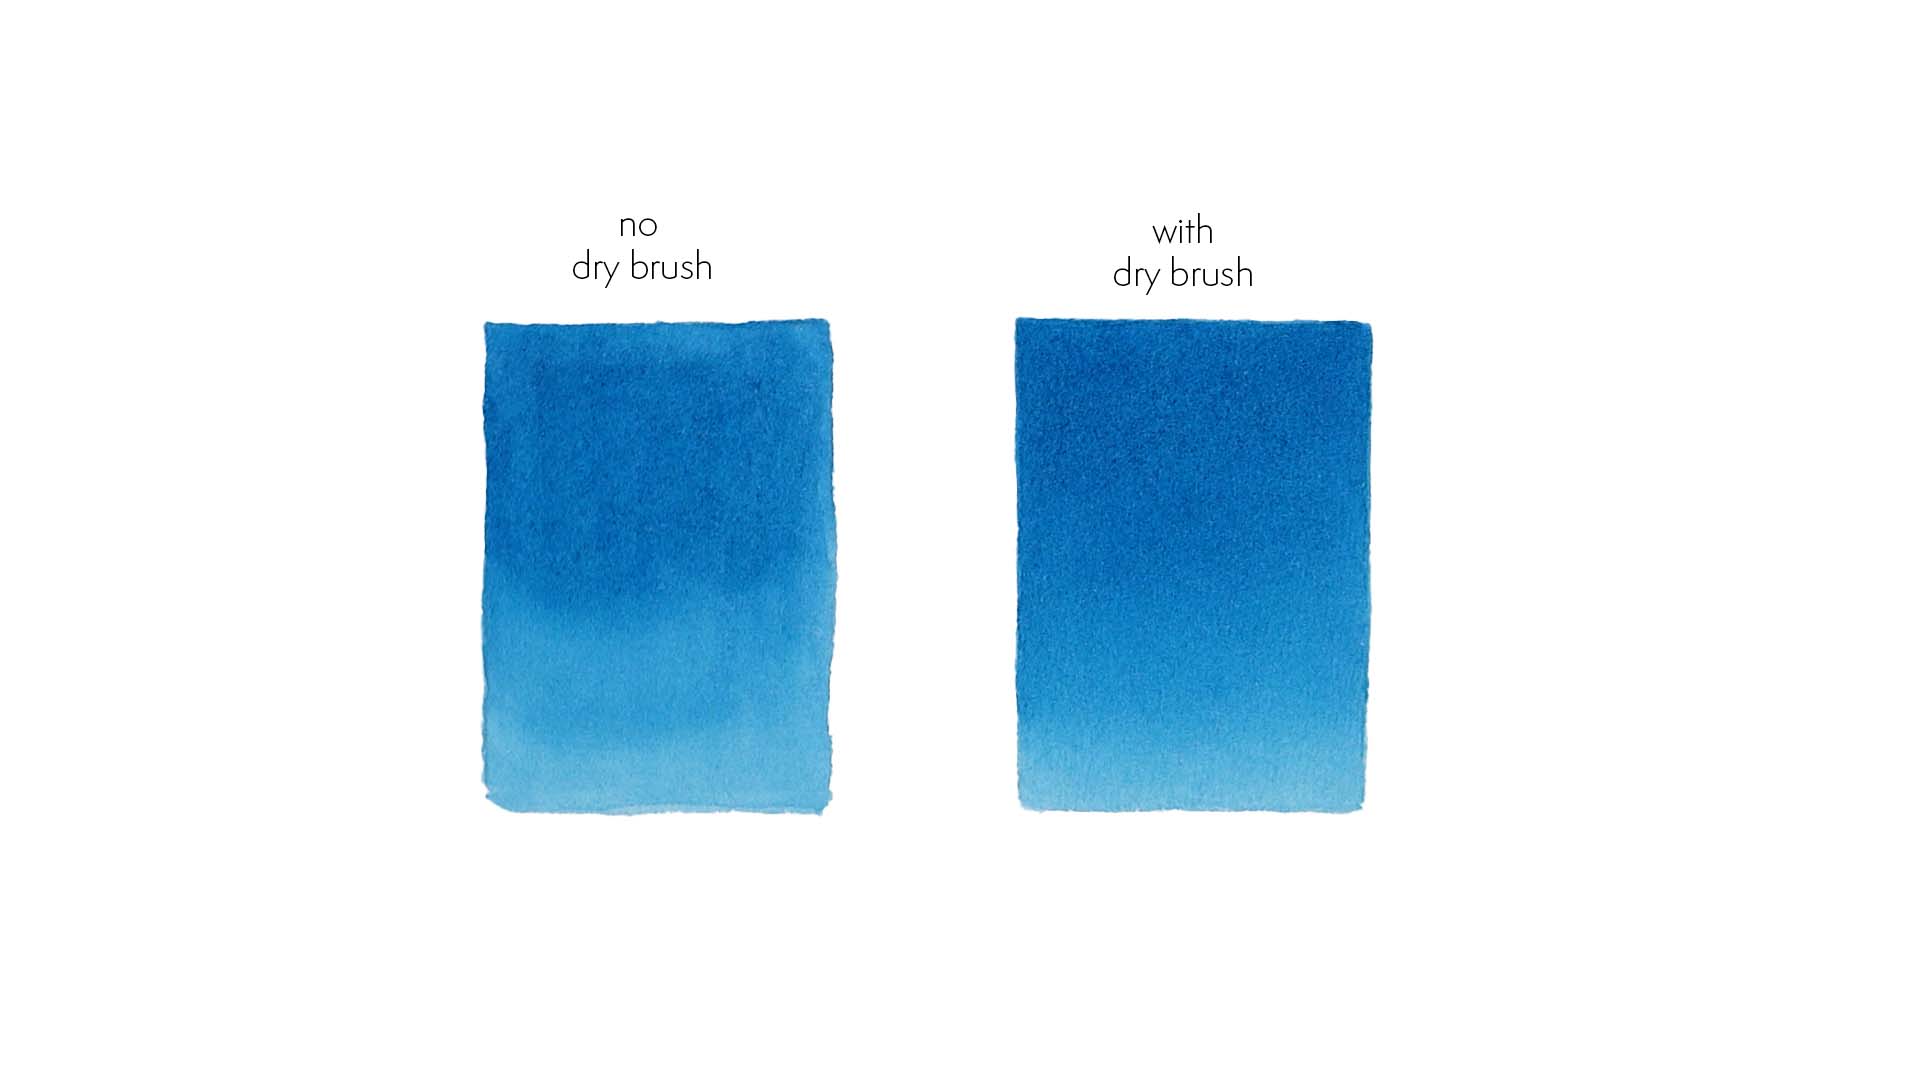
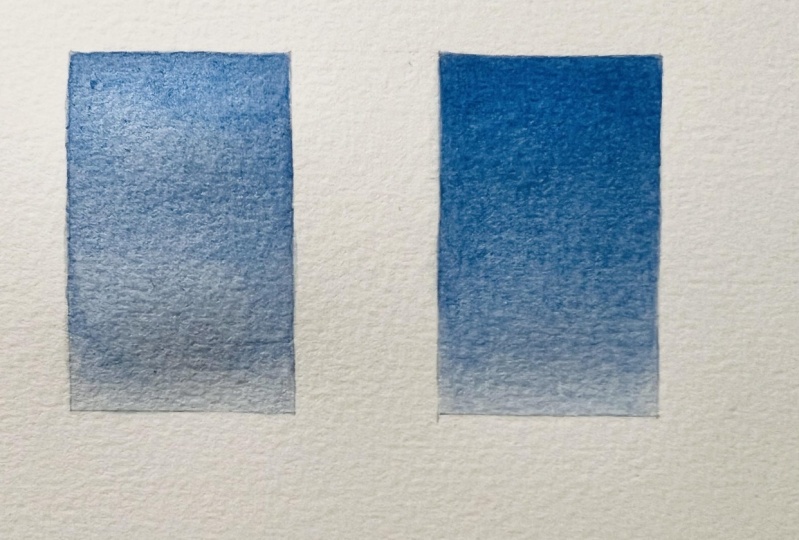
their mistakes and watermarks. And so, yeah, so
for this technique, we need two rectangles. And the reason we need to is because I wanted
to paint them both the same way and I want you to see them the difference
that dry brush make. So we're going to dry
brush only one of them. So let's just quickly paint
those two rectangles. Same way. I will start with wet on wet. Choose your favorite color. And I will try to paint him
in a way that first half, the top part is darker and then lighter at the bottom so
that when you dry brush, you can create this really seamless and smooth transitions and graduation. So, right, so why don't worth, and then I'll give a couple
more layers with wet on dry just to get that color
a little bit darker. So I'm going to use
my smallest brush. I have, usually for dry
brush shoes number 0 or one, but I want to try my new
Rosemary and cold brush, but I only have a
smallest number two. So I'm going to try use
that because I'm now trying lately to test those
brushes. So far, so good. So I'm going to buy
a smaller number 01. If you have smaller
than number two, then use either one or 0. So the way I use dry brush technique is
for two main reasons. First, to enhance and
dark and the darks. For that part, I would use
cross hatch technique. Just like so. I'm showing you own
a piece of paper. So I have fairly dry
paint onto my brush. And I change the directions of the strokes to create
the cross hatch technique. And that way I
build up the color. So this technique is
when you want to build up your darks to make
them really dark, really bright, and especially
for our shadow areas. So I would use that
cross hatch technique. And you see that I don't
leave any droplets, so I don't have much
water onto my brush. The best way to know if
you have the right amount of water on your
brush is to pick up some color and dab it
onto the towel that the tower can absorb the
excess amount of water. And then you only left with the pigment as dark
as you need it, but without too much water. Because if you have too much
water on your brush, venue, dry brush onto the
existing layers, you would be lifting
off that color of the paper so that
you don't want it. You want to add a color, not start lifting and
disturbing the glazes you already put here. So I tested a few, few patches on my
piece of paper. See how that brush is behaving. Now, before we start our
smoothing technique, we can build up our shadows. So let's say we want to
really darken our shadow. So we would use this
cross hatch technique. Before I do that,
I quickly tidy up my watermarks and edges that I have a little
bleed on the sides. Because when I start the dry
brush stage of the painting, usually you'll not only build up your tonal value and you do
the smoothing technique, you also tidy up all the
edges then all the curves and making everything
really neat and tidy. Rights I'm taking back my brush. I have a small piece of
paper right next to me so I can test to see the consistency of paint
and water I have on my brush to always have a piece of paper where
you can test it out. So I fill my brush so
in the darker areas to use thicker mix and in a
lighter than the mixes. So here I start building
up the shadows. So when I refer to my other tutorials
smoothing technique, so this is not it
yet. Right now. I am intensifying
and darkening and building up the value of
the shadow, the dry brush. Because especially if you want really dark color
in some paintings, you can't really achieve that
without any dry brushing. So let's imagine that
for this rectangle, we want the shadows to be
a little bit more intense. So this is the technique
of reducing cross hatch. So I will change the direction. So important thing to
know is although you use the comics on
the shadow area, you still wanted to
keep pretty light. So when you dry brush, you don't really see dark lines. You barely see the color there. But the venue layer it in
a different directions. It slowly builds up, but it builds up in this
very smooth, nice way. Rather than seeing clear lines, although you are making
lines right now, but they're very subtle. Tone enhancement that
they appear very smooth. So that is what we want. I will use this technique
on my shadow area only. I am not going to try to
go into the lighter areas. So this is just to
build up the shadow. And so you see now I'm
starting to change the direction of my dry brush. And so I will do this
technique until I get the darkness that I'm after that it has the value
that I'm looking for. This is not yet a
smoothing techniques. So when I get my darks
as dark as they need to, them to be, then we will go
into that monic technique. So if your glaze is not looking completely smooth
yet, don't worry about it. We can fix in the next step. So you see right now
I'm changing even into the other direction so that I fill in those gaps that I left. When you when you dry
brush only one way. So that's why we use cross
hatch technique that this glaze would appear smooth. Because when you
change the direction of your brush strokes, you fill in those gaps. This is what you would do when
you draw with your pencil. Right? So now my darks are
as dark as I need them to be and now will be the fun
part, the smoothing technique. So now this process, this process is purpose, is to make the glaze seem really smooth and to have this
sort of airbrushed look. Now if you look at your glaze, you see the graduation
from darker to lighter. We want it to have very, very seamless and
nice graduation. And so when you look at a glaze, you can see those tiny
little lighter gaps into your Glaser
that are uneven. And so those are the
parts that you will be filling it with a
tiniest brush strokes over and over again until your glaze
appears really smooth. So here you see I've
filled my brush with watercolor and I dab it on a towel to take the excess water because It's very important
not to have water, too much water on your brush. So you need to
make those kind of a really light dry brush
strokes to always have a piece of paper that you
can test it out to see the consistency that
you have on your brush. But if you just pick up the color and then
dab it on the towel, you will always have
the right amount of pigment and not
too much water. So you start from the darkest area using
thicker mixes and Daniel, the lighter, your glaze is the lighter
pigment you will use. So here I start
by filling in the main, most obvious gaps. And so once we fill
in those main parts, main biggest gaps, then we'll go from
top to bottom, from their darkest to
lightest gradually. So here, picking up the
color and I'm filling in those gaps in the glaze. And if you see that you
live in too wet mark, then dab it on the towel
again to just make sure you don't have too much water
because as I mentioned, if you have too much
water on your brush, you will be lifting out the color from that glaze and
that's what we don't want. Once I fill in the bigger, the most obvious gaps, then I go back to the
very top and I start then from the top
down from the darker, lighter, that smoothing
technique, tiny brush strokes. At this point, I usually do
it in a direction of a form. I don't often use cross
hatch at this point. You can sometimes do
use brushstrokes in a different direction depending
on the gap that you see. But generally, that would be
in a direction of a form. So at this case,
at this rectangle, it would be straight
strokes, very few, doing a petal or
circular object, then you would curve your
brushstrokes to accommodate the shape of your object. While doing that
smoothing technique. Now you see I tidying up all the edges and
that is what I would do when I paint the flower or any other object
while dry brushing, I tidy up every single
stroke and line and curve and outlined
to make it everything. Because this is the stage when we make everything perfect. This is the step that we do. Usually, they're almost at
the very end of our painting. When using dry brush. To make a graduation from darker to lighter appear smooth. Think of it as though
you are filling the lighter spaces with lines or dots to fill
in the required shape. So the goal is to have an even value and smooth
graduation so that the surface appears really
smooth and airbrushed. I'm starting with little lines and those lines will get
smaller and smaller. The smooth ER, my glaze
is at the very end. I might end up using just dots. Now I slowly move into the lighter areas and
I will use lighter, more diluted mix
is always tested. So if you're not sure, even though when you try
it on your piece of paper, if the color is red. So that's tiny little strokes on your glaze and see what
market it's making in. If it's too obvious
and it's too dark, then you need to dilute your
paint a little bit more because you want to make
I'm barely any mark there. So when you fill in
the gaps in the glaze, they appear the same
color as overall glaze. You don't want to
make a darker line than what the paint
is on your paper. So you want the same
pretty much cooler than your glaze on the
paper so that you fill in the lighter areas. I hope all of that makes sense. So as I go down my shape, I see the transition
here and here are just too rough and too hard, so I need to fill
in that middle part and the bottom part, the dry brush to
make the glazed look smoother and not to have those very obvious
gaps and lines. Now I'm picking up some color
and I'm giving a little bit longer brushstrokes to fill in the slider cap here
in the middle. So now I want to use
the technique that I used to darken my shadows. And you can see how subtle
color I give to my glaze. You, you barely can see any paint on my brush
and that is important. That's what gives
that smoothness. Because if you use a
little bit stronger colon, a bit more saturated, then you will be leaving
really obvious lines. And that will give a
complete new look. So very pale mixes and you build up that layer
slowly and patiently. And it can already see
how that second rectangle looks different and smooth
and even finish it. So by the end of it, it will be a real difference. I would like to mention that this process can take as long
or as little as you want. Some people would paint and think that while they
are ready to leave with, were the first rectangle is. But if you wanted to
take your painting to the next level and to have
really smooth appearance, then this is the
technique to do so. And sometimes they can spend, it's from few minutes
to hours doing that. It depends how much time I
have and the longer you do it, the smoother the glaze will appear because as you fill in, you start with a
little brush strokes filling those little
lighter gaps. But then as you are
glazed, gets smoother. You then use even smaller
and smaller brushstrokes, even to the point where we
can just use only dots. So that is not necessarily
to the point you need to go, but that is an option. You can take this dry
brush technique as long as you want to and you
can stop at anytime, because that really
depends on the level of patients they have
and what time you have. And I am a mother of two kids, so I don't have all that time. So because this
technique I really, really loved says
My favorite part of painting and I could spend
hours doing that if I could. So here I continue
further to fill in the lighter areas
and my glaze until I finish entire rectangle. When I finish with a smoothing
technique at the very end, I give this very gentle diagonal
brush strokes with very, extremely pale mix
just to kinda give this last attempt to even everything out in case there
are a bit too strong lines. Only one way in this case if I was making a
straight little lines. So those just very gentle, very pale mix
diagonal brushstroke is just to even things out, but the very, very pale mix, barely any paint on
my brush whatsoever. And so this is the very
last step, and that's it. And my rectangle is
actually finished. And now you can clearly see what the difference is comparing
to the first one. And now we can make a decision whether you would like to
learn this technique or not. And if it is worth
practicing, in my opinion, this is the technique that can take every single painting
to the next level. Because whenever you paint
it and you think, Oh, I messed it up the painting, it looks so uneven and
so many watermarks. Well, with this
technique, we can fix any kind of painting
in any kind of damage that you think
you did and make it look just like this here,
smooth and perfect. So I hope you enjoyed
this practice and place. Give it a go and I would
love to see your result. And if there's
anything I see there, you can do better. I will let you know
whether you use to strong pigment or not. So the end result is
obvious need to make it look as smooth and
even as possible. So please practice this because this technique I use in
every single painting. So I hope you enjoyed it and I'll see you in
the next tutorial. Bye.
 Egle Kolev, Watercolour Artist & Teacher