Transcripts
1. Introduction: Hello fellow art enthusiasts. My name is Agli Clef, a botanical watercolor
artist on a mission to share the joy of creating lifelike botanical
watercolor paintings. My artistic journey
started seven years ago. When I was pregnant
with my first child. I stumbled upon a
captivating world of botanical watercolors. Despite holding a degree
in public administration, my heart have always
earned for art. But I could never
place myself in any specific area or medium. Therefore, I quit art entirely. But the discovery of
botanical watercolor art have marked a beginning of this
profound artistic journey. So after graduating from society Botanical Artists Distance
Learning diploma course realized for need for more immersive learning
experience course. Do not contain any tutorials, demonstrations or techniques. And made this journey as a beginner watercolor
artist, very challenging. What was hard to find is to find an artist to work that they
really love and enjoy. And you just wished that
you knew how he did it. All the techniques and tips the process you took to paint
something this complicated, realistic looking, or
just simply beautiful, to see fully what it takes to create piece of
art that you like. Especially when it
comes to watercolors. Because watercolors are quite difficult and
challenging medium, but it's absolutely
fascinating with its fluidity, transparency, create something really
realistic and detailed. It can be challenging. So it took me quite
a lot of trial and error and quite a few years
to learn to control it. And so that's why I'm
here to try and tell you some tips and
tricks and techniques. I wished I had. I
am chilled to be your guide as we embark on this artistic
journey together. Thousands have found already inspiration from my teachings, whether it's here or patron, and now it's your turn to bring your botanical
visions to life. I hope you will stick around.
2. The Project : This course isn't about marks
or assignments and grades. It is a journey into the
heart of botanical art. I will personally guide
you through every step. Unveiling the
techniques, thoughts, and creative
processes that define my realistic and highly
detailed painting style. In this course, we
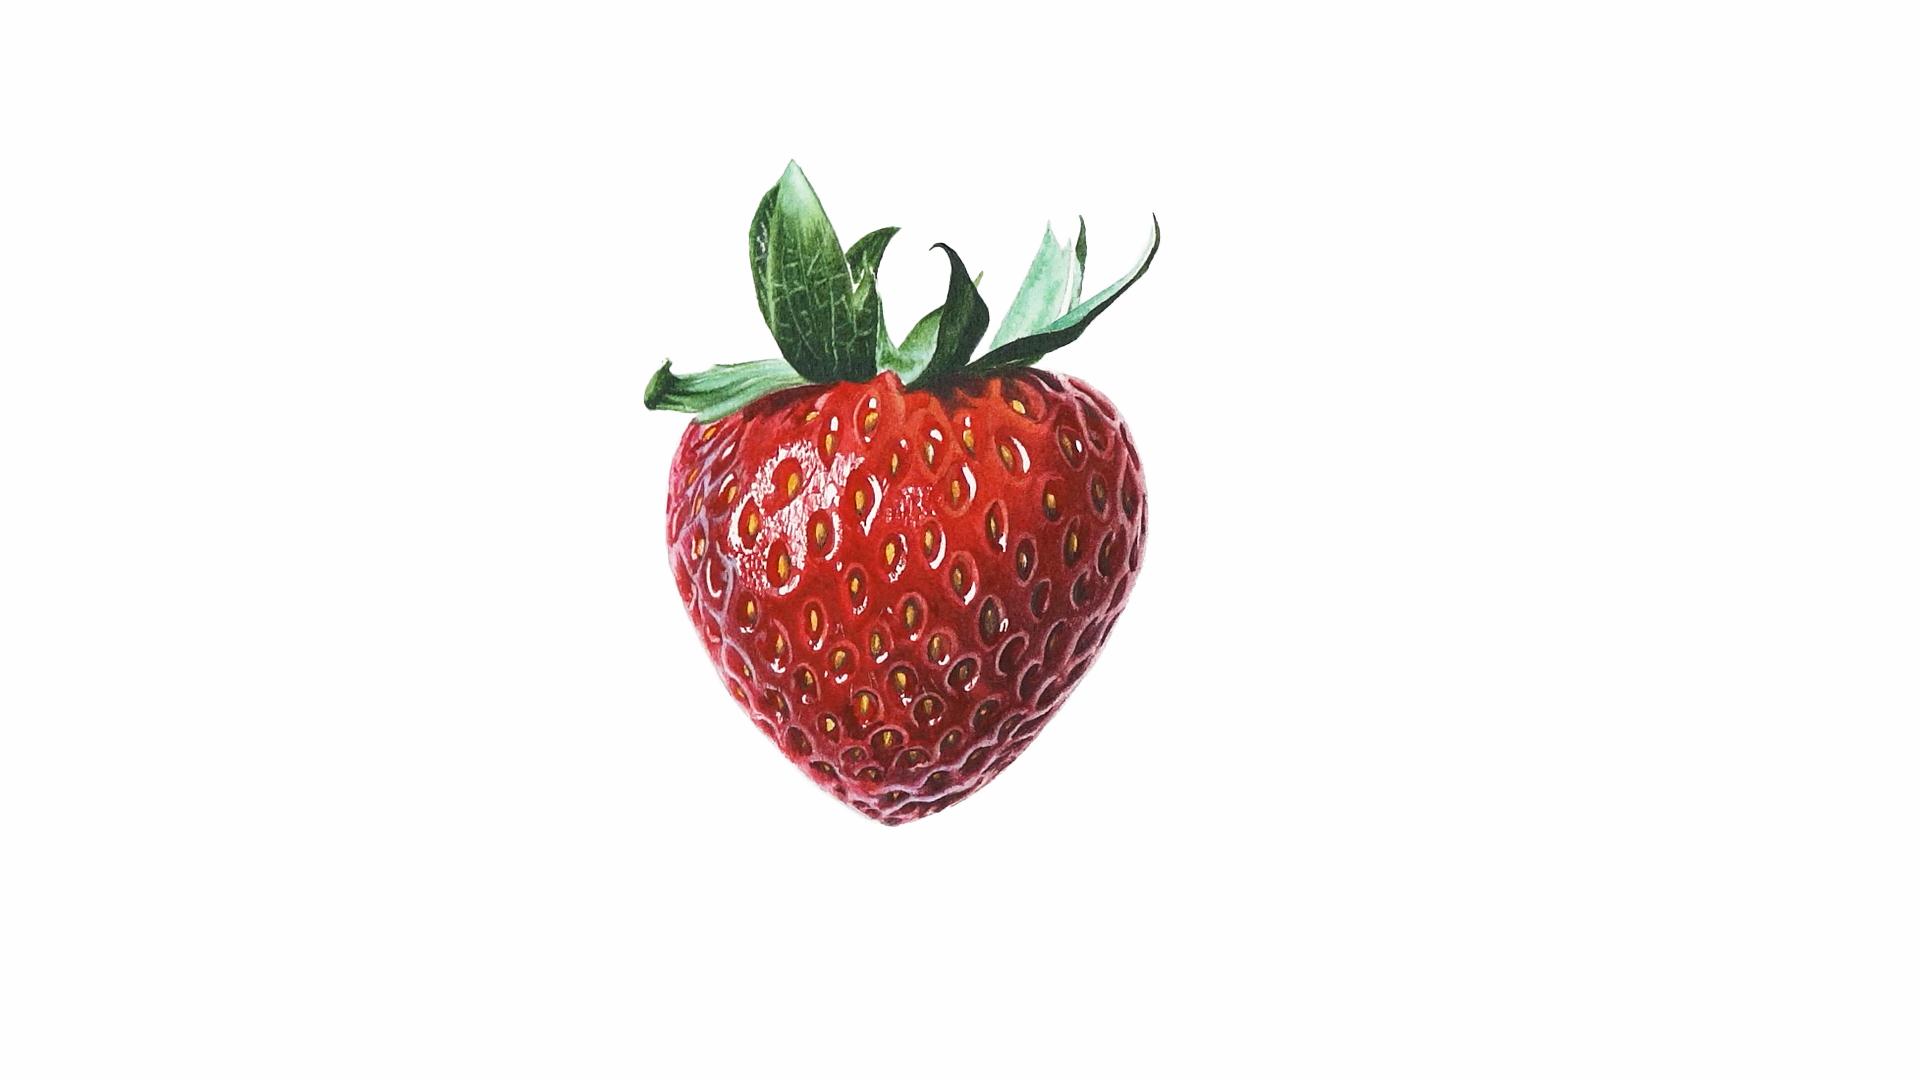
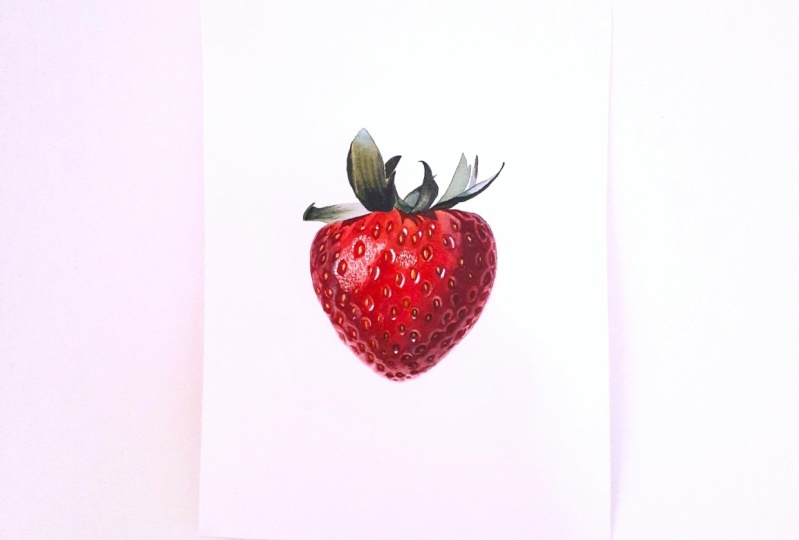
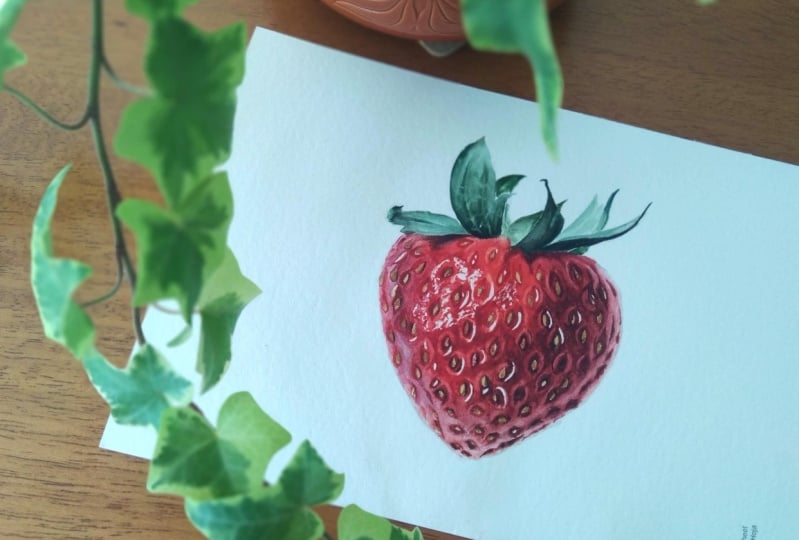
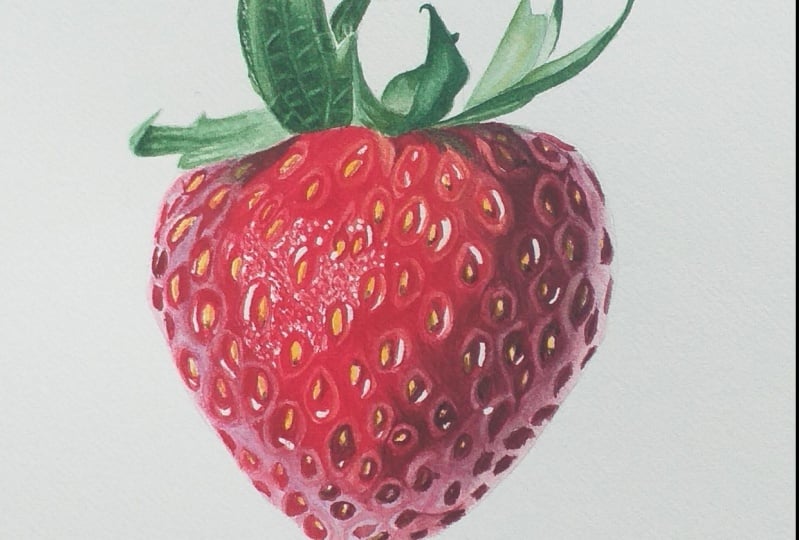
will be painting juicy, delicious,
shiny strawberry. The reason I chose it because when you first look at
it with all its tiny, tiny seeds and little heads and the shine and all
those little crevices, you just really don't know where to start and how to paint it. I have tried to do with this
course is to create clear, understandable steps
and techniques that you can actually follow. It is, however, a very detailed, small object to paint with
all its tiny, tiny crevices. And seed painting,
something that fully requires my full attention
brings me comfort. It is something profound. Being fully immersed, examining every centimeter of a subject that is so small
and so beautiful. I have never really noticed that much beauty in small things and mundane things until
you actually try to paint it without further
ado, let's paint.
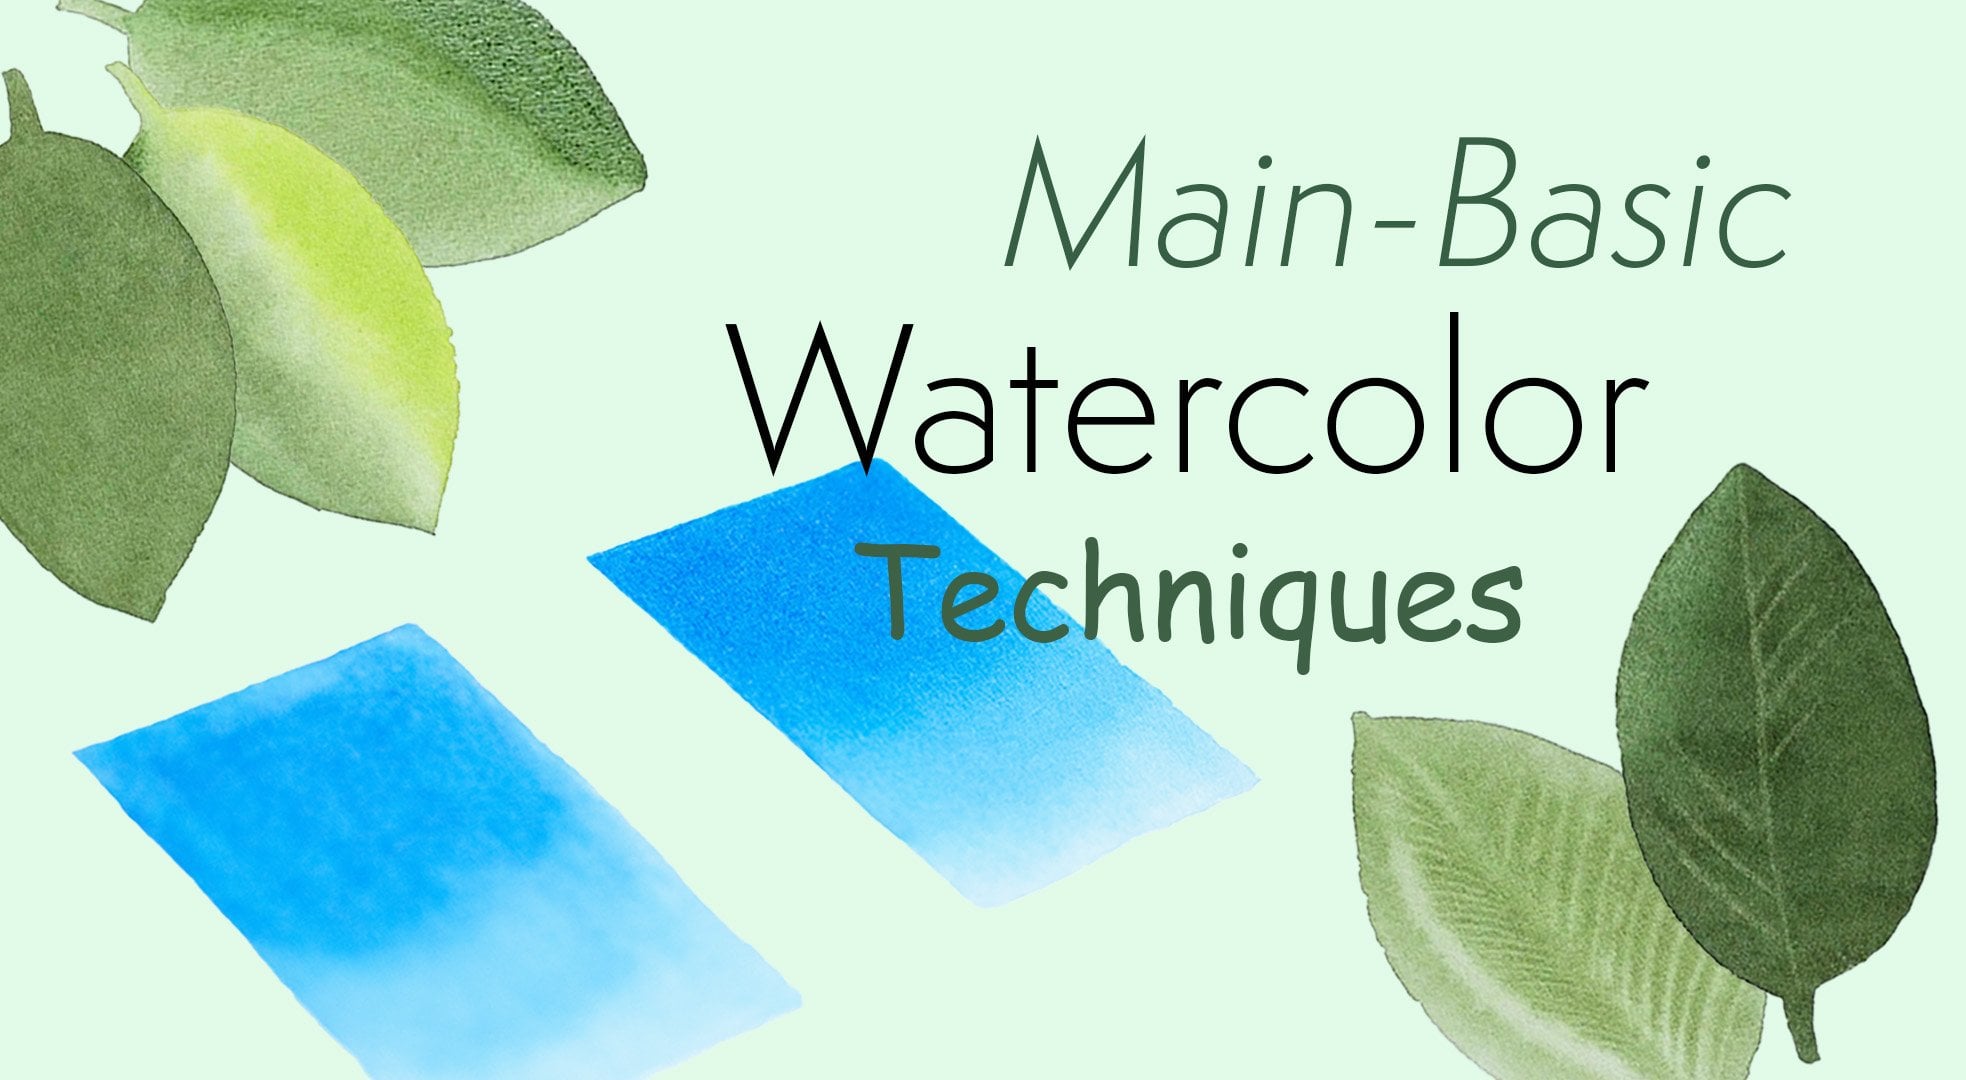
3. Before we start: Before we start, I would like
to mention a few things. If you are an absolute
beginner and you are not familiar with basic
watercolor techniques, I would like you
to check my class specifically dedicated to those main botanical
watercolor techniques called master and main basic botanical
watercolor techniques. I explained there
in great detail how the technique works, how to do it correctly, and how to practice it
with simple shapes. If you do that, you
will feel much more comfortable painting a subject. Also, if you would
like to know how to stretch a watercolor
paper onto the board, for example, if you're using 300 GSM or lighter
watercolor paper. I do that to prevent paper from buckling and settling unevenly. Or if you would like to know how to transfer your drawing onto the water color paper from either your sketch or from the line drawing that I'm
going to provide you with. Or if you would like
to know more about the materials that I
use in greater detail, like what type of paint and
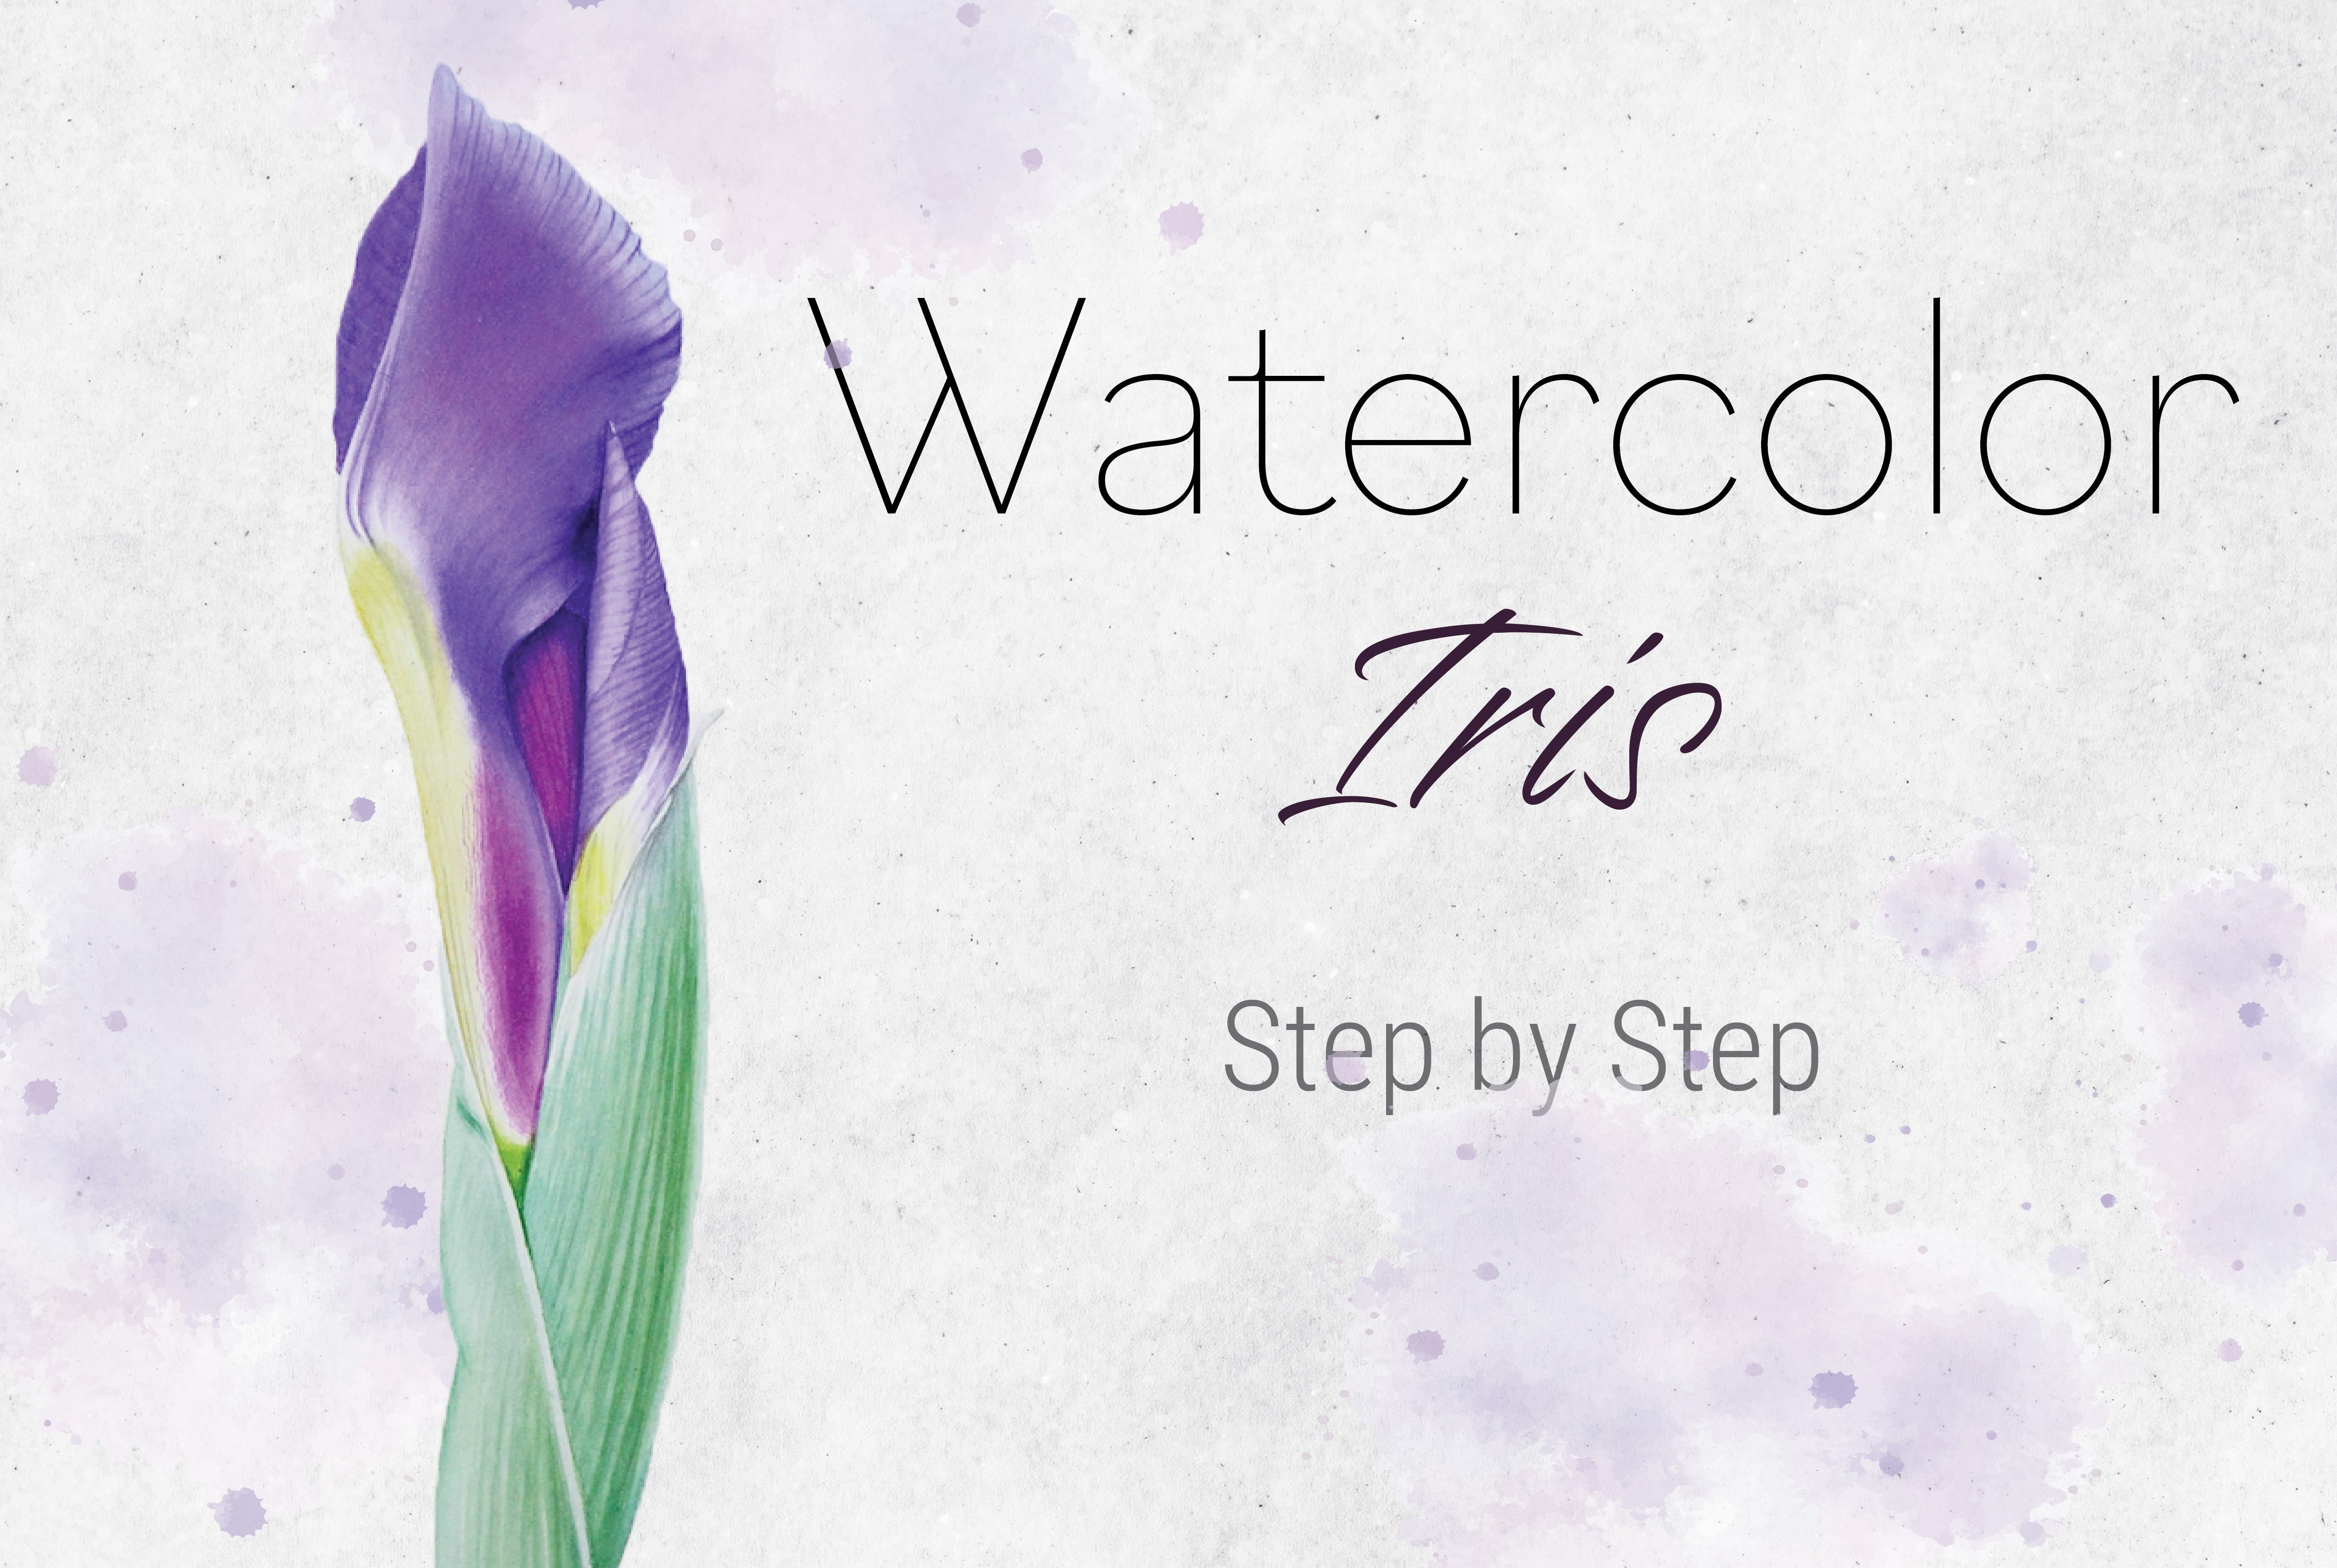
brushes and palettes I use. Then I would like you to check my very first Sola class called Botanical
Article Painting, Learn to Paint Iris. But step by step and choose
a lesson accordingly. You don't have to
watch an entire class, just the topic that
you're interested in. Then without further
ado, let's get started.
4. Materials: Hi again. Let's go
quickly through the materials you're going
to need for this project. To start with, you will
need watercolor paper. I recommend to be 100% cotton so it can handle the
layers and water. If it is 300 SM Ora, I would recommend
stretching it onto a board to prevent
from buckling. For that, you will need
gum tape and sponge a paper if you would like
to know how to do it. I have a class on my
first skills course, Water Color Iris Bot, where I show you how to
stretch a Watclor paper onto a part next to transfer your drawing
onto watercolor paper. From your sketch or the line
drawing I provided you, you will need tracing
paper if you would like to know how to transfer your
drawing onto water color paper. I have a class on my first
skillshare course as well. Watercolor, Iris Bud. Choose the class
accordingly for that. You will also need
pencil and an eraser. You will also need a container
to clean your brushes. I use 21 to clean my brushes and the other one for
clean water glazes. You will also need a
towel where you can wipe your brush and a palette. I recommend ceramic palette
because the colors flow much nicer on the surface and you can see the correct
color of your mixes. The pigments that we're
going to be using are Senelia, red, rosemary, lake yellow, blue Nacua, and gold Arland yellow
and neutral tint. We're also going to
need round brushes, Number 42.0 We will also
be using masking fluid, which is watercolor medium
that repels moisture and is used to help artists leave small areas white of the paper. That's it, those are materials, and let's get straight
to the painting.
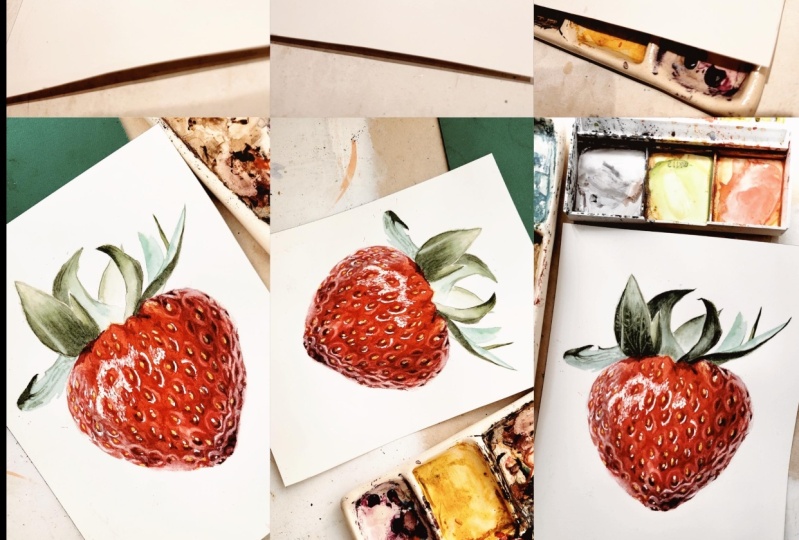
5. Applying Masking Fluid: Hi everyone. We're going to be
painting Strawberry. It's one of those, a little bit more challenging
and detailed paintings, but they're really fun to paint with our
little brushes and lots of dry brush and get the shine and they just
look really pretty painted. For this project, we're
also going to be using masking fluid to mask out all the seeds and the high lights, really
white highlights. There is a way of painting without it that would
be then probably not using what we techniques and just dry
brushing all the way. That is a little bit more, maybe complex and it
takes much longer. For the purpose of tutorial, I'm choosing ways that are a
little bit straightforward, though slightly, maybe
easier and faster together. I mean, if you painting
with watercolors, this is very useful to have. I'm going to be using N Newton. Here's the strawberry,
you can see now where are
highlights though here. Tiny little dots here and there, and those seeds as well. First step, before we start painting and mixing the colors, let's go and paint and cover those parts
with masking fluid. And then we leave it to dry, and while it dries, we're
going to mix up some colors. What we want to cover
with masking fluid now is we want to cover
all the white parts. All the white bits you see
right here in this part. We're going to just tipple
with masking fluid to create this busy and even texture. You see those highlights here, those little dots we're going
to try to cover the seeds, even the ones that are
really dark in the side. And that's it. Once it's dry, we're going to apply
our base layers. Pinks and reds. Yeah. And then we're going to
start doing all the details. Let's get on with
the masking fluid. A little tip with masking fluid, if you don't want
to ruin your brush. I'm going to be using brushes
that I don't paint with. These are some little
synthetic brushes. Very small, because those
are really tiny pieces. Yeah, I don't paint with them. I'm going be using them
for masking fluid. Even if they get ruined, I won't be very upset about it, but you're going to use my tip. They shouldn't get ruined. The tip is, dip your brush into the liquid soap before you dip
it into the masking fluid. And that way it just doesn't
stick to the bristles. And it washes off in
the water very easily. Right. I'll pour a
little bit of masking fluid on my little plate. That's way too much.
You're going to need just a tiny dip actually. For this, I'm taking
my smallest brush. I make a little dip in the liquid soap and
then in masking fluid. Then we're going
to start covering all those parts that we need to. I'll start covering the
seeds and then we'll pay attention where are
the highlights or we can do it all at once. Maybe I'll do that too. Here, I know this highlight. No matter how small
is the brush, I never managed to
do a perfectly as I need to. I'm not
worried about it. Once we remove it, we
can define the shape of those marks with color and make them a bit more even because
they won't be very even. They won't be very nice.
And that's all right. Yeah, let's go and cover all those parts now
on all the strawbery, right? So now, while the
masking food is drying, we can mix up some colors.
6. Mixing Underlayer Colours: Now, while the masking
fluid is drying, we can mix up some colors. By the way, if you know, does it say it's a latex? I think based substance that when you apply and once it's dry it becomes waterproof. The water color is
not going to go through the layer
of masking fluid. Once we finished
with, let's say, and ready to paint the detail and all around the highlights,
we can remove it. And it's going to be white of the paper with the first
layer with wet on wet. Wet on wet is our base
layers as we usually paint with the first layer
would be to paint in the lightest colors would be this reflective light which is pink with tiny bit of blue. And on the other side
it's a little bit more red, gray, red. That would be our first layer. Also on the first layer, I see here the red looks
a little bit more orange, means it has some yellow in it. So we can also apply some yellow patch here
on the first layer. Then once that layer is dry, we can apply second
layer with wet on wet. And we're going to apply
our main red color with a little bit shadow and a little bit
more pink maybe, but mainly red color. Then once that layer is dry, we're going to go and paint in all this detail
in those creases, right, those circles
were around the seeds. Once that is done, we're going
to go around and fill in the gaps where we need between those red parts
like here, everywhere. And then a little bit
more pink on top, right? That's basically the
plan at the end. Once done, obviously the leaves, if you see very closely
right, the pink is around. But what we need to paint
now is what's underneath, because we're going to be
painting that pink after we painted all
these red circles. What we need is the
color that's underneath, which is a little bit grayish, bluish pink because we're
going to be using pink on top. I'm going to use for
that underneath color is also Rose Matter Lake. We're going to be adding a bit of fallow blue to it to make it a bit more bluish, purplish. Let's get some paper, maybe a bit more blue. Water it down. I was testing it yesterday
at home and I was using cobalt blue
instead of palo blue. While that color is
great and looks great. But then I painted
with white on wet. It really separated on a paper and that's why I
just don't like using it. So I'm trying to use my regular
blue, which is low blue. That sometimes maybe it's not the best option but just I like the way it
looks on a paper. Just always very smooth. Right? So something like this, maybe I'm a bit scared
to add this blue. I don't want to
make it too purple, but I think that's what we need. Just maybe water it
down a bit more. Right? Something like this. Maybe it's a little
bit too dark. But when we paint, wait on what? It's going to get
diluted and it's going to be lighter, right? That would be for the left side. And on the right side
we have this red. Our main red for the strawberry here will be Scenellia red. I'm using Scenellia red
for this part as well, but to make it as it is, we're going to be
adding blue as well. Lots of Sceneliia red, adding same fallow blue. You can see it's
look this dirty red. That is great for that shadow. Let's see. Right, that looks pretty good. On the first layer we're
painting those lighter parts, maybe we're going to need to just water
it down a bit more. We're going to mix up a bit
more because we're going to need it for a
second layer too. That looks for the
same first layer we're going to need
as well. Yellow. I'm going to be using
my land yellow. Add a little bit of anacdon
gold just to make it a bit warmer, just a bit. Okay, that's our colors for the first white and wet
layer and second one we're going to need a little bit
more red and rose matter leg. But we can maybe
it later because it's going to dry
on our palette. Anyway, let's get our
first layer done.
7. Painting Underlayer- Wet On Wet : For the first layer, we're
going to cover it with water. And we're going to paint this reflective back around
and yellow here. And we're not going to paint
anything in the middle, because in the middle it's
very fresh, clean red. So we don't want to contaminate
it with some blue tones. Only around the edges here. A little bit further
down where we have this dark red shadow so we
can apply this shadow color. Right? I'm going to be using maybe number four to paint with and number six
to cover with water. It's just going to be okay loading my brush
with clean water, dropping it in the middle. Masking fluid is already dry. And you can see I left
the pencilight quite dark this time because we're
using very dark colors. And after the first two layers, I can barely see anything. I left them a bit sharper because we're most
likely going to cover most of them because we
have very dark colors everywhere except around there. Maybe there we can
remove as soon as we paint in those circles. Let's s but testing it
yesterday a little bit. And I had the pencilines
much lighter. After those two layers, I could
not see anything anymore. And it made it very
difficult to find where is what because you can see
how detailed this is. We're going to be painting
with small brush afterwards. Each detail and all
circles, right, covering with clean water, entire strawberry, all
the way to the penciline. As you can see, I dropped lots of water in a middle first. And then just using
that puddle to move it around the rest of the shape. And all the way
to the penciline, I'll have a little
bit too much water, but you can let it soak into the paper a little bit
or just collect it. Brush like all dab
a bit on a towel and just sweep through
collecting the As. Just making sure we have
everything very evenly covered. No drying patches. We went all the way to the
penciline but not over it because pain goes
where water is. We need to try and be
quite precise here collecting the excess. I just start to dry first, so make sure you revit them
before with then glazing. All right? Okay. So now I'm
taking my number four. I'm waking it up in my water. I'm going to start
applying the color. I'll start with my purple first. I'd like to have a little bit
of paper towel in my hand. Even though I have
a towel right here, just a little habit, maybe it's a little bit light, but let's go and start. Let's see. Yeah, I feel like I wanted to
make a bit thicker. It's just too watery. I watered it down a
little bit too much because when you paint
with wet on wet, I get diluted anyway. Maybe I shouldn't
have got that watery. I'll make quickly. Right. Okay. I start to apply color
a little bit short of the edge because it will
travel the color anyways, for the color to go slightly
lighter towards the edge, so we're going to be sweeping
through with clean, um, brush a little bit to make
the edge slightly lighter, a little bit short of the edge. I'll bring that purple
to the side as well. A little bit as I
can see. All right. All right. I'll clean my brush. Take the water out. Pick up the dark red bow
on the other side there. I need some purple as well. Actually, let those
colors mix a bit. This red, we can bring higher here where the shadow is anyway. All right. Now clean my brush quickly and
pick up my yellow. Because the glaze is
drying quite fast for me, I need to make sure I am
able to cover what I need to cover yellow approximately here. I don't think it's going
anywhere further than that. Clean my brush again, pick
up a little bit more purple and drop it in here. Actually, right now,
clean my brush, Take all the water out and we sweep through
around the edge, making that color travel
towards the edge, but in the softer manner. Right? If it doesn't, we can add a little bit. So it goes a bit closer. Started trying, I'll make sure I'll push a little
bit of that color. All right. Collect a bit more in here. Okay. I know it looks weird now, but those are just first
delays, not panicking, right? Maybe I'll collect a bit here. I don't need that much
of darkness here. A bit here. Right? I'm just thinking
that we probably can leave it and let it dry a couple more lips to make it slightly
lighter around the edge. Right, That's going
to dry lighter. I know it looks a little bit
too dark and too strong, but it's going to dry lighter. Let's hope that,
let's leave it to, once we're going to
apply second layer, we're going to put
our red color.
8. Mixing Main Colour: All right, now that
the layer is dry, we can apply second layer. And this time we're going
to apply red color. Let's mix up some red. I'm not sure if
we're going to need this purple or yellow anymore. I think we might clean up. We can make space for our
red if you will need it. We'll mix up, but I
don't think we're going to be using it anymore. Right, Our main red is
going to be sellados of it. We, lots of Stena red. I want to add a little bit, it's a little bit to brown. Now I wanted to make dark red, adding more stenea into it and leaving just
a little bit darker. As you can see, we can still
adjust it as we paint. If you need for
now, leave it end. I don't know if we're
going to need any pink for the second layer, but I'll just mix up just
in case that rose matter on its own is going to be
our pink if we need to. All right, so those
are the colors you're gonna need right now. All right.
9. Painting Main Colour - Wet On Wet: So again, as we did
the first time, let's apply clean
water glaze first. Just dropping lots of
water in the middle. First I'm just moving that
puddle up to the penciline, try to have very even glaze. No drying patches. So I keep tilting my head
to see if I don't have any. I think we could, right When we apply red color, we can apply in the middle. And if you can see there's
like a line that Dd, We don't want the red to pass because in this around the edge, it's mainly those grooves
that I painted in. But around is pretty light. We don't want to paint
over the dark color. Let's push the red
color up to this edge. So then once it strive, we're going to start
painting the detail. But we don't want the red to
gold way, the pencil line. We leave it clean, focus towards the
middle and we can add a little bit more
dark red in here. But mainly it's just the
middle part of the strawberry. I'm picking up my number four
again and loading my brush with lots of red. All right? And starting just dropping it straight
in the middle. Right. You can see how the color just runs away where the
masking fluid is. Okay, so let's move
that red up to here. Now that shadow is shining
through very nicely. Okay, so approximately like. So now we can see this yellow is
shining through and it's giving this orange. That's the beauty of water, colors that are transparent. If you make a good plan
and plan your layers, if you understand a little bit how the colors work
when they layered, you can achieve very
realistic looks. I feel like I might have went a bit too dark with this purple, but even I can sometimes just make everything
perfect as I want to. That's okay. I'll clean my brush and I'll pick up
some of that darker red. And so where we see
that shadow red. Okay, clean my brush.
Take the water out. We collect some
color that starts to run towards the edge. After each little swipe, I clean my brush and keep collecting the
color of that edge. We might need to
do that multiple times because while
the glaze is wet, it just going to keep
moving wherever water is. We need to keep control
over it constantly. Yeah, this is a bit,
maybe too blue, but it's going to be okay. Right to keep collecting
and keep cleaning up rush. Because here there's lots of light parts around
those grooves. I'm collecting all around them because we're going to
paint this detail later. We can't do it with what we
just need to make sure we leave parts as light as they need to be in the
places that we need to. I'm going to pick up
a little bit more red and add a bit towards the center where
it's very juicy. And bright red here, it's a bit lighter at the top. All right, but it's a middle. A bit juicier, just
putting a bit more juicy. Red. Okay, but mom here, okay, left a little bit here that there's little
light part in here. So anything here. Let's see. A bit lighter here
maybe. Actually, no. Before I do mistake, I think I'll just leave it to just make sure we don't have anything
around the edges. Now, layer is dry, it's a little bit
too, but we can try to collect while
we still have time. While the glaze is damp, just a little bit around few grooves where we see
it needs to be lighter. There are some parts that's
going to be lighter. It has to be lighter, but because you can't
do that with water, we we will be able to scrub a little bit paint once the
lay is already even dry. But now before it
completely dried, let's go around some
of those grooves and collect a little
bit color around. You can see this around the
edges on the left hand side, there are like
highlights, right? Try to collect a little
bit if you still can, but the glaze has to
be not completely wet. It needs to start
drying in order for you to be able to
lift a little bit. It has to be still
a little bit damp, but not too wet
with clean brush. Making sure important,
don't put any water because it's going to bloom
right away and it will be las, ruined. Need to wipe your brush on a kitchen towel or paper towel each and every time you
clean your brush with water. After each time
you keep cleaning your brush because otherwise you just can't
collect any color. I'm going to keep doing that, just here and there while
I still got some time. Now you can see why kept my pencilinettle bit
darker than usual. Because it is canty. I think even if I'm not very precise here, I'm not worried because when
we paint with dry brush, the detail we will define everything that
looks out of place. Not to worry, you think it's not in a
perfectly right place. We can cover anything
we need to cover and define anything we
need to define later. Okay, we getting there? Okay, I think I'm just
going to leave it already. I can't really lift
anything anymore. Right? So let's leave that
layer dry completely. Once it's dry, we're
going to start painting the grooves around the seeds. I think to do that we will probably remove
the masking fluid. Because masking fluid
is not perfectly, it's going to be like
in a perfect shape. In order for us to
define the shape, it's probably best to
remove it and then paint those groos and
shadows around those seeds. Once the masking
fluid is removed, otherwise we can
define the shape. Let's leave it to dry. Completely, completely. It needs to be completely, completely dry because
you're going to have to remove the masking
fluid by rubbing the paper. And if the paper is
a little bit dump, we're going to be damaging it, so it has to be completely dry. And then we can remove the masking fluid and
continue painting the detail.
10. Defining Seed Beds: It took a while for it to
dry because it was very wet. It's even now here
where it looks a bit. But let's try and remove so
you can do it out of it. Finger others are doing with but because I don't want
to erase the pencil line, I'm going to just rub a
little bit with my finger. Make sure your hands are clean. If there's a better way
of doing so, let me know. I don't know it because anything sharp you might use
would damage the paper. Like sponges or
finger works for me. If you keep your hands clean, you don't smudge anything. We're going to remove
it in a minute. I'll show you why I wanted to remove it now. And at the end. Okay, comes pretty Okay. Now you can see that
those marks quite uneven. Even the highlights need
to be very, very thin. They're very thick, big lines. And if we removed at the end, we would have to paint
around them again. It's better to remove them. Now, even the shape
of the seats is odd. That's why I remove it now. Because now we're going to
paint in those grooves, right, those creases
around the seats. While we do that, we can define those highlights and the shape of the seeds while
painting it right, as I just mentioned,
we're going to be painting in those seeds. I can take maybe my number one or zero, whichever
feels comfortable. Or even two if it has
a really good point. I think maybe I'll paint number zero
because it's very small. We're going to be painting
grooves around the seeds, everywhere here as well. But we're only going to focus on those darker parts you see. Because you can see when
there's using red color, red groove around,
there's some pink. But we're going to
do that after first, we're going to focus on just
painting in those creases. Then once we've done that, we're going to go and paint around in between those grooves. And like here and connecting
all these detail around. Now just focus on painting
in those little grooves. It's pretty simple. We're going to use red
color on this side as we go decide we're going
to use our darker red, it's even black,
but we're going to build up that darkness
layer once we have all the detail we painted in between the grooves and
we'll see how it all looks. And then we're going to
darken those darker parts because we don't want to
go too strong just yet, not knowing how everything looks in comparison
to each part. Let's go and paint in
those little grooves. Now, as I mentioned, I'm going to probably
use number zero. See how I go with it. If it feels uncomfortable, I might switch, right? We're going to be using
red color all around. I'm going to start
by diluting it a little bit when I paint
those slider parts, because I need to first
test it on a paper and see how it's being applied and
how it looks on the paper. And if I need to go
stronger, I'll go stronger. We're mainly going
to be glazing, not completely dry brushing, but it's pretty dry brush, I would say keep
your mix is dry, I would say because you
want to stay in control, we're just going to go and
start painting all around. Then we need to define
that set as you see in the reference photo and
the highlights, right? It's very detailed
work from now. I don't want to really
rush that too much. You want to keep it detail,
That's what I meant. It's very detailed process
of painting strawberry and I'm painting that
cred just like so I'm. Thinking that I don't really
need to soften anything, but if some edge is a
little bit too harsh, maybe we can have, on the
other hand, small brush, which is clean brush and
just soften a little bit around this outer edge where we're going to apply
a bit more color around so that we don't end
up with the hard edges. We can feather it away
just a little bit. Continue painting,
picking up more color. Go into the other groove. Let's see. This one, for example, has a little seed popping out, which I can see that. I can see that I
missed it probably or we didn't cover properly with my masking fluid
and it's not white. We're going to have to try
and lift some color later on. But now I'm going
to go and define that highlight paint in that groove painting around the seat and around
the highlight. See, now I'm correcting the
shape of that highlight. And that is why I
wanted to remove the masking fluid
now so that I could do it right now. With clean brush, I can soften
a little bit this edge. We will need to darken
and build more color. But once we have all
the detail right, then we can build on it. But first we need to have the of all the details to just being able to even understand
where is what. Once we have all it mapped out, we can just keep building on it. But now we need to focus
and paint all the details. Yeah, just like so now
we need to go around the entire strawberry and
paint in all the groups. Just wanted to mention as we
move towards the right side, we need to use darker color in those parts.
It's really dark. You can add a little
bit more blue into the red and
make it really dark. But as we move and we reach
the middle part here, which is something in between
the red and dark red, you can just pick up some color, mix it with a little
bit of that dark mix, you can get something
not completely dark, completely red, but just
something in there. And you can just paint in those slightly darker
than red parts. Also, I'm going to
mention that when you go into the
yellow, orange part, we can pick up a
little bit of Ireland here in a corner with
a little bit of red, and you're going to have the
slightly more orangey red to paint in those trees. Yeah, we just need to adjust
slightly for each area because now I painted here and I noticed that it's a little
bit too dark with red. We need a little bit orange
red just here in a corner, mix with yellow, and
you can paint that.
11. Lifting Off The Paint : Right? Well, that took a while. What we did now, we painted in the case of the strawberry. What we need to do
now is we're going to go again with small
brush all around, but we're going to be
filling in gaps in between. What we need to do,
we're going to be painting around the creases,
creating the highlights. Like this one, we
painted the middle part. Now we need to paint around, creating this ring of light. We're going to paint
around creating this high light
around each crease. And we're going to just
paint in the middle parts, in between those seeds. Also, while we do
that, while we paint, we're still going to go
over exactly the same time on the crease
that we painted and just darkening where we need perfecting the
shape or something. Because once we start
painting around, we can then make the
shape of it, right. That's the plan for now. But before we start painting it, I think we can take our small
brush and kitchen towel and go around a
little bit and try to scrub off a little bit of paint and debit kitchen towel where we lost a
little bit of light. For example, if I
go here, right, I didn't even missed when I was applying
masking fluid here. I'm not going to be able to
lift off white of the paper, but I can make it lighter. Just go around your
painting and see. Because once we start painting
around those creases, if some areas are too dark, we won't be able to create
a high light around. Let's go around and lift
a little bit of color on those high lights where
we think we lost, right? If I just go like
here that I did now, then where I think
I'm going to lose, for example, here I think
I don't have enough light. I'll just scrub it,
clean them, brush. If the paint is quite dark, it's lifting off quite nicely. You see nice little light, make it curve a little bit and where it's dark especially, it's lifting off quite easily. You see now we have
a little highlight that we missed when you
paint with wet, wet. But as I mentioned, you can lift off a little bit
with clean ambush. Just go around now
and lift off where we think we need to before we start painting around and creating. Now, for example, highlight,
let's say here, right? It's a little bit too dark. I want to lift off that highlight so that
when we paint around it, the contrast will be stronger. Okay, let's do that.
12. Painting In The Rest Of Strawberry: Right. Again, a detailed work. Again, I'm taking
my number zero. I have my number
one clean and damp. On the other hand, if I
need to soften anything, I'll just go and again, using red color here as they
move towards the right side, I will start darker red. Right now I will start with red. Actually here in this part, on this side I might use
a little bit of Rose, Mata Lake because it looks
a little bit more pink. And then as I moved
toward the middle will be red and on the right
side will be dark red. Right? If I start
with my rosemake, watery down, completely dry. Now I'll start with slightly
watery, pale mix, right? We paint around those creases
that we painted, right. And moving the color
further as we see, I soften that edge with
clean dombrush paint, very close to the crease. And just moving a
bit further away. And softening like here as well. Slightly further and softening, it's all disappearing and soft. Then at the same time, we can pick up some more red. We can define, we can do them after we've
done with that part. Painting in between
decreases, it's up to you. I will start painting maybe
all around the creases and then I'll see if I want to darken the creases
now or later. Let's just start by
painting around them. We'll see how it's more natural. Again, with very
small brush strokes and soft with clean brush, which you need to clean
as well every few uses here I see that I
probably need to start picking up my red color pat, moving further away, making sure we still
have those highlights in between and softening so the sole blending
in very smoothly. There are no hard
edges here, all right, when we paint next to
decrease on the other side, we need to leave that
little highlight and paint around it. It's very detailed and it's probably not the best
project for beginners. So it's for advanced artists. Intermediate beginner might struggle a
little bit too much. Maybe paint some
easier projects. If you are a complete, complete beginner, well you
can give it a go. Actually, when I started, I was very motivated. I was taking up all
kind of projects, even though some of them were clearly more advanced artists. But even though I
struggled a little bit, but they taught me a lot
more detailed project. Yeah, give it a go. Why not? Right, connecting. Basically, I'm
connecting those creases now with each other. Making sure I'm softening everywhere and leaving the
highs now on the other side, I need to leave the sliver of
light I'm painting around. I know it's very hard to find
in a reference for what. That's why we paint
the dry brush, so we can be very focused
and we don't have to rush. I went a little bit too dark
here with my under layer. If you are painting,
maybe you go slightly lighter because that
blue is a bit too dark. I should have watered down the mix a bit more blue on the very
first layer that we did. Maybe you go a
little bit lighter. Softening here, the
stage between um, make sure I don't have too
much water on a brush, just D, right? And we need to paint around of crees is creating this little highlight
at the top of each. Right. Now we're
just going to go all around doing just that. What we're going to do
with this highlight once you reach the high light, pick up quite a dry
paint, let's say red. Just scribble over
it to create this. You see by highlight
with lots of texture, just tiny little brushes. So like in all
directions that one way when I go to the middle I
start dry brushing is if I do at the very end where we usually dry brush,
right to smooth. But now we just basically painting in
rather than smoothing. But the same way literal brush strokes define the edge and then
fill in the gaps. Very small brushes
that we don't make any mistakes and slowly move constantly,
referring to reference, photo paint, define
that highlight. I didn't fill in the gap
until I reach the decrease. Okay, let's go and do that now. Oh.
13. Painting In The Seeds: Right now we are somewhat done, but we still need to darken some that are
really, really black parts. Right? Some of the
creases are nearly black, so we're going to need
to darken those also. There's a little bit
more darker red here and a few places needs defining, especially around those seeds. But in order to do it correctly, then I think we should
paint the seeds first. Because on this side
the seeds are real and some have shadows. You need to have been painted those seeds already in order to define them and put like really dark shadows before the last step for
the strawberry. Let's paint in the seeds. And then we're going
to go around defining, going into like small
detail if you need to for the seeds. I'll make a little bit
of space on my palette, clean some of that pink. I can leave a little bit
because even if you'll need to, we won't need much of it, right? For the seeds on the left, they are very bright yellow. We can using rely right linn, a little bit of Akon gold. There's like a little bit
of shadows for this side. Going to use Ac gold and add neutral tint to get them
really like gray yellow. On the left hand side where they barely visible, they almost see, it's like yellowish gray, dirty mixing some neutral tint. It's going to work, obviously
we're going to have to make this little shape slightly lighter at the top
and darker here. But when it's small, you can't almost see it. But try to create
this tonal values. Lighter and darker
land is going to go here and then connect on, go a little bit
on a shadow here. As we move here, we start applying a little bit yellow and then shadow
with this color, right? We can probably go and paint all of the seats with yellow, but then start painting on
the shadows as we go here. They're going to turn
completely dark like So the first step, I'll just get my
number zero again. Just paint all of them with my Arlen or even those bigger ones
you can add like this, paint with land Cont on
gold and add a shadow. But because it's
such a small area, I'd rather paint with the color first and then go around
painting with the shadow color. Let's just go and paint just
with land, all of them. Try not to wiggle
around the red part because you're going
to be lifting off the red part and they
will get smashed. Trying not to touch
the red colors. Okay, now we can go around painting in the
shadows a little bit. Pick up a little bit of
early connect on gold, slightly bigger, and put a
little shadow on the knees. Pick on one side because the light is
coming from the left. Okay. As we go down, I
already want to pick up a little bit of
our yellow weight neutral tint, just pain like. So we need to clean my brush
and soften a little bit. I'll take my second brush
for that will be easier. Some are just darker, so I'm painting over. Some has shadow just on one side like so and soften just a bit
to leave the top. Okay, so it's turning
into something.
14. Final Dry Brush : Okay, so we have our
seeds painted in. What we need to do is now
put the finishing touches. For most, that would be it. It's usually not for me. Again, I'm taking
my number zero. Now I'm going to do
proper dry brushing with tiny brush strokes, pick up little color, just go around each
defining those seeds. For example, you can see some of those seeds
have dark, dark parts. I'm picking up some of
my dark red, dark, dark. And just go and define
the edge, right? Define here. Those crystes need to be
darken in a lot of places. Here, for example,
really, really dark. And then with lighter red
go all around filling in those little gaps,
defining everything. Basically all the
lines, all the seeds, making a bit sharper on
one end where the shadow falls and putting a little
bit more color where needed. Also, some of those
highlights are too light. We can see reference
photo, they are red. Once we apply a little
bit more darker red in these parts, then we can pick up a little
bit of Arland yellow. Mix it with a bit of red to make a little bit
brighter and lighter, slightly more orange,
just with pale color. Go over that highlight, making it red rather than
the pale gray, right? But we need to make contrast, so we need to put a
little bit more color around it so that
we don't lose it. But we do need to
put a little color because it's just a very
wrong color right now. We need to be just
slightly lighter, but not completely like
gray needs to be red. Still go over the
highlight legs, but we need to put a little
bit more cola around. Let's just dry grape, almost grape, entire strawberry. Just defining things,
making a bit more perfect. And if you knew watch dry brush tutorial
that's available, you will know what
I'm doing Now, filling in little gaps, defining lines, just
putting the last detail that it's still missing. Now I'm focusing rather
like at one, grease. I'm focusing just a
tiny area at the time. Because I like making things
like extremely detailed. That's why I always do the last step with dry brush
with very pale colors. And we can go over those highlights here and create slightly
smoother transition. The tiny tiny brush
rocks almost dot, see, just diffusing the sharp line like this is maybe
not for everyone. You don't have to necessarily
go to this a detail. It's just a possibility
if you want to. Right, let's go and dry brush. So, okay, so we are done with
a strawberry part. We can clean up the palette
and paint in the leaves.
15. Mixing Leaf Colours: Right, let's mix up the
colors for our little leaves. Leaves are not too
much detailed. Maybe this one, I'll
start by the way, I usually start on these leaves. You can see there are some
blue tones and green tones. We can paint them
in like two layers. First applying blue color and
on top then applying green. Let's have slightly
lighter bluish tone. We'll start with my land. Add a little bit flow blue. We need to add a little
bit more palo blue to have this bluish stone
very light and pale. Okay, perfect here. Second one is with
the same pigments but slightly more green. So more yellow than blue. Maybe we can make
slightly darker. Okay, then we need dark green. For that, I'll use two yellows. I'll start with my
Arland yellow con golds. Give some worms
and add palo blue. But in quantities, strong consistency,
more saturated. All right, let's see
like a base for here. For here I need a little bit even darker. Again, the same colors
but even more saturated for real seniarly black parts. More saturated, but
all the same pigments. But this time to
make it even darker, I'm going to have to add
some red and it's just going to go dark right away. Okay, so I'm adding Senala red and you can see it just
going dark immediately. Yeah, that will be okay. He lost.
16. Painting Leaves - Layer I: Those are very small leaves. I'll maybe number two, al right, so we're going
to start with water and white as we
usually do everything. So let's start with this
main big leaf, for example. Put a little bit of water first. Pick up a little bit
of my lighter green and drop it here at the top. And then go to my darker
and cover the rest of the leaf there and details, but they are light dark. It will be easier for us
once we paint to be lifting off little brush once
the glacier is dry, because those fans are like
lights and very small, it will be easier for
just to keep scrabbing off each way at a
time. All right. So okay, I can even pick up
some of my dark green. Drop it at the bottom. It's really dark here. C f take the water out and
lift a little bit here. There are some like
hairs actually here. Okay. And I'll leave it to dry. We can move on so we can't
paint anything next. Because it's drying,
we can go and paint this one, for example. Apply a little bit of water. Those leaves are
going to be easier, not as detailed as
the strawberry was. This should be easy for you. If you already
painted strawberry, there's getting in the way. Okay, Picking up my
bluish green, drop it in, and so let's leave it
to dry a little bit, and when the glaze still
damn, but slightly dry, we can add green color so that it wouldn't
spread as much. Let's give it a minute. Can load my brush with quite
sticky paint. Don't make it too watery, so that it doesn't spread
too far, too wide. Okay, let's add a bit of green. Go with like little tabs like, because that's what I see in
the reference for all here. And then there's a
little line here. That's it. That's what we see. Let's
leave it to. Right. We can this leave
behind it is small, we don't need to wear it before. Maybe I'll just pick up much more watery and
pale mix of blue that, that would work as we're going to
drop in some green in it while the glaze is wet. But we're already painting
it with light blue. I'll drink that down, clean my brush, and just
soften around the edges. I'll quickly pick up my green
even Actually, it's darker. Probably go here at the top. Put some of that paint down, and it goes lighter there, dark in this corner here. So here we go. Don't forget to paint this little tip of it, right? What else we can paint This little thing
that speaking out again, picking up my blue, picking up my dark green, and oops, going at the top here. Okay. So this is drying. Still damp in the dark part. We can wait a bit longer. Let's see, this is dry
around, we can paint, apply just a little
bit of water just so that colour is moving
around slightly easier. Just a little bit.
Picking up my dark, I'm just painting entire
leaf with just dark green. Okay, cleaning my brush. Take your wood and collect
some of that in the middle. Alright, that's it. Pick up my light blue
and just straight in. Let's paint this little part. Get my green and add
a little bit things. I'm moving fast now, okay? All right, so this
one is dry enough. We can paint this one again. Is also quite small. We can start painting it maybe
right away without vetting it before I'll water
down my green. Start painting and I leave a little C there is lighter and there's
some hairs as well. Just leave it like so right now clean and I pick
up some of the dark and drop it in the
nctnal values. Okay, continue painting
in the rest underneath. I'll start with putting
some light blue glaze first and then I'll add green. Just step to make
it an even texture. Okay, I can paint
this one as well. Put a little bit of water on
this one because slightly bigger I'm leaving that little
end that's curving upward. Can I paint it separately? A little bit of water. Started my blue green mix. Put it all the way all the way in the in
the shape the sleeve. You're just, we're going to
be adding some darker color, picking up my green,
darker green. Start from the top and it has those lines sweeping
through like that, creating those lines a
bit green down here, picking up some dark
green on the top, on the very tip of my
brush, what I meant to say. And there's very, very
dark shadow here. And here we go, something like this. Okay, we need to paint that one. This one is just a plain
black green color. So I'm just going
to load my brush with dark green and just
paint straight in as well. All the way to that
top of the leaf. Clean my brush to the water out and smudge some
of that paint here, and even a little bit on the strawberry with this
green to create a shadow. You see that we ignored
here from that leaf. Here we go, as it needs to be. We can even drag some
of that green here. It darkens the strawberry underneath those
leaves right away. Okay. Pick up a little bit more green. And there of the other leaf that's finishing,
that's painted. Okay. That was very
quick first layer and there's not much that we're going to have
to do after this. What we need a little bit of tonal values and a little
bit more definition and you get that layers.
17. Painting Leaves - Final Layer: What we need is we
need a little bit of tonal values and a
little bit more definition. And you get that with layers. Let's just go with wet and dry can have a second
brush to soften the edges, but on the other hand
just go glaze over like in areas where we just
want to darken it. Here we go, just give a strong contrast here. Soften, pick up some darker. This corner, the
sounds really dark. Can't seem to get very sharp
at the foot of the sleep. I just keep curving it, so let's build up almost like dry brush here
to build that dark color. On the other side, it is a bit darker since there's not
much detail captured. We paint as we see. Okay, let's paint this T
here that we left out. And with dark green, let's build up some
of the colors. I'll go and glaze it. A little bit of pale
colors all over. That's it. So, all right, so this one has a
little bit more work. Let's build up some color first, let's start with this edge. Let's darken it and
then we're going to be lifting off some
of those veins. Let's define this edge, right? And dry brush with
the tip of my brush sweeping across that leave
building up the color. It's too harsh here. You can soften with your T
brush just when you dry brush, you build up the darks much faster just with the
very tip of my brush, going like this and building that darkness in the
direction of that petal. Sorry, the leaf a bit moved towards the
petals, really dark there. Okay. Leave it to
dry for a minute, and then we're going to go and lift off a little
bit of those veins. Okay, a little leaf is dry. I pick up my number
zero kitchen towel and just go and scrub a
little bit of details. I'll start with main
vein here in the middle. You have a little bit
of water on your brush. You have damp brush.
Not because you want to scrub off very thin lines, it needs to be just
a little bit of damp and on the other side. Not completely straight. Okay, On the side as well, you don't have to go as
detailed as the sleeve is. Maybe just indicate those
veins left off here and there. All right, do we see them? So we see them
horizontally all over. They're not very even
going in all directions. You don't even have to
do exactly what you see. Just since you know they're
going horizontally, just lift them off
wherever you want. It's still going to look
natural and realistic. I'm not even paying attention
to the reference for, I don't know exactly
exactly each vein. I'm just, I'm lifting
off wherever. Okay. I'm going to even do more. I'll just do a few hairs
in here going to be white. Maybe we can scrabble a little
bit with something sharp. I can use white paint
if you want to, just never use white paint. I don't see anything
wrong with that. If you do right, then I'll go with the same
brush and same dark paint. Just go a little bit around those veins to just define them a little bit everywhere. Just wear the veins I think
a little bit too thick. Just go around and defining
them just a little bit. I didn't lift off exactly
as I see in the reference. I just wanted to make some
indications that that's how it is because it's a pretty
long Storiallready. That's going to be fine for me. I'll take my compass, which is very sharp, and you can go and scrub a little bit here
and there if you want. There's also few has on
the actual strawberry. You can also scrub if you want, but it's not scrubbing
in a perfect nice line. I would probably suggest leaving it if you are able to
do scrubby, very nice. You can like somewhere here. They came off quite nicely. So you can go and do that, but it's not necessary
because it's all finished. That done? Yeah. That
is our tutorial. I hope you enjoyed
it. It's a challenge. But, I mean, strawberry is
one of those subjects that every botanical painter wants to paint at some point
in their lives. I'll see you next time By
 Egle Kolev, Watercolour Artist & Teacher