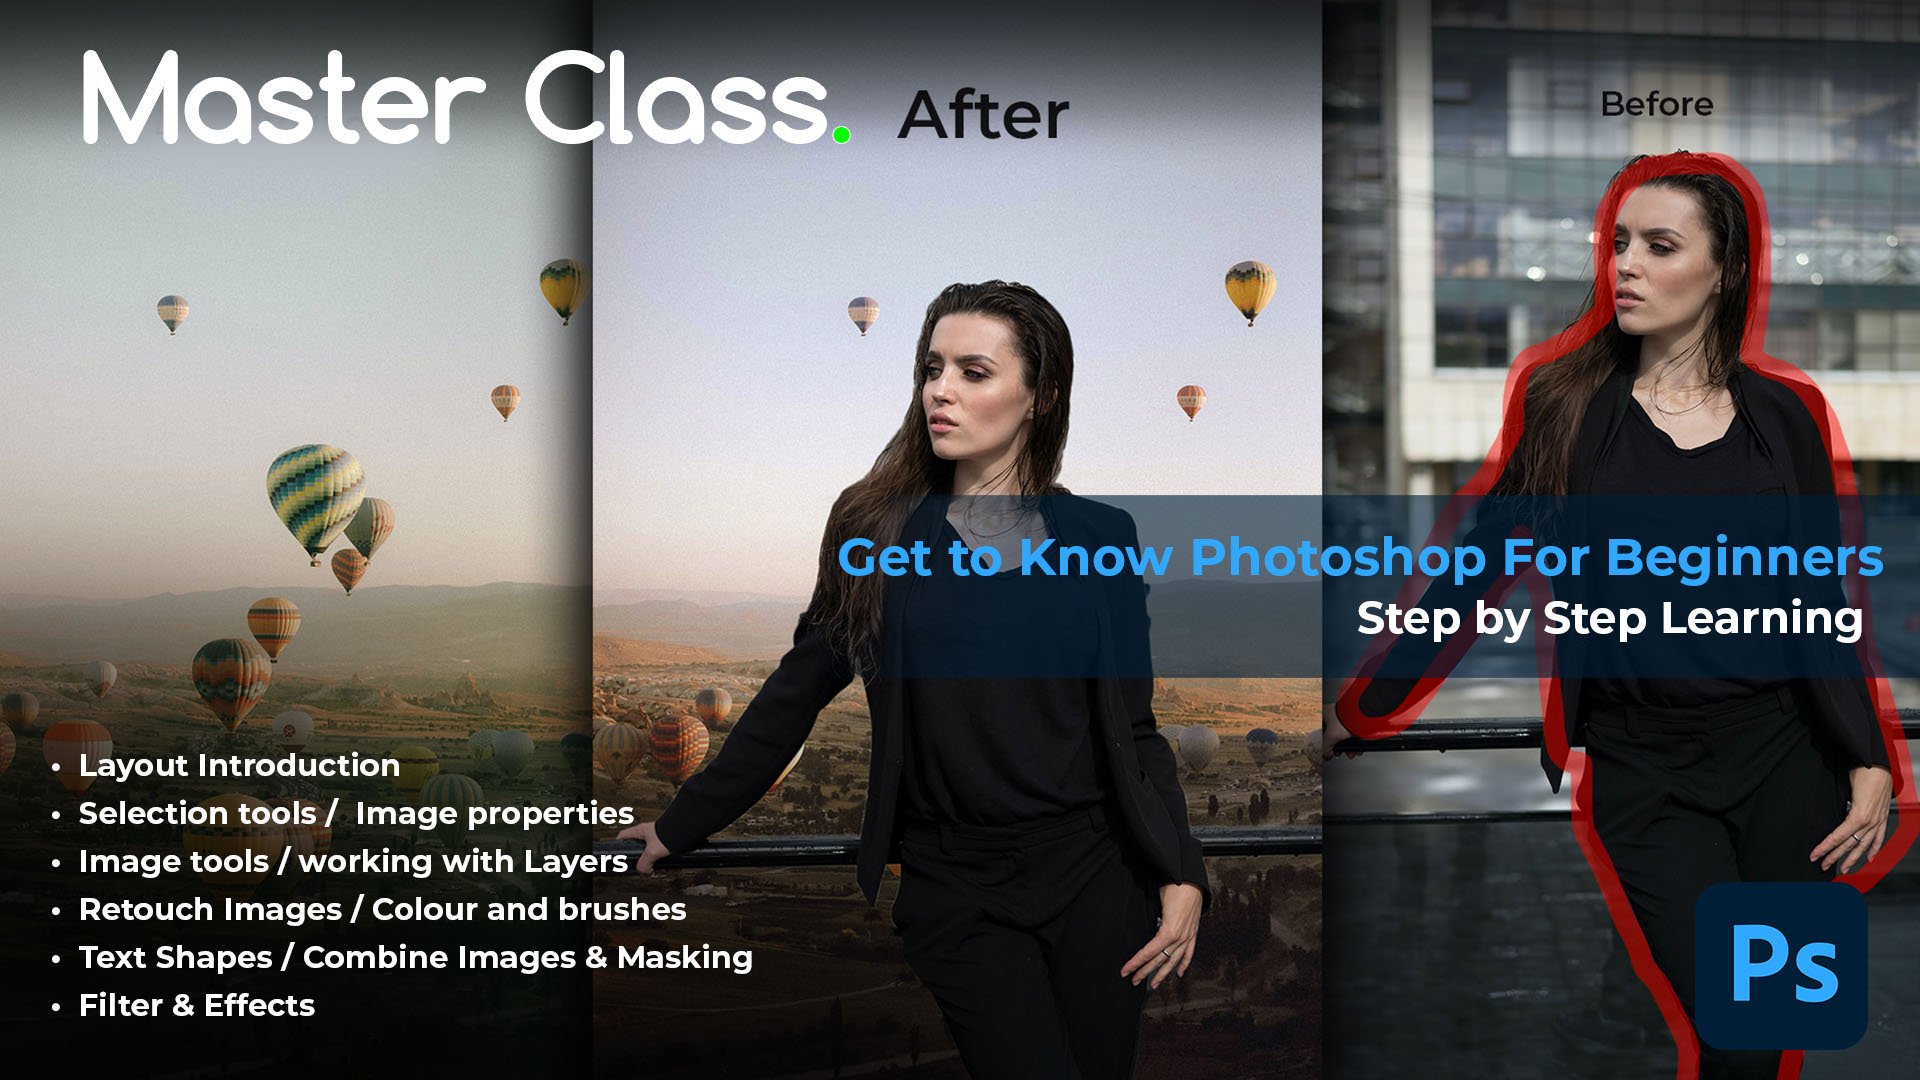
Transcripts
1. Introduction: Hello everyone. My name is Avi Mirza. Image is still artists
and creative director. I've been working for
last seven years. I've worked with major brands, including United Nations,
pepsin, railway, the keratin. In this class, I will teach you different techniques
and different methods. Edit landscape photographs in a very dramatic way
in Adobe Photoshop. In this lesson, I'm revealing
all my secret techniques, different methods,
and streamlined workflow to edit landscape
picture especially, we will explore
luminosity mask, dodge, and burn techniques are our editing of landscape
in Adobe Photoshop, rather than finding
the right composition, glowing and dreamy
landscape editing and its use of some
advanced tool. So let's start the class.
2. Edit in Camera raw: So I just open a landscape, rough picture of a landscape, and I just open it
in Adobe Photoshop. After that, we will make some
initial retouching for it. We will go to the Filter
and go to camera. Sometimes it takes time
to edit your camera. So first of all, in the camera, we have our basic
section, which we are, we can increase or decrease the contrast
highlights according to the taste of our picture. So first of all, I will
increase a little bit of highlight and
shadows a little bit. And after that, I will increase some familiarity in the picture. And l will increase
a little texture. After that, we can
also go to our Curves and play with the
curves little bit to make your picture
a little bit of crispy before making
it a dramatic look. After that, we can also
go to the color mixture and we can change the colors
which we want to find it. You can just go to Color
and select the color. Or maybe go to HCl and
click on this icon and you can instantly choose which
color you are playing with. And you can increase or
decrease is luminous, saturation and cues as well. So it totally depends
on your choices, which kind of picture
you want to develop. You can change the hue and saturation of the
pictures all the time so you can see how
the landscape is changing. I think this, this look fine, maybe a little bit greener. I want it to look like
this here, a little rusty. And after that, we have our calibration
option where we can increase the bloop
primarily to make it more realistic and
more prominent. So it usually depends on our own requirements on which
kind of editing with it, what you can change the
colors all the time to mess your editing
style and offer that. Here is where we are
going to play the Magic. We will select the brush
tool, Adjustment Brush tool. And now we will make a very specific adjustments
where we want to highlight or we want to increase or decrease the
shadows or highlights. First of all, we will select that gradient filter
and apply a gradient. We can move the gradient filter
by clicking on the icon. And you can maybe add
another gradient. You can always try to do. You can go to Command
Z. I will apply a centralized gradient on
this side just a little bit. And I will decrease the exploits of daddy ingredient a little. And I will decrease
the texture as well. So it, it gives a little blurry and detailed in the far vision. After that, you
can also play with the hue saturation of
that specific thing. So you can go to another, you go to the, all the
information of your gradient. Daddy, you put your
adjustment gradient. I will put the same gradient
on this side underneath. But I will decrease, increase the exposure
a little bit so it can make a very
cool, majestic look. After that, I will
apply some brush tool, or maybe I will use
the radial filter. It will be fine if I will
use the radial filter here. And I will move my radial
filter to the center so it gives the focus
point to the center. Now after that, we can
do the other editing. After that, you can just reset your gradients
settings and then you can change the settings of your gradient,
maybe applied here. And then just go to the Options. Click and just click on
the selective edits. And these are to your
settings and alter that. You can make the changes of your gradient
options as well. Now we will apply too
little bit more clarity. And you can always do that. Which part of gradient
going toward you can do gradient invert or
you will do like, the radial part will be
worth like this way. You can do the inverse
of your radial circle. So it's a very
tricky process and its need a lot of techniques
and lot of course has, first of all, we apply
the gradient filter. Now we applied the
radial filter. After that, I will
apply the filter to make a very focused in
their compositions. So I will try to highlight a little bit of areas where light is
getting, e.g. this area. You can show with the mask, and I will try to
highlight this area to a little bit here as
well and decrease the brush size and this area, maybe this area as well. And here, a little bit after
they're just your mask and hide your marks
so you can see the editing and increase the
exposure just a little bit, not so much, just a little. So it can make a difference
in the editing and give the like light and the shadow play in
your photograph. It's very important to
do it in the steps. If you will follow
all these steps, you can make all the edits in your camera roll and you
don't need to go away. Any other tools out there
that you can play with the hue and saturation
little bit to give a little extra ordinary
effect on your landscape. And then you can
increase, if you want, you can increase the
saturation a bit too. I think I will
prefer to increase the highlights a little bit, just a little so it
gives us dramatic look. I will try to decrease
the shadow and highlight this a
little bit after that, I think I need to play
it on here as well. And I will apply a little
bit on the on the men. So it gets a little highlights. And it will give the focus in our composition, in our editing. And I will apply a little
bit on this rock to. Then we will try to develop
something more in it. Just decrease the exposure a little bit so it
doesn't look artificial. Keep the realistic
approach all the time. And after that, if
you want to make another brush or answer
or adjustment, e.g. we can make another adjustment
for these big, big rocks. You can do it and you can mask your point so you can see where you are doing
your new adjustments. And we can also, maybe we can, we can do the more highlights to this part of the mountain and just this part
of the mountain. And now we can see
we made the changes and it's already looking our very surreal
and very focused. So these are the techniques
you can, you can follow. And by following these
techniques you can, you can, you can get to
the point where you can. You can make your
photographs more realistic and more very magical
and very dreamy. And after that, you can go
to your basic adjustment. You can make adjustment
as well. If you want to. You can apply a little bit of grains if you want
on your picture. Maybe there anything
on your picture? I just a little bit. But we already applied it
with the help of maybe we can add three point. Looks good. It depends on our,
on our requirements. You can also add a
little highlight on the, on the whole section. I prefer to make this
part is even because it's the fault of our maybe little focused
point in our editing. After that, you can click Okay. And now you will be
amazed the difference between the before the
picture and the picture. That's all with the
power of camera. You can edit your
landscape pictures.
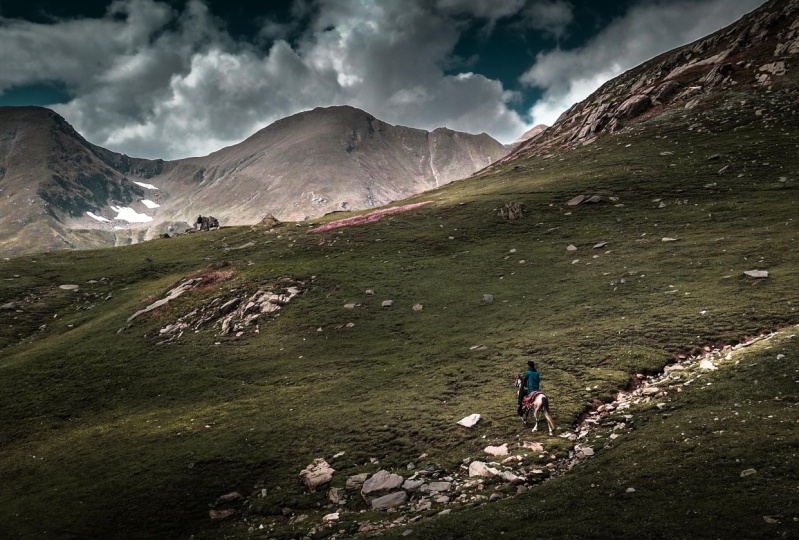
3. Re Composition: So now we will discuss the composition sections in
the landscape photograph. So basically three types of compositions in the
landscape photography. First of all, we have
the grid composition. We call it rule of
thirds and outer debt. We have central
composition where our subject is in
the center point and we have the diagonal
composition where we make our composition
in the diagonal. And we show that subject in
the diagonal part of the, of our photograph or
off of our area, e.g. in the rule of third, we have
our basically on this part, maybe I can make the color to red to make it more visible. So we have added this area, we have our subject and
above is the sky to one. If we divide this portion of the picture or this
picture into three parts, the two parts are sky
and one part is subject. And simply add own
this point as well. The one part is subject
and the two forces sky. So this is how rule of
thirds works after it, central composition,
it's pretty simple. You have to make your
subject in the center, your subject in the center, and the diagonal composition, It's very tricky composition. You make diagonals and
your subject consist in that diagonal parts of your photograph may
be like this way. And this way the focus points
are in the diagonal parts, so it makes interest
in your compositions. So now we will, we
will experiment on which part our
composition is like this. And we will try to
recompose, eat it. I think our composition goes
into the rule of thirds, and as well, our composition is in that diagonal sections. How it's going in the diagonal
section, like this way. Here we are making
two diagonals here. And also this part is making the rule of
third, our subjective. We make our subject as a horse. It's making the rule of third. So we will try to recompose created to make it
look a little better. So let's start. We can, if we can try to make it a little better
composition so it can develop or make interest in
our photograph in innovative, better way or in a
very better manner. So first of all, we will, may cover horse or our subject to exact
rule of third position. So here it's the rule of third position,
our subject game. After that, we will try to make our composition a little bit more in the diagonal sections. So it, it gets a little bit more interesting
close to the subject, I think here it's getting a
little, little interesting. You can always try to experiment on which
way you are planning, on which society It's sporting. And you can make your
composition size 257 to make it, make it a little better in
the compositing sections. So you can get, because most of the papers, when you are going to print, you have to make it in the
exact composition size. So we will try to
make it here and I think it's going go into
a better direction. This way. This a little bit more closer. You can agree or disagree
on these points. It's not a lot, but these laws are just help
you to make better pictures, to click better
photographs and make better interesting
points in the pictures. School, I think
here, it's perfect. So this is, you can explore, this is before and this is
after all of our picture. So it's creating a scene little bit of 12 months
seen in our picture. And it's going to
the rule of thirds.
4. Doge and Burn Technique: And now we will also
explore how we can use the Dorian Burn tools to make little bit more detail
in our photograph. So we will already have a duplicate layer and we
will go to our low section and we will keep the
exposure to 36 and we will use the mid tones to highlight. You can always use the mid
tone if you want, or you can. You want to highlight
the highlight section. So you can choose it
according to your requirement and then you can
apply the brush. And it will start
highlighting parts of the focus object or which
parts you want to highlight. So I want you to highlight the whole section it's
highlighted as well. And with the Burn tool, you can also create the shadows on the areas you want to create
shadows same simply, you can also decrease the exposure on with tones or
highlights or the shadows. So I will prefer the shadows and I will
use a do while loop. I think we need to decrease
the exposure more to 15. I think it will refine
this a little bit so it look realistic, increase or decrease
the brush size. So you can, you can feel
the difference in it. And to keep it in a
very realistic manner, you have to play
with the size of brush as well. There's
very important. After that, I will use
the Dodge tool again and I will try to
highlight this area, just a little bit. Highlight. And tried to highlight
this little bit too. These areas decrease
the exposure to six or 16 to make a
little highlights there. So you can, you can make the
highlights in the picture. And this part is a
little excessive. So we can always change the opacity to comply
with our editing. So I think in degrees
over our best to do 50. So it will comply with
the editing and offer it. We will merge it
and we will always, we will do the duplicate
layer to have a backup.
5. Dreamy Landscape Editing: After that, we can
explore how we can make them very
magical effect in it. For it, we will go to simply,
it's a very simple way. Go to the blur and decrease
your blood section. And then you can click okay. And after that, you can change
your layer to multiply, or you can change the
layer to this screen. It depends on the visuals, it depends on it depends on
the on the picture as well. If it's going with the dreamy factor is not
going with the trim effect. After that with the
with the eraser tool, you can always increase or decrease the section which you want to make
a little visible. So you have to play
with the Eraser Tool, different tools to highlight or increase or decrease the
look of your dreamy effect. Just to comply with it, we can do we can try to make
that dreamy look towards the mountains and we can
decrease it towards the subject. So I think it's looking, looking better this way. And you can also increase, this is why if you
duplicate the layer, it's giving a more
realistic dreamy look. So either increase or
decrease the airport. And this is how you can create a dreamy look in your
portrait as well.
6. Lumitery Technique: And now we will explore another technique in the editing of landscape photograph here, which we call
luminosity editing. This works in a way it increase or decrease
the shadows and highlights two specific
points of the luminosity. Or your shadows are your
highlights or your exposure. Maybe you can say so far is we will click on
the Gradient Map, and we will select
our gradient map into that black and white. After that, we will
make some points like center point of our map
and midpoint of this, midpoint of this as well. And after that we
will put it to 75, maybe from the, from
the zero to 75. So this point, we will call
it zero, the total white. So these areas get total white. And this is, we will
add it to 75 in the k, which is black color. So this point is
highlighting the 75 Fortune. And after that, we will
make it to 50 for the k. So this portion will show the 50 per cent area
of our picture, of our shadows and highlights. It's because the black
is going to saying the shadow and why it is
refereeing the highlights. And after it, I will
go to the white and 25 per cent light on it. So it will harmonize
our picture. And after that, I will
put it into luminosity. So this technique
works like this way. So this is before and this
is after and after it, we will make the
sufficient changes in our gradient according
to our requirements. So I think I can play
with this and I can, I can reach the changes to this specific points
of the exposure. And this gives a very beautiful and
very creative effect in our pictures. And you can control
the highlights and shadows in a
very detailed way. The more points you
increase like here, you can also add the 0.22 k. You can keep it like 85. Maybe. Maybe you can apply it. 85 or maybe 90. Yeah, you can apply
it to the 90 and you can you can get them more control on these
sections as well. After it you can
apply highlight. And I can increase this,
change the position. So you can see when
I move the cursor, the focus points of our
highlights get more highlighted in a way we want it. So this is how you can
increase or decrease a very specific points of the exposure in
your photography. And this technique, we call
it luminosity technique. After that, you can
just save your picture and upload it on
different platforms and for the exhibition and enjoy it and get likes
over the Instagram.
7. Final Project & Results: So here is the final
result of our class. If you have any questions
regarding the class, you can ask it in the discussion
section of the class. For the class project
follow my procedure and editor landscape photograph. First of all, you have
to choose a photograph, then start editing it. The steps will be first of all, you have to make edits in Camera Raw and then
come decomposition. And then you can apply
different effects. Maybe you can apply them to me. And then you have to submit
it as a class project. So I can give you feedback and
critiques and get a chance to win Amazon gift card or
Instagram Photoshop preset. Thank you.
 M Amir Naseem, Graphic Designer / Creative Director