Transcripts
1. Introduction: Hello. I am Zha as watercolor
artist and instructor. I had the pleasure of teaching and holding workshops across different countries
and connecting with sitdents both in
person and online. Creating depth and focus
in watercolor is one of the most challenging yet
rewarding part of painting. Over the years, I have learned that this is not about control, but about harmony between the
water, pigment and timing. And in this class,
we will explore exactly how to achieve
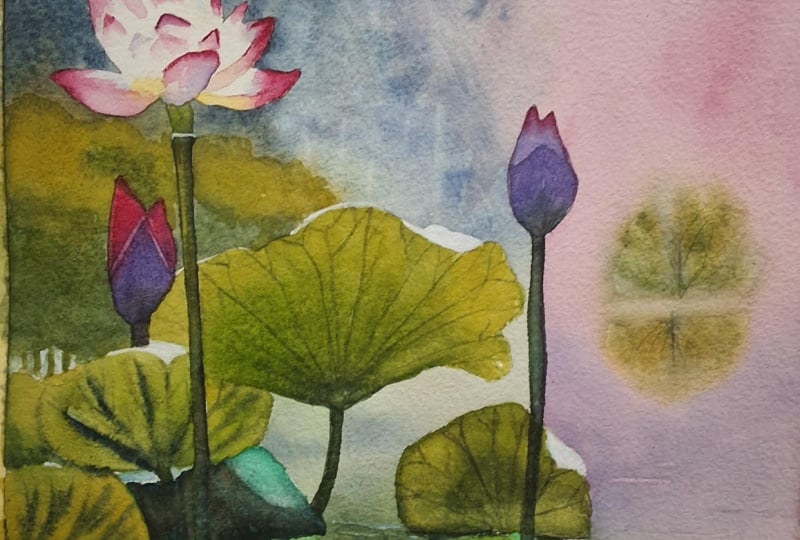
that by painting a lake scene with lots
of flowers and bringing the painting to life with
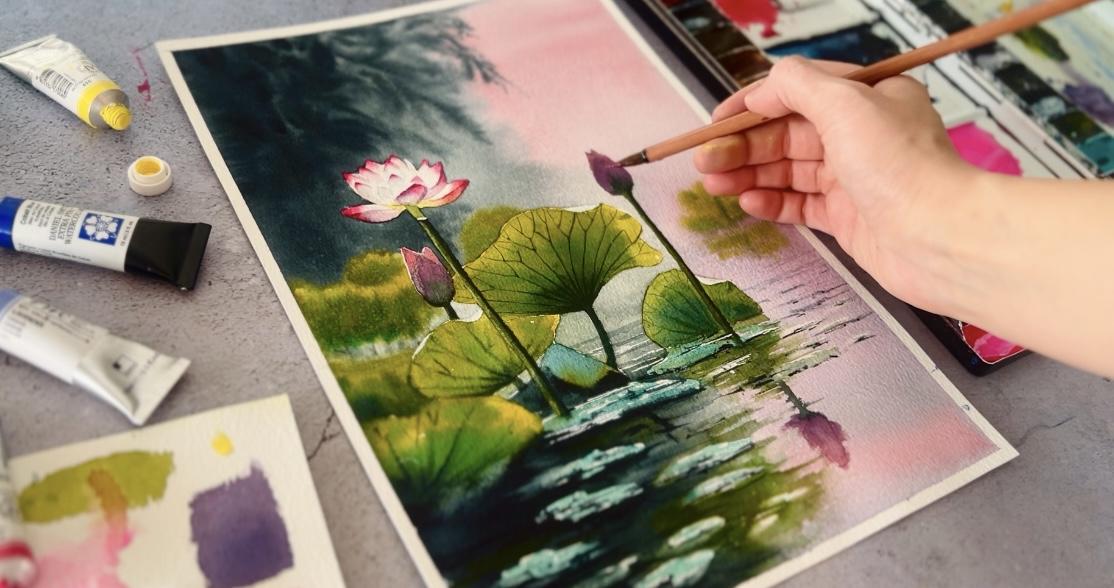
light and subtle details. We will start by creating a soft misty background using wet and white techniques
to build up an atmosphere. And then we will move on to lotus flowers and their leaves, focusing on learning
how to preserve whites, softening the pink transitions, and creating rich
layered greens. Finally, we will complete the scene with the
reflections on the water, and if crips this is to
bring everything together. Will also learn how to keep
your paper moist and how to adjust your timing for
perfect edge ablance. And by the end of this class, you will understand
how to create a balanced composition
and how to use water control timing and color transition to bring harmony and contrast
into your painting. You will gain the confidence to control softness and sharpness. Use color contrast
effectively and bring depth and atmosphere into your watercolor landscape. So get your brushes and
let's flow with watercolor, creating the timeless and
calm beat of lotus lake.
2. Welcome to the Class!: Welcome, and thank you
for joining this class. I am so happy to have you here. In this class, we
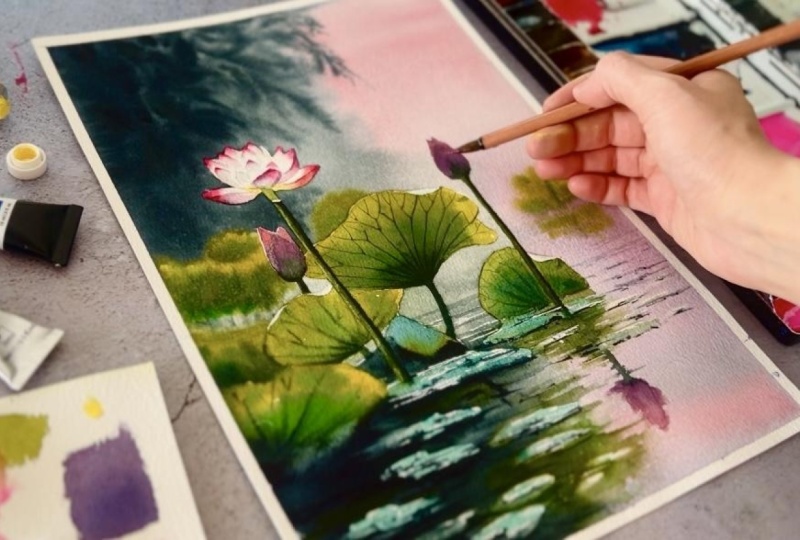
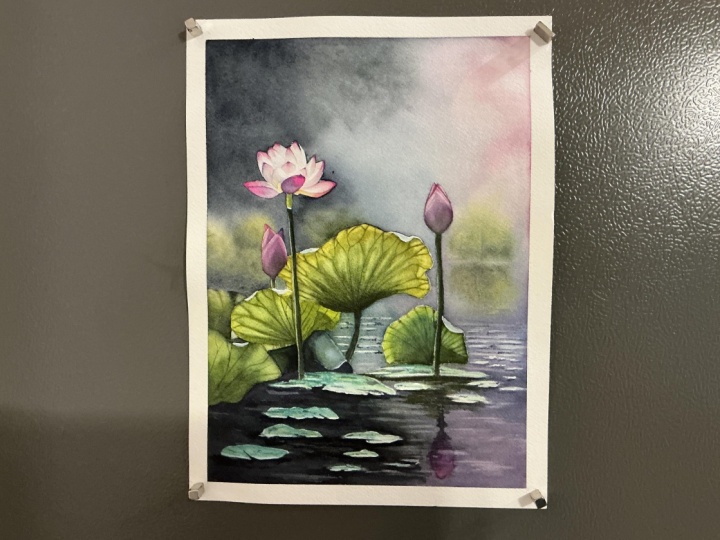
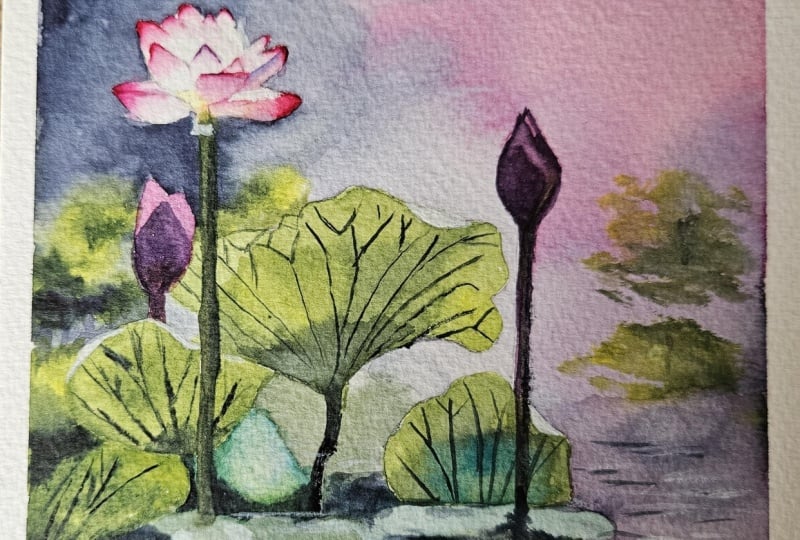
are going to paint a peaceful lake scene with a
beautiful lots of flowers, a perfect project to explore
how to create softness, depth, and focus in watercolor. Through this class,
you will learn how to use water
control, timing, and color raisons to bring harmony and contrast
into your painting. Will start by creating a soft misty background using wet and wet techniques to
build up an atmosphere. Then we will move on to
lotus flower and the leave, focusing on keeping
the whites clean, softening the pink transitions, and creating rich
layered greens. Finally, we will complete the
scene with transitions on water and a fifth crisp details to bring everything together. In your projects, I will be looking at how
effectively you create depth and focus through your
use of soft backgrounds, contrast in the
foreground and the way you handle reflections
and color harmony. I will be offering detailed
feedback on each piece you share to help you grow
and refine your skills. You will find the
skate reference photo and a list of materials
in the project section. And now let's talk materials. You will need watercolor paper, preferably 100 person cotton. As colors, we will use
permanros Opera, lemon love, Hansow, viridian,
indigo, turcos, cobalt blue, Pico
blue, and sepia. I free to use similar
colors from your palette. As for brushes, we will use one big mop brush and one
natural sus round brush. You will also need a palette, a cup of water, napkins, spray bottle, a
pencil, and a dissert. By the end of this class, you will have a finished
lot slake painting and a deeper understanding of how to use
watercolor techniques to express atmosphere
and calmness. So gather your materials, take a deep breath, and let's
start painting together.
3. Background: Hi, everyone, and welcome
to this watercolor class. In today lessons, we
are going to paint a peaceful lake scene with beautiful lotus flowers
in the foreground. And I will show
you how to create a soft and calm background
with the trees and sukai, how to build that in
your composition, and how to make
your flowers stand out with sharper edge
and rich colors. So get your brushes ready, relax, and let's start
painting together. I already rolled the
skates and I mask the flowers and leaves on the lake before I
start to painting. And now we will going to start
to wet ground part first. And this is my horizon line. Okay. Maybe a little bit. Yes. Okay. And let's wet
the paper first. First, we need to wet the paper with the clean water like that. Around the age of flowers, we need to be careful like that. We were the big areas
with the big brush, and now I'm going to move on the round brush for the
smaller areas like that. We need to take excessive water
from the paper like that. There shouldn't be any puddle. Now, let's move on to skyparch. For the sky, we are
going to use cold red, which is permanent rose. A little bit cobalt. Not too much. You can
see it's like a purple, but there's more red
in it. Like this. When we came to the bottom part, I took more cobalt blue. Make the colors more purple
more cobalt like this. And here also on the bottom. Pink. And you can see there's scatter in there
and to do with napkin. Okay. Okay. A little bit indigo. On this part. Only indigo. Okay. Now for this part, we need to change our brush, getting a small
sized round brush, and we will add a
little bit green there. For the green, Alto
critan and Hans here. And indigo and more in the coheres. I like that. For this part, and now I'll clean here. We have a tree on
the background, and we will paint its branches and trunk using paint gray. We will be working on wet paper. So if your paper
has started to dry, you can lightly spray some
water on that area before. I don't leave a little bit indigo, paints gray and indigo. And now for that part, I'll take indigo and
pen scray together. For the big wash, we need to get big
brush like that. And I'll take the board on the right side and
down in this way, we will get smooth transition. For this part here. And I'll take the excessive
paint from there. Okay. Now for this part, we are going to use green ridian slow Rosina. Okay. And around here, like this I'll take indigo,
mix the indigo with the green color we
prepared like that. And for that part, we need to make color green, and I add indigo like here, more indigo spar on spark. And our paper stil wet, and we will work on here. You can see it's settlo wet. If it's dry, if
your paper is dry, you can spray a little
bit water around here. There are leaves on the
background, lots of leaves. And for that, you are
getting yellow color. After that, we need to darken
the bottom part of this. And for that, I'm getting
indigo and ansa yellow. Okay. Like this. And here and here. And for the bottom, we will use pase
grey again here. And for the small area. Okay. And I think we need to add little bit
written to same color mixture. To enhance the green tone. Okay. And one more
here on the spot. More yellow. Nice. That shouldn't be too much detail
on these list. They are very far away from us. And I want to add
more color here. This part looks empty
to me like that. Now, for this part, we
need to add more dap. And for that, we
are going to add some leaves for the trees. I change my brush. For the leaves, I'll
take pins gray indigo. These areas should be setill wet while you are working on it. We are just imitating the
lease tip of our brush. And the left side
should be darker. And this area also
should be darker. Okay. I think that's enough. I just add pigmented
pins gray around here. And I just fix this part. Okay. And here also Our background is almost done, and now we will work on here. I just want to wet this
part a little bit, not too much with
the spray bottle. And for this part, I want
to add one more leaves. And for that, we are going
to prepare our green colors. And for the green,
we are going to use a little bit dian dian, and Hans more Hans. It should be more
yellowish color. Okay, let's see, nice. It should have softds because this is on
the background. And for the
reflection also here, we can move on the green we
want little bit indigo two. Here. And here. And for the autum yes. We finished the background, and now we will let our
paper dry completely, and then in the next lesson, we will move on the
flowers and leaves.
4. Leafs: First Layer: Welcome back. In this lesson, we are going to
paint the leaves. And before we start to painting, first, we need to remove
the masking flit. Okay, that's it. We
just need to remove this part and we will left
the masking filed here. As you can see, our pencil marks gone because of the skin filed. We need to just throw
the lines here. Now, before starting,
you can see there are some paints
on the leaves here, and I just want to remove
them with this eraser brush. We can use any synthetic
brush for this. Oh You can see in this sport there are
more yellow pigments, and we will start
with this here. Sorry. I think it is better
to draw this line to be careful on the edge. You can see I left
this part. More paint. And this part Oh. First we put a
yellowish green colour and now we will add more green, a little bit sepia,
not too much. Here. And here. In this way, we will get soft, smooth transition to dark green indigo. We mix written and
indigo together. Here on the bottom. Now, let's move on this. Like before we will start with the yellowish color mixing of whiten and Hansel Okay. We put our yellow color. Now we can move on
the dark green indigo and cos. Indigo and tocas. If we don't have to cos, you can add cobalt. It's rocks too. Let's see here. Now, let's move on this leaf. Again, we will add yellow or yellow colour
and say yellow here. Again, be careful around
the edge of the leaves. Okay. Now, let's
add green color. Middle tone, dian, and a
little bit handset low. And while settle
wet we will draw some veins on sitel
wet paper like that. And for this part,
here and here, we will add just a little
bit to cause. Not too much. Little. You can't see
the color like that. And here also here. Okay. And also, we need to
add some leaves here. Again, we will start
with the yellow color. And here also.
Let's take yellow. They can't mix each other.
It's not a problem. I want to soften
the eggs like this. All indigo from there. And here also, I want to use
indigo and for the veins. And these veins should
be wet on white. And let's add some
scrat here also. Okay, we finish the
first layer of the last, and in the next lesson, we will paint wins of them.
5. Leafs: Veins: Welcome back. In the
previous lesson, we finished painting the leaves, and now we are going to
paint the veins on them, and we will use the same
color mixture for this. And for the veins, I use this natural versus brush. It has a fine tip. I'll take indigo. Also take the
excessive paint from your brush. Okay, let's see. It's too dark. Let's
use from here. We need to just follow the same line from
the sketch part. Oh. And after painting the veins, I'll take the
excessive pigment with the napkin because this
part should be lighter. Let's darken the bottom
parts of the veins. Okay. I think that's
finished. Let's move on this. This should be lighter
in tone because of this, we need to add water
or paint mixture and starting from
here like that. You can see how light
my paint mixture is. Okay, let's move on this. I'll take picoc and the
Viridian color here. The consists of our
paint mixture should be like T. It means lots of water. Here. It is really nice
work with green tones. Yeah, like that. And here
also, I'm coming down. Okay. Now, while it's still wet, I just add green to iden, and in this part, this one's cool, ton. This one's warm like that
and directly yellow. Okay. And for the dark parts, I'll take indigo here. And after that, we
need to wet this area to create soft edge like that. Okay. We finish the painting the wings of the las, and in the next season, we will move on the flowers.
6. Flowers: Hi, everyone. And now we
can move on the flowers, the most enjoyable part. Before starting to paint, you should change your water because this should be
white and pink flowers, and we don't want to see
any green color on it. And we will start with
the flowers first. And for that, I'm going to use opera color and starting
from the tip of the leaves. If you don't have
Opera, it's okay. You can use any cold
red pink you have. I mix opera with the Permos
colors. Like this. Let's say. Now, I'm just adding the colors. And then we just need wet the bottom
part like this. That's it. Okay. And I
want to add a little bit, um, pico Bulo to make the colours more
purple, like that. Okay. And now we will
move on the other leaves. Okay, I just put the pink color, and then I'll just soften
the bottom parts like this. Yes. I'll take Opera. Elizabeth Rose. Okay. And here I am
adding the color. After that, with the damp brush, we need to soften the
bottom part like that. Okay. I think we can just remove little
bits of pencil marks here. Okay. Let's move on this one. Okay, we added the pink colour, and then we need to
with the bottom part. And here, you can see we
wait until this part, and we will add doodle
bit lemon yellow here. Like that. Okay. And again, let's soften the bottom. Like that. Be careful. Do not bring the pink paint
the downside of the leaf. Do not mix the colors
with these leaves. You can see there are
whiteness between them. Softening the bottom part. And also, we are writing
this petal until here. And while it's still wet, we are eating a little bit
orange tone like this. Not too much. And
lemonla here again. Not too much. Let's
mow a little bit. We are mooting the
bottom, like this. Unless it little bit peacock to make the purple
tones a little bit here. Okay. And for the bottom, I will add a little
bit green too, not too much, and let's mix
them to each other. Okay. And for the top of the petal, I'll just add directly
permanent rolls like that because
it's very dark there. And here you can
see our drawings. We need to soften the bottom
part again, like that. You can see there are
one more petals here. And for that one, we
will use only digo, but it should be very light like this. And one more here. We finished lot start. And let's move on this. I'll add just pico colour. And you can see
Water consistency is very high, like that. And for the top part, you need to take more
permanent rolls. Me tons more peacock and permant rose here. And for the bottom part,
we need to add green, ridim and sepia little wet. Whilstill wet like that. Sepia Okay. That's it. Let's move on this. Weable to do same things
in this part also. This one, our first layer. Now we need to add
dark tones for that. I'll take indigo mixing it with the same mixture and
starting from the right side. You need to just start green. And for this one,
also, same first, go with light tones first. Until the bottom. And for this part, you need to make this
part more light in tone. Okay. Now we are going to
darken with the indigo. Starting from the right side. We finish the flowers, and in the next season, we will move on the water part.
7. Reflections: In this season, we will
focus on the bottom part. But before starting
to paint the water, I want to add more
petals on the flowers, and we are using layering
technique for that. We will just use the same purple color
just drawing the petal, and then we will cover inside. Et's move on the bottom part. See, we are not removing this. For the bottom part, we will just darken that area and we are going to use all
of the paints on our palette. Now I am adding indigo. So And while this
part is still wet, we need to soften
this area like that. Okay. More pain. And we need
to soften this also. Okay, and we are softening
this part also, like this. Okay. More indigo. You can see we are
eating the dark tones, more dark tones, direct the pigments under
the leaves here. And small lines inside
the wet area, like that. Now, we will create the shadows of these beautiful leaves. I'll take s o. This is nice color. Let's check. You can see in this part, the paper is dry, not wet. We are getting a soft
edge, hard edge, soy. Ridium, nice colour. Water the consistence like milk. And softening some of them. Not all of them, but. We are just creating
reflections for this leaves. And let's move on the
reflection of the flowers. And more permanent
throws on the bottom. And now we need to
soften the edge with the clean and damp
brush like that. This part start
to dry and I want to add more layer on it. We almost finished the painting, and now we will left the
painting to dry completely. After that, we will
remove the masking flids and we will paint
the leaves. For
8. Final Details: Welcome to final part
of our painting. In this lesson, we
are going to paint the leaves on the water
and the final details. I already removed the masking
fluid on the bottom part. And for this part, let's
clean this part first. Okay. And for this part, we are going to use tocas. A little bit green Ridian before starting, we need to soften some
of that like that. You can use any synthesic
brush for this. You just need to soften the
edge of the white area. After that, softening, we take
the paint with the napkin. Okay, I think that's enough. And now we can paint
on them like that. Let's get more water. I forget when I want to add
more warm greens too here. Okay. And last one. Little bit purple. Okay. That's enough
for the green part. Now I'm moving on
the thin brush. This is the final
stage of our painting. We are taking indigo. You can see on the
reference photo, there are small dots, shadows on the leaves, and we are trying
to create them. To consist like
cream. Let's see. Like that. Just try to create small dots. Do not cover the who
lives with them. And here we will do
the same thing with the lighter tones indigo, but in light tones, I add water like this or water. I'll take the excessive
paint from here. For the highlights, I am going
to use Japan, white Japan. If you want, you can use white gouache or
white watercolor. I just add small limes
upside of the darker area. And here like that. And one more here. Also in the spark, I think we need to
add more highlights. And here and here also. And this part also. Also, we need to add
lines like this here too. And for this flower, this needs to be more lighter, and I just want to highlight
this area like that. And the final details are done, and we finish the painting.
9. Conclusion: Everyone a huge congress
on completing the class. I hope this painting
journey has helped not only strange in your
watercolor techniques, but also discover new
ways to create depth, softness and light
in your works. In this class, we
explored how to build a peaceful lake
scene step by step, starting from creating a soft, misty background using
gato techniques. You learn how to balance
wet and dry applications, how to preserve the white
for glowing petals, and how to create
subtle reflections and texture on the
water surface. Dedication, understanding
how to control, softness, color transitions, and light is truly inspiring. And these skills will not only
help you in this project, but also in every
watercolor landscape you paint from now on. If you have any question
or need clarification, feel free to post them in
the discussion section. I'm always happy to help. And if you enjoy this class, I would really appreciate it
if you could leave a review. Your feedback means a lot and helps me improve my
feature classes. And don't forget to
share your paintings in the project gallery so I can see your beautiful works and
celebrate your progress. And if you like to stay
updated on upcoming classes, make sure to hit the
follow button by my name, and I can wait to see how you keep using
these techniques to bring life and depth into
your watercolor paintings.
 Züleyha Aydoğdu, Artist, Instructor