Transcripts
1. Introduction: So today my name is coffee machine that
will come to my class. This is a beginners class for graphics design and we're going to be using poster on my wall. We're going to be using Canva
and we're going to be using powder online packages
for creating flyers, posters in anything
for marketing, looking at the graphics, using templates as well
as creating from scratch. So as you can see, examples of the things that
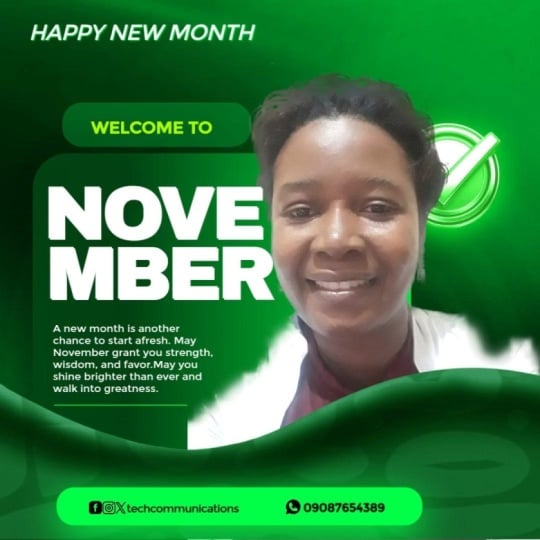
we are trying to make. The posters for
different events. Here is one for a blood drive. We want to be able to create a flyer or poster
of this nature. It can be a preacher or
even just a short video. So by the end of this class, you should be able to create a video as well as a picture. It can be full of animation. As you can see, the
clouds are moving or it can be just stagnant. In queue.
2. Postermywall platform overview: Alright, could they friends? We are back again. The first episode, for instance, we want to learn how to
login to post on my wall. So the first thing we need to do is you type post to my audience. Then once we are
in post tomorrow. So this is the homepage
for pasta, my War. One can create a design
in week only designed without having to sign in
or even open an account. But for the sake of Hey class, We are going to be looking in so that we can save our work. That is the advantage. You can work on
design and finish it and download it or
export it in any way. You can use that design with us, even to create an account
on poster, my wallet, calm. But if you'd like to wake up on a design and then save it
and then completed later, you need to create an account. So since I already
have an account, I'm going to login
to my account. The advantage is you can
login with Facebook. You can login. Or you can, you can create an account with the email address in each one. Password. I'm logging in using
my e-mail address. Is this is a toe of the
platform post on my wall. The first thing, after logging
into your own account, it brings you to a page which is called my staff or my design. This is where you
find all the work that we have worked
on as well meat, this is the work
that I've worked on. Post MI all I've created
via as posters, Vesta, various flavors, as well
as marketing items. You can see here this
Xenophon identity card. You can also create
those with the customer. So it's way beyond grass simple graphics design for
marketing as low as human use. So this is the homepage that you always come through if you have an accountant
post on my wall. And then from here you can see the several
items that you have access to give access to templates of different sizes
in different teams. For example, say
we want to create a poster for our small
business just to market it. If you come on templates and then you'd be able to
market your small business. Here you find several
templates in this course, we are going to create the
flares from templates. And then in the next
class we are going to be creating from scratch. So you find, when you commit to create design, it asks you, do you want to browse templates or G1 to start from scratch? So in this case we are
starting from templates. These are several
templates of businesses. And from here, you can
create your own templates. You can create your own poster, you can create your own flyer or any marketing ITM doctrine
that you'd like to use. Let's say for example,
your business is a car washing business. A car wash business. So you write the name
or anything that you think is key
to your business. And it gives you templates
that have been made by other users that are in line with that same business that
you're trying to review. This is so that
you actually have a very good ground
to status, right? So yeah, this week
for you to finish. So from here, we can
see this is one, this is one template.
You could also use. From these templates, you
can do several things. We are going to,
the next videos, we're going to make
one how to edit a design into make a salt. In this case, we're just
showing so that you can know how to
use what is what. So this is a design. You can then choose to, as you can see this
as a template. So you find that the creator
of the templates, right, Loren ipsum, just, this is
where you put your own taste. This is just temporary objects. When you create
your own company, you put your own name, you put your own address, you push on details, even the numbers and the
prices and everything. So this is the name of the creator in Utah has
shared on Facebook. So this is how we
find the templates. You can, you can find templates, you can select the Templates, see you prefer VT0 templates. It goes exactly two videos. You can just use images. Specifically, it
only selects images. But the standard factory
setting for SH is any, which means this is going
to mix both videos. You can see this one is a video you see by this small icon. When you move on it, to create
an animation at a picture, creates nine cities a picture, it creates no animation. But when you have on a video, it shows the animation
in the video part of it. So post on my wall allows
you to create all these. Normally the videos are just
about five to ten seconds. Ten seconds at most. And then the same video
over and over again. Whenever you have managed to share the flight,
You can choose, you can create your text to be, to be stagnant or
stationary at 1, and then the deadline
is ever changing. So that can also work. So you find, you can browse by year we have been
browsing by the themes, search for the females. We said we want a
small business. And then we selected, wrote a keyword
for the business, which is the car wash. Then we have examples
of car washes. You can now choose L1 to
design a logo for Akash. I can browse by this size. Then I can find several templates of
logos of cash businesses. You can see these CFO of the
company name, you take line. This is a logo that you
can use for your car wash. The car wash and business
needs to change your name. In changing the
tagline, it maybe change some colors,
will move a few things. You can also have gift certificates that you have something to do with
the car washes. These are several gifts
that you can work with. You can have just personnel, tickets, documents
in all the likes. So we can even select what type of social media graphic
we're looking for. We can select what type of marketing IT and
we're looking for. So here we are. We were just browsing the
different phases that are available on postal
mail, template forms. Here's one for the Juneteenth. Not be changing things and customize them for
your business, for projects or
whatever campaign or drive you're pushing
whatever you want to make it, whatever you want to make. Public. Post **** allows you to browse several
features that it offers, as well as video tutorials
on the platform. It allows you to search
for live classes, age, even join some creative kernels were other users
will be creating. You can also join them. For our pricing,
which we are not going to get to because
this is a free course. And what we are doing
is we're producing flowers that are in
the free package. So you can promote your judge, you can promote your restaurant. This allows you to
create a free design or you can work with
designs that already exist. Again, these are
different templates. And these are several comments that come from users of pasta, my walk on how it is in terms of pricing easy as well as
how best tricks for you. So you can end up
creating one leg, this for your restaurant. You can share it on your
social media pages, as well as printed. Some are printable.
Depends with the size. This marks the end of our class. We turn again to the homepage. Okay, so meet me in the
next class where we will be designing one simple poster for your car wash in business. In this one would be
a car washing logo. Thank you.
3. Poster logo from template : Welcome back to
lesson number three. So in this lesson we
are going to create a simple logo for your
car wash business. Here we come again to the
homepage, actual research. In these other search results, we find several other
marketing items or since in this lecture, we are looking at
just a simple logo. Go on browse by size. Then we select the logos. These are the results. For our logo. We are looking for the winner. This is the mean. This gives you a preview
of the template. Remember, we are creating from the templates that have
been made by other users. So this gives you a preview of the template that you can choose to share the
template as it is, or you can change the design. In this case, two agencies. You can see the big one is
saying it is transparent. You see this after we have
downloaded this picture. Here, we can choose
to edit all this. You can even choose to
age of the patient. But for a logo, this picture, the things we want to
change, the words. We can change this. Clean, clean, clean. Then you can select whatever tagline mantra
that you want to go with. Once you have decided. Now, it is a matter
of sizing it, depending with the logo
that you're awake. So that it would be useful. So as you can see, difficult to hear these two
sides in the way. So we could decide
to change the fonts. In this lesson, we
are not going to be changing any fonts that are going to be changing
any colors, sizes. We are only editing text. So this is the main
clean cars limited. That's your company
in the module. Is even your car
clean up and ever. So, you can choose to
add something else. Let's say for example, you want to add additional texts to the three
on the screen right now. You can then come and check. Then you choose a
defensive text. Plain text, or do you want
to end this slideshow? We're going to add a fence. Each x we want to add. You can select the
outline. What's the text? We want our business to be
called clean cars limited. So this brings the
text to the screen. Then with that, you can
then resize it in front of your chest so it's
clean cars limited. Leaving your car
cleaner than ever. You saw. We managed to change
the color of the text. If you just click on the text, it will show you the icons this side where you can find
the different colorings. Then if you click on a color, you can select the
color from real. You can push the color squad
for those whom other calls. Or you can just scroll this
up and down and up until you find a cut out your
liking. You can select. There you have it. Clean cars, new tube in. You find that most of
the pasta my holes. There we have the
small watermark region postal, my audit com. This is always day
is looming as you're using the free version of HTML. Why not? It should not
be inappropriate now. So things to make sure
we, this is a logo. You want it to fit in
almost any situation. So we have our background
is transparent. This is a stationery items. So our intro animation is none. In the next lessons we are going to be altering
the big launch. We are going to be
altering the colors in it also in animations, as well as changing the sizes. So with this, we can
then choose to save, it, saves the templates for the flyer or the
logo, in this case, into your own
folder of my stuff, which is the homepage,
or you can choose to download and share
now is would lecture. We are going to select
the basic option, which is the free option
buttons just to the last $0.99. You can select the high-quality. Let's try and preview image. Alright? So this is your image. You can see the logo. But in this case,
as you can see, the background is still
showing pride in your logo. You want this to be
transparent at what, not. When you go to a printer, it recognizes this
as a big round. But in the next lesson, we are going to learn how to
remove a big round peach. There you have it. You
can still come back and add the logo however
way you want to. You can also go
to your homepage. My staff page, or
my designs courage. And you'll find that your
design will be here. So anytime you wish to
change anything about it, anytime you wish
to download it or publish it in any way, a digit. You can also do that in
my design. Thank you. That concludes the
end of this lesson. I'll see you in the next lesson.
4. Removing Picture Background: Hello friends, welcome
to this lesson. In this lesson we're
going to learn how to remove the background
from your picture. Is might be a preacher
if you shade from your clients or even your own
poster after creating it. So to do that, we're going to be using a
different platform. We're going to need
to perform custom IO. I'm using a platform
called remove PG. So as you can see, the platform is relatively simple
to use in D3. So you just upload your image. Solving, upload it. Then once it's finished, yes, click on. Your image opens. Each week pretty much bigger and I'm going to
use that feature. These two bits here.
Screwed on Upload Image. You can even use this to remove big runs for any of your images. Whatever use besides, of course, the graphics design, ingest it gives you a transparent image. In this standard formats. Of course, you can choose to go for high density,
high definition. In each case, the true church. This is the image
very much Vagrant. You could see what it
was like before in what it becomes after
removing boogers and this platform,
remove dot Vg. You can also add the background of your
liking to the image. This is what it was like. You can end up standing
on top of the bridge. You can put it in any
place you'd like. You can erase a little bit. But of course in our case, we just wanted to
remove the big lunch. So if you download that image, now is much bigger.
So there you have it. The image with the
remote Vagrant, and you can use it
for several things. You can even super impose it on any background image in each
boutique, exactly that. So that's what we do
with every flat that we take for every
poster, every logo. The logo is because you want the logo to feed on any page. You want them to feed on any big ranch in
note-taking scholar. Or you also don't want these small boxes and
know that to be showing. So I have to remove the
deadlock every time. Thank you very much for
joining this lesson. I'll see you in the next lesson. We'll get to customary law.
5. Text Editing : Hello friends. In this lesson, we are going to practice how
to change colors, as well as font types
in t equals to o. So to do that, we're going to go back to our clean cars logo. As you can see with
several checks here. And when you click on a text, you can get the option to edit, which is here on gauges to
see this is also a text. You can change whatever
you want to change. While we are designing. The most important thing
is to be able to change the font types in the
color and the font size. So the first thing
when we are editing our texts is we come to the
right, the aging section. We'll look at several items. The first is going
to be the position. Where exactly do you
want your text to be? You want to be in the
middle of the page. You want it to be at the bottom, at the top, the
mid-side, it aside. The center or center. Then this. And then if we take it down or we can choose to flip
it, does literary invasion. We can choose this to
stretch it vertically. Horizontally. You can
choose it to flip it vertically to be the same texts. So you also want to be able to change the
size of the texts. In this case, there
are two options. You can either just use your
mouse to change the size. Dragging. Clicking means that increases or reduces
the size of your text. But if you want to
be more precise, you can then come to
this section where you find you can be able to change
the size of your texts. So to do that, we're
going to introduce a new plain text that we're
going to be playing in. We're going to call
it simple texts. So again, remember the process
will come to the text box. Then you tweak plaintiffs
sensitive slideshow, whatever type of
ticks want to use. This one is a plain text. So we can change the
size of this plain text. Allow me to clear this. We can put a solid
color. Alright? So this is our text in one
to play around with it. We can choose to increase its
size, will make it smaller. We can choose to make it bold. You can choose to make it
italic. You can underline it. You can cross through it. Any of these options
are available. In this text. Came with a victory. It came with a fixture
reforms, railway bytes. Total of options in
fonts to choose from. Is he can see you can click on any font and then
it automatically changes, allows you to preview. Before you select, you can click Change, save
Alphonse takes. All of these are available in their free on postal
mail. Which column? We're going to choose Rochester. So once you have selected
the one you want, you can also choose to say, to search for the one. Say you want a time
when you search for it, you want to search for a value. Once you selected, you can back. That changes your fonts to this point that
you have selected. Now we can choose to change
the size in a precise manner. You see as font size is 46. So we can choose
to increase this, or you can increase
it using this button. Or you can reduce the size. This will depend with how big you want your text
to be. Of course. You can also change the
color of your text. If you click on the Color
option or the fill option, in this case, the income here, where you have different colors, which you can use,
text. You can change. Anyhow. You can also change the type of fuel
you want your text to be. It can be just solid
or it can be linear. It shows a gradient from
one color to another. Say for example, one
sharp transition from a red color in blue color. So you see here the text
now comes from late. You can also choose to make this idea such that it changes color is it goes out, right? So that changes your fill color. You can also change the
position in the textbooks itself, which is this box. Centralize it in, push
it to, on the other end. You can justify it. Most cases, you want to
make your textbooks as small as possible so that
any changes are visible. Swiss dynamically. You can also choose any
alignments you want to work with. Text. You can choose any format. The default is which column. And this is especially visible when the intake for disability in
bed Enter button. Here. We can also change
the line height, which if we were to write another line, Chord
sample texts. And another one, simple tics. So if we change the line height, changes the separation
of your texts, each line or each paragraph, so to say, from each other. You also want to
take note of this. In case you have written
a small paragraph in your flyer or graphics poster, you want to make
sure that text is much all over the place, as well as news choose Paste. You can also change
the line spacing. This is from texts,
from letter to letter. Now, you can see there are some times when
you want your line to span the roller coaster that sometimes when you don't want
it to span the goalpost, that you can change
the letter spacing. We can also choose to make our paragraphs create
lists of sorts. We can choose to
make them create any numbered list or an
ordered list of choice. We also have these options here. You can choose what, how
to list your bullets. Tip, pen, I'll flower
whatsoever option you choose. The fill in the color are
the same thing for the text. They're interchangeable. And you can also choose if you
want your text to here, it's one color. The
textbooks itself. Let's say for example,
you want your text to have a blue color. Let's select is cyan. So there's the same color. You can see this finally, put this around the texts in
it respects the line height. This you can also choose
to change its opacity. Make it brighter,
make it darker, or make it lighter and a
little bit transparent. You can also play
around with that. You can also choose
to put a shadow with a light shadow,
very strong shadow. You can also choose to
customize the shadow. What obesity, what you see
smooths out on the shadow. So in this case, we
want a text with no backgrounds, that
costume shadow. So you have it there. Simple checks in with managed to get it various
things about the text. Now, if you want to select
the same text in here, It's several places
in your poster. You can then use the duplicate
option, which is here. We can duplicate
that same textbooks. Now the duplicate
option is available for n elements or any item
we have imposed on. You can do it for its texture. You can do it for
peaches, for videos, anything that you upload here, you can duplicate it,
you can delete it. You can change its opacity. You can change, you can put cheese position by putting
forward or backwards. We are going to chop
off, Let's bit, but in the next lesson, thank you very much
for your time. I will see you in
the next lesson.
6. Working With Images : Hello, Good day. Good day. In this lesson we are
going to discuss how to edge moving images
in post on my wall. So to begin with,
we're going to open on design for the sake of the cyclical and listen. We're going to just take a
foresight to start with. Then we're going to
create from scratch. When you are creating from
scratch, select the size. I've been to several
options ending peaches. And you are going to explore
some of these options. Since we are creating
from scratch, we are going to do the fist in individual stages that you normally have to go through. And the first one is
to select the size, then you select the
type of background. We're just going to choose
a plain white paper. You find every time that the
watermark may post them, organize convoys the day, so long as you're using
the free version. So the first thing that
we need to know when uploading images is we
use this option photo, maybe just before we go ahead. Even though you selected size of the pasta or flyer or logo, when you were
starting the design, you have the option to
change it on this side. And there are all these options. You can even customize your
students specific dimensions. Now, for the images, we have the option of uploading. If you click on photo, you find it for my photos.
Did is took water. Slide show you can add
from your Facebook for Google Drive or Dropbox. For instance, we're going
to get for my photos. So Maya can't actually his photos that are
uploaded before. But in case you have not
uploaded anything before. Who then click Upload photo. In which case, it
prompts you to select a photo from human from
your original memory, which is what I'm going to
do for the sake of this, for the sake of this lesson. Once you click, you
click on the photo, it brings the photo here. This is the poster that we
made in one of our lessons, is now referred to as we
exported it and download it. So this is one way
of adding a photo. Now once you have
edit one photo here, it will also be automatically stored in your mind
photo section. So anytime you want to
retrieve effort to like it, you see here this tiny photos. And I need to access
my hard drive. I can do this on a
separate computer as long as all these four these
are all photos I've used. And the moment you
have used it for sure, it gets to engineer my photos. You can now actually have
to remove it manually. Following each or
my photo section. You see this is the option to delete if you selected
what, you can delete it. But otherwise, if you
upload any photo that four to automatically edit
into my photo section. So here we've
uploaded this photo. Now we want to also work
on how to crop a photo. You can crop a photo like that. You can change into
various sizes. You can make it a specific size if you want
your photo to be scraped. Going to restrict it. If you
want it to be four is 23. This is going to restrict
it or you can be just free. We can crop into any size. Once you are done copy, you click on Crop and
then it updates together. Now the Remove
Background option is now changed to something that's new and it's only
available for premium. In this case, this course is focusing on the free version. You also have the
option to mask. This is whereby you select the things that you want
highlighted, the photo. You can choose to mask
a certain area, right? Well, not going to do
that because lead to huge continue to
use this picture. You can mask with free end or
even use a specific shape. For example, you could say you want to check out
just s-squared. Maybe let me say this is because squaring the square right? Masking means it's
only going to leave all the areas that
are in that square. So you see here, if we've mastered, this,
is this two-sided. More visit with pictures. So I'm not just going to
undo then remove that mask. With this picture,
we can also copied, as we said, we've been mascot. We can also alter
how it's presented. Like for example, we
can change its opacity. If we change the big ones who create color, that is contrasts, maybe we change a big
one like that. Right? You see this picture is solid. That you can change
it to obesity regulates it becomes
transparent. That's how you delete. You can also select how you
want ages to be shown. We're going to do this
with the next peaches. So the next option is to
be able to replace an MHC. You've put one image and
you want to change it. Or maybe you are
using a template. In this template,
actually here's another picture and you want to replace it with your picture. Then you click on Replace. In which case you now
select the photo, whether you want a stock photo or you want to replace
it for my photos, I would like to replace
it with a picture for my photos so I can come in here, a picture from my photos. This is a picture that averages. So originally it will come to the cropping size that we had for the picture
is trying to replace. You can choose to
crop it or not. I will choose to not crop. It will check. The
check is in P a is the picture that we have now
replaced the cow ash logo. So now we're going to play
around with this picture. For instance. We can click on it and we can
change its opacity. You can see also, we can change how the agencies
are going to be presented, may make them over. You can make them rectangular. You can make them gradient. Then you didn't have to
change the gradient. Of course, they
make them curved. You didn't change
the cave amount. How you make it like a
scratched or if any one paper. These are all the
options that we have. We can repeat the hacks. There. You also have the option to Fourier image to
give it a shadow. Strong shadow. You can also make explore. All we can choose a
specific order that we want to explore, that you can change
its color whatsoever. And we can choose to make
it black and white or not. You can choose to
make it simpler. We can choose to
invert the colors. We can remove some
specific colors. In this case, if she
moves color change to blend, the bigger ones. Leaky way of removing a big one, but it's sufficient
for that you need to go to Remove BG.com is we, as we discussed in one
of our previous lessons. You can also adjust several
things. You can put a tint. I can choose a color
to tinker with. Juice. Orange juice. To what extent I
want to change it. I can choose black. You can use it to paint. You can also choose things
like saturation. These are all some
ways, two edges. Once you have made
your picture or maybe for any element
for that matter, there are times when you
would want it to be fixed, but it'll be altered by any
other additions that you do. In that case, you'd come to a position in geoloc in place. So it will never be
moved in any way, right? Up until you unlock it. And you can actually
duplicate this picture. We have to now, but
they are both locked. For me, I would love to go to another method
of adding a picture, which is this top photo. You a platform or access to several other photos
that are available now. And you see from Getty Images, you can see from
the story blocks, you can see from Pixabay. So in this case, we
want to search for impeachment about Smile example. So these are several
features that we have still photos about smiling. And you can choose to take from storybooks.
These are free. You can choose to
take from Pixabay. These are also free. Now, if you choose trick
from Getty Images, they are willing to
give you a watermark because those are
supposed to be paid for, so you need to pray for it. Now here we're going to select, we're going to select
this picture. For. This photo is our variable name. Let's say for example, you
are creating your car wash. You should be able to find
the stopwatch with us. If you add just like cash, you find a stock photo
that outlines national. Each will come automatically
on top of what DFS day. Now to alter the position, say you want this picture
to go to the back. You can click on
there, but you can see or you can bring
it forward up to you. You can duplicate it and
make several copies of it. You can choose to just make
it the obesity such that the pitcher they began to show with this smell
showing in front of it. Right? You didn't choose to tint it. You can see it's another
way of editing features. So this is us having to upload several pictures in this picture as we can then use them
for whatever method, whatever you want to do. Two are features.
In the next lesson, we're going to off the elements that we can use in the media, that we can use in
post on my wall. Thank you very much.
7. Working with elements: Hello, Welcome back to this lesson on graphics
designing custom. I want. In this lesson we're going
to work with elements. The elements that are
valuable in post on my wall. How to use them, how to
change them in various media. As you move on to phase two, I'm going to create
our templates, which we select the size. Prefer the screen, Instagram
posts, Food Justice, solid. So here we are. The elements. These are the various shifts that you want to use in Boston. My whole variety of silver peoples is you might
want to listen, for example, you want to put a
background checks or you want to put some, some design, some ads,
eligibility stopped clinically. Here we click on elements. We have several options. We can have a shape that we can add a sticker
or even a QR code. It looks simple one to do. You are creating a poster for your events or your program or your
business in Japan, people to reach on Facebook. So here you can select
the Facebook app. You can even select
several others. For all your social
media platforms. You can add this clip path. Alright, we have them. Now you can just
resize elements. Then remember we didn't
know how to use TikTok. So if we resize, we can resize these elements. Then maybe age of texts. You see IT? Car wash limited. This is maybe a social
media and do that. So that's your customers know that you are
available on Tutor, available on Facebook, we'll
say the YouTube channel. So you didn't do this for several forms of paths
you want to work with. We can maybe even WhatsApp. David, beginning
of the WhatsApp. You can hit the peak of
silver items that you made. Fence this if, for example, you want to show if one core, one core business
executives are valuable, but you may find fun. You may want to use this
whatever is in your poster. You make me want to
show the location. You designate, you
share location. These are available in remember, you have two options, whether you're willing to
use Pixabay or storybooks. So if for example, except it does not give you
the exact location exists, actually annuity,
you can look for different others on Pixabay. Alright. Okay. Sweeping. Where are you located? You can take your text. Second Street, right to CT. May see Cape Town. That left the location for
your business. You resize it. Chest location symbol. So this is an agent that
you'd be doing with elements. We can also took off
shapes. For example. Shapes to work with. I'm just going to pick something
that we use for maybe all it takes is one ship you might want to use that. You can get your text editor. So these elements, you can
also play around their colors. So customers you'd be
paying on your own. See, they also took off
the border thickness. You'd like to hear
something over six. So these are seven
elements that you have and you can
change that shifts. You didn't change their sizes. Is you can also change
anything above them. Alright? You can also choose to fix them in one position,
locked in place. You can change the opacity. You can duplicate them many times as you'd like.
You can delete them. Okay? So here we look at stickers is other elements
that we can use. Remember, we talked
of animations. So let's say for example, there are three h
goes from damage. Now nobody. You can choose to edit Stephen
International Labor Day. These graphics. You can also choose to change it,
uses separate, steeper. All these are available for use. Minimum. So that's
all on elements. And there are many other options in many other regions you
can do with elements, with explored, just
a few of them in. I would encourage you to get
onto them, change the ships, join them, make them, use them together on
top of each other. You can change them by just pushing because it's
close to the back. In, push it forward.
It comes forward. So thank you very
much for attending. I will see you in
the next lesson.
8. Full poster demo: Welcome back. We're
going to continue with our lesson on
using post tomorrow. And in this lesson, we are going to finally
create a full event flyer. We're going to, maybe
we're going to wait with the charity event is a
charity fundraising project. So the fifth thing is once you are logged
into post on my wall, you then choose and
creating a design. In this case, we want
to use the templates. So I'm going to
create a template. You faced rights charity, the queue ID for your event. So what that does is
it's going to load several charity
templates, right? Then from those ones, you can then now work with
yours is try to customize it. So here is examples of fundraising charity
programs or charity flyers. And as promised, we would
like to use with one, with an animation of sorts. So we say it is one. So the goal is to try
and to see what is closest to watch
would like to make. In this case, we're going to make a charity for
feeding the homeless. So you find one
with the homeless. You can make it for
food. For me, the cows. For what Eva program in
these always going to be either a template of sorts and keys as
close as possible. If there's none, you are going to be creating
it from scratch, but most likely you find
something, you can add this. Here. We open that. Now we're going to edit it. Okay? So since our program, our event is going to be
feeding the homeless, this is a kind of feed you
to keep that in any case, if it is not the one
you want to keep, you can always add
a stock video. You can always add a
video of your own. You could make a video of your
own input in the bedrock. Just let me edit photos
and edit elements. So you can edit Stroke video, or you can even add your own audio so that whenever someone
is viewing your poster, event flyer, a big round video, in this case would like
to keep this video. So I'm not going
to get any video, but like I said, you can edit video
from your collection or you can upload
a specific video. You can also find a video. Stoke video's going to see. If we can find any stock
video. We charity. See there are many
videos for charity. We can use sees another
one that you could bet. Although in our case, like I mentioned, we are
going to remove it later. But I'll just let you to
familiarize with the process of aging. So basically, if you do. So, just going to
delete this video now. And then we're going to maybe
work through the video. So you can choose
to mute or unmute. Sometimes, in some cases, your video might have audio also coming with
it, which you can choose. Either you want to mute
that audio or audio to be audible for anyone who's
going to take the video. You can choose to trim the video to whatever
length of choice. So you can see here, we can just trim each to a half of the time. Whatever you can, select a section that richer
you'd like to take it. That's also okay in once
you're done, you can train it. And you can choose to. Everytime you trim,
you can then play it, see what it looks like. And then you can also edit it. You can change the
duration that is trimming. You can replace it
with another video. You can also make
the same video. They can white, you
can make it disappear. You can integrate its colors. You can change several things. Maybe putting a
tint on the video. These are all the
kind of machines you can also do with pictures. So I'm quite sure you are
familiar, familiarize. So we are going to be
working with this video in the background and
it has no audio. So I'm going to keep it at that. So what we're just going
to change maybe is V1 to change with what we are
trying to do in our program. I think it has feet, homeless, kinda cooler, Tom. So this is a campaign
and our campaigns so that anyone would like to join us by an extra new
in shade with within homeless person that they see in colloquial term,
which is our tongue. You can then shape. So when
is it going to happen? According to the
February last campaign? I'd like to leave this,
here is the edge, but remember, it's not
going to easily show. Push something big
or bring it forward. So there you have it. February, laugh campaigns. So this is something we are doing for the month of February. We are feeding the
homeless. What do you do? These are the directions. And maybe who is
pushing the campaign? This is our lovely
town foundation. This is where they're
located. This is the logo. Caracalla, time to conduct. It shows everything.
So you might, maybe we want to make sure that the people are going
to drain this campaign. They're also going
to be able to post whatever they post
on social media. So you see maybe what
we're going to do campaign on TikTok. We are saying whenever
you join this, you can post until we are
going to be posting good, Just off the campaign
TikTok page. Kaplow town foundation. You could also say, every time you post, you put your hashtag. So let's hit Edit Text. Let me just can hit this big ****. So that's there. Remember
these are all elements. So someone can
take this element. You may choose to remove it, you may choose to edit it. In this case, we're just
going to leave it as it is. But these elements, you
can play around with them. You might want to
sit in, fled to eat. Maybe you want this to
be chest five to decide. You want to meet
them and you want to divide them with shape. So today we have the
trends are post-op for the February laugh campaign from Qatar Foundation campaign
is to feed the homeless. So here what we've
managed to do is we've created an event flyer
from a template. We didn't change many things. Although we could have. For example, we can choose to change the color
of the elements. You can choose to change. If we change, we can change this playground
example. That color. This is all according to what the leg your
poster to look like. It is estimate of
remembering which colors go hand in hand with each other.
And then you mix them. So this is a light let
love lead campaigns. Now once your poster
is done, remember, this is an animated pasta, so we can clear. In case you don't want
to make an animated one. You can just picture, you can replace this video. We're going to delete it
and then edit picture. But this is what it will
look like when you're going to shade on your social
media platforms, as well as on your, on your WhatsApp status or
even in your YouTube channels. It to always be looking with animation and it
will continue to look This tickets
and give images. Do you save it? So remember, when you're
using the free version, you're going to be limited
is to watch and watch. You can download in
what you cannot, as well as the
quality of what you, where you can share
in where you. This is as attempting to
download short animated flyer. You're going to fly up for a charity organization
for the time foundation. Alright. So you see, we can download
it for personal use, which is the festoon
one sequence one. And in this case is
to be free entry to contain the watermark for
posted. My world is calm. So as expected, we would like
to open the short video, see exactly what it
is that we've made. And if it is showing the
results that we expect. Remember our video. So we don't expect this one to have some
too, so they have it. This is your event poster. This watermark is going, is going to be the free video
created and postal mail. Now, for posters. Video watermark that peak,
especially manageable. But it is encouraged that you subscribe to the
premium version, which gives you access to videos in posters of all sizes and
of all types of quality. And again, be printable
and you can share it to your social media platforms straight from Pasta,
my oldest com. So on that note, we're
just going to change the video and then
we're going to put a picture in
this case now so I can delete the video. Then. I'm glad to add a picture here aid for my photos. So there's the two chip. Put
it in every piece of text. We can put some tinge to it. So that's also another way of creating a poster
note with the video. But with It's always good to play around with
different types and sizes. You familiarize with them, play around with
how to use them. This is why they've
changed it to. You can also save this
one and download, which is what we're going to do. Again, remember, if we have used anything that
requires a payment premium, you are willing to give the watermark for
post on my wall. If you've used only
playing elements, you can download your pasta. If you can use played
elements in your own photos, you can download your poster without a watermark form
from post on my wall. They added, we actually have
it without any watermark. And that's the
poster we've made. And we can continue
to make others. But this is where
we have come to. We managed to create
our two posters. Thank you very much for
joining this lesson.
9. Conclusion: Hello friends will come to the conclusion for
this lesson in class on using post
tomorrow to create posters and flyers in
event in graphics design. So the platform we've been using in this pose time
I ordered come in, we've managed to create our
lesson on creating a logo, working with animations, working with several
other elements, urging them and removing them. As you can see, we have
our February loved campaign and we managed
to aid campaign. And we created a poster
with a video and we created a poster with stationary photo. So it is up to you
to go and work on every other projects you'd
like to post tomorrow. Here we have pasta, which is our example
for the lesson. And we played around with it. We move it. We change the
text and change the sizes. You deaminate to change also the colors in every other item. Thank you very much for
joining this class. Thank you for being part of it. I hope you also go out there
and make your own posters, make your own design. Make your marketing
strategy is better with more graphics and make it
a little bit exciting. Thank you very much
for your time. For me.
 Mapfumo Chipinda, Graphics and UI Designer