Transcripts
1. Introduction: Hi, I'm Zoe bigs. And in this class
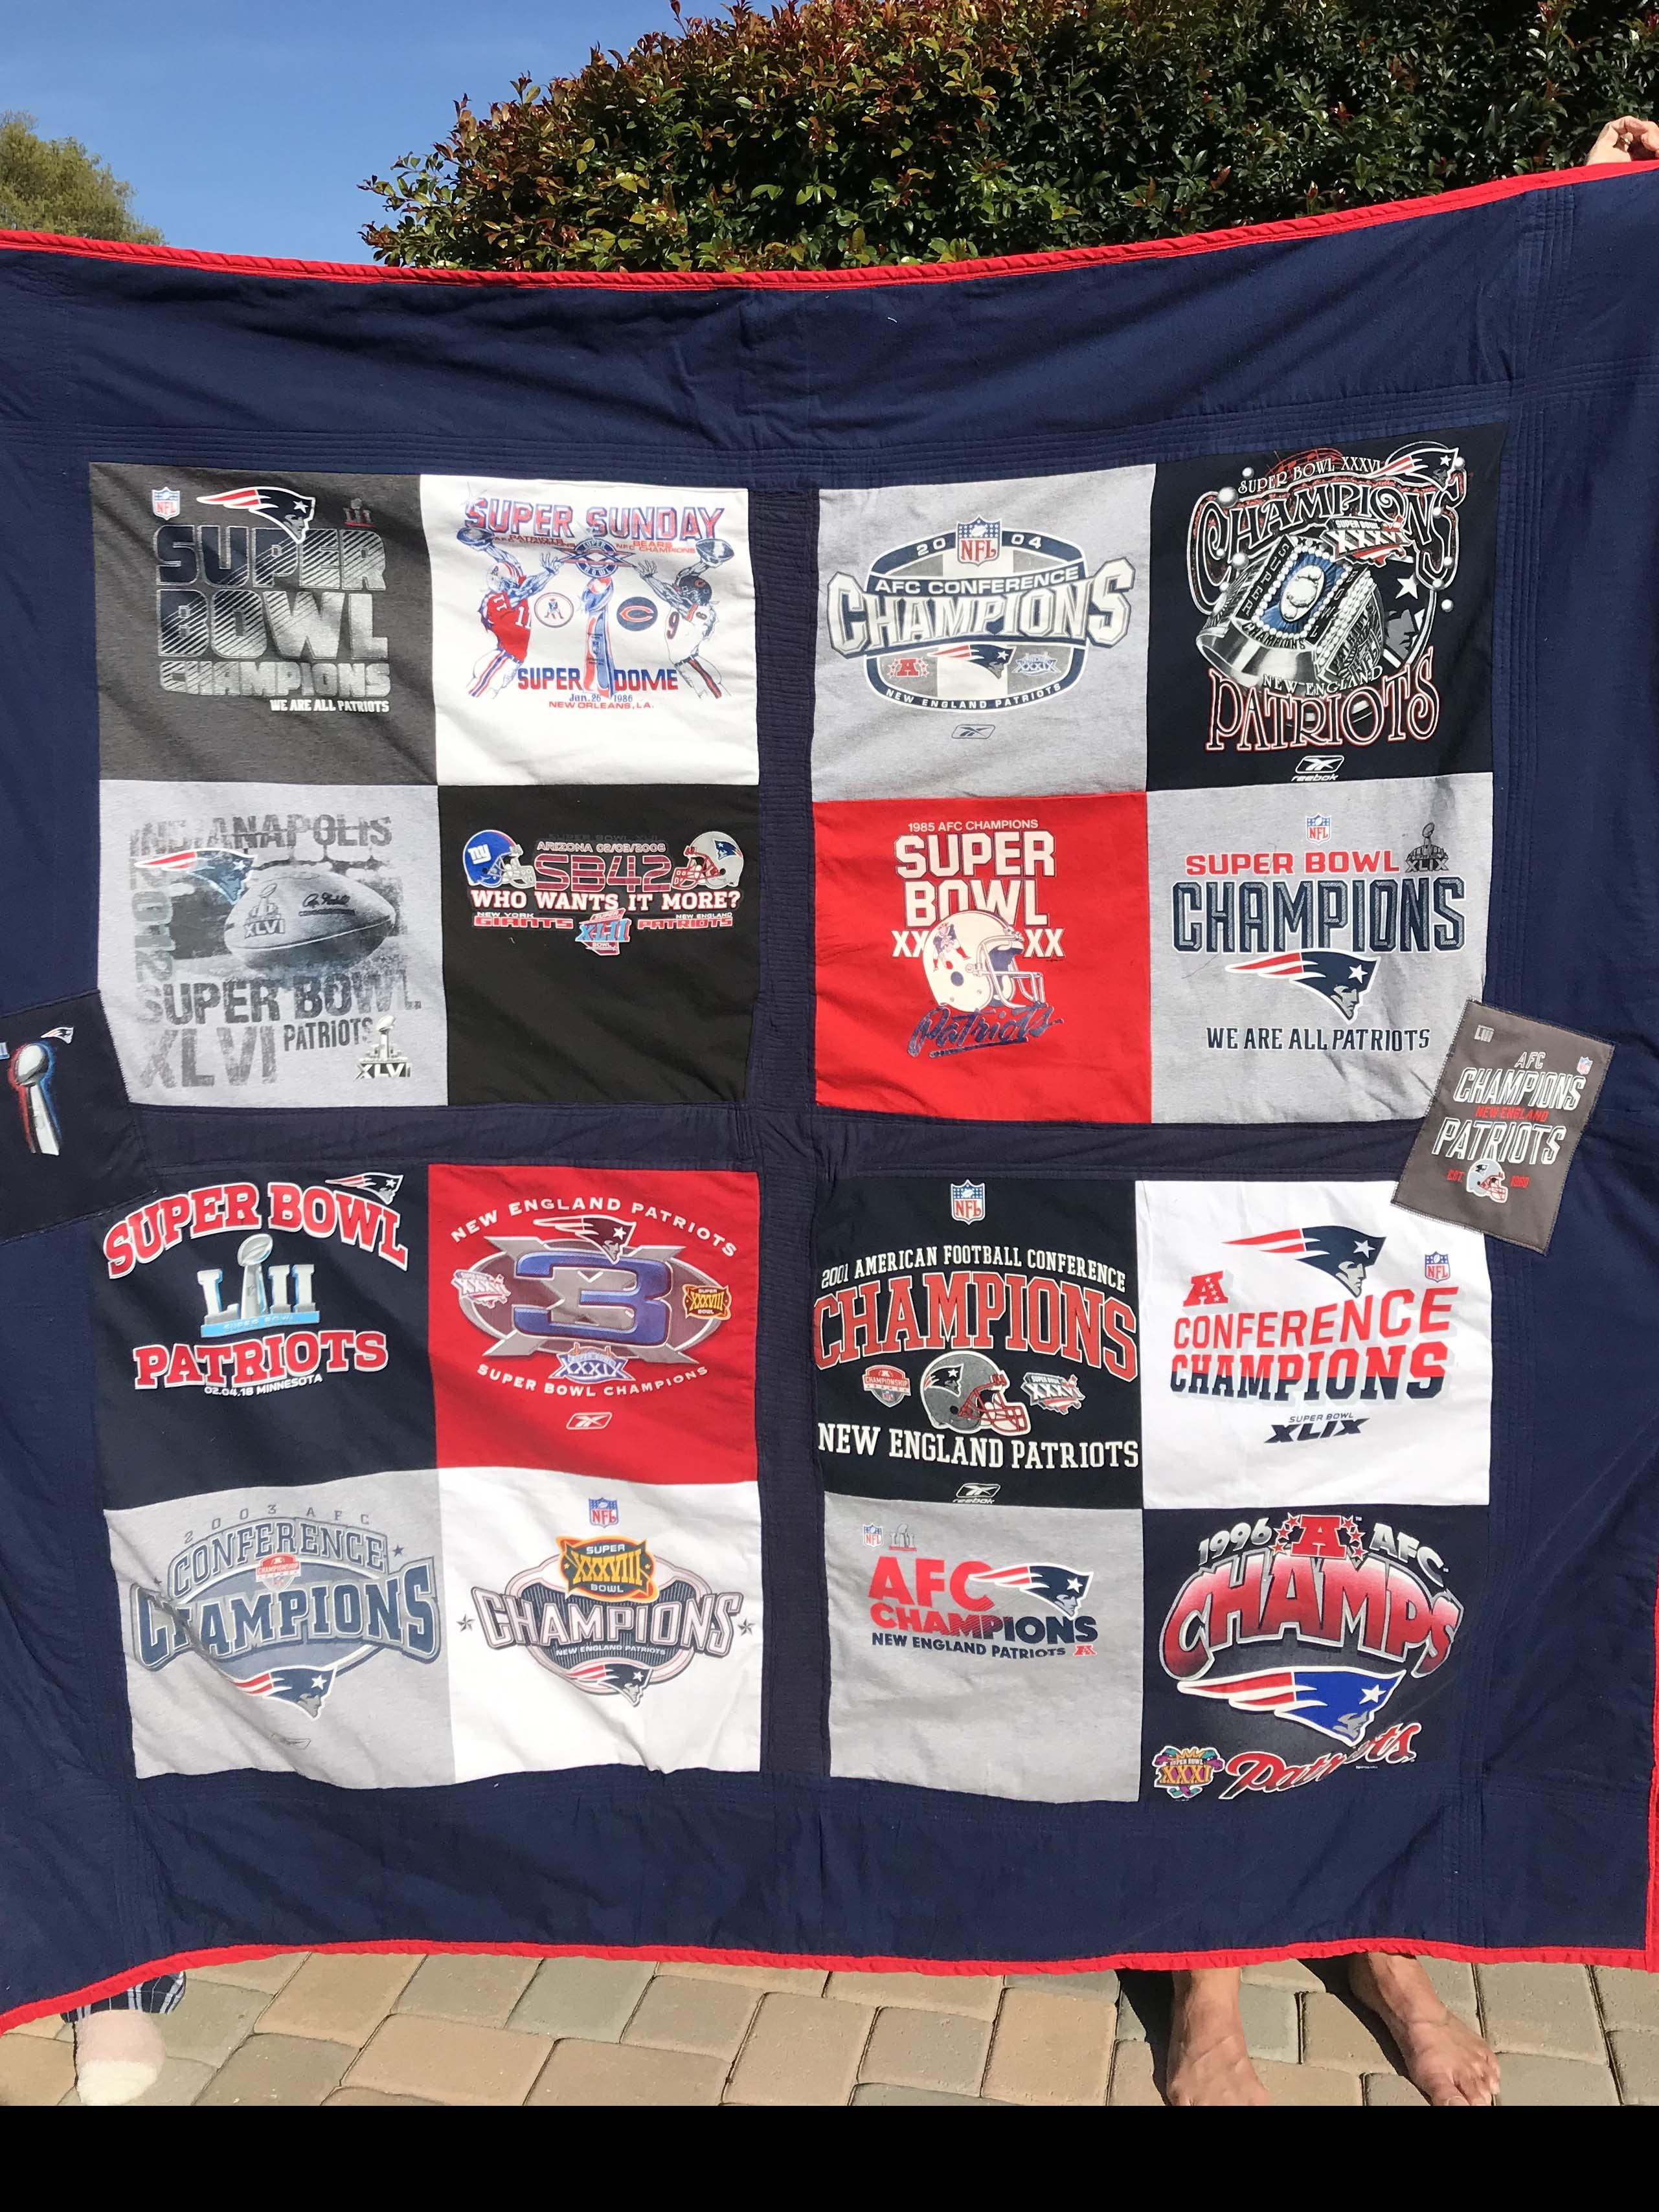
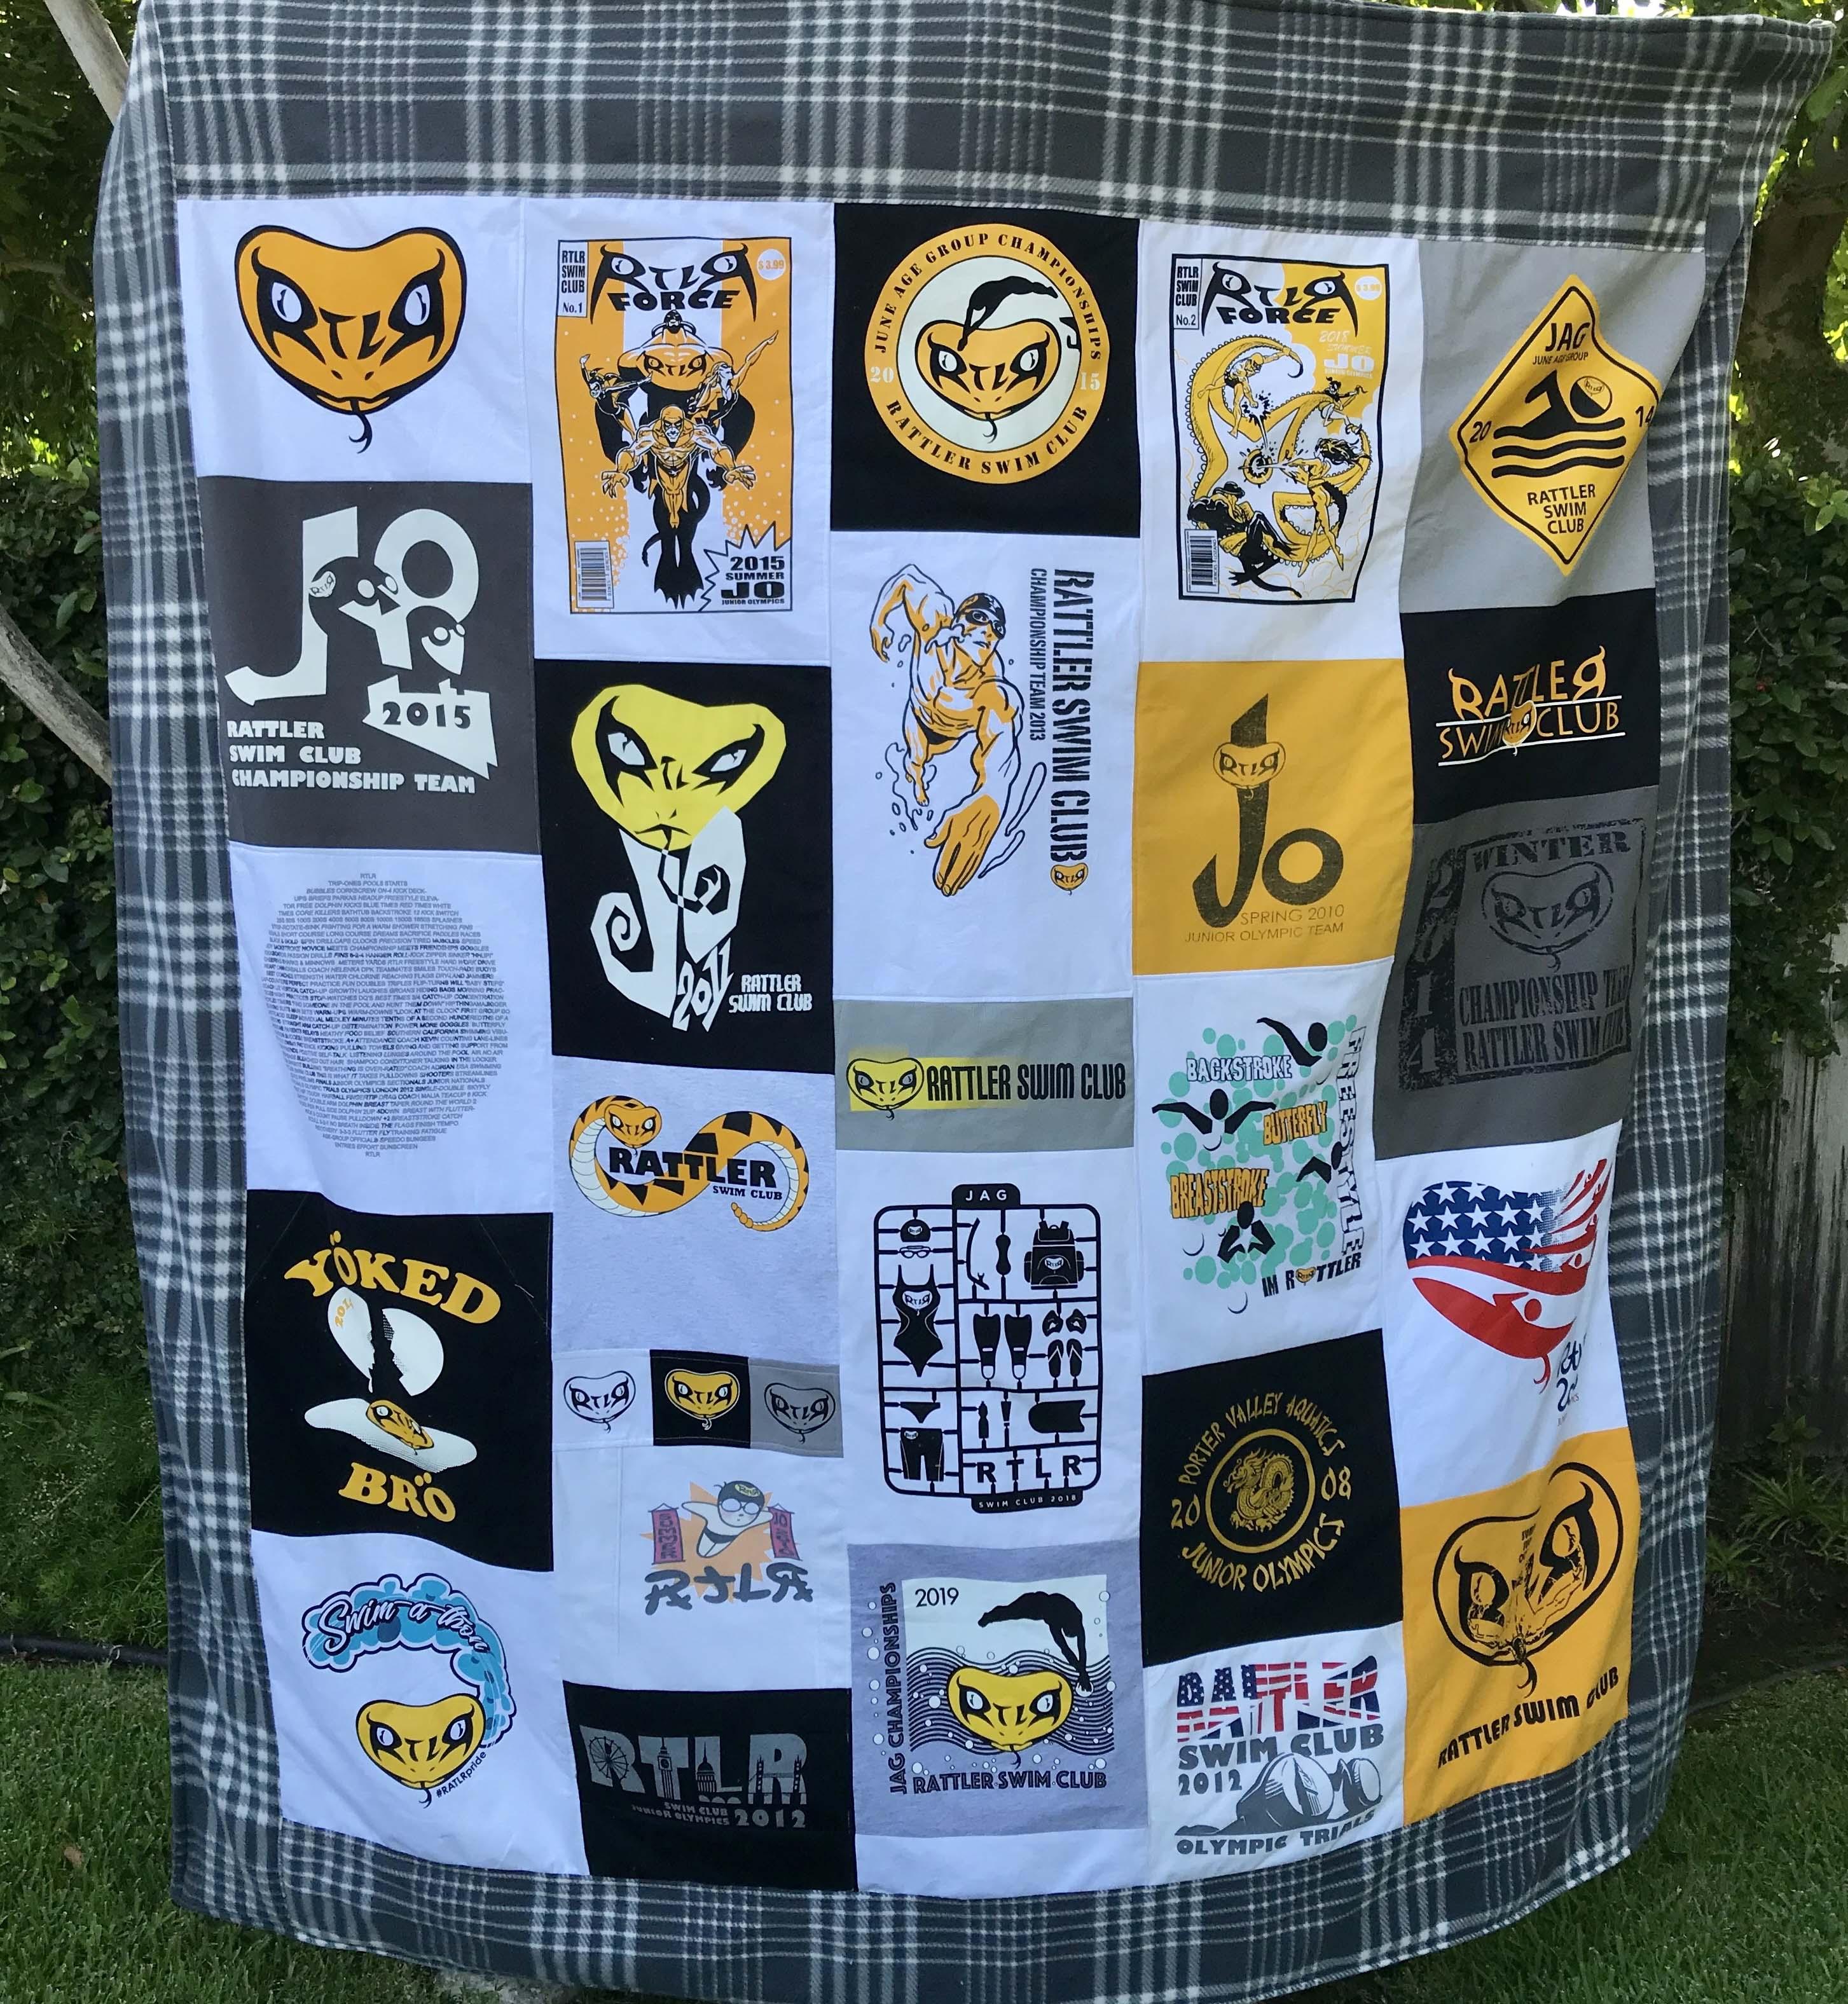
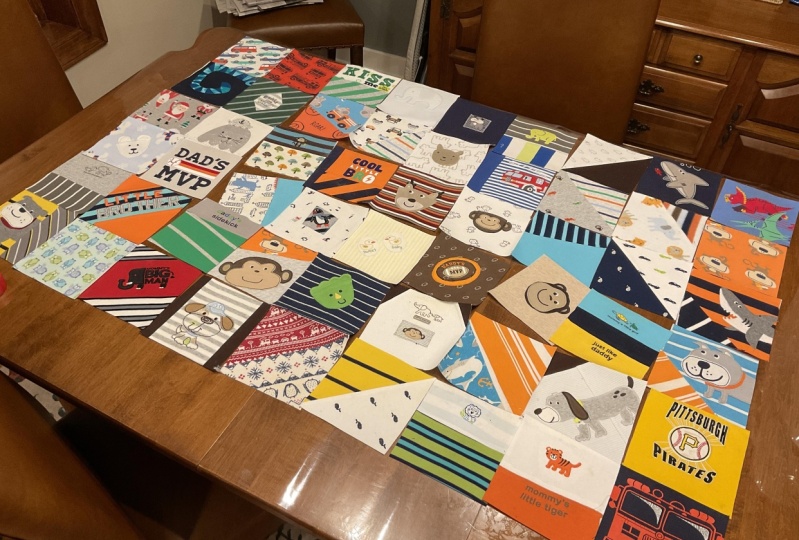
I'm going to show you how to make a memory quilt, also known as a T-shirt quilt. A memory quilt is a quilt made out of anything
that holds memories. How tired are you of all those storage bins full of old shirts and
special memorabilia, taking up drawers
and closet space. It's time to take those
items and transform them into a beautiful memory quilt
that you can enjoy today. My very first quilt
was made out of my daughter's baby
clothes that I had saved in one of
those storage bins. These quilts can be
made out of T-shirts, sport jerseys, AB
blankets, costumes, concert T's camp
shirts, shorts, jeans, pajama bottoms, and
Diana's college shirts, shirts from a
deceased loved one. I have even included parts
of a bathing suit and even a Girl Scout vest
with all of its patches. In this class, I'm going to show you how to take all
of those items, figure out a layout, a design, cut everything up. So everything up. And finally, make
yourself a cozy quilt. I think of myself as
an all-around artists. I love sewing and
sewing projects just as much as I love painting, drawing, art, journaling,
gluing, collaging building. I bought my first sewing
machine 19 years ago. And ever since then I haven't stopped learning new things. Five-years ago, I
started my memory quilt adventure
started as a hobby and got very popular very fast
as soon as the other moms heard about what I
was doing and wanted graduation gifts
for their students. What's next? Go and get all your shirt
that we spoke about earlier. Bring it back here. We'll go over the supply list, the stages of the project. And before you know it will
be beginning your layout and organizing your shirts
for your memory cloth.
2. Class Project: In this Skillshare class, I'm going to show
you how to take all of those special
T-shirts and memorabilia and make them
into a nap size memory, approximately 54
inches by 78 inches. To be successful in this class, you should feel
comfortable using irregular home
sewing machine and iron and then ironing board
and a rotary cutter on a map. There are some other
supplies you need and we'll go over those in the
supplies lesson. Each lesson reveals the blanket being born and that's
very exciting. This is recycling at its best. Once your shirts and
memorabilia items are gathered, we will start by separating
them into three piles. Then we will spread
out the shirts and a good workspace and begin to see the layout of
your memory quote. Next comes cutting. We cut the shirts in
half using a scissors. Then we use a 12.5
inch square grid, a rotary cutter, and we start making the shirts
into equal squares. We also cut the interfacing, which is the stability
fabric iron to the back of the shirts to make the shirts more manageable. After that, we will iron the interfacing to the
back of each shirt to square to make them equal in
weight and stretch ability. Next it's time to, so the shirts into four columns. Four columns is the amount of shirts needed for the lap size, slash throw size blanket. We will so each square together
to make up the columns. After that we will
so all four columns of items together to make
the front of your quilt. Depending on the size, we may add a border of fabric to add some inches all around. Following. It will be timed
to so the batting, which is the material
inside a quilt that gives it the cozy weight to
the front of your quilt. Finally, we get to sewing the backside fabric
onto the quilt. And the last step, create and add the binding. When it is all done, you will have a
beautiful memory quilt. The front made up of all
of those special items. The batting and backing
and border and binding, all joined together to make a remarkable art piece
and cozy blanket. What's next? Take a look at the supplies in the video and the attached list. Gather your items and let
the organizing begin.
3. Prepping: Supplies: Since this class
will work well with someone who already has
some sewing experience, you might already have a lot
of the items on this list. Everything on this list
will continue to get used as you continue on sewing
or quoting projects. But the cost for
the actual memory comes down to these items, the shirts which
you already have, so they aren't really a cost. The thread, the
interfacing, the batting, the fabric which is
used for the border, the backing of the blanket
and the trimer binding. If you're on a budget, buying in bulk can really help. Plus, your fabric or hobby
shop probably have a lot of sales and I always
keep an eye out for those coupons and buy ahead. I really liked buying flannel in the summer because that's
when the best sales are. I stock up, then I also stock up on batting and interfacing
whenever I can. The list is also
attached as a PDF. In this lesson, you'll need
a basic home sewing machine. Nothing too fancy. I have 21 is just a regular singer
competence sewing machine that I got many years ago. And then I have the
singer heavy-duty, which has been very helpful
for some bigger projects. It moves a little faster, which I also like. This project can be done with
any basic sewing machine. You'll need an iron
and ironing board or any surface that you can
iron on parchment paper, which I use when I'm
ironing the interfacing to the cotton t-shirts as protection for the
iron and the fabrics. You could also use a towel
instead of parchment paper, you'll need a cutting mat. Good pair of scissors, a rotary cutter and blades. And what are very helpful,
our seemed cutters, small scissors or slippers, which are just very helpful
when you're selling anyway, they'll need the square grids, the 12.5 inch by
12.5 inch for sure, and the 14 inch by 14 inch
square is very helpful. Also helpful our metal rulers, the long one is 36 inches and it's terrific when
I'm cutting material, I really like having the
metal ruler for that. Parking tools like
fabric pencils or Taylor's chalk
are always useful. You'll have to get
a walking foot for your specific machine. So I have the singer walking foot and I have the
Singer machine. And this basically
this Even Feed Foot, feeds multiple layers
of fabric through the machine without
puckering or bunching. So it's great when it comes to the quilting part of the lesson. Needles for your machine, definitely quilting needles,
thread and bobby pins. You can get any color. Colored threads are always fun, especially for the
visible top stitches, but it's always, always can go with white and you never
have a problem with that. Pins and sewing clips, which are just a
great sewing tool, interfacing fabric, which is
shown here in a small bolt. I bought it in bulk, but you can buy it
like you buy fabric and yards and basting spray, which is an adhesive
that's used to hold your fabrics in place before you sew them altogether. In the quilting process
of the blanket. This is the interfacing
I liked the best. It's the appellant white
shirt, Taylor feasible, 950 F. It's a little thicker
than some of the others. I can definitely feel
the textured side. That's the side that will
go against my t-shirt. Every one of talons. Interfacing comes with the sheet that explains what fabrics, a specific interfacing
works best with Iron temperature duration for
the iron on the materials. And you'll see you'll
have certain favorites. You might migrate towards
the ones that are on sale. Or if you're working with
a certain type of fabric, you'll find the one that's
best for your fabric. Like I said on here, it does explain what each
one is best for the batting, which is basically the
inside of the quilt. I like cotton, but
it does come in other materials
like polyester wool or bamboos sometimes used. And you can buy it. Here I'm BY, I'd bought it
as in bulk as a huge role. You can buy it in
yards like fabric, or they also come in
pre-packaged bundles. You can buy for a
baby size quilt, a twin full kings. So whatever your needs are, if you don't have space to store it or you can't deal with cutting up a huge
piece of batting. And it's really easy to buy. There are three areas that need fabric for this
memory quilt project. In the throw blanket size, you can use the same material in all three areas if you want, but I'm choosing three
different fabrics. The white cotton,
which I will use for the binding of the blanket. I sometimes call it The trim, the mint green flannel, which I'll use for the border, and the red monkey dot, which is a fleece
valorem type of very cozy and soft,
stretchy fabric. I will use this on the
backside of the blanket, the amounts needed
and this will be on the supply list attached
to this lesson, are interfacing seven yards, binding, 2.5 yards,
order, 2.5 yards. Backing. Depending on the
width of your fabric, you may need more or less, but I will say roughly
five to six yards. I always buy a little
extra fabric when shopping because I
have had the scenario. Why bought too little? Then when I went
back to the store, it was already gone. What's next? You're gonna get your shirts and special memorabilia and we're going to organize
them into piles. Then we're going to
cut the shirts and half the front side
on the backside. And we'll lay them out
in a rough layout. You're going to start to see
this project come together.
4. Prepping: Organize & Layout: In this getting organized class, we're going to take
the shirts and sort them into various
groupings or piles. Cut the shirts in half, so the shirt is in two pieces, front and the back. Organize a rough layout of the blanket using
a large workspace. We will put the shirts into four columns with
about five shirts and each column for our design
of the nap sized blanket. Then finally, we will take a
picture with a rough layout. This will serve as a reference. I'd love to see
everyone's pictures uploaded to the project section. I realize that this class
has a lot of steps, but that is because it
is the foundation of the project and where we begin to see your blanket
come to life. Let's get this project started. I've got my pile of shirts. I've got my 12.5
inch by 12.5 inch grid by also have a
14 inch by 14 inch, which is not required
but could be helpful. And my scissors. Let's take these items. Let's go find a big work
area to spread out. And I liked the floor. You could use a dining room
table and the area where you can spread out and make some
piles and do some layout. Come on. I wasn't joking when I said I like
to work on the floor. There's tons of space. You can't beat it. Anyway. Have my pile of shirts, and I'm going to sort
them into three piles. The first pile is going to have shirts that are two-sided. That means they
have something on the front end,
something on the back. The next pile, just
one-sided shirts, either something on the front
or something on the back. The last pile is for shirts that have a logo that's bigger than the 12.5% by 12.5 inch
grid that I like to use. That's why the 14 inch
grid comes in handy. Those are my three piles. Now I have my three
piles of shirts. There was only one
shirt that had an oversized logo on the back, bigger than the 12.5
by 12.5 inch grid. So I'm gonna save that. It's going to be one of
my specialty squares. I had about three
shirts that only had one side of information. That's easy. And all these had something
on the front and the back. In some cases that could count as two shirts or two squares, which be really handy if you
don't have a lot of shirts. Other times you have
to make a choice. Which part of the shirt
am I going to use? The front or the back? Sometimes my clients make requests on what sides
of shirts they want. But a shirt like this. The main information
is on the front. But I liked this little
x that's on the back. And I noticed there was
a few shirts with this. I'm going to save these x's and maybe make up a
specialty square later. Next we're going to
take the shirts and cut them into front side, back side, just cut right around the perimeter
of the shirt. Now it's time to cut what I called the perimeter
of the shirt. And what I meant by that was basically all around the edge, the shoulder, armpit,
down the side. Let's start cutting. If there's a seam on the shirt, it's really easy to
follow the same line which there is on this one. But if there isn't, just
as easily follow where the shirts been folded. Go. Once. One side of the shirt. That's a sudden going to use in the next side,
which was the back. There wasn't anything
on this back. I see all the parts of the
project until I'm done, just in case we need some
pink somewhere as a filler. I have this nice clean
pink background. If you are working with a
child size shirt and you find that it's narrower
than the 12.5 inch grid. There are some solutions. You can cut down the back of the shirt and have this
should open like a booklet. This case of course, there's something on the
back, so I couldn't do that. Or you can let's say
it's this narrow. You have some space
on the sides. You can always so read on filler to make
up the difference. Or you can use a smaller grid if all of your shirts
are child size, that might be a great solution. So I just cut one side
of this shirt and I was about to cut the sleeve. And I saw this little note here. Now I don't know if
that's important or not. Since I'm making this as a gift, but instead of cutting
through that beat and B, I'm going to save the arm. Is it bigger piece? That way? If I want to add it
somewhere, I can. I didn't ruin it. Some of those things do pop
up while you're cutting. You'll see stuff you
didn't realize was there, especially if it's
not your shirt, you don't know all the details. So pay attention. Here I am back on the
floor and we're gonna get started on the rough
layout of your blanket. I have these little x's
that I mentioned earlier. I'm going to make specialty
square out of them. Perhaps if I have room and I'm going to push
those to the side for now. I also have this one shirt
that I mentioned was a little bit larger than the
12.5 inch by 12.5 inch group. And there's a few ways
to deal with this. Dealing with oversized logos and patterns has
a few solutions. If you have more than one
shirt that is oversized, I suggest keeping the oversized
shirts all in one column of your design and making all of those shirts
in that column, the 14 inch width instead
of the 12 inch width. Another way is to tilt the shirt so it is
at a slight angle. This bys and interests. So for the logo
width and creates a nice angle that
add some dimension. This is a technique
I've utilized quite a lot in my
memory, quilt making. Additionally, you
can turn the logo completely sideways or vertical. As long as the width
remains 12.5 inches, the length can be as
long as you need. This also creates a fun layout. Speaking of fun layouts, you can also not use the
column technique that this class is demonstrating and do more of a collage
type of blanket. You can just build
different size squares and shapes of shirts
along the way. Lastly, what I'm using in this blanket is the
slight trim approach. I will merely trim off
some of the edges of the design so that it will
fit into the 12.5 inch grid. I won't take off anything that takes away from the main
message or meaning. But for this shirt, I will be cutting
off the word Xavier. However, the school name
of Xavier is all over this blanket and me editing
it out here won't hurt. So this will be a little
bit of a stream of conscious process while I think through and try different
things for this blanket. I noticed there's
quite a bit of black. So I'm going to start by putting black shirt and
each of the top four corners. A black in the four corners gets me started and sets
my boundaries. Remember, we will be making four columns with about
five shirts in each column. Keep in mind, I did not
have 20 shirts to start. But between fronts and
backs of the shirts, I will fill the space. This is the puzzle
part of this process, and it's good to
keep in mind that any space can be
managed somehow. If you don't have four
same colored shirts for the four corners, you can use two reds and diagonal corners and to
whites and the other corners. Or you can use all sport
jersey numbers in the corners. Be creative and try
different things. Remember, this is a rough
layout and nothing is wrong. Then I will add a gray
shirt to the bottom of the second column and the
top of the third column. Notice that my gray
shirt on the bottom of the second column is that
seemingly oversized one. Originally, I thought I was gonna do something
different with it. I called it a specialty square. But now I have decided
to incorporate it into a regular spot in a column
as a 12.5 inch square. I will divide up the two shirts that
said a place for you. One in the middle of the first column and one in the middle of
the fourth column. The green was the
only one of its kind. So it will be a lovely accent
color wherever it lands. I will also place the red and the teal shirts
as accent colors. And once again, there
really is no bad spot. I have three pink shirts, so I will spread them out, each in a different column. Next, I will add my two white shirts with what
open spaces I have left. Finally, as you can see, I have about two spots in
column three. In that area. I'm going to use the
x's and other bits that I saved to make
that specialty square. Don't forget to take a picture and print it out if you can. You're really going to find
it handy as a reference tool. Congratulations on finishing up the getting organized class. Look at all your
accomplishments. You've sorted your
shirts into piles. You cut the shirts and half. You organized a rough layout. You took a picture, and now you will go and share your picture in the
project section. Next up, we will start cutting your shirts and the
interfacing into squares. Bring your pile of shorts. Interfacing the square grids and the rotary cutter.
See you there.
5. BONUS!: Hi there. Memory Quilt students. It's Zoe, and I'm
interrupting myself to let you know about
a special offer I have for my students. And I know you're my student because you're watching
my class right now. At the time when I filmed
and edited this course, I didn't have my one
on one session set up, but I do now, and I'm really excited to
offer this to you. My one on one session is a
session where you and I will meet virtually and go over
the layout of your blanket. Sometimes when you're really
close to these projects, it's hard to come up with a
good layout or understand color balance and words and different parts of the
shirts that can be used. The shirts are the items. Anyway, that's where
this session is perfect. Once you and I meet, you'll have a beautiful layout, and the rest of the project
should flow pretty easily. Honestly, I've made so
many of these quilts, and sometimes the most challenging
part is this first step. So I want to help you so that you can carry on
with your project. Anyway, my students,
that's you get a 30% discount on my
one on one session, offered through Skillshare
and Super peer. Go to my profile page. Use your code, sign up. And I can't wait to see you and see all the items
you've collected and work with you to
get a beautiful layout so that your blanket
can get going.
6. Working: It's Cutting Time!: It's cutting day. We're going to cut our
shirts into equal squares. And our interfacing into
the same equal squares. Interfacing is a
special fabric which is used to make certain parts
of a garment more stable. It is used for stiffening, reinforcing, and
shape retention. It's the fabric we
will iron on to the backside of our
T-shirt squares. Here are some examples of stretch cotton with and
without interfacing. As you can see, the side with interfacing has a lot more
structure and control. Whereas the side
without seems much more stretchy and loose. Interfacing is important because it gives the same structure to a lot of these items that
have different materials, thread counts, stretch ability. It's like a straight jacket
for the shirt and makes every square equal and
easy to work with. Cutting is one of my favorite
parts of the project. I love getting into
the cutting zone. You can listen to a
podcast, Audible, or talk on the
phone with a friend on speaker phone, of course. It's also when you start to see the project really
come to take shape. That sad pile of
shirts starts to turn into an actual blanket right
before your very eyes. There are some fabrics
that are worth spending a little extra
special attention on. These are fabrics
that are very thin. Fabrics that are
soft stretch cotton or fabrics that are
athletic sport material. Once these fabrics get cut, they seem sensitive and tend to recoil or shrink or contract. So I always cut those
squares and intro to bigger by using
my 14 inch grid, knowing that once I
attached the interfacing, I will trim it down to
the correct square size. Like I mentioned, some
shirts can be challenging. They have seemed, and collars
and armpits and V-max. These presents some challenges when cutting them in squares. This can be resolved with filler fabric later
in the process. Just cut the shirt shapes to
the best of your ability. And later we can go
back in and fix it up. We've got our grid, a rotary cutter, Oliver, our shirts that have
already been cut in half. And our interfacing material. Here we are. I have my cutting mat, my shirt, and my grid placed over my 12.5 inch by 12 and
a half-inch grid. And of course my rotary cutter. I'm going to start
by just centering my logo as best as I can
in the middle of my grid. Now, of course, there's
only so much distance from the top of the
logo to the neck line, which often happens
with a lot of shirts if the logo goes up high. So you do your best you can
with what space you have. I'm just going to make
sure that all the way around we've got
even as possible. So from the top that's about
two inches and the bottom, it's about two inches
to two and a quarter. I use might use this. Cast your net as my
straightening line of coarse cotton over time
stretches and distorts a little. So it looks like I'm
a little crooked, but the logo was straight and that's what we'll
count when it's cut. And on the left side, let's see, I've got an inch and a half
here and note one inch there. So I might even it out. Once again, trying to center, doing the best I can. Whatever you do will work. Okay. I'm ready to cut, get my rotary cutter and
make sure it was closed. And now it's open.
You always want to close it because you can
really hurt yourself. It's left open on a table. And I start cutting. Go a
little bit past each corner. Make sure your shirt is smoothed out before
you start cutting. I forgot to mention that, but that's important. Okay. Close it, put it down, peel away, hoops, the
corner had a threat. Cut it. Sometimes a really
sharp blade will help with those threads
that are holding on. Okay, here we go. First. Many squares. Looking good, Always keep the scraps until the
project is done. You never know. So I have a scrap
bag put that there, fold this up, moving on. Here's a live example of what I was talking
about with the tilt. This word is coming very
close to the edge of my grid. Now, it can work
because like I said, if you just cut off a little, you can still read the word. But if you tilt this a little, you get a little more room. Now of course, I'll be
cutting into the armpit and the color the other
armpit with some seams. But that'll be a really
good example for me to show you how to fix those later. I'm going to cut this
shirt on the angle. And you will see that
it works really nicely. Cut off some of those
stragglers. Okay? Now you can see that this square will be in the blanket like
this, which is cool. I'm going to put
red filler there. I think I'll be okay
with the seam lines. Sometimes the seam lines can buckle and be
a little weird. But we will get to that later. But now you can see how I'm tilting and still
look really cool. This is our oversized shirt. Remember that the
design was slightly bigger than the 12.5 inch grid. But since it was the only one in this shirt that was over-sized, and I'm feeling
that in this case, I can cut off some of
the information without losing the message will be okay. So like I said, Xavier
is all over the shirt. So the X there, if I cut off the word,
Xavier, will still be okay. On the left side and the
right side or the hands. So maybe I keep one hand and just skewed
to the left a little. Or I could do the other way. But then I'm starting to
really cut into those logos. So I'm gonna go over here. And then on top, just
a teeny bit of that. Then I'm going to start cutting. Keeping in mind I'm
going to have a quarter inch seam line. So for the exam we'll try and
go as close quarter inches. I can give a quarter
inch on the left side. When I'm ready to cut, peel away my excess. And there I have my square. Here's an example
of a shirt that is actually more of a
rectangle shape. It's longer than 12.5 inches. The width is fine, but
the length is longer. So I'm going to cut it that way. I place my grid giving
some border at the top, keeping my margin
around the edge. And I'm going to cut. Then when I do is I peel back. So I can see I'm going to slide
this down, wanting it up. So I can just extend my square. Keep my same width
as best as I can. I'm finished cutting. Okay, So that is not a square, it's more of a rectangle, but it will still fit in the column because it's
still 12.5 inches wide. Here's an example of a sport
material shirt that sort of very thin wicking material and sometimes when you cut
it, it does contract. So I'm gonna do what I suggested earlier and use the bigger
grid size to cut this one. I'm going to use the
14 inch by 14 inch. That way if a
shrinks up a little, It's still going to fit on my 12 inch 12.5 inch
interfacing square root. Okay. I don't know that a trunk up
but better safe than sorry. And I mentioned and
I mentioned that I'll use the interfacing that's
cut and the 12.5 inches. And when I run it,
I will iron it on the back and I will
just trim off the side. I'm going to cut this
x in a big square, even though I know it's gonna
be a much smaller square. Just while I'm here cutting in my assembly
line, I'll get it done. It's time to start cutting my interfacing and have my grid, my rotary cutter, and
my bolt of interfacing. So I just start
by opening it up. Let it up. I'm going to cut my square. There is my square. I have this tail
bit of the fabric. And I will also cut that. Because this will definitely get used either on those
small specialty squares. You can double up filler fabric. There's always a use and
nothing gets wasted. This was a great
lesson because we cut all of our shirts and
all of our interfacing, the same amount of each. We went over interfacing, challenging fabrics
and special shapes. In the next class, we will iron the interfacing onto the backs of the shirts. You will need your
short squares. You're interfacing
squares, your iron, your onboard, and parchment
paper or a towel. See you there.
7. Working: Iron It Out!: This lesson shows how to
take the square cut shirts, iron the interfacing
onto the back of the shirts and see the structure of the
blanket come together. You need to have an
iron and ironing board, some parchment paper or towel. Your cut shirts and
the interfacing. Oh, some good music. Of course. Here I am at the ironing board. I have my parchment paper down, then the interfacing
rough side up, then the shirt square, which I line up perfectly
with the top corners. I smooth it out nicely. Then parchment paper again. Then iron. Iron is set a medium
and I will do solid 15 seconds over each area or a little more if
it needs to adhere better. That's one side
and you can see it already beginning to look
and feel more structured. Then I turn it over and
repeat, on the backside. That looks awesome,
fully structured square. And it will be really
easy to attach to another shirt in
the same column. Here's the specialty square, the red one that we tilted
so that the word could fit. And you can see that the color is not making
up the complete square. So I'm just going to iron on the interfacing as if it
was a complete square. And later I'll go back in with some red filler fabric
and fill in that color. Here's that bit of interfacing that I call
the tail before and some red that I cut from the
same red shirt rectangle. I'm just going to iron
those two together and that's what I'll use
as the filler fabric. On the corner of the big square, there was a large logo
or an iron on the shirt. It's important to pay attention to the fact that the iron, the hot iron doesn't heat and peel off the ink that was
printed on the shirt. And here's the x
I'll be using for that specialty
square with some of the other x's and small parts. Even though I'm only using
a small area of the shirt, I will still iron
on interfacing to the whole piece because later I may need some gray
filler fabric. And then I'll already
have it ready to go. Confession time.
On the pink shirt, I realized a piece of fuzz got caught between the
interfacing and the shirt. If the shirt was black, I may never have noticed. But now it's going to
bug me in this case. Luckily, I was still early
in the learning process so I can just peel it
back and then retired. Now that you have
your shirts iron to their interfacing and you've
got some filler fabric. You can begin to see
that your shirts are taking on their
new life as a blanket, you should be feeling
pretty excited. Remember that photo, I
told you to take in print. You can use that now as a guide for when you're laying your
shirts back in their grid. Sometimes you forget where
we had them originally, but this is a great reference. After you lay them out again, take another picture
because you'll really see the development of the
blanket come together. If you're making a
blanket for someone, it's a great opportunity to send them another
picture so they can make any adjustments before
you start the sewing process. Here's the blanket
laid out again after the shirts have
their interfacing, it's really coming together. I have a few specialty squares, these two where I will iron the red and teal filler fabrics, where the color is
at the corners. This other larger square
slash rectangle area that's much more of a collage of the various x's
and leftover bits. And that becomes almost like
its own little mini quilts. Within the next step, we're going to start
selling up the columns of shirts with our
sewing machine will be sewing four columns with about five shirts each,
which you'll need. Your sewing machine, bobbin, thread, needles and pins. This is so exciting.
8. Sewing: Columns: So here's my blanket laid out on the floor really
coming together, looking much more structured. I'm going to have to rely
on the corner of that x. I can see it killing off
from the interfacing. I've got my two specialty
squares that I'm going to use my filler fabric technique to fill in that, those corners. And I've got the other
specialty square, which is more like a rectangle, which I will also get two. Now if we take a look at
the length of this quilt, column four is
definitely the longest. So I'm going to need to
deal with that somehow. There's a few ways
to deal with that. Number one is C, the white shirt has an inch on top and a few inches on
the bottom that are extra. So if I just fold those under and it brings up the whole length of the
column a few inches. Just helpful because now in relation to the
other three columns, I can easily fill that
in with filler fabric. I'm going to start
with column for when I start sewing, I'll
start at the top. And so those first two
together and make my way down. Let's go. The first thing I will
do is trim off the top and bottom of the senior
nights white shirt. Then I will pin the square above the white
one in the column. Moving from top to bottom to the one below it in the column, I will pin them each
facing each other. So a quarter inch seam iron and then reinforce with a top stitch. Then I keep moving down the
line of the column until all of the shirts are sewn
together in that column. You can see column four
is all sewn together with the top stitches and it
has shrunk in its length. As I mentioned before. Before, we can move on and finish the other three columns. We have specialty squares
and each of those columns. So let's head to the
next lesson where we will go over those
types of squares.
9. Sewing: Specialty Squares: In this lesson, we're
going to review two types of specialty squares. These are the squares that
need some extra attention and some labor of love to make them fit into the grid of our memory. Quote, take a picture and
share the before and after. It's always fun to see
the transformation. We will start with the
teal green Clever shirt that had a neck line and made this shirt miss a
part of its corner. First, I will trim off the
extra corner of interfacing. Then I will pin the piece
of matching fabric that has interfacing on it face-to-face
with the main piece. Next, I will, so the
pieces together. After I will iron the same flat with an iron
ore in this case, I can finger press it since
it's so small of an area. Then add the top stitch. Finally, I will take the grid and match it
up and trim off the excess so the square is complete
with the filler fabric. I will do the same exact thing
for the red shirt that had two corners that needed filler fabric attached
to make up the square. The next area on the blanket
is that portion that had almost its own mini
quilt within the quilt, this specialty square,
I'll start out by measuring what size
I am working with. The length is 24 inches and we already know
the width is 12.5. I look at the balance and
swaps and pieces around. So the two mini black
squares are separated. I have three rows, so they'll each be about
eight inches in length. I will start with the middle
row of this mini quilt and just measure and tweak by folding and seeing how the
squares will make up a row. Always making sure the logo
stay as centered as possible. First, I saw the pink and
green pieces together. Then I attach the red piece
to the pink and green piece. After I use my 12.5 inch grid to cut off the excess on
the left and right side. Then I do the same with
the gray and black pieces. I use the grid to
make sure the space is used in the
logos are centered. See how nicely they
look next to the pink, red, and green row. I did. I continue with the final
row of the mini quilts. Eventually i so all three rows together to make up the
entire specialty square, or in this case,
rectangle of the blanket. Now the specialty squares
are all done and I finished sewing them into
their respective columns. Once all four columns are done, we will move on to the
next lesson where we will, so the columns together. Don't forget to share
your before and after pictures of your
specialty squares. It's really fun to
see how these evolve.
10. Sewing: Joining Columns: In this lesson of sewing
the four columns together, we're going to start
by so in columns 12 together, columns 34 together. And then so in 12
together with 34. The first thing I do is trim off any straggling threads I have. Then I'm gonna take
column two and light on top of column one so
they're facing each other. I'm going to line them up
very evenly at the top, all the way down, so their edges line up. Then I'm going to pin
them from top to bottom, always checking to make
sure they still lined up. One thing I like to
do is take my ruler and my fabric pencil and draw a quarter-inch line
for myself as a guide. Since the t-shirt edges
aren't all exactly the same, It's hard to get a straight line without some sort of guidance. And I really liked the technique of giving myself
that pencil line. So I go all the way down
with my ruler than I, so it iron it. And then I do my top stitch. I repeat the same process
for my other two columns. And then eventually I
saw them altogether. So we lined up columns 12
at the edges and corners. We pin them, we
drew a guideline, we sold them, we iron them and then did is top
stitch and repeated. I can see the bottom
of my blanket is not completely even
and this is where I'm going to add some
filler fabric to help that. Next steps, we're going
to add our border. We'll take some measurements, do some basic math, cut that border fabric
so that border fabric.
11. Sewing: Adding A Border: Before we get started
on the border, we have to make sure the
quilt front or quilt top has the same flush
edge all the way around. So along the bottom
of the quilt, I will trim off the extra pieces so there's a straight
line across. Currently, my quilt top measures
48 inches by 61 inches. In order for it to be
the throat or nap size, the dimensions should be
54 inches by 78 inches. So I have to increase
the length and width on each side to
get to those numbers. The width needs six
inches to get to 54. So that works out to
three inches on each. The left and right sides. The length needs 17 inches
to get to 78 inches. So that works out to 8.5 inches on each the top
and bottom sides. So I take my fabric and
I cut two strips of three inches and two
strips of 8.5 inches. My border fabric
was 2.5 yards long. So easily makes the 78 inches in length that I
need for the sides. But if I had smaller
piece of fabric, I could always join pieces together to make the
length I needed. I pin ISO iron and I do my top stitch
for all four sides. First making sure I have
attached my walking foot onto the sewing machine as
we are starting to pass more layers of fabric
through the machine. Now, when the border
has been attached, you can see it is really
coming together nicely. The border is the
perfect frame for the blanket and the
mint green fabric complements the pale
green t-shirt included in the blanket. What's next? Take a picture and shared in the projects and
resources section, we'd love to see
how you're doing now that it's really
coming together. Next up, we're going
to attach the batting, that's the sandwich
part of the quilt. We're going to need the batting, the basting sprite and
your sewing machine.
12. Quilting: Adding The Batting: In this lesson, we're going to measure and cut the batting. We're going to set it in
place with the basting spray. And then we're going to
sell it in place using vertical and horizontal
grid lines as guides. Once the front of your
quilt is complete, it's time to add the padding. The padding is the inside of the quilt that makes
it cozy and waited. It goes quilt top
batting backing, also known as a quote sandwich. So this is my technique for adding the quilt
top to the batting. You have access or experience
with a long arm machines. Makes quilting bigger
projects much easier. But on a home
machine that can get a little challenging with all
the weight and materials. So this is my
technique for making sure that batting is
secured to the quilt top. And in a way that's really
manageable on a home machine. First, we need to cut
our batting to size, especially if we had purchased it in bulk
or as a large piece. My bad and came folded in half. So I know my length is fine. I just have to trim off some
to get to the correct width. I cut at the arrows, seeing that the
approximate 12 inches will make the width correct. I will lay it out smoothly
under my quilt top. Then I will trim off any
excess around the edges. I already have vertical
lines in place that were sewn as the top stitches
from the earlier lesson. And then we'll use
those as guides for my next sewn lines. The lines that will be attaching the quilt top to the batting. Other lines I'm going
to so now I want to so five vertical lines using my quilt grid and border
fabric lines as the reference. Since I'm starting at the top, I'll use my Taylor's chalk to
extend the guides and make white lines as referenced along the top portion
of the quilt. And along the bottom. Then I'm going to make
sure my quilt top is in place and use
the basting spray. I will peel back about
half the blanket and spray the adhesive. Then I'll smooth it down slowly and
methodically in place, making sure there's no bumps. If there are, it's easy enough
to peel back and reapply. After I've sewn the first
three vertical lines, I will go back and spray the other half the blanket in place. Then I'll roll up my
quilt so it's easy to manage and make my way
to the sewing machine. Don't forget to make sure you're walking foot is installed using my white lines and the grid lines from the
blanket as referenced, I'm sowing lines to the opposite of what
is already there. So if the pre-existing
line is on the right eye, so on the left and vice versa. Once all the vertical
lines have been sown, it is time for the
horizontal lines. Some of the blankets grid has continuous rows and that
will be easy to follow. Other times I may have
to stop and start when the rho is not a
straight line that has more of a step. On the left. I can start at the very end of the blanket or where
the row starts. If I start all the
way to the edge, I would want to draw those
chalk lines again as guidance. Again, I saw opposite of the existing top
sich already there. I may have to move
my sewing machine to move the needle to
the opposite line. I want to make sure the
Batting is attached to the quilt front at every
12 inches or less, which is usually
what is specified by the batting instructions. So I double-check
that every square on my quote has been attached
to the batting at the top, bottom, left and right sides. Then I know my batting is
well secured to my quilt. In this class, we measured
and cut our batting. We laid under our quilt top, trimmed around the edges
to make a perfect fit. We base it it with
the adhesive glue so it stayed in place. We sold it in vertical and horizontal lines using our quilt
top as our guide. And now we're ready to
put the backing on. Next up, we'll get
our backing fabric, will measure and cut it to size, will get it in place, it, and move on.
13. Quilting: Adding The Backing: To attach the backing, we will need to measure and
cut the backing fabric. Then we will set it in place. You can use basting
spray and, or pins. Finally, we will so it, depending on the length
and width of your fabric, you may need to so two pieces together to make up the correct dimension
of your blanket. If I have to do that, I'd like to have
the same go down the middle of the
blanket on the backside. In this case, my red
monkey dot fabric was 57 inches wide and my
blanket is 54 inches. So that means one piece will
work without having to. So two pieces together. As long as I purchased enough
for the length which I did, I will lay the fabric down
under my quilt top and pin it in place across
the top, then I will. So along the
horizontal guidelines were the border method,
t-shirts, squares. I'm going to use a zigzag
stitch because this is a stretchy fabric and the zigzag works well
for materials like that. But if you're using cotton, you can use a regular stitch. Since the batting was sewn
so well to the quilt top. I'm only doing two
rows of stitching to attach the backing to
the rest of the blanket. Of course, it will be
sown when the binding is attached and well secured
in place that way too. In the next lesson, we'll go over the final step
which is adding the binding, I sometimes called the
trim to the quilt, go over some other
binding techniques, will cut iron and
make our binding. And then we'll pin it in place.
14. Quilting: Binding & Done!: In this class, we're going to add the binding to your quilt. I sometimes call it the trim. I'm also gonna go over some
other binding techniques. We're going to cut iron
and make the binding, and then we're going
to pin it in place. Binding is the last
stage of the quilt. This sort of like the crust
on that quilt sandwich. Here's a sample of some
store-bought bias tape or quote binding that
comes like this. It is the one-inch tape and has been pre ironed and folded into the correct shape to wrap around the front and back
of the blanket. The first binding technique
is probably the most common. You lay the binding down so
it in place on one side. Then fold and flip it over to the backside and sew
it on that side. It creates a tighter, more compact and neat
binding is usually done with one long piece of fabric that can make its way around
the entire blanket. And there are techniques
for managing the corners. The second technique involves the backing fabric
of the blanket, wrapping itself
around to the front. It is cut at least two inches bigger than the blanket size, then it is folded over
and sewn into place. This is a really easy and
fast way of doing binding and looks great because it integrates the
back with the front. For the next technique,
number three, let's use this mini
quilt as a sample. I had the mini quote
on the left and I have the backing
fabric on the right. Please ignore the creases
in the backing fabric. I face the front together and
pin around the perimeter, leaving an opening which I will mark for myself with Eclipse. Then I saw around the edges. And it's nice to
do a curved edge here that helps with
the corner bulk. Later, I trim the edges, then flip it right side out. I saw the opening
together while also adding the top stitch
all around the blanket. And there it is. This is fast and easy. You can also have batting or
no batting in this version. The final technique
and the one we will use for this class
project involves taking four pieces of
binding strips and attaching them around
each side of the blanket. There is also a
technique I use to keep the corners
tidy and finished. My fabric, like
my border fabric, is long enough that I
can cut four strips and know that they will
be long enough for the longest two sides, the lengths of the blanket. So my two inch border
will actually be an eight inch strip
of fabric that I will fold in half and then
fold again into itself. I will cut my strips. Then I will iron them
all, each in half. Then the two halves in again. And then I will reinforce with the iron again so they
are neat and crisp. Instead of the one-inch binding I showed is a sample before. I'm going to make
a thicker binding. I'm doing this because I
liked the way it looks. And B, because when
using thick fabrics, like the mint green flannel and that red monkey dot
for the backing. I want to make sure I have a
binding that easier engulfs the edges of the blanket without
worrying about bunching. Bunch she can happen
when you have a lot of thick fabrics. Then I will pin them in place. I always leave an inch
or two on the corner. I'm starting with
the longest sides, the left and right
sides of the blanket. I clip and pin them in place. Before I do the second side, I may want to sell my personal
label onto the backing. Before I forget. I usually use some
fabric glue or a pin to hold it in place
and then sew it down. If I forget, then I
just have to sew it onto all of the layers
of the blanket, which is not a big deal. But it's nice if I can remember
earlier in the project. I pin my second side, then roll and so I trim up the
extra tail for the length, so does flush with the edge. Then I pin the top
and bottom binding. For the corners. I leave a two-inch tail
again and they do a fold. While it is opened. I fold one edge in and then the main piece
folded over it. I'm careful about folding and tucking
everything in neatly. I also cut off a
triangle piece of fabric on the inside of the
flap to help with the bulk. Then I use a lot of
clips and pins to get it secured in
place before sewing. I do the same for each corner. Once the binding is sown
all the way around, I often do a second
line of stitching for reinforcement
and aesthetics. I cut off all stray pieces
of threads and guess what? You are done. Congratulations you did it. I'm so proud of you. This is not an easy project. It takes a lot of time, a lot of commitment, a lot of patients. And here you are. You made
your first memory of quilts. Well, I really want them
to see those pictures, so please remember
to share them. I can't wait to see
what you've done.
 Zoe Balsam Biggs, Memory Quilts & Other Fun Art Stuff