Transcripts
1. Intro: Hey, what's up, everyone only here. So I am a designer and entrepreneur from the UK. And this has been a very highly requested tutorial on how to make your own iOS icons. Ever since I released my own iOS icon pack, I've made over $30 thousand and I've had a lot of requests from people asking how they can make their own icon packs and either how they can make their own icons in general. So this sort of guide is a very, very quick one on how to make your own. So let's get into it.
2. Part 1 Set Up Your Icon: So we're going to start in sigma. If you don't have a figure account, please do sign up. It's free to sign up and it's free to use. We're gonna make a new document. And then we're going to make a frame by pressing f. Just make a frame, an outboard where we can make our icons. And what I'd like to do first is I'd like to bring in a screenshot of my home screen, for example, like to bring this in. So this is actually currently at double the resolution. We can change that by going to the width, putting a slash and then putting to you, and then I'll half the width. And what we do from here is you can see that these icons have a border-radius. So we're going to copy that border radius. So we'll make a rectangle prayer Pressing r. Make it around the same size as this one. Let's make sure actually that this is in here underneath. In the frame. They're like, oh, come on. There we go. So we wanna make sure. So we'll zoom in. And it's lined up perfectly. And then let's adjust the width to be perfect. 9091 is not correct. 90 by 91, that doesn't see my muddied. Will do it by 90, by 90. So that's done. And then we can bring down the radius by going to any other corners of the shape, bringing that down and getting it as close as possible to the iOS icon. I think that's close enough. So now that we've done that, we can move that out of the way. And we can start making our first icon.
3. Part 2 Make Your First Icon: So my icon pack mainly was black icons. So I'm going to make black icons here as well. So let's do the fill color is black. And let's start with something simple. So for example, if I look at the icons that we have here on the right, let's start with the reminders app that we see here. So I'm going to make a little circle. Make that circle White, I think. Yeah, let's make it white. And let's make it ten by ten. There we go. So my aim here isn't for the icons to be exact replicas of what you see here. I want these icons to have minds or style and taste to them. So I'm going for a monochromatic look, as you can see here. So that's what we're going to go for and we might even make things simpler. So for example, the reminders app has three dots with the rings around them. I might not even put the rings in. So let's just copy and paste it. 12345678. Yeah, I think that looks nice. And then we can move the second or third shape even to eight. There we go. And then let's make sure it's centered. Nice. And then let's put in a line. So I'd like to put in a line with a rectangle because the line is going to be, well, it is basically a rectangle anyway. Let's make it 49. Actually, let's make it a bit shorter, him width. Let's make it 34 and then two pixels high. And then we'll make it white, will send to it with our circle, 12345678 year. I think that works. And then we can do the same here. We have our first icon. Very simple, very easy, really as simple as that. Lets me, well, let's GUI bill into reminders. So now that we know that our Reminders app.
4. Part 3 Recreate the Notes App: Next, let's do the next step that you see here. So we'll just copy and paste our reminders icon 1234. So to move an icon ten pixels each time you hold down shift, and then you press the arrow key left or right, and it will move it along by ten pixels. Say, let's move along to that, and let's do the knights app. So let's zoom in. We made this desk ness, and then we'll take this shape here. Put it over here, and we shall bring it, although Erlang, nice. So the WhatsApp has sort of come up at the top and then aligned so of the top of the notepad and it has two lines. So you're trying to figure out what would look good here. Maybe we shouldn't actually make it completely full width. The lines, I mean, so we made this one and we'll select our line. Maybe we'll make it so it's 90 width now, let's decrease it by two. So let's decrease the width to 70, center it. And then let's put in yeah, you know what, I think that can work. And then I'll see we have three lines here now that I've copy and pasted. We can change the width between them each by going to the right hand side here and then changing it to what we think is appropriate. I think 12 looks good. I actually also want to change the width of the icons again. So let's bring that down maybe to 60. And then let's send to the icons. Now we are actually think that looks pretty good at it as a notes app. Again, very, very simple. Doesn't have to be complicated. I think this is the main thing. Make icons as simple as you possibly want, especially when you're first starting out making the icons because it's very easy to get over complicated with icons and really get into the design because I know some lichen designers can really spend hours just on one icon when you're first starting out, I highly recommend you're starting out simple with icons like these.
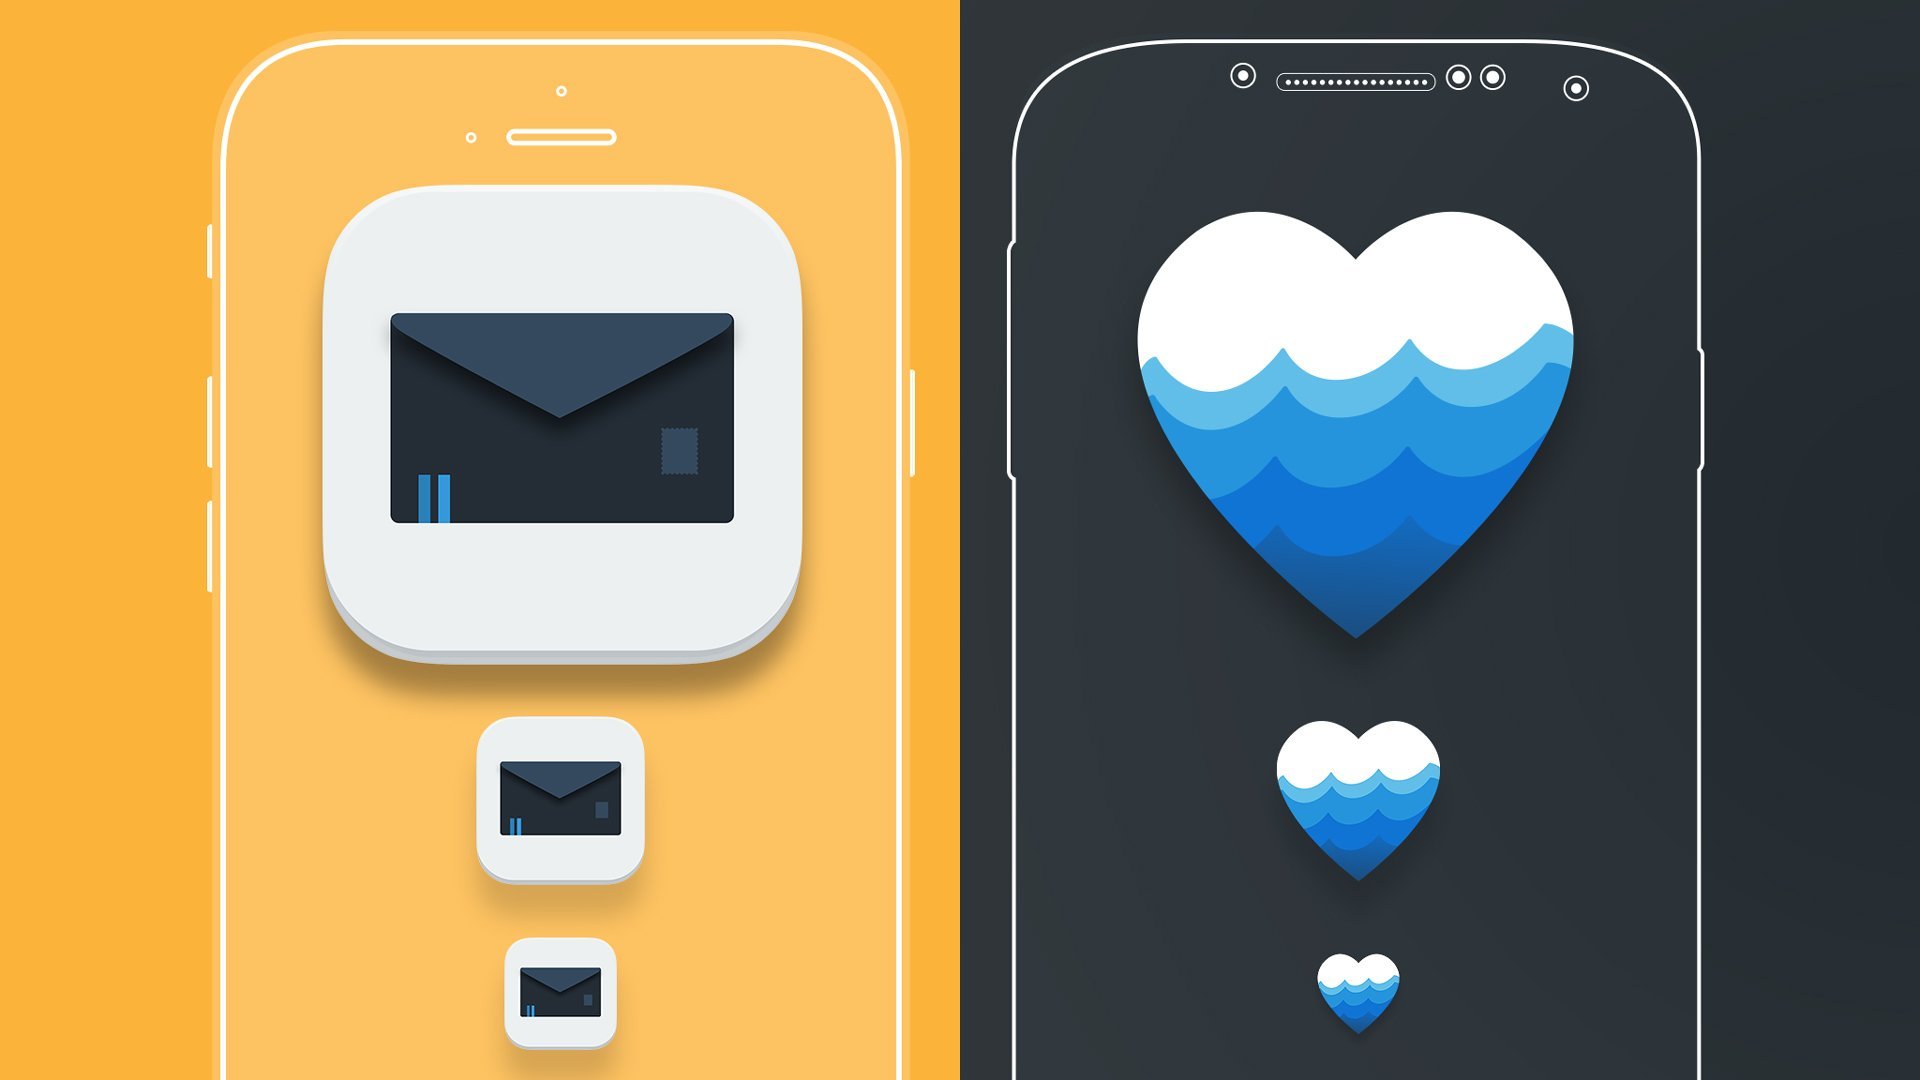
5. Part 4 Make An Icon for Your Favourite App: Now, what if you want to make an icon of your favorite app like Twitter? So what we're going to do is we're going to copy. Actually we need a name, our icon as well. So let's name this one, notes. And we're going to name this one Twitter. So what we do is we search for Twitter, logo, SVG, maybe as probably the best way to do it. We go to bear brown resource of epsilon that I have here. And then we can download the Twitter logo. Once you save the Twitter logo, you're going to want to go back to your FISMA fall, will remove these lines here quickly area. And then we can drag in the SVG file here. Once you have a drag, Dan is quite large, definitely way too large to fit on the actual icon itself. And you can also see the Twitter SVG actually has two shapes in there and their spacing around the actual Twitter icon. So we can remove that shape. We can take the Twitter icon here and drag it into our Twitter icon here. And then we can change the size of it. Oh, I'm changing the size of the whole shape. We actually only need change the size of the vector. Now when it comes to how large the actual Twitter icon should be relative to the icon, that's totally up to you. But what I recommend is if you have shapes like this, like the Twitter icon, and you going to be more icons which are in the middle of the icon itself, is try to keep to the same width and height relatively, so we know that our icon is 90 by 90. Let's change the width of this little icon to maybe 48, for example. Actually, we need to link them so we need to make sure that the proportions are constrained. You press that button here to do that. But yeah, Let's change that to 48. And we can center it will also change the color of it. And yeah, I think that's looking pretty good as a Twitter icon. Now we can see the height and the width of it is different. But as long as we keep to a relative high of 48 and a relative width to 48, whichever side is the longest. I think that's a good way to make sure all of your icons look in proportion and you get a more sort of cohesive and consistent look between them.
6. Part 5 Making Messages Icon: Why don't we do the messages icon next. So let's copy this one. Bringing IVR. And we do the messages I got. So we'll delete the 2s icon inside there, will rename our group. So what we're doing today is we're going to insert a circle. So we can do that by going up here, or we can just press on the keyboard. I had a guy. And then let's make meshes icon. So I'm going very rough here. So I'm just trying to figure out more legs, right? And then what we'll do is we'll bring in a vector. So we use the pen tool here that you can see p. And then what we'll do is we'll make a shape like that. Oh, sorry, you got connected up. But our shape obviously only has a strike. We actually need to give it a fill. So we removed the strike and we'll give it a fill. There we are. We're actually pretty module already there. So then what we do is we take these two shapes and we make them into one. So we go up here and you can do union selection and I'll make the shape into one. Then we can change the color of it to y. Now we are, that is our meshes icon done very quick and easy.
7. Part 6 Export: To export your icons, you simply select each one. Like so. You go to plus on export. I usually like to export them at quite high resolutions. So let's do four times. And then you can do PNGs easily worked best. You export four layers and then you simply save them wherever you like. And it's really as simple as that. You can basically go over any icons, any favorite icons of urine, and copy them. Make them just use vector tools and shape tools to copy them as much as you like. And you can also get brand logos like Facebook, Twitter, Tesla, other logos from the internet. Drag-and-drop don't change the color of them, put them on top of the icon. And that is pretty much it. Of course. It does take time and that's the main thing. It does take a few hours to make all of the icons for all of your favorite apps. But with time, you can do it and you can have whatever sort of lucky like. So I hope you guys enjoyed this tutorial and thanks for watching.
 Oliur, Designer and creator.