Transcripts
1. Collage Paper Alchemy: Are you up for another fun class that will enhance
your creativity? Good. Let's make our
own collage papers and turn them into
little art pieces. This class is perfect for you if you feel like maybe you're stuck in a rut or just maybe today you're
not quite feeling it, but you want to create, or, you know, you just love collage and making your own papers. I mean, we can't have
enough papers, right? In this class, we will find a nice balance between
playful experimentation and ticketing our creativity and learning little
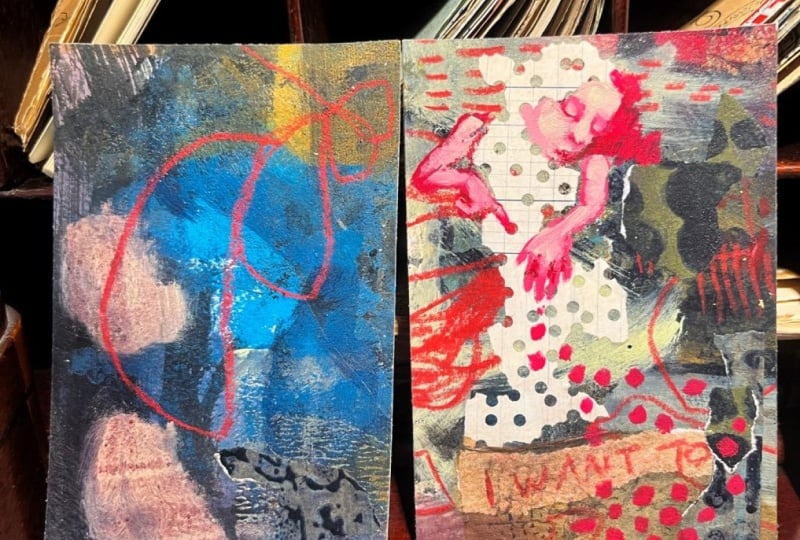
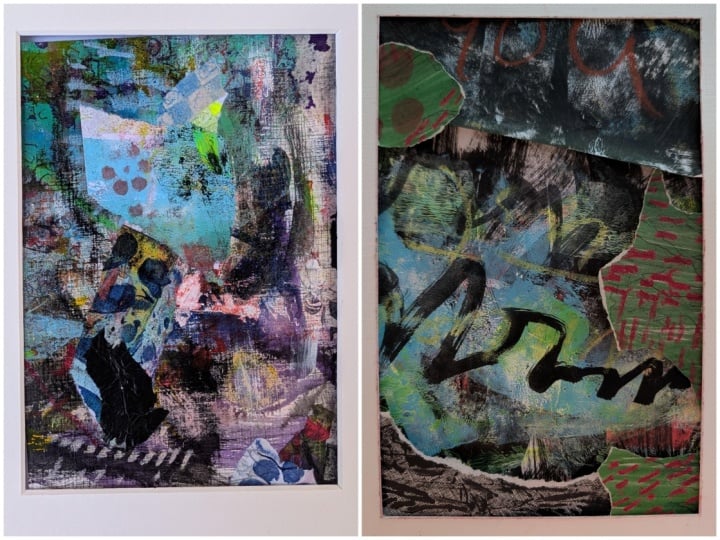
articles along the way. By the end of this class, you'll have a series
of tiny abstracts that you created with the help of your own
homemade collage papers. But, you know, if you're
like me and you love faces, figures, or animals, plants, whatever, you can
sneak them in there. I mean, I did. You'll see. If you don't know me yet,
my name is Journey Marisha. I am a Dutch art teacher
living in Antwerp. I have a background
in art therapy, and I sneakily used that
to make you have fun with your art supplies
while still learning all kinds of things and
gaining creative confidence, overcoming fear filure and perfectionism, you
know, stuff like that. But everything in a really
fun and playful manner. So, if that's something
that you enjoy doing, then join me, and let's
jump in with both feet. Both feet? Oh, my
Dutch. Let's go.
2. Welcome to Class: Welcome to class. So,
about the art supplies. You know, I will put them in the PDF that you can find
in your class resources, but I'm not going
to show you what I've used because, you know, you can substitute with
whatever you have on hand, my lessons on the
collage papers. They are inspirational,
and, you know, just watch them and then do
something inspired by that, even if you don't have
the exact art supplies. And if you want
to do more stuff, then do that, you know, we are free to do
anything that we want, but I do have a little
suggestion for you. Since creating collage papers
is a really messy process, we are going to need a place Mt. And I suggest the biggest
paper that you have, it would be lovely if it's
nice and sturdy because I'm going to give you
a class project to do with your collage papers. And we are going to, just build up nice
layers on this paper. And if you have taken my other class a while ago
called Faint Play Discover, then you can already guess what we more or
less are going to do because we are going to use this as a substrate for
our little abstracts. If you only have a smaller, you know, piece of paper
or it's rather thin, you know, you can still do this, and you can turn this into another fun collage paper
in the end, you know? Just enjoy the lessons and the inspiration and do it
in any way that you want. If you want to art
journal, you know, or if you want to use your journal as a placemat,
that's fine, too. Just tailor my classes
to your needs always, you know, I'm here
to support you, but you are free to
do whatever you want. I'll get off my
soapbux now. Let's go.
3. Paint it Black: Let's keep it simple and just start by playing with
some black India ink. You can use acrylic ink as well. You can even dilute acrylic paint if you
don't have any inks, just as long as it's
nice and runny, especially for this little trick that I'm showing you right now. I'm folding tea bag, and I'm just dipping
it in the ink there, just a little dip because the longer you
leave it in there, the more it will spread around, and you'll just end up
with a black sheet. And now I'm just carefully
unfolding my tea bag, and I'm always surprised by all the different
patterns that I'm able to get just by folding them a little bit
differently each time. And don't overthink
it. Just wing it. Oh, and by the way, I'm not a latex glove
type girl at all, but for this, I
recommend putting some on because
otherwise you will be scrubbing your
nails for days on end. Right now, I'm showing
you what will happen if you are a little bit too
generous with your dips. Right now, you can still see
some of the T bag color, but, you know, it
was just too much, but it's alright
if that happens. It will still be nice and
transparent when it's dry. But, you know, don't
have any patterns. But diversity, right? So don't beat yourself up
if that happens to you. And if you are not in a mood to prepare a whole
bunch of your tea bags, then just take some tissue
paper or something. I just really like that
neutral brown of the tea bags. And if you're up for a
little search online, then you can also find some brown transparent
papers. They're out there. But, you know, these are
fun to make, I think. For this one, I'm also
quite heavy on the dipping, but I try to find
a balance between the first one and
the previous one. There, let's unfold it
and hope for the best. So you can still see it
traveling through that tea bag. But I think this is really nice. So I hope you'll have fun with this and make a
whole bunch of them. Now, I'm going to continue
on some craft paper. I can do some random mark
making, some pattern play. They're always nice
to have on hand. And even if you don't really like them as you're making them, you can always find a nice
spot when you tear them up. These cheap papers are
really nice to experiment on and see how many types of mark making you
can come up with. Or maybe you want to
scroll on Pintrs for a while and search for
pardon play or mark making. And you can use that
for inspiration. And you can play around on all your different
types of paper that you gathered from your home
or maybe Etsy. I don't know. You can use a stick or something
to do some mark making, like we did in art quickies. If you enjoy this class, I think you might love
that one as well. Here I'm using that same
stick on my tissue paper. These are really nice to have on hand when your collages
lack a little bit of linework and you
want to try them out rather than dive in and
bolkly paint them in there. Think of them as your safety net in your creative process. Keep experimenting with
all your different brushes because each and every
one of them will have their own character to it, like this fan brush here. It's a nice way to really
get to know all of them. And for the last step, I'm taking my craft paper, and I'm just making them black with all the
remaining ink, and they can be a nice
and dark starting layer for some of our next projects. So follow me to the next
lesson to play some more. I do
4. Palette Play: Now, we already have some spontaneous marks just
by making our collage papers. But let's take a brush
and play a little bit more so that there's some
mark making across your page. By playing on here, you know, as we go along, we are going to build a
very layered place Mt type of paper that we can experiment
on for our class project. So just play your heart out
and don't try to make it beautiful or anything because a lot of this is going to
be covered up later on. I really hope this knowledge
will help you to liberate your mind and just follow your gut and
have some fun with it. Again, you can take this as an opportunity to test out
all the different types of brushes or other interesting
tools that you have in your home and see what
you can do with them. I'm just playing my heart
out with this one brush, but you can grab your
stick again or feather. You can even dip a string
or something in your ink and drag it across the page that is also
very lovely to do. Just go on a little
scavenger hunt in your house and see what you might want
to use and give it a go. There are so many possibilities. You can even bring
in other type of black art supplies like a
posca pen or a pit pens, maybe some charcoal, you know. This piece of paper
is your playground, and you are free to choose
what you're going to do on it. Have lots of fun, and I'll
see you in the next lesson.
5. Brayer Layers: Okay. For the next step, let's take brayer and some acrylic paint and
just go to town on it. I'm just starting out with a
grungy even layer, even ish. There. No need to cover up
all that beautiful darkness. We like texture. Do as many as you want. And when you're done
with your color, just take your brayer and
move that paint across your big paper so that there are not really big blobs on it. Because remember,
we are going to play with this paper at
the end of this class. And when you're taking
a second color, just put that on a
different part of your paper so that we
can slowly build up many layers and
have all kinds of colors everywhere without them being mixed up and
getting muddy. And just keep playing. And again, when I'm
done with my paper, I'm just moving that blue across the page until my
brayer is somewhat clean. And I'm moving on to the
next when I'm starting off, I just like to do random
things, not overthinking it. Now I'm going to
do a golden layer on top of that red current, and that's nice and grungy. Okay, spreading it
around and moving on. I found some black paper from a sketchbook
that I never use. So since that paper
is rather thin, I thought it's perfect
for this purpose. It's really nice to have a
whole bunch of papers in different colors so that you can experiment on them later on
with different techniques. And that way we can make our collage papers a
little bit more complex. You can use your
favorite colors, but also try to include some of your
neglected paints in there, and maybe they
will surprise you. I mean, if you never use them, then they are only
going to dry out, and isn't that a shame? Same thing goes for
your favorite ones. Just use them up
because otherwise, they'll just end
up in the trash. And see how I am using the side of my
brayer to scratch in that green paint
so that you will see the lighter paint
coming through. I really like doing that. And I don't know if you
have some iridescent or interference
paints lying around. This is also the perfect
moment to use them, especially on those dark papers. I'll show you right here. The iridescent paints have
a nice shimmer to them. And the interference paints, they have a couple of different colors
in them depending on where the light hits it. Those are also really
interesting to play around with. And especially with
these collage papers can be a little bit more tricky to use in a proper painting, unless you know
what you're doing. So let's just play
around with them here, and again, we can
get to know them. Right here is that interference paint that I was talking about. So I'm just going
to put it on there, and then I'm just going
to br it on there. See? That is such
a magical color. You really have to
see it in real life. And there's still a
little bit of blue in my brayer because I'm working
quickly and I'm impatient, and that just makes it a bit
more interesting still, see? I had the feeling that
the interference paint loosened the dried up paint
in my brayer, as well. So if you don't want that, then really clean your brayer first before you are going to use
this. But I rather like it. I will include this art supply in my PDF that you can download
in the class resources. So, you can just look it up
and see if it's for you. And when you're done with preparing all your
collage papers, just take your prayer again
and spread that paint around. Really get every blob
that you can find and just have a
little play session and then come along with
me to the next lesson. Come on. I know you want to.
6. Stencil Patterns: Now, let's fool around
with some stencils. I'm using store bought stencils, but if you don't have them, you can always take a
sturdy piece of paper and an exacto knife
and make your own. But as I mentioned before, I am impatient, so I'm just
going to use a few of these. I really like the
pattern ones because there are a bit more abstract. You can use your acrylic paint or ink or whatever
directly on them. But I have wet my sponge and then dipped
it in the acrylic paint because I like the
fluidity so that I don't get these crisp
marks on there. I like to be a little
bit more messy, and I will show you what that looks like in a
couple of seconds. I'm using Pains gray right here because I love lots of contrast. But you can also choose a color that is closer
to your background, and then it will be
a bit more subtle. But I like things
to be in your face. Now I want to clean my stencil, and I'm just going to put
it on my big paper and take a baby wipe or you can take a paper towel or something and just clean it a little bit. And that way, we are adding
some marks on our big paper. There, I'm stamping with my baby wipe just to get a bit of interest
on there as well. This time, I am using my sponge a little bit drier
than the previous one. There's still some
water in there, but not quite as much as before. And I just want you to see
the difference in vibe, a little bit more
and there it is. It's still kind of fluffy, but the shapes are more
separated this way. I like to do a couple
of them in a row. If you want to, if you
let one of these dry, you can always go back in with a brayer and some transparent
paint or something. And I think that might
look cool as well. I just wanted to keep it
very simple for this class, but you can mix and match the techniques that I'm showing you and experiment that way. Now, for this one, I'm using a lot of water and
very little paint. And this turned out to
be my absolute favorite. It was on top of the iridescent one or the one with the
interference paint. So there's a bit of shimmer
and lots of texture, and the shapes aren't
really recognizable anymore as if you have used
a stencil on them, you know? And in between, I'm giving my big paper a
little bit of TLC. I'm just moving around that
sponge to up some contrast. We need contrast to find
interesting compositions. Now, let's layer our stencils. I'm taking some lighter paint, and I'm putting this stencil on top of the previous pattern. And I also really
enjoy this one. So I want to challenge
you to be creative with this because I'm just here to
give you quick inspiration, but I'm sure you can come up
with even more fun stuff. And again, I'm taking my sponge and I'm just
doing some mark making again here and there before I move on to
the next technique. Are you coming along? Let's go.
7. 05 Favorite Color: For this step, take any
drawing tool or painting tool, whatever, in your favorite
color and just have some fun. I'm starting out with my Sharpie on some book pages that I
covered in white gesso, and I didn't really like it. So I'm continuing with my
favorite neoclor crayon. Usually, I like to draw
with the two series, which is water soluble. But for this, I really
like the one series, which is not because I like to glue my papers on
with matte medium. And if I use my water
soluble crayons like these, then my mat medium
will reactivate my markings and
most of the time, I don't really want that, so that is why I'm choosing
the non water soluble kind. But I will demonstrate
the difference for you. So right now I'm writing with my water soluble neocolor
crayons from the two series. Now, let me get some water, and I'm going to spray
both of these papers. I'll start with this one, taking my baby wipe or, you know, any other thing. And one I can't reactivate
and this one will move. So if you want some
gruniness to them, then they are perfect. But just be sure to use a
fixed display suitable for watercolors after you have created your collage
paper like this one. So you just gave it
a couple of sprays, and now it's protected. Now, let's have a little
play session with our favorite color because you can't have enough
of that, right?
8. Stamp That Thing: Gather all your stamps, and let's go to town. If you don't have
any, I will show you an alternative
later in this lesson. As for your stamp pads, make sure that they are
archival so that they won't move on you when you
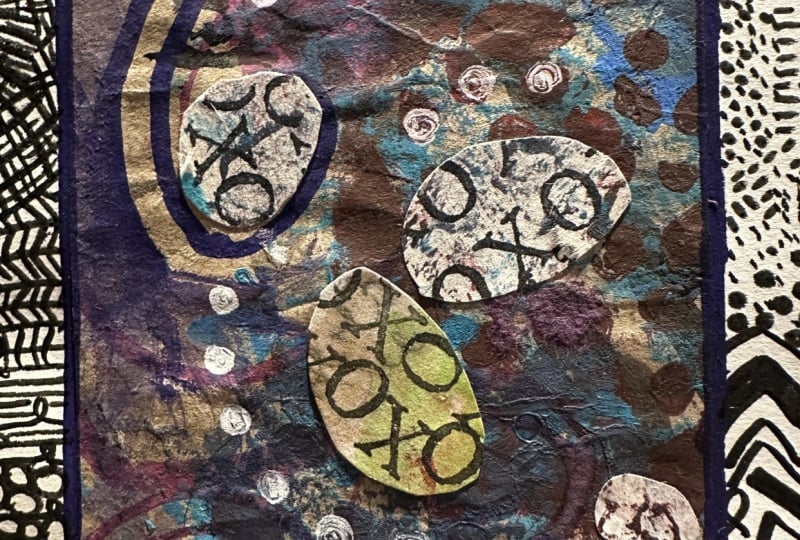
try to glue on your papers. And something I really like
is using alphabet stamps. So this is just an O, and I like to only reload my
stamp every other couple of stamps because I like
the variation in the darkness of the ink that will make it
look nice and grungy. And in between, you can just
stamp on your big piece of paper as well just to add
a bit more interest to it. And do you notice? Because
my t bags are transparent, I'm getting some nice transfers on the paper that was
lying underneath as well. And I'm taking a
potato cut in half, and I'm using that
one to print on here. I really like those textures. You can also cut it in several different
shapes if you want to, like some kind of a
low budget linocut. But I really enjoy
these circles. Did I mention I'm impatient. Let's do a couple more of these. If you don't have any ink pads, you can just rub some
regular inks on your stems or you can even use acrylic paint, work
with what you got. Now for the next one,
I'm trying this green, and I'm not really fond of this. I like more contrast, so I'm just going to offset the circles with some
red ink on top of that. And now I rather enjoy it. So if you're underwhelmed
by anything, just do something else on top of that and see where
that will lead you. And for this one,
I'm going to place my potato in between all the
previous circles as well, and that will give you a
nice different pattern. So be creative. Let's get this stamp on here. Because the T VCs are so thin, I'm going to place them on there and just rub a
little on top of it, and that will give you a clearer print than
the other way around. And now it's your turn. Just be as creative
as you would like to be and try out
all the things. Let's have some fun and
go to the next lesson.
9. Asemic Writing: In this step, let's play
with asemic writing. This is just making some movements that look like words, but
they really aren't. If that is difficult for you, you can just write
your thoughts very, very sloppily and quickly
like I'm doing right now with my ink
and my bamboo pen. This is actually my favorite way of creating collage papers. Artists use asemic writing to escape the pressure
of perfectionism, to loosen up their
hand movements, or to just overcome
writer's block. And as a bonus, the repetitive
fluid motion of making these abstract marks serves as a meditative or
therapeutic practice. So it's really calming
for the mind as well. You can try out different
styles of asemic handwritings, and you can try out
different art supplies. I'm using a crayon right now, but if you have
some brush bends, that could also be
really awesome. You can continue on your collage papers that you built up in the
previous steps. And right now I'm just
wetting that collage paper. And I'm using one of my ink tens pencils because when you write on a wet
surface with them, they really bloom out. But do be mindful of the fact that they will dry lighter than you see right now. I hope you'll take this
inspiration and just experiment and try to find out
your favourite way of this fake type of writing. I think you'll love it. Now,
let's go to the next lesson.
10. Inks & Watercolors: M I know a lot of you guys
really love your watercolor, so let's put them to work. And since I've seen how many awesome things you
guys have made with them, I'm going to keep this
short and sweet and trust in your skills that
you've built on here. And I'm just going to do a
couple of simple circles here on this copy paper
with my acritic ink. You can either copy
me or you can use your favorite techniques of the classes that you've
learned on here. And you can use them just
the way that they are, or you can do some
semic writing on top or some other
type of pattern play, whatever you need to do to
make this really fun for you. And don't get too fussy with your geometrical shapes because if they would be too perfect, then you wouldn't even know that your collage papers
were homemade, right? So let's ditch that in a
critic and just go for it. And here's another
technique that we did in the art
quickies class. You take either a
transparent oil pastel or acine light or
something like that, and you just make a couple
of shapes just like this. It's really nice not to be able to see what
you're actually doing. That way, it's always
a bit more surprising. And then we're going
to take some ink or watercolor and go
over it like that. And wherever you
made your marks, the paper is going to resist
your ink or watercolor. And if those droplets are
a bit too intense for you, then you can just take some
paper towel and blot it. And then you're left with
something like this. It's really fun to use papers that already have a bit of
writing or drawing on them. And if you would like to include a word in
there or something, you know, it's the same
thing, put it on there. Put your ink or
watercolor on it, and a. Now, you can be a little more heavy handed with your paint or ink
in some places. So there's a bit of
variation in there. And instead of blotting
the whole thing, you can also just touch the parts that you want a
bit cleaner, and that's it. I hope you'll have fun with
your running art supplies, and don't forget to play on your big piece
of paper, as well. Especially the acrylic inks
are really nice to tone down some of those lighter
paints on your page. Let's go.
11. Putting Holes in Happiness: Yep, you guessed it. We're going to put some
holes in our papers. If you don't have one of
these, that's no problem. Maybe you have one of those scrap booking
tools, you know. They come in all kinds of
shapes. Those could be fun. Or if you don't
have any of that, you can just take
your pencil when it's rather sharp and poke
some holes in them that way. Or if you're outside and
not as clumsy as I am, you can even take something like some incense or something and burn the
holes in the paper. But be careful. I don't
want to be responsible for you burning down your
place or hurting yourself. So use it with caution. Or maybe you're really
into administrative tasks, and you have a hole punch,
I think you call it, right, to put your
paper in those maps. It's pretty much the same thing. I think a lot of you
will have that on hand. And it's really fun,
as you can see, if you slowly tear the paper wherever those little holes are and make all kinds
of fun shapes. It's easy to get more surprising shapes
in your paper, I think. And later in class, I will show you
how cool they will look when you use them
for your collages. Really add some interest
and texture to your pages. Personally, I love very
neutral pages to do this. But if you're a colorful person, then, you know, get something you like
and see how it looks. Oh, and this is another great
exercise in mindfulness. So if you are in need for
a bit of stress relief, then let's cause
some destruction.
12. Little Abstracts: When you are happy with
all your collage papers, it's time to prepare our big placement paper
for our class project. This part of class might seem familiar to you
if you have taken my class, paint, play, discover. In that class, we were working more figuratively and we were really trying to find stories
or figures in the paint. But for this class, we'll keep it abstract. So take a frame like
this and just move it across your paper
and see if there are compositions that you're surprised by or
just really love. This one. And then you can take a water soluble
drawing tool like my new color crayons that I'm using right now,
surprise, surprise. And then you can just mark it. I really like to use these crayons because
they're very easily removed with a baby wipe or
just a brush and some water. And don't rush this process. Just take your time, ask yourself, do I
really like this? Or maybe I want to
see something else? Sometimes two compositions that you enjoy or more will
overlap each other. And then it's really a matter of making the choice that
makes you the happiest. And there is no right,
there is no wrong. It's just a little exercise
in making decisions. And making decisions, it's a really important
skill for us to learn because when you
create art, it's all you do. Do I like this? Would
I like to do that, or would that mess that up? You know, we are
constantly making ourselves crazy with
all these doubts. So this is a really
important exercise to get to know the
things that you like, that you enjoy and having the courage to
take action upon that. So don't question
yourself too much. Just make some decisions and move on with me
to the next lesson. Are you ready? Let's go.
13. Cut it Out: Now, this step is
pretty straightforward. Just cut up your compositions. If you have a paper
cutter like this, it's really handy
and goes quickly, but, you know, a
scissor will do. Or if you're clumsy like me and you're thinking, scissors, Nah we're not friends, then you can always use an exacto knife or
something and a ruler. And well, that's it. I don't think I can give you
more instructions than this. Just get it done and meet
me at the next lesson.
14. Class Project: So, now that we have our
stack of tiny abstracts, let's go through them for a little while and see which
we already like as they are. And which of them can use some help from our collage
papers we just made? And let's start with
our least favorite, you know, to warm up a little. This is mine. And ask yourself, why do I dislike it? For me, in this case, that is because it
lacks contrast. So that's why I'm getting these, you know, very intense
collage papers. And because they are transparent for a little bit, anyway, I thought it would
be nice to cover up the hideous part that still has some mark
makings underneath. So I'm taking my met
medium and a flat brush. I'm putting enough
of the medium on there to prevent air
bubbles showing up. And then I cover it up while I'm smoothening is that a word
smoothening out the T bag. I already like it more
than I did before. So let's see if we can find another collage
paper that can bring some more interest to
our first project. In fact, let's choose a couple that we think we will
enjoy putting on there. Don't commit to the very
first collage paper. That way we can compare the different impact
the different papers will make on your
little abstract. That's always a very
interesting exercise. And ask yourself, why do
I like this the best? For me, I enjoy, of course, the one with the most contrast
because that is my jam. And maybe your jam is
something else completely, and you'll never know if
you don't experiment. So I'm trying out a
couple of options here, and then I decide that I really enjoyed the
first one that I grabbed. And one thing I could learn from that is that
I can trust my gut. And that's also a
very important thing to learn as an artist. That doesn't mean you
need to trust it blindly, you know, experimentation
is always very important. But so is gaining
self confidence. And I know that for a
lot of us out there, that can be a little
bit tricky because, you know, the inner
critic is always so loud. But when we achieve little wins, little experiences of success, slowly over time,
your self confidence while making art
will slowly grow. And this exercise is really nice to create a whole lot of
little success experiences. And you know what they
say, the more the merrier. So let's play a whole
bunch and just have fun. The goal is not to create
genius pieces of art. We're not going to
create masterpieces, or maybe we are, but
it's not the goal. The goal is to try and improve your tiny
abstracts in little ways. You know, all we're
looking for is that they will become a
little bit more interesting, a little bit richer
than they were before. And did you notice
that I started out quite hesitant, very shy, just adding two bits of
collage papers to my abstract. Well, this time, I'm going to see what will happen if I am combining way more of them and layering them
on top of each other. Let's see. Yes, let's
add some words in there. Just try a couple of places.
Maybe I want it here. I don't know. No. Or maybe this. Yeah, I really like the paper with all the
little holes in them. Okay, and evaluate. Maybe I want a couple of them. Yes. I'm trying to find
a nice composition. Again, we're not
looking for perfection. Just needs to make us
a little bit happy. I think I want to follow
the rule of odds so that I have an odd number of the same type of
collage paper on there, and I really enjoyed that. For some reason, our brains like odd numbers more than even
ones, and I don't know why. But it really helps. Try it out. Okay, next, I think
I would like to extend this shape with
a similar color there. Yeah, that brought
a nice balance between the darks
and the lights. Let's put some texture in
there and a bit of yellow. Yep. I also like that. And I'm thinking I want a
bit of rhythm in there. So I'm tearing up these pages. If you would like to
learn more about rhythm, there is a lesson on that
in my art quickies class. It's the rhythm and blues
lesson, if you're interested. And I can hear you
thinking right now. What about the rule of odds? First of all, rules are
there to be broken. And second of all, this is kind of an extension of that shape that
was already there. I would still like to
experiment with a bit of text. Let's see. Somewhere
around here, maybe. Let's try on. Hmm. I'm not sure yet, but I'm
just going to continue. We just need to accept that
sometimes we don't know, and it's fine to keep moving, and then later on, we can adjust things. We can pull it off or like here, I am thinking maybe I want to put something on top of that to push it into the
background a little bit. Yeah, I like it better this way. I'm going to put something on
that remaining piece there. Yeah, much better. And I think I will repeat that collage paper a couple
of times on my tiny abstract. Yeah, something like that. And I'm going to be
honest, for this one, I really didn't know
what to do with it. I liked the shapes too much, so I was too hesitant
about covering them up. And I tried to bring
something back by tearing my next this
one collage paper into a similar shape, and I'm trying to
overlap it here. And I'm not too fond of that, and I didn't listen to my gut. So I kept it on
there and I thought, whatever, we'll go to the next. You really need that type of mindset to continue to make art. Otherwise, you will
drive yourself crazy and you will put yourself down trying to
convince yourself that you're not an artist or
not creative or anything. No, every artist has their
hits and their misses. It's just part of the process. So now you know, and I hope that that will help
you to just relax. And sometimes you'll have something that you
really like as it is. So you can choose to either just keep it like that
and go to the next, put it in a frame or something, or you can try to find pieces of collage papers that kind of blend into your
background like this. Let's do another one like this. There, it doesn't
really blend into the background like
the previous one, but it's still really subtle and it adds a
bit more interest. There, don't be stingy
with your mat medium. Otherwise, it will curl up. You know, it's going
to be a hassle. Here I'm trying another piece of the same collage paper
for some cohesion. See, you can barely even see it, but it's better than before. There. Yeah,
something like this. I'm just covering
up all the bits that are just a tiny bit ugly. I hope this helps. Let's move on to the next one.
15. 13 BonusProject: I thought maybe it would
be a fun little bonus to show you how I created my
thumbnail for this class. It's no rocket science. You just take your
leftover papers, and you do a little
puzzle with them. Just move your papers around and see if you like how they
interact with each other. Again, there are no rules. There's just what you like
and what you don't like. And you keep moving them around until you are quite happy
with what you're seeing, and I'm not there
yet, obviously. Do you see that middle
part at the bottom? It's just too closely to that
other yellow ochre paper? So I'm just going to squeeze in my tea bag
with the ink on there, and that is so much better. And of course, you can keep
the papers as they are, or you can adjust them by
ripping off some other pieces. And little changes can change a lot for the composition
as a whole, actually. Let's see if this piece of paper will look good
on there somewhere. Yeah, maybe. When you like your composition, take your phone and
make a photo of it so that if you would like to actually turn this
into a piece of art, you know where what goes more
or less because trust me, you will forget really quickly. And if you want to, then do
another quick play session. Here I'm trying something
a little less busy. And I think I prefer this
one over the last one. Just a couple small
tweaks here and there, and I think I'm done. So let's take another
picture, and that's it. I hope you enjoy this bonus, and I'll see you
in the next video. Almost there.
16. Your Turn! Plus some Tips & Inspiration: Well, I hope that
was fun for you. Now, if you are really happy
with your tiny abstracts, then your journey is over. I hope you enjoyed it. And if you did, I hope you
will leave me a review. You know why, you know, and also because I really love to see your thoughts
on my classes. But if you look at some of
them and you're thinking, M, they could be
more interesting, there are a couple of
things you can do. First of all, you
can just work on it, um further in an abstract way, maybe you want to add
a bit more contrast, bring some darkness or
lightness in your piece, depending on, you know,
what it looks like, you can add some shapes on
top of your background, you know, if it's lacking a
little line or something, you can use repetition,
different art supplies. You can bring some contrast in there using color. So, for example, in this piece, it's mostly yellow ochre. So what you can do is you can
take a little color wheel. They are very cheap in
the art supply store. I really encourage you to get one because they're
so lovely and helpful. And you can see which color is dominant
in your painting and then go to the opposite
color on your color wheel, and you can add that to it. And then a little mark making.
Doesn't need to be a lot. And I know a lot of you enjoyed my class leisure
muse is very much, where we found the figures
in the watercolor shapes. And you can do a similar
thing, you know, with these as well,
like I did right here. It was a really fun project. And I only use two colors to
paint this little figure. If you would like to see me paint her from
start to finish, I will put a link in my
PDF with your supplies. And then you can watch it on my patron if you're
a free member. So it won't cost you a thing. And every now and then, when I have some extra
time on my hand, I will inspire you, you know, in many months to come. Whatever you do, I hope you'll
have fun, and I really, really hope that you will
upload your class project to the classroom because I
am so incredibly curious. And it's also very inspirational for all the other students, and I love how supportive
you are in the commons. And I think that's it. Yes, I've talked enough. Now it's your turn to make art, and I hope to see you in the future or in
my other classes. And I wish you
happy creating. Mm.
 Jerney Marisha, Making Art Fun Again