Transcripts
1. Art Quickies: Stay Creative on Busy Days: If you are looking for quick and fun art projects for those busy and low energy days, then you're in the right place. In this class, I will
guide you through simple and playful projects that are designed to help you
create without overwhelm, perfectionism, or needing
hours of focus and energy. These exercises are all about experimenting,
loosening up, and reconnecting
with your creativity in a way that feels
doable and enjoyable. If you are a beginner, a busy creative, or maybe you are
recovering from burnout, anyone struggling with
creative blogs or artists who simply want the softer and more relaxed approach to making art, this class will be
perfect for you. Hi, my name is Journey. I am an artist and a creative teacher with a
background in art therapy. I work a lot around expressive
and intuitive practices, and I create classes
that focus on the process over perfectionism
and the end result. And what I love to
do most of all, is to help artists build
creative confidence through playful experimentation
and self expression. And another thing, this class
is very beginner friendly, but at the same time, I also like to challenge
you so that it will not get boring and it's also interesting for
more experienced artists, and it will give
you lots of tips on how to use your supplies
for mixed media. If that sounds like
music to your ears, let's get coffee, grab
our art supplies, and mix some art together. Come on, let's go.
2. Class Project: Welcome to class.
Before we get started, I thought I would suggest
how you use this class. Of course, you are very welcome to do all lessons and
have some fun with it. But, you know, this is
a class for people with a busy schedule or maybe some overwhelm
going on, low energy. So I want to take
the pressure off. And I'm going to tell
you that it's okay to just upload one quickie
as your class project. And see this class as
more as a library, as opposed to something
you have to finish. Just watch the
lessons and try to find a quickie that suits
your mood, your energy level. And the amount of time you
have on your hand, you know? There's no pressure whatsoever, and I know that I'm using lots
of different art supplies, but that doesn't mean
that you need to run to the art supply store to
be able to do this class. In the class resources, you will find a
little guide where I explain about art
supplies that I'm using. And I give some suggestions on how you can substitute them. So don't stress out about it. And we will do a little
bit of everything. We will experiment with
collage, with mixed media. I will give you lots of tips along the way on how
you can use them. And we will close the
class with a couple of ar therapeutic exercises that will help you to
ground yourself. So whenever you need them, you can come back
into this class. They will help you to calm down and regulate
your nervous system. And I think that's it.
Let's make some art.
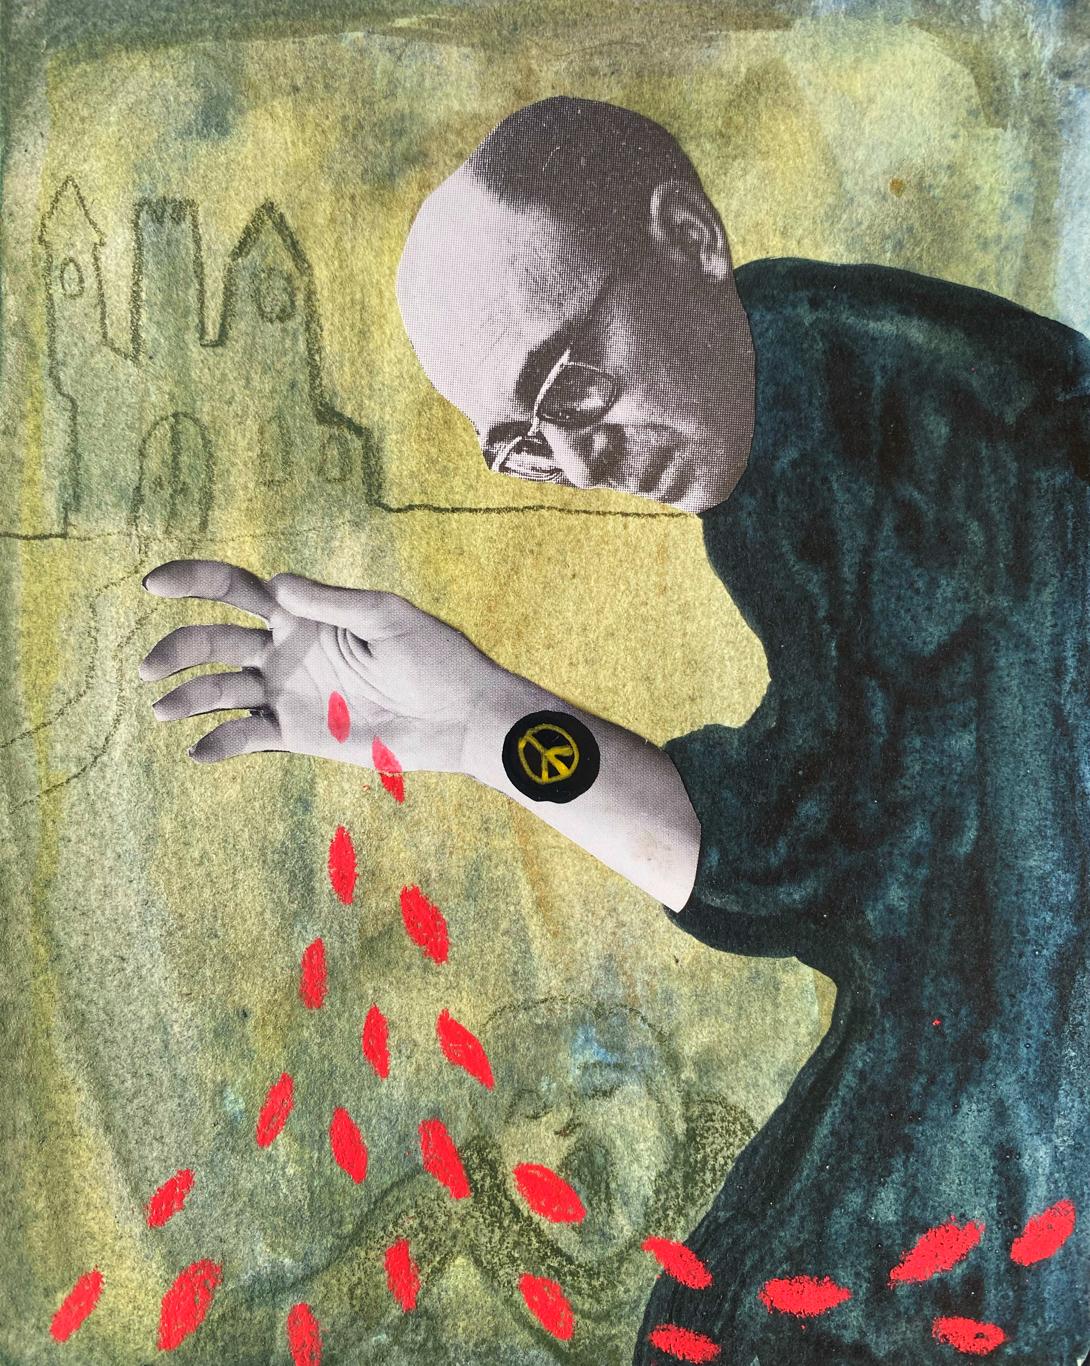
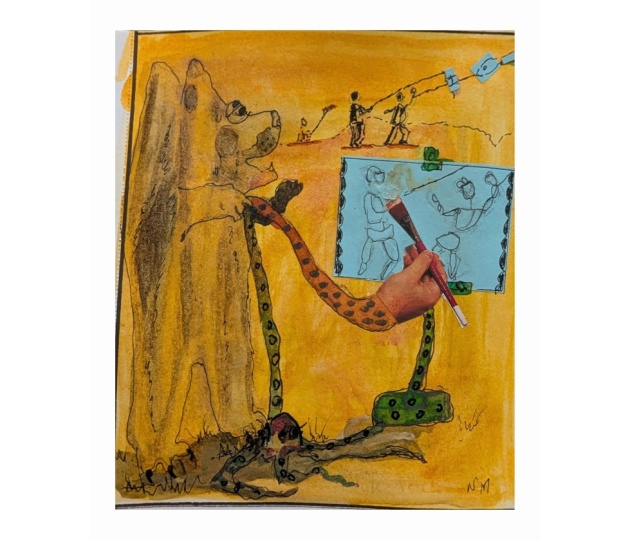
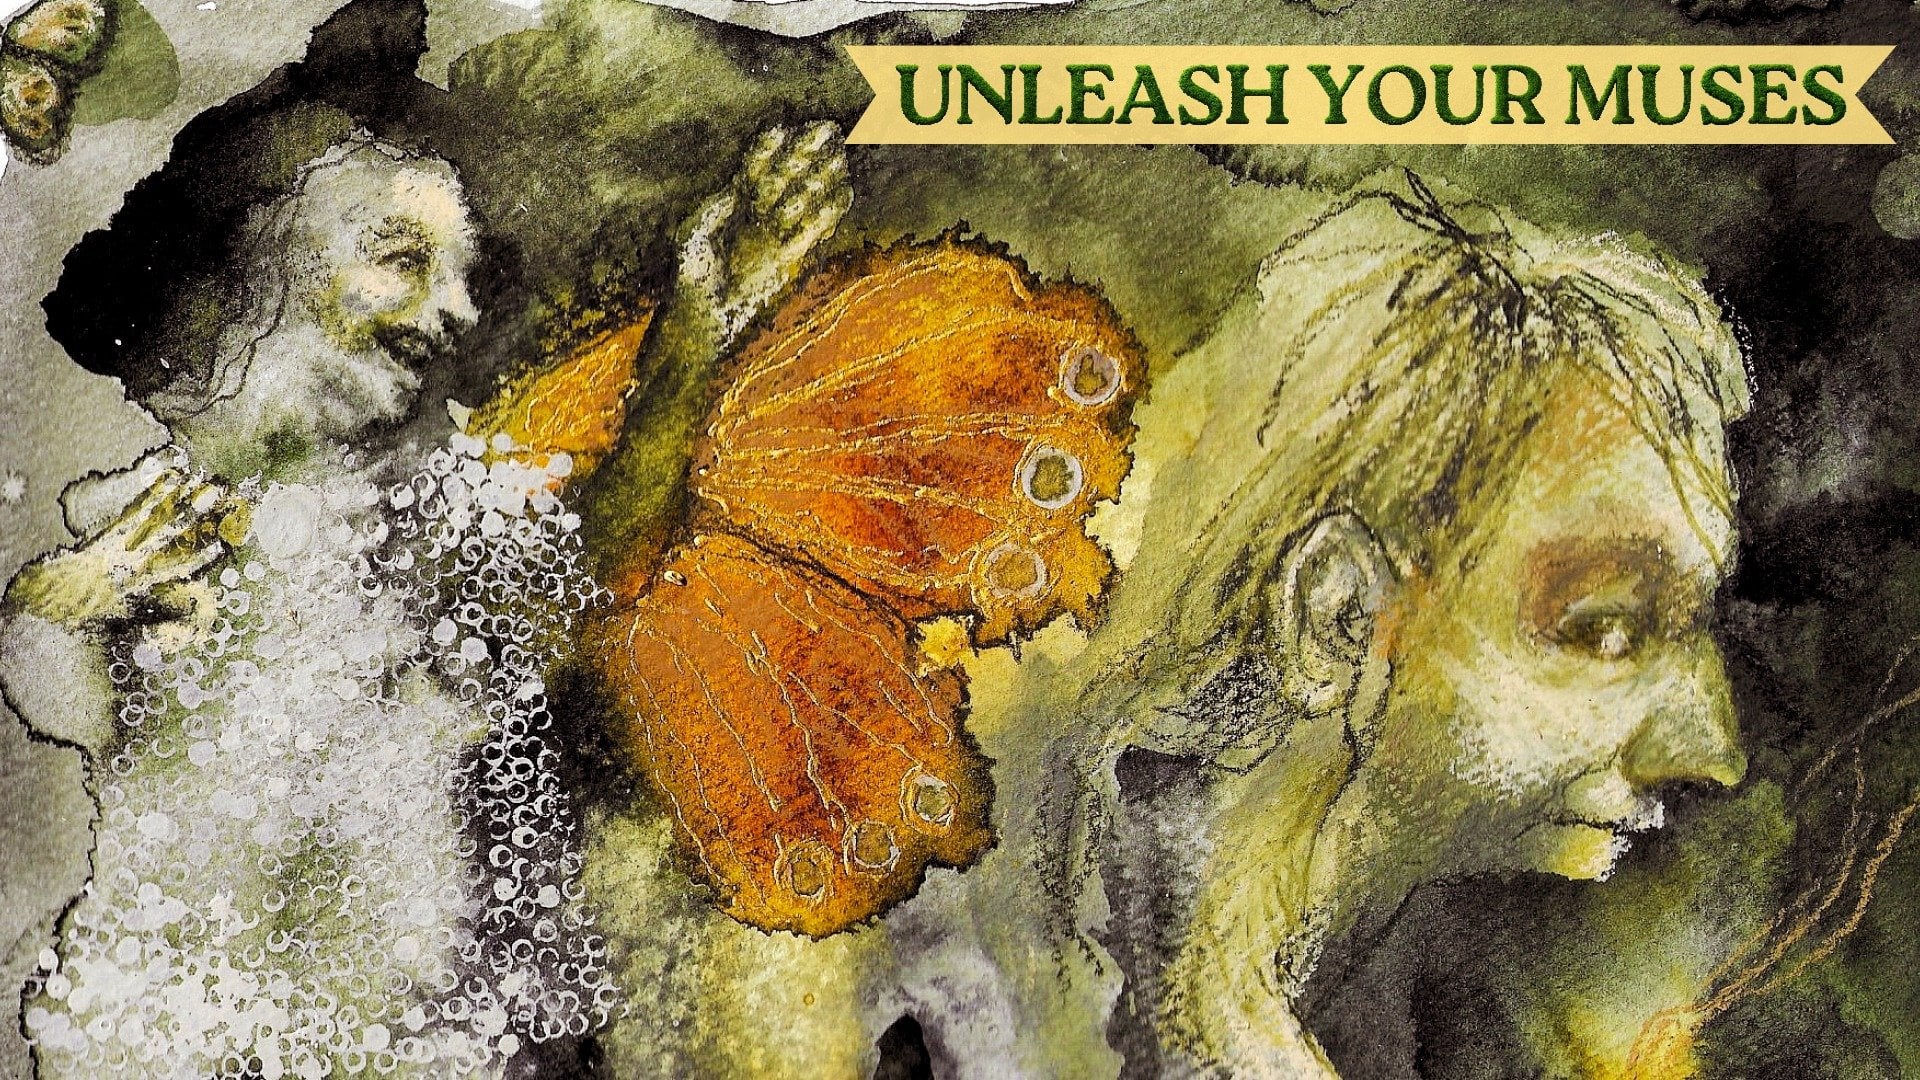
3. Kickstart Collage: Let's kick start a bit of storytelling using a
couple of collage pieces. I'm just using this
face and a hand, and I am moving them around on the paper to see if it sparks
some inspiration inside me. But you can use
anything animals, architecture, natural elements,
anything that you enjoy. Okay. Now that I've
found my position, I'm just going to start by
layering some watercolor, so that I have a bit
of a background. If you have taken
my class unleash your muses on creating intuitive watercolor
backgrounds that inspire, you already know that you
don't have to be very neat because little
pools can um, can turn into blots that inspire you to draw
something on top of them. Just let the watercolors
dry how they will, and maybe your eye will
find something a little piece of a building or
an animal, anything. Now, when I'm done
with my first color, I'm going to take
my collage pieces, and I'm going to see if I like
them on top of this color. And I decide to work on
it a little bit further, not only because I'm not
enjoying the color on its own, but also I don't see
that many shapes to help my intuition find
something in the paint. And we need a bit of
contrast for that. So I'm taking this
darker blue and some more water so that
it can really flow. And I'm just going to do
a layer on top of that. And when I'm done, I'm going to take
my heat gun again, and I'm going to make sure
that it dries because I want those pools of blue
to stay where they are. And now I'm taking
this golden color. And as you can see, I'm
being really messy about it. Oh, it's all fine. If I wouldn't have
liked it so far, I would just continue to
build on layers of the paint. But for me, personally, this is enough to have
some laid back fun on it. Okay, let's try it again. And let's find that decision. And then I'm going to just paint a very simple body
using my acrylic ink. I think this might make paints gray because it's
my favorite color. See, you don't need much. This is very sloppily
painted and very simplified, and it will do just fine. And because I wasn't
being careful, there was a drop
landing on his arm. And, you know, if I
didn't like that, I could just cut it off or, you know, use something else. But I think it landed
perfectly to add to the story. So, you know, sometimes you
just have to roll with it. Now, it's time to
glue everything down. Just using a glue stick, but if you want to, you
can use the MT medium. Well, this is fine for now. It's just a bit of playtime. Now, let's put something on
that happy accident there. I'm taking my gel pen, and I'm just trying a
little peace sign on there. And I'm thinking about
what he might be doing in relation to
this little symbol. So I'm putting some seeds of peace coming from his hand
spreading across the page. You don't need to
know the whole story before you are putting
down these features. Just take it step by
step, have some fun, and maybe put in something that doesn't
make sense, you know? That kind of ambiguity
can be very exciting. So don't feel like your story
needs to be very clear. It doesn't have to make
sense to you, even. Or subconscious is
funny that way. Sometimes you will
make a drawing and you don't really
know what it's about. And then a week later, you can see that something was bubbling
beneath the surface, and this was a way
to process that. And did you see how
I transformed one of my messy spots in my
background to a story element? That's the upside of messy
watercolor painting. There are always
alternative ways to use your art supplies. So if you don't like
your watercolors because you're not fond of how they react and you have difficulty to control
them, try it this way. Use them for play. And just continue to respond to the page. You can keep it as
simple as I did, or you can make it really
busy and colorful. Do whatever it is
that you enjoy doing, or you just want to try out. This is also a great way to find inspiration for paintings
that you want to do later on. Maybe this art cuiqut
inspires you so much that you want to create a painting out of that without any collage parts. You can use it as a
reference photo and use that as inspiration and
maybe you will take it further in your
painting, you know? Or maybe you will
leave stuff out like this little fellow gobbling
up the seeds of peace. Although I really like them, but maybe you'll want to create
them in a different way. But above all, this is just a fun little
experiment to have a bit of creating time whenever it feels
hard to get started. And you can play with
this concept whenever you want to using
different features, different collage elements,
different techniques. Maybe you want to
do this on top of acrylics or alcohol inks. I don't know. You can also just collage everything if you're insecure about your
drawing skills. The most important thing for our well being is that we
create, not how we create. So let's find ourselves
some fun collage papers and find the stories that
are waiting to come out. Now let's go to
the next quickie.
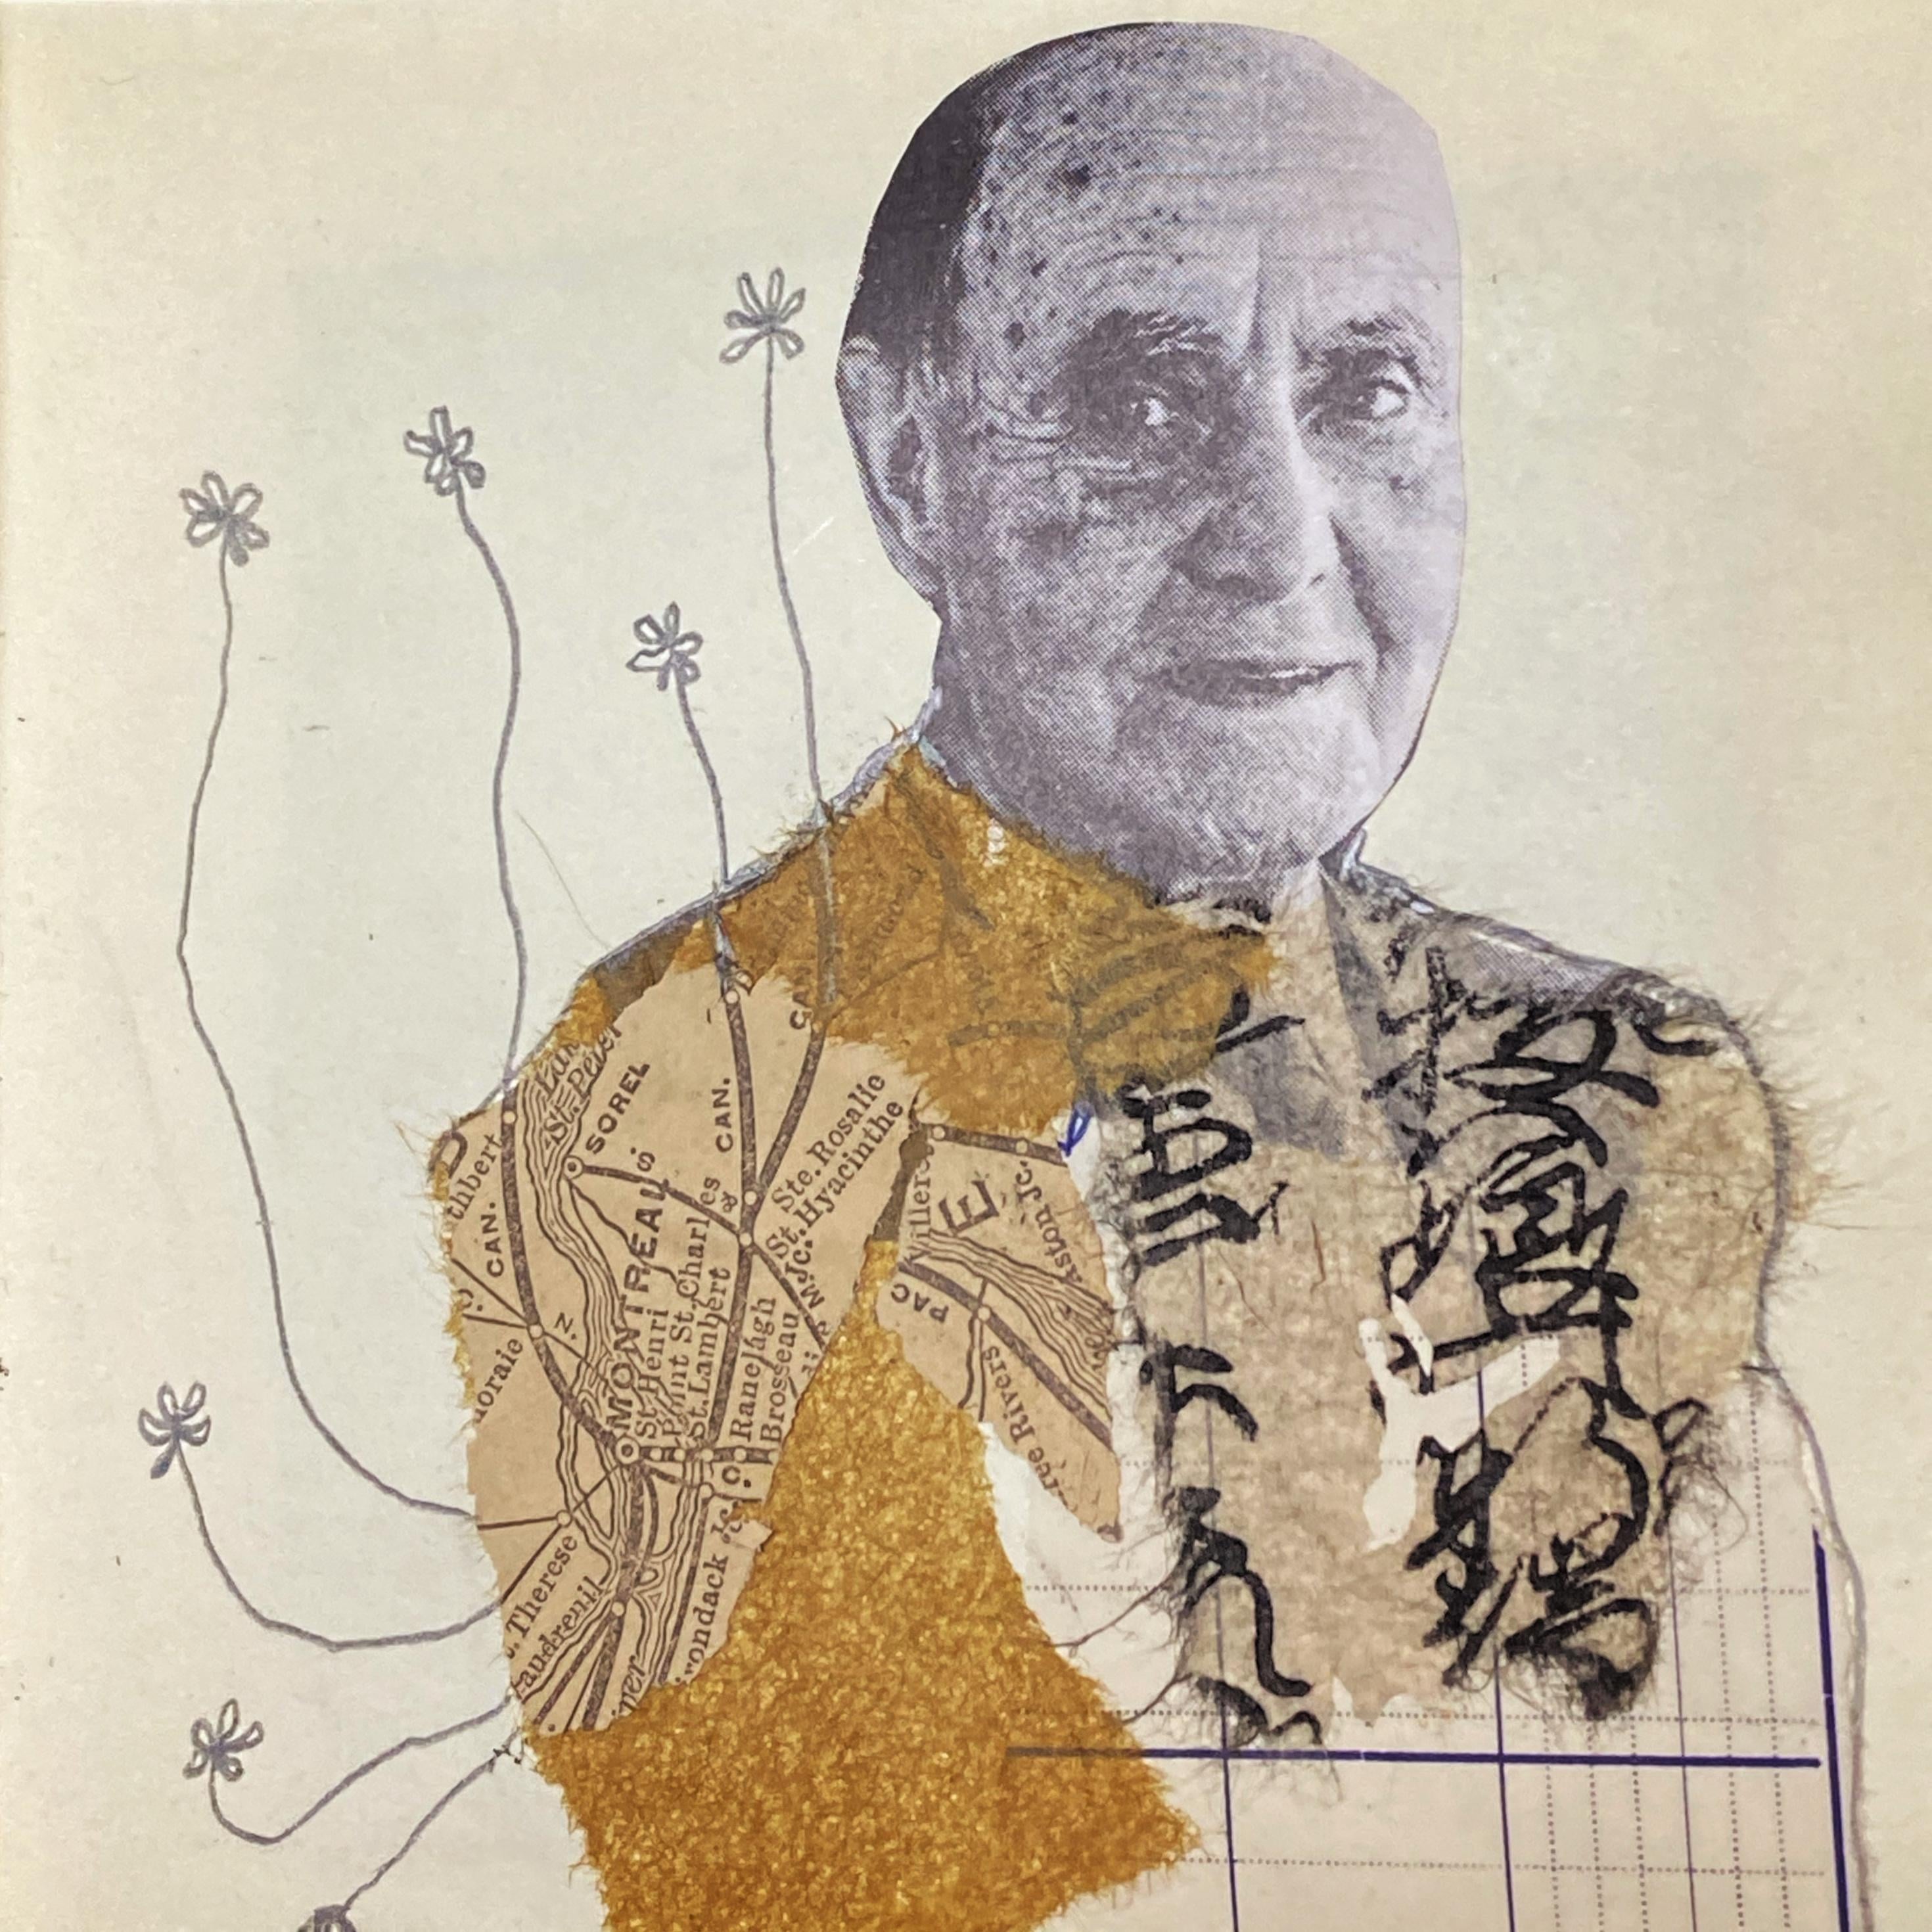
4. Patchwork Portrait: A fun way to have a
bit of relaxing art is to find yourself a portrait in a magazine
that you enjoy. Just stick it down there and do a bit of patchwork
collaging on it. If you want to make it
a bit more challenging, you can do a little pencil
drawing of a portrait, you know, like we
did in my class, small portraits, big progress. Or you can flip through
your own sketchbook and find yourself a portrait
that you want to expand on. Just see how you
feel today and what you're willing to do and how
much time you have on hand. And then just look around for some collage papers that
you would like to use. I really like these
neutral pages. I'm a sucker for them, and they always are an easy
way to make it cohesive, but feel free to turn it into really colorful
collage as well. My favorite thing is
to scroll through the class projects and see all your different
interpretations, and I'm looking forward
to seeing yours. So listen to your heart, have some fun and allow
your art to be around. Don't feel like you
have to copy anything, but on the other hand, if it helps you, then you
are absolutely welcome to follow the steps
exactly as I show them. The end result will be uniquely
yours, however you do it, because even if you
follow the steps, you'll have your
own collage papers, your own way of doodling. So yeah, just do it
anyway you want. When you're happy with
your patchwork collage, take a drawing tool, something that you enjoy
drawing with and add to it. Would you like to add your
own story to the portrait, or maybe something in your collage papers is triggering
you to draw something. Like, for example,
the map that I use, the old map has some
lines on there, and I decide to extend them even before I know
what to do with them. I'm just extending those lines, and that makes me want to draw little childlike
delicate flowers. You can keep it very
simple and minimalistic, like I have, or you can go nuts, you
know, with a drawing. You can place him in
a magical background, maybe a landscape
or a cityscape, or maybe you would like to draw some creepy animals
surrounding him or something. Or maybe your figure is looking off to the
side and you want to draw whatever they are
looking at, stuff like that. Again, make it your own. Now, I hope you'll
have lots of fun, and I want to invite you to come along with me
to Next quickie.
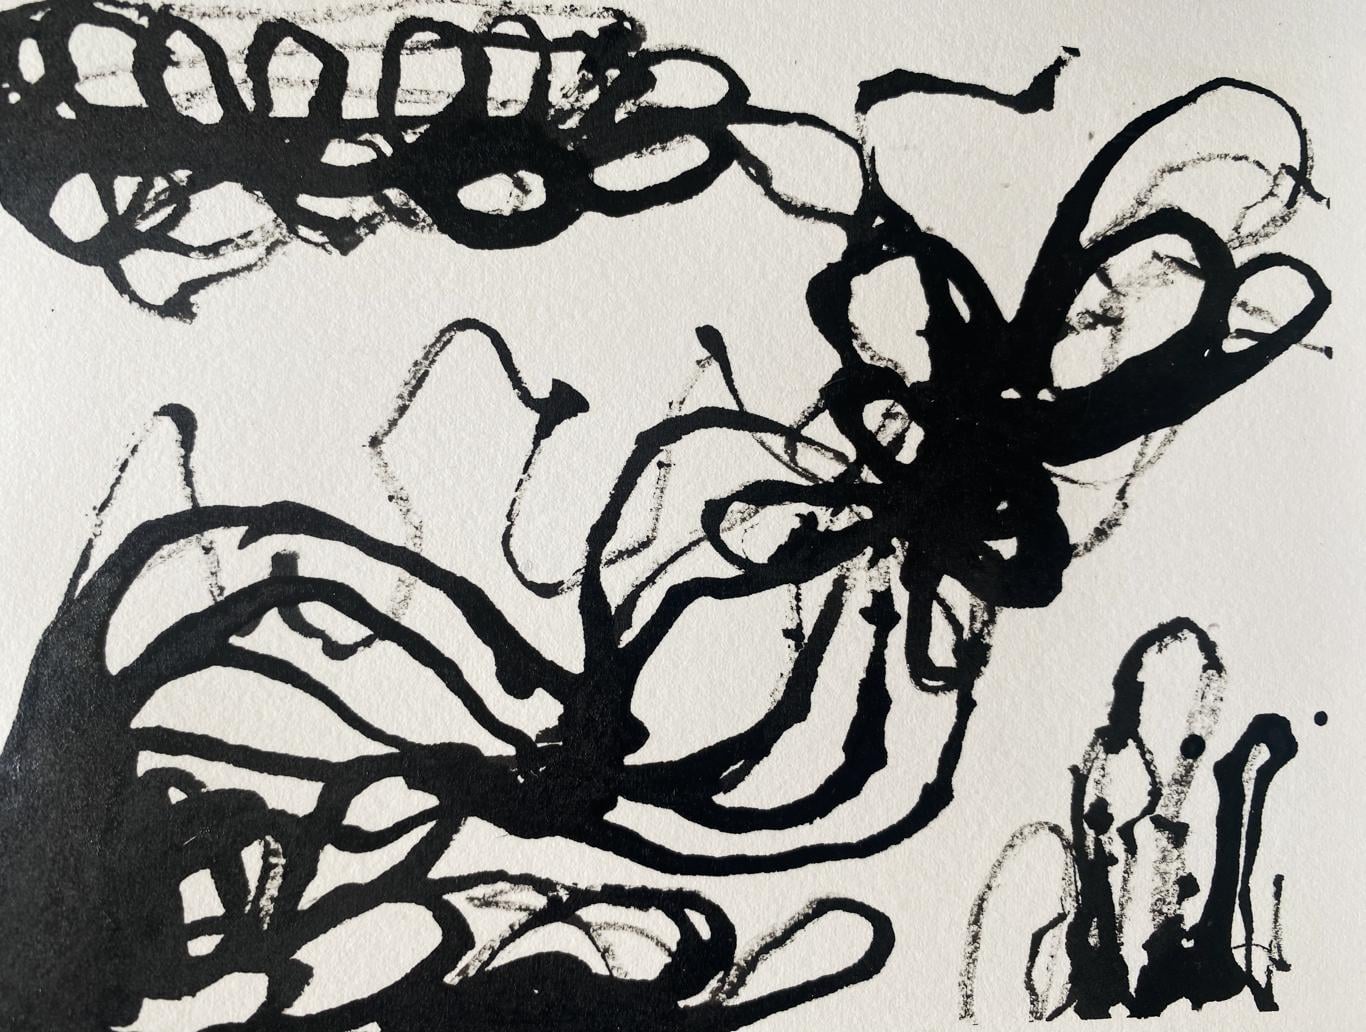
5. Word Play - Illegible Journaling: Et's get started. I've
taped off the edges of my sketchbook because it just looks a little bit nicer
than if you wouldn't, you know, if you don't want to, feel free to skip this. I've put down a layer of gesso, and I've dried it completely. This is because you can get rougher on your paper
without destroying it. The first step is to
just do some journaling, and I'm doing this with a tabilo pencil because
as water soluble, you can also use watercolor
pencils or ink tense pencils, whatever you have on hand. Get all your thoughts
on the paper. Don't censor yourself. No matter how embarrassing
you think they might be, it doesn't matter because
we're going to mess with it, and it won't be really legible. This is a great way
to work through your emotions in a
way that feels safe, especially if you are sharing your home with
someone else and you don't want them to
find your journal, you know, get it out
there and destroy it. When you're finished,
take a spray bottle with some water in it
and just spray the text. You can keep it like it is, or you can take
paper towel like I am and just blot the
text in some places. You can take a baby wipe or something and smudge
it in some places. You can think about the composition when
you're doing this, or you can just
wipe out the text that you really don't want
to see ever again anymore. It's up to you. I'm going
to remove my masking tape. See how I am zig zagging
for that middle part. This is because I don't
want to rip my paper. And for the rest, I'm just going to pull away from the page. You can do this step at the end, but I'm just impatient. So do what you want. I'm going to dry my page again, but you can also
try drawing with your tobool pencil
on the wet paper because it will go very intense and you get nice thick lines. So try it. Right now, I was tempted to create a face with the shapes
that I was seeing. But I changed my mind. I thought it would be nice
to keep it rather abstract, not only because I want to
practice with that myself, but also I thought it
would be a nice change from my regular classes where I focus more on
portraits and figures. So I'm going to get rid of that. Whenever you do something
you don't like, don't stress out about it, put on another layer
or rub it out. There's always a way for you to take your art in a
different direction. So in this case, I just put
a few more words on there. And now I thought
it would be nice to introduce some
black acrylic ink. You can also use Indian ink, and I was experimenting
with my tracing wheel, but it wasn't a huge success. I was hoping to get
more interesting marks. So I thought, let's do
some finger painting. And with the remaining ink, I'm just going to stamp a couple of marks on
the right page there. Now, let's put in
a pop of color. I'm going to stamp
again, but this time, I'm going to do it with
an old cap or something, and I'm taking some more
acrylic ink, some kind of red. I'm loading up my
cap, and there. Let's go for some repetition. I'm getting a smaller cap, and I'm going to put a few more circles in
there in some places. Don't overdo it, though. You know, don't fill the
page with all the circles. Try to leave some
room to breathe. But on the other hand, don't take it too
seriously, either. This is just an art
quickie. Have some fun. Now that the page is dried and I can't smudge
the paint anymore, I'm taking my new color crayon, and I'm going to
write some more. At this moment, I'm
listening to some music, so I'm putting in some of
the lyrics here and there. Bonus points if you
recognize the song. It's an oldie. I often listen to music
while I'm creating. It's a nice way to calm
down that inner critic. It's especially effective
if you're choosing a playlist full of songs that make you happy that
you can sing along to, something to ease your mind. Just keep experimenting
with layers. Here, I'm taking some of my
white gesso and a clay tool, and I'm scratching
in some more words. And although I enjoy doing that, I didn't really feel
this combination. So I'm going to mess
about for moments. Trying to make some marks, and I kind of hate it. So let's switch it up. Yeah, I'm trying the
tracing wheel again, still doesn't do
anything for me. So I think, oh, well, nothing is
working right now. So what I can do is take
some more of that black ink, put a light layer on top. It would have been better for me to dry the previous layer, but I didn't it worked anyway. Going to smug it a
little bit more again. And now I'm going to do the same thing with
the clay tool, and I like this much more
because of the contrast. You need some contrast. If you want to, you can
later on repeat this process on a different page
in your Art Quickies journal. You can try different colors of the SabloO pencil or
ink tense pencil. I would also really like to invite you to upload
your class project to the classroom so
that we can all see the different interpretations of this exercise that's
always so inspiring, and I hope you will join in. Let's go to the next lesson.
6. Rhythm & Blues - Abstraction with Masking Tape: For this quickie, let's play with rhythm and blues
for a little bit. So just take a dark color. I'm using blue, but you can
also use your favorite color. And I'm just going to lighten it up a couple of times using my unbleached titanium because I like that more than white, but you can use white. No problem. This just makes
it just a smitchwarmer. Now, what is rhythm in art? It is the feeling of movement your eyes experience while
looking at an artwork. Just like a music, rhythm happens through
repetition and variation. You can create rhythm by
repeating shapes, lines, colors, marks, patterns,
textures and movements. Think of it as a visual beat. Your eyes move from one
repeated element to another. So for example, dot, dot, dot, line line, line, dark, light, dark, and that movement
creates energy and flow. Rhythm becomes more
interesting when repetition is not
perfectly identical. A little variation makes
the artwork feel alive, you know, like jazz
instead of a metronome. And for this quickie, we will use masking tape to find ourselves a
certain type of rhythm. I'm going to work from a dark background because
that's what I enjoy, but feel free to mix it up. I'm just going to fill
the whole page with it. No painting skills required. And when you're done, just give it a quick
dry because the paint needs to be dry before
we put on our tape. So to create some rhythm, I'm going to make
three similar shapes, but they're not quite the same. I'm also going to overlap them with my edges
for a little bit, just because that seems a
bit more exciting to me. My shapes are at approximately
the same kind of height, but you can also put them
at different heights and make the differences more
noticeable between them. And that can be a bit
more exciting as well. And if you want to, you can pick out a journal that
is a little bit bigger than what I'm using so that you'll have
more room to explore. Just keep it very
simple for now. If you want to, you can do a second page where you
try to switch it up. But for now, this is just
a little art quickie, and it's about the experience. And also, it can be
a nice inspiration for later on because often
we will explore something, we will like it,
and then we will forget that we ever did it. So that's why it's
really nice to do these art quickies
in your journals. It doesn't need to be one
journal all the time, but it's nicer than loose
sheets of paper, you know, because you can easily
flip through them and remind yourself of the time you had
fun with something. When you're happy
with your shapes, just put a little bit
of blue on top of it. Don't be afraid of brushstrokes. They will add some
dynamic to it. And I'm looking at my
own mini painting. And even though I
like this blue, I think I want a
bit more contrast. So I'm making a lighter blue, and I'm putting
that on top of it. You can create a lot
of depth by layering your colors and letting
some of it shine through, you know, don't
cover up everything. I'm being a little bit careless and I am losing
some of that depth. But I will show you what you can do when
that happens to you. So let's make another
lighter blue. I think I might like this one or maybe a little bit more, yes. Okay. Don't need to
mix it perfectly. You know, we are going
for variation after all. Okay, now let's put that
other layer on there. I kind of regretted that I used this color to
cover the whole page. I was just not really
paying attention and the way I deal with that is I take a baby wipe or a
paper towel or something, and I'm just going
to wipe that paint, and then some of it will show through because all these
layers are still wet, except the first one, of course. Here, I am wetting my
page with some water, and I'm taking a paper towel. And I'm wiping vertically because my shapes are in
the same direction as well. And that is another way to add a little bit of
rhythm to this page. Now, let's get rid of
that masking tape. Isn't it always exciting to have a bit of a
review in your art? It always brings me back to the time when
I was a little kid, still curious about the world and having to learn everything. And we really need that feeling
when we are creating art. We need that sense of wonder and curiosity because
when we lose that, we often get stuck in a rut, and that is not really
motivating to be creative. So let's just play a whole
bunch in this class. Time for another review. Always looks so much
better immediately, right? I hope that you enjoyed this
inspiration and that this is a first step on your
journey to explore rhythm. You can do this in many ways, so I wish you lots of
fun to figure it out. And let's go to
the next quickie.
7. Badly Drawn Boy: Let's give ourselves
permission to make a bad drawing because you know what's worse than a bad
drawing, no drawing at all. And you want to know what else. All those bad drawings, they help us to become
good at drawing. There's no way around it. We just have to make some sucky drawings and
have some fun with them. So let's draw this bad boy. We're going to create in a
way that we did in childhood. We're not going to care about proportions or
realism or anything. We'll just have some fun. And what do kids love? Watercolors. And we're not going to be precious
about that, as well. We just want some color, some shape, nothing deep. Just do something, anything. Because, you know what? We
are going to distract from our sucky drawing with
some mixed media fun and, you know, random stuff. We're going to maybe
play with words, put some thoughts on the paper or some lyrics that
you love, whatever. We often tend to quit when
we don't like our drawing. But for this quickie, let's see what happens when
we just keep adding to it. Let's play with a fine liner and trace some of
those pencil marks, and we can leave
some of them bare, You know, add some
variation to our drawing. It's stuff like that that
turns a bad drawing into art. Now, let's give this
boy some clothes. And I don't mean
anything realistic. We're just going to fill up that body with whatever
comes to mind. Doesn't need to
make sense at all. Again, have some fun with it. Now, let's go back
in with some paints. If you don't want
to use watercolor, you can use squash or acrylics
or even markers, you know, whatever you like to use, and give this badly drawn boy
a badly drawn background. I just want to wet these
pages before I go in with my ink tense pencils
because I like to draw and write with them on
top of a wet background. And check out your figure
or whatever you're drawing, you know, can be an animal, something out of
your imagination. Try to see if you
can add something to it to give it a
bit of personality. I decided that my
badly drawn boy is going to be bad to the
bone. Well, kind of. I'm just going to jot down a
random thought that I had, but feel free to give your character
surrounding or something. Add some childlike elements to your page. Just follow your gut. And do you see how
nice and saturated these ink tens pencils become
on top of a wet surface? I really love that, that
and the messiness of it. Pattern play is
always a nice way to add to your page if you
don't really know what to do. And it works around
that sun as well. It's nice to have a
bit of repetition. And look at your art and try to decide what it needs or
what you want to do. You can do some dooding or some journaling with more
subtle drawing tool like I'm doing right now. You can add some collage to it, or maybe you want to remove some things that you don't like with some
paint or something. The possibilities are endless. Just see this as a nice and
relaxed play session where all the mistakes are allowed
to happen, and, you know, it's only going to make your drawing more
layered if you're going to cover up whatever you don't like and then
work on top of that. It's a fun process. Try it out. Right now, I just want
to add a bit of color to that face with a couple
of neo color crayons. I'm using desert
rose that used to be the flashtone and some kind
of silver or something. I really love to use these
water soluble crayons. They blend beautifully as you
are coloring everything in. So it's really low effort. I like low effort. We're
inclined to create more art more often when we allow ourselves
to be a little bit lazy. And you can badly dry
your boy in many ways. We can also pull out our
ink and our stick again. This is a great way to just accept whatever is going
to happen on the page. It's also really, really quick. So if you only have a couple
of minutes to spare today, then this is a great way
to play around for a bit. And if later on you
have a bit more time, you can just return to
your page and add to this, maybe pull out those
watercolors or colored inks, you know, or maybe those neo coolor crayons or regular
old color pencils. Have fun and experiment. Now, you can make your care free drawing or you can
go to the next video.
8. Paint Without a Brush: Oh. Let me show you a fun way to loosen up. You take a stick and some ink, and then you're just going to
do some random mark making. Don't worry too
much about creating the perfect composition
or anything. Just play. You can always focus on that a little bit more
at a later stage. But for now, just move your stick around the page and see what kind of
marks you can get. You can just keep
it totally random, or you can see if you can replicate the effect
more consciously. But for now, let's enjoy
the element of surprise. For my second page, I want to try something else. So I'm taking a feather, I'm dipping it in the ink. And again, I'm going to see what kind of marks
I can make with this. And I want to put a bit
more contrast between the halves on my page because I would like to experiment
with some white ink as well. Now, let me get that white ink. Don't be like me. Don't
double dip your stick in that ink while the
Indian ink is still wet. But if you're an impulsive
artist like I am, you can wipe your stick off with some paper towel or something
before you double dip it. There might still be a little
bit of Indian ink in there, but way less than you
can see right now. And because that ink
underneath is still wet, you will see that the white
will kind of bleed into it. It will become brighter if that Indian ink is properly dry. I will show you later on. Let me give this page a
dry so that I can show you how much of that white
has kind of disappeared. See? So dry your page
before you go in with your white ink unless you want that very
subtle line in there, but, you know, it's barely
visible. It's up to you. Here's some acrylic
painting for comparison. I prefer the inks, though. When you're done playing, close your ink bottle
because if you bump it, you will regret it and remove
the tape of your pages. Of course, you don't
need to use that, but everything just looks
better with a little frame. I hope you have fun, and let's go to
the next quickie.
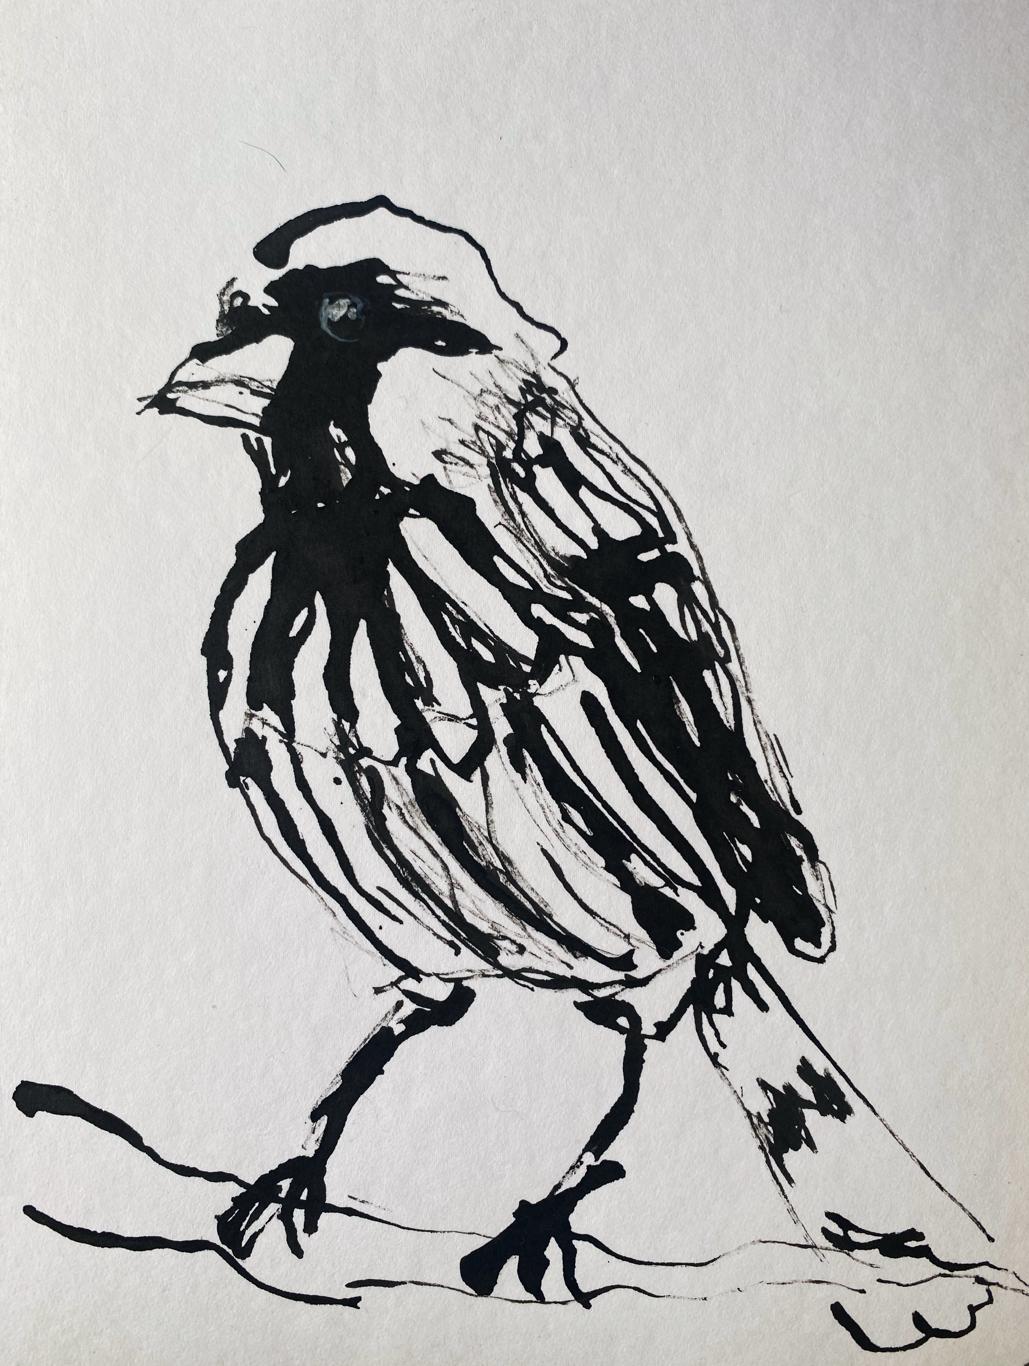
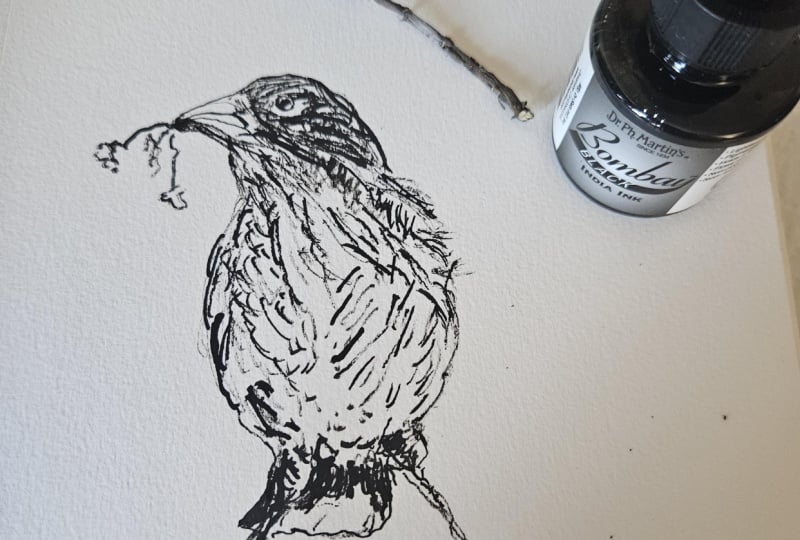
9. Loose Lines With Twig Art: For this art quickie, let's use our stick to draw
something more figuratively. I'm going to choose this little bird because I really like the markings on it, and it's black and
white already. And that way, I won't
have to try and translate the color photo into a
black and white image. And if you don't
like to draw a bird, then just pick out
anything that you enjoy. You can try and draw a
portrait or a landscape. You can draw by heart, you know, adapt this lesson to something that will
really bring you joy. And as you can see,
I'm not trying to draw this bird in its
entirety right away. I'm choosing a kind of anchor point that makes it
easier for me to get started, and then I just take
it step by step. And I'm not going to
put the pressure on myself to get all the
stripes exactly right. And when they confuse me, I'm just going to try
and make parts of it up. When we give ourselves
permission to get things wrong and just go with the flow, often of the times
the end result will become more free and the process will be
more enjoyable to you. And that is where
the magic happens. It's not like you're going to create a drawing that you
like each and every time. But if you allow
yourself that freedom, then it will result in loose drawings and a couple of little masterpieces
along the way. And we can't get there
without a whole bunch of badly drawn or mediocre pieces in between because
we're learning. So don't be upset when
things don't go your way. Just know that it takes
a little bit of time to find your groove
and try to accept every drawing that you do and even cherish
them because they're here to help you to help you grow and to help you
to find your style. And that can't happen without
all these awkward pieces. So let's just take a risk, and it's only paper, you know, in the end. There's no one grading us. We're not making it for an
art gallery or something. These are here for us to grow
and to build some skills. And it's so funny, even when we might not enjoy what
we're drawing right now, if we keep up our habit and just relentlessly keep
drawing and drawing and painting and trying out
things when you are going to flip through these sketchbooks and these drawings
that you didn't like, you can see your
growth, and, you know, that is why these are so valuable because that growth
is really motivating. So don't tear up your drawings
if you don't like them. Let them be here to document
your growth as an artist. And you can see, right, that I'm not nailing the
angle or the placement of the beak or that little
mask on his face. And it's just because I don't
draw birds all that often. So it's only logical that I'm finding my way here
if I would make it my mission to really go for birds and make a whole bunch of
drawings for a month or so. Then you will see that I will
build up some experience, some muscle memory, and a
better eye for their anatomy. And then I will get
to the cool stuff. And not only will I be able to draw them,
you know, correctly, but I can also start
making some decisions of how I want to adapt them to my own style and make
them more expressive. So be kind and patient with yourself and allow
yourself to really take your time and get
to know any new subject or way of creating and try
not to judge yourself. Focus on play and
experimentation. You know, that mentality of, Oh, what would this button do? And try to appreciate
distortion and exaggeration, whether you intended to
do that, or, you know, even if that happens
accidentally, then just take a
minute and wonder if that actually helped your drawing because
let's be honest here. Sometimes reality can
be a little bit boring. So let's forget about realism and reality as
a whole for a moment. And just try to embrace our inner world and how we see things
because that's what art is. It's not about depicting
the real world. It's about how the
artist sees the world. And that's what makes
the art interesting. So let's make a
deal to just draw freely and not worry about
the end result so much. You may surprise yourself. Now, let's take some of that white ink to
put in that eye. I'm going to start with that little reflective
light in the eye, and then I'm going to draw
a partial circle around it without dipping it in the ink again because then
I'll get a more delicate line. I'm twisting my stick to I
need a little bit of it. So I'm putting it in the
reflective light first. And yes, now it's better. I hope you enjoyed watching
me draw this imperfect bird, and I wish you lots of fun drawing whatever
you love to draw. Now, let's go to
the next quickie.
10. Collage & Mark Making: When your head is full of
overwhelm after a busy day, it's very relaxing to
just do some collaging. Just take some papers
that you enjoy, put on some music, and don't overthink it too much. You can use a glues stick
like in the previous lessons, but for this one, I really enjoy
using my MT medium. The pages will just take
better to the page. But if all you have
is a glue stick, then just use that. It
doesn't really matter. The MT medium is just a
really nice adhesive, and because I'm going to put it on top of the papers as well, it's nice and sealed, and you can do different kinds of
techniques on top of that, but more about that
later on in this class. For now, just keep collaging in a way
that makes you happy. And and when your pages are dry, let's take some Indian ink
and do some mark making. You can also thin out
some paint or something, just make sure that
it flows nicely. For the ultimate stress
free experience, you can just do some
mild mark making. But you can also paint
some florals or faces, do some journaling on top
of this, using the ink. Whatever it makes it the most
fun for you in this moment. You can also bring
in some mixed media, or you can do another
kickstarter collage on here and explore that theme
a little bit further. You can add to these pages
in any way you want. Here I'll show you what kind of marks you can make
with a fan brush. I think these are
really, really nice. Just push down those
bristles and twist and turn your brush and be amazed with the expressive brush strokes that you can get. And the less ink
is in your brush, the more delicate
your marks will be. Let's give these pages a
dry so that I won't get ink on my hands while I'm removing the tape
and see what we got. Somehow, our art
always looks a little bit better when we have a
nice border around it, right? And there it is. Let's
go to the next quickie.
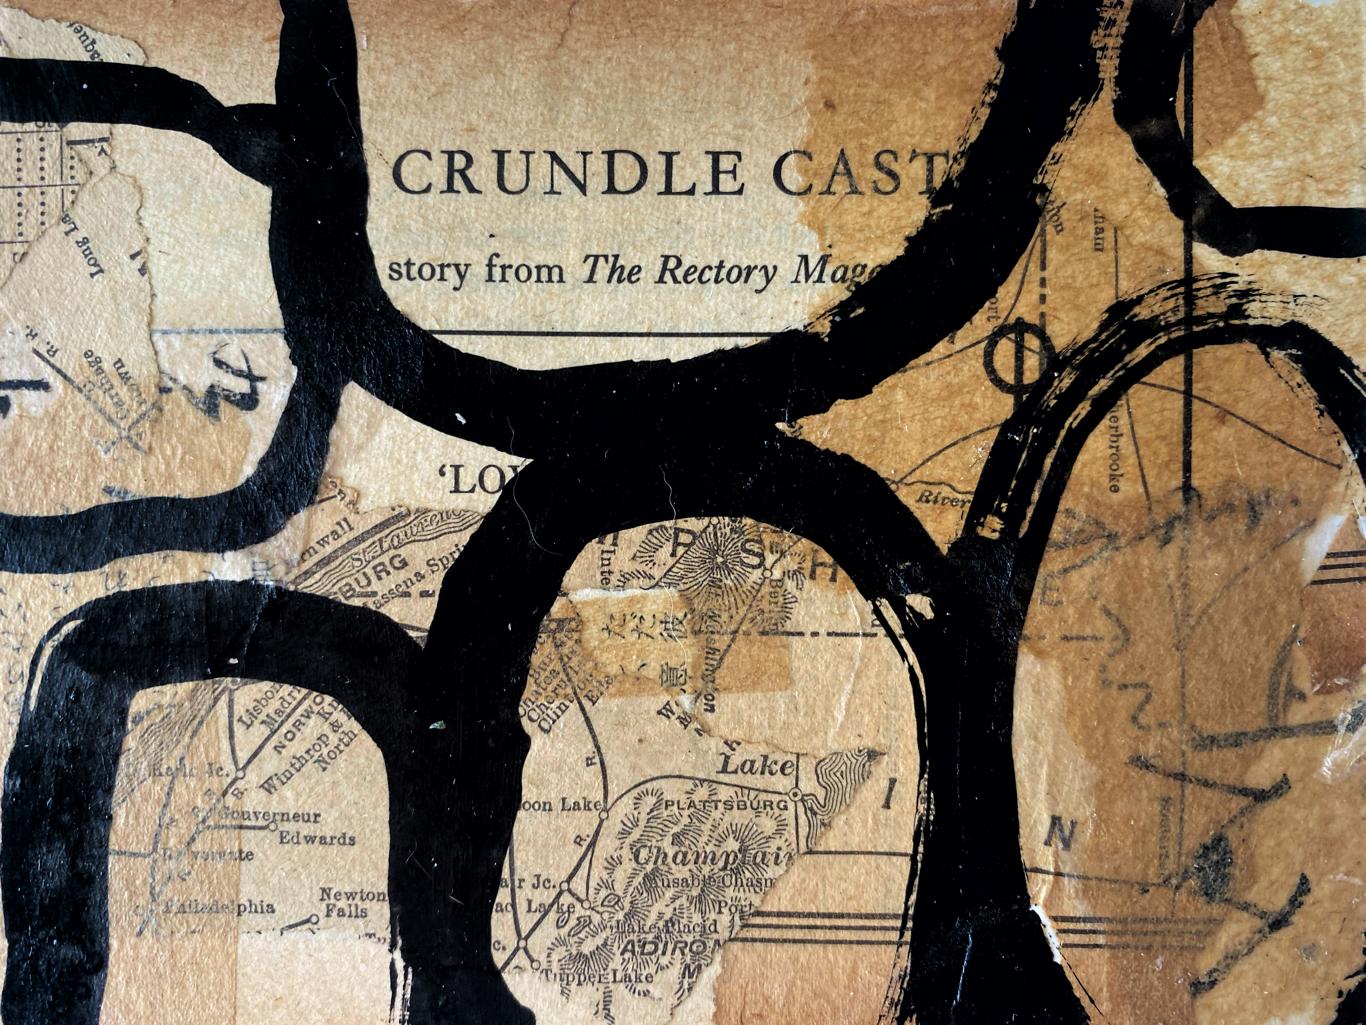
11. Stack and Stick Collage: Let's make a simple collage. All you need to do is gather
some collage papers that you enjoy and just tack
them on top of each other. This is a really relaxing
exercise for those days when we feel overwhelmed and we're
not sure what to create. The goal is not to
create something impressive or with the
perfect composition, but to find out what
you enjoy and to learn a little bit
more about what a pleasing composition
is to you. You will make choices
that you really like, and others might have seemed like a good idea in your head like this one
that I'm doing now. And you're a little bit
underwhelmed by it. But that doesn't matter. Just continue and
try to find a way to problem solve and still enjoy your collage in the end
and take some risks, you know, it's fun
to try new things, even if we are not really sure
if it's going to work out. If we always play it safe, then we never grow. Allow yourself to
learn and mess up. Nothing is really messed up,
especially with collage. If you really hate something, just put another
paper on top of that. This is a safe space, so allow yourself to play. I'm still unhappy with
my awkward black shape. So I'm taking one of
my collage papers that is still a little bit
transparent but not too much, and I'm looking for a
way that I can cover it, maybe partly, but yeah,
I think this is better. I don't want to see most of it. But a hint of it is okay. This is a great
way to learn about composition in a very
intuitive and laid back way. And, you know, each time where you feel a
little bit drained, but you still want
to do something, just make one of these. And when you're done with yours, it can be really helpful to observe it for
a little while. What does it lack? For example, mine even though I like it, I can see that it
lacks some contrast, you know, because I got rid of that shape that I didn't like. So instead of trying
to fix this one, I'm going to make a
mental note of it, and maybe I can write down my goal for the next
collage on this page, somewhere on the
bottom in pencil. And that way I can remind myself what I
want to do next time. And I love stamps
as a focal point. They're quite easy that way. So if yours lacks a
little bit of mph, that's a great way to
add some interest. I wish you lots of
fun exploring this. Now, let's go to
the next lesson.
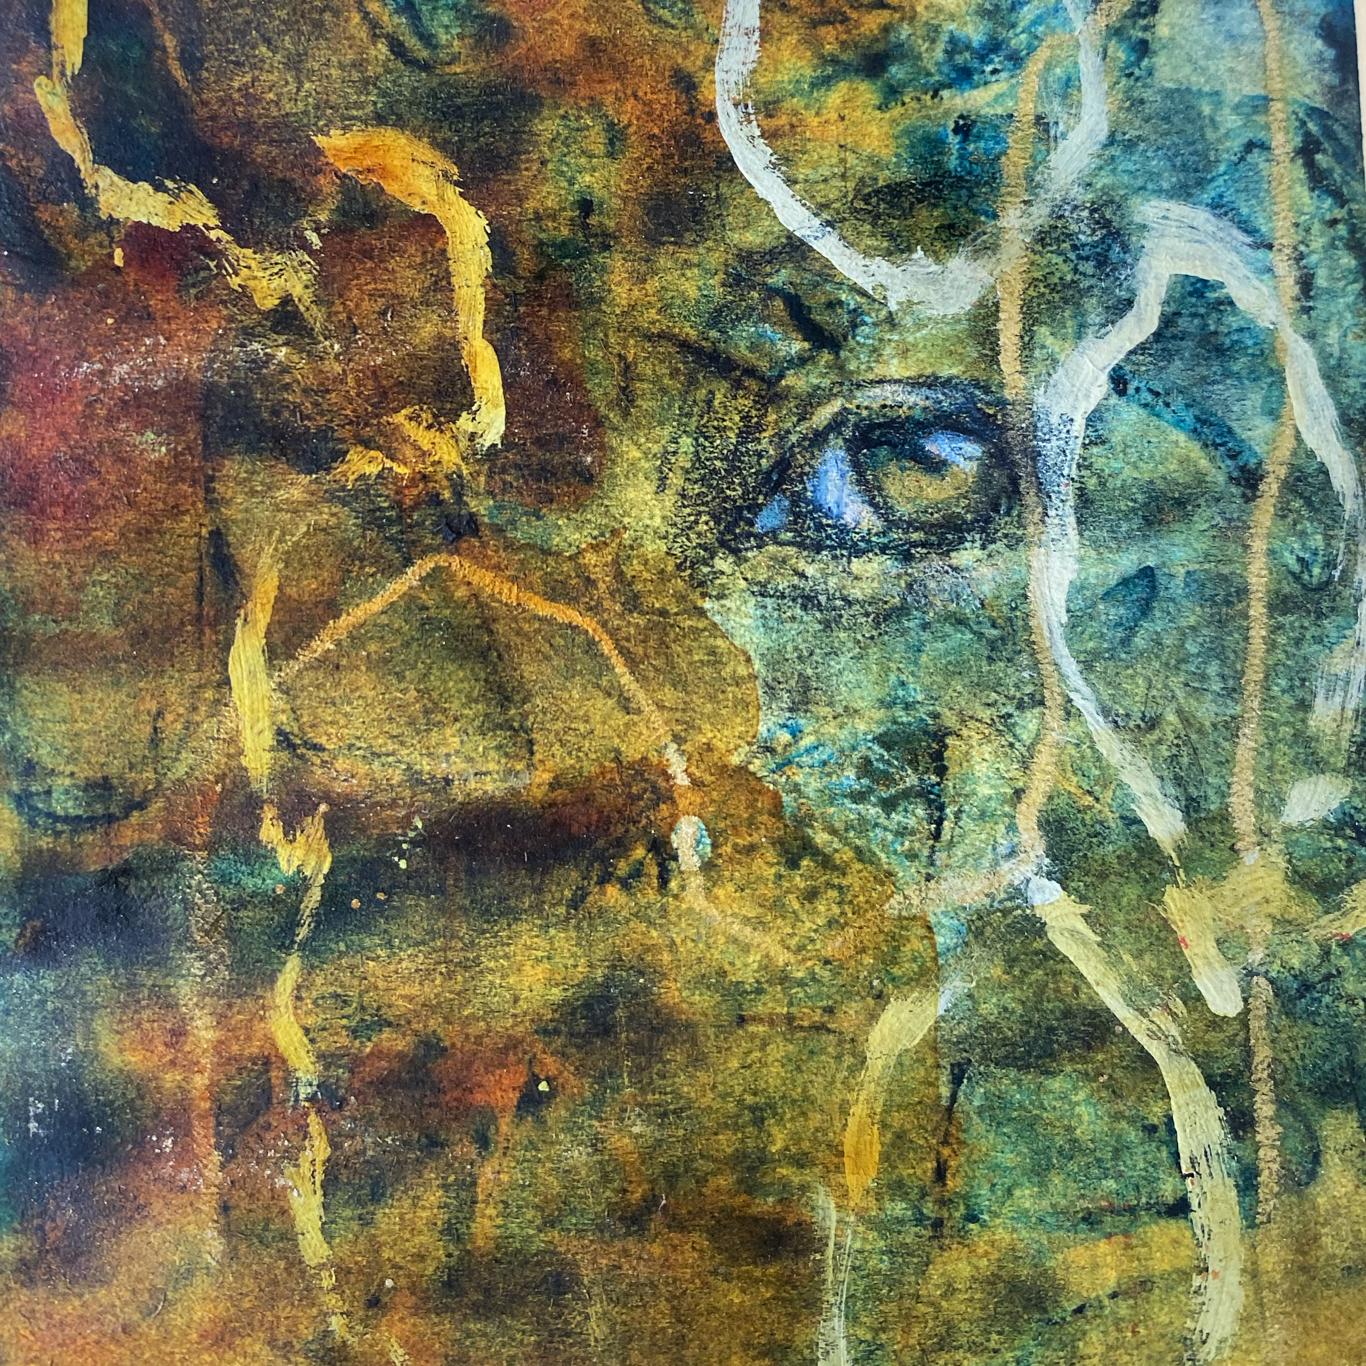
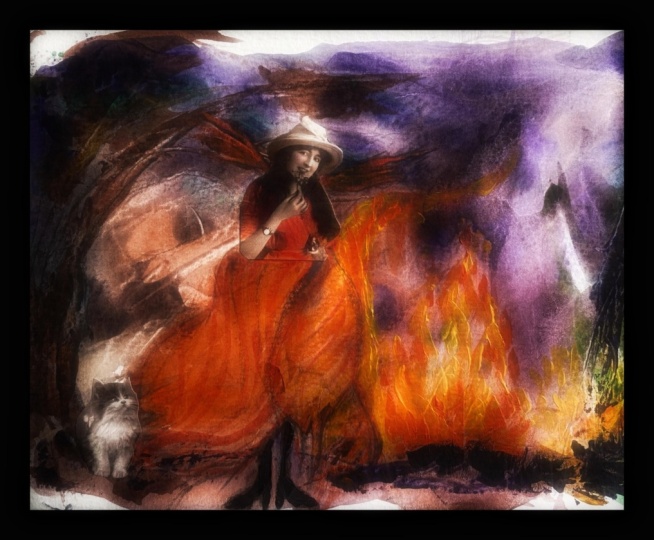
12. Just Play - Mixed Media on Watercolor Backgrounds: Et's just do a laid back
mixed media play session. I'm starting with
some watercolor, and I'm just going to put very sloppy and wet
wash on my page. Don't worry about
using it right. Just make sure that there's enough pigment in there
and that the layers quite wet because we're going to get some saran wrap and then crumple it up
and put it on there. We'll let this dry naturally while we start on the next page. It's going to give
some cool textures. Just pick some colors
that you love to work with and
experiment with them. Because my own journal isn't
the Watercolor journal, you'll see a buckle, and if you don't want it, then use one that is
suitable for wet media. I personally don't really care, and it only helps me to loosen up because I won't
be precious about it. Whenever I get pulls of
watercolor like this, I will get some paper towel and just dab it because otherwise it will take too long
for the water to evaporate, and I'm impatient. I don't like waiting.
If you have some inks, then you can drop them in there
and see if you like that. Again, there's not really a
technique to worry about. Just drop them in there,
and if you don't enjoy it, then you can always take some other media
and cover it up. And that is exactly
what I will show you after I'm done
drying this page. I don't really like
these red blobs, so I'm taking my neo color cray, and I'm choosing a
color that is close to the watercolor underneath. In this case, it
is the golden one. And I'm just scribbling with a light touch
around those edges. I don't want to
cover up everything. I just want to integrate it into the rest
of the painting. It's also a good way to add some additional
texture to your art. Something you can
experiment with is to take some ink or paint, but ink is easier. Take a stick, dip it in there, and try to draw some
shapes with that. Because of that lack of control, the lines you'll get are more
unpredictable and playful. Especially with geometrical
shapes like these, it's a really nice way to prevent it from
becoming a bit boring. Whenever a line is too thick for you because of too
much ink on there, just scribble your
stick through that a couple more times and it'll break it up like I'm
doing right here. Let's do some light splatters. I'm taking some ink, and I'm going to tap on my brush to get a couple
of sprinkles on there. Now, let's move
that surround wrap. It's best to do this when
it's completely dry. But you want to know a secret? I didn't wait and I just
dried it before I'm going to put a second
layer of watercolor on it. Knowing the rules is great, but knowing that you can choose to ignore
those is even better. Okay, I'm taking some
water and paper towel, and I'm going to dab it. That way, there's no harsh edge. I'm taking that
gold new color cran and I'm just doing a
quick mark right here. Not too fond of it, so
I'm taking some water, and I'm going to
go over it again. And now I like it better. Just keep experimenting with layers and remember
that you don't need to submit it to any jury or hang it on
your wall or anything. This is here for you to
find out what you love. Okay, I'm liking
all the textures, but I need some contrast. So I'm taking some
acrylic painting, and I'm just going
to make some marks. I'm not overthinking it. I'm just kind of twisting my brush for some more
unpredictability, and I'm making more ovals. There. I'm going
for another mark, more of a line now, again, twisting my brush. And I'm not too fond of it because it's kind of competing with those
ovals on the right. So I'm going to give it a
quick dry before I'm putting on another layer of watercolor on there to push
it into the background. Now it's better. It's better,
right? That's better. And even though I wanted to
keep it kind of abstract, I'm seeing an eye, and
I want to bring it out. So let's do that. I'm
taking my Stabilo pencil, deep indigo, and I'm tracing those shapes
that I'm seeing. There's a little pupil going to bring in an
eyelid right there. And I want to bring
in some color. So I'm taking my gold and
I'm just filling that in. And I want to put in
a reflective light. I thought this was
going to be lighter, but I need different color. So I'm taking my silver, and I'm covering up that old mark and see how much that brings
that eye to life. It's a really cool trick. I'm putting a couple more
highlights around the eye. Then I'm going back
to my Stabill pencil, and I'm putting in
a little bit of shadow that would be
there if it was a face, putting in some kind of
eyebrow, very lightly. And I'm going to put more
shadow on the side of the eye and around the iris underneath
the eylashes as well. And that's how I can bring
more form to this eye. Here as well, I need
some shadow because it's an eyeball and ball has some
shadow on the side there. Se is more three
dimensional now. Okay, for me, this really helps to make it
more interesting. And on the right, I
also need focal point. So I'm putting in circle and a faint one in
the back there. If your page looks a little
bit flat and boring, then you'll probably
need a focal point. So just try to put one in there, even if it's very
simple like this. Now, let's get rid of that tape. Because my journal is buckling and I had a very wet
wash of watercolor, you can see that it bled
underneath the tape. Also, this isn't
watercolor tape, so that's also not helping. And, you know, I
don't really mind. I'm just taking a white new colour crane
and I'll go over it. Doesn't need to be
perfect or anything, but I like that there is
some kind of a frame there. So there it's fixed. And just observe your
art for a little while. What do you like?
What don't you like? In my case? I'm not
sure about this part. I need a bit more contrast
and things going on. So I'm experimenting with that. And here, I'm realizing that I want it to be
darker right here. So again, I'm taking my
stabilo and I'm just going to color in this part,
tracing some lines. Yeah, I think that is
a little bit better. I hope you enjoyed
this inspiration, and I hope you will
have fun playing with mostly abstract
in your own journal. Okay, a couple more
lines here and there. Some tiny marks. Why not? And let's go to
the next quickie.
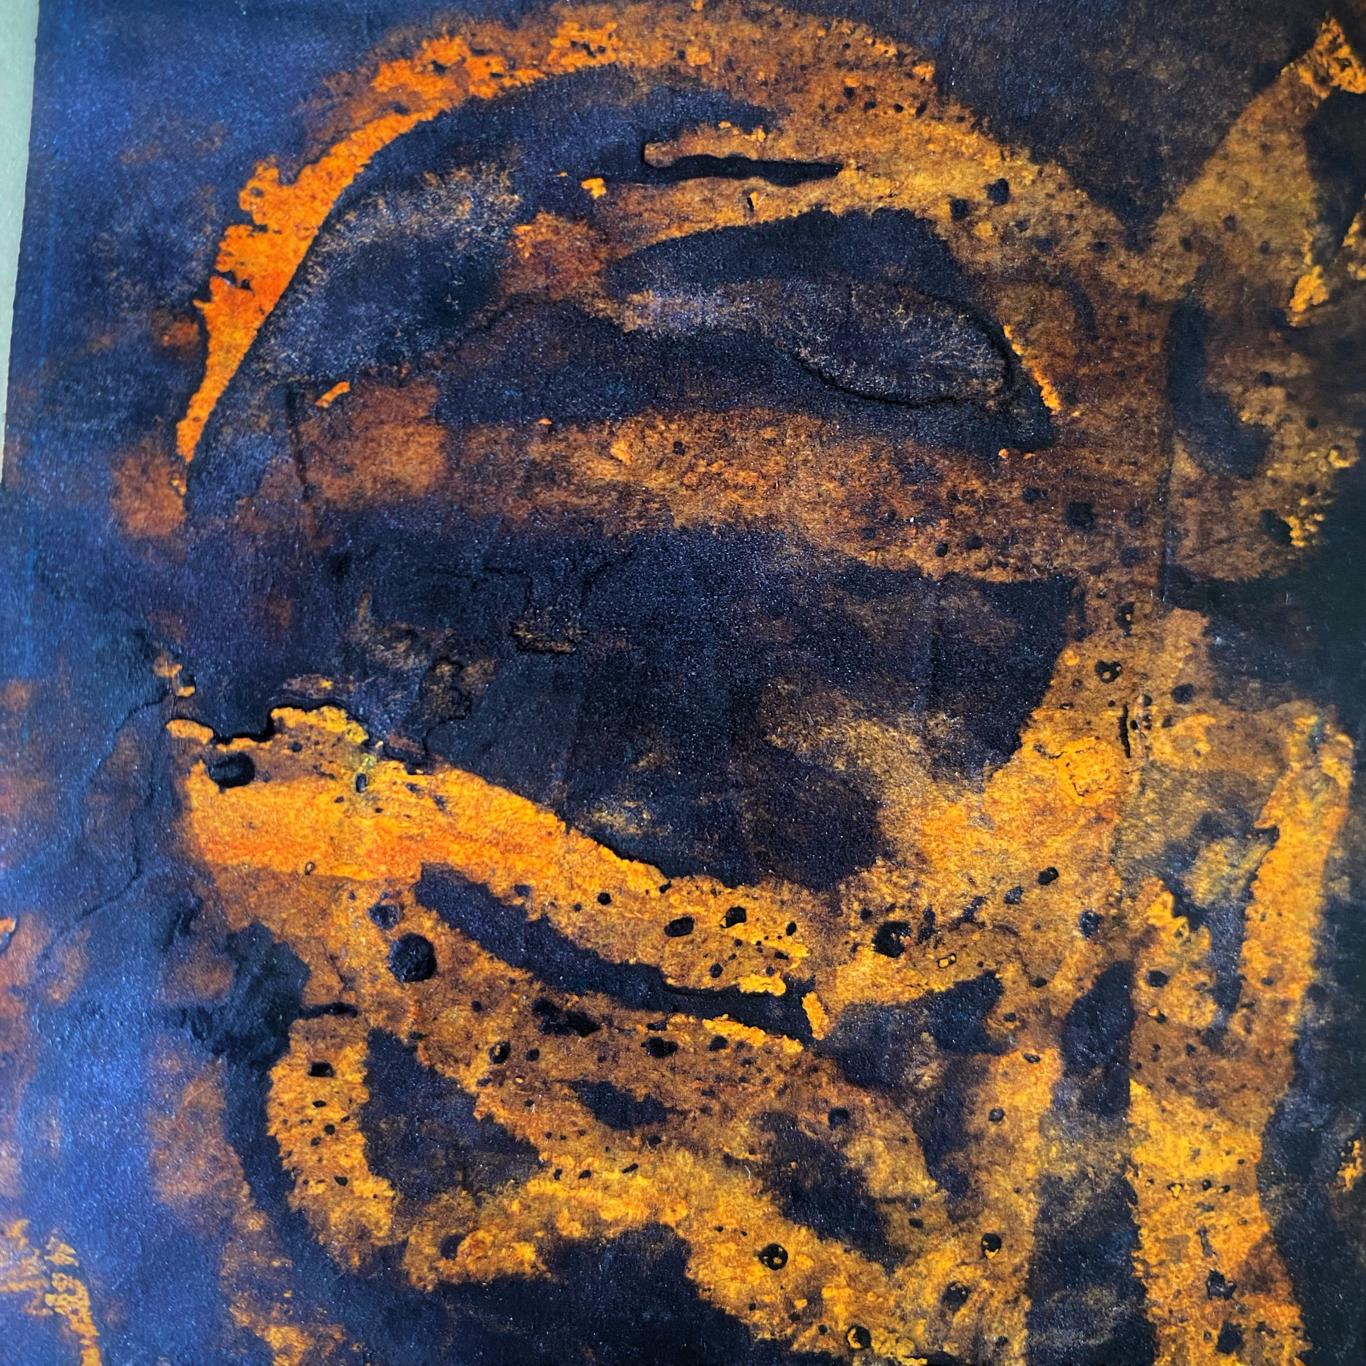
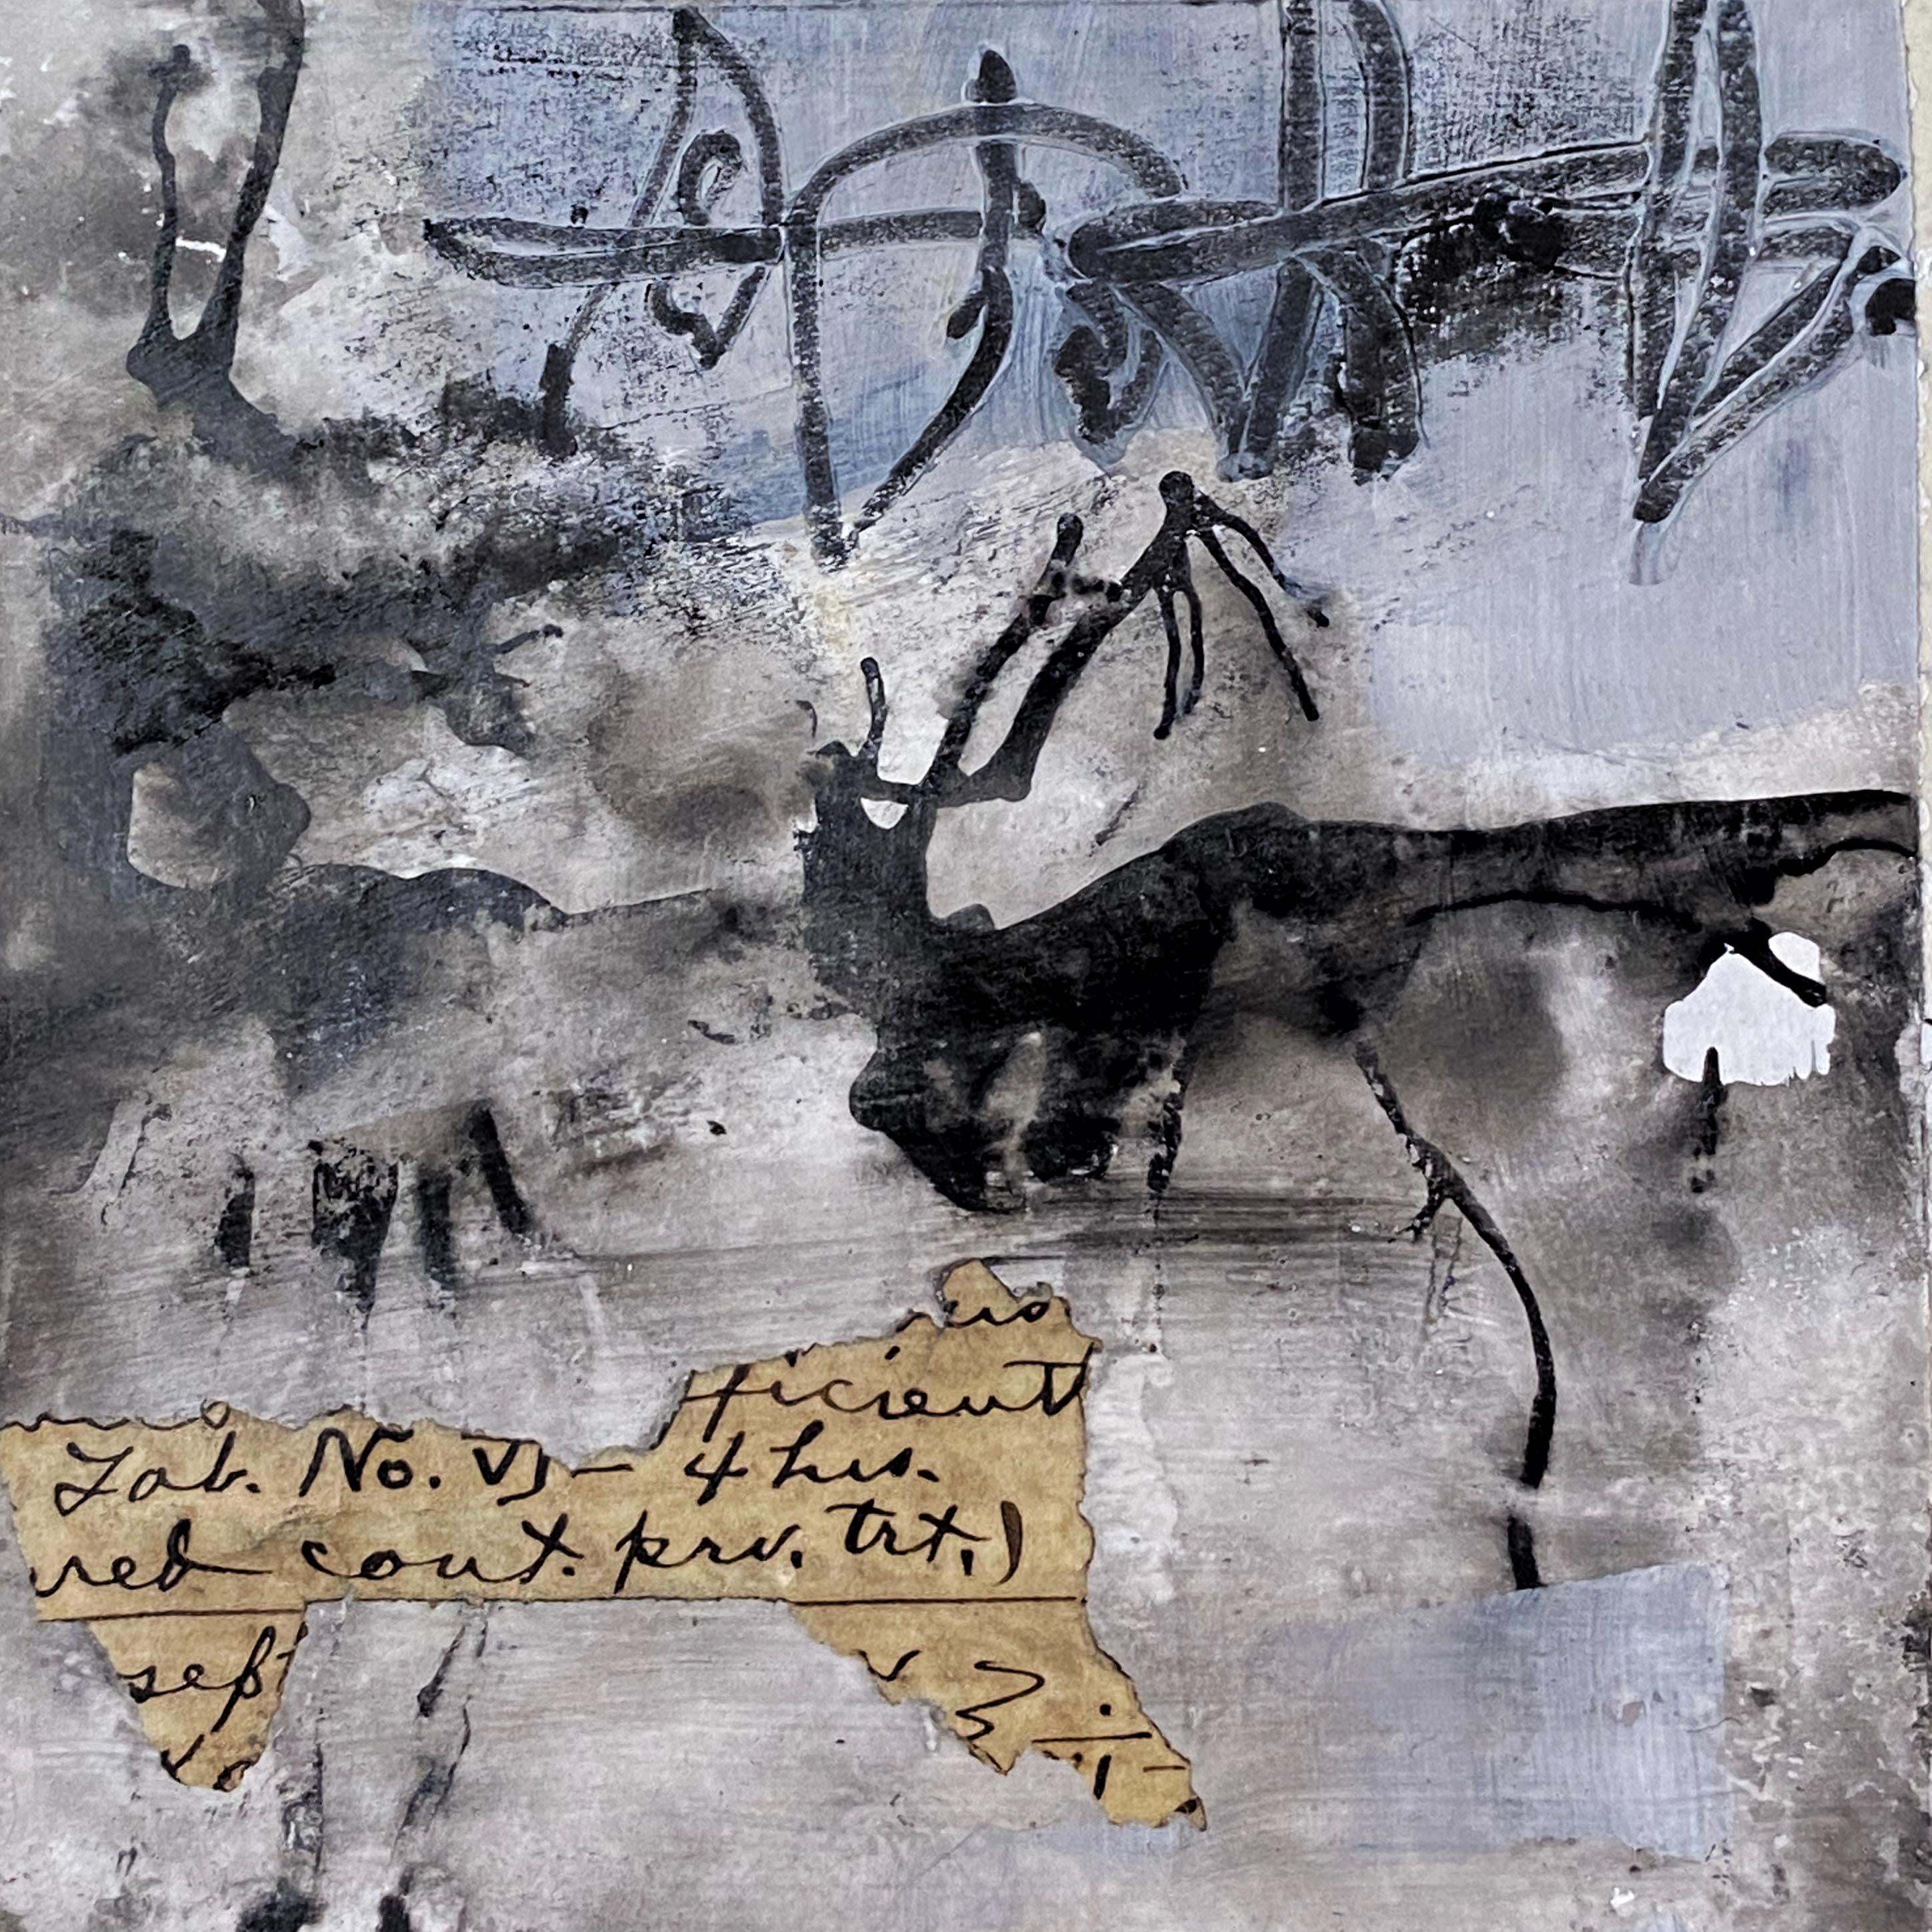
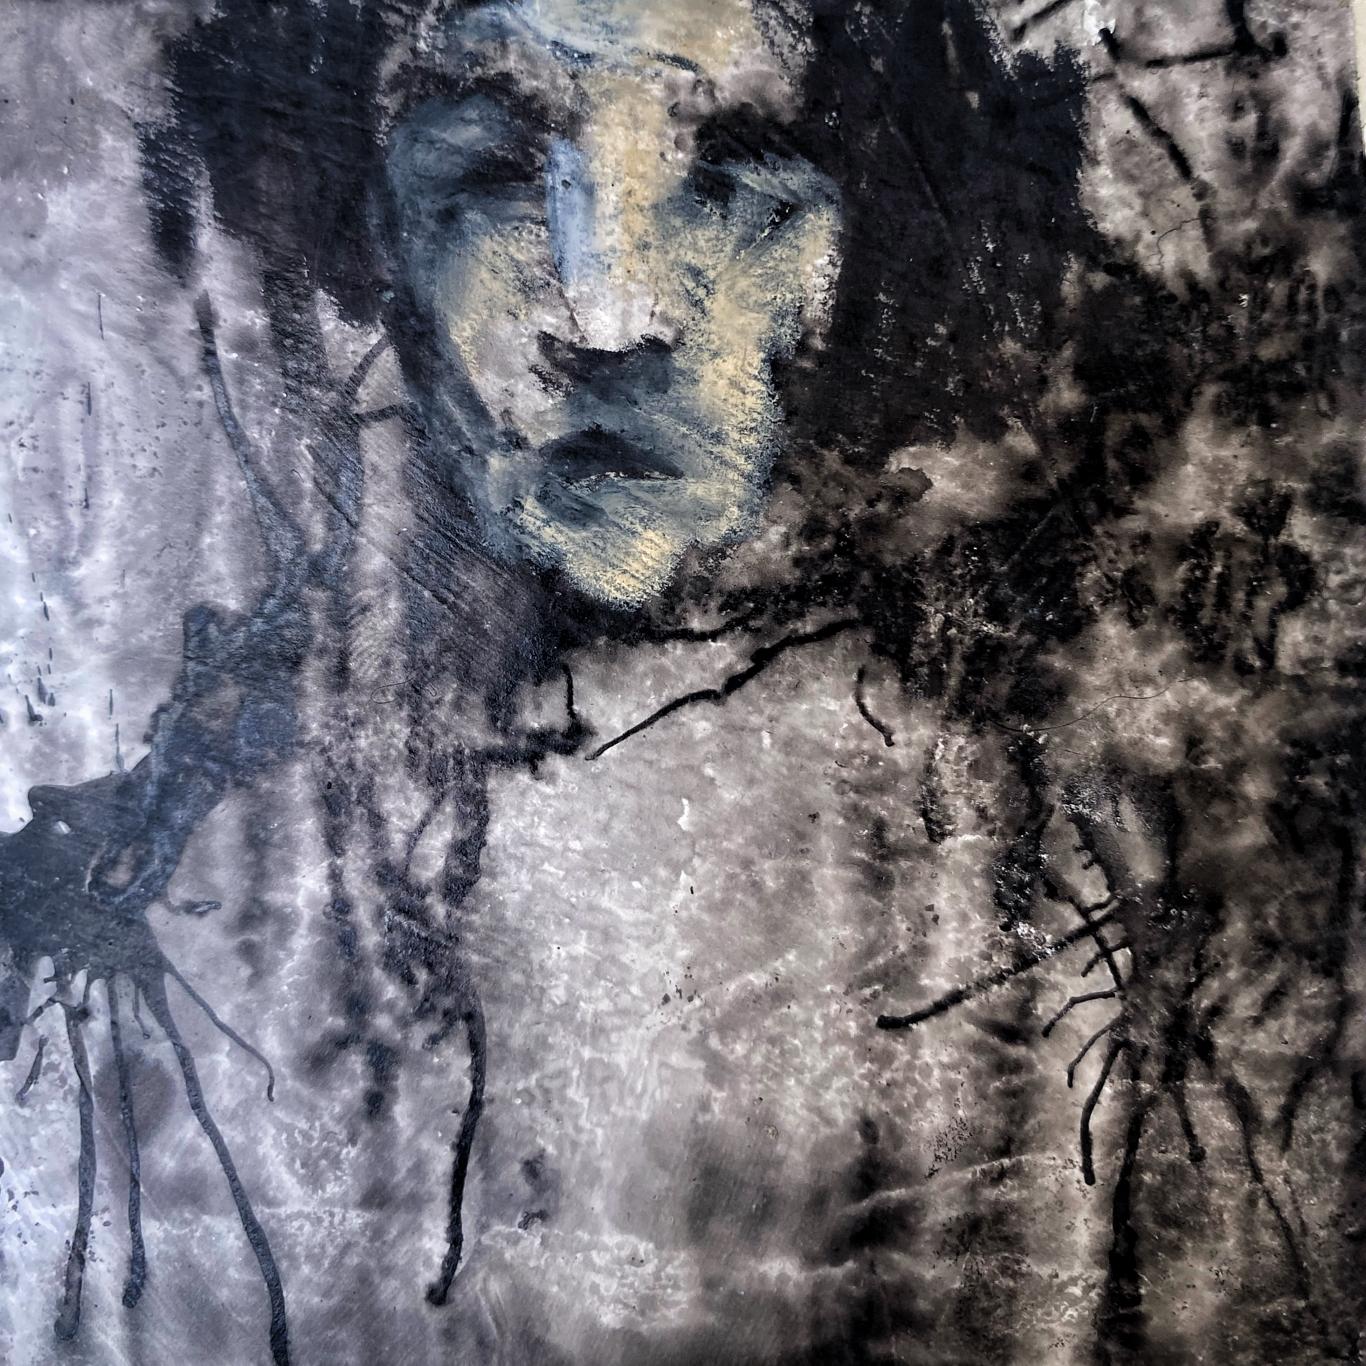
13. Grunge It Up - Ink Staining on Gesso: Once again, I've prepared my
pages with gesso. Okay, let's get some ink. Make it playful, and then you get a straw and
you start blowing. Just keep blowing and
changing directions. And when you think you
can't blow anymore, keep going because then
you'll get tiny little drips. Are they drips? I don't know. And you can vary with how hard you blow
through your straw. You can just do it very relaxed or you can put some
more force into it, and that will also have
an impact on your marks. Now, I'm going to try
this for a little bit because you don't want to dry it entirely because
then it won't move, but you want to
dry it well enough so that there will be some
marks left on the page. And you can just
practice with it. There are enough pages
to do so, right? You don't need to move on to a different technique for each
and every page, like I do. Most of the time because
sometimes I will catch a bug and I'll do many, many pages in the same kind
of way to get started. And now I want to really dry it well because I'm going to
take my new color crayons, and I think I'll start
with my, my stabil pencil. Th is very black and I like it. And I'm just going to bring out that little face
that I'm seeing. Now I'm getting into
the highlights. See, I don't need much detail. And Now, for the other page, I'm just going to take
a little bit of gesso, and I'm going to do a couple of brush strokes because
I want to take my sabio pencil and scribble right through
there while it's wet. And that's going to
have a different effect than if I would just scribble on it when it's
dry and then wet it. See, makes a nice texture. And I would like to add in
a little bit of collage. I'm just trying to see here, and I'm thinking, No,
that's way too big. I tend to go too big with my bits of collage
with the text on it. I don't like that. And I'm deciding that I
want to get rid of the tape because I can't really see
what I'm doing with it. In a minute, it will be
much easier for me to see where my collage paper
will actually look good. Now I'm getting it. I need a much smaller piece, so it can really be part
of the composition. And I tore off
some weird shapes, and I kind of like it. So I'm taking my met medium, and I'm sticking it on there. There. I think
that's a nice spot. It balances out those marks I did before with the
s SibilOPencil. So those were top right. And this is top left
with that nice, no, not another one. Let it go journey, let it go. No more paper. It's good. I wanted to see if I should
cover up that blank spot, but no, no, it's right. Less is more, they
keep telling me, and I'm trying to listen. I hope you will give it
a go because it's fun. But for now, let's move on
to the next art Quiki. And
14. Scribbles & Scratches: Let's get ready to scribble. First, I'm going to put a
layer of tinted gesso on my pages because I
have worked with water soluble art supplies
in the previous page, and I don't want them to, um, to bleed into each other. So that's why I'm protecting
my pages with my gray gesso, which I hardly use because
I meant to buy black, but that's another matter. I'm going to take some
Indian ink and a brush, and I'm just going to
scribble pretty randomly. I'm not worried about making
the perfect composition. I just want to play around with different types of
scribble techniques. I'm going to let it
dry for a little bit, like the other day, and then I'm putting
some water on there, dabbing it away with my and
I didn't like the wiping. I just wanted to experiment, but I like it when I dab
it with my paper towel. Okay. So now I'm just going
to scribble some more, see how I like that, and it's very busy because I
have multiple dark places. And I decide to
bra on some gesso. That's always a nice
way to up to contrast. Now I'm scribbling
into that wet gesso with my Stabil pencil.
I really like that. And that's why
these art quickies are so amazing because
it's so easy to discover mixed media techniques that you really love and you can use them in your other art. Now I'm just taking my new
color cram in flash tone and I'm building up a little face
that I saw in the paint, and I'm scribbling, scribbling. I'm starting out fairly
light with light pressure. And then when I want
to do the highlights, I just press harder. I always like some
finger painting. I'm taking a clay tool and I'm just scribbling
into my wet paint. I also really enjoyed that. Now I've dipped my stab
pencil in water and I'm just going to scribble in a
second half portrait there. Just to see the difference. And now my flesh tone
new color crane is going to mix in with that stabill pencil because
they're both water soluble. I just wanted to see
the difference in vibe, I prefer the one on
the left, honestly, but you never know for
sure until you try, right? I just keep scribbling. And I really like
scribbling back into that new color portrait with my stabilol pencil for
some additional textures. Again, I'm pressing harder where I want the
highlights to be, and I realize that I want to
see my pages as they are, so I'm removing the tape. And I should have dried
it a little bit better. That's why I'm having some difficulty getting
the tape off in one pull. Sometimes it pays off
to be a little bit patient. But it's no big deal. But it is handy to wash your hands before
you remove the tape, see? Pretty dirty. And I'm just
scribbling some more. I just keep going
back and forth and adding some additional
scribble marks to see how I can make my
compositions a little bit more interesting when they're
lacking some dynamic. And that's really helpful for your larger
paintings, as well. It's a nice and safe way
to practice your skills. Here, I just keep on
layering and scribbling, and, yeah, that's
pretty much it. Going back and forth
between my tools, and I'm happy with my
play session for the day. I wish you lots of fun
with your scribbles. And when you're ready, let's
move on to the next quickie.
15. So Transparent: In this lesson, I want to
invite you to experiment with transparency and how you can build some
layers with that. So I took some gelmet
medium as my adhesive, and I covered the
whole pages in that. And then I just picked
some random ephemera. You know, I have lots of these, so I don't get too attached, and I stick it on there
as a first layer. I'm taking a bit
of acritic paint. And I'm going to just work it in there while
my medium is still wet. And that is how you can achieve some transparency with
your opaque paints. Right here, I'm varying my opacity because I
would like some contrast. So I'm putting on the
paint more heavily on top, and on the bottom,
I want to leave a bit more room to breathe
to show that collage paper. And on the left there,
I'm taking one of my high flow flu acrylics by golden that is already
transparent by itself. I'm taking a baby wipe to
remove some of the paint. It's a nice way to push back the paint when you went
a little overboard, like I tend to do sometimes. And when I look
at my other page, I can see that I
want more contrast, so I'm putting on another layer of the paint's gray on top. I'm going to dry for a bit because I want it to be
really dry for the next step. Here, I'm taking some
high flow fluid acrylics by Golden in white. And because it's not as transparent as I
would like it to be, I'm loading my brush with
water and I spread it around. I'm going to let this try for a little while while I'm going
to play on the other page. If you don't have these paints, then it's not a problem. You can just take some
white acrylic ink or white Indian ink, or you can even dilute your acrylic painting
with lots of water, and you can do the same thing. Because I don't
like harsh edges, I'm taking my baby wipe again, and I'm just dabbing the page. And I continue to play. Just try out different things and try to work without a plan, you know, see what happens. And if you don't like it,
put on another layer. It's all good. Just experiment and get to know
your art supplies. I like working from
a dark background, and even though I try to mix
it up with a lighter color, I always get antsy,
I don't like it. But we're just going
to try some stuff. And it's a good exercise
in your problem solving. And acceptance as well, because not everything
we do needs to turn out beautiful or to
our liking, even. Because I don't really
like that green gold, I just moving around that paint on top of almost
the whole background. And now I like it more. I like it when it's
more subtle apparently. That's why it's
important to just keep playing even when
it disgusts you, Take it as a challenge
to just improve it. Et's see what happens
when we remove some of these hard edges with a baby wipe after we let
it dry for a little while. Now you see kind of two lines. I like this so much more. This is how you can make
your shapes more complex. A little bit more grungy. Whoops. And that is okay. Even well, it's okay. I'm still going to cover it up a little bit with
this new color cray. And this way, I get a
little bit of variation in the color and it doesn't bother me as much because it was really distracting
right here. Yes, I like the
grunginess of this. When you like a page, but it's still a
little bit boring. Try to see if you have some bits and pieces of collage
paper that can add to it. Just switch them out
and see what you like. There are no rights or wrongs. It's just what you enjoy. So just put them on there
and move them around. And whenever you like something, then just stick it on there. I am really enjoying these
Japanese washy papers. I love vintage stuff,
so I'm going with that. It's a bit of repetition from
the background underneath. And it's what I enjoy. So I'm going to practice what I preach, and I'm going to
glue it on there. Again, with my mad medium. It's nothing against
the glue stick, but with these
transparent papers, the medium is really superior. This was my interpretation
of the transparency. And if all you have is watercolors or inks,
then go with those. You know, doesn't matter. Play. Now, let's go
to the next lesson.
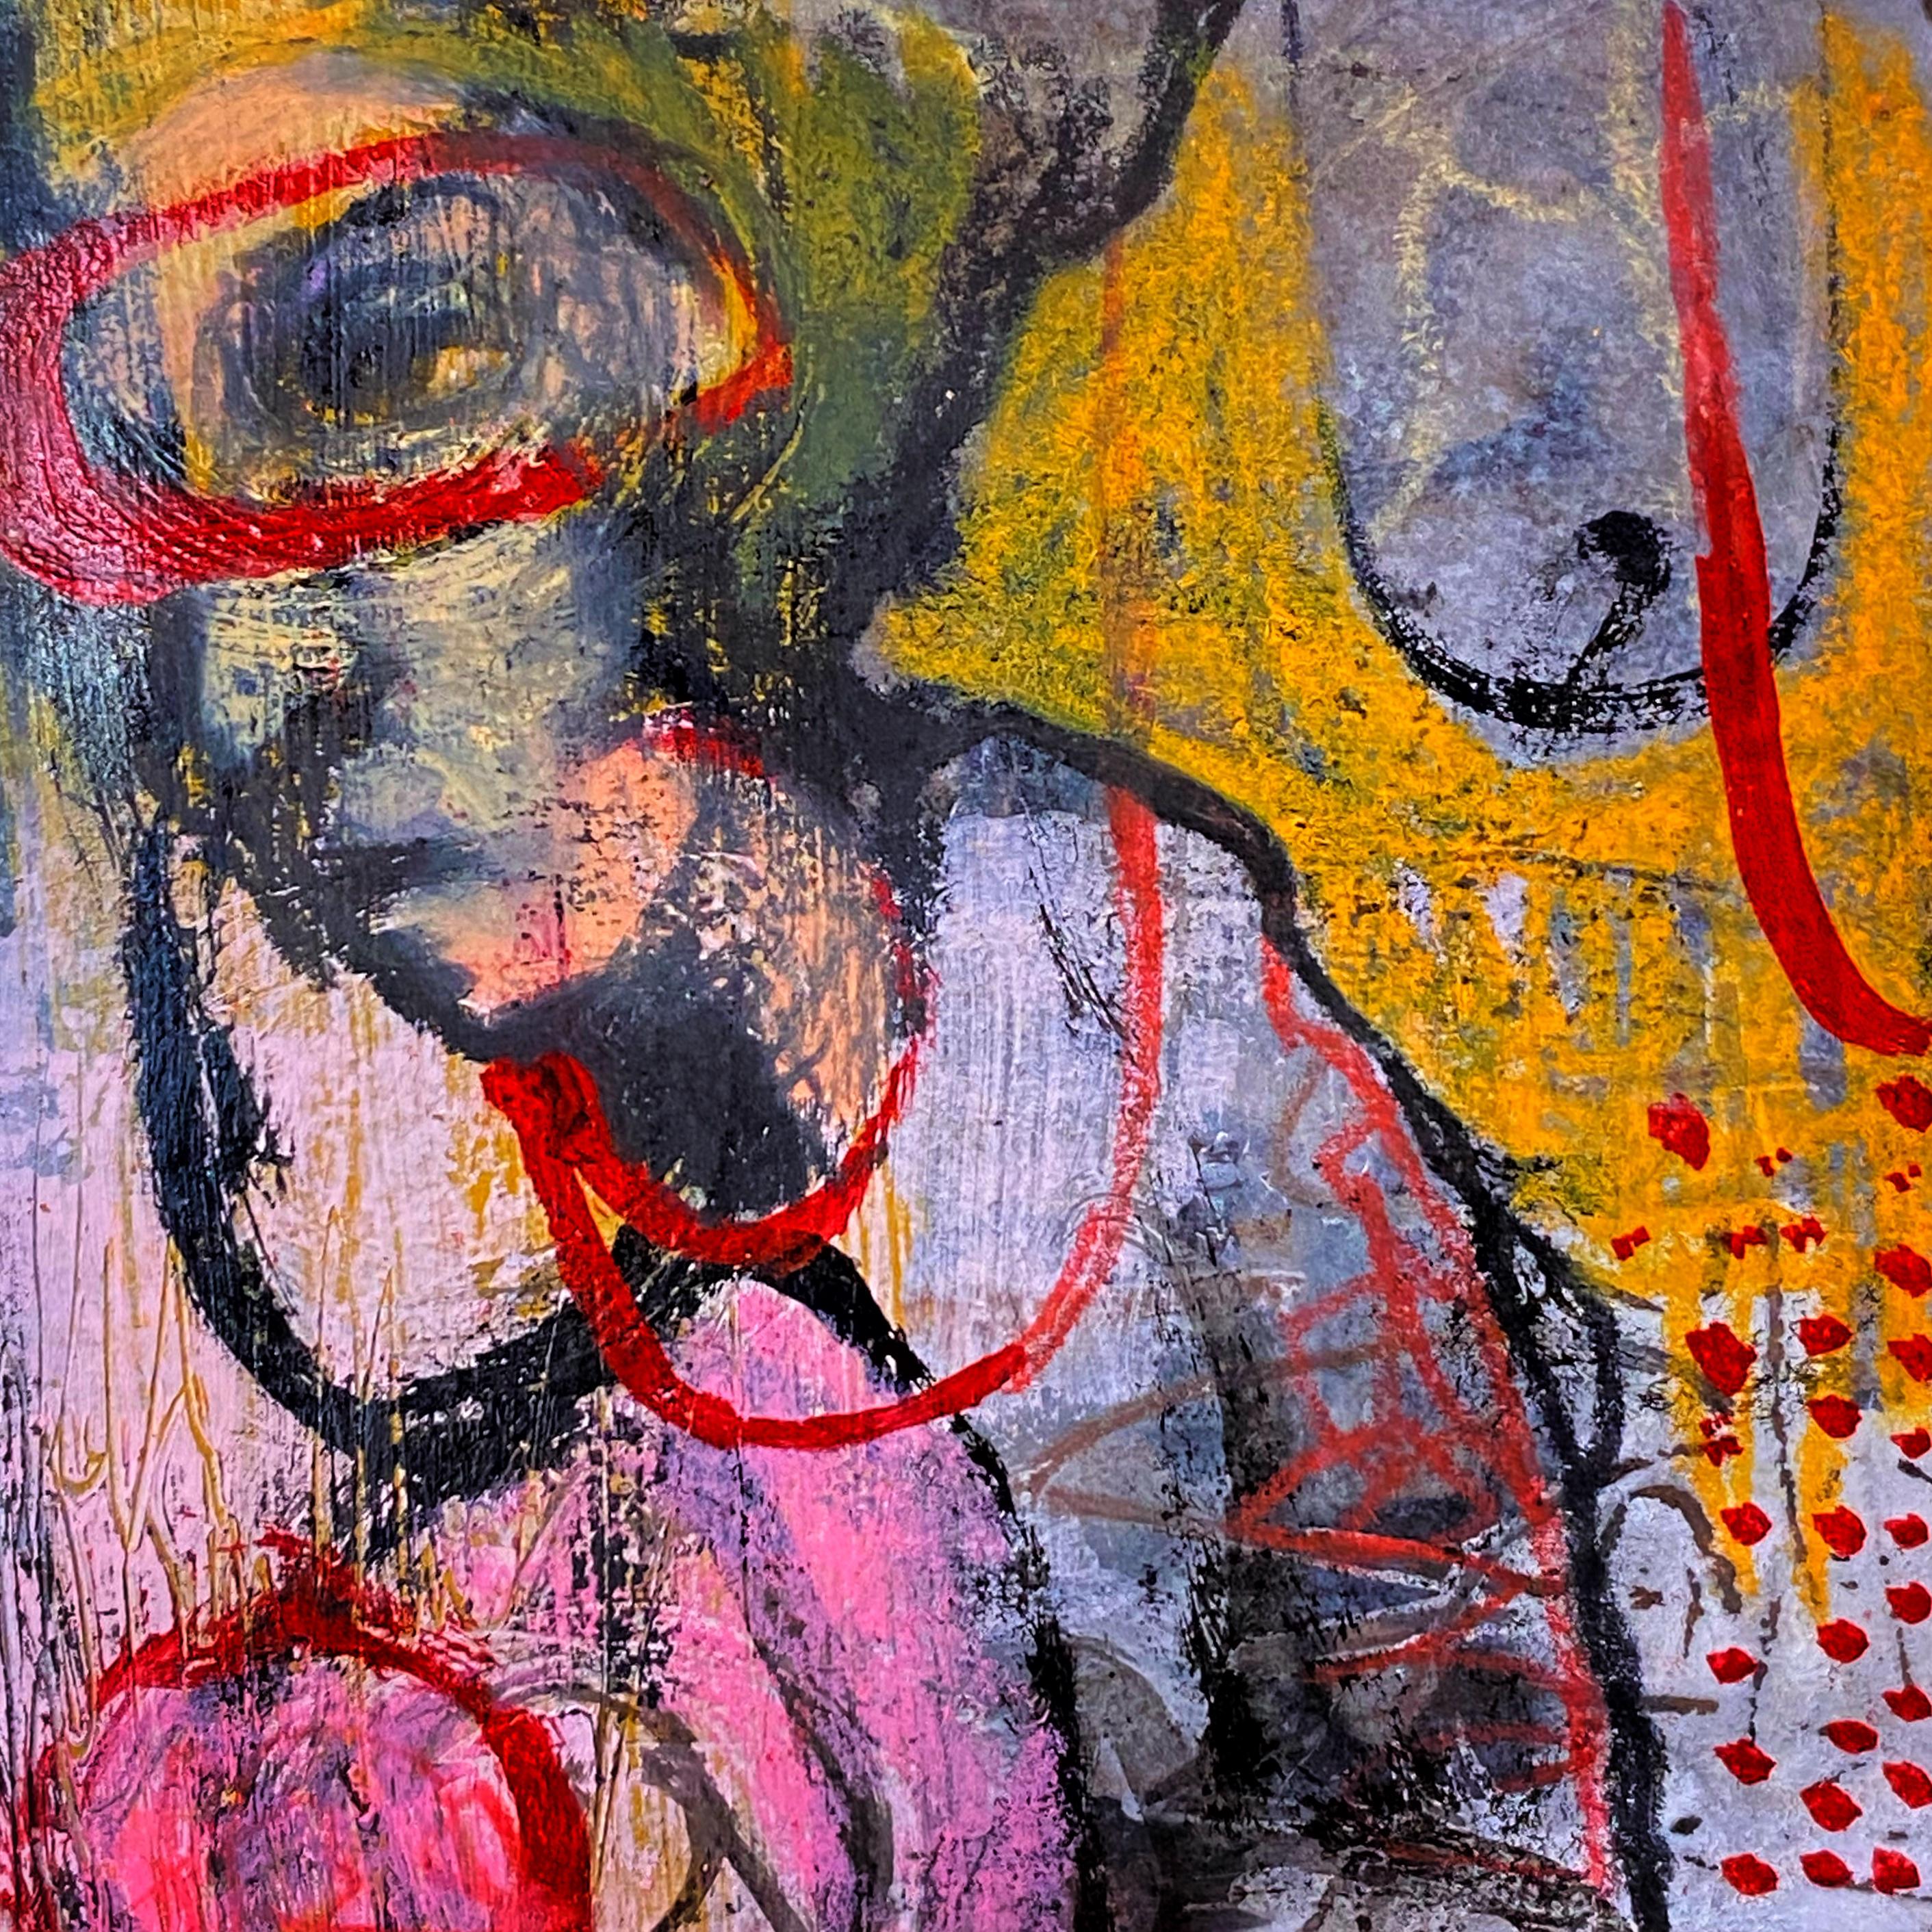
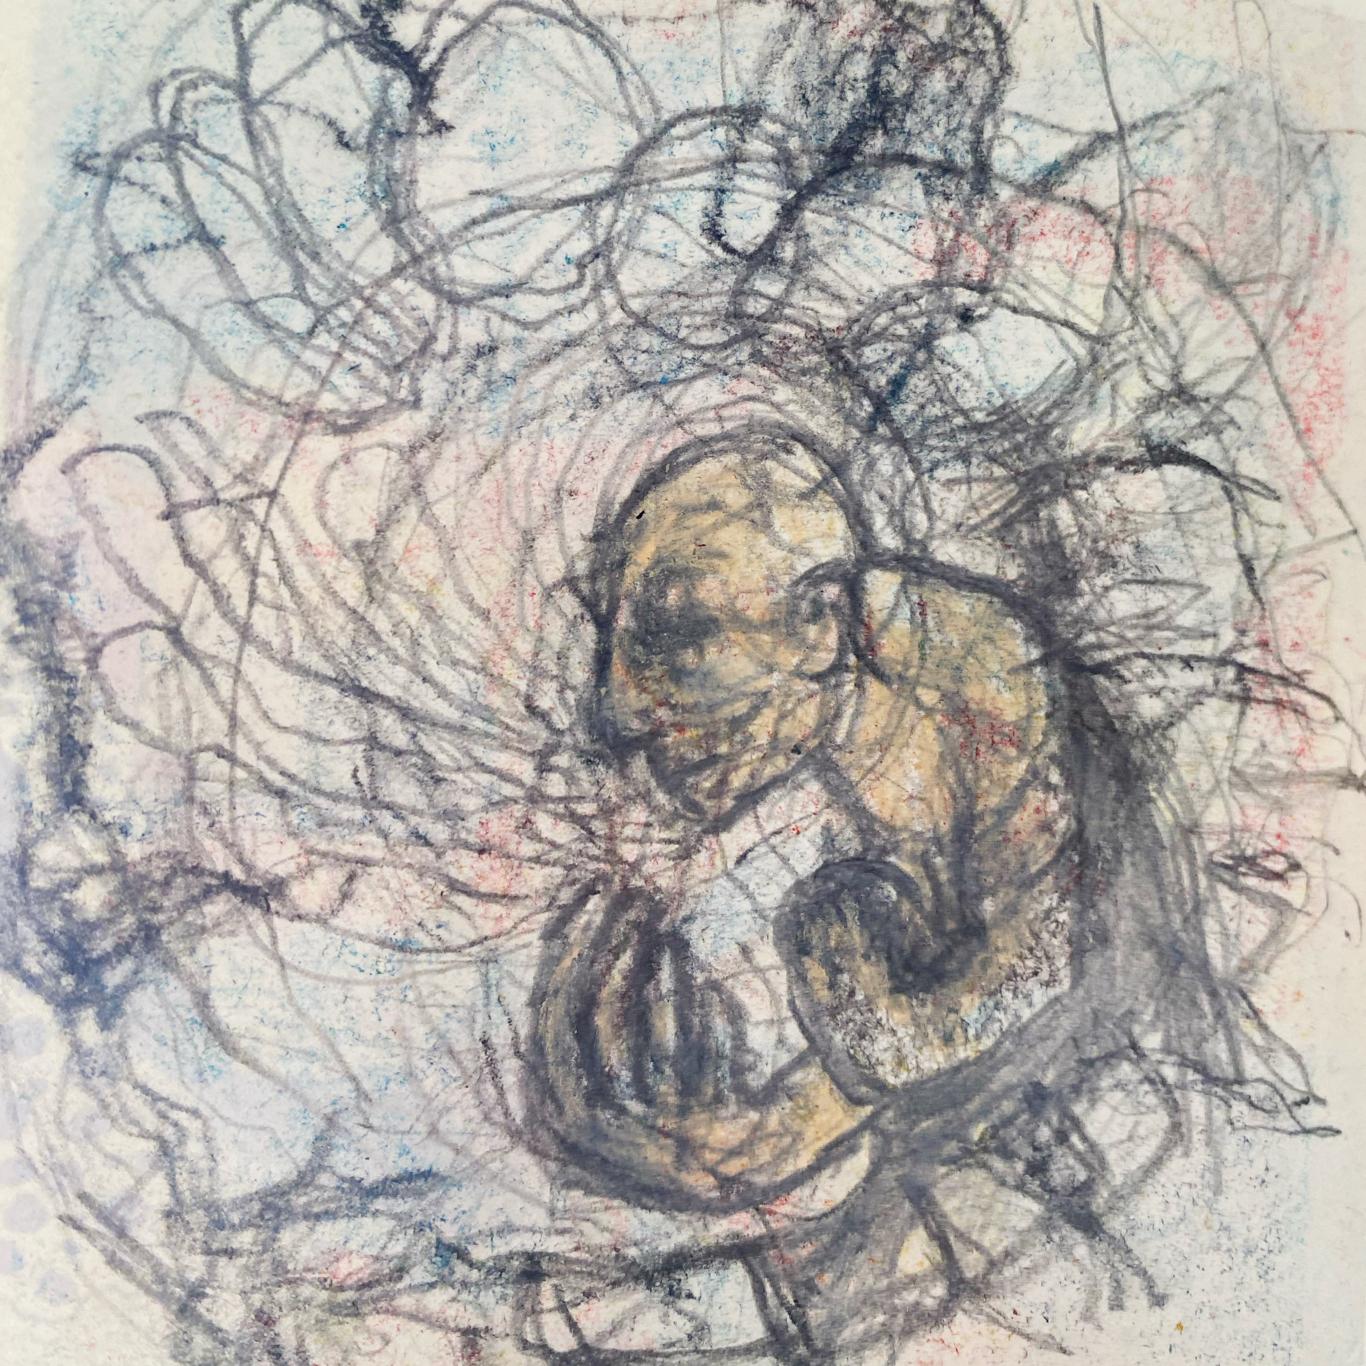
16. Marks & Layers - Intuitive Acrylic Painting: In this art quickie, we're just going to do a
whole bunch of layering. I'm going to alternate between
acrylic paint, Indian ink. In the end, I'm
going to bring in some neo colors as well
for even more texture. We're going to do
some mark making, you know, whatever
your heart desires. Try to dry the paint in
between your layers. That's going to prevent your colors from getting
muddy, you know, unless you have a specific
technique you would like to do where your layer of
paint needs to be wet for. But if that's not the case, just dry it in between.
You won't regret it. If you're like me and you tend to see things in the paint,
just bring them out. If it doesn't happen,
keep it abstract. Later on, I will see
a figure as usual. That's what I'm
into, but maybe you see landscapes or
animals, you know? Whatever you see,
bring it out or not. You know, if you're not
in a mood to do that, then just keep playing. If playing feels hard to you, for whatever reason,
put on some music. It really helps to distract
that inner critic. And. And I hope you enjoyed seeing what most of the previous techniques
together could accomplish. And let's go to the next lesson.
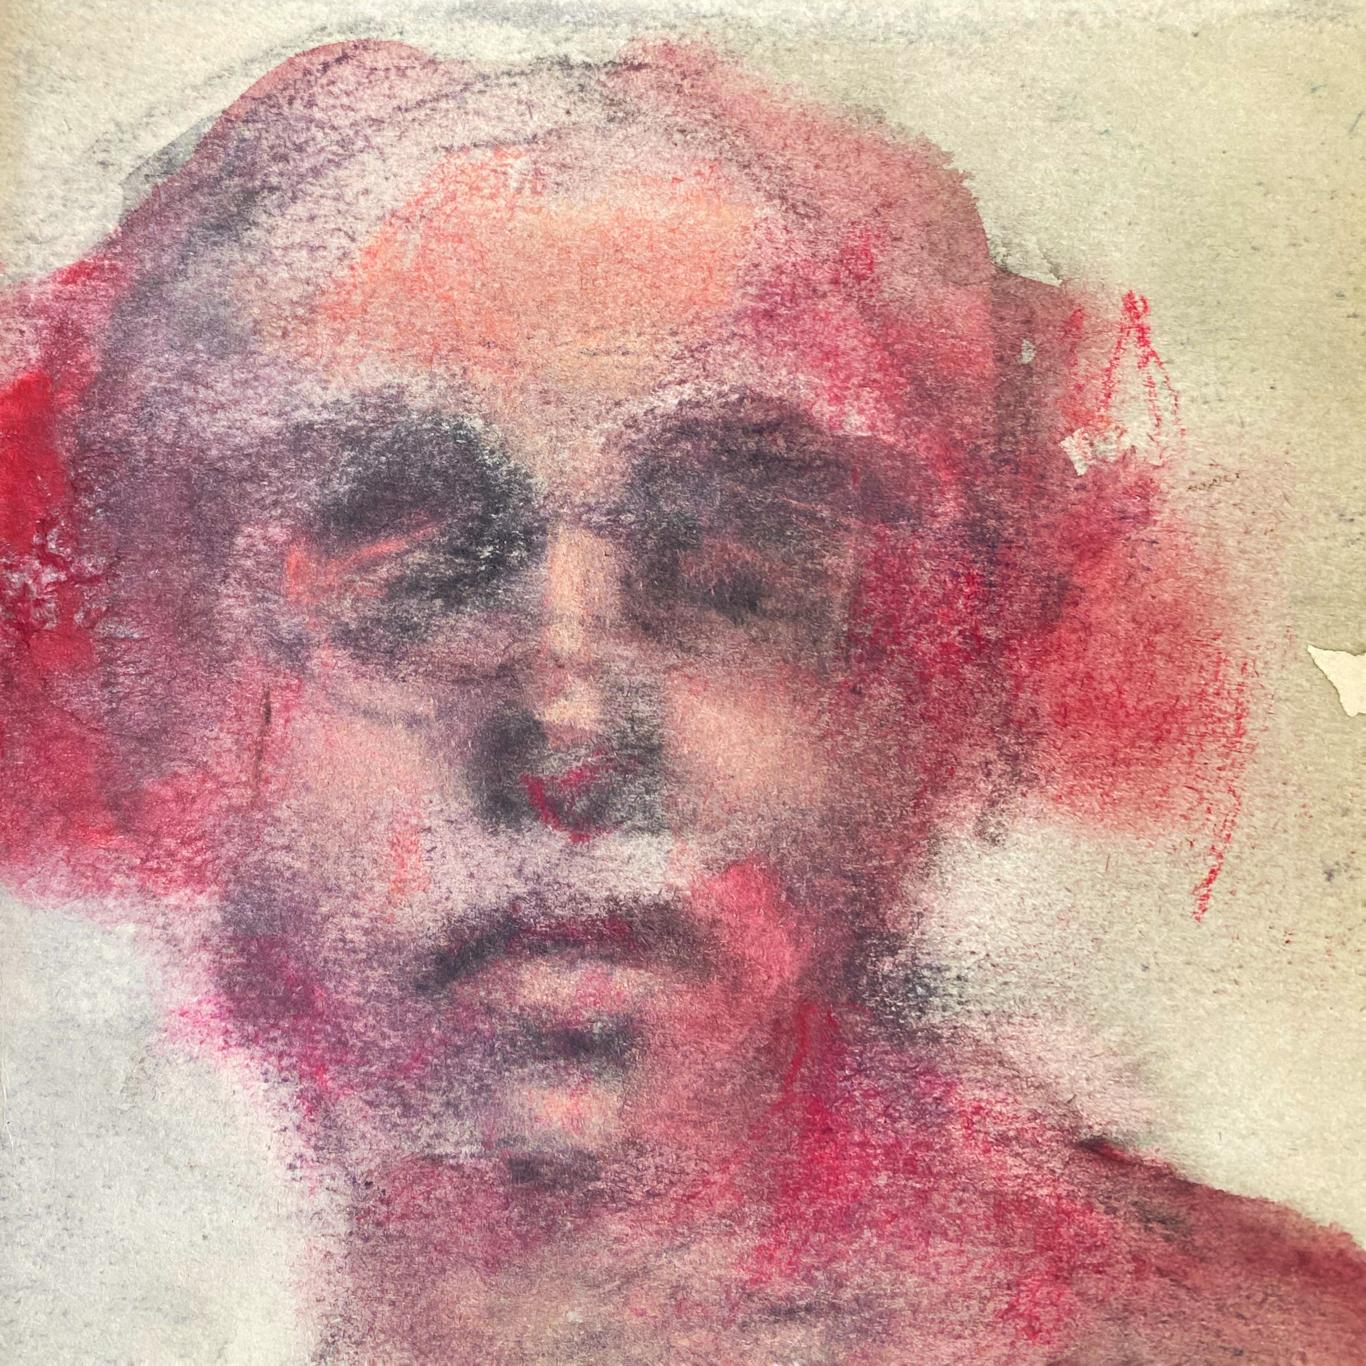
17. Soft Pastel Portraits - Mixed Media Exploration: Now let me give you some
inspiration to create a soft and expressive
portrait in Mixed Media. I'm just going to take my
SabitOol pencil and I'm going to just intuitively make some marks that could
lead to a portrait. So, as usual, I'm going to
indicate the eye sockets. Shadow underneath the nose, the mouth. Some cheekbones. So extracted hair. Okay. So now that I know my
placement, more or less, I'm going to I'm going to become more
confident with my eyes still not putting in much detail. I'm pressing harder
here on the lips. There. See how I'm working
in blocks of shadow, keeping my pencil
on the side there. And I'm working quickly and slowly at the same
time. You notice? It's because I'm searching
searching for body language. I'm not making the
neck too thin. I used to do that a lot
when I started out, but it should run from ear or where an ear should
be to ear, more or less. Most of us have the tendency
to make very narrow necks. M see now going to push the neck back by
putting in more shadow, and that way, the chin appears
to come to the forward. Pressing a little
bit harder again. I'm not worried
about these lines. But something like this. I'm trying to work loosely, and it can be hard for
us, right? Me included. I also have a tendency
to work tight tightly. That's why I always
come up with ways to spin things out
of control like now. Let's see. I want a brush, flat brush, flat ish. And I'm going to I'm
going to wet it. So this brush is very wet, and I'm not putting
a lot of pressure. I'm going to wet it again. Otherwise, I'm just going
to smudge everything into a black Olivion Okay. So by doing this, I'm activating that Tabilopen, so I'm just going
to take some water and going around
it because I don't like the paper to be all
white around my figure. Let's see. There. Okay. Now let's take
some watercolor. I'm going to take
a different brush. Maybe I'll take this one
and never use these. So why not now? Okay. I am going to What
kind of color is this? It's a little bit
too brown for me. Think, maybe this one. Okay. So going to put that
here and there, mostly in the shadow parts. For now, anyway. And now that there's
little on my brush, I'm going to spread it around. See, there's a hint of it, but not too much. Because the paper is still wet, you know, maybe a bit more. You're not getting harsh lines. Just play. There are no wrong moves here. I'm not saying you're going
to like the end result, per se, but try not to
think about that too much. There. I think I
rather like this. H. Maybe a little bit.
Nos there as well. And it's going to get a little muddy and don't
worry about that. There. Yes. Okay. So now let's
get that heat gun. Where's my heat gun? And this is the heated
craft tool from Ranger. And if you're easily overwhelmed and
overstimulated like me, then this is such a
pleasure to have. It wasn't crazy expensive
either, so look it up. There. Now, let's you can
take some pastel, but I think I'm going to
get some contact crayons. Can use this little set. Oh, there used to be a
white one in there as well, but I also have this box. I got from my neighbor
in my old place. His father was an artist and sadly he passed
away a while ago. And then he gave me this. And I like this range
of colors much more. So what am I going to do? Maybe I'm going
to get this pink, and I'm going to Just
put it in some places. You don't need to stay within
any lines or whatever. Even better, go over some lines. Okay, let's mix it up. This one. I really don't like to use
just Conte crayons or pastel. But in mixed media, I rather enjoy it. See how I'm pushing
certain parts of the face forward by
putting highlights on it. Okay. Going back to this one. And my goal here is to
not work too tight. So I'm only hinting
at some eyes here. And I think really
this is enough. I can try to get this red or I didn't like it, I'm
just going to smudge it. I think I like this portrait. I want to use a lot of
contrast and darkness, but sometimes I like to
switch it up, you know? Yeah, I really like this
dreamy figure right now. So I think I'm just
going to stop. So in not even 15 minutes, I got this little portrait. I hope that you'll
try it as well. You can see it's
not time consuming. It's a good way to start
your day in your art room. And just try something
else for change, you know? That keeps us motivated
and inspired and curious. And that is what we need
to, to keep creating. I hope you enjoyed this. Now, let's move on to
the next Art Quickies.
18. The Importance of Being Messy : Et's get messy. I'm starting with twisting my Stabilol pencil
across the page, and let's put some gesso
on there because we want the paper to not be absorbent for what
I'm going to do. And I wanted some marks
to be there already. Okay, let's try this so that we can play with very watery
inks on top of this. I'm starting off with the
liquitex transparent ink, raw umber or burnt umber,
I think burnt umber. And since I had too much water, I just dropped
some ink in there. And I'm going to dry
this for a little bit. And then I'm taking a paper
towel to remove most of it. And I'm going to do
this a couple of times. And on the right there, I'm mixing in some black ink. Just because I want to
see the difference. Allowing yourself to get messy on a regular basis is
very good for your art, especially when you
have a tendency to be very perfectionistic
and overwork things. This is really freeing, and on top of that, it can also inspire you for some figures or maybe
some abstract work, whatever you're in the mood for. Now that we have a
pretty neutral base, let's up the contrast
with a credit card or wedge or something and
some black acrylic paint. If you see something, you can paint in the negative space around
whatever you're seeing. But there on the left, I just did something random, and luckily for me, I also see a figure in there. So we're going to have some fun. If you don't see a
figure or anything else, then don't sweat it. Layer and have
some fun that way. You don't always need to
make something figurative. Now that the paint has dried, you can dab away the
droplets pretty easy, and that's how you get these
nice and grungy textures. I'm taking my tab pencil
and my fingertip, and I'm going to smudge this around and
bring some form to this face just so that I can clearly see what I want
to do with paint later on. This is a very nice and safe way to shape your portraits without
it being too permanent. So you can still make changes. If you don't like what you do, then just take a baby
wipe or something or a wet brush and remove
that sablol pencil. That way you can
practice without having fear of creating something
that is really hideous to you. Although you know my
point of view, right? I love the wonky weirdos, and they also help us
to understand phases. So if wonky weirdos is the best you can do, celebrate them. You know, I will come later on. Whether that's months or years, doesn't matter as long as
you have fun with your art. And did you notice how
I created the form in the face wherever the
features are lying deeper in the face or they're
they're casting a shadow. That's where you need
it to be darker. And just by doing that, you'll see that the forehead and the cheek there and
the nose a little bit, they seem to be sticking out more than
the rest of the face. And we can fine tune that later on when I
bring in some paint. Just create some
marks here and there. Until your inner critic, it's going to be, okay. This is just some fun,
nothing to worry about. Now let's take some
acrylic paint. This is actually
my acrylic gouache in Ivory yellow or something, just as long as it's nice and light and watch me
create that face. I'm starting with a cheek there, and I'm making sure that my brush strokes
aren't just random, but I put them in the
direction of the skin. I know it may sound a
little weird, maybe, but just look what I'm
doing. It's not random. Let's put in an eyelid and I have a brush that is a
little bit too big for me. I always tend to do that, and that can help you to stay loose, but sometimes with the eyes, it's going to get in the way, and that's what I'm experiencing
here, but I'm stubborn. So yeah, Major cross eyed. Okay, time to No, not yet. Okay. Okay. So here
I'm thinking maybe I do need to put in the effort
to find a smaller brush. It there. That's better. So I'm just getting rid of a little of the
paint on the cheek, and now I'm going to
put in the white of the eye there another eyelid and a little bit
of white of the eye. And there, she has an
expression. It's that simple. And if you don't
like the expression, then just blacken out that
eye and let it try again. Try to not cover up
everything there in the face and don't be too tidy. Let's give her a little
bit of body language. You can do scribbly
art with your brush as well. Let's see. Shoulder, a little bit too
much paint. Oh, not yet. That's later on, you'll
see because I wanted a little bit more light on that shoulder because that is
where light is coming from, as you can see in the face. But first, I'm going to
do a sloppy hairline. Seriously, be sloppy, you guys. It's so much better
than being precise. People often wonder, why are they not succeeding
in painting loose? And the thing is, you
need to be more sloppy. Forget everything your
parents told you. You need to be more sloppy. And maybe you want to cover
up a part of your figure, whether it's with the same color that
you're working with, random quick brushstrokes or something or maybe with
a different color, just to mix things up
whenever you get too tight. I'm not doing that right
now because I didn't feel the need to do that,
but that's an option. Okay, so let's do kind
of the same thing with the figure on the left
there, bottom lip chin. And do you see since this
is a very light background, you have less
contrast in the face, and I could put that in anyway, but I figure this
is an art quickie. Let's make it a little weird, oh with bony knees and big feet. Little bit more paint for those feet with a
hammer toe. Why not? And let's see, I think I
want a hand right there, the base of the hand and
then some wonky fingers. He doesn't need to
be perfect hand, just an illusion of a hand. Right now I have no idea what that hand is going
to do, but later on, I will put something in it just because I want
to at that moment. But here, I have no idea. I just wanted to put
that hand there. Whenever you get
impulses like that, but you don't know
why, just do it. When we overthink things, then it's hard to create from our gut,
from our intuition. Pre planning doesn't
really work for me. That's why I'm really big
fan of Monkey weirdos. Now, let's add little mph
to that sleeve there. I'm just going to lightly
put in a couple of stripes. And then I'm going to
show you how you can make those simple stripes
look like clothing. So in a couple of places, I'm going to here, I'm shading the
shoulder a little bit. And here I'm going to emphasize
parts of those lines, and I'm going to press
harder on my stublol pencil, and that looks way more
organic and less drawn on. Yeah, something
like that. And I'm putting a shadow
underneath that arm. It's little details like
that that's going to make your wonky
weirdo believable. And I'm not going to put a
lot of detail in that face. I rather like it like this. Again, be messy. And it's
imperfectionistic a word? I don't think so, right?
Not perfectionistic. So we're going to have
sloppy fun. Are you with me? Okay, let's remove that tape because that's always
so satisfying. I'm thinking I want to put
something in that hand there, but I want it to
be really subtle. So I don't want to use
my paint and a brush. So I'm going to get my Oh, I think, how do you
pronounce that? It's the book binding needle
to poke holes in your paper. And I'm going to scratch away
a little bit of the paint, so something like a
stem or something. And here I'm just
making some scratches. It could be a flower, maybe
a dandelion, or whatever. Doesn't doesn't matter. Just want to put
something in there. And it'll add to your story. Just going to shade a couple
of his fingers a little bit with my stab pencil,
and then that's it. I hope you enjoyed this, and I wish you lots of
fun in your journal. Or on a piece of
paper. What's easiest for you? Epic creating.
19. Art Quickies for Mindfulness: After all these art quickies, it's time for a little
bit of relaxation. Whenever you need to calm down, you can come to this chapter
to do a little bit of mindfulness and meditation
in a more visual way. I've designed the lessons
so that artists from every level can enjoy at
least a couple of them. And I have stayed
away from mandalas just because I don't like that
geometrical perfectionism, you know, I know that they can also help to
calm down the mind. And if you enjoy
them, then go for it. There are lots of
classes on those, but I wanted more
liberating approach while more or less
doing the same thing. And as usual, you can just use your own
favorite art supplies. I'm only here for some guidance, and So, Hey, baby. It's been a while since one of my cats came to
say hello, right? So that is Flood, my
naked little boy. But okay, back to the subject. I hope that you enjoy this. So every time that you feel
some anxiety or overwhelmed, you can just come
back to this chapter, pick out one of the exercises, and take a little bit of time to unwind and relax your mind. So let's take a deep
breath and relax together.
20. Pipe Down With Pattern Play: Let's give up some control. We're going to divide the
page in random patches by slowly moving a small
object across the page. We're just going to push it. You can even go slower than I am because I am rather impatient. But the slower you go, the more relaxing it
will feel to you. If you are a bit nervous about how to start your
art journal pages, then this is a great way to get things going and just
take it from there. The possibilities
are endless when it comes to how to deal
with these patches. I'm showing you one of these, but you can also do something with words or zentangle
or something. When you feel like you
have enough patches, then just stop and move
on to the next step. Now, let's take some
colored pencils and just fill up these patches, both with color
and with pattern. Put on some calming music
and just follow your gut. There are no rules. This is a great exercise when
you feel really anxious. The slow repetition
will help you to ground yourself and calm down
when you really need it. If you are working in
a larger sketchbook, don't feel like you have to
fill in all the patches. Just do enough of them
to calm yourself down, and then they will wait for you whenever you
need them again. Now, sit back and just enjoy watching me
fill up my patches. I hope this was a
nice ice breaker for you to get started with
some fun and color. Now, let's go to the next video, and I'll show you another
fun way to just relax. Mm
21. Breathing Lines: In this exercise,
we will focus on our breath because when we're
anxious or stressed out, we tend to breathe very
superficially and quickly, and, you know, that's not
going to help anything. So I want you to
get a crayon or, you know, a pencil.
Whatever you have. And I want you to focus
on breathing slowly. And we're going to
move the crayon on the rhythm of our
breath very lightly. So breathing in. Breathing out. Breathing in. Breathing out. And
again, in out. And I want you to just
fill up the whole page like this in out. Okay. Now, we're going to
do the same thing. Only we're going to put a little bit more pressure
and color on the page. So in out. I out. And we're moving down in out. In oh Out. In outs. See, we're making gradients
while we're breathing out. In outs. Just focus on your breath. Okay. Now, let's take
a different crayon, and let's do the same
thing with lines. So wetting in and out. In out. In and out. In in out. You can change your crayons, you know, with every
breeding session. In out. In and And it's not about Oops, making
something beautiful. It's just about you can
switch up media if you want. And and And when you notice that
you're getting more relaxed, then it's time to go on to an art quickie that is maybe more stimulating
for your creativity. And if not, then just continue. And just notice how this white crayon will
become more blue, blue green when it
reaches the top, where there's more
pigment on the paper. It's also good to know, right? And out. You can also mess
about if you want to take some water while
you're breathing. And you can take another ink tens pencil or
watercolor pencil. I really like the
ink tens pencil, especially when drawing
through some wet paint. In and out. In and out. In Eels. Okay. And if you want to, you can also write down a word, whether it's from your
experience doing this or maybe something that is occupying your mind and
you want to let go. Whatever comes to
mind, just write down. Y. I hope this exercise will help you to slow down and relax
whenever you need it. And, you know,
after you do this, you can move on to
another art quickie or project with a more
centered feeling. Now, let's move on to
the next one. Okay.
22. Freestyle Unwinding - A Variation: Now, let's do something similar to this, but more freestyle. So we're again going to
focus on gentle breathing. Breathing in, breathing out. Breathing in. Breathing out. And you're just going
to continue like this for a good while. M. You can also after a while, really focus on breathing in
deeper and with more force. And you can put some more
pressure on your pencil. So bringing in. And reading out. Reading in and reading out. And back to normal. As you enjoyed the
previous exercise, when we add it to water, you can do that in and out. Doing everything in
correspondence to our breath. Notice how the water makes
these lines way more delicate. Now, let's do the
same thing again with the inkton pencil
on the web page in and out in and out. And if you're like me
and you like to find some figures or flowers or whatever in random marks,
then you can do that. I saw a little head here. Very simple. Another one year. And But only if it's enjoyable to you, you know? Let's get a new color crayon. It's just about having some fun with the lines
that you're creating. It's not about
creating art that you want to sell or
hang in your home. You can still move that Ink and pencil around
just by drawing. That's useful
information for when you are creating
other art projects. This is just some quirky
fun to help us to relax. And maybe I want
another ink ten pencil, my deep indigo is
my favorite one. I wonder what
they're looking at. If you know you can
put that in there, maybe a word, maybe
some symbolism. Let's get him some
nostrils there. You can do some pattern
play again, slowly. If you want to do it
on your breathing, that's fine, but
you don't need to. Just don't move too
quickly for this one. Because mindfulness is
all about slowing down and repetitive marks
interventions. I could make so many more faces, but I'm not going to do it. I'm thinking about
putting in a word, but, you know, I don't want to. I want to exaggerate some
lines here and there. I just want to keep my pencil moving without actually
thinking about it. Just respond intuitively
to whatever's there. You can also dip your ink and pencil in the
water and draw like that. You get more fuzzy
lines that way. Let's give this one a
headphone or something. Maybe I want to get rid of
that tape now because I want to let that headphone
come out of the frame. There, that's better.
Let's skip it again. Yes. I'm always walking
around with my headphones. So I guess it's kind
of a self portrait. And that's pretty much it. Just do whatever you
want with the spage. You can bring in
collage or paint or, you know, whatever you have
on hand that you enjoy using. Just put it in there.
I hope you enjoy this. Now let's move on
to the next video.
23. One Shape: When we are stressed or
experiencing brain fog, it's hard to make decisions. And that's where
this exercise comes in handy because for this one, we're only going to
choose one shape, and we're going to repeat that shape until we fill
up this whole page. That doesn't mean that
it has to be boring. You can make your
shapes overlap. You can play with skill, make some bigger than others. You can make them
change direction. You can do anything you
want with that one shape. Just follow your gut. Do not stress out if
after a few of them, you're thinking, Oh, this is stupid or it looks like crap. It's really, really boring. Just continue because the beauty of pattern play is that it will look kind of cool once you're finished just by
the repetition of it. And you also don't have to limit yourself to just one art supply, like I am doing right now. No, you can do layers
of charcoal, you know, as long as you fix it
when you're done with it, you can take a posca pen and do some bigger shapes on
top of that base layer. You can bring in paint,
whatever you want. I always encourage you
to make it your own if you have enough energy,
you know, to do that. And if you don't, it's no
biggie, follow my lead, pick one art supply
that you really love and keep making that shape and just have some fun with it. Exercises like this are really great when you're stuck
in overthinking mode. I mean, you have one job, so just relax and if that's
hard for you, then again, put on some music,
music that you love, and maybe sing along to it or just move your pencil to
the rhythm of the music. That's another fun exercise. Just create to the music. You can respond to
lyrics or the rhythm, the melody, whatever
captures you the most. Or you can do it all, you know, I a sequence, you can start out
with some paint and listen to the rhythm. Maybe then you can take a drawing tool and
draw the melody. And you can finish by responding to your favorite
lyrics of that song. Maybe you want to do an
illustration or some collage. Maybe you want to just
put in the words. Doesn't really matter
as long as you're having fun and it's
relaxing to you. There are so many ways
to relax while drawing. You know, you can
make up your own and share it with us in
the discussion in the classroom because
maybe there's someone who can really use your idea
to, you know, wind down. Maybe I can use it. I mean, I have brain
fog all the time, and I'm pretty low in my energy. So if you have any
ideas, hook me up. Another fun idea
might be to pick your two favorite
art quickies in this chapter and find
a way to combine them, you know, using the art
supplies that you really love. But only on days where you
can handle it, you know? If you just want to go
back to the basics, you don't want to make
any decisions whatsoever, then just follow my lead and
keep drawing that shape. Okay, so now that our
whole page is filled, we can leave it like that
or we can move the charcoal around either with our finger or if you don't like the
messiness of charcoal, you can take a paper
towel or something, you know, so you don't
get it on your hands. If you want to make your
drawing a little bit less flat, then you can just layer
bigger shapes on top of those little ones and make
them a little bit darker. You can go over them multiple times and they
will get nice and black, and you'll get a sense
of depth in there. And if you notice that you're still a little
bit stressed out, then you can create your shapes on the rhythm of your breath like we did a
couple of exercises ago. I think that can go really well, especially with this shape. It's pretty easy
because of that arch, you know, but honestly, any shape will work for this. If you've used charcoal like me, then don't forget to fix
it with a Vigilia spray. Just a couple of quick bursts, so you won't get shiny pulls, couple of layers of them, and you can close your journal. Now let's go to
the next quickie.
24. Palm Reading: This is a great exercise for present moment awareness. It's really simple. Just put out your hand like this and observe
the lines in there. Do not look at your paper. It's not important that it will look
interesting or artsy. This is all about quiet
observation and calming down. It's also really nice exercise to practice with letting go of expectations and just accepting to whatever is going to
show up on your page. Another thing that's really
interesting about this is the longer you are observing
the lines in your hand, the more subtle ones you'll see, and that is exactly the same for when you're
observing portraits, in the beginning, you'll mostly see the rough shapes and values. But as you are drawing, more little details will
start to catch your eye, and you'll put them
in bit by bit. So no need to get overwhelmed by the
complexity of human faces. Just take it step by step. You'll get it in the end. As you can see, I
have started out with very light and frill lines. But after a while, I'm
feeling more confident, even though I'm still not
seeing what I'm making, and I'm going to press
a little bit harder on my pencil just to have a bit
of variation in my lines. If you want to,
when you're done, you can observe your lines and see if you can see
some figures or an animal or maybe
a landscape or just a cool composition
for something abstract. You can work on this
a little bit further. I'm not going to do
that for this exercise, but you know I'm
always up for that. I just thought, you know, I'm going to do this a
couple of times already, and it's nice to have lessons that are short
and sweet so that you can just focus on the observing part and not spend too
much time on it. You've probably noticed
by now that my lines are becoming very different
than the first few minutes. That is exactly
because of what I said earlier that the longer you
are observing something, the more you will notice. And what I noticed is
that my lines are made up by many tiny little lines. And that is what I'm
doing right now. So take your time
with this exercise. Don't rush through it because it takes a while
to really get into it, and it's quite enjoyable. Right now, I'm pretty much trying everything
at the same speed. But you can experiment with
different tempos, you know? What happens when you speed
up a little bit or slow down? And I don't mean what
happens with the end result, but what happens
inside yourself? What happens with your
experience of this exercise? Do you prefer one
over the other? If so, have you noticed that when you are creating
other class projects, or is it a new discovery? Would you like to
experiment more with that? Observations like that can be very helpful
for your process. But these are questions to consider after you're
done with this exercise. While you're drawing, try to just stay present
in this moment. And just enjoy your
pencil or pen gliding across the paper while you're watching all the tiny
lines on your hand. There's no specific time for you to be done
with your drawing. Just listen to your feelings. If you feel done,
then you're done. I hope you enjoy this exercise. If you want to take it further, you can bring in some mixed
media on top of that, whatever you want, or you can just go with me to the
next part quickie. Sounds good. Then let's go.
25. Texture Adventure - A Variation: Sometimes we get
triggered emotionally so badly that it gets hard for
us to keep things together. And something that can help
you cope with that is to shift your focus from your feelings towards
your environment. So for example, you
can look around and count all the red
objects in the room. If after that, you're
still really anxious, you can just move on to the yellow ones and
the green ones. It's just a way for you to take your mind off
that high emotion. And this exercise works in the same kind of way
without all the math. Let's practice, walk
around your home and try to find an object with a texture
that interests you. Now, take any art
supply that you want to draw with that gives you some comfort that
you're familiar with and start to draw all
the marks that you see. But first, let's make a deal. We're not going to try and
copy whatever you're seeing. Just observe the texture
and make some marks without feeling the need
for any end result. They will distort
overlap, doesn't matter. Don't bring any extra
stress into your life, putting expectations
on yourself. Just enjoy watching all these
interesting little details and let your hands slowly move along with
whatever you're seeing. You don't even have to
look at your paper at all. The longer you're looking, the more you will notice, and it's perfectly
fine to simplify what you're seeing so you won't
get stuck in overthinking. Just keep drawing. And remember, it's not about the
end result at all. Just enjoy this quiet
moment of slowing down. And just know that you can also just watch this
whenever you need to. If you're out and about and you aren't able to draw whenever
you need to come down, then just open the
Skillshare app and watch me draw for a while. And then later on
when you're home, then you can do the drawing. So use this lesson
however you need to. If you are drawing with a water
soluble pencil like I am, you can take a brush with
some water and activate it, and then you can draw on it again while the
page is still wet. And that way, your marks
will become even stronger. This will give you a
nice and layer drawing. You can be done,
or if you want to, you can observe your drawing
and see if you can find a figure or flowers
or an animal, whatever it is that you love to draw or that you just see in there and you can slowly
bring it out once again, we're not going to
worry about making it pretty or correct
or something. It can show up however it will. You're just going to enjoy
the drawing process. And you know my philosophy, the wonkier the better. I hope you enjoyed
this exercise. Now, let's go to the next video.
26. Go Forth and Create!: And that's it for now. I hope you enjoyed it, and I can't wait to see your class projects if
you would like to share, because I want to
give you some love. And if you want to
show me some love, then I would love it if
you would write a review. Not only will you help other
students to find this class, but I also genuinely would love to know
what you think of it. So if you have a
couple of minutes, I will appreciate it so much. And I want to take
another minute to thank you all so much for leaving all your
beautiful reviews. You always make my day when
I get that little email. And yeah, I appreciate you guys. So thank you from the
bottom of my heart. Now, find yourself a quickie that you would
love to do right now and have some fun
with it. Happy creating.
 Jerney Marisha, Helping You Create With Freedom