Transcripts
1. Rose Wrist Corsage Introduction: This is really fun to
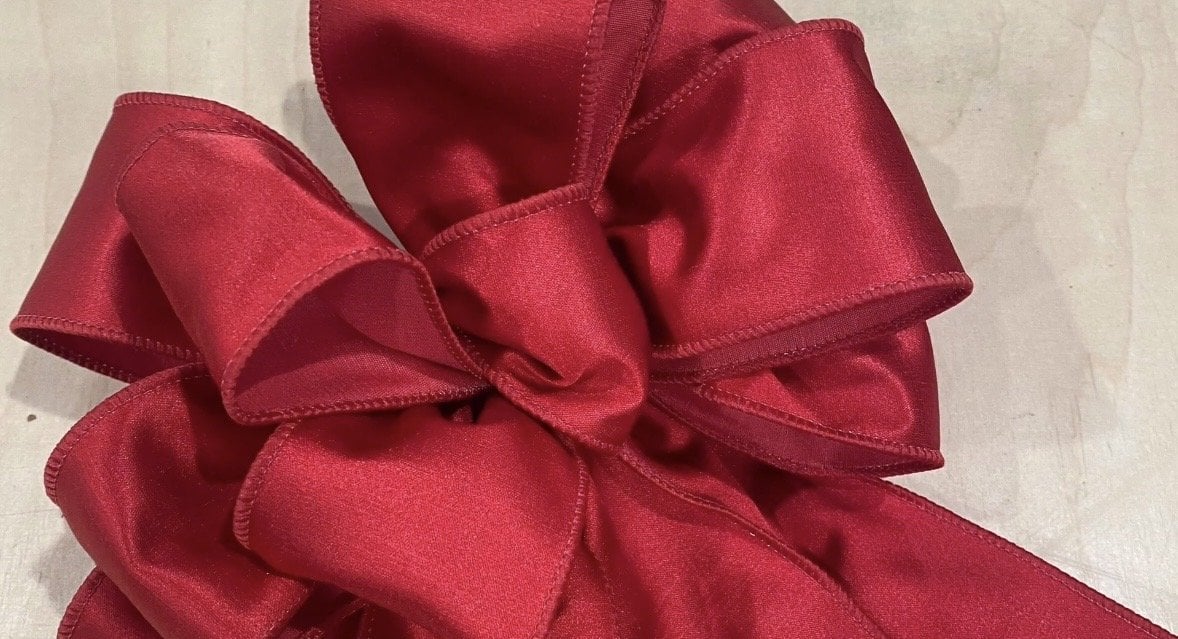
make a wrist crisage. I'll show you all the supplies
that you're gonna need from ribbons and glues and, you know, what supplies
you're gonna need. Floral adhesive glue
is really great for making flowers
stick to objects, especially natural objects
like leaves and so on. I'll be showing you
how to make a bow by hand that you can use
on your wrist crisage. And really every
step of the way it takes to create one of these. It's great to have
this knowledge. So if you need to make one for prom or somebody for a dance or a wedding or as a
gift for a holiday, um, once you learn
how to do this, you'll be really empowered. It's just knowing how
to do it and taking the time to do it and
having the right supplies. So I think you'd have a
lot of fun watching this. You can use any type of
flour that you like. And it's really easy.
Once it's done and dry, it just slides onto
as from the wristlet.
2. Preparation & Bow 2: So this is a rose wristlet, nice for proms and weddings. The supplies you're gonna
need is some ribbon. I like the double faced
ribbon, adhesive glue. This is a floral adhesive glue. You can get it from Amazon
or some supply stores. It comes in a tube, and it's a wet almost
like a super glue. It holds flowers really well. We'll need some clippers,
floral clippers, wire. You don't need these many wires, but that's just so you
can tie your bow up. Some flowers, some filler
flowers, and some greenery. I chose to use roses
for this video, but you can use any kind of flower you want
and glue them on. So we're gonna make
a bow by hand. It's really pretty simple to do. The ribbon's nice, flexible. It's basically just making loops and holding
tight in the center. And you can do about three
to five loops on a side, depending really how big
you want your bow to be. But it's always about twisting, making a loop and holding it. One hand is holding
the bow together, and the other one is
making the loops. This may take you a few times, but it's really not that
difficult to do. H. So now that you're
finished and you got all the loops you like,
you just cut it off. And we'll have to grab a
wire so we can attach it. What we do is we go through the center loop where
your thumb is holding, go right in the
center underneath the ribbon and come
out the other side. It'll probably poke through your fingers where
you can see it. That way you can grab it easily, pull up on the ribbon and
then twist it to secure it. And it just makes it nice and tight and holds
your bow for you. And now just move your loops around to fluff out your bow, make it nice and full. And that's it. That's
all there is to it.
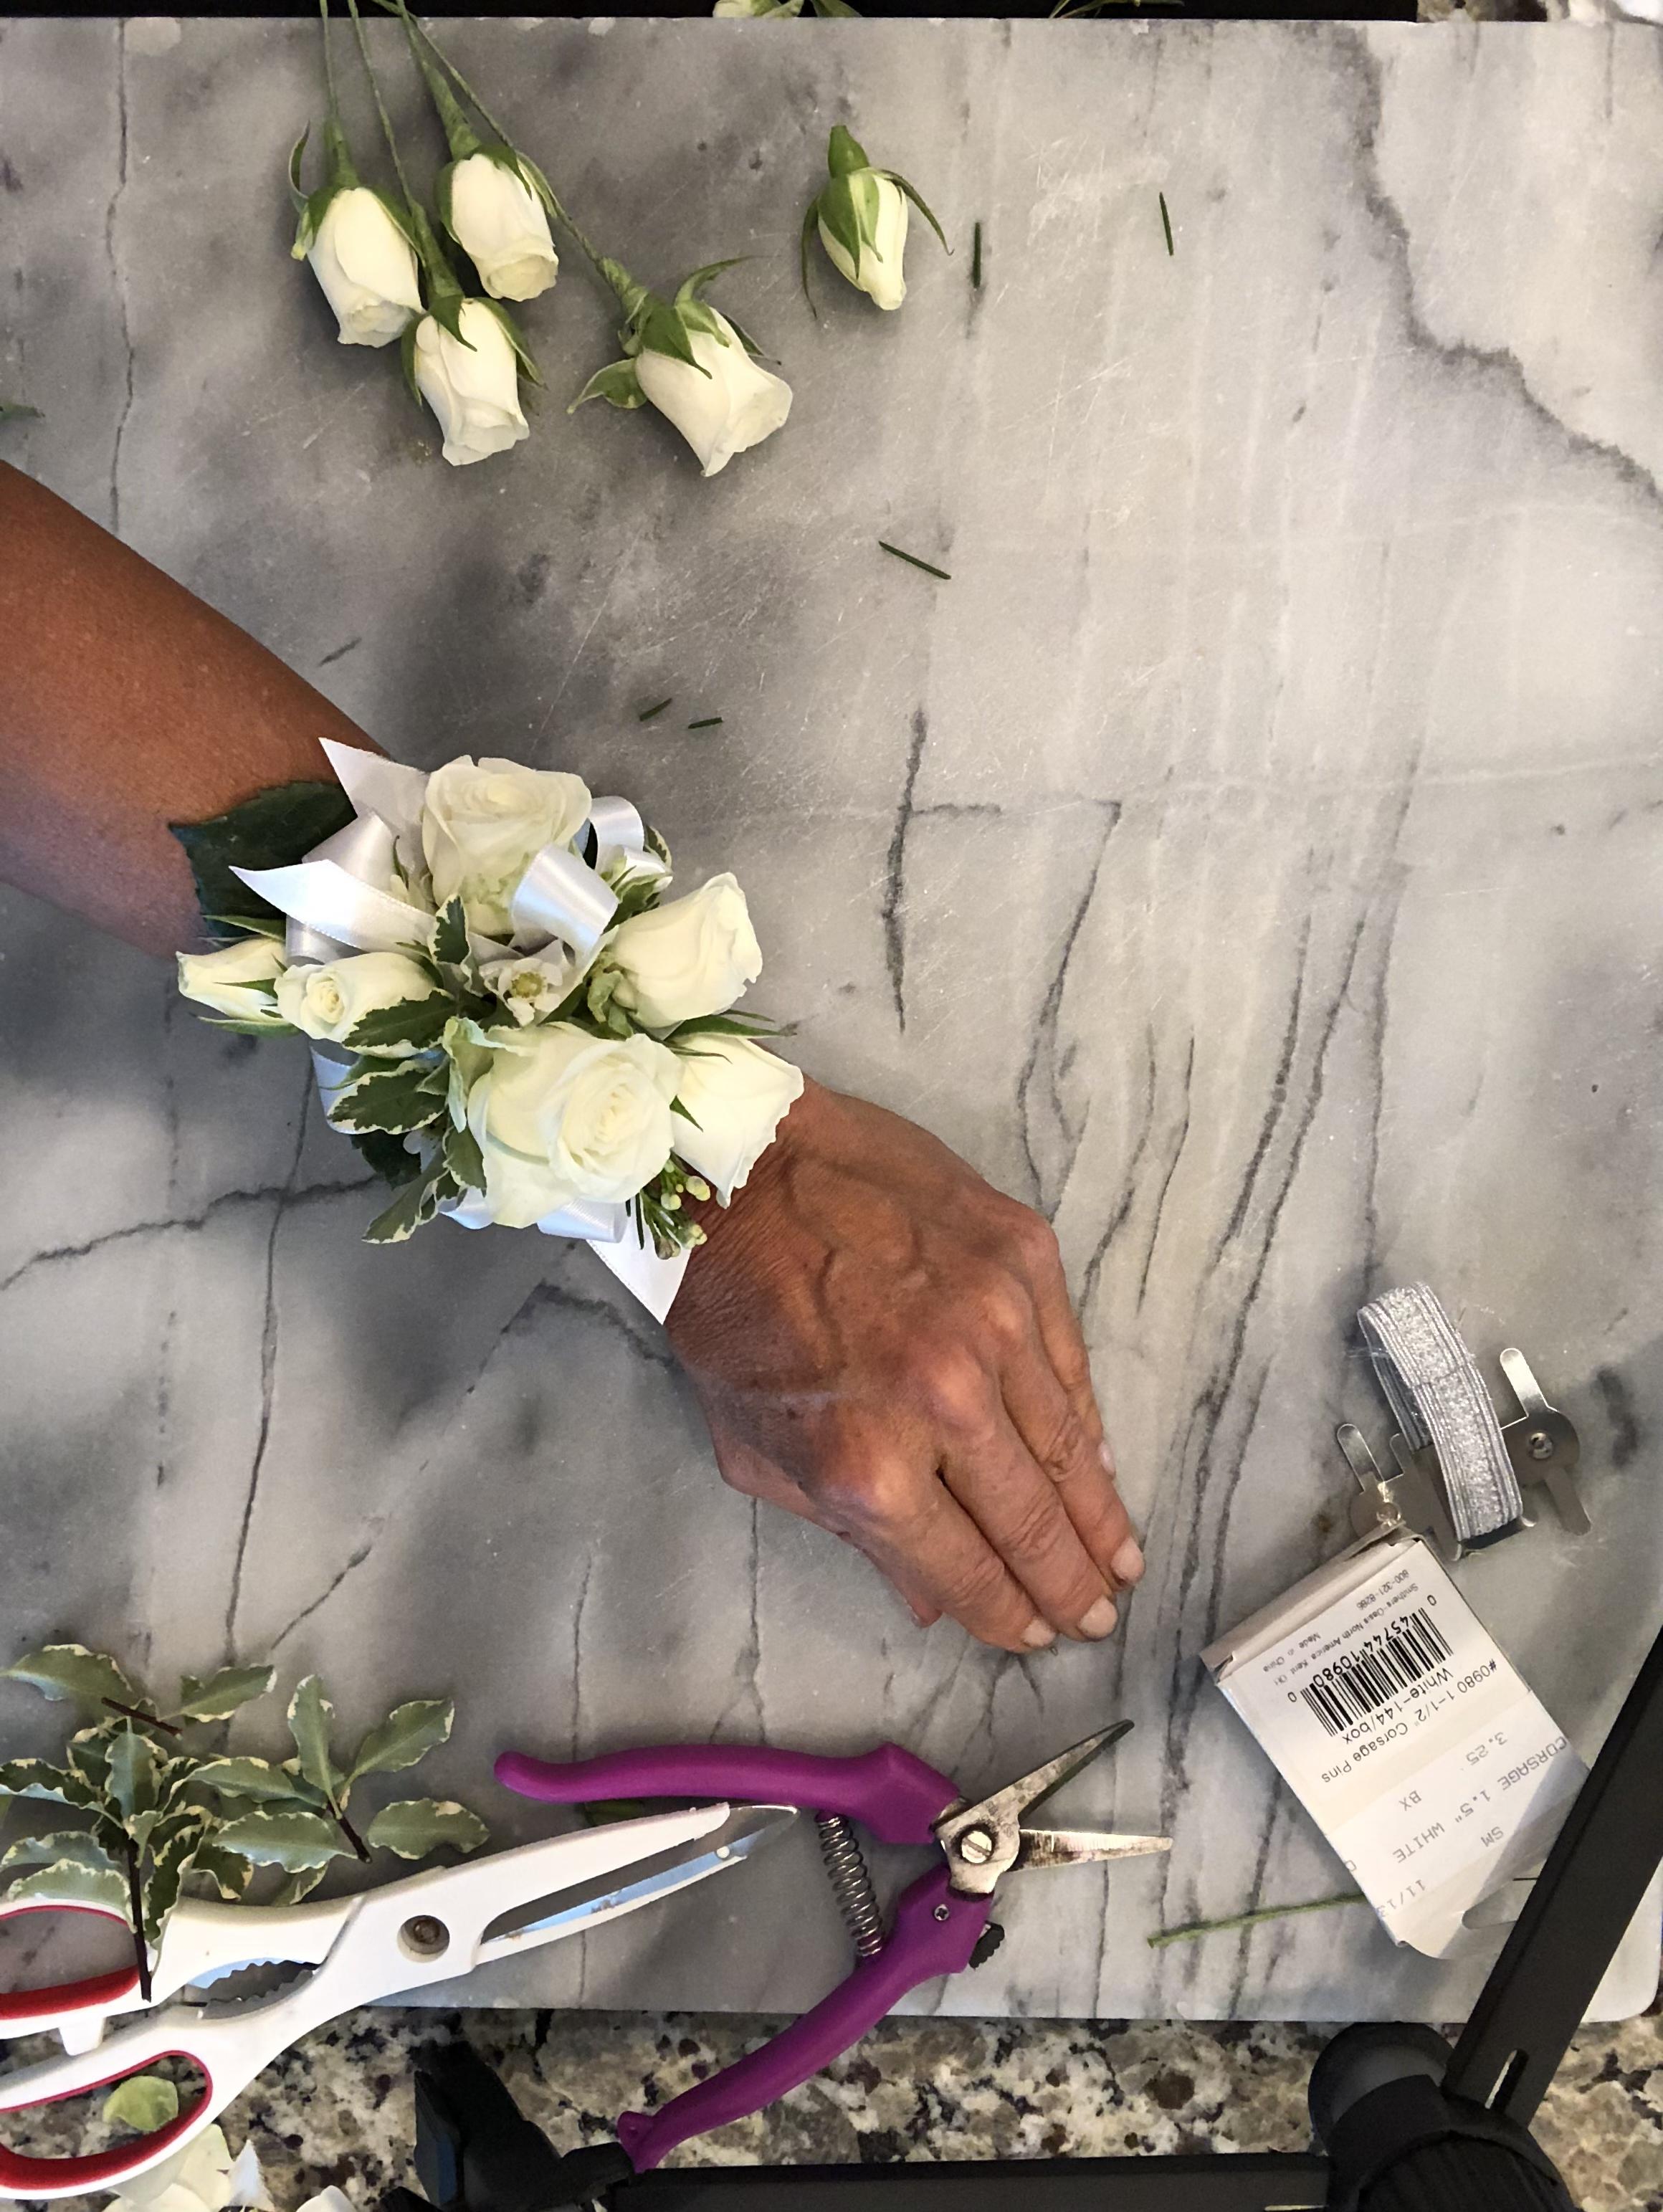
3. Design Corsage & Conclusion: So now we'll cut the roses from the stems that you want to use. Pick out the ones that you like. I like to do some open more open roses and some buds
when I make a corsage, give it a little bit of
texture and variety. You can save some of the
foliage, too, if it looks good. It's nice to use the
natural foliage that comes with a flower when you
make corsages if you can. Oh. So this is a
nice full open one. Some roses have damaged outer petals or guard
petals, they call them. Just stick your finger within a petal down
to the bottom of the flower and pull gently to
remove any damaged petals. That way, it keeps it
fresh and clean looking. The wristlet comes with these bendable sides
that you can use, or you can take them
off or fold them under. But it just slides
down like that, so it's gonna be really easy
to wear So on the sides, I like to bend these inwards. You can use it to
clamp the flowers on. Instead of using glue, if you used, like,
tape and wire, you could make a corsage and then attach it to a wristlet
by using the clamps, but I like to do it
this way and just have a nice solid base without
the pokes poking out. That way, I can glue
the leaves on nicely. So I'd like to have a
paper towel and my glue. And I grab the pin box because I can secure the wristlet on
there as I'm designing. And then it slide right off. It's like the size of a wrist, so I can get an
idea of the size. So I like to grab a baggy
so that I have protect my workspace and a
place to lay down the glue so it doesn't
stick to anything else. So now we're gonna get some glue and start getting the leaves
ready to go on the bristlet. So I'm going to put
the glue right on the wristlet so then I
can stick the leaves on. The glue takes about good ten, 15 seconds to dry. So you have a little
bit of time to grab your leaves and
put them in place. But you're gonna
have to allow it to set a little bit before you lift your hands
just to make sure it stays and doesn't slide off. So now that it's dry, I want to show you that you can
just slide it right off, see what it looks like
on the back side. I like to keep clean
mechanics when I design. Then we can just slide it back on and get ready
to do the flowers. This is a pipe cleaner
or chenille stem. I like to just roll it up, just to create a base to
go on top of the leaves. I think that the roses
will hold, you know, the glue holds a
little bit better on a fuzzy surface on
the chenille stem. And, you know, also
the bow will adhere better to that than it
will to just the greenery. So just wind it
up, add some glue. And we just place
it in the center. That way we can grab our
bow and you just cut the wire down pretty close so
that you can bend it back, and the bow can lay flat onto the pipe cleaner
on top of the wristlet. So you add a little bit of
glue to that and to the bow. So that it can, uh, adhere right to the top. So once that's dry, you can add your roses now. If you have too long of a stem, just cut away from it. I like to add the glue directly to the bottom of the rose. Then you can just
spread the loops aside and press it down in.
And, you know, hold it. You're probably gonna
hold it, you know, five to 10 seconds so it doesn't fall before you start
adding your other ones. We just continue to do
that for each rose. I like to add a little
glue to the baggy, too. That way starts to
set a little bit, so I can just put it on the
back of the rose and insert it instead of directly
out of the tube. Sometimes I like to see if
a rose is gonna look good before I put the glue on
it in a certain area. And if I like it, I grab the glue and insert
that one, as well. I like to use buds
when I make corsages, as I said, adds a
little more interest. So now it's time to
add some greenery. This is a variegated piosporum. I like it because it has green with a touch of
white on the leaves. And you just put it
in different places throughout the corsage. I have some white wax flour or you could use baby's broth. And you cut off little
florets of that, as well. When you're happy
with it, let it dry. And then you can remove
it from your pin box. See how it looks. And try it on. I hope you had fun
watching this. You can experiment with
different color flowers as well.
 Elisa Gabrielli, "Create easy to do Art & Floral Designs"