Transcripts
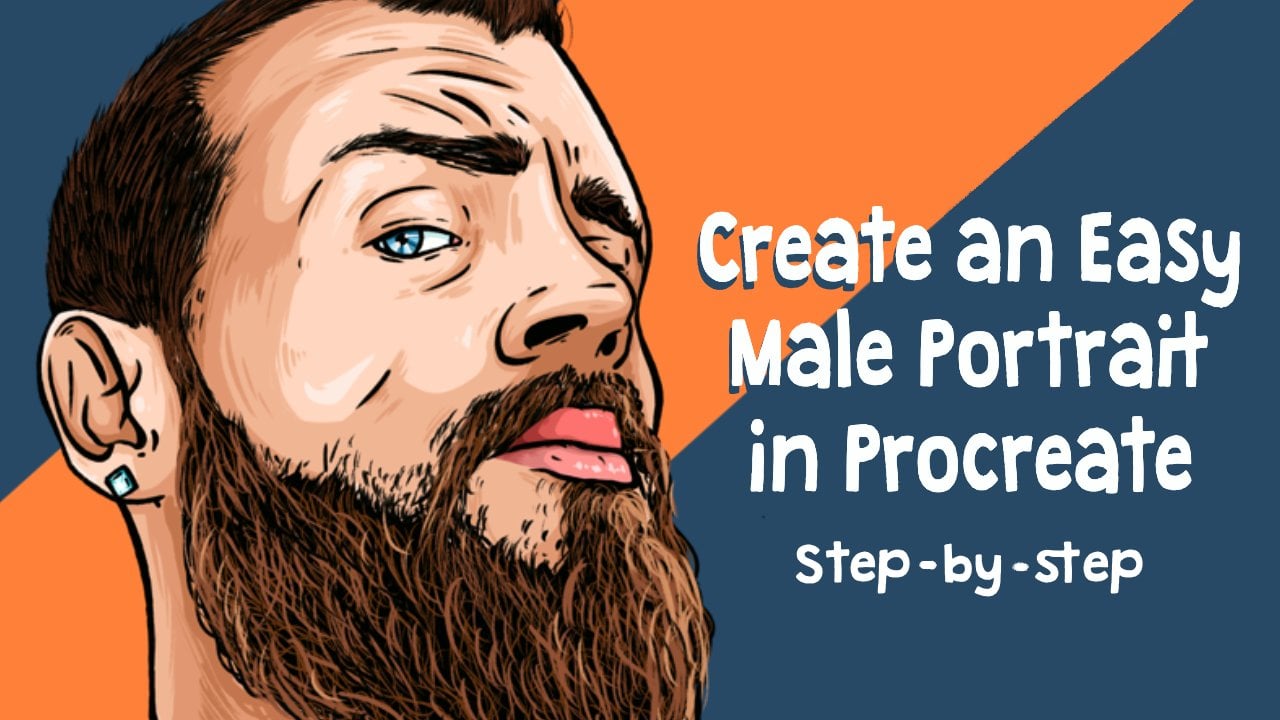
1. Intro: Hi, this is Jay, and welcome to another video. And in today's class I'm going to teach you how to make a cartoon out of a photo. The easy way. Let's get on with the class and have some fun.
2. Creating Canvas: And as always, we're going to start by creating our Canvas. So we're gonna click on a plus in the top right corner. And we're just going to click on screen size. We're going to do it the easy way this time. So click on screen size and that'll be the canvas we're going to be working with.
3. Import Photo: So to start off with our cartoon, we are first going to import our photo. You can use your own photo for this one. If you do not have a photo of yourself, you can use the one that I added into this class. So let's add the photo by clicking on the tool on the left corner. Say insert file or insert photo. It depends on where your photo is minusing the file. So I'm going to say insert file. Let me click on the photo. So k here it is. Then I'm going to place it in a nice way. I'm going to place it on the left side so that we can later compare the photo with our cartoon. But if you want to keep it in the middle or anything like that, it's totally fine. Totally up to you. And that's our photo. So now we have imported our photo. We are going to lower the opacity of the photo by clicking in the layers. So I'll click on the layer, click on the M, and lower the opacity so that you can see a little bit better.
4. New Layer + Brush: So now we're going to create a new layer on top of the photo layer. We are doing it by clicking on the layer section, which is this too little squares on the top right corner, click on a plus. And here's the layer. I'm going to click on it and click Rename. We're going to call this one outlines. So what we're going to do now is we're going to draw over the photo. We're going to trace it. Because that's a really easy way of creating a cartoon out of a photo you will see. So for now, for the next tab, we're going to first pick our color. We're going to pick black. So just scroll down in the colors. If you're at the desk and you scroll all the way down and we're like swipe down like this. You'll have a black color that's good enough for this picture. And I'm going to be using my own brush, which is called the crispy brush. I also added that into the, into the, into this class. I'm going to show you real quick on how to import it. If you want to use this one, you can use any brush you want, like what you are comfortable with, Procreate. I'm going to show you real quick how to import it right now. So you go to blush brush library, which is this little brush over were overhearing the top right corner. You go to import it all the way in the bottom. So if you scroll down in other brushes, you have one is imported. You're going to click on a plus. You got to click on import over here. So click Import and then click on the crispy brush that you can download in this class. And that's it. Just make sure that you have selected it. And we are ready to go.
5. Outlines: Okay, so now we're going to trace our photo. So make sure that we are under outlines layer and have selected a brush. Just make sure that your thickness is correct as well. I'm going to be using a round 6. I think six is nice in this way. So let's like lives in the left toolbar over here you can see the slight bar. You can see percentages. Now it's 15 and 16. So we're sure it's on six or five or something like that. What you're comfortable with the patents on what brush you're using. Because if you're using my brushes sector, if you were using a brush, if your own, you just have to make sure that like it's a nice size to trace the photo with. All right, so now everything is selected. We're going to start like tracing the photo. So what refers going to do is we're going to zoom in a little bit. And what I'd like to do with the IRS, we're not going to trace the air like that. We're going to make like a circle because we're going to make a cartoon out of it. So if you do this, you make the circle, you hold the pencil on the screen. It will create a nice flowing circle. You see it because if you do it without, you will see like maybe like some edges, but if you hold it, it will create a nice circle. You can do either way, whatever you're comfortable with. If you are really, really good at making my strokes, then there's no problem. Like we can also just do it like that if you want to. But I'm going to be holding it to make it a nice smooth circle, circular line. And then one line like this again. So you make the curve and then you hold it, and then you can move it like whatever you want. So you all that you can do whatever you want, right? Like that. Okay, So we're going to make two lines like this. That's current IR, you see? And I didn't delete my other line over here, so I'm going to delete it really quick. All right, so now what we're gonna do ISI, I have an earring over here, so we're going to make some space for the hearing. What is really fun in cartoons is we can exaggerate a little bit. So I like when an arrogance, for example, not too big, we're going to make it a little bit bigger. That's really nice. Amanda, important thing about cartoons is that you have to really look at the face. So for example, when a person has really tiny eyes or a big nose or anything, we can always exaggerate that a little bit more. But right now we're going to do it easily and we're just going to trace this photo. So let's keep on going. So let's just trace the beard. Also look at how the beard looks. For example, some people have a more curly beard, but my bears a bit more spiky. So like we're going to make points like this, you see? And that's the most important thing about cartoons is that, you know, you do a little bit of research before you're going to draw so that you know exactly what kind of features you're working with. So just really quickly, we're going to refine the lines later on, no problem. And you see, now we already have created the beard, at least the bottom of it. And let's keep on going with the rest of it. Let's create this kind of spikes like that. And if you're using your own photo, like to take a really good look on how your features look like. If you don't have any beard, then just follow your jaw line or anything like that. So like that. Alright. Nevertheless, we're just going to follow it like that as well. Not the smooth, not too realistic. We're just gonna do it very quickly and cartoony like so just like that are simple, easy strokes. Because like what happens in a cartoon is that like you want the lines to be simple and not to over-complicate it, but it still has to look like the person. Alright? Alright. And with bras, I don't like to follow the eyebrows x regularities. We're going to create like, sort of like rectangles like this. See like a little bit more of a rectangle of fact like that. It's not exactly like your eyebrow. And the I. And what you can do is you can do a line with a little dot like that because that's the kind of face and pooling. But if you just have a normal face, you could also just like with like a little circle, I guess we're going to keep it simple today. So just do a little black dot like that. And if you have big eyes, she can make it a bit bigger if you want to. Do what you feel like and what, what do you enjoy drawing? Alright. And the other side as well, little square or rectangle, right? So like two lines over here to create a little bit of motion in the face. Same over here because like I have wrinkles over here. So like it's nice that like there's a sort of motion going on. See, just follow the face and the nose, make it a student moves like that. Keep it simple. Just outlines like that. The cheek. And if you have any questions on load, if I don't explain something very well and you want to know anything to do it a bit better, you can always contact me and I'll react. Of course. This is just a very easy way on making cartoons. Like I will make another video where you can learn how to make a cartoon from the face. Not exactly like tracing it, for example, but more like, like drawing it from a photo instead of by tracing the photo. But that more in another video. For this one, I want to keep it simple for like some of the beginners in this class. Maybe if they know how to draw already a little bit. But not too much I think because we're not going to go really into detail at the moment. So for the neck, I don't like to do the neck all the way thick like this. I like to do didn't act like ten to get a little bit more cartoony effect you see? So like when we just close it out like that and himself pole. Because if I take the photo away right now you see that it gets more of that cartoon effect because of the medicine that the MAC is not so realistically thick. So it's like a very thin, thin neck, which you can decide for yourself. You could also just draw the face alone without the neg, whatever you want. Okay, so now let's follow the hair. Very simple. We're not going to draw her hair, which is going to keep it pointy like that. Alright. There's going to be a short video is going to be short lesson, because it's very easy. Just have to know a little bit the, the ways on how to do this. I guess. I want you to have the hang of it. With some practice. You'll get a lot better at it. All right, so these are basically already the outlines. It's very thick. It's very quick. I simple. So let's drag the outlines to the right side so you can see better. Let's see, I haven't finished a beard yet, so let's first finish the beard real quick. All right. Okay, so now put it into Word. So that's basically the outlines. We're going to color it right now. It's going to be really quick and simple. But before we're going to color it, we're first going to refine our lines a little bit to make it a bit more spiky or to make a little bit more contrast and thick. And then, which is always really nice to do.
6. Refining Outlines: So to do that, we're just going to stay in our layer. We're just going to have our brush ready and we're just going to refine some things like sometimes we are a bit messy and we work too quickly or something like that. And you just refine some things. Sometimes you just want a little bit more spikes for someone not in the period. I like I like to put a little bit more spikes like this to make it a bit more point here. You can like grew up the eraser and just help you out with that. Like that. So I'll just do it wherever you want, wherever you feel like you are needing some extra lines are some spikes or something, some thick or thin contrast. Like to make some lines a bit thicker, some lines a bit thinner. And just like that, see like a little more spiky beard effect. There's another exciting week necessarily know that my bird is exactly super spiky or anything. But we could exaggerate a little bit because it's a cartoon and that's exactly what it's about. Exaggeration, kind of like a caricature, caricature. And so does legs are just a bit messy and you just want to clean them up a little bit with the eraser. Just like that. Whatever you feel like whatever you think needs some work. And if you already felt like it was good from the start, then just leave it like this and skip this part and go to the next port. Slow good. Seal. So I forgot that part of my mustache. But we'll fix it myself like that. I'm going to keep it like this for now so that we can keep on going. So now for the next step we're going to color it. So let's get on with that.
7. Base Color: So to color it, we're going to create a new layer. So we're going to do the layer section over here again. We're going to click on the plus. We're going to drag this layer under our lines so that we are going to draw under the outlines. We're going to click on the Layer, click on Rename, and call it base color, please. All of low base color. So base color. And here we're going to color it. So just going to pick your colors by using our wheel. And I have a very light skin, so we're going to search for the skin color a little bit like this one I assume. One thing I have to tell you before we go to color refers going to click on our outline layer. So click on it and then click on the reference. Because if you don't click on the Reference, it will fill in the entire thing that like you just saw. But if you click on a reference, if you have the reference selected in the outline, so you go to the base color layer with your color, you'll see it click. It will fill in only the sections that are likes with the lines. So it will fill in the lectures I can like paint from my candidate EC. You'll fill it in like that and just drag it. I feel like this color is still a bit too dark. So I'm gonna go a little bit lighter, more like that. So I got, so to do this, you have to first select your color. And then when you have your color, we're going to hold our pencil in the circle and then drag it in there. So you like, I'm going to select another color for now. So you're going to hold the circle and drag it in there, and that'll change entire color. Now I'm like a Smurf. That's totally fine. So like okay, so first let's start with the skin and now with the beard, which is a bit of a brown color in my photo. And you are and it's a bit reddish. Maybe I want a bit more brown like that. There we go. And for the otros a bit darker. I'm gay. See it like it because it's a cartoon. It's very simple, but it's not like overly complicated curve. Wow, complicated because it's just like very easy parts. You know, you have the hairy of the face, you have the lives and the earring. That's basically it in this illustration. In your photo can be a bit more complicated. Depends on your hairstyle, depends on your face structures or anything. But don't worry, it's going to be still easy if you follow the steps along. So now for the earring, we're going to color it with a sort of diamond blue color. And the lips are a bit like so many. Call it Saman. Saman color. And for the upper lip are always, do it a little bit darker because the shadow of the nose and the beard and everything is right. And so that's basically the base color already. You see it already looks like a cartoon. What now we're going to do some shadows and highlights, and that will be basically the entire video.
8. Shadows: Before we go to add our shadows, we first going to make another layer again. So got to delay or section, click on a plus again. Click on the Layer, click Rename and name it shadow. I'll shut offs with an S. So shadows. So this is going to be really easy. How are we going to make our shadows? We're going to have our fingers. We're going to hold the part where we're going to do to show us first. So the skin. So you see it when you hold your finger on the screen and we'll select the color. So now the color of this layer selected and we go to just go a little bit darker, just a little bit. And that's it. So now we have the skin tone, but the darker skin tone. And then we're just going to select or decide where we're going to draw our shadows. Let's say the sun comes from the right side. So we're going to draw the shadows on the left side of the face. Whatever you want in your photo. If you want shadows in a different way or like you just want to freestyle it, Go ahead. It's very simple, doesn't have to be super correct or anything because it's a cartoon. They don't make sense anyways. So right. Does draw your shadows like this. Draw it, draw it in their nose. Because it creates like, for example, the nose is like has a has a part that is like, this is on the bottom right. So didn't recruit, we're going to draw it a bit darker. And that's it does like this. The birds on how your nose is because minus up in the sky. So therefore we can draw the shadow under it a little bit. But if yours is from the front or anything like that, you could just basically draw under it a little bit like this. Whatever you want to just experiment a little bit. Just experiment with it. And you will see that it's not that complicated. And a scholar at all, I guess with the hand very quickly to, doesn't take too long. Now you can make are tons of people can put it into your arsenal of skills. Some people like to pay you money for this going to work. And then you can do it really fast. So only in the inner part of the ear l will create shadows here. Maybe a little bit on the site. All right, so for the neck, we're gonna follow that bird like this. If you don't have a beard, just draw the jaw line. So if you don't have a beard, then just draw the line like this. So under the jaw line and it'll maybe just the side of the leg like that. But just see how it looks good for you. So that's basically already the shadow for the face is really simple and fast. And now we're going to draw the shadow of the hair and beard. So what we're gonna do again, we're going to hold so that we are going to have the color selected. You see now that the bird is selected and we're going to go like a little bit darker again and just go and draw the same thing on the right side of the face. Draw the shadows like this. You can already, what you can also do is just like make the lines first like that. And then we're just going to color it in, in a second. And if, for example your brushes too small, I can always erase the brush size a little bit bigger to make it faster. Just like that, you're just going to color in all the parts that you just colored. It just outlined. I mean. So that's very simple RED like you just going to make the shadow like this setting we're here. This has been a bit covered by the well, let's go in here. Also the bottom bottom lip use a little bit of shadow. Doesn't have to make too much sense. If you, for example, make a mistake like I just did, like go out of the lines a little bit. You can always erase it with the razor. No problem. That's the thing about drawing digitally. We can easily repair our mistakes. So don't focus too much on doing it perfect, Just do it. What feels comfortable, comfortable for you if you want to work fast and quickly and a bit messy like I like to work. That's totally fine. We can always repair the damage later on. So there you see the shadow of the beard, know a little bit of the nose because that also crews issued. And if you want to go back quickly, two fingers, you can erase the last part you have drawn. And with three fingers she will like root and make it reappear. But I assume that most of you already know a little bit how Procreate works. But you never know. My Abella sliding all over the place, some, sorry. All right. So that's the shadow for the hair and basically none. Now we're going to do the shadow of the eyebrows, which is a bit darker than the hair. So we're going to also do the shadow a bit darker. Same thing, select a color and then just choose a slightly darker color. Does like that. And now we're just going to have to do the earring and the lips. So same thing. All it a bit darker for the upper lip? Like I'm going to lower my size a little bit. And the girl one lives in thing selected bit darker. And we are like what I like to do is like because some people are like like me, my upper lip, It's a bit over my under lip. So like I'd like to create a little bit of shadow, but like that really depends per person. So you have to just basically look at what the structure is like from the person you are drawing rights as the lip now just the earring, same thing. Hold it. Darker color and with earrings, I like to just do the size I got really quickly. The C, it's very easy. This was already the shadow and now the last tab is going to be the highlights.
9. Highlights: So again, for like to start with the higher before we start with the highlights, we're going to create a new layer, rename the layer and call it highlights. It's going to be the most quick one so far I think. So let's select first the hair m instead of going darker now we're going a bit lighter. So you select their hair and then into the color, the color tool, we're going to just select on little lighter color like that. Just to make the lines first and then kill them colored in later. Like this. Now very quickly. So does the highlights on there because the sun comes like from the side. This is the same with the errors. Doesn't matter too much. It's a bit darker than the hair, but for the highlight is fine. We could do two things. You can like do only the edges if you want, like for someone, for some people like to do just the edges in highlights. But I'd like to also give a little bit of highlighted integrate itself. So in some sort of places like I'm doing right now, I hope you can see it very well. Thanks. So here, sometimes they get a little bit too focused on illustrating that. Forget that I'm filming. That. I'm like, I have to look at the camera if it sharpen off for you guys because I'm getting sometimes a little bit into my work and it's good. That means that you like what you're doing right? And love illustrating. Love to teach you guys some easy methods on how to get better. And I always got better like when I was a kid by drawing like over characters to, to learn how to draw myself. Because your brain will memorize things better. All right, so I'm going to keep it to this into here. So those are basically the highlights were to hire very simple, very quick. Now we're going to be the highlights of the face and the earring and a little bit of the lips. And then we're done. So for the face we can do almost white, I think, like maybe not completely but like this. And then the edge of the face, like God can do a little bit of a point of their little bit of the cheek here. And the nose. Like that. Very simple. Keep it first so you no longer necessary then this over here, like in the Adam's apple or like a little shine because it pumps out. So you can always draw a little bit of shine their ear, same thing. Just the edge open. And that's basically it. Now for the earring, we're just going to select a white color, which is like somewhere around here. Slightest possible. If you want to make sure you can always go to the blue and then choose a wife from there. Like this. And what I'd like to do with it, like a diamond shape just colored square in the middle. We'll make that a little bit of lines like this. And read it for the ellipse like a very light bluish cell niche color. Just the edge like that. For the bottom lip. Little Lu, do, little lighter. So they are there, you have it. Now you have major illustration. It's really quick, it's really easy. I hope you understood this class completely. I hope it wasn't too messy here tend to be a bit messy sometimes and chaotic. That's how I like to work. So hope I was able to tell you good How, how to do these things. Please show me all this illustration is that you have made. Like show me in the project section, I would love to see what you have created. And if you learn something, let me know if you want to learn anything else, if you're like my style of teaching or anything of what I can improve, of course, let me know in the comments or send me an email or wherever you can send me something. And yeah, that's basically it.
10. Thank You!: So thank you all so much for clicking on this video. It was a short one. Hope you'll enjoyed it and I will see you in the next video. Thank you guys. Bce.
 Jeroen Van Wel, Let's get creative!