Transcripts
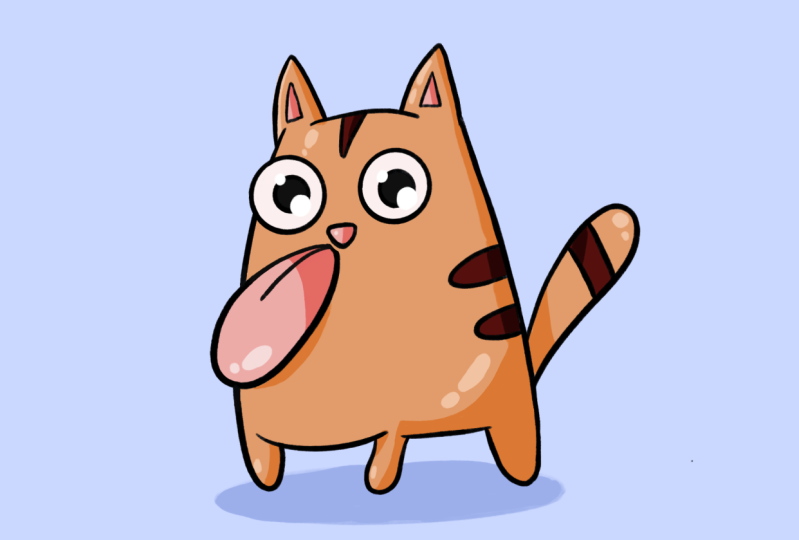
1. Introduction: Hi guys, welcome to another video. My name is Jay, and in this class I'm going to teach you how to draw this funny cartoon cat in Procreate. I'm excited. So let's get on with it.
2. Creating Canvas: And as always before we start, we're going to start by creating our canvas. We're going to click on the plus in the top right corner. So click on that and then just click on the square. We're going to keep it simple today. And there you have it. That's our canvas.
3. Select Brush: Now we have our canvas. We are going to first select our brush. You can decide whatever brush you want. If you want to use the same brushes I do, I'm going to teach you real quick how to import it. So you're going to click on the brush over here in the top corner. Then you're going to click on the Plus. Click on Import. And then he goes search for where your, your brush is. Going to be called the crispy brush. Click on it. Now it's important to make sure that it's selected. It's all the way on the bottom. If you go to your brush library and you scroll all the way down, click on the important. And there should crispy brush, make sure that, that one is select it. And now we couldn't get on with it.
4. Sketch: So now we have everything ready. We're going to decide what kind of shape our cat is going to be. We already know that there's going to be a cat. So before we do that first, make sure that we pick our color. I like to pick a color blue, because blue, it's a very nice light color to later draw darker color over. Because what we're going to do now is we're going to sketch the shapes of the cat. So what we're going to do is like refers going to decide what shape our cat is going to be. It's going to be like this kind of shape like a ghost. Just draw like I do. And just draw roughly. You don't have to do it perfectly neat like that. You just have to dare to draw. So just draw the lines, draw a lot of lines to each other. It doesn't matter. Just like that. Don't worry about failing or anything like that. That's totally fine. Make him a little bit more fat. Like this. So drought first the shape, very simple. Then we're going to decide the ear. So like if you're gonna make your own illustrations later on, you can't say like, do I want really big ears? I really want small ears. That's totally up to you. But for us, we're just gonna do like normal size. So just draw the ears like this. Same places I do. Just sketch it in there. And after this, we're going to decide like, what kinda lines were using, which language, like perfect for us. We're going to decide it, everything, so don't worry about that. Okay, so now we're going to draw the ice. I like to draw the eyes very exaggeratedly like what is really fun about cartoons is to really exaggerate forms and figure. So in this case, we're going to draw the eyes very wide from each other. So drawn very big. So make your circle here and another circle over here. Remember we're big pupils. For example, if you don't like it, there's a certain line in the way you just grab your eraser. Make sure that you have a nice eraser selected. And just delete the lines that you don't want because they can be sometimes in the way. And then just draw your eye. But keep it messy. Don't worry too much about professionalism right now because we're going to be drawing it over anyway. So you already see the catalysts starting to form right now. So what we're going to do next is that the low, so low, lows right between the eyes like this. Just draw a little triangle in the middle. Just like that. And you already see it has a nice form at the moment. So what I'd like to do next is we're going to draw a really big tongue and we're going to exaggerate a ton like this. So here's the mouth. So decide where the mouth is going to be. You can draw first a line if you want to start off, and then just draw the tongue like a very big, exaggerated going out of the body like this. Just make some lines until you have it arrives. Practice, don't worry too much about proof like that. Everything is perfect right now. We're going to take care of that with the outlines and then just the tongue line. And again, if you don't like certain lines, just erase them. So just see really good what you form is going to be like. Right? So now we have basically the shape of the cat. We're going to draw the PaaS. So we're going to keep the poles very short. Just like this. You raise it a little bit so you can see better. There's like that you see, and you do the same over here. Decided like the width of the policy, what you can do it really close to each other if you want. If you want to add some, some of your own flair into it and go, How totally fine. I would love to see that as well. If you just want to follow along, that's fine as well. And just erase the parts that you don't like. And then we're going to draw the belly or the chest in this case, just the line like this over the path. Can erase this part. We're not using this anymore. And also this part we're not using, so we can also delete that. So now the band-pass, same thing, so shortness. And just draw the belly like this little bridge. And just clean it up a little bit. Just do it roughly. Don't worry too much about how good it looks at the moon. And try what is really good to torso notice is like, for example, think of an organism. So this is the origins of make everything, all the pause touched the horizon. You see. Then it will show that it will be a good proportion. We're not going to worry too much about proportion, of course, because it's a cartoon, but still it has to make some sort of sense. And just clean it up a little bit. Let's draw the ears like this. We can remove this part of the head. So very messy. Small, short, short-legged fat cat. Just draw some triangles and the ears. And there you have it. Okay, so now we're going to draw the tail. Just do like a little bowl like this. And you can make it as long as you want, if you want a really big till goa had like put some flair into it from yourself. You could do a little smarter if you want. And I'm going to do with the medium-sized. But if you want something big, you could also do it like all the way around if you like. That's something of yourself into it. And then a little stripe which is going to be like another color pigment. And 74 here, we're going to draw two stripes. Give it like some tiger, tiger, USC. I don't know how to say characteristics. Sorry if I said wrong. English is not my first language, so I still make mistakes sometimes. And also under hat we're going to draw a little stripe to make it like a little tiger cat. All right, You see it's very simple now we have already decided the entire forms of our cat. What we're going to do next is we're just going to make it a little bit bigger so that it fills up the screen a little bit more and learn center it. And there you have it, the outlines of our cap. So now we're going to be drawn over it for, for our outlines. We're going to draw with black. So let's get on with that one.
5. Outlines : For outlines, we're first going to create a new layer. So click on the layers over here, does the two little squares. Click on the plus and then rename the layers by clicking on it. Click on the layer, right-click Rename, call it outlines. That's fine. Click on the end of the sketch later, which we can also rename a real quickly. Click on Rename and call it sketch. And then click on the N and lower the opacity to around 40 percent or 45, something like this. So 45 percent and 90, so that we can still see when we draw over it. So what we're going to do next is we're going to trace our lines with the black color. Choose a nice thickness over here, you can decide you're on thickness. Some people like to have a really thick lines, other people like to have thin lines. I want this to be your decision. Make your own decision about what kinda thickness you like of your, of your cartoon. I like semi thick. Not too much, not too little. Maybe a bit more on the thicker side. Alright? And you can always check here next to it if you'd like you're lying or not. And we're a little bit smaller. All right. So what we're going to do next is we're just going to trace it and that's it. We're just going to trace our image. And I want to give you a little small technique that can help you out a lot in also in other things in the future Lisp program. For example, if you want to make a perfect circle, just draw the circle. It's not perfect yet, but I will hold the Depends on the screen. And you see it will create a perfect circle. If it's still not a perfect circle, you can always click on the Edit Shape and a top, which will appear after you hold it. And then click on circle. And then you can just move it wherever you want to. And that can work out with a lot of things later on as well. And then just do the same way. If you want to serve already in the first place. And so they're graded way so that you don't have to go through edit. You can hold with one finger while you're holding the pencil on the screen. And that will create a perfect circle and it will keep it in proportion. And then just let go. And there you have it, you have your ice. So if we're the pupils, very simple for triangle work the same way. If you want to do a perfect triangle, just hold it and click Edit Shape and you can click on triangle, then it will make a triangle. But I wanted to a little bit more rounded, like a nose. So it's going to be a little bit more messy, but that's fine. It's a cartoon illustration. It doesn't have to be perfect. All right, So I was saying for a ton, just trace it. Like choose a line that you like. If you like the tongue all the way to be here, That's fine to just do whatever you feel like, whatever you find funny, whatever you find cool. Sometimes this brush can feel a little bit. I don't know if that also with you. And I don't know what it's doing right now, but just trace it. And if you make mistakes, you can always erase it later on. That's the fun part about digital art that you can like, make as many mistakes as you want because it's so easy to just go back and do it all over again. You don't waste any paper. And there you go. If you already get it, you can always go to the next tab already if you want to. I'm just gonna keep talking about the process and everything like that. So if you already know what that however dean works, go to the next step. It's totally fine. Okay. So another thing I like to tell you is like the same thing you did with the circle and a triangle. You can also do it, for example, arc lines. So if you want to make this line very smooth, you can just make the line like this and then hold the pencil on the screen Nanker format that you can always edit shape and you can, if it works, like shepherd them, move it and do things with it you see. But it's up to you. And if you want like more wrinkly lines, like more organic lines like I did with the tongue that is fine as well. Whatever you find beautiful art. And I'll just keep on tracing everything. If you want some thicker and thinner lines, you can always do that too. You can erase some lines if you want, for example, a bit more of a point, pointy and in your, in your lines. And you can always just erase a little bit of the layer itself and then repair. All ready. Make sure when you illustrate, like for example, you see here there's an invisible line going through. So make sure that this one aligns good with this one. Because you can draw three or you can always just draw, true if you want as well. And then just erase the part. And if you would like. But if you have not done that, then just make sure that it feels like it, it's aligned. So if when you zoom out that it feels like it's going in through the leg. And you can do this in your own tempo. You want to take more time if I go too fast, just relax. No worries, no race. Pause the video or whatever you feel like doing. There you have it hears. Same thing over here where there's an invisible line. So we're going to be drawing it like that. Same over here. Just clean up your lines a little bit. If you feel like a kid or if you want to feel like the stumpy edges, that's fine as well. Like tastes are really different in illustration. So do whatever you think is best for your illustration and your style. Now, right? We're almost done with the outlines. And after that it's going to be really quick because then we're just going to color and before you know, it will be done with this class. All right, so that's the body does to the lines of the body like that as well. Really quickly make it a bit more pointy if you want. Now your tail. There we go. It's a bit messy. And always zoom in and pinch and make sur sure that everything is nice for you. So you can always zoom into to clean up your lines a little bit. Make things a bit more smooth instead of like messy, I'll, I did it. That's totally up to you. And then just the length. Right there, you see it? Now we have the outlines. Now how are we going to have to do is just color it and then we're done. So let's go on with that.
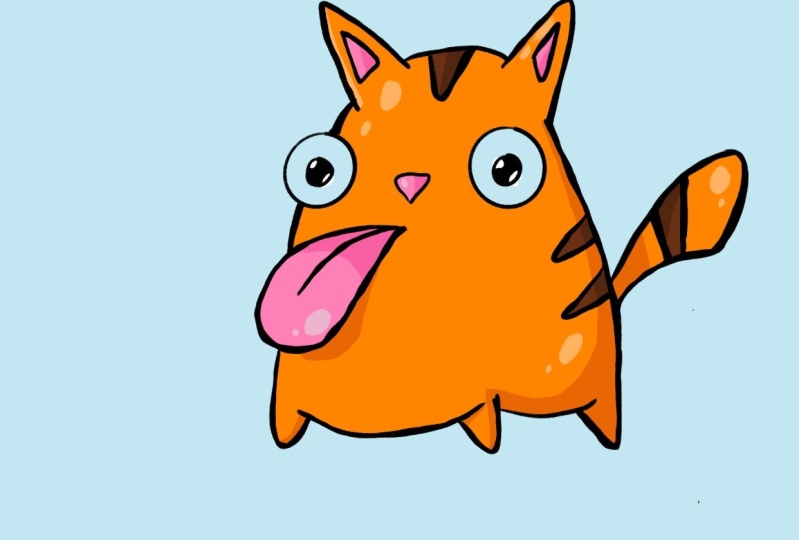
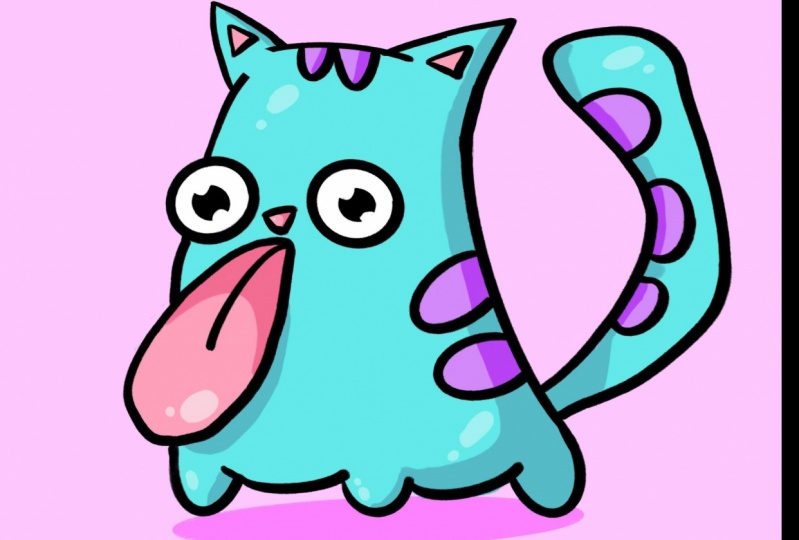
6. Base Color: So to color, we're going to create another new layer. Click on a two squares again, click on the Plus, click on the layer to rename it and call it base color. Then we have that. So now we're going to do the outlines again, click on the outlines layer and we're going to click on Reference. So what that does is that we can now just fill in the colors if the reference would not be selected. And you would go to base color. First also put the base color under the outlines. So that the layers under the outlines, they are where we're going to call him. So for example, if the reference would not be selected and I tried to fill in the cat, it will color in the entire screen. We don't want that, we only want the parts that have the lines. So then by doing notice, by clicking on the outlines layer and then click on Reference. And now when we fill in, it will fill in the cat only. We could also turn off the sketch right now because we have right now made our outline so we don't need to sketch anymore. So now just pick a nice color. You can decide your own color. Please be totally creative, is totally up to you. I'm going to be using orange. I like orange cats. And then replicates whatever. I always find it more orange than red. And then just fill everything in that it's orange. That's it. That very simple. That's how simple it is. And now we have covered already the body. We're going to relax is the tongue. Tang is like a pink or reddish color. If you want to make the tongue blue or green or yellow, that's totally up to you. Go ahead, be free. And there you go. That's the tongue. I'm going to add that same color to the nose and the inner parts of the ear. And go on to be coloring the ice, the pupils complete black. If you want blue eyes or anything else, same thing, be creative. It's totally up to you. And for the stripes of the card, I'm choosing a darker brown, just like that. And then just the eyeballs which are going to be wider and got to see it. But once we're gonna put in background or anything, and indeed it's nice that, that is also colored. And there you have it already. These are the base colors of our cat. Now what we're gonna do is we've got to create shadows and highlights. And then we're done.
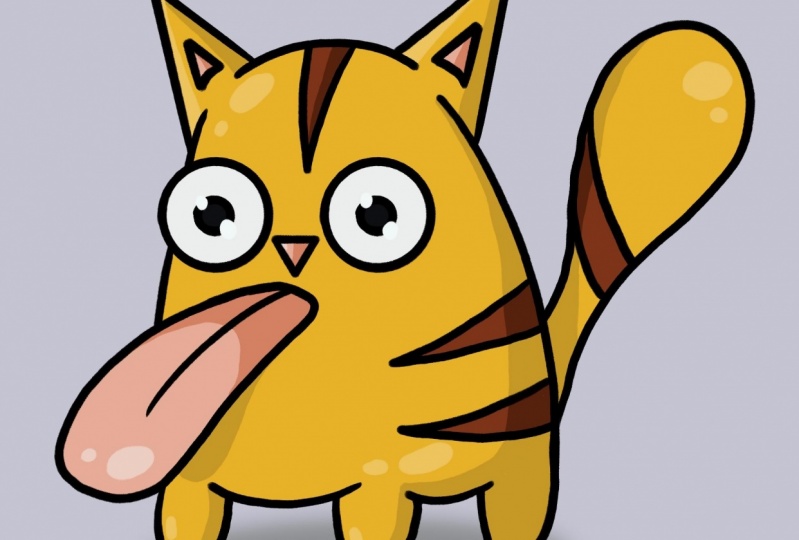
7. Shadows : For the shadows, we're going to again create a new layer. So go again to the layers. We're going to be drawn. Creamy layer on top of the base color. So click on the Plus, click on the Layer, click Rename, and call it shadows. So what we're going to do next is we're going to hold our finger on the color that we're going to first put our shadows in. So we're going to firstly the body. So click on the orange. Now the orange is selected. And all that we're gonna do is we're just going to go to the disk. And then just, or like whatever color you have, just select that color and then just make it a little darker. Just a little darker so that it stays in the same tone. Dial we're gonna do is just make it a dark color and to shadow it in. So we're going to first decide where the light is coming from. I like that this height is coming from this direction. So then the shadows are going to be on that side and the right side. So behind the detail, that's going to create more shadow because the body is there, so it creates a little bit more shadow over there. And then draw all the shadows on this side. Just draw this entire completely with whatever color you're doing. It. Just make sure it's a darker color than what you have. So if you make a green cat, just make the green slightly bit darker so that it looks like it's shadows. And don't dwell on here because this doesn't have the same color, so only the colors that are orange or your color. We're going to create shadows. So the entire right edge of our cat saying 40 year lag is also this year. You see mostly here because there's a body. So you also have to create a little bit more shadows in the past. Maybe also here. And then also the tongue is covering this part of the body. So because the sun comes from that side, we're going to be drawing the shadow slightly under it in this direction. And there you have it already, the shadow of the body. Now we're going just to do the shadows of the nose, the tongue, the inner ears, and a brown or parts. So let's first start with the tongue. I see I made some mistakes here with the black color. If you see that you can always go back to your outlines and just erase it. And that's it. So we do the same thing with the tongue. We're going to select the pink color and then choose a darker pink to create shadows. I like to just do it like this. Entire edge is going to be a shadow of the tongue. Just like that. No same thing as what we did with this side. Always to the right side because the sun comes from that side. If it comes from the other side, then you do the other side. That's totally fine. Now you see it. There's the shortest and the tongue. And we're going to do just the shadows. Darker brown spots, same thing, all deselect. Make it a bit darker. And lunges do the same thing as you have done in all the other spots. And it just creates a little bit of darkness like that. And there you have it. Those are basically the shadows. Now we're going to do the highlights. We're just going to select the background. And you'll be done.
8. Highlights: For the highlights again, we're going to create a new layer. Click on the Plus, rename it colored highlights. And what we're going to do next is the same thing as we did with the shadows. We're going to select the color with your finger. So selected the orange. And what we're going to do now is instead of going darker, we're just going lighter. Is that simple? That's how you can make lights. The highlights very easy. And then just select where you want the highlights. I like it just like this a little bit on the pore. Maybe like that. Over here, a little screen, a little highlights in there, maybe the edge of that. Same thing over here. And then also in the tail. Alright, we're gonna do the same for the tongue. Let's choose a lighter color. Whitish, pink. You see a greater nice highlight from return. Same on the nose and the ears. I'm going to keep it as it is because there's not a lot of houses because it's more deep because those things are more in the ear. So I'm not going to draw any highlights there. And now we're going to create one new layer. We're going to do that on top of the outlays layer. So click on the Layer, click the plus sign there, call it. Final highlights. Are we going to do now is select a white color. So if you want to select the white, you can go to value and then make sure that all the RGB, RGB are on 255. And let us perfectly what. So what we're going to do next is just click Create a reflection of the ice. So just create a ball over here and a smaller ball in the tub. And you do the same over here. It's created a little bit more of a, of a reflective feeling, makes it a little bit more organic and real. So this is basically our cat. There. We have a ducats already done. Just we're going to create a background. You can decide whatever background you want and they'll be done. So to create a background, we're just going to click on a color. Go to the desk or whatever. Just go to background color over here, click in the white screen of your background color. So I'll go to Layers and then on the bottom you see background-color. So if we click on the white screen, then this, this, the colors actually will pop up automatically. Now you just decided what color you want. I'm going to be using a blue color. I find it nice to public health perfectly fine. And there you have it. Our cartoon cat.
9. Reform and Bottom Shadow: One other thing I would like to mention is that if you, for example, are not totally happy with the shape of your cat, you can always just select all the, all the colorful lines are. If you select everything you select by swiping to the right on your layer. So select, Select, Select, select. And if you have everything selected, you see that by the, by the blue selection. If everything is selected, you see that everything is blue. Then go to the arrow. For example, over here we can click on discord and we can just decide like that we wanted to bit different. So we want to shape a bit different. And really we want to just play around with it a little bit. Whatever you want if you're not satisfied, for example, I wasn't a 100 percent satisfied with the form of my cancel. I'm just going to play around a little bit with it until I am. And this is more likely if you want to give it a bit more for Brown, feeling can go to warp and then advanced mesh. And then you can just play around with that a little bit. Very easy, very simple. And there you go. Another thing what we can do is we can create a little shadow on the bottom of our cat. It's a little extra. So you go to the sketch layer, click on that one, click on plus. Rename at the bottom, shadow. What we do next is select the blue color, something as we have done with the shadows of the cat. Just select it and make it a bit darker. And just create a circle like this. Oh, there's no circle like that. And then just color it in. Very simple. Now you have created also a shadow on the bottom of it if you want a little till, you could also do that. I don't like it, so I'm going to keep it like this. So I hope you really enjoyed it. Like it's a quick, quick class. I hope it was quick for you as well. Could take a little bit more time with explaining things by 2 once you have the hang of it. You can do this with any animal. You can do this with all other things that you wanna do it with. Exaggerated forms, exaggerate shapes, and you'll be on your way.
10. Outro : So that was the end of this video. Thank you all so much for watching. And I have really have a lot of fun with these classes. If you want to know a little bit more about me and what art I make, you can go to my Instagram, that link is in my bio. And also over here, you just have to type that one in yourself. So thank you all so much for watching guys and I'll see you in the next video.
 Jeroen Van Wel, Let's get creative!