Transcripts
1. Class intro: This course is all about
taking you step-by-step on making a low poly super
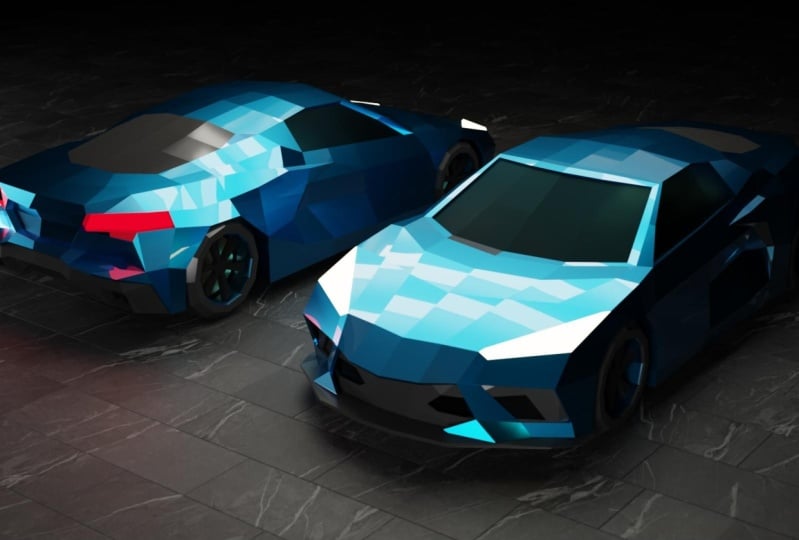
car inside of Blender. So it began to be
using this car. We're going to be
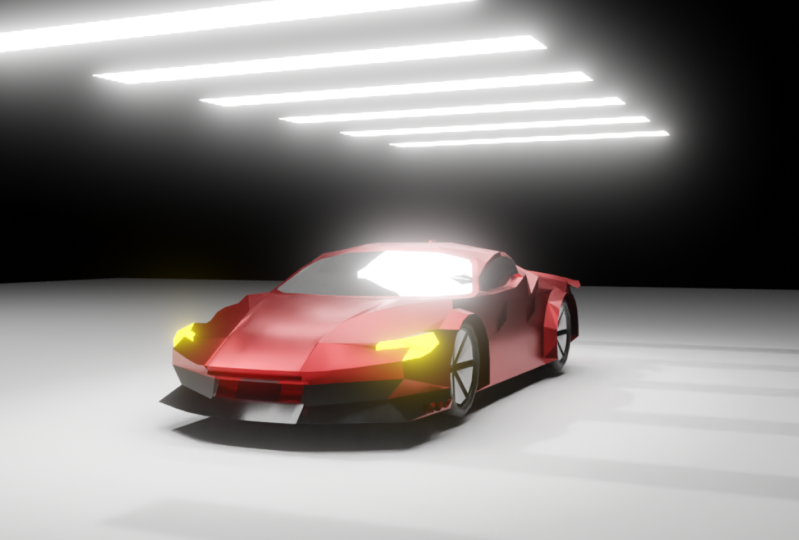
turning it into this. This will be the final results. By the end, you'll have
this lovely render. I'll take you through how
to model a towel to make materials and how to render it out into this lovely
random like this. I hope to see you in the
first video. See you there.
2. Addons you need to enable: Okay, so the atoms
that you're going to need for this course is, let's just go over to the
Edit Preferences Add-ons tab. As you see over here,
the two add-ons that you're going to
need is a loop tools. So there's top and loop and
you can see mesh live tools. Just make sure you
enable that just by clicking on the box. Close that. And then the other one
you'll need is autumn MRA, which is this mesh
or tomorrow that basically just mirrored across. So I'll show you here
quick demonstration. So over your main thing, Let's press N to
open up the panel. Go to edit or
tomorrow, or tomorrow. And you see now it's
mirrored across, whereas before it was
just an oval cube. Yeah.
3. Before you watch the course: By the way, this is not a super beginning of for
any course. It does. It doesn't really go in
depth into anything. It doesn't go in-depth on how to learn blend over everything. So you've probably already learned quite a bit of
a blend that before. But if you have any
problems with it, you can change the
speed, you can rewind. Make sure this, if you feel if it's going
too fast, pause it. You can rewind, you
can slow it down. You don't have to
just go follow along. It is edited. It's not just me the whole time, so even me, it's
fascinating what are go. So make sure that you
use all the tools available to make it as easy as possible for you
to follow along.
4. Setting up the Reference Images: So step one, we need to
grab some reference. The best place to get it
is there from blueprints. The blueprints.com
open up like yep. So you can open it up and
I'll show you a bunch of reference for cars
and stuff like that. If you have a specific
current month, you can go search it up
in the top-right corner, or they can have a bunch
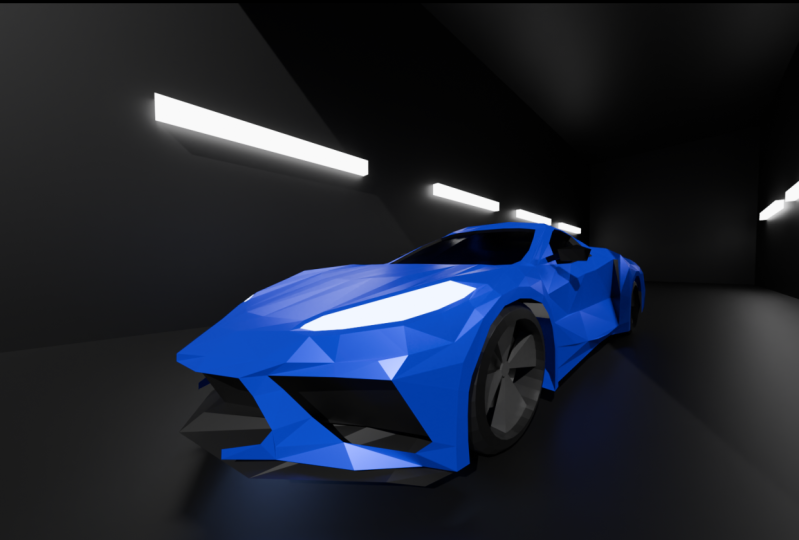
of recommended ones. So let's go through these. Let's just grab this first one, the Chevrolet
Corvette C8 does go C compiler thing if you want
to get a full scale image, but this row 400 pixel
images should be fun. So just go download that
and suburbs blender. So here we are over. I'm Linda. First I want you to
do is it's going to shift a image reference, go find your image
loader reference, and then he goes and you'll see, I'm going to lower the
opacity a bit just to like 0.7 and started so big tree
in front of view, right view. And then just line up the
front of the car like that. And Gezer drag it down like
that, and then drag it back. Then you're going to
shift the top view now, rotates 90, I get negative 19, make it fell short
facing forward and just drag it backwards
like this isn't the middle and maybe
drag it out a bit out. And then what you didn't
do is to learn this up. So we need the top view. So we're gonna go to front view, shift D, drag it in, rotate 90 negative non ti. It's got his face probably M
and just g x to ladder up, zoom in to make sure you get
a rod and then drag it down. And later we will set up the
back view. When we eat it.
5. Making the Outside of the car: You to do is go should
be at each mesh plane, the bottom like this, and
just start working on us. I want to delete the
left side and add a mirror modifier like there. And then I clipping and start moving it into place for
the windshield like that. Cool. Then we can position it like
this and then move these in. Now remember all these images, I'm not going to be completely
in the right position. So you Aniston or
poly said it has to be exactly rats, but yeah. You'd have to make everything
line up completely. You're out there that's
full of windshield. You can add another
edge loop in the middle if you want there. Then for, let's go to top
view and make the bonnet. So let's just select
this whole edge. Extrude scale. You can see it has
that great outline. So group probably be flat here and just bring
them in over here. And then it gives us work
on the ballots because it's extruded out there and
then just extrude in. So you can see it
kind of tapers in. I'm going to see this
in front of you. Just drag it down there. So basically we just wanted
to get the shape and then we can make
like the headlights kind of shaped like a yeah. So you see, we need to
derive this down there. And then this up here. You can see we just get it like their drugs and solve
the headlights. We could probably add some
more edge loops in the middle. Like yes, a lot it up, close the curve around. Make sure you get there. And then these can
join together. Drive that back edge loop, and then Fill and fill with f. And we can just extrude
this down to the front. Okay, there. And then we can just go
make the slack front parts. Okay? So something that can be useful, grabbing some
reference images on your second monitor
or just like that, you can put it in the top
right just so you can kind of see what the cost
supposed to look like. It just makes life a bit easier. So like, as I can see from a reference when I
extrude this part up, that's supposed to go back. I guess you can see it
under the sea as well, but yeah, sometimes I've seen other view does
help quite a bit. Let's go is like underneath, I guess it can have
joins over here. So if you want, you just go to our red triangle and then turn on vertex
snapping and put it there. Cool. And then we need
to m bar distance. And then extrude this down. Put it back there. Okay? And then just extrude
it along like that. He then we can fill the sun. Like this. Cool. That makes it. And sometimes I have to play around
with the vertices, get something that
looks okay, cool. They're dry the center and
then extrude that out. And you can extrude
up and fill this in. These ones are going
to carry out a bit like they're there. And then we're going
to need to have a extremely long for we'll run. We actually have to
make sure that we have a similar amount of vertices. Okay, Cool, That works. Then let's fill in this gap. Yes, and there's
another August we'll rename it needs omega triangle. If we do it like this, then we don't have to have
a triangle here either. We can just go edge. And there you go, make a face. And then we can extrude
out before the headlights. So it doesn't need us first
see like their their tool. Drag this down. We'll add some materials later to
make it look more like a headlight and then
fill the space. And we're going to just go like they're join these two together. Like they're going to move
this whole edge back a bit. Cool and then fill
there and there. These can be extruded backwards. So we want the room
to be alphabet. So you can stack
this whole edge, sx 0 and then just drag
it out like there. And then this whole
edge is just going to go extrude backward. So just extrude y 0 to make
it flat. To the other. We'll room. And we can do the same thing
as extruded out like batch. So now let's go to talk
to you again soon. So what happens is
this thing over here means that the cargo
is like in like this. Underneath there. You have this line that
comes up through here. So we need that edge. So let's just drag
this up to there. And then we go good enough
to do this along here. And that kind of
drugs arch goes, in this case, arts again, that goes in there. And then we could probably add another edge loop
just to kind of like fix this a bit. Again, Sx it up, and then all of the 0s
just stop the curves. Just isn't as harsh of
a kind of edge there. And then we need
to fill in here. That kind of this tape is down. We can extrude this up, create like a face over here. That's what that little window. Let's drag these in. And then it's extruded
across for the roof. And I think we need to add
what one edge loop like that. Now I just drag it up there
and then drag it up again. So then these need to
connect to this F, F. Let me have a gap
to make our window. Yeah, cool. So let's add another
edge loop, the middle, this curve, that curve
there. Okay, cool. That's looking pretty good. Let's work. Actually
forget about this part. So we need to kind of
set slots like here from here down and then
joins back here. Let's drag it up. Cool. Actually there. Okay, so basically we can
just select this whole patch, delete this face,
and then just f. We can just extrude up there. Dissolve edge needs to make this dissolved soils and word j. So there actually we do need that edge because we
need to go back there. Okay, So then we have this whole piece
that we can extrude. Our ops began to need the vertex snapping again so you can bring them back in. Stop that share. This
money stopped back in. Yeah, cool. There. Then this can
become a face edge. Those can be concerning
to a face as well. Delete this face because you want those quads
and other triangles, even though we have done the
triangles, doesn't matter. Yeah, cool, That's
looking pretty good. And then just worked on
this little wheel room. They're extruded up
and then extrude over. So now we're going to
want to have a back view. I'll show you how to
set that up right now. So basically just
select this one. What we're gonna
do is changes to be depth Back, side front. So now what happens
as you can see, it goes C3b and meat behind it. Now I can select this,
drag it forward, and then you see, you just
want to change it to back. Now in back, we can
drag this up like that. And then when we work in, we can just delete or athletes hard like
the front part of this hard and then go back and you can see we can
work on it like this again. So let's just start
working on this top view. We can see these down
surplus over here. Let me just grab some images. Okay, so I grabbed a couple of images of the back of the car. That has helped me quite a bit. So basically, we can see, I can see over here, we have this kind of
thing over here. Doesn't really matter
about this little thing that we haven't like this. We've seen a frame, this
kind of edge that suffixes. And then we'll need to
maybe create a triangle there and create a
better shape or Anja. And then just
extrude it on there. And then same thing here. Then we just need to change
the shape of it there. And then we can
kind of just ship it from the back as well. Remember, we always want it
to curve around like that and not dip there. That's looking pretty good. Then you're going to want to
extrude this out lock there. And then they can probably
do something like this. Just to simplify it
a bit at the back. And then we have
this little edge and then we have the
kinda stuck there. And then, and then, and again, I say hardest
front part again, just make it a bit
easier for us. So you can see over
here, actually, it's a bit smaller
than I thought. So we can just fill
this in there. I will fill it on the outside of it and
then we can extrude. It was like a little dip in. That's why that's what it is. So we have here
and then it kinda like extrudes in and then we won't have the skirt over
because this goes in there. And then this will
probably go in slightly. And then these will connect
and they go out that far. And then these extruded
up to your face, then we can kind of create
a shape for the headlights. She yells, Let's go make a triangle there
to kind of cars. It's an E vertices over
here, m by distance. And then extrude this alone. Think we actually
need these faces. And then the smooth
all of this arch. So it's going to look bad. You thought that you use go to Object my
cookie if you want to see how it looks without would like the whole other side of
it still being there. Care of this face, your face. So this needs to be
like curved arch. Like they're there
for the head large. This thing is pretty
long as well. So maybe we need
another face over here. This is pretty bad over here. Makes it better when it gets
some decent topology on it. Okay, this isn't working because this piece needs to extend out and have its own kind
of continuous non. Okay? Then just have to
create something. I could add an edge, you have too many entries. So we could just create a
triangle somehow like there. That should work there
and then fill there. And then we have
plus the wheel room. Let's fix that ACh. Then this needs
to go down there. Let's go out there
for that face. And then what does this form
or this supposed to go? It needs to go out. And then these two faces
bring this out as well. So it's out of you. And then extrude and cool and
then maybe scale it down. That looks pretty cool. And then this as well, it's going to need to
go across like that. And then we can extrude
down cool there. And then you can
fill this in here. Let's fix this edge
because there you get to like make everything
look curved.
6. Finishing the Car: I guess I'll give a bit
of a problem over here. Let's see if we can
fix this quickly. Making this Twain
that back together. And then just like like like that made me yeah, that works Cool. So we have a pretty
decent looking part. We need to work on this window. So this is full. Then we
need to sort this part out. Maybe join that in there because we need to
have this little arch. So we bring this part in, street us along and then have this edge over here
that I've joined sphere. Cool. And then we just need to fill, fill and then drag it in. Yeah, that's cool. Maybe move this back a bit. We need some more edges because we don't have enough
because I don't know. For clarity. Cool. We have these three
faces for the class, as extreme as in
week three it in, and then scale it down slightly. And then basically what I
can see on the reference, it, it kinda cuts in and
then it kind of like joints back over here. I would like at slot
these parts in. The catalog tape isn't
kind of cool there. And then just extrude
in the front as well. Yeah, cool. So let's work a bit on
this front of the car. So we need to fill
in this and this. So underneath here we have like a little spoiler. I don't
know what it's called. But yeah, I'm just gonna
quickly autumn or this. So there. Okay. And then we need to go and
wrap this up here. And then it kinda like
goes underneath like this. And then we just
got extruded along. Calculus goes
underneath the car. Okay. And then turns into
those pods came down. This part needs to
go specs, not 0. So we got this
guy, make it a bit thinner and then
extrude it up slightly. The front part, we
want the back to be taller and then the
front to be smaller. And then drag this up. And then this can go
on the outside of it. I think these need
to go down slightly. And then this needs to
come above it. Like that. Yeah. And then those
knees come in? Yeah. Actually, we can
do the materials later. So we have this front part and then we're going to need
to do the inside of this. We can just extrude this scope, select these faces in the
back and delete them. Then select this, a
couple of these edges. Show them, drag it up. We can start shaping
this inside part. So there we need
to drag this in. Actually get the whole
edge to go up there. That's straight up. And then F. All right, some
reason, that's cool. Now there, you can
drag this along and just start shaping
it all inside. It kind of goes like so we
have like this kind of shape. Does it kinda continues
along to here. And then we can
just go to the edge of this whole edge is going
to just go extrude it in. Actually add plus this. Okay? And let me s And either drag these parts and so that aren't clipping through this there. And then just go in further. And then we could
add a solidify to this body just to fill
in some of the gaps. And then these can probably
go snapped to bear. So to select these faces, the edge at the bottom, but the top of it like that. And then we can extrude this
up like this and fill it in. And then just make
a face of it. Yeah. It's fill everything and just try to fill in all the
capitals much as possible. Yeah. That's looking pretty decent. And then we can just
drag these forward. And then that can lead
to taper off their cool. That works. And the kind of the front, it's time to save us. I think with this head loss is kinda just like extruded out. Scale it and just slightly just to kind of
help like a shape to it. Some distinction to
the rest of the model. Yeah, cool.
7. Making the wheels: And then let's add some wheels. Let's go add a cylinder. Let's change this to
be like 88 enough. Let's go 12. Because the low poly
wheels usually look odd. So you don't have to low poly. So yeah, let's just
write it as suddenly. Put it in there. Then we can just go
change the shape to be allowed with this. And we're going to want to it's going to be
flat tire versus bevel. Slightly. Select this whole
edge on the Assad. Artem mean bevel weight
changes to our angle to wait. That should remove any
artifact triangles. Okay, so it's a plot of this and then reconstruct
this process. Get rid of these
bevel, wait a sec, three things to 0. And then just set a slightly. And then I'm going to quickly go autumn or those that
didn't work at all. Let's go Control
a rotation scale. Now we can probably automate. Cool. Then it mirrors on either side. So I can just set this in
an extrude and delete face. And there you go.
We have a tie up. Now because sectors in a pouch Shift D P to
make its own object. Then we can delete
this and an edge set aside dressed ragged
in the x slightly. And then we go into just
extrude scale street in. And then also what do we want? This duplicate this. Applaud the mirror. Just delete this inner edge. Scaled us, Shift X. Yeah, multiple squared x faces. Scale theory. It's like the Assad scale 0. And then just go scale it
down slightly and drag it back because he always usually
have this sort of thing, somebody using new tools
to bridge it across and then just drag it in like that. I've sold like the
disc brake discs and everything and the
brakes and whatever. And then we want to
pluck the French thingy. So we can just go add a, select this edge, shift the P that can drive this forward. Scale it down. And then 15 organs have enough because this extrude scale there and then just go to individual origins
and scale down like that. And then we can just go select all of
these F two fillets. And then just go and drag it in, scale it up, and then just
go to add a little far. And then maybe we can drive
this whole drum in slightly. Okay, that's pretty decent. And then we're going to
want to have a cylinder, Let's drag to rotate
90 scales down. This is going to
be for the axle. Is make sure we have the robot locations
as I have the new, something new that Google
translate transform add-on. There are anti S, we get to the same
location of the thing. You're gonna show. Your mouth, your
3D curves to it, but whatever, scale x. And then what you're
gonna wanna do with this tire is created
group services, move to new collection. Machinery is a control
G G omega group. Okay. It's true we've
done a group similar. Forgot about that as to say one. And then we can just
select all of them. And then just Alt B, g x Arg1, dragging along. Then in theory. Okay, Yeah,
everything's married. They're scared, shy. Three, I think,
because you'd go 1234. We can just make it tricky because we're going to
mirror it across anyway. That's just like all of these. At a mirror. The mirror object too. Yeah. Is that a empty,
plain access middle? Select all of these like this. And then the last
one is this object, mirror object to be the
empty in the middle. And then just copy selected. And they go, we have our tires. If you want to
change the position of them, drag them out on it, you can do that, but yeah, cool. So I think these baptize, Let's make these backtrack
slightly bigger, like this. Empty. Can this be back
in the normal place? The tied to just
select all of them, scale it up slightly, and then drive axle zip files, meaning is you can just
go Shift S, Shift, Shift S Kirsty selected shift, shift D firstly, and
then shift deaths likely to cursor set the x is 0. Okay?
8. Polishing off the car: Okay, So next off, we're just going to go work
on this back part of it. So same thing. You can this go
delete, delete hard, the front part, like this, H. We could probably
just go out the front. And all the ties is h. And the slurry should
probably move these two tied to that. Cool there. And now we can just work on
the back part of the car. So I have a backup on
my second monitor. And then we can just select
this entire edge like this. And then just duplicate
it p by selection, make it an object. And then, okay, yeah, so here, and then we just
want to go select this whole edge,
extrude it down. I guess we can even just
how this whole body just make sure we
don't touch this edge. So there, Let's just
get rid of this edge and then just trying
to see me disgrace. Actually, let's leave
that works there, but we're going to
Exterior this whole edge in batch and then join and join. Let's get rid of the
solidified for now. And then let's just
hide this bottom view. Top view. And then
basically what we have is we have a full like a flat part that
comes out like that, right? So we need to leave
that vertically. They're like their
point of view. We haven't, they're cool. There. I'm then going to go meet to make a hole
for the exhausts. So we can do this here. Let's just put this in properly. And then just go and set this across and then
extrude it and extrude why? Okay? And then there's
kind of a cigar is in set B for boundary. And then as X3 this and
scale it down like this. Okay, so maybe drag
this further in. And then we can create,
Let's go select Shift S curve
selected at a cube. Scale this down to a mirror, and then go to edit
my drag it out. And then scale it. And then just G. And then just go and
set and extrude. And that's all because all I was going to think quickly add
some cavity just so I can see probably
she liked this. Cool. Rotate it slightly,
just make it look cool. And then she has money
skill, this shale shift. Wow. Maybe skilled. She kind of tapers in
the GI. Track it back. Cool. So those are the exhausts. And then we're going to
need to add another mirror and set it to be the body. Cool. And then these spots just going
to be for the headlights. She ought to add what
they have and they have a kind of a batch. And then we can just
extrude it out, scale down as causing
problems with the Slidify. Maybe even thickness will help. Problem is that from
waste because there's duplicate vertices m
butter Since I'm done. Cool. So this is looking pretty nice. And let's go shifting to recalculate
homophily and Potluck that edge you put me
here because it kind of tapers in at the bottom there. And yeah. So now we just need to add a bit more of the underside
of the car. And we are done with most of it. Firstly, let's add some
we'll else like this, just extrude x as x 0.
Make sure it's big enough. Wheels. F, F there. You can unhide these there
so we'll work properly. And then we can just select this whole bottom
except for this part. And then shift the duplicates
P path selection in harder. Maybe just go F. So there are three edges. Okay? So we're
going to find a way to connect these
two parts together. Let's go. Says hardest edge. I mentioned bottom. It's extreme, the sin fill. And then you can kinda just go, delete p is drag this in, and then just go in like this. And then fill, fill. And then we need to
drag these down. And then Alt H. And yeah, that should be cool. Maybe drag this up sloppy, except to the front seats
like the French. Write it up. And then we have that. We can add the
materials and later. Let's try cosine.
Snap a survey here. Once I have this body again, put that there to
across to Canada. And then we just
need to move this. And then we can unhide
the wheels again. If you want to add a more
detailed bottom to it, you can get so much point because we're not
going to see it.
9. Compositing: So when you're done,
if you're happy with it and you don't
do any compositing. You can just go to Image Save as Agra funded, you name it. They'll pop up with
your plan to fail view and then you can just
name it like whatever, like super car, render. Done Save As image and
you can close that out. It's one. If not, you can just go closer anyway and then
go to compositing. Now what happens is what you need to do is click Use nodes. So pop up with this and
you can see you have your render layers and you have your image thing rendered. Usually, you don't really
need to dope sheet at all because it's been
up using animation. So let's get rid of that. Drag it over to the left, open up a image editor
like this, render results. And you can open
this up and do that. And sometimes even
want to just duplicate it so you have to
render results. So you can have the file and you can also
have the view anode. So what happens with
the viewer node is you can just go like this. Actually, let me get
rid of the composites. Composite can just
go straight to there in the viewer. We
can just work with us. I'm going to turn off view, backdrop, turn it off. Or you can press N to open up
this panel, get rid of it. But yeah, so we can start
compositing this now. And then the top one will be the one that we actually
working on and the bottom one will be the final
one that we haven't changed. So I'm going to
go at a sequence, go to color with the color here. So you can see there's
a bunch of them. So you can change
the color balance because you want some specific
things to go up or down. Like this. Middle parts. You can even shift the
color slightly there. That's looking kind of cool. Bringing up this, the, the, the gain that really
helped with this front. The bottom part was
looking kinda weird. But now let's put better. If you want, we can
go add a blue glow. Glen to glen. Oh, that's what it is. You can have it like this. You can see that's way too high. So think you can leave
the iterations up. Streaks is basically how
many go out from it. I think we wanted to
have like fog glow, like that. Threshold when sauce. And then mix. You can just
drag that down a bit. So if you use one to
have a slight glow, and then if you wanted to see
what it is like before and after use for this M, like that. Yep, cool. Then what
else can we do? We can go to color.
If you want it to be like less contrasted,
you can just go. Was it contrast? Change that? I don't really care that much. Don't want change to touch
my job to go through. Another one that's useful is not color balance
as you want. It's just call it runs. It was probably don't use color correction unless
you're really skilled. And all. I usually use RGB curves. That's a useful, actually, it's pulled this off
the color balance RGB curve like this. So you can usually just use
it to change specific stuff. Quite useful. And you can change the colors, you can bump up the red color, you can get rid of the red. So that's kinda useful. Or maybe you want like on some slight blue in
the scene like that. And can look quite
as compared to this, like the bland thing. Or you wanna get rid
of the blue and green. Like slightly red on the floor. I like that. Yeah. So that's kind of everything. And to do this, now that you have
your final thing, you can just go to
Image and Save As. And obviously you have to have the calm calm ponds because you've done a
composite and yeah.
10. Materials and rendering: Okay, Cool. So next part is
going to be setting up some launching a background
and camera and everything. So first off, we can just go select all of
these and hard them. There. They're cool. Animal is going to protect
this empty and hard. That's just makes life simpler. We want to set my cursor
world origin was Shift S. And let me turn
on my shortcut keys. When an airplane in the
middle of our scene, scale that all the
way up get huge, does not matter that much. And then go render this. And then I'm going to
change it to cycles, make the recording lag of it. So I'm just going to
set our samples all the way down just so it doesn't lag it too much and you can
see what it looks like. So what I'm gonna do first
is we need some materials. So I'm going to use hubs plane and we can set
up the materials. I'm going to click on New. I'm going to choose
like an orangey color. Like that. I'm going to drive up the metallic and
the roughness down. Or It's still just have it. You can have it
either doesn't lose roughness or low rafters with metallic depends
if you want like a metal color and not like that. And then I'm going
to go into edit mode and we can start adding
different materials to this. So for the windshield. So luckily we lost
from the windows. I'm just going to press,
press, Edit, click on New. And then I'm going to go down to roughness,
drag that down, bring up the transmission a bit, and bring the base
color down quite a bit. So now I'm just going
to select all of these things we can select
down as well. I think her son. Now, you can see the
references there. Maybe make it a bit darker. Yeah. Like that. Kept cool. Then they have that
weird thing on the back. So first thing. So we can just select that
whole thing plus add a black, dark material, whatever it was. Actually insert a
slightly write this Betsy and then just extrude
it out softly. And they get this whole edge. And then just make
it orange weight. We need to make this center. Delete the faces, and then just get these
four edges in G, g, x, drag it in. Cool. I think we should just do it
like this. Cool. Next off, we're going to want to add some materials to the wheels and the
bottom of the car. So here we can just add a
black part for the bottom. Same thing. You can just go for
the rest of it. And the front, like that. The front can have
some debate had like two for materials like add. Second one, you can
just use the slash key and select the parts selected
and it will make it loose. Focus on that. So
then plus nu add another black material but drag the roughness up that reference. Now other, whatever,
sun like batch, cool thing, It's press slash, users slash again and
it will go back to the main D. And then for the
backwards they over here, we need these to have
them at metal color. So here, roughness, metal. We can actually have the
roughness bit higher there. And then for the wheels
begin to add a third, another black and black and car. There. We can just reuse
one of the metals, which petals on a magical thing. Should wait, let me
just go SeaWorld. You can actually see what
the material is look like. That one's fun. She
may get slightly broader than this one also weed, which one was that material? And then the of all we can
add users back one and B, the dark color. Cool there. And then yeah, and then we just need to put the headlights so we can just go select these
two plus new red sun. Then you need to go
down to mission, derive that up and
give it a red color, and then drag up the strength. You can't see it
because it means an EV, but I've got to even add bloom. You can see it will
actually glow. Then we can go to the French to select the
headlight like this, plus new slightly
yellow color like that. And then properly yellow here, right up the strength Sun, you can actually, you can
change the color of it. So if you want to make it like ready orange, you drag it there. But for people watching,
drag the color here. So there, that looks kinda cool. And then also I wanted to
add was on the reference, they have a little
show you here. You see on the side they have like this kind of gray part. So I wanted to add that in. So I'm just going to go with
here nav tool like this. If you get it in the
middle like this, when it goes like
snapping to the middle, that just means you press Shift. So just if you have it again,
just press Shift again. Here. And then here. Cool. And then we just
need to select all these and then grab a dark
color and then just go. And you don't want the
reference to be that half so you can maybe even
tried it up slightly. See cycles. Yeah. Doesn't look bad at all and can mess around
with the color if you want. The base color. Whatever color you want, does not matter at all. Okay, So next off, I'm going to go actually
start rendering this. We go to rendered view
and then I'm going to an oxygen to turn
off this de-noising just to make sure that
the remnant of an lag. But basically what we're
gonna do is you're going to change the background to be 0. So it's completely back. That turns seen
rolled off like this. I still make Mac
computer login script. But yeah, so we're going to, I'll just use an EV for now. I'm just going to set
up a camera like this. We can just get an angle. So I'm going to go to
a lawyer like this, and then I'm going to
change the focal length, so I'm going to make
it super wild like 24. I like those kind of view.
So we have it like here. And then looking at
us, actually want to change this back
to like a red color. I think it works well like that. And then what you're
gonna do is you're gonna go add a plane like
this and then go Edit Mode, S, scale it down like this. And then we're going
to drag this up and drag it forward like this. And they just go add a array
and then change the x is 0. And the Watts like to, you can just mess around
with the thickness, the width to show how much further apart
they are like that. And then you have to go Add a New and then emissions drive to watch and drag
up the strength of it. So this won't work in EV. If you do want to
get it to work in, EVs have to have a
irradiance volume. What are the brackets
board like this? Make sure just covered
if your car and then just go irradiance,
indirect lighting, bake. And then you see
works like this. So it doesn't work very well. But it does kind of
changes the cycles. And then you'll see
it works like this. I'm just going to choose render region to make it
work way better. But just so you
can see like this, you can see it kind of works. I just want to
reposition the camera. Make sure it's more
on the center. Bit further up at that. So you see this is
looking pretty nasty. So maybe one base material
to be as metallic. Metallic looks pretty nasty, like bass and the headlights. Maybe you want them
to be pit bull. Let little bit less yellow, like that. Okay. Yeah. So here we have it. So you can mess around with
this style because I mean, you can have things like this. Something else that
seems to be pretty good. So far. Had this set my cursor
hold origins are shipped desk because we'll
large and add a plane, scale it up, and then just subdivided so I can
press Control F5. Just get a proper
circle. Scale it up. She said, I think good
Edward, F to fill it. So let's drag is now
a ***** rendered. And then we need to go add
the Watts, lot like that. So you can see that
has a nice effect like this on it. A batch. You can always, you can find different ways of
different shapes. So you can make
anything you want. So you could even just
go, look up a plane. Just go or this transformation. We go, I have a cube
subdivided a couple of times and then go
at a, displays. New genes to be clouds. Make the size a bit lower and then just
drag up the strength, scale it down. But like that. She has rank sounds down *****. There. Then just go apply both. And they just go acids to get like a random shape and
see how this looks. Please. You can just
add like random shapes, whatever to get the different
effects that you want. But yeah, let me just keep
them coming back but S1. So there. Yep. So you can set everything. So usually you want to, you want to change our
render settings so you can choose it to be
like her father. Samples. You have your de-noising on, just get rid of
any noise at work. Look like this is
just because I said unless you want to make sure that you have your
background obviously to 0, if you wanted to have like this, you can use your color
management so you can use the curves to change it. I don't know why that may
stop the headlights so much. But yeah, so you can
have it like this. So here's what I want
to get rid of them. Just delete research. I don't know how you
get rid of those. But you can use that. You can change the fuse. You can make it a filmic log if you editing
it somewhere else. But yeah, so once you render, so if you're happy with it, usually would have your
viewport samples people tie up, but just the recording legs
when it's super hard for me. And you can scrub rendered
image and then we could do something
compositing, compositing. Some last, one last thing is when you're
rendering in cycles, you will have a bunch of extra black triangle edge model a bit, I'll show you here. So basically it's a bit hard
to tell, but you can see, see how black the
slack extra triangles here that we don't
even have esophagitis. See if I got a solid,
that's just one phase. So to get rid of
this, just go shade. So W shade, smooth
edge like this. And then go to your
little triangle here I've got a normals and autos be the change that to 0. Now we'll make sure
that everything is right and it doesn't have
any of those triangles. And you could do the same
thing for the rest of it. Auto smooth changes
to 0 degrees. So that just helps, especially when you're
modeling because it can, if you don't have
exactly flat face. And then cycles usually
just like triangulate, it looks super weird. Like batch. And then we can just go render
it out and using quality.
11. Class project: Now that you've done
the whole course, make sure to go send
your final render in the class project. I'd love to see
what your renders are and give you some feedback.
12. Bye: Hope you enjoy this course if
you have made sure to rate it and give me any feedback on what I can improve it to it. I can constantly change
this course whenever, so I can re-record stuff. If there are some
problems with that. If you want some more things, you can go check out some
more Skillshare classes, or you can go check out my
YouTube that'll be linked in the class description or whatever to see
some more videos. I hope you found this course
useful and I hope it helps. And you like doing
your blender career. Yeah.
 Thomas Potter, 3D freelancer and content creator