Transcripts
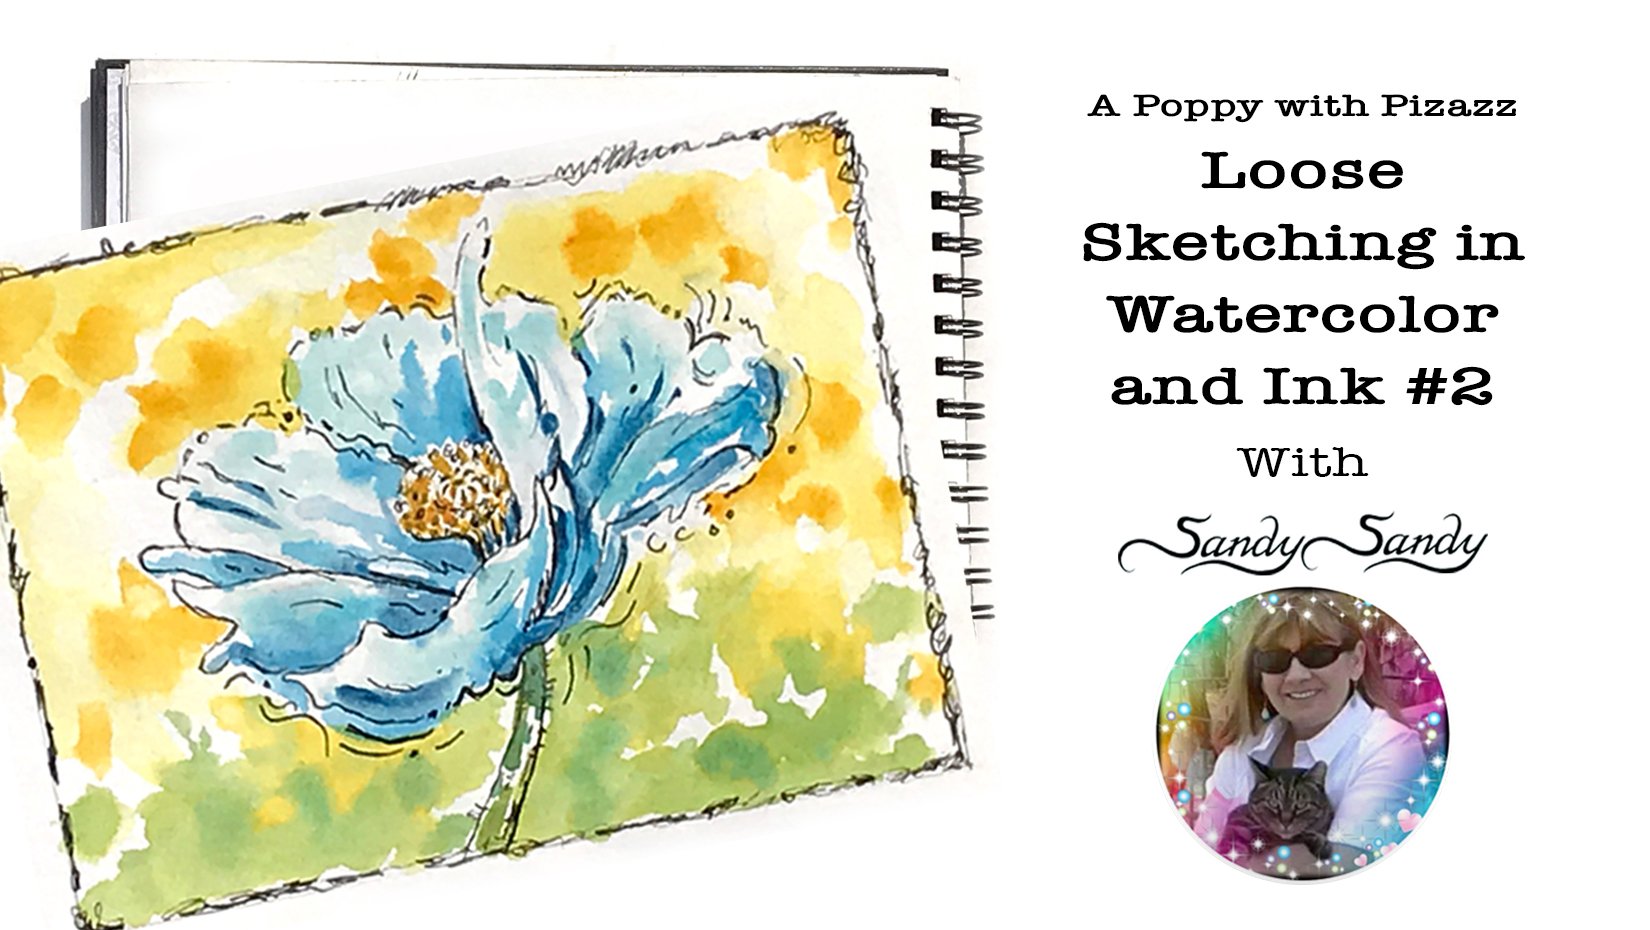
1. Introduction: Hi everybody. Sandy Sandy here. For over 25 years. I've been teaching people of all ages how to express themselves and let go up the idea of perfection and the fear of making mistakes. I strive to inspire students by showing the hows and explaining the whys behind the principles, techniques, and the spirit of art. In this class, I'm going to show you a fun, loose technique for sketching in watercolor and ink. Two sketching projects will familiarize you with my philosophy. process and techniques. Follow along. Day loose, have fun, and enjoy the process. Don't worry about making mistakes. That's how we learn. Making something out of our mistakes is a good way to develop and enhance our creativity. A sketchbook is a great way to gather ideas, experiment, and make mistakes. You don't have to show everyone your sketches. Do it for yourself and for your own improvement and enjoyment. Don't think too much about making art that fits with your specific style. Instead, just let your ability and art evolve naturally. Investigate your interests as a basis for your art. This will allow you to use your voice as an artist to develop your own style. Thank you so much for joining me here. I'm really looking forward to seeing your sketches. So let's get started.
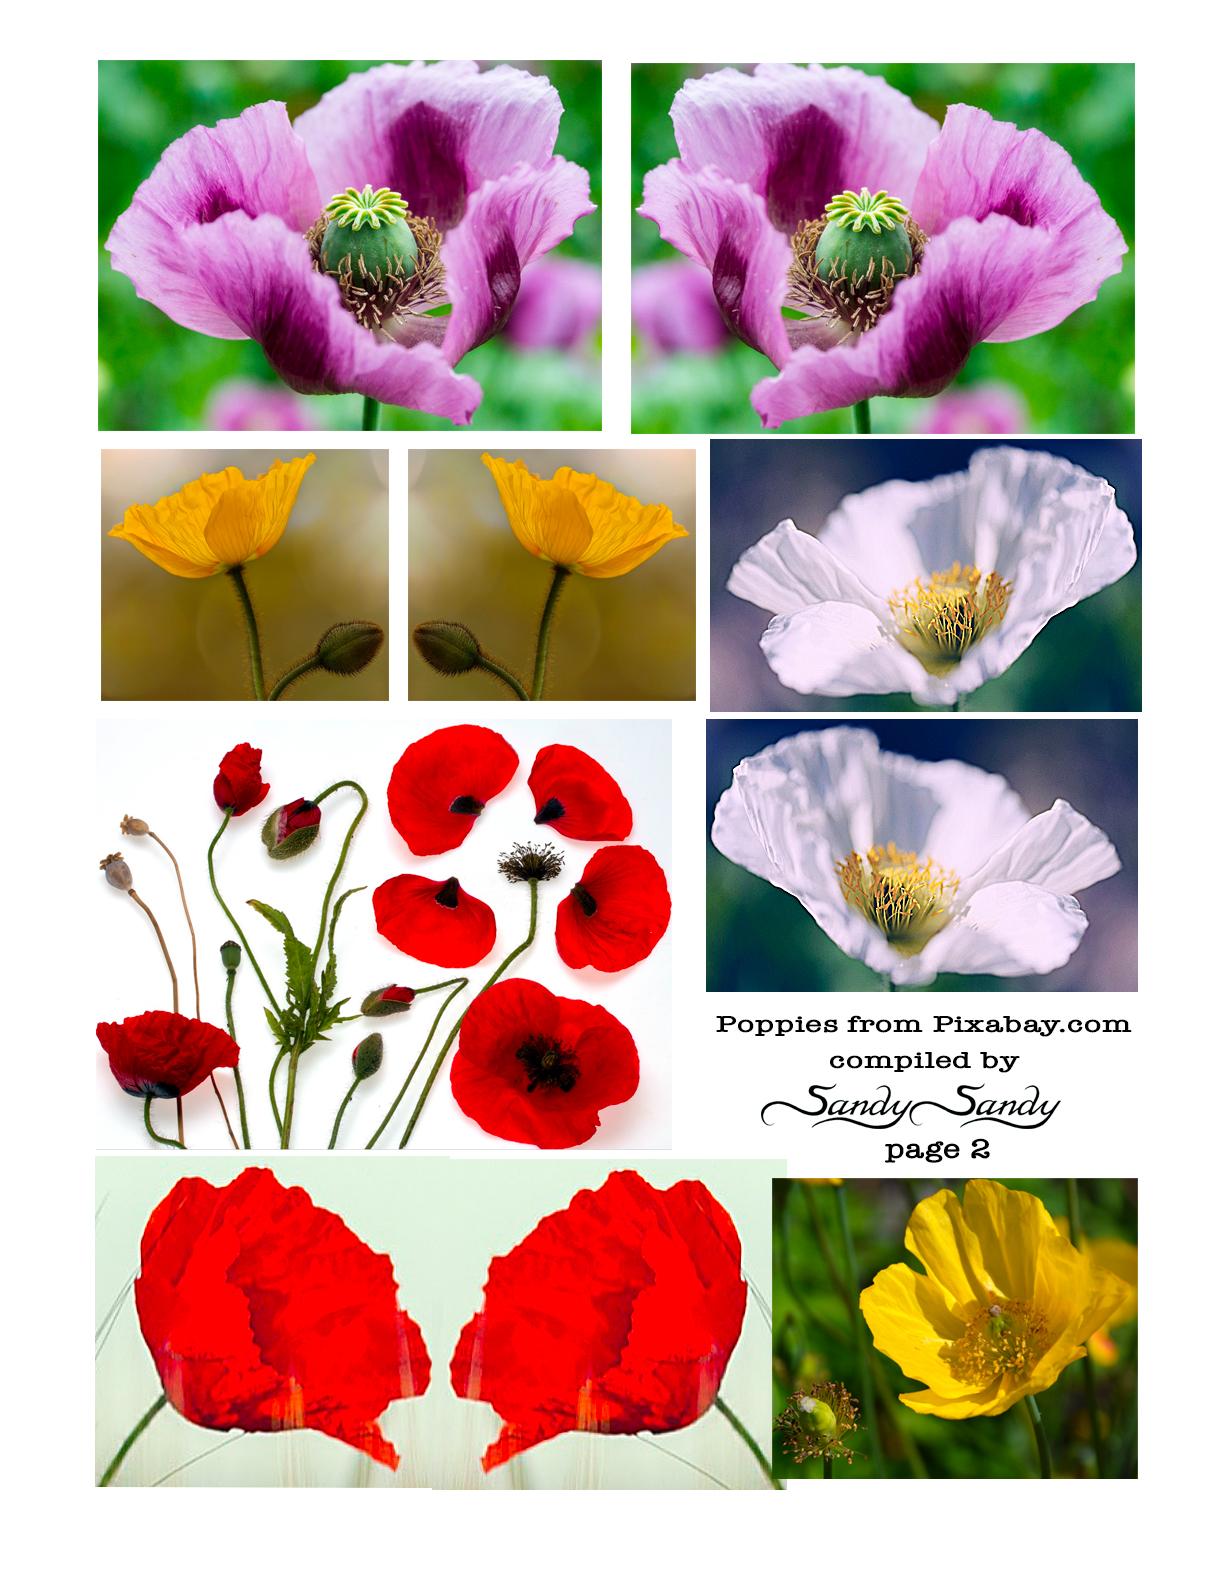
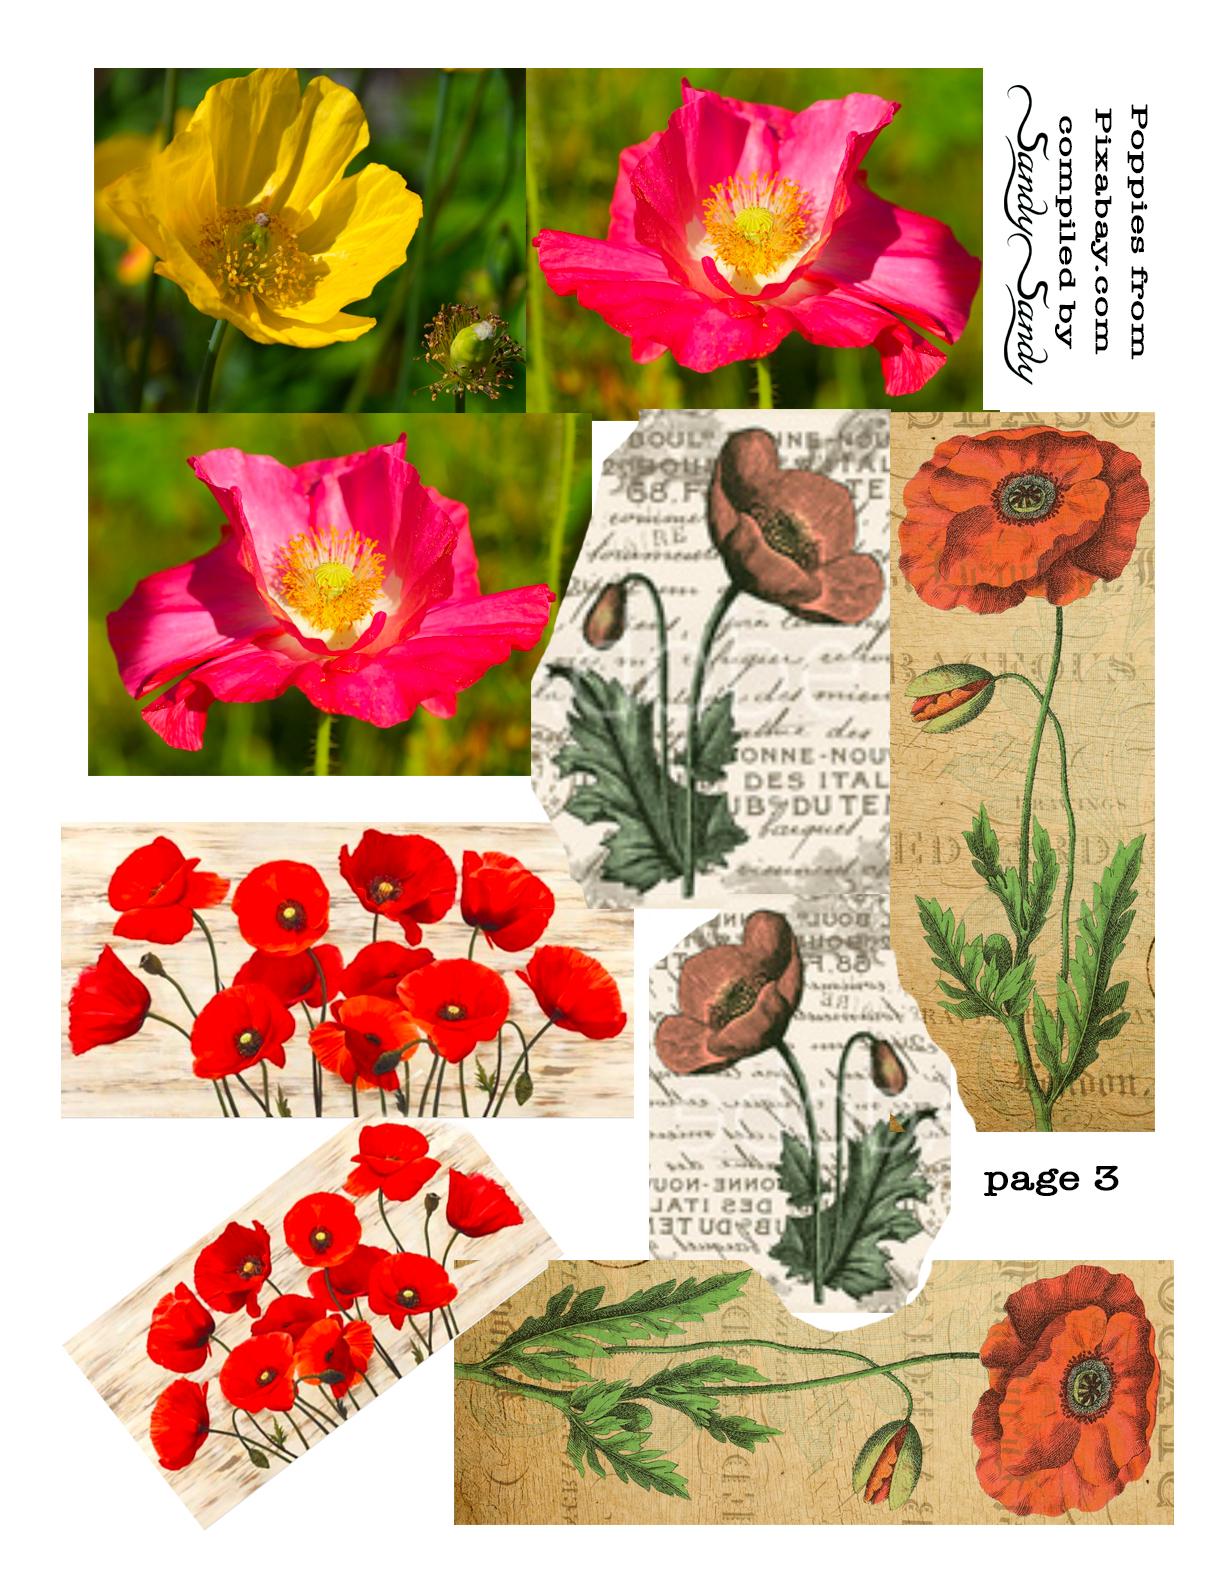
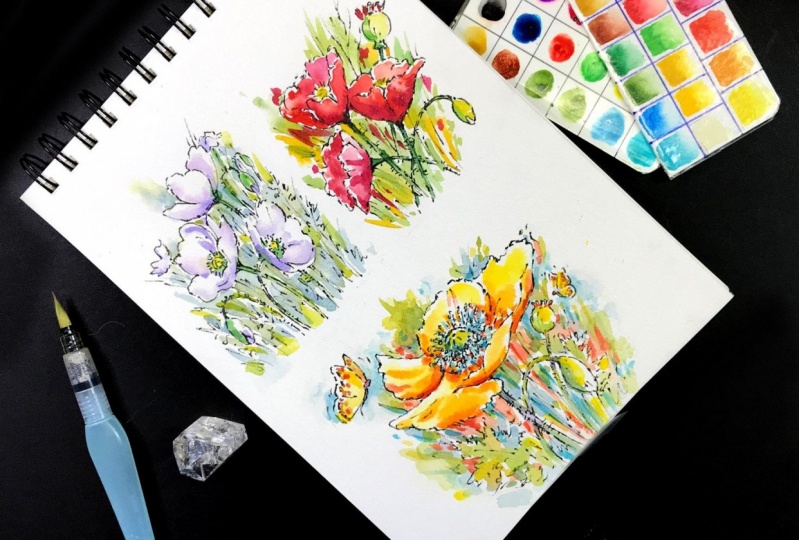
2. Materials: For this demo, I'm using my on-location, portable sketching kit. I keep this kit packed up so it's ready to go whenever I am. I usually take my six-by-six inch journal, but I also have a 7 by 10 inch that I really like. I've got several of these in different sizes. I like them because they have a 140 pound cold press, professional grade watercolor paper. I really like this heavier paper because you can work on both sides of the sheet. I can fit everything I need to do sketches in this little pouch. I keep my little portable field artist paints and I made myself a color chart. This has all the colors that I really need to do, my watercolors. So it carries my little palette. And also what I do is I make reference sheets of images, either my own images or images that I get on Pixabay or Unsplash or Wikimedia. And I usually flip the images so that I have both orientations. And then I just fold it and keep it in my little pouch. So whatever you have an appointment, doctor, dentist, whatever, you can take your little sketching pouch and you've got everything ready. I have a couple of soft pencils. This is a to B and this one is a 3 B. And I find, I like a short pencil when I'm sketching because I hold my pencil like a wand to start, and I find, if I have a long pencil, I end up holding it way back here. And I don't have the control that I do with a short pencil. I also have a micron pen here. This is an O1 and I have a pilot twin marker. This one has a fine point and a thicker point. I like to keep a couple of ink pens in my pouch. I've got my two pencils. And I also keep a ballpoint pen. Because sometimes I want to do my ink work with a ballpoint pen. The last thing that I do keep in my pouch is a little kneaded eraser and a couple of aqua brushes. And these are Pentel. I have all these supplies on my Amazon store list on my website. I also keep a little mini mister in my pencil pouch, and that way I can reconstitute my watercolors when I get ready to use them. So I've got everything here that I need to do sketching or location or in my studio.
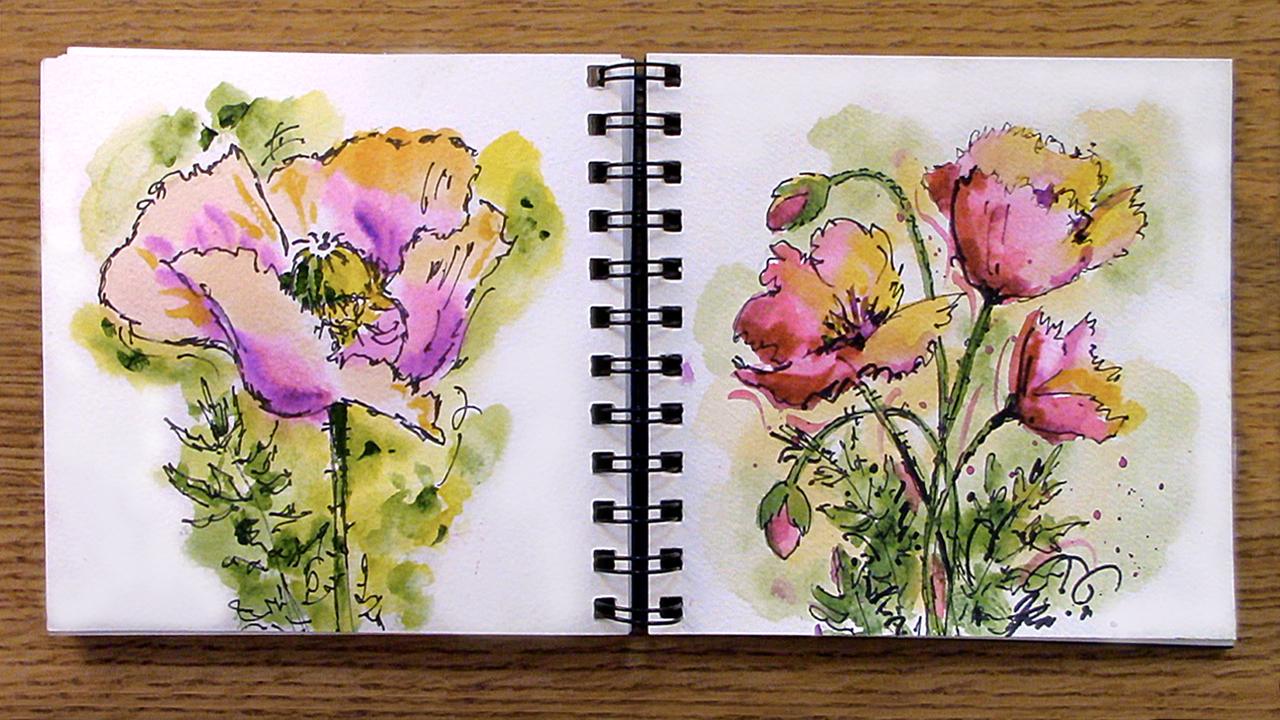
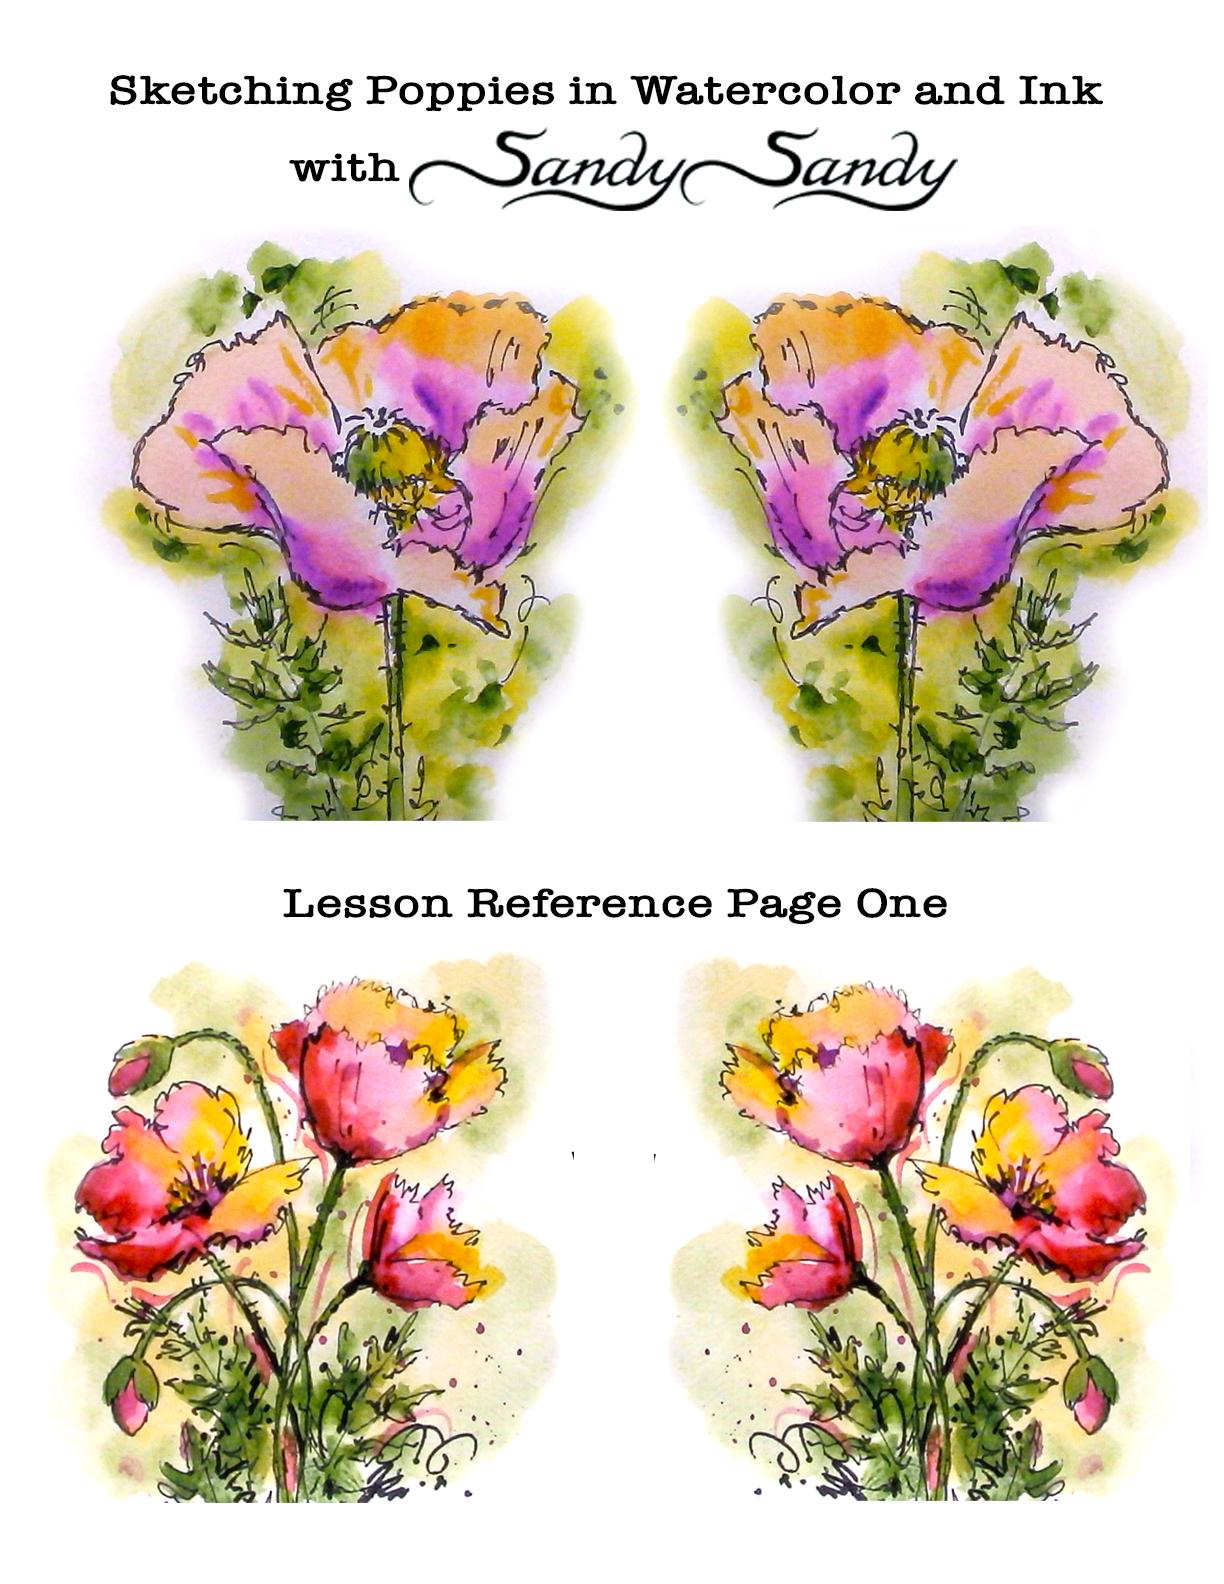
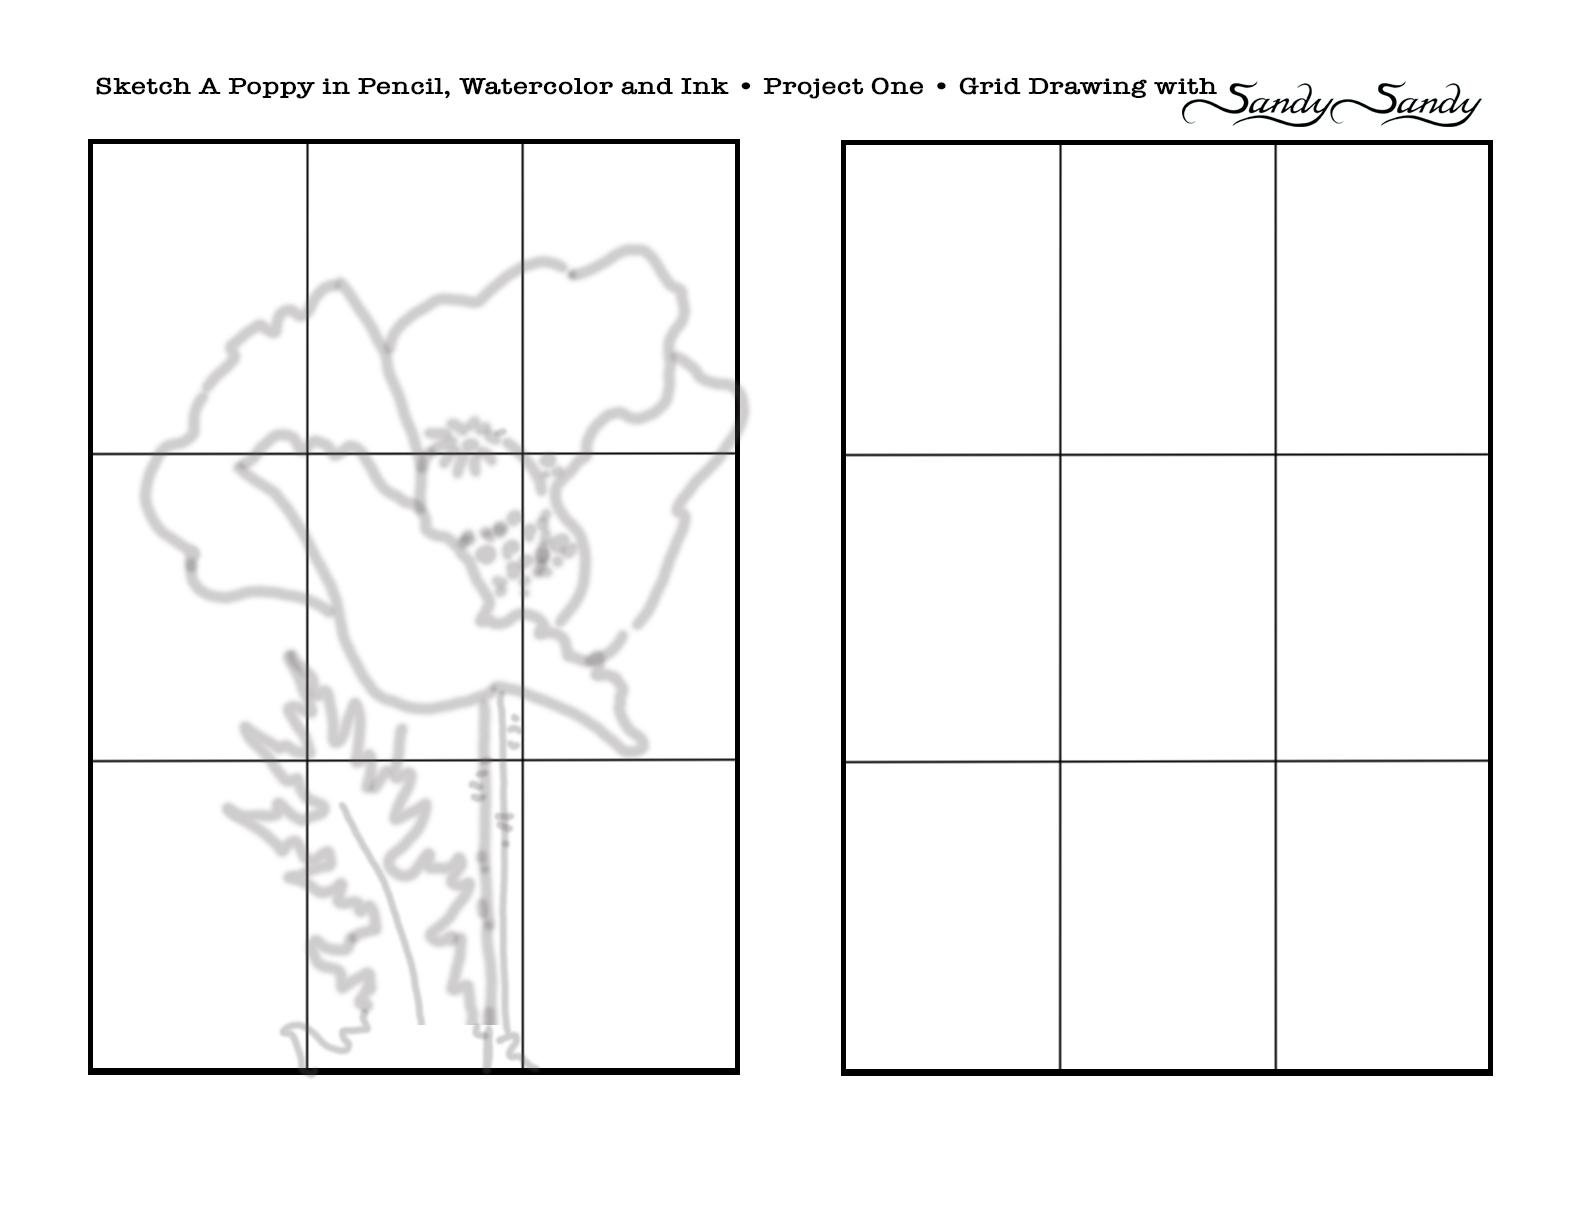
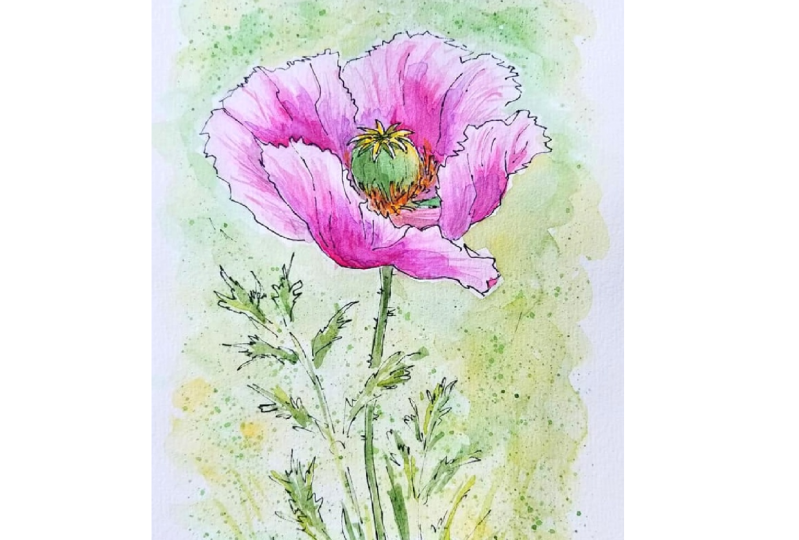
3. The Pencil Sketch: I'm getting ready to do some sketching here. And I've got all my supplies from my little watercolor pouch laid out. And the first thing I'm gonna do is I'm going to wet my watercolors with my little mini mister. Or you can actually use your aqua brush. If you don't have the mini mister. If you were going to wet it with the aqua brush, you would just put a little drop of water in each. Well here. First thing I'm gonna do is I'm going to use my pencil like a wand. And I'm going to do a very loose, free, sketch. I've got some poppy reference in front of me. I'm not trying for a field study. I just want it to have the essence of a poppy on this one. I'm just going to do a single flower. This is from your reference sheet, page 2. And I really like this flower, it's sort of Georgia O'Keeffe-ish. I'm just going to do a similar shape. I'm not copying it exactly again, holding my pencil like a wand. I'm just basically looking at shapes, trying to get the big picture here. It doesn't have to be exact. It's an organic shape and so you have a lot of leeway with an organic shape. I don't know if this is part of the flower are not, I'll just sort of draw it in there. Now, this kinda comes like this. And then here, that top part sort of fans out like this. And that's my preliminary pencil drawing. Don't be afraid to make some lines as you're figuring it out because you can come in with your pen and correct those lines. You have to really put in some lines so that you know where you're going with this.
4. Adding Ink Work: I'm going to come in with my pilot twin marker. And I'm going to use a Lost and Found edge, kind of a scribbly line. And I don't want this to look, to tight, I really want to try to stay as loose as I possibly can. So I call it a nervous stroke. I don't think that's part of this flower. I'm going to leave that part out. I'll just kinda go every which way. Here. If anything, you want to exaggerate the angles and the lines rather than under drawling. This is an interpretation. Don't be afraid to be bold! And this is an exercise. It doesn't have to be a masterpiece! This is a sketch book. drawing or sketchbook watercolor. It doesn't have to be a masterpiece. You don't have to show it to anybody. Going to make this stem have some hairs on it. And I'm also going to draw a leaf up here. The leaf kinda has three parts to it. And kinda jaggedy. Maybe a couple of lines on the outside here in places, just to give it that sketchier look. Ok. Now I'm going to come in with my kneaded eraser, just going to get rid of these pencil lines. There's so many different types of poppies that pretty much any shape will do. Some of them are sort of irregular like this. Some of them are almost completely round. So you have a lot of leeway.
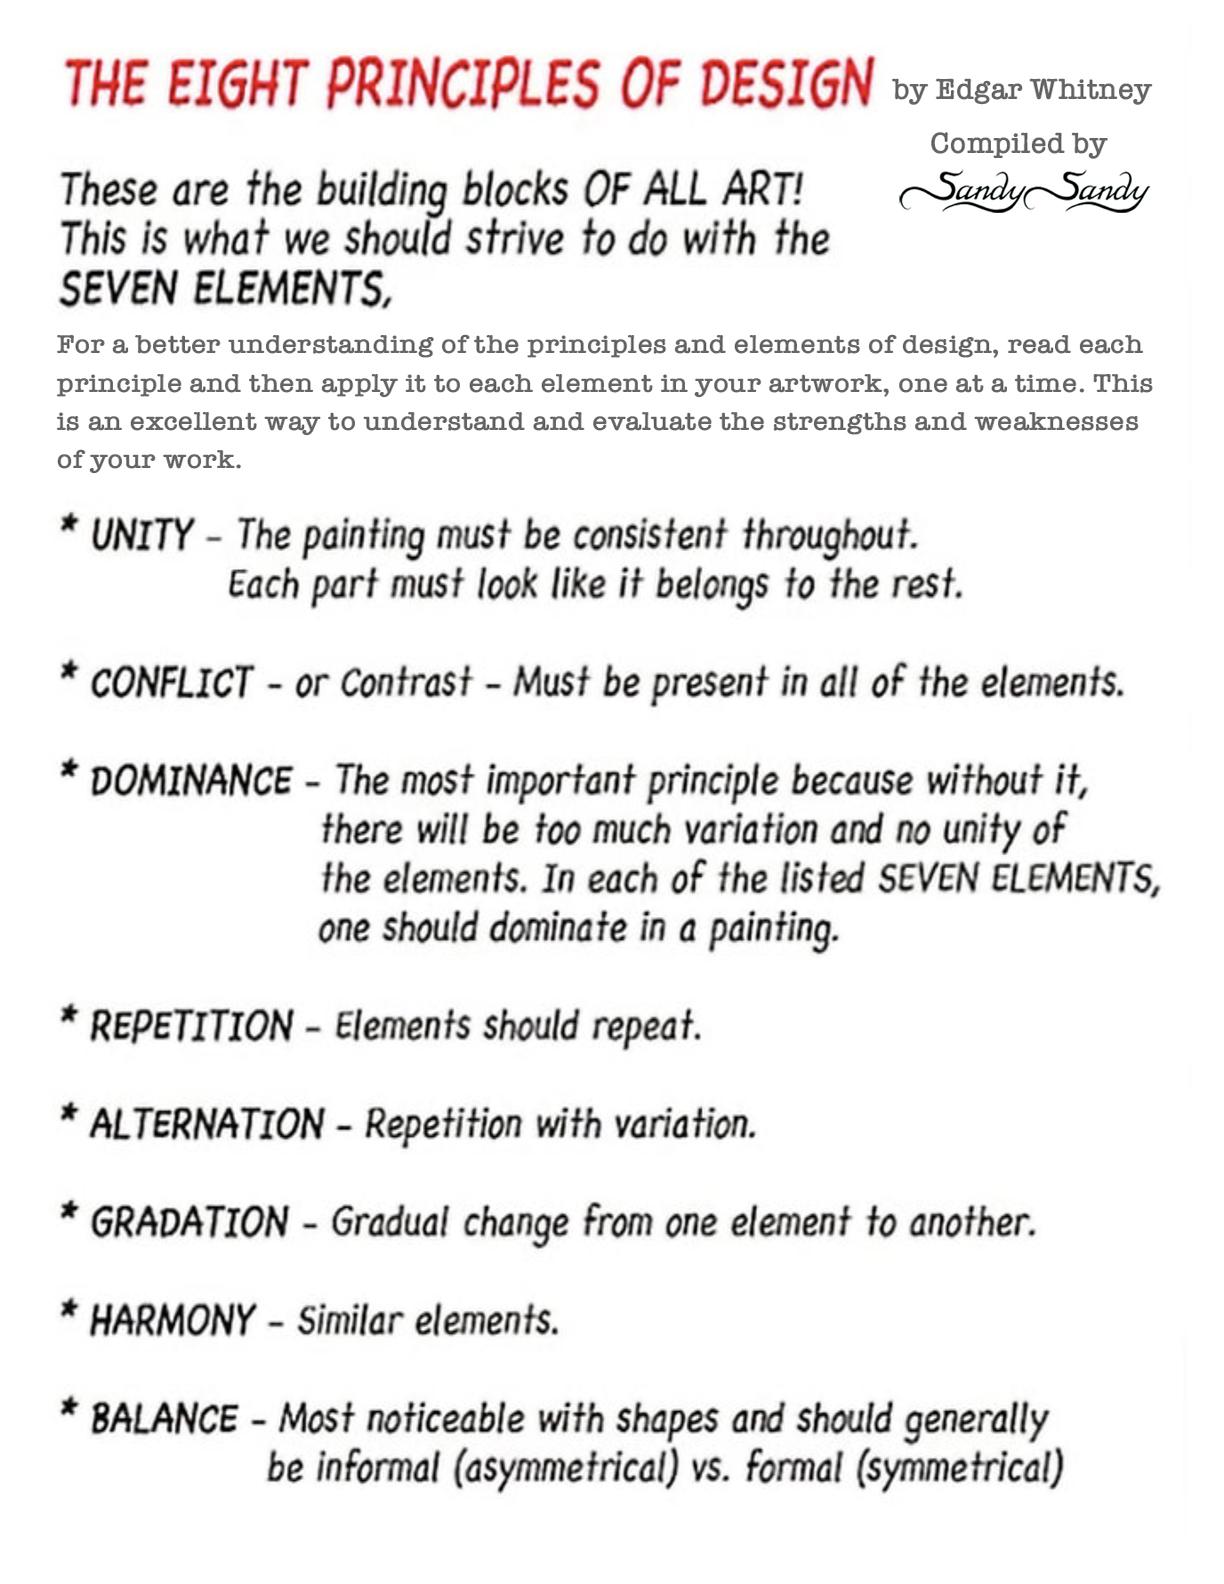
5. Adding Watercolor: Now I'm going to make this one pink like this reference here. So I'm going to come in with my aqua brush and I've got this purplish pink color here already. But it's pretty dark. So I'm squeezing out some water too. Now, as I squint at this, I see there's dark spots here, here and here. And I want to try to do those dark spots first. So I'm going to come in here with a clean brush. And wet some of these petals. Just quickly, just squeezing a little bit. And I'm going to come in here and I'm going to go into these dark areas first and kind of let it bleed out. I'm going to pick up a little of this yellow even though it doesn't really have any yellow in here. I think the yellow will work good in the light areas. And I'm going to bring it a little bit of that purplish color into these darker areas. You can really use the tip of these brushes. You want to make sure you don't squeeze it too hard, when you don't mean to though. I tend to have kind of a heavy hand with them. Maybe a little bit there. And then we have this green. I'll use my yellow and green brush that I have here. If you only have one aqua brush, you'll just need to squeeze it and clean it on the paper towel in between your colors. Again, the lights kinda coming from this way, so this side here is going to be my dark side. And this other side over here is going to be the lighter side, and I'm exaggerating it. I'm going to leave that top part white for now. And as far as the background goes, I think I'm going to go ahead and use this yellowish-green color and just sort of put it in loosely. Not even worried about my leaves here, more yellow. Whatever you do to one part of the painting, you have to repeat it in other parts so that it looks like a unit. Trying to be loose and not getting hung up on staying in the lines or anything like that. Just trying to play. Okay, Now see how I have a hard line here. If I want to soften that, all I do is come in with my aqua brush and just tickle that edge a little bit. Tickle where you see a hard edge and you want to blend it.
6. Details and Finishing: Add a few darker areas, for some contrast. You don't even have to stay in the lines. The color can be separate from the line work. Just keep it playful. Try to make these quick. About 15 to 20 minutes, which doesn't give you time to get caught up in too many details. Okay, the only thing I really have left to do is this part down here. And I'm squinting at it and I'm just seeing like a lot of dots. I'm seeing a gold color. So I'm going to come back in here with this brush that I was using for the green. And I'm just going to dot in some of that gold color in there. Maybe too much. But, you know, it's a sketch and doesn't have to be anything more. It's practice. It's practice in staying loose and being spontaneous with your art and making decisions in a playful manner. So that's this one.
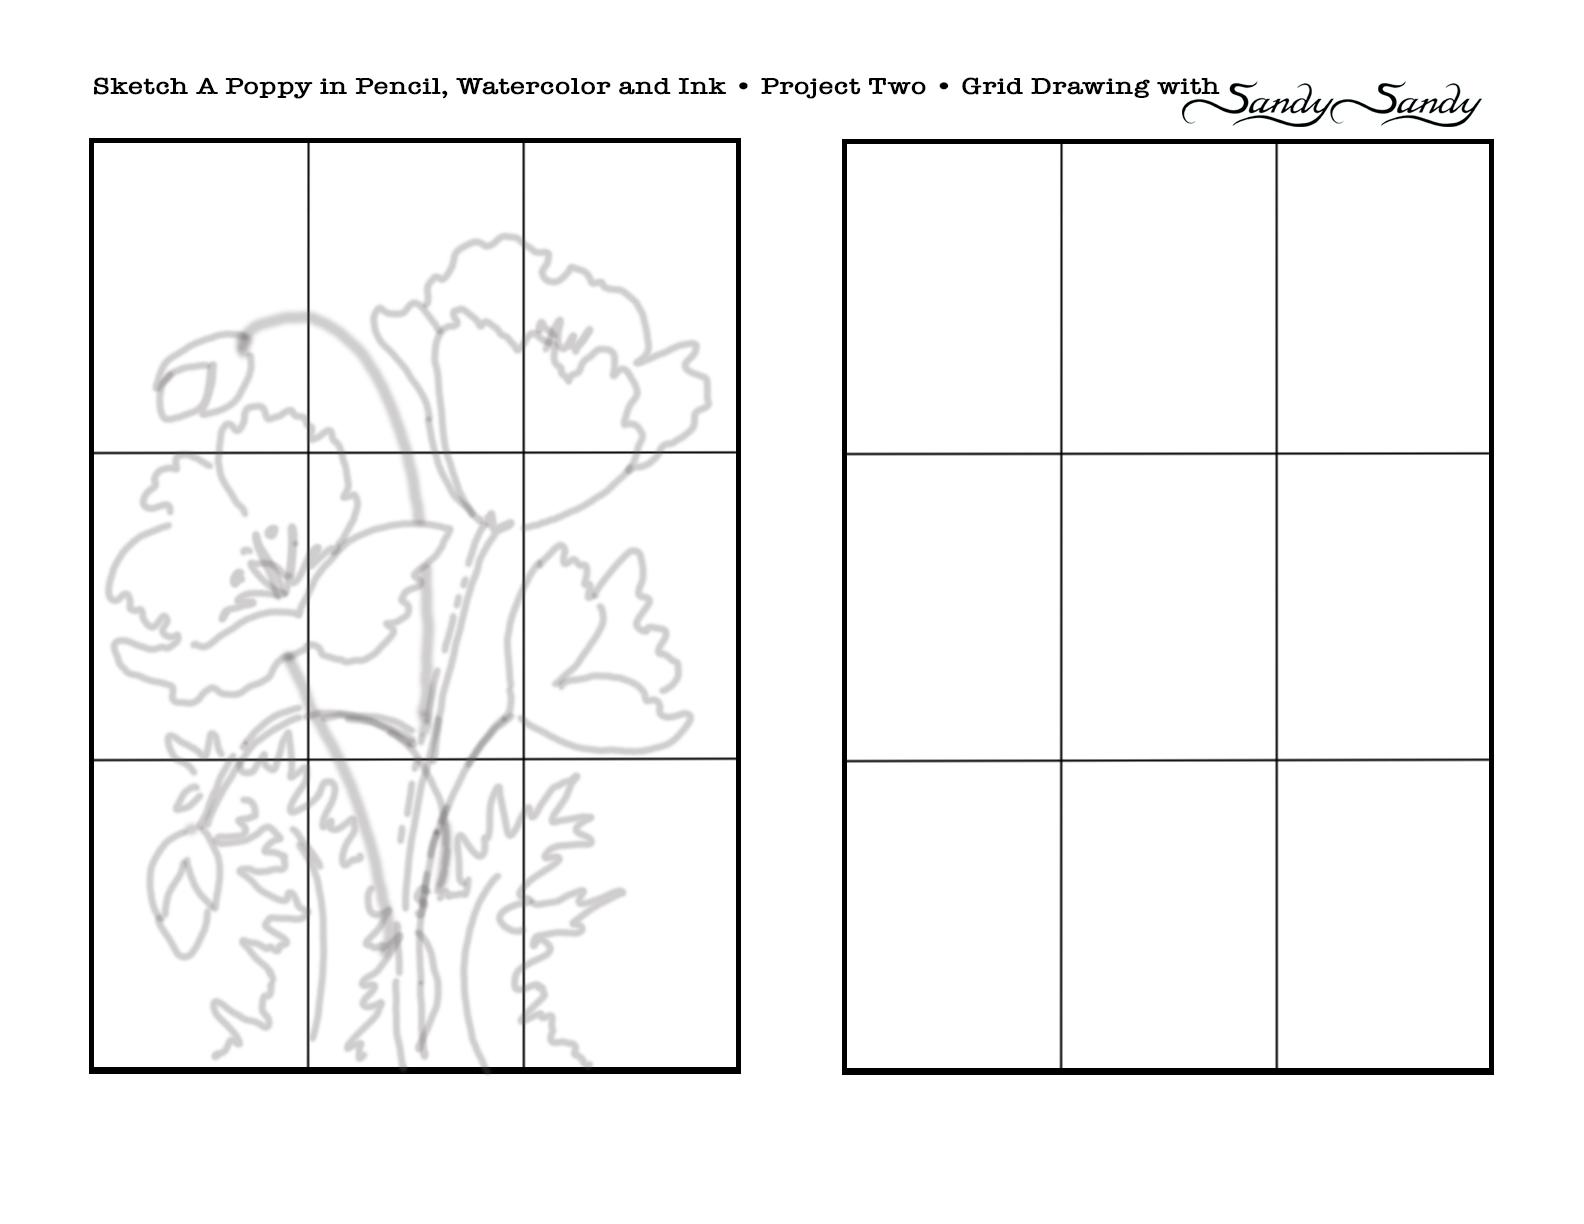
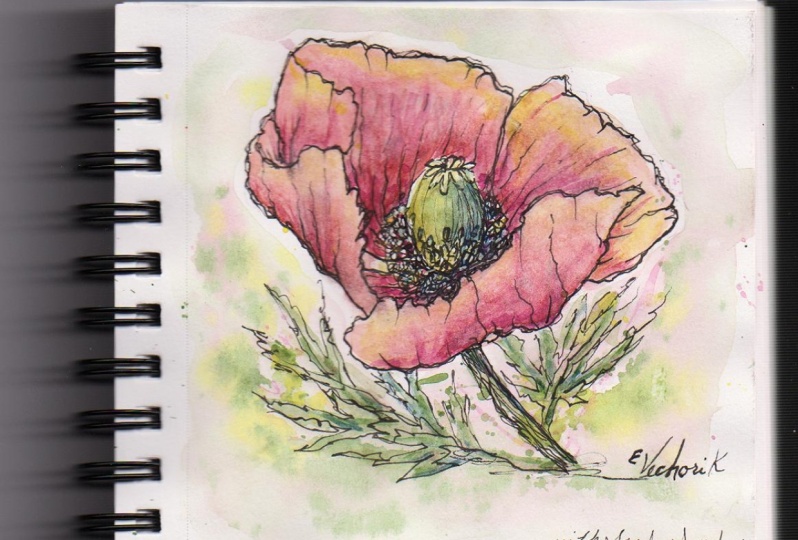
7. The Pencil Sketch: First thing I'm gonna do is I'm going to use my pencil like a wand. And I'm going to do a very loose, free sketch. I've got some poppy reference in front of me. And I'm not going to copy any reference specifically. I'm just going to go for a poppy looking flower. I'm just going to come in here and I'm going to put three poppies to start. And up here I'm just holding my pencil like a wand and I'm going to just rough in a poppy like shape. I don't want to put my second poppy right next to this flower. I want to move it down a little bit. You want to try to go with a diagonal thrust on your drawings. That makes it more dynamic and less static. So I'm looking at my reference here and I think this next one I'm going to put right about here,. I'm going to make it a little bit smaller. I'm just thinking poppy like shape. I'm not trying to be too specific with it. So here's my second poppy. Maybe those will actually crisscross. And then this third poppy, I think what I'll do is just do one that isn't quite open. More of a back view of this third poppy. So the leaves of the poppies are kinda jaggedy. And I'm just sort of roughing those in. I'm not getting real specific about it. You know, maybe I'll have one that comes up here in the back and another one over here. Just very loose, very loose and free. And I think I will put in a bud here. Bud coming in here, maybe not quite as long as that. And maybe one more that comes up here like this.
8. Inking the Sketch: Now I'm going to come in with my micron pen. This is an O one. And I'm going to try to stay sketchy and loose with my drawing. So just sort of scribbling as I go. Trying to be loose and keep it very spontaneous looking. See how I'm just kind of doing a jagged line here. This isn't writing real well, so I'm going to switch pens and this is a bit of a wider line. So I want to kind of skip around. I don't want to fill it all in. Poppies kinda have these, some of them have these little hairy type things on the stem. So I'm just kind of indicating that. And here, just really trying to be very sketchy with it. Loose. Skipping around a little bit, breaking my lines. here, back flower. Now, we are making that stem a little bit jagged to sort of indicate that hairiness of the stem. This one here can come behind. These can go right off the page here. Drawing a couple of indications of those little hairy things that are on those stems. And then just a little bit of an indication of those leaves that are kind of jagged. Kind of branch off into three sections here. Not getting very specific. I'm trying to stay loose and sketchy with it. I'm looking at reference, but I'm really not copying anything. Just kind of trying to portray the essence of what I'm sketching here. I tried to make it Poppy-ish. Okay. This comes back here. And that's that. Okay. So now I'm going to come in here with my kneaded eraser and I'm just going to erase my pencil line. Okay.
9. Background Washes: So, now I'm going to come in with my aqua pen and look and see what I have here. This is a bit of a thicker one. This is finer. Going to go ahead and use the thicker brush. Make sure it's clean, which it isn't. Make sure your aqua brush is clean before you use it. Squeeze a little bit and get some water to come out. And the first thing I'm gonna do is I'm going to put a little bit of water on my paper here. I'm just sort of squeezing it gently, coming in here and dampening that background, I'm going right over most of the lines. I'm kinda staying away from the big blossoms here, but I'm quickly wetting the background and I'm just going to lay in a light color, a light warm color, and know that watercolor dries back about 30 percent lighter. So you always want to try to go a little darker than you think you want. This looks pretty dark right now, but once it dries, it's going to look pale. So you want to keep that in mind when you're laying down your background color. And I'm gonna go ahead and add a little bit of a light green color into that, that background too. And I'm going to let it blend in a few places. Let it skip around a little bit. Whatever I do to one part of the painting, I want to repeat it in other parts. Okay. I think that's enough for my background. And over here, see how I have this hard line? I can just come in here with a little bit of water, clean water, I cleaned my brush, and then I can just soften that edge if I want to. I can leave some hard and soften some, for variation. You want to try to vary everything about your sketch that you can think of! Okay, So I'm just gonna let that dry for a couple of minutes and then I'll be back.
10. Add Color to Flowers: Okay. My background's dry and I'm going to go ahead and spritz my paints again. And I'm going to start putting some color into the poppies. So I'm going to mix up a couple of different colors. Going into my red color, this is like an alizarin crimson type of a red. It's got some blue in it. And then I'm going to also use my other aqua brush. And I'm going to mix up some yellow to mix in with that red. But I'm going to mix it on the paper. So it's nice if you can have two or three different brushes going at once because then you don't have to clean them in-between colors so much. We're going to come in here to this first flower. And I'm thinking that my light's coming from the upper right. So that means the underside and my left side is going to be more in shadow. So I'm going to come here with my red and I'm not going to worry too much about staying in the lines. Putting a little bit of that red down on these blooms. Then I'm going to clean my brush a little bit. It's alright if it's got a little color on it. Then blend some of that color with just water so that I get a graded wash. That wash, that color is going to be different from the other colors. And then I'm going to come in here with this yellow and put some of that yellow on the side where the sun is hitting it. So come back in here with this red, it's still got a little bit of that red residue on it. Again, this flower now down here is going to be the darker part on this flower. So to clean this brush, all I do is squeeze a little bit and blot it on my paper towel and come back up here with my yellow. Put my yellow on. The light is coming from the right. So we want that part to look like it's lit by the sun a little bit more. Okay, so more of the red color, here and here. And I think that's about all we need. I'm going to put in a little bit of a darker color. I've got some purple here, and I mixed it with the red. And then I'm going to add a little bit of that darker color here on the underside of some of these petals, to give it a little bit more variation. Give a little bit more depth. With my sketches, I try stay loose and spontaneous and I don't get too caught up in trying to stay in the lines. I think it looks better if some of the color is out of register.
11. Color Blooms & Leaves: Here I'm going to do my stems. Little bit of water so I can vary that color. So all these greens are not the same. Here. This, this part of this leaf where it's in the sunlight is going to be lighter than what it is down here where it's not getting as much light. not even staying in the lines here. I want it to be really sketchy looking. So I'm just coming in wet in wet, letting it bleed. I'm going to add a little bit of blue to that to darken it some for variation. Just sort of skipping around. Not concerned with staying in the line. Now to get this stem, I turn my paper so that I can use the curve of my wrist. All right. Go back to my red and I'm going to darken this a little bit here, darken that. And then the centers of these flowers, I'm just going to come back in here with some purple. And I'm going to add some darker color in here in this center. Indicate maybe a little bit showing here. Couple of lines. And that's all. I think I'm going to add a little bit of splatter to this piece. So what I'm going to do is, I'm going to take a paper towel and I'm going to tear little pieces of the paper towel and cover up my blooms here. Most of them anyway, don't have to cover up everything. It's all right if it gets a little bit of splatter here and there. And then just with my brush, my aqua brush, I'm just tapping it. I have some of that thick purple pigment on here and I'm just tapping it. Okay. So that's all I'm gonna do for this one. Maybe I need to restate this stem a little bit. Don't be afraid to turn your paper to get to a better angle. Okay, so that's all I'm gonna do for this one. Let it dry and Maybe I"ll comeback and I will detail it a little bit more with my pen. Possibly add a little bit more darker pigment on it in a couple of places.
12. Finishing Touches: It's dry now. I think I'm going to first off come in with my pilot twin marker. And I'm going to add a little bit of darker lines here and there in the centers. In this one, you really wouldn't see the center. And I'm going to add a little bit of darkness here coming up underneath of it. This one also, you really don't see the center on this one. Down here. Just a few darker lines, maybe a few little squiggly lines to make it look more sketchy. Thin and thick. Then adding a little bit of a thicker line. On this underside here. Doesn't need a whole lot. Maybe a few dots here and there. I think maybe just a little bit more of that red color, in a couple of spots. Clean this off. It's got a lot of purple on it. Before I do that, I'm going to wet the area where I'm going to come in a little bit ,so that it's soft. When I put the color down, I don't get a hard line. Just coming in here and I'm letting that wet area blend those colors together. Just a little bit. Just a few sort of playful lines in here. But I think that's enough. I don't want to over work it.
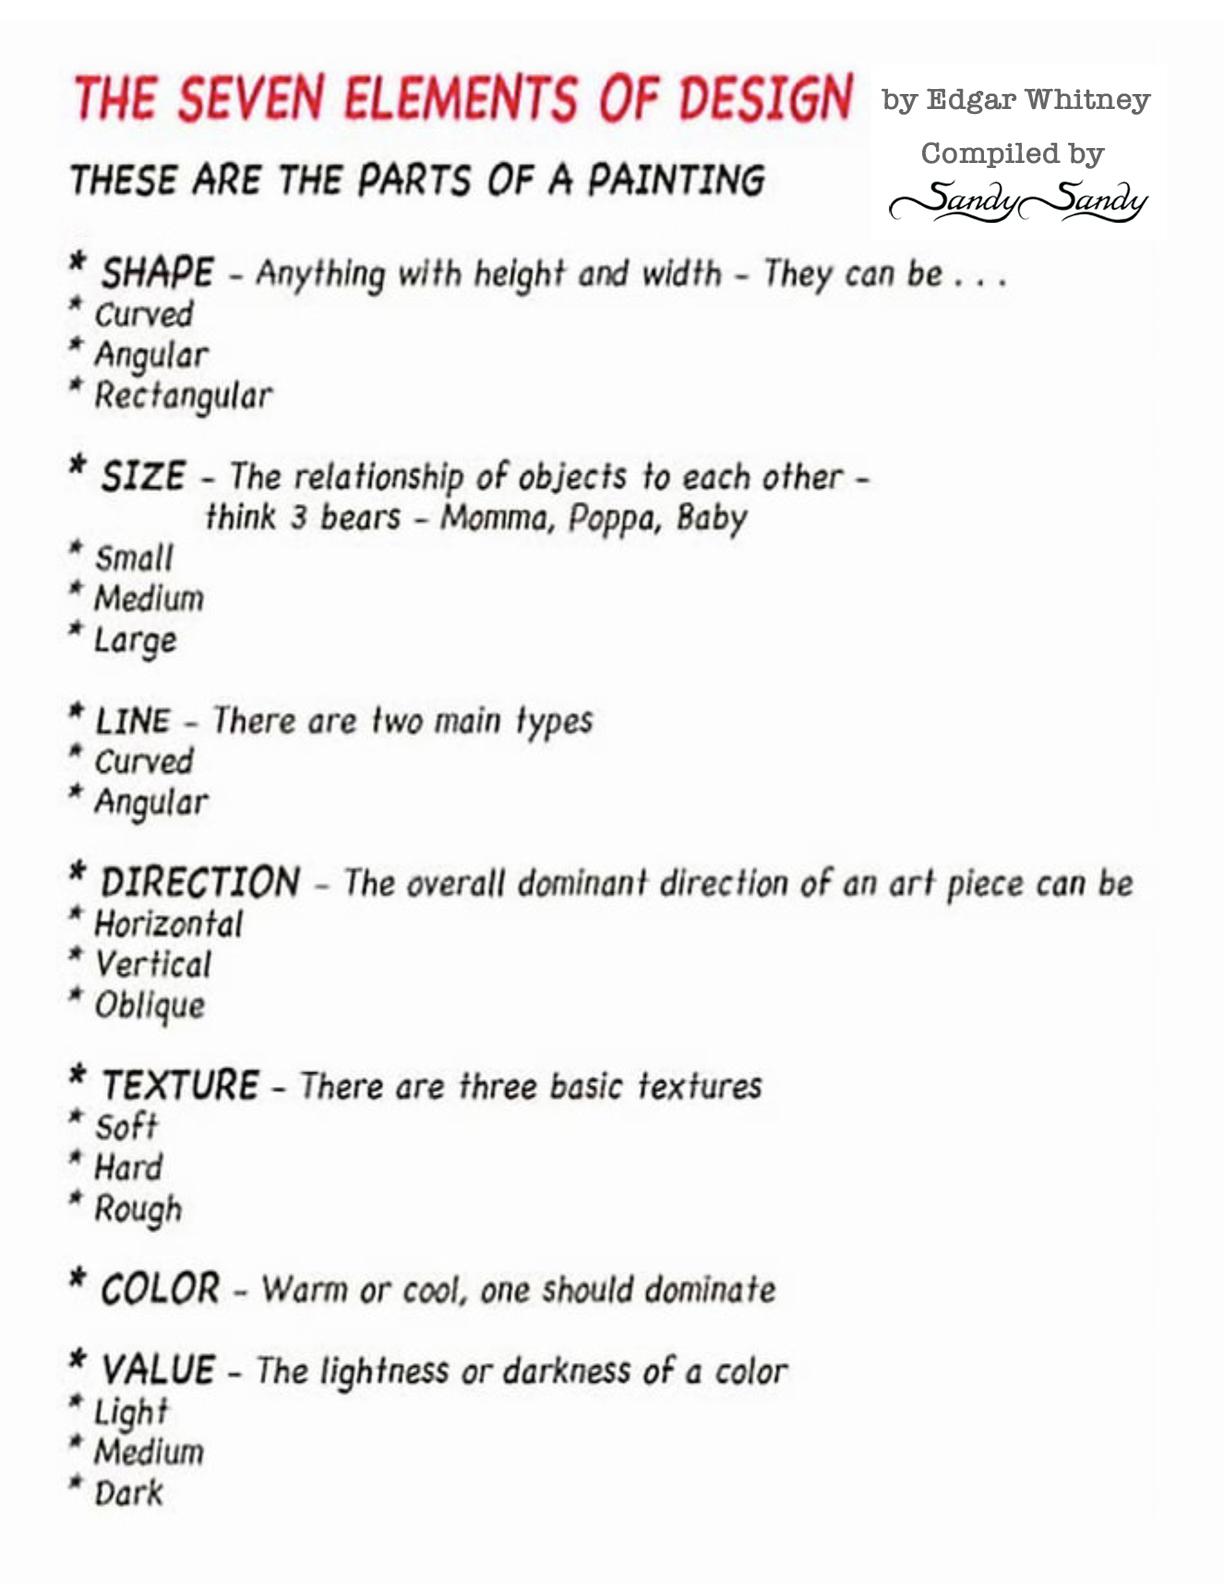
13. Closing Thoughts: Now, Repeat the same drawing as many times as you can, because it takes 12 to 20 repetitions to become proficient at something. Just think, How musician or an athlete practices the same movements over and over. See how many poppy sketches you can create out of the photo reference I've provided. Do the same sketch, but reverse it, change the colors or line work. How you make your marks and use color. will define your style and set you apart Visually. Experiment with curved and angular lines, varying the width, length, and texture. Play with your colors, edges, intensity, temperature, contrast, and value. Working in a series will accelerate your artistic growth. Searching, exploring, and refining variations of the same theme uncovers hidden nuances with layers of possibilities. It exposes a certain depth, perspective, and proficiency that isn't present in a single work or two. When you work in a series, each sketch becomes a stepping stone to the next. Due quicker pieces. Instead of obsessing over getting something perfect, try taking 30 or fewer seconds to draw gestures. Aim to get the underlying form, or idea of your subject matter, rather than drawing the minute details. Nobody improves or finds their style without practice. Mistakes are your best friends as an artist. Draw with the purpose of making mistakes. Ignore perfection. You want mistakes. Mistakes are what you should go for. Mistakes are your best friends. They don't lie to you and they tell you what you need to know! Cherish them. Look at them for what they are. They are you and you need them. Every time you make a mistake and you see it, you should be happy. Start looking for mistakes. Make them on purpose. Train yourself. Practice making mistakes until you are comfortable with them. Nothing comes for free except for the gift of mistakes. Thank you so much for joining me here. I hope you find inspiration, creativity and making mistakes to be your good friends. Happy creating everyone. Thanks again. See you soon. Bye bye.
 Sandy Sandy, Learn.Love.Create with SandySandyArt