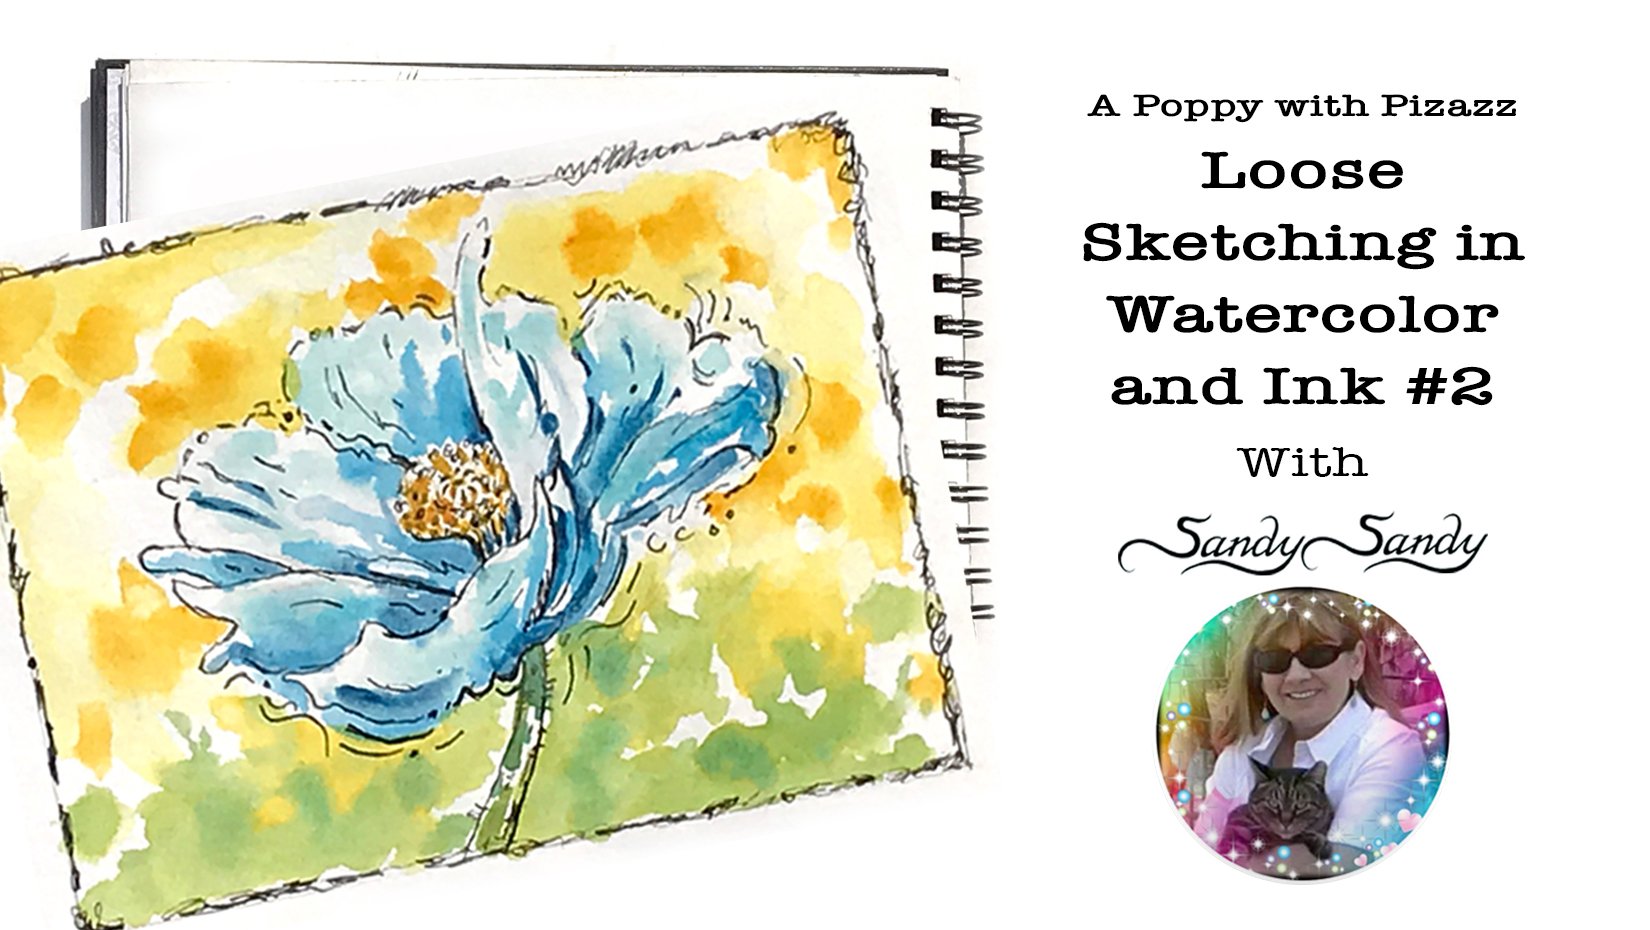
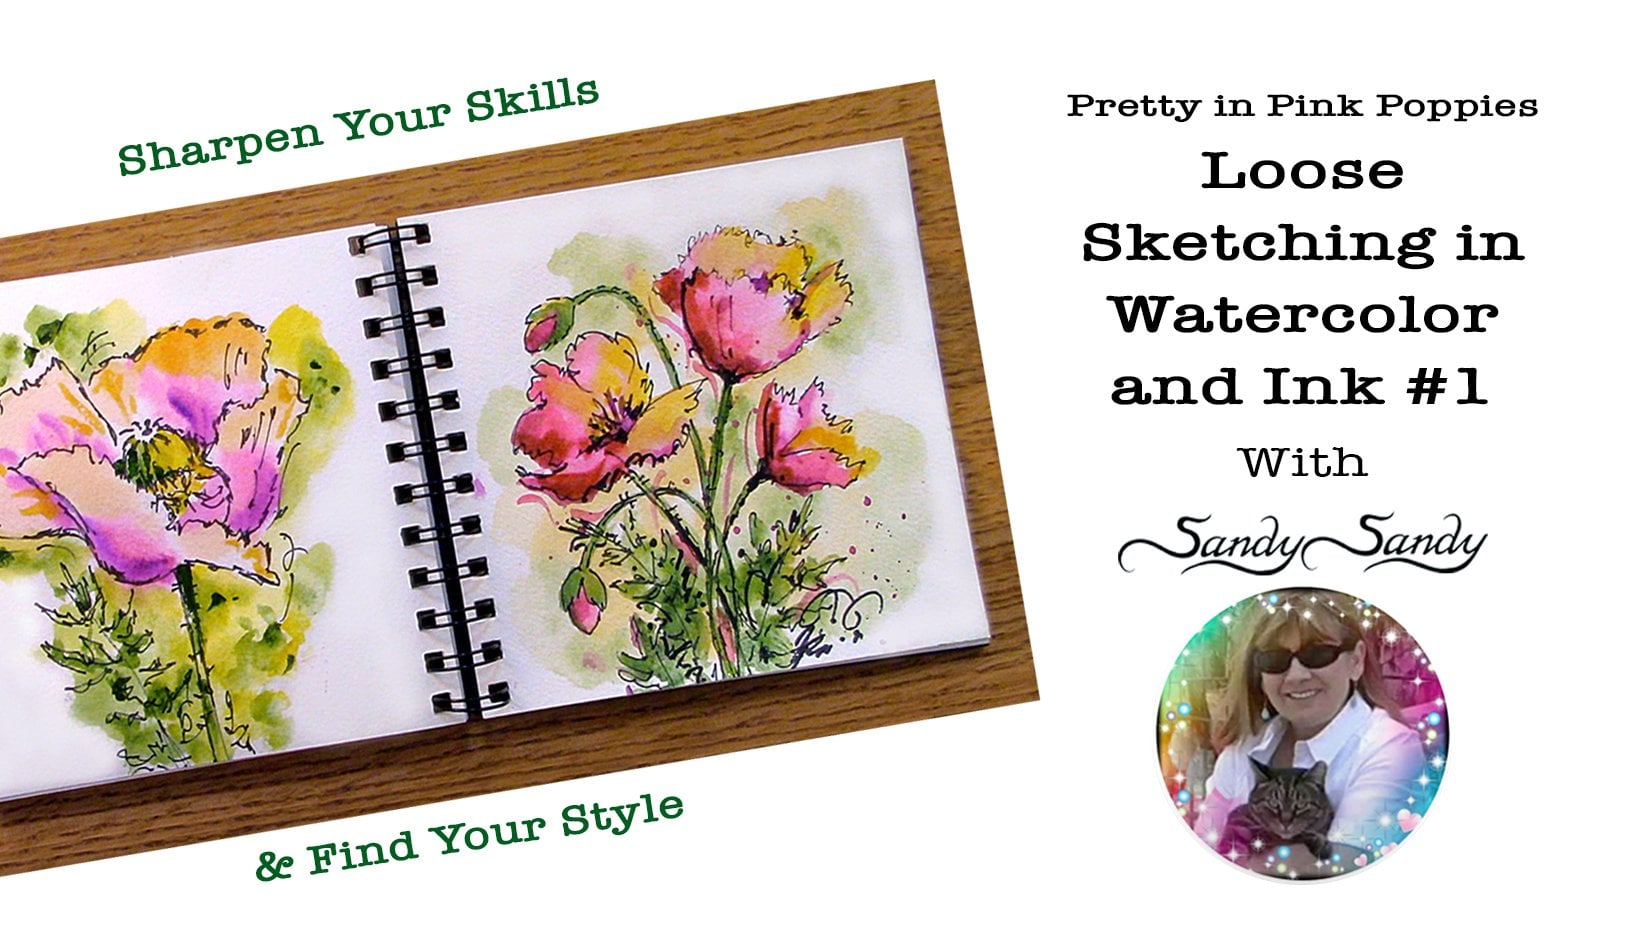
Transcripts
1. Introduction: Hi everybody. So
good to see. Today. We're over 25 years. I've been teaching people how to act themselves and let go of the idea of perfection and
the fear of making mistakes. I strive to inspire by showing the house and explaining the
whys behind the principles, techniques, and
the spirit of art. I believe drawing is an important skill needed for sharpening many
abilities as an artist, learning to draw is
learning how to really see. Your drawing style is as
personal as your handwriting is. What sets you apart,
makes you unique. It highlights your personality
and your creativity. In this class, I'm
going to share my six steps to sensational
sketches technique. Here we'll be concentrating
on value instead of color, because color gets
all the credit. But values do all the work. One of the most
important elements of successful drawing and painting
is understanding values. I'm sharing the
sketching technique with you because once grasp, this method is one
of the fastest, easiest ways to add light, medium, and dark values
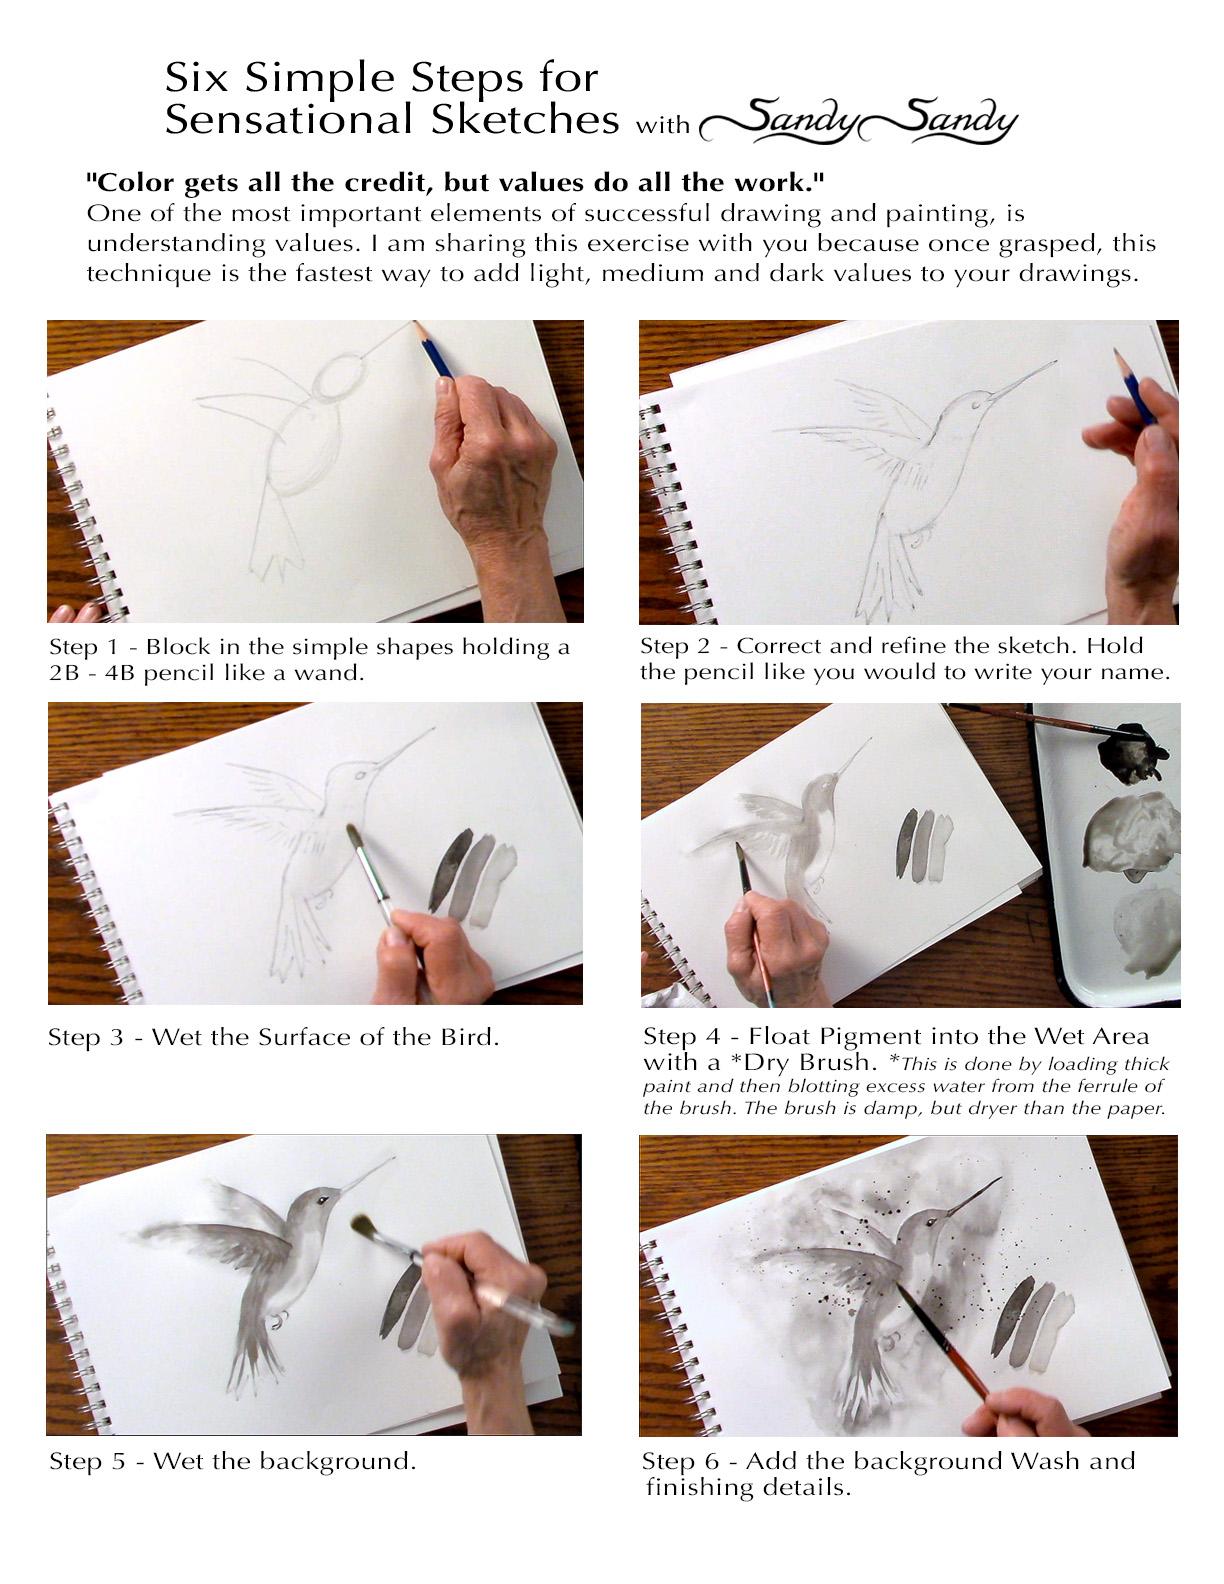
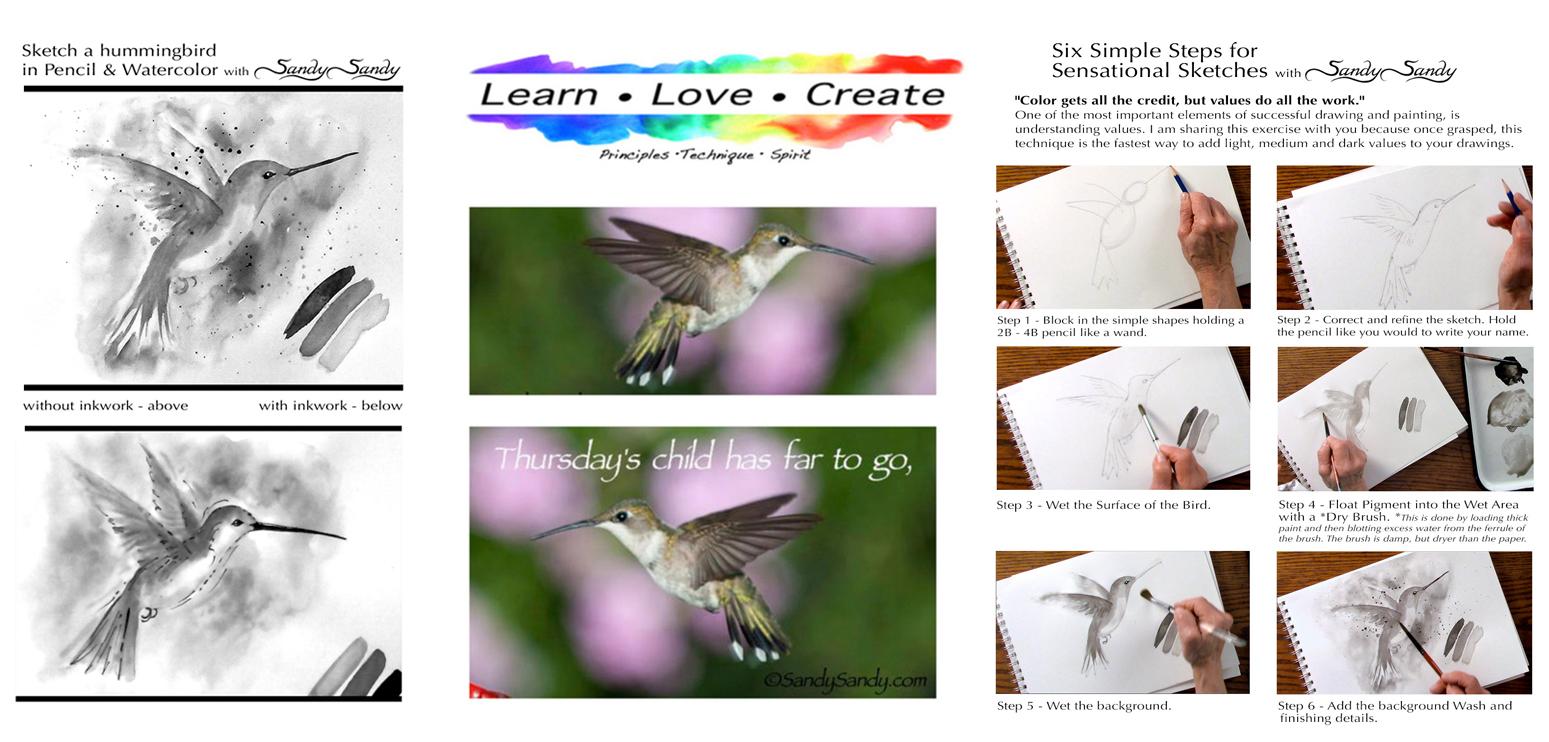
to your drawings. This picture shows
you how to hold your pencil when you
first start your drawing. It's much easier to 2s block
and shapes this way and keeps you loose without getting caught up in details
too early on. Okay, now you can tighten up a little and hold the pencil
like you would to write, add some of the main
details, correct, and refine your sketch, but don't get too nit-picky. Keep in mind, this
is an exercise. It doesn't have to
be a masterpiece. When out of the
studio sketching, I often stop and
add the wash later. I start this next
step by generously wetting the surface of my
bird with clean water. I go right up to the
edge of the figure. So the paint will flow to that point and the strokes
will blend together. In this step, I use a thirsty dry brush that's loaded with
watercolor pigment. I sometimes use a combination of ultramarine blue and burnt
sienna to make a gray, but any dark color will do. I'm more concerned
with value than whew. I start squinting a lot
from this point on. That makes it easier to
see big shapes and values. I float the pigment
into the wet area, giving the figure
shape by rendering values and a few details. In this step, I quickly wet the entire background
area where I want my wash to be
with clean water. Again, I float my
pigment in with a dry brush and finish the
piece with a few details. As in my other classes, I've also included multiple
printouts with reference, training exercises
and helpful tips that will help expedite
your progress while laying a foundation of better understanding,
appreciation, and enjoyment. So what are we waiting for? Let's get started.
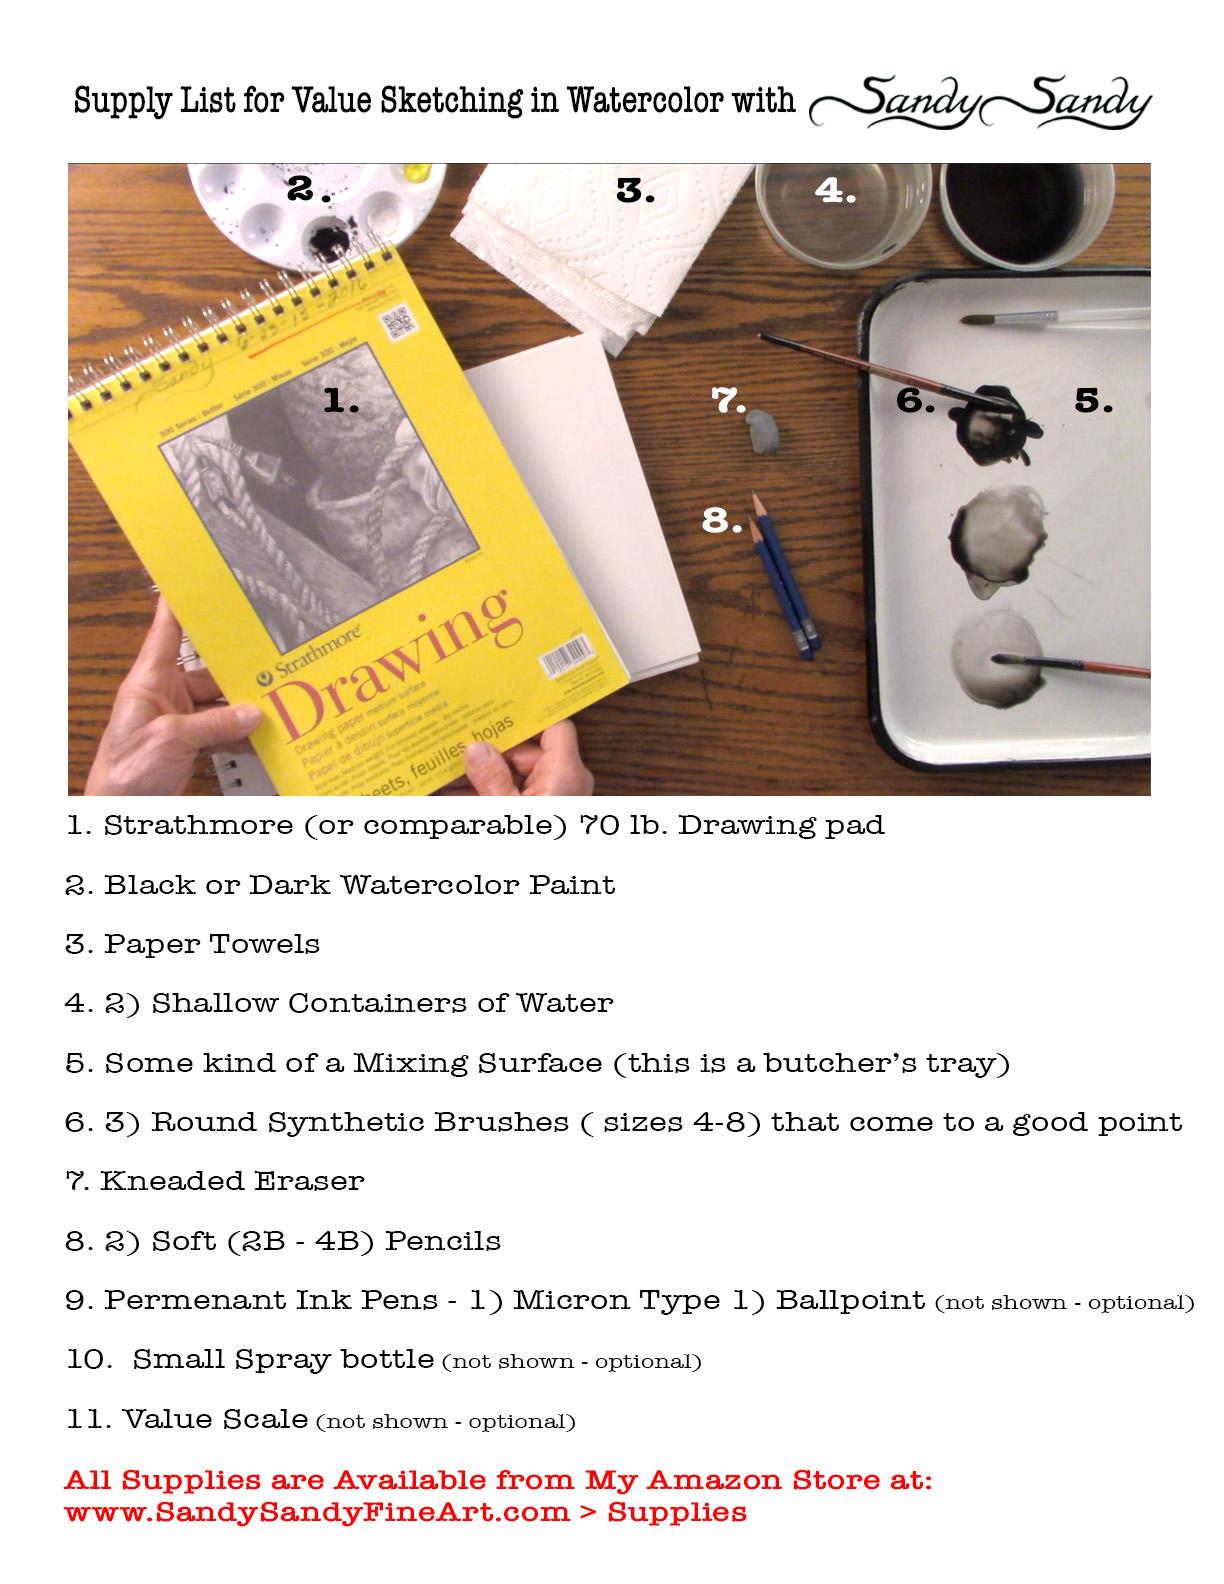
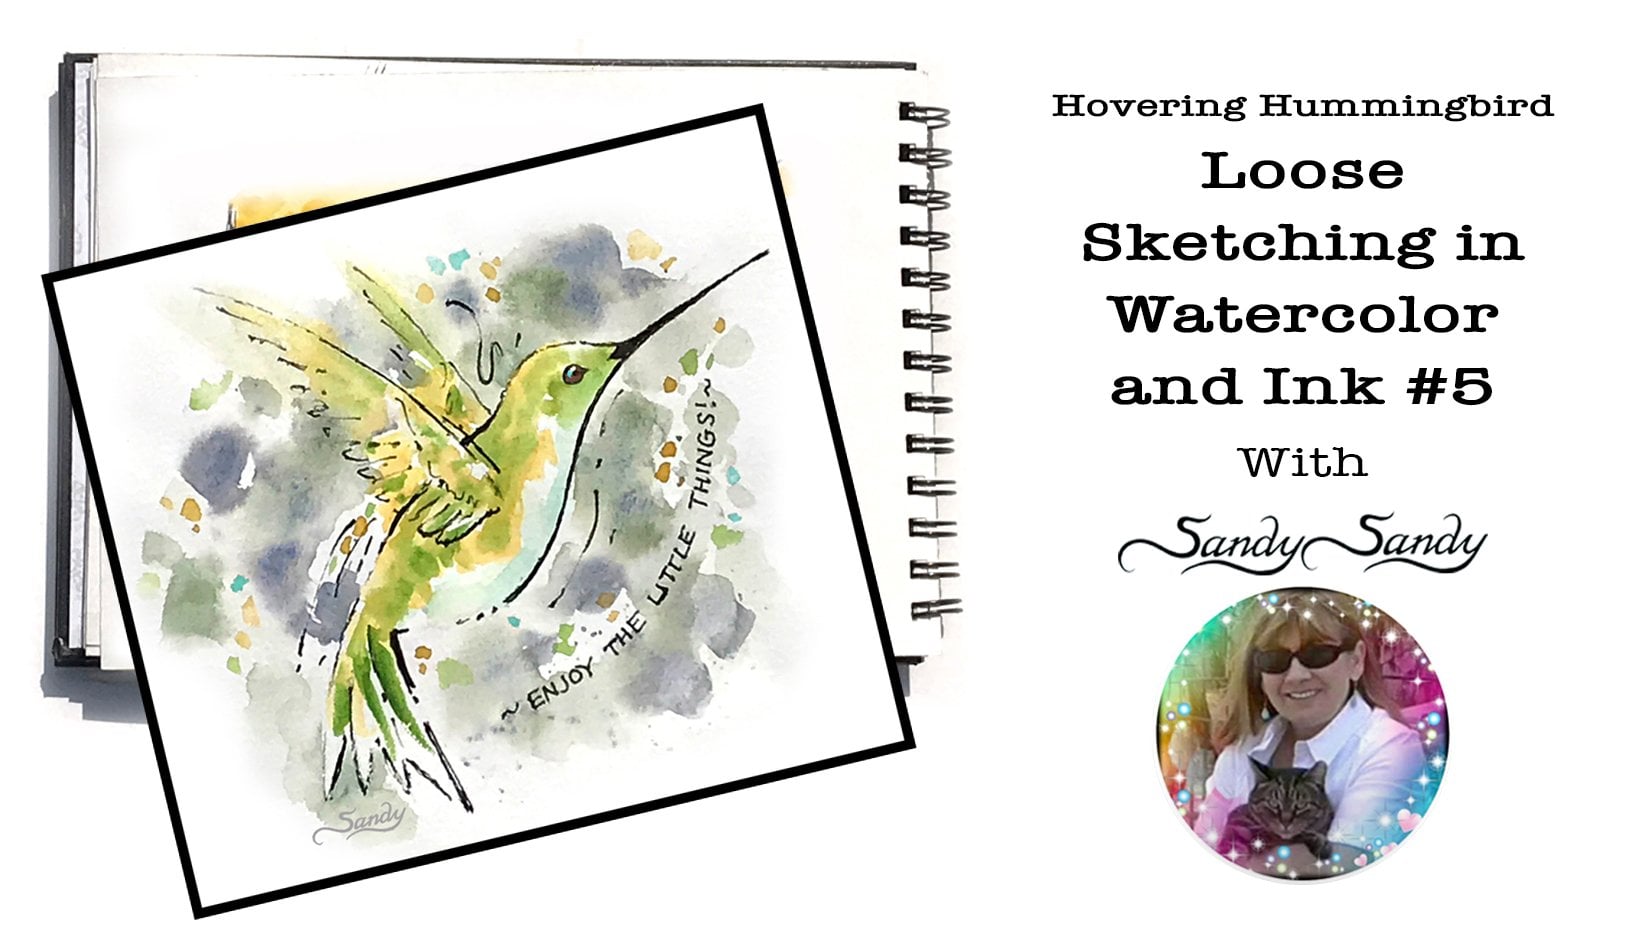
2. Supplies: I've got my supplies all laid out and I'm getting ready to do a hummingbird on
regular drawing paper. I've been using these
Strathmore drawing pads for many years and they hold
the water pretty well. This is a nine by
12 inch £70 paper. I have them on my Amazon store. Now since we're gonna be using
watercolor on this paper, you have to act quick and
you have to put a piece of watercolor paper
behind your sheet so that it doesn't affect
the sheets below it. I'm going to use a
soft drawing pencil. This is a to-be.
3. The Pencil Drawing: Holding my pencil like a WAN, I'm going to put in the basic
shapes of my hummingbird. I've got an oval for the head, bigger oval for the body. Triangular lines for the tail, triangular lines for the wing, and just a straight
line for the beak. Then I'm gonna take
my pencil and hold it like I would to write my name. And I'm going to detail
and refine the sketch. This wing comes in front
of the back of the body. Beat comes in here. There's a little v there, and then the eye is usually right in line with the
middle of the beak. Hummingbirds are
all individuals, so you have a lot
of leeway as far as how long the beak is, how long the wings are, how long the body is. Here, I'm going to
put the wings in. And there's a little triangle of feathers up in this part. Then these feathers here
comes straight down. And as they get closer to
the edge, they fan out. And at the end they're parallel
with the top of the wing. So here I have another triangle. These would be parallel
to the top of the wing. And as they come down, they fan out and get straighter. So that's all I need for
my preliminary sketch. I'm going to take my kneaded
eraser now and I'm going to erase some of the lines
that I don't need. Okay, so that's step 12
is with your pencil. First holding it like one, filling in the big shapes, and then coming back
and holding it, like you would write your name.
4. About Values & Preparing to Paint: Now you drawings are one of
the artists, best friends. Light and dark values
create dimension, drama, texture, and shape. No matter what
medium or technique you use to depict your subject, always try to use a
full range of values. Value is the lightness
or darkness of a color. You can simplify value by thinking light, medium and dark. A good drawing should
have all three. A tool I use frequently in drawing and painting
is a value scale. Pictured below is one
of the ones I use. I like this one because there
are notches in the card. The values are and you
can hold it right over the area you're evaluating
to get a good match. I prefer to think of values
as percentages of black. However, I added approximations here and on my own
physical value finder. I've included this page in the printouts for
your reference. I'm just using black watercolor. And I have two
containers of water, once for dirty and
once we're clean, I've made three spots of
different values of the black. I want a light. I want to medium. Maybe a little bit more pigment
into that medium value. You want to see a difference
between the values. And then a dark value. If you want to take away
some of that pigment, come in with a thirsty brush and you can actually pick
up some of that water. When I squint it that I do
see a difference in value. I've got to light a
medium and a dark value. Okay, now I'm gonna come in with just clean water on my brush and flood water onto the whole
body of this bird quickly. Because this is really
not watercolor paper. And the beauty of using this is that it's inexpensive paper. And you don't get
all caught up in worrying about
wasting the paper. This is an exercise. This isn't meant to
be a masterpiece. You can look at it in
the light table and I see I missed a spot here. We can actually go a little
bit outside the lines. The hummingbirds wings are
blurry when they're in flight, so it's fine to go
outside of the lines. In the next step, I'm going to come in with a dry brush loaded with
watercolor pigment.
5. Painting the Hummingbird: And quickly, I'm going to come
in with my mid-tone value. I'm going to block the
feral of my brush to remove a lot of
the excess water. And as I'm putting
this down though, I'm gonna be picking up water. So you really need
to constantly be blotting the feral of your
brush on your paper towel. I'm going to make this
a male hummingbird. Want that to be dark
underneath there. I hope my wings are still wet enough to give me a
little bit of a blurry. Look to them. Softening that a
little bit where it got a little hard edge. So I'm just coming in with a damp brush and I'm
just kinda wiggling it. They are at the wings. Blur those a little bit more. I'm going to come in with a
little bit of a darker value. Mining some water to that dark puddle that I have there and I'm adding
it to my mid tone. We're going to come
in here and add a little bit more
value to this top part here is going to drive back a
little bit lighter to here. I want to blend that
a little bit more. And then I'm gonna
come back with some light value underneath the spelling that up, so it's not super dark. I could see in the light I
still have a little bit of a sheen to this area. So I can come in here and add in a little bit more value without
it getting too hard edge. I can come back and soften
it to with the dry brush. Okay. Using pretty big brushes here. You don't have to use
these huge brushes. But as long as it
comes to a good point, you should have pretty
good control with it. I'm going to add a few
little darker strokes here to the wing. The wing kind of disappeared
here into the body. And it's a sketch, doesn't have to
be a masterpiece. But I've tried to interpret
the essence in my sketches, especially in this technique, you have to work quickly and not be too concerned
about the details of it. I'm here to indicate the feet. You don't have to put the
feed in if you don't want to need to put a white
highlight in the eye. Then I'm going to do the beak. After I do the background. Maybe one more line here that come in
front of the body.
6. Painting the Background: So now I'm going to
wet the outside of the bird real quick because
this is just drawing paper. And it will pill up pretty easy. But the beauty is, it's
not very expensive. And you feel more
free to take risks. You're not gonna be ruining a good piece
of watercolor paper. Then I go in with a medium tone. So I'm going to make it a
little darker down here. I'm going to put it
right up to the bird. And over here, maybe connect it, maybe a little bit there. Then I come in with more water and just run
that around a little bit. Run it right up to the dry area. Use your brush to kind
of soften it here. So you need that extra piece of watercolor paper
underneath the page or if you didn't have it, it would affect the page below. With the watercolor paper there. It doesn't affect it. So you have to be pretty
quick to come back in and soften especially
that outside edge. Want to come in with
clean water and soften that outside edge
so you don't have a hard line on that
background area. You could actually
come in and detail it. When you're all done with some line work,
if you wanted to. Wedding that a little bit
more fluid and a little bit of pigment in that area. Okay. So as soon as this is dry, I can put that beak in there. I like how the wings
are kinda blending into the background though. Because that's what they
really do when they're flying. You can still continue to
soften it a little bit. Like if you see a
hard line forming the hard lines are kinda
cool in some spots. But if you want to break it up, you just bring in
a thirsty brush and break it up a little bit. After it's dry. Sometimes you can come in
and soften it a little bit.
7. Final Details & Closing Thoughts: That Brown is dry, at least where the
beaks gonna go. And the last thing
I would do is come in with a darker value. Twirl my brush and bring
it to a good point. And then come in
here with my beak. A little bit more darkness
there to the eye. You could splatter
it if you wanted to. You want to cover
up with your eye and your beak because you really don't want splatter
in that area. Can block some of it if
you don't want so much. If you've got a lot of
water on your brush, you're gonna get bigger dots. But if you have less water, you're gonna get
smaller daughters. I hope you'll give this a try. Let me know how it works out. I just wanted to
show you some of the sketchbooks that I have
from quite a few years ago. This was July first, 2009 to August 31st, 2009. So this was the end
of the summer of my fourth year in a row of
doing sketching every day. And by this time, I had gotten pretty comfortable
with sketching again. And a lot of these
were done when I was on vacation in Colorado. This was done in July 2009. This was done from
a woodcarving. This was done from life. This is just done. The Strathmore drawing paper were done from some
of my photographs. Tried to loosen up and add
some splattering to it. The advantage of having the sketch books is that
I can refer back to them and I can use them for ideas for projects
that I'm working on. Now, here's some
two-minute gestures where I go in and
with a little object, turn it a quarter, turn every two minutes. And then after I was done here, I went in with some watercolor and added some color
to those sketches. This is a blind contour of
a bird carving that I have. Some hummingbirds, even
some master drawings. This was a drawing that
van Gogh had done, a self portrait,
and I redrew it. These are some little figurines. Again, two-minute gestures. I colored in a couple of them. More two-minute gestures. Exploring your interests
as a basis for your artwork will help give your artwork a specific
direction and focus. This will allow you
to use your voice as an artist to develop
your own style. Check out the training exercises that I've included
in the printouts. Thank you so much
for joining me here. I'm really looking forward
to seeing your sketches. Please do me a favor and post them in the project
section below. Thanks again. Happy creating. Until next time. Bye bye.
 Sandy Sandy, Learn.Love.Create with SandySandyArt