Transcripts
1. Class Intro: Hi, there creative friends. Welcome to class. I'm Sarah. I'm an artist and designer, and today we're going to slow down and paint some
darling little sunflowers. This class is part of my
watercolor bloom series, where we'll explore
a different flower in each class and
enjoy the simple, relaxing process of
painting with watercolor. So grab your brushes, get comfy, and let's paint.
2. Art Supplies: I'm going to go over
the supplies we'll be using for this class if
you'd like to follow along, but please feel free to use
any supplies you have around. So for the watercolors, I'll be using this
palette I have, and I will link
everything below. I have this watercolor set and this little
pan I filled up, and I got everything
from Amazon. So I'll be mixing different
colors for our sunflowers. And then I have this mixed
media paper I really like. I pick this up at Hobby Lobby, and I really like how
thick the pages are, and the colors always
paint very vibrant on it. So I'll be using
this for our class. I will also be using my
number eight round brush. And just HB pencil, and we'll be using
this to mark off where we will be
painting our flowers. And then, of course, I have
a bowl of water right here. So those are the supplies
I'll be using for this class, and I will be sure to link
everything down below.
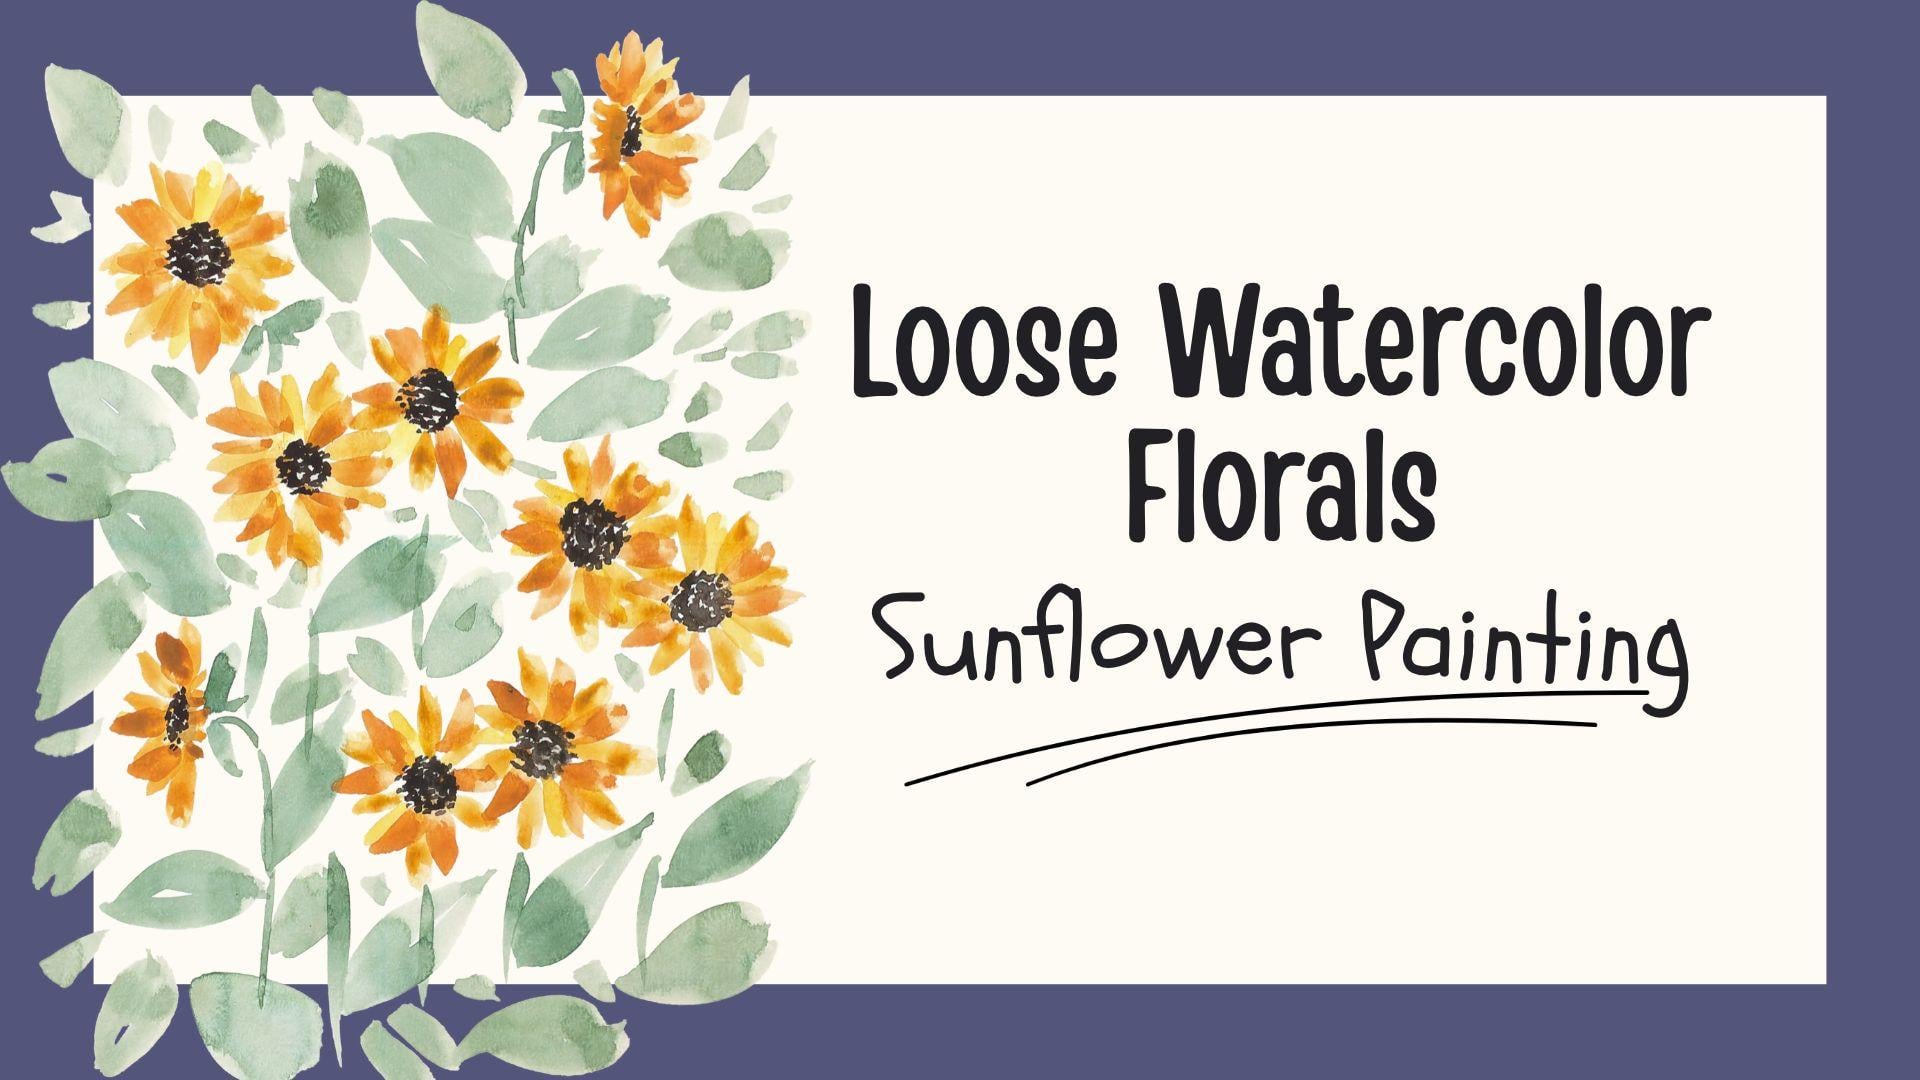
3. Sunflower Painting : In this class, we
will be painting the lovely sunflower,
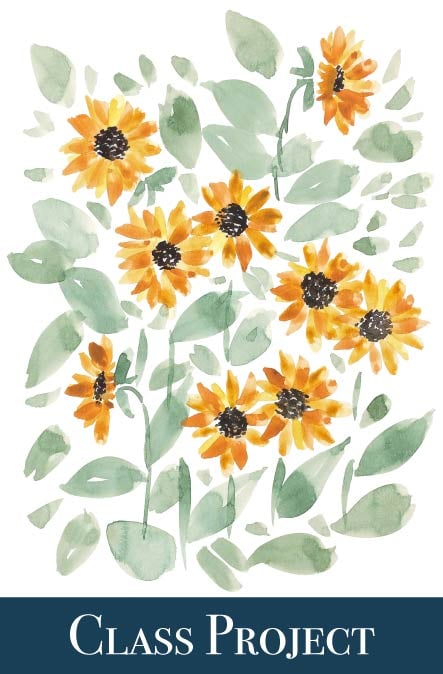
and we'll be painting. This is a reference
painting of who we will be creating
in this class. So we'll just do a little field of beautiful wild sunflowers. So I have included a reference image down below in the projects
and resources tab. You can find this
image down below, and this is just going to
be a reference photo so we can kind of study the way
the flowers are growing. So before we begin painting, I'm just going to
kind of observe our picture so we can kind of see the angle we want
to paint our flowers in. And as you can
see, these flowers are in different angles. Here is kind of a side view. This one's kind of
straightforward. You can kind of see a little
bit of the brown here. So I'll put that aside. And as you can see, this is our class project
reference painting. And as you can see,
we kind of mimic that where you just kind
of see a little bit of the brown on the side, and then we have some
that are straight on, and then some that
are to the side. So I'll leave this. I'm going to put
this away for now. And I'm going to keep this here on the side
so we can reference it. I'm going to just
grab my pencil first. So I'm going to
start off by marking off where I kind of
want my flowers to be. And I'm not going to draw
a very outline pencil because I don't want the pencil to show once I'm done
with the painting. So I'm just going to start
by placing some little dots, and you can place your
flowers wherever you'd like. I just kind of want mine to look like
they're just growing very naturally like a
field of wild flowers. So I think I'm going to
place one right here. So I'll just put a
little dot right here, and that'll be the
one here on top. And then I want one kind
of lower right here. And this will be where
our centers will be. Then I have two
that are together right here in the center. I want to create some
visual interest. So I want them all
kind of staggered, like if they're growing out in the garden. That looks good. And then I have kind
of two right here. I'm going to make them not to too close because that'll be the center and then
we're going to have petals going around. So I'm going to maybe
separate this one a little more to give
it a little space. And then I have two down here. I want to kind of lower, and then one kind of
here on the corner. So I can just place that. So that's kind of
where our centers are going now that I have that, I can begin with
putting the centers, and I'm just going to
lay down a very light, kind of grayish, yellow
color underneath cause then I'll come
back later once it's dry and add in the
darker centers. So I don't really have a
set color I mix a lot. So I'm just going to grab a
little of this gray color, and I'm going to mix it with
a little bit of yellow. So I'll make sure
my brush is wet. And I want it just a very light gray with just
a touch of yellow. So I'll just mix that
off here to the side. And we're just going
to put down circles. It's going to be very simple. We're just going to
put little circles on the little dots
that we marked off. So just place little circles and they don't have
to be perfect. That's what makes it
nice and organic, just, you know, nice little round
spheres for the centers. And this is just our base
color because we will come back and add our darker centers. But I always like to give
myself a little base, so the color is a
little more vibrant. So I'm just going to
keep adding my centers. And if it starts
getting too light, we can mix up a
little more of that gray and yellow
and then continue. Okay, and then for
these two that are going to kind of be sideways, I'm going to do more of, like, an oval shape because we're only seeing a portion of the center, so it's kind of more like a little slither
we're going to see. So I'm not going
to do these round. I'm going to do these
more of an oval shape. And that looks
perfect. That's all we'll need for now
for our centers. I'm going to rinse off my brush. And now we'll begin
with our petals. And as you can see, the petals are not all the same color. There's a little variation. So we're going to start
by placing a first layer, and then we'll go over it to
place a second layer on top. So it kind of gives this depth and really nice color variation. So I have two darker
kind of yellows here, and then these two
brighter ones. So I'm gonna pick one of
these darker yellows, and I'm going to mix it in with one of the
lighter yellow ones. And I just like to mix straight in to the
colors like this. But if you prefer, you can
always mix the outside of the little pans on
your plate right here. So I'm just going to get
plenty of color on my brush, and I'm just going
to mix these two. When I see that my brush
has plenty of paint, I'm just going to start
placing the petals, and we're just going
to kind of lay the brush at a 45 degree angle, and I'm going to press
slightly and pull up. And it kind of creates this beautiful kind
of petal shape. So I'm going to just
go around my circle. And as you can see,
I'm going to leave some little gaps because that's where we
will come back and fill in with another color of our yellow to give variation. So I'm going to go around, but leaving some gaps
like that so we can come back and add a
different color yellow. So I'm going to
do that to all of these that are going to
be straight on forward. And then we'll do
the ones that are on the side after we
get these down. So just going to go around. And if they overlap like
that, that's perfect. That's how flowers grow. So we want everything
to kind of be very natural and organic,
nothing too rigid. And that's what gives that
realistic kind of look. So I'm gonna continue just adding little petals
all around my flower. And again, I'm just
touching the paper, pressing and pulling up to create kind of this petal shape. And in our last lesson, for our bloom Series in lesson in our first class
of the Bloom Series, we went over the
different brushstrokes we would be using for our flowers. If you haven't, you can
go and have a look, and we went over the different
angles we would be using for our brush to create leaves and
petals for our flowers. So again, I'm just gonna go all around the
flower, no perfection. Just make it look very
nice and natural, like the little wildflowers
you would see outside. I see these a lot. I live in the Texas
Hill Country, so these grow beautifully in
the fields out in the back. Okay, so now for our side ones, we're not going to go
the four way around. We're going to do longer
petals here in front, and then we're going to
make the side petals look as if they're folding
over the center. So, again, we're going
to mix this yellow. We're going to
load up our brush, and I'm going to start
with just around before I add the
shorter little petals. So I'll do some longer
ones here on the side. I'm going to go
around only half way. And then to give that effect
that they're growing inward, we're going to do some
very small little strokes kind of going upwards. And that's basically the petals kind of being folded
over the center. So just like that. And
we'll just leave it. We'll come back, add the
center and more petals, and it really will
give that nice effect. So we're going to do the
same thing on this side. You're going to start
with two edges, and I want my
flowers to be longer here and the folding
up this way. So I'll just go
around my center. And again, we're going to do some very short
little brushstrokes to look like the little petals are folded over the center, and we'll just
leave it like that. I'm going to rinse off my brush. And now it's time to come
around for a second layer, and you don't have to let the first petals dry completely. If you want to, you can, but I always
like when they're just a little bit wet and the color
is kind of mixed together, and it gives it a really
nice realistic effect. So this time, I'm going to
grab my light light yellow. And I'm just going to add
very few here and there, then I want to add one
more layer on top, and I'm going to
have a dark yellow. So just here and there,
I'm going to add my light yellow to some of the
spots that we left. I'm not going to go
all the way around just visually where you feel. You want to add them.
We're going to keep these minimal. Just like that. And to rinse off my brush. And now for my final pet layer, I'm going to grab my darkest
yellow color like this. This one is my darkest, and this one comes after, and
then these are light ones. I'm going to grab my
darkest yellow color. I'm going to load up my brush, and now I'm going to come
in where I see the gaps. And as you can see, it gives such a nice variation of color, and it looks very realistic. So I'm just going to
fill in all the gaps. Now I'm going to make sure
all the gaps are filled in. Just go around. And once we add the
centris it's going to look absolutely beautiful. I'm going to keep adding these. We can add a few to the
little folded over spaces. It slow dry. We're going to add little water here and keep adding some more petals. Keep it very natural and loose. You can add as many
of these as you want. If you want a little
fuller, add more. If you want a little more
sparse, you can add less. And that looks beautiful. If you see any gaps
you want to add, you can just go on and keep. This is the fun part. You can add as many layers
as you'd like. So that looks perfect. I'm going to rinse off my brush. And now I'm going to
mix up my green color. So I'm just going to
get one of my greens. This is kind of my darker, and it's like a
brighter, darker green. And I'm going to make
sure I add a lot into this silk plate right here. I like to mix it to make it have more of like
an olive green color. So I'm just going to
grab a little bit of that darker yellow
we used earlier, and I'm going to mix
it in with my green. As you can see it already
starts changing it to look more like an olive green color. And then I want just a touch of black to kind of darken
it up a tiny bit. I like the way that looks, but you can do your leaves any color you want a
bright lime green, a very dark muted green, this kind of olive green. So I'm just going to be
using this olive green, I mixed up here. And I like for this to be
just like all over leaves, as you can see in our
reference painting stems here and there,
leaves kind of coming out. I just love that effect. So I'm going to just
visually kind of start seeing where
my stems may go, and these will be kind
of going down toward the sides and then these
kind of straight down. So I'm not going to touch my petals because they're
so little wet, and you can let this completely dry or just kind of go for it. I'm just going to
go for it. So I'm going to just kind of start visually seeing where my
stems would come down, so this one would
come kind of curved. As you can see, I'm not making them perfect or super straight, just kind of touching the page. I like leaving
everything very nice and painterly. So that looks good. Now I can add I
like to add, like, side little leaves coming out from the flowers that
are kind of to the side. So I'm just going to have them, like if they were growing
out because you can see the side part of our flower. So just tap side it's
kind of like that. And now I'm just
going to start adding leaves where I
feel there's gaps. So I like to just I press
down on my page and point up. And then for the other side,
I press down and point up, and it gives me a nice
kind of leaf shape. So I'm just going to do
that all around my page. And I don't really
have any set place. I'm going to be
placing my leaves. I just like to see where I
feel there needs to be a leaf. So you can go as dense as
you'd like with your leaves. Or if you just want stems
and maybe a few leaves, that is totally up to you. I like adding a lot
of leaves all over the page because you can
see in our reference photo. I just start filling in
all my gaps and using that same technique where
I press down slightly, press down and pull up, press down and pull up to create this pointed little leaf shape. I'm just going to
continue adding and I'm going to have to mix up a
little more of that green. Again, I'll just get some of my brighter green and then mix it with a
little of this yellow. A little bit of black. And I like when I
remix because it changes the color slightly, and it gives a very nice
variation of green tones. So I like to just kind
of if you just, like, tap your brush on the
page, it gives, like, this very pretty, like,
fallen leaf effect. So I'm just going to
keep adding here. And if I see gaps I don't like, I can just add some
smaller leaves in there. And here I feel like there needs to be something at the top, so I can just add
that in right here. Just kind of tapping
on the page. So it just looks
like the leaves are growing within the flowers. So I think that
looks pretty good. I'm very happy with
the way this looks. So I think I'll
stop right there. So in the next lesson,
we will finish off by adding our centers. I'm going to let this dry you want your flowers to be completely dry
for the final step, we'll add all of our center
little parts of our flowers.
4. Finishing Touches : In this lesson,
we will be adding our finishing touches to
our sunflower painting. So I'm just going
to wet my brush, and I made sure that my
petals are completely dry. For this last step, we'll be adding the
center of our flowers, and we want to make sure
it's completely dry centers don't bleed into the petals. So I'm going to
wet my brush here. And I have this very, very dark brown color. And I'm going to just add
a tiny bit of black to it, and I'm just going to mix
it right here on the side. And I don't want it
to be too runny. I want the watercolor
to be a little thicker, so I'm not going to add too
much water to my paints. And I like that color. So I'm going to make sure my
brush has plenty of paint. And for this step,
I'm going to kind of, like, stipple in the
centres of flowers. And I like to leave
small little gaps, as you can see in our
reference painting. I don't like to just fill it
all in because it gives it a more realistic
look if you kind of leave little
spaces underneath. So I'm just going to start
kind of stippling in the center, leaving
little spaces. You can kind of see
a little bit of that gray we placed underneath. I'm just going to go all around. Then on the corners of
where it meets the petals, I like to add a few
little extra dots outside of the center, so it gives it a
more realistic look. If you look at sunflower, it has little bits coming
out on the petals. Get a little more of
my brown. I'm going to do this to all of my flowers. I'm just going to do
this stippling effect, just like little tiny dots, leaving little gaps go around. You can see that
looks so pretty. I'm going to do all of my
forward facing flowers first and then we'll work on our side little flowers next. Because for those,
you'll only see a small portion of the centers. You can see, now that we're adding this darker brown color, you can't see that little
pencil dot we added earlier. This covers it up,
so we're good. I'm just going to
continue adding these little centers
to all my flowers. Now that we got all our
ford facing flowers, we're going to work
on the flowers that are on the side angle. So I'm going to
make sure I'm just mixing up a little more
of that dark brown color. Make sure I have plenty
of paint on my brush. And for these, you're
just going to see a tiny little, like, slice. And it's just going to
be kind of the sides. We're going to start adding
our little dots again in our stippling
motion and just add very little bit just where it's just kind of like
peeking out, just like that. And I'm going to stop right
there. As you can see, it gives a really
nice effect that the flowers to the side and you only see a tiny portion of it, so it looks like
the little petals are going over the center. So I'm going to do the
same thing over here. I'm just going to do it
we're just going to put very few little dots here just to give the look that we're
seeing it from the side, just like that, and just keep
it very loose and organic. So that's perfect. And that, my friends, is how you paint a little field
of sunflowers. And I just love it so much. This would look beautiful on
a greeting card, R print, or even if you vectorize
this and put it into a repeating pattern
Photoshop or Illustrator. If you have any questions, please feel free to leave them underneath in the
discussions tab, as I am more than
happy to help you.
5. Final Thoughts: Thank you so much for
joining me today. I hope you enjoyed
painting some flowers and found a little time
to slow down and relax. Don't forget to share your project in the
class project gallery. I'd love to see what you create. And if you have any questions, feel free to leave them
in the discussions tab. I'm always happy to help. Thanks again for
painting with me, and I'll see you in the next
Watercolor Blooms class.
 Sarah Raquel, Artist & Designer