Transcripts
1. Intro: Hi there, creative friend. Welcome to class. I'm Sarah. I'm an artist and designer. In this class, I'll
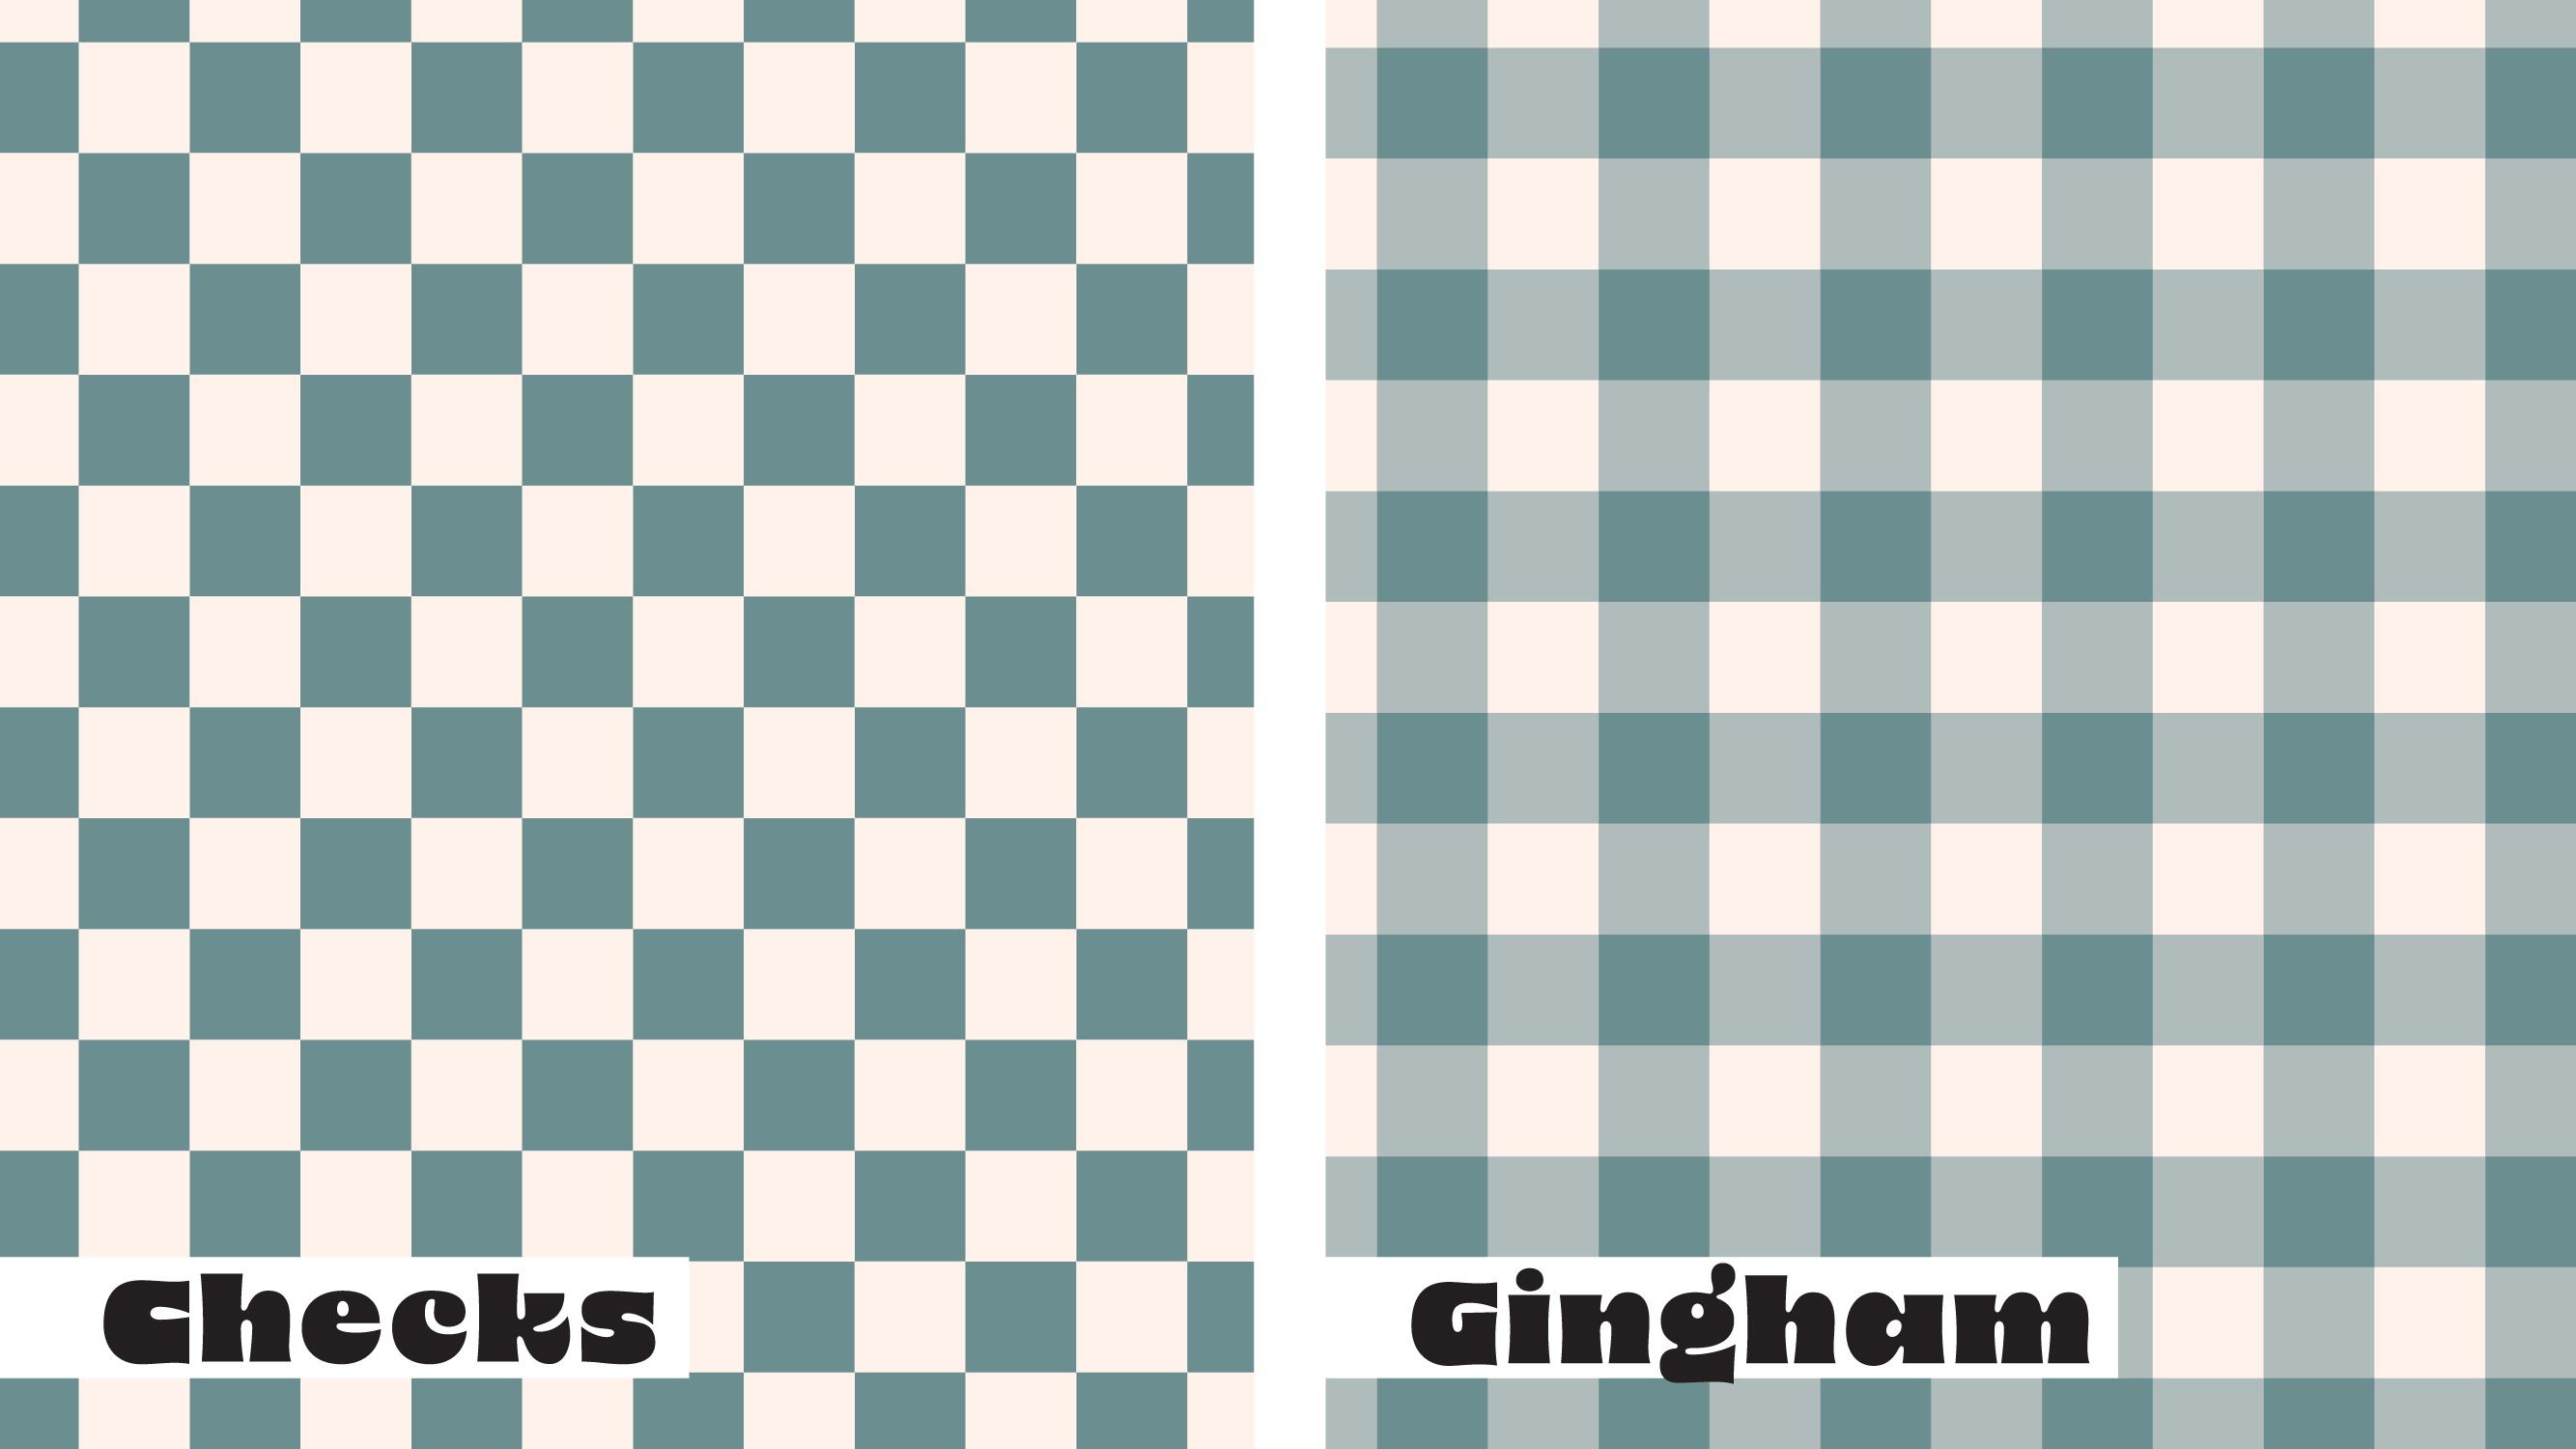
show you how to create the classic and gingham
style patterns using the procreate app with the holidays just
around the corner. I'll show you how to make a festive Christmas
checkers pattern. We'll start off with
a classic checks. Next we'll move on to creating
a gingham style pattern. Then we'll create a
fun Christmas checks. Finally, I'll show you how to save your final pattern files. All you'll need for the class
is an ipad, your Stylus. I'll be using my Apple pencil
and the Procreate app. Are you ready?
Let's get started.
2. Class Project & Resources : For your class project. Create a checks and
gingham style pattern. Using the techniques
demonstrated in class. Play with different
color combinations and scale to create some
unique pattern styles. I'm going to quickly show you how to download the
class resource. Something important to keep in mind is that you
will need to be on a web browser and not the Skillshare app
to access the download, I'll be using Chrome. We'll just scroll down
and you'll see some taps. Go to your project and resources tap and scroll down till
you see download resource. You will see I have uploaded a swatches file, You
will tap on that. You'll see at the bottom of your screen it has
placed it there. Tap on download, then open
in and select Procreate. Your color palette
will automatically be imported into the procreate app. It usually places it at the very bottom of
your palettes panel. We can just move that all
the way up to the very top. I've also included
a Pinterest board. Go to your Abouts tab, scroll down and
click on the link. Here You will find all
kinds of inspiration and ideas for your checks
and gingham style patterns.
3. Checks Pattern: In this lesson, I
will show you how to create a classic
checks pattern. A classic checks pattern is
comprised of two colors, the background color
and the checks color. Here are just some examples
of different colors you can use to create some really
neat checks patterns. Really, the possibilities
are endless. You just need two colors, you can create all kinds of
fun and interesting patterns. I will start off by
creating a canvas. I like to create my canvases, 3,000 by 3,000 pixels. I will just make sure I am on pixels and I will
type in 3,000 by 3,000 I will make sure I'm at 300 DPI for my color profile. I will make sure I'm on RGB. I can tap on Create. To start off, we
are going to have the background color
and our checks color. I want to create a square
with a solid color. And then we will create
two smaller squares that will have the checks color. We'll turn on some
guidelines to help us. You will go to your
actions panel. Make sure you're on canvas and we can turn on drawing guides. Now we'll click on Edit. Drawing Guides, tap on Symmetry. Since we want this to
be four equal squares, we will make sure it's on quadrant that gives us
four equal squares. Now we can click on Done. We will go to our layers panel. I will make sure I am on a brand new empty layer and this will be my
background color. I will go to my Palettes
color palette panel. You will see I have created some color palettes
for you to use, but feel free to use
any colors you'd like. You can make Christmas checks
or some fun unique checks. But if you want to follow along, I'll be using these
colors for our class. Our background color
will be a light and our checks will
be a dark color. I'll grab my lightest color
in my navy blue palette. I want to just fill my
entire bottom layer. Since this will be
my background color, I can just drag
and drop my color. Now we have filled in
our background color. I will go to my
layers panel again. Now I will create a new layer. This time I will fill it
in with my dark color. I'll grab my dark navy color and I'll do the
exact same thing. I'm going to drag and
drop it in and it will fill the entire canvas. But now I want to make it just be in one of the little squares. How we will do this
is we will tap on this little arrow icon. As you can see, there are these little nodes
on every corner. I'm going to tap on
this bottom node because I will start
with this bottom square, Make sure that your dimensions
are linked right here. It can bring it
down proportional. If it's not blue color, just tap it till you see
that little icon turn blue. We'll be dividing 3,000 by 3,000.5 It'll be 1,500
by 1,500 pixels. As you can see, it places it perfectly in this bottom corner. Now we can deselect it, and we have our first square. Now I will create a new
layer because I want to add my other checks
to this top corner. We will do the exact same thing. I will tap on a new layer. I already have my
dark color selected. I will just drag and drop and
fill in the entire canvas. I will select the entire square, tap on my little
node, and again, it will be 1,500
by 1,500 pixels. As you can see, it
has perfectly placed our two checks in the correct corners
opposite each other. Now we have our background
color and our two checks, we can just rename our layers so it's easier for us to keep
track of everything. I will name this one background. I'll name this one, checks one. This one checks two. This makes it easier if we
want to change out the colors. I'll just group those. I'll know that. I'll
rename this to Navy Blue. That way if I have
multiple checks, I can keep track
of all my colors. You can do as many color
variations as you'd like. For this lesson, we will
stick to our Navy blue. This right here is
the full repeat. You can save this and upload it to Spoon Flower if you want
to put it on some fabric. Spoon flower is really good. If you want to adjust your size, you can play around with that. But if you want to upload it in a smaller scale, we
can do that right now. And I'll show you
how to do that. I also want to test to
see how my pattern looks. I will go to my layer. We will make sure we're
not on the layer. We'll be on the, on the group
will be on the first layer. That's something important
to keep in mind. Before we test it,
we're going to be selecting everything,
copying and pasting. I need to make sure my
settings are correct because sometimes
procreate gives in error. I'll go to this like
icon right here. We'll want to make
sure we are on freehand and that this fill
color is not selected. If it's something like this, make sure you go to freehand and deselect
this color fill. Then you should be good to
go to test the pattern. Now I'll make sure again,
I'm on my first layer and not the group with
three fingers. I will swipe down
and tap on Copy all. Then again, three
fingers and paste. It's pasted a flattened
layer of all of our squares. Now we can just select
the entire thing, and again, I'm going to
tap on this little node. And we know that half and half
is 1,500 by 1,500 pixels. We'll place it perfectly in
that square right there. Now I will just duplicate my layer and move it
over to the next square. Make sure your snapping and
magnetics are turned on and it will snap right
to the correct position. I'm going to do this
for all four corners. Just move that down.
Bring this over. That is looking great. We know we did our
repeat correctly. You can upload, we'll just
merge these together. You can upload this to print on demand side like spoon flour or you can upload
something like this. Because we know that it
will repeat perfectly. It's just depending on the
size you're going for. If you want to make
it even smaller, we will do the same thing. I will just duplicate that. Select the whole canvas. Tap on the little node, type in 1,500 by 1,500 pixels. Then again, we will just
duplicate this square and place it in each one
of our four squares. The more times you do
this, you are really just changing the
scale of our checks. It's totally preference if what size you want
your checks to be. So you can see it keeps
getting smaller and smaller. That looks really nice. You can have several scales. Here's our original scale. We have a bigger
scale, smaller scale. And you can just go on
and on and on and on. That's how you would
create a checks pattern. If you wanted to
change the color, you would just back
to your checks. And since we label them, they're easy to find and we can change it
to this red color, you can just tap on it. I like to do alpha lock, so then I can easily
just fill the color I swipe with two fingers and
alpha lock is turned on. That way I can just
tap on the layer. Tap on fill layer,
And it will only fill the square and not
the entire canvas. I'll do the same
thing to this one. I will swipe right
with two fingers. I can tap on the layer
and tap on fill layer. Now for our
background, we can get this lighter color with
the red undertone. This is my red checks pattern. So we can do the
exact same thing. We will make sure we are on
this top layer of our checks. Three fingers swipe, copy, all swipe paste, tap
on our little node, 1,500 by 1,500 pixels. And we will do the
exact same process. We duplicate and move it over. And do that to each
one of our squares. We can just merge
them down together. That is how you create a classic
two tone checks pattern. You can do as many
colors as you'd like. You can create a smaller scale or a larger scale and just
play around with the scales. You can keep going smaller and smaller and it's really fun to play with the scale and
the color. I love this part. I can just go on and on and on, Try all kinds of color variations and
different color scales. It's a really,
really fun process. In the next lesson,
I will show you how to create a variation on the checks and we will
make a gingham pattern.
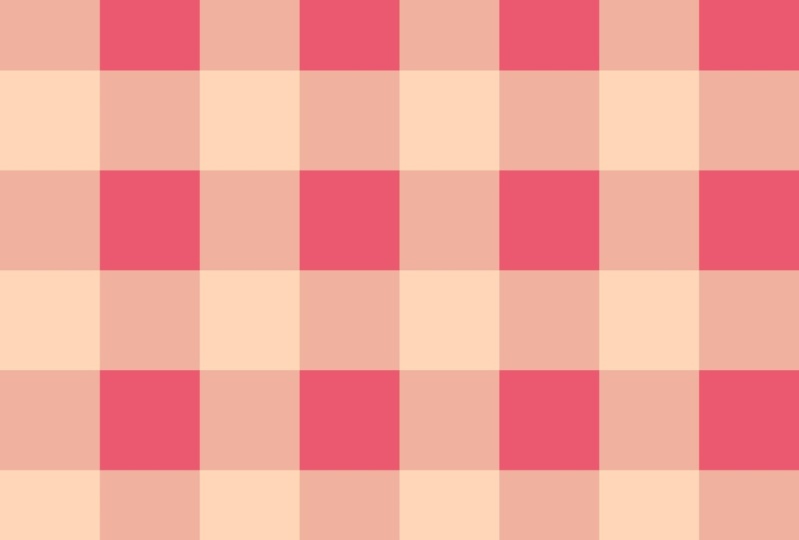
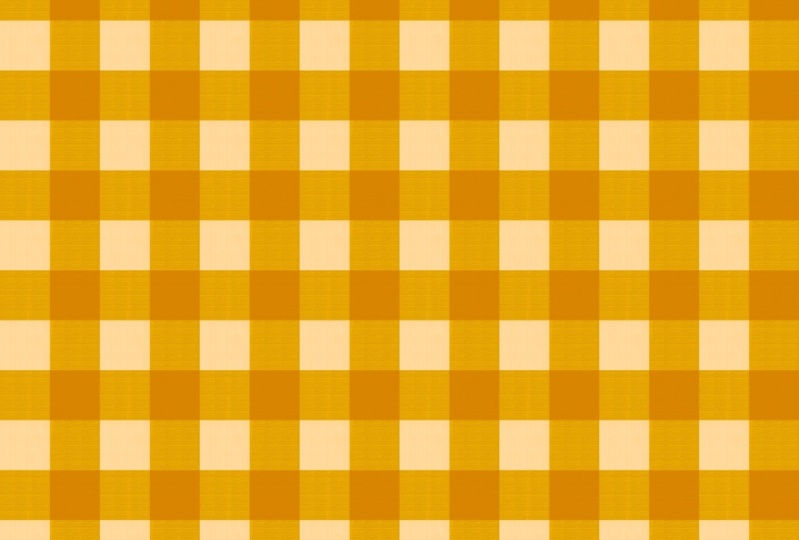
4. Gingham Pattern: In this next lesson, we will create a classic
gingham style pattern. The gingham is slightly
different from the checks pattern
because we will be using three tones
instead of just two. The lines almost look as if they inner weave each
other almost like a lattice style on a p.
I have some examples, and you can see you
can do all kinds of colors for the Gingham
style pattern, as long as you have three tones. Again, we will start
by creating a canvas. Again, we will just do the
classic 3,000 by 3,000 pixels. At 300 DPI, our color
profile will be RGB. We will do the exact
same thing as we did for our checks pattern, where we will divide this
into four equal squares and place our squares into
each one of the corners. But instead of having a
background and two checks, we will have four
different squares with the different
color variations. I'll make sure to turn on
my drawing guides again, I'll be using the quadrant
I can tap done now. We will start with
our empty layer. This time I'm going to just grab some random colors so I can
see where each square is. I'll just pick any random color. I'm going to do that,
I'm going to do the same thing for four layers. I'll just grab a layer, create a new layer. And I'm just picking random
colors because we're going to make each square go
into one of the quadrants. I want to be able
to differentiate which one is with my colors, I can label everything before I start creating my
gingham pattern. One more, we'll
make sure we have four layers with these
filled in colors. Now that we have
our four layers, we can start placing them
into each one of the squares. I will turn off the layers
and start with the first one. Will select the whole canvas. Tap on the node
like I did before. And again, half is 1,500 by 1,500 and that's a
fourth of the larger one. Now I can go to my next square. Did the same thing, we'll
do our third square. Now our last square. As you can see, this is why
I pick different colors. I know which squares which, if we pick the same color, it's hard to tell
where the squares, where the different squares are. We now know that each square is perfectly placed in its area. I'm going to call
this square one. This can start getting
really confusing. I'll name this one square two. You can name them whatever
you want just so it's easier to know which one is
which square three. You really don't need to
label these. I do that. So then if I want to recolor, it's easier for me to see
where all the squares are. Last time we did
just the two tone, where was the background
and then the darker color. For the Guingum, we are going
to be using three colors. Again, you can use
any color you want. Just always make sure
you have a light, a medium, and a dark. But if you want to follow along, you can use the color palette
provided for the class. I'll be using this
light blue color. How we will do this is this top square will
be our dark color. This bottom square will
be our light color. These two squares will be
our medium tone color. We'll start with our
bottom square, square one. Again, I'm going to
turn alpha lock on. So I can just fill in the square and it will not
fill in the whole canvas. It will only fill in that
one square with two fingers I will swipe right and that turns alpha lock on
while I'm at it, I'll just do that
to all of them. Then I can just easily
go and recolor them. Now I know all my squares
are on alpha lock, so I can just easily Change out colors
and fill them in. Make sure we're on square one. And remember that will
be our lightest color. I will grab the lightest color
in our light blue palette. Now I can tap on that layer
and tap on fill layer. Now these two squared
squared squares two and squares four
will be my medium color. I can fill this one in with
the medium color blue. Again, tap fill color. This square is going to
be my darkest color. I can tap on that square, grab my darkest blue, tap on it, fill layer. Then finding my
last square again. It will be the same
color as this one. It's going to be the
medium color, my blues. Once you get used to like
how where the colors go, just remember it's dark and light contrasting
our opposites. And then these two medium
ones are next to each other. After a while, it gets easier. At the beginning, it
can be a bit confusing. There's our repeat.
Like I said before, we can upload this
to spoonflower or any site we want
or mock it up, or we can make it
a smaller scale. I always like to
test my pattern. I'm going to group
them because I want to make sure
I keep my groups. I'm going to name
this light blue. I'd like to play with color. I always like to keep
my groups separate. I know where which each
color belongs to each group. Again, I'll make sure I'm on my first layer up here at
the top, not on my group. Make sure I'm on a layer. The top layer with three
fingers swipe down, copy all, wipe down and paste. We can tap on our little node, and again it's 1,500
by 1,500 pixels. Now we can just
duplicate this and do the same thing we did
in our previous lesson, where we place this square into each one of the
smaller squares. I'm going to pinch these,
merge them all together, and I'm going to
do the same thing. I'm going to duplicate this
one tap and select it. Tap on the node 1,500 Again, the exact same process. That is how you create a gingham pattern in
the procreate app. It looks more complicated
than what it is is actually super fun to create these and it's
not hard at all. Again, if we can change
the color of these, I'm just going to
duplicate my entire layer. Since everything
is there already, I'm going to turn my
original layer off. It's down here, light blue. I can just delete these extras, because now I'm going
to change the color. This time I want
to turn it in to this gorgeous red
gingham pattern. We have all our squares are
placed in the right position, have our alpha lock turned on. Now it's very easy to just
change out the colors. Square one will be our
lightest color in the palette. I'll grab the lightest
in our red palette. Tap the layer I squared two and square
three will be our medium. I'll go to square two. I'll grab this medium red
color and fill layer. And I know square four is the same. So I can just do that. You can do one at a
time or you can just, if you know which one is which, then our dark one
will be square three. Again, here is our full repeat. We can test this out. Now make sure we're on our
top layer three fingers. Copy all three fingers
again and paste. I'll just place this in the
top square and we'll do the exact same thing where
we will test it out. We'll duplicate it and
place it in each square. How I can merge all
these layers and I am going to test it
at a smaller scale. And it's just the
exact same process. That's how you create
a gingham pattern. Try different colors,
try different scales. Just experiment and have
a lot of fun with these. I love making classic checks and gingham style patterns and they're great coordinating and blender prints for collections. In the next lesson, I'm going to have a super fun
bonus lesson and we'll be creating
this really neat and unique Christmas
checks pattern. I'll see you in the next lesson.
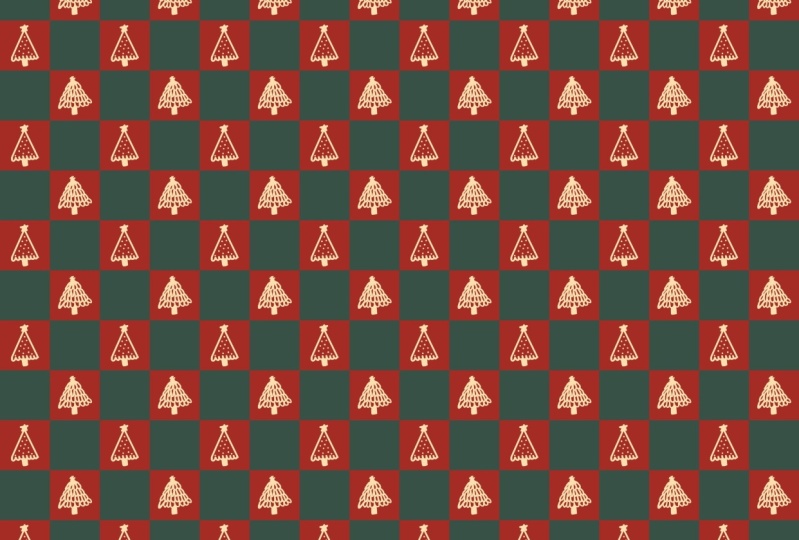
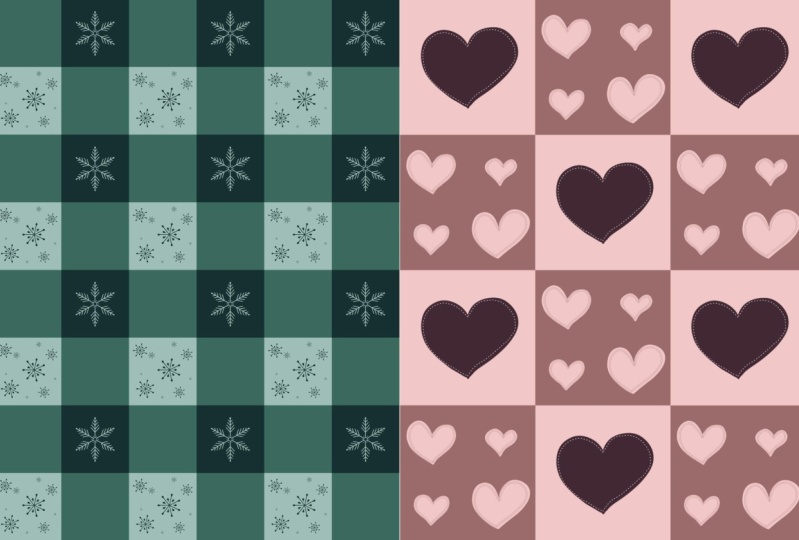
5. Christmas Checks: In this bonus lesson, I will show you how to
create this super fun and festive Christmas
checks pattern. It's the same as
our checks pattern, but this time we're going to
add a fun little surprise with some little Christmas
trees in between our checks. Just like we did last time, I will create a
new canvas that's 3,000 3,000 pixels at 300 DPI. Our color profile will be RGB. This one isn't our
gingham. It's our checks. We only need a background color. We need our two checks, colors. I will turn on my drawing guides and everything is just
like we did before. But this time I'm going to use this dark green
as my background. I will grab my green color will make sure I'm
on a new layer. And we'll do the same as
last time, drag and drop. Now we will create another layer and these
will be our checks colors. I'll be using this
classic red color. You can play around with this. You can try different, a more contemporary color Christmas pattern color palette, or you can stick
with the classics. You can do this for all kinds of holidays like Fall or Easter. Honestly, the possibilities are endless. That's what
makes it so fun. That's why I love pattern
design because you can really tell a story
with your patterns. Now that we have
our three layers, we will place our squares, our two checks in
these two corners. We'll start with
this bottom square, and I'm going to rename
everything again, just so I can keep
track of all my layers. Now we'll do the same thing, so we'll start with checks one, we will select it, tap
on the little node, and we will go 1,500
by 1,500 pixels. Then we'll do the exact same
thing to our next checks. Now that we have
all that set up, we can put these on alpha lock, so we can easily
change the color later if we want
two fingers swipe. Right now we have
everything set up. I will create a
group with those. This will be my
Christmas checks. Now the super fun part, we created our checks
here is our repeat. But now we're going to take
it a step further and add a little hidden surprise
with some Christmas trees. You can add anything you want. You can maybe do
Christmas ornaments, Santa Claus, a nativity, a star. I'm going to be adding trees
on these two red checks. I will go back to my
group and I will create a new layer above
my checks layers. This will be for my trees. I'll just rename
this trees tree one. I want to have my
trees separate tree two so I can position them in the right position or I can
later change the color. I'll have my tree
one and tree two. Now I will grab, I'm going to use this light yellow color. I feel it's a really
nice contrast to the red and green for my trees. I will go grab just the
classic monoline brush that comes with
the procreate app. You can find that under the calligraphy section and you'll just click on Monoline. Now this will be tree one
and this will be tree two. I can start just drawing. You can do the trees
exactly the same. You can do them different. You can have maybe
two different motifs. Maybe a tree and a santa
play around and be creative. Have fun and do
anything you'd like. I'm going to do this
tree for this one. I'm going to adjust it a bit. I'm going to turn my
snapping and magnetics off. It came out a little bit
tilted so I can just fix it. I tend to do things off to
the side skewed. I know. I don't really know why
that happens to me. That's why I love digital
art because I can easily Um, fix things. And adjust them now we
can just adjust it. I'm going to add a little stem. See, I think I just want like a little
starburst at the top. I might fill this part in. Just play around and see
what you like specifically. I'd like to just try a
bunch of different things. See what I like. I'll
place that tree. You can turn your snapping and magnetics on for this
part if you want. And it usually snaps it. You can see it snaps it
right in the middle. You'll see this that looks
pretty centered that tree one. Now I will do tree two. I'm going to go with a different
style tree on this one. I think I'll make sure I
have my monoline brush. I'm on my tree two layer, I have my yellow color. I think this one I'm going to
make more of a simple tree. I'm going to just hold it down so my lines
come out straight. I think I'm going to
make the bottom of this one like scalloped
a little bit. Go with maybe a little
star at the top. Now I can add my stem. Maybe this one. I can add some ornaments to it,
like little dots. My advice would be, don't go too complicated with the
motifs on the checks, because when you scale it down, they can end up looking
like just little blobs. You want to just keep it
very simple line work and not overly detailed
with this pattern. That's just my advice for these because I've done
so much detail in the past. I upload it and then the
details just get lost. Since it's a checks
and you scale it down, it can get lost in the pattern. Now, I'll just center this
one up, that looks good. I have my two trees and I'm
going to do the same thing. Here's tree one,
Here's tree two. Now that I have my
trees in my checks we can test our pattern out. I'll make sure I'm
on my top layer. Three fingers, swipe down, copy all, wipe down and
paste top on my little node. We'll do the same thing
like we did before. That's just such a fun pattern. I just love that so much. I'm going to test it out
at an even smaller scale. Again, I'll just duplicate it and do the exact same thing. There is our pattern. I think that would look adorable on a pair of pajamas, don't you? Now, I can upload
this to anything I want to be printed
on mugs or fabric, or even wrapping paper. The possibilities
are just endless. I want you to just have a lot
of fun and play around with different motifs and
different colors. Try traditional
Christmas colors. Try non traditional
Christmas colors. Maybe vary the motifs, maybe make them the same. Have fun, play, and
be super creative.
6. Saving: I'm going to quickly show
you how to save your pattern swatches to use on pnomand
websites or your own website, your portfolio or even
share on your social apps. I will go to my actions panel. I'm going to tap on share
here the different types of file types you can save to
like PDF, Jpeg, PNG, Tiff. I like Jpeg, but it's
totally your preference. I'll just tap Jpeg. Now I can click on Save Image. It will save my pattern
file swatch to my photos. Or now I can export
it and upload it to POD sites or share on my
social or use in my portfolio.
7. Final Thoughts: Thank you so much for
joining the class. I'm always so honored that
you take the time to join me. I hope you have fun creating all kinds of checks and
gingham style patterns. I'd absolutely love to
see what you create. Please share your beautiful
work in the project gallery, and you can find that
right below this video. If you have any questions, please don't hesitate to ask. You can start a new discussion
in the discussion tab. You will also find that located
right below this video. Lastly, if you
enjoyed the class, I'd very much appreciate if you'd leave me
a sweet review, you will find the Reviews
tab also below this video. Thanks again and I'll
see you next time.
 Sarah Raquel, Artist & Designer