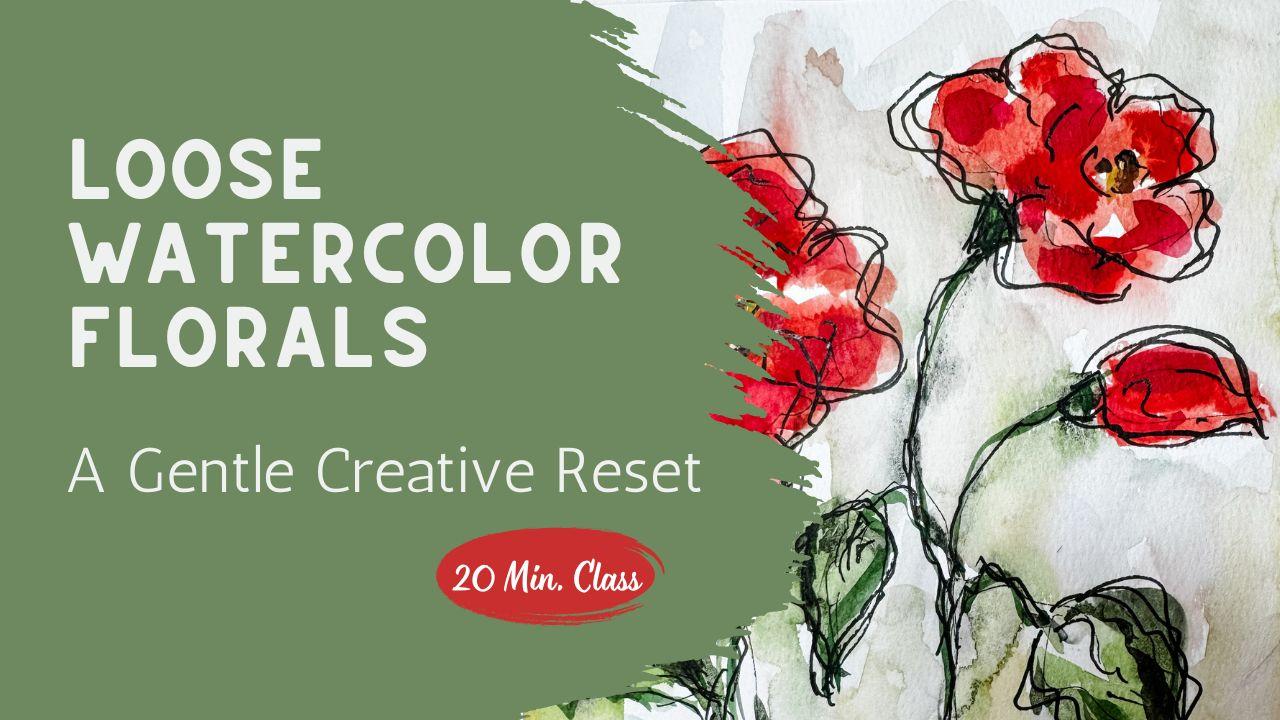
Transcripts
1. Welcome: Let’s Get Color on the Page: Hi, this is Brenda.
And in this class, we're going to do something
very simple and very freeing. We're going to put color on
paper before we overthink it. This class is for
you if you've not painted in a while and
feel a little rusty. It's also for you if
you're brand new to watercolor and starting
at a blank page, not knowing where to begin, it's also for you if
you just want a gentle, creative warm up
without pressure. We'll talk about color
blocking for the background. Adding simple floral
forms and finishing with expressive ink lines to
bring everything to life. This is not about painting
the perfect flower. It's about building confidence, loosening your hand, and remembering that
watercolor can be playful. For your class project, you'll create one color blocking floral painting of
your own design. Upload your project
to the gallery so that we can see your progress
and celebrate with you. In the next lesson,
we'll go through color blocking the simple supplies
that we'll be using, and then we're going to
get started painting.
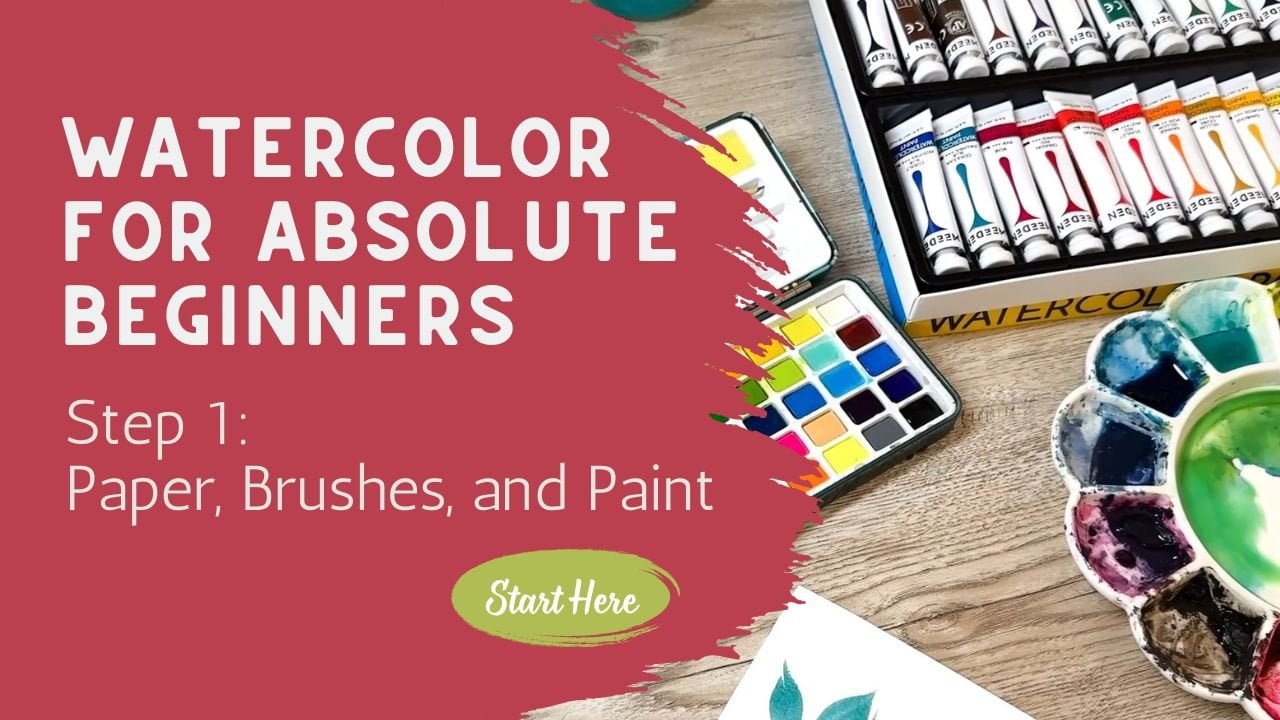
2. What Is Color Blocking and What You Actually Need: In this lesson, we're
going to quickly go over the supplies list
and focus more on the color blocking
and how I went about doing that and then the
process for how to paint this. Then the next lesson, we're going to go diving right into the painting
process of this, which is going to
be so much fun. Make sure you bounce
over to the next lesson when you are ready to get
right into the painting. Start with some kind
of a watercolor paper. This paper that I have here is pretty much my
practice paper. It's not expensive. This is
just some practice paper, and I have it taped down
using some artist's tape. I do that because I'm going
to be using a lot of water, and if I don't have
it taped down, the paper will wrinkle. I definitely recommend that. I always like to have some
kind of a cloth nearby that if I get too much water or
paint on my paint brush, I can dab it off onto my cloth. You could also use
a paper towel if that's more handy for you. Then the micron graphic pens, these are permanent markers. They come in all
different sizes. I'm going to be using two sizes. One is it's almost
like a thick marker, and the other one is a thin marker where the line
is going to be much thinner. I'm going to use two
different sizes of that. Of course, I have my water. I have two different
fresh waters, and then I have my
palette of paint. For today, I'm going to go ahead and just use this palette. I love this palette. I'm going to spray it down. I have a spray
bottle and I'll just spray it down so that
it is ready to go. When I go to do my
color blocking, I am actually going to use
the color that's in here. You can hardly you're
going to say what color? I don't even see any color. But see all this muddy
weird leftovers. That is what I'm
going to be using for the color blocking that
is behind the flowers. It's actually amazing how
much paint you can pick up. Over here, I'm seeing I
can pick up some pink. Over here, there's
some green and some yellow and maybe even some teal. There's all different
colors in here. I'm going to be using
mostly just this because it's nice and liquid because
I sprayed that down. I'm going to be using that as my color background for
the color blocking. I do that mainly because I'm not really particular about what that color is going
to be in the back. It's all right here. If I needed to add just a touch
of something in, I could. I could make a new
color over here. But it's just making more
colors that I really don't need because the colors
are already in here and if you don't have that, you could absolutely make up some just like I did right here. Just make sure you
make it so that it's very transparent so that
when you are looking at it, it is almost completely
see through. You want it to be very,
very transparent. Lots and lots of water, very, very little bit of paint. That's what we're
going to be doing here when I painted
this one as a sample, I was just using some of
that muddy colors that were in my palette leftovers
as the background. Then I did use
more full strength for the flowers and the greens. That's the general
idea for this. Now, what I'm going to do
is using my thinner marker. These are just micron markers. They usually come in a set. Maybe there's 12 or
16 different sizes all in one kit, which
is really great. There's a whole
bunch of different companies that sell these. Then what I would do is
you could use a pencil. If you are not sure about where exactly
you want to line out, you could use a pencil to outline and put your pencil
marks down on paper, or you could just go for it
and be like, Well, it's fun. I'm just trying to
play around with this, and so wherever
it lands is fine. What I would probably
end up doing is I'm going to do it
very similar to this, just so that we can
just keep repeating is holding my pen on
the second half up, instead of down here
where you would normally use your
pen for writing, I'm going to get very,
very loose and hold it above the second half of
the pencil or the pen. That's going to
help me stay nice and loose and I definitely
recommend that. I'm going to start
with a little flour. And I want it to be about here, so holding it really up high, I'm just going to
make a little sketch and say that's where the
center of the flower is, again, holding it really
high so I have no control. I'm just going to make some
squiggly lines here and say, these are where the flower petal outside flower
petals are going to be. Then I want this flower
facing that direction again. I'll probably I like my base to have a
little angle to it. I'm going to put that as my triangle and
then I'm going to just bring these out here,
something like that. Really sketchy,
really, really fast. Just bring down my stems. Again, I'm purposefully making them wiggly because I
don't want straight stems. I do want to have a little
bud off of this one. So I'm just going to just kind of come up here and
just kind of have a bud that goes like this and
then something like that. Then maybe we're going
to put in a leaf. Again, just a really
fast shape of a leaf. There and then we'll
put one over here too. Again, see how high
I'm holding my pen? I have absolutely
no control over what this leaf is
going to look like, and that's the point. Really, really sketchy,
really, really loose. Now I have the general idea. You could have done
that with a pencil, but then I would have
recommended that you go back over it and use a pen. So just dive right in and
use a pen if you're ready. So now that we have that drawn, really simple, yours
could be different. You could have different
style flowers. You could have just one flower or you could make
a whole bouquet, whatever you want to make, you could do yours
exactly like mine, however you want to
do it, that's fine. Get to this point and then meet me over in the next
class where we get the paint actually on this paper in
a really quick way because the whole point in this class is it has either been a long
time since you've painted, you need a warm up for getting into your artwork
this weekend or maybe you have never
painted before and you are scared to death to put
some ink down on paper. I want to get rid
of that right away. And so come on over to the
next class where we are going to dive right into this
and have so much fun.
3. Painting Loose Watercolor Florals Step by Step: Okay, we are going to
get right into it. I'm so excited to show you
how we're going to do this. I'm just going to be using this. It's like a number four, but it's one of
those squirrel hair. It's probably a synthetic
squirrel hair brushes, but they're nice and
floppy and big and fat. This one happens
to be from meten. There's all different kinds of companies that have
these available. I'm going to start with
the blooms themselves and the leaves because those are going to
be my boldest areas, and I want to possibly
have some white spaces, so I'm going to
start with those. I'm going to get a little
bit of paint. Let's see. Let me move this over here so you can see it a little bit. I'm going to get some paint out here and maybe even mix a
little bit together there. Really load your brush up. Go ahead and get your wet brush, come on over here
and load it up so that your paintbrush
is full of ink. Now, I'm going to
say this again. The whole purpose of this lesson is to stay
loose with our watercolor. We are not doing precision
watercolor painting here. This is supposed to
be just a loose, fun, almost abstract
style painting. So please hold your paint
brush above the center point. If the middle of this
paint brush is here, I want you to hold your
paint brush here or above so that you have hardly
any control whatsoever. Now that my paintbrush
is nice and full, I'm just going to
go ahead and put my paint brush down on here
and squiggle it around. You can leave some white spaces. That would be fine. You can come back in and grab a
little bit more color. Maybe it's a different
color and add in just a little bit
of extra color there. Then I'm going to come over
here, I'm going to put one there and put a leaf, petal there, get more paint
on my brush, more petals, petals all the way around,
petals for everyone, and maybe even one over here for the really small bud
that we have going on there. I'm going to rinse that off. I do want to work
kind of quickly because I don't want
that to really dry. And I am going to go ahead
and grab just a little bit of yellow mustardy color and
just add a little bit of yellow mustard into the centers here just because I would
like to have a little bit of that and maybe even just a
touch of a darker color. Not much, just a
little tiny bit. Okay. Now I'm going to go
ahead and get some green down on here as well
for these leaves. See how I'm just
throwing it on there. I'm not painting a leaf. I'm putting them where I think the leaves
are going to be. I'm just dropping
some paint down. And then you know what?
I think I do want to add in these stems. So I think see how high I'm holding it almost
at the very top. I'm just going I'm very
purposefully making this jagged. That's the way I'm
suggesting that you do this. Maybe a little base for
underneath the flower. You know how the flour has that little area here that's
always a little bit heavier, a little thicker make
that area there. Now before all this dries, I want to get to
that color blocking. So as you know, I've
got these colors on here and I'm going to
start diving into that, picking up some of
this blue that I have, and I'm just going to be
pushing that right in there. And you see how I
touched that green in my leaf and I started
to bleed, I'm okay. I don't mind that. I'm just going to keep putting
some colors down here. Not really choosing
anyone in particular, other than I like this
grayish blue background. Picking up some more
coming up in here. It's okay that I
touched my pink, my red color that
I've got on my flour. It's all right.
I'm just going to add a little bit more in there. Wet my paint brush down, get
a little bit more going. I'm not filling it completely. I'm not trying to make the whole paint the
whole page full. I'm just adding, make sure
you got lots of water. Key is getting lots
of water on here. I'm just adding
just enough color. Kind of even going
over top, it's okay. Just do some color blocking. I'm even going to dip into
my yellow a little bit, maybe add a little
yellow in here. I really love when I
can do some layers. I'm not putting a lot
of thought into this. This is just really a um
I'll see what happens. So I didn't really like
that red that was there. So I just got more water and picked it up and wiped
it off on my towel. That way I could kind of
remove that a little bit. Um, I'm going to put
a little bit more, you know, yellow in
here, different areas. And the more you layer, that'll be really a fun feature. If you get something too
bold, just use fresh water. Move it around. Okay. I feel
like maybe that's good. Maybe add a little
bit more green. I feel like maybe I'm
missing a little green. Maybe right over the
stem because I used to black or brown it, you call it. Is put a little bit more
green here in the center. Lots of white space showing. Lots of pretty colors. My background is a little lighter on this
one than this one. This one I have used raw
pink vibrant colors. This one is a little bit
more of an orangey red tone. It's all good. I'm even going to just come up
in here and actually touch the blooms itself so
they bleed a little bit. Okay. I do like that. This paper is very inexpensive, so it dried really quickly,
which I don't love. So maybe when I go
to make my next one, I will not use this
really inexpensive paper. Okay. So maybe I
have this kind of a darker green it's kind of
like a green black almost. I'm just going to
add some just some little outlines
here just to create a little little
definition for my leaves. Don't need a lot, but maybe just a little
bit of something so that I don't feel like I
lost that leaf completely. Okay. I can always come in and add a little bit more
when this is dry. So I'm going to let this sit. I'm going to let that
completely dry or I might use my heat tool
and dry that off, and then we're going to come
back and do the next layer. Okay, now this is
dry or mostly dry. I just want to add in just
a little bit more detail that I had lost when
everything got wet. I'm just going to add a
little bit more green back in here to my stems. And just if you don't need to, then just skip this part, but I just felt like
I needed to add just a little bit
more detail back in for my stems and my leaves. Um, and then also for the
centers of my flowers, I felt like those were maybe just a little on the weak side. So I just want to add in just a little bit
more color there and maybe a little bit of a
little bit of brown as well. Not much, a couple of little
drops of brown. All right. And then I'm gonna just liven up these petals with just
a little bit more. Basically, it's the same
thing. I just added a little bit more pink to it just to add another layer and just
dropping some paint down, leaving the white spaces. I'll let that go. Okay. So I think I'm going to
let that dry real quick and then come back and
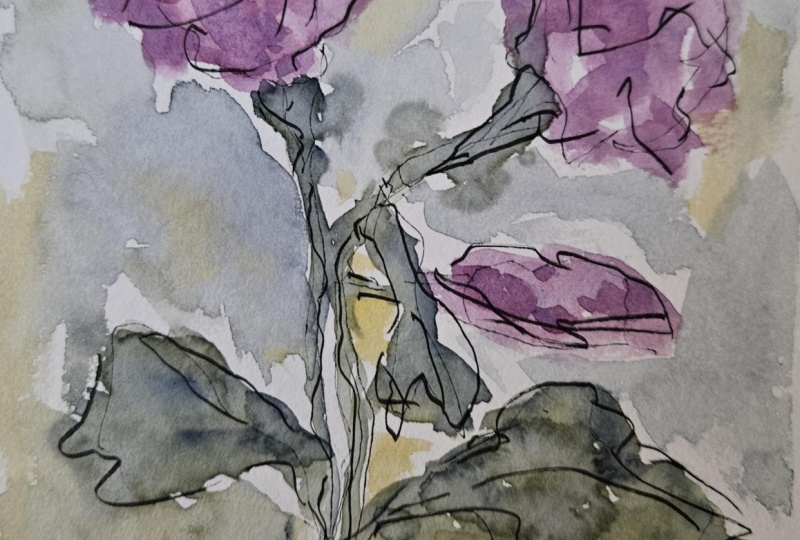
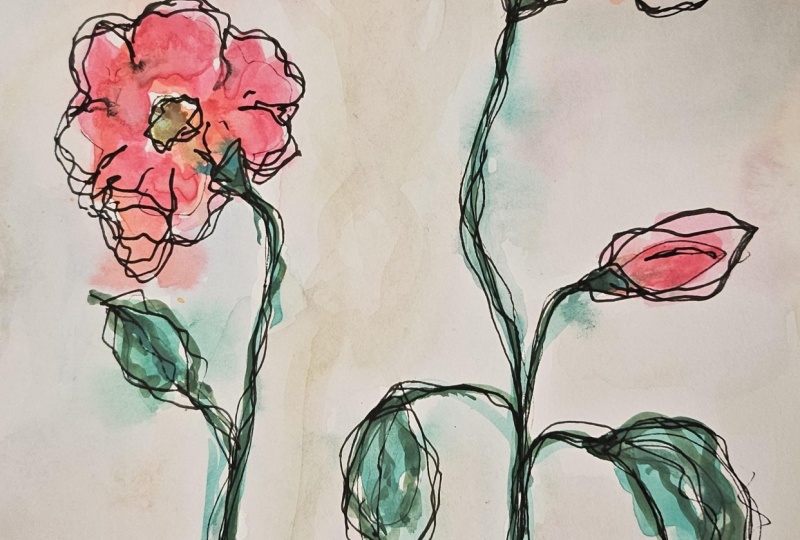
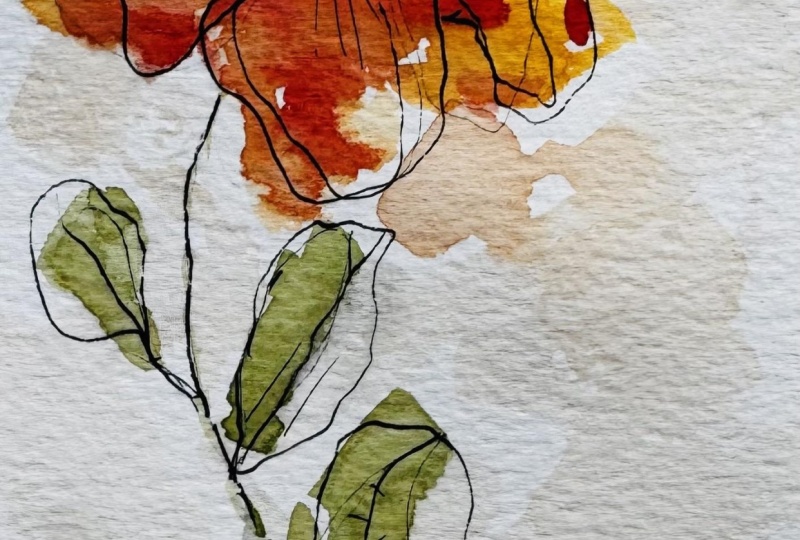
finish it up with the pen. But Okay, so I'm going to be
putting the pen on here now, which is going to give
it the more definition. I want you to take notice
how sketchy this is. I'm again, holding it really
up high to lose control. And I'm going over and around and around several
different times, most making it
really jagged and, you know, sketchy instead
of a precision line. So that's what I'm going to
be showing in this class. You can do it however
you would like to. But for me, that's kind
of the concept is I know that I want to
have some kind of a triangle here for the
base of the flower. So I'm just going to
kind of go like that and just draw it a couple
of different times. My paint my pen here is going to skip because I
have no control over this. So it's okay if my line skips. In fact, I'm kind
of purposefully allowing it to kind of
skip along the page. Going over a couple of
different times coming down, really purposefully
making it jagged. Yeah, I need to
put this leaf in. Even put into like
a little center. Go around it a couple times. And then this one. Same thing. Go around it, make it
jagged, Make it squiggly. Just to give an idea of
where that leaf might be. Now I'm going to
start with a center and put in that center. Really loose. Then for these petals, I'll come back
over and do that a second time, but I'm
just going to move on. Even going outside the lines. I'm going outside
where the paint is and even over here
where this bud is. I'm going to do that a
couple of different times. I'll come in here. Squiggling, squiggling, squiggling, maybe even add in
some little inside things. I like to sign it
using the thinner. Find that one
straight up the stem, and there you have it. See how different it is,
but yet very similar. Each time you paint, it's going to have
a similar feel, but it's always going
to be different because you may put
your flowers in different spots or use different colors or used a
different color background. But in both of these cases, you really get that
sketchy color blocking with a really fun flower on top with this black
pen sketchiness. That's just as such a
fun little thing to do. In the meantime,
you weren't caring about making sure that
it was exactly correct. You weren't trying to make
sure that your flowers looked like a very,
very particular flower. You were just putting down
some paint onto paper. You were just experimenting
with thinner paint. Was how much water did you need to mix with your paint to be
able to do the background? How much water did you
mix with your paint to do the petals and the leaves? Figuring out all those things were things that you were
learning along the way. You might make this
four or five times until you find one
that you really like. Maybe the one that you made had too much bold background colors and you didn't
care for that. Maybe it was too muted and that wasn't the look
you were going for. Yet, you're going to have to experiment and do this over
and over and over again. But every time you
do your painting, you're going to learn
something about yourself. You're going to learn
something about the paper, about your paintbrush,
about the paint itself. I want you to just remember that you're not wasting paper. By doing a project
over and over again, you are, learning
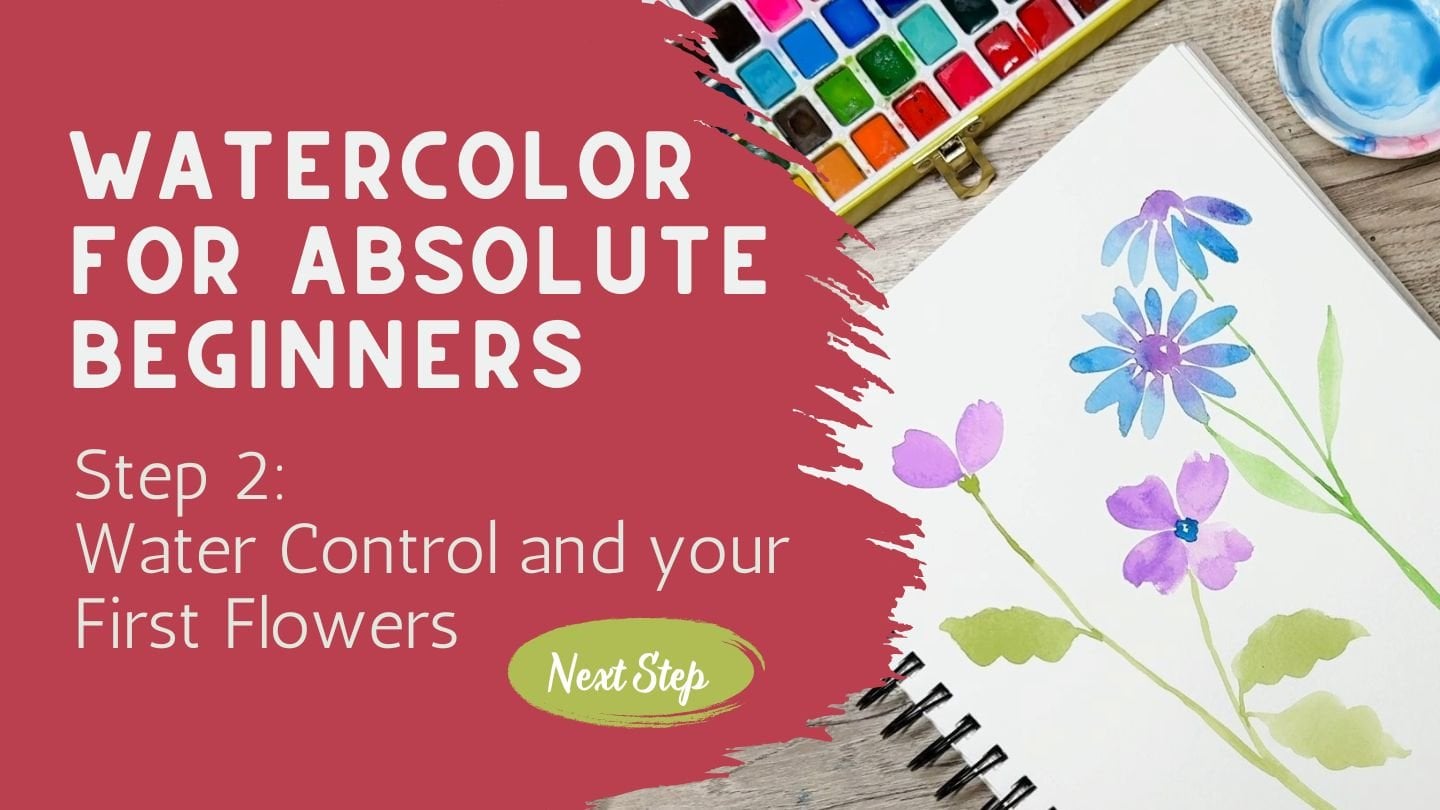
about yourself, and about your supplies, and in the process, you are gaining so many skills. I'm so glad you came
to learn this with me. Come back to the next lesson
and we're going to get this framed or matted so that you can see what
it looks like finished.
4. Bringing It to Life with Ink and Sharing Your Project: Did it. You put color on paper, and that is always
the hardest part. If your painting feels
loose, imperfect, or different from mine,
that's exactly the point. Color blocking is about
movement and confidence. It's about learning to trust your eye instead of trying
to control every mark. Before you close the class, take a photo of your piece. I would love to see your
painting the soft color shapes, how expressive your
lines worked out will help other students feel
brave enough to try as well. If this class felt
like a helpful reset, I have other loose
watercolor floral classes in my profile where we
explore layering, depth, and expressive
techniques in more detail. You can also follow me
here on Skillshare so that you're notified when a
new class is published. Most importantly, keep painting. Every 10 minutes of play can shift your whole
creative mindset. Thank you for painting with me, and I will see you in
another class very soon.
 Brenda Jones, Watercolor Artist & Teacher