Transcripts
1. Course Introduction: If you ask me why logo
animation is important, I will tell you it's important
from two perspectives. From designer perspective,
it can considerably increase the chances
of your logo getting approved by the client. While aesthetic logo makes sense and animated one
makes more sense. [MUSIC] From a
brand perspective, bringing logo to life through animation can
connect more with the customer and
make the logo more memorable and more engaging
to their customers. Hello, everyone.
My name is Adam. I'm a professional
designer animator. I started working as interim
with a lot of companies such as an Airline company and I
have agency and Facebook. Now I'm a full time freelancer
and content creator. My most recent projects
I'm working on right now is a web animated
series called Jenny, but that's for another story. You're here to learn about the basic principles
of logo animation. In this class, you will learn about the do's and don'ts
of logo animation, basically logo animations
best practices. Then you will learn about the basic principles
of logo animation. For this class, you
will have two projects. One simple reveal and
disappear animation, and another one is a more
advanced characters animation of a logo type or a world map. This course is for absolute
beginners in logo animation, but a knowledge or basic knowledge in Adobe After
Effect is really helpful, like you know how to export
projects and After Effects. For this class, you will
need Adobe After Effects, of course, you will
need two free scripts. The first one is
the Duik Bassel, and the other one is Rift. That's it for the
introduction, guys, and see you in the first lesson.
2. Class Project and Resources: Now for this class projects, we have two projects, as I said earlier. The first one is a simple
logo reveal and disappear. The reason why I
chose this one is to get you familiar
with the key frames, with easins and with
the speed graph, and this is very important, especially if you're
just starting. The second project will be a more complex characters
animation of a logotype. The reason why I chose this specific second
project is because the techniques you
will learn here can be applied to any letters, and also you can apply
them to objects. Either simple objects
are complex objects. What I want you to do now
is go ahead and download the project from the
project and resources. You will find here all you need to follow with me
through the course and you will also find
the final project in case you don't
know what I did or you need some help I included the final project as well. So what I want you to
do now is go ahead and download Duik Bassel from here. Then you go to their official websites
and you just download it. Then you go to aescripts.com and you download the
rift script as well. You see 29.99 here.
Don't get scared. Just put 0 and then
you put add to cart. Basically you just log in to the website as if you
were buying something. They will send you an email
with the download link and then you download
it Once you have it, you may want to unzip the file, double-click here
and you will find this one, the Duik Bassel.2.jsx. Extract to, and then
you copy the file here. So this is the path, if you're on Windows, and this is the path
folder if you're on Mac. Same thing for the rift you
install it the same way. Then what you want to do before
working with the scripts, you want to go to edit, preferences, scripting
& expressions. Then make sure you check allow script to write files
and access network. Then click "Okay", and
you're good to go. My tip for finishing the project
is just to take it easy. Don't stretch yourself. Just follow through with
me and try to understand why we're making such decisions instead of just
following blindly. So make sure you get
everything ready. Make sure you open Creative Cloud and make sure you download the project and see you
in the next lecture. We'll be talking about
logo instructions.
3. About The Plot and Logo Restrictions: In this lecture, we'll
be talking about the do's and don'ts of
logo animation, and basically what I
mean by that is we'll be talking about logo
animations' best practices, things to keep in mind
while making the animation. If it's your first time
making logo animation, you may be thinking, how do I come up with the plots? A nice trick I do every
time I need scenes to animate my logo is
I think to myself, what the point of this company? What does it do? Let's take Indeed, for example, and try to come up with mini
plots for our animation. Indeed is a free service
for job seekers, and what you do there
is upload your CV, search for jobs, create
job alerts emails, save jobs, apply
to a job directly. In order to do that, you need to have a degree or
training or job experience. Now that I have brainstorm
all these ideas, I can go ahead and
narrow it down to a mini plot's from one to five events. We want a short and
logic animation, because logo animation should
not exceed at maximum, I find, eight seconds. Some people say six, others say 10, I think eight is good. For example, I can do an
animation with a degree peers, then a CV, then a job
plus logo reveal. Or we can do a CV, plus a magnifier, looking for a job, plus
the job, plus logo reveal. As you can see, shorts and thus tell a little
story about the company. With that being
said, in some cases, you are only required to
do a minimal animation, like a simple reveal
and disappear. In that case, you don't have
to worry about the plots. You only have to worry
about the techniques. It all depends on what
the client is asking for, that he wants a full
explanatory logo animation, or you just want a simple
appear and disappear, or a shape morphing to logo. That's about coming
up with the plots. Now let's talk about best
practices for logo animation. The first rule is
that you want to keep the animation between
one to six to, maximum, eight seconds. Why? Because the
animation will be used on mobile apps, on websites, so you want the viewer
to quickly see the logo reveal and then start exploring the website
or buying product. You don't want to
hold too much time of the users showing
the logo reveal. Second rule, keep the animation inside the frame or
the active area. It should not go outside
the borders, again, because it will be
used on many devices, phones, website, etc, so it has to stay
within the active area. Third rule is that
you should learn about who you are animating for. Learn things like who is
the audience of this brand, what the mission of this brand, and also check their products so your animation is aligned
with the brand's purpose and mission to avoid
things like doing a logo animation with meat
for a vegetarian restaurant. You get the idea, right? Fourth rule, avoid insulting
jokes and black humor. Unless you are
animating for yourself, no one wants you to make
fun of their customers. A company can make
fun of itself, but never affect customers. Fifth rule, don't interfere with the original logo design because most of the
time you will be provided with graphic assets. If you have to interfere, you should at least see with
the customer if it's okay. To recap everything, in this
lecture we talked about coming up with a mini plot and best practices
for logo animation. We said for the plots, you brainstorm everything you
know about the company, then you narrow it down, and for best practices, five of them, try to
keep them in mind. Next, we'll talk about the basic principles
of logo animation.
4. Basic Logo Animation Principles Explained: In this lecture you
will learn about the basic logo animation
principles and we're going to see difference
example of how these principles are
applied to logos. Basically, they're the same as the 12 Disney
animation principles, but these one are more focused to logo animation
than characters. The first animation principle
is easy in and easy outs. This is probably one of
the most important aspects or principle of animation in
the history of animation. Funny story actually is that when I started making animation. The first time, I wouldn't apply easy ins because I didn't know what these
easy ins were for. I saw tutorials and the instructor was
saying that's easy ins. will make the animation
run smoothly, but I couldn't understand
what they mean by smoothly. What do you mean smoothly? But apparently, I
learned and easy in and ease out means acceleration
and the acceleration. You can show him the
speed of the animation. You either wants the animation
to start fast and slow. This is easy in. Or you want the animation
to start slow and end fast. This is easy outs, or you want the animation
to start slow and then fast and then slow and
this is easy ease. Definitely something
that you should apply to all your key
frames unless you are animating robots
because robots they move and run speed in a
linear position. For robots machine,
you can go ahead and leave the key frames linear. Next is the arc
animation principles. Basically, the arc principle is the visual path of an object. Instead of an object moving in a straight trajectory
like robots, it will move and
an arc trajectory. Imagine someone
kicking a football. The football will go up
and then it will go down, creating that's arc path. However, there is a rule
to this principle is that the greater the
speed of an object, the straighter the path will be. Imagine shooting a
bullet from a gun. It won't curve unless you're in a movie wanted but the bullets will go and in a
straight trajectory because it's super-fast. The next animation principle, is squash and stretch. Think about a rubber ball. If you toss it up in the air it will stretch on its way up. Then it will squash when it's
at the bottom the ground. This animation principle
gives the illusion of gravity and we will be using
it a lot in this class. Also, it can be applied to both complex and simple objects. But there is a rule though. If you stretch the
object's height, you have to make sure
to stretch the width equally, and vice versa. This makes for greater and
more realistic animation. Overlapping action
and follow through. This principle we will also use a lot in this
logo animation class. Basically, what I mean here
is that when an object moves a part of it will move and another
part will follow, we call this overlapping. Then when it comes to a standstill position
absolute being in motion, different parts of the object will stop at different rates. We call this a follow-through. Inertia basically means that a force is making you
either move or stop. Now to explain this further, imagine you're standing
on a bus and the bus is running and you're
not holding to anything. If the bus stops, your body will throw itself
by the force of inertia. In this case, the bus
stopping. This makes sense. If it doesn't, you can
just leave me a question. Next is anticipation. Anticipation is the
preparatory action or poses to the main action. For example, you bend
the knee before jumping. What we're doing here by using anticipation is as we prepare the viewer for what's about
to happen when applied, it has the effect of making the object action
more realistic. Finally, staging. Staging principle means that the main actions take place by turn with a small pauses to
emphasize a specific moment. The scenes must be in order and must have
the same purpose. Guiding the viewers to
the final logo reveal. To recap everything
in this lecture we covered the basics
of logo animation, which are the easy ease, the arc principle,
squash and stretch, overlapping action
and follow through anticipation and
finally staging. Next, we'll open after effects
and set up our workspace.
5. Setting up The Workspace and General Settings: In this lecture, we'll
open After Effects, and we will be covering
the workspace, the composition settings, couple of settings that
you need to set up, and we'll be also importing Adobe Illustrator files
into After Effects. [NOISE] After you
open After Effects, you want to go ahead
and click on "New Project" and then
"New Composition". Now let's go ahead and give
a name to this composition. Logo reveal [NOISE]
Attika like this. These are the settings
for the new composition. Width, we have 800
pixels; height, we have 600 pixels; frame rates, 29.99 or 30 frames per
second; resolution, full; and for the background,
whites color; duration, eight seconds. Cool. The next
thing we need to do is I'm going to
double-click here. Then you want to go ahead and find the file that I
told you to download from the projects and resources and open
this one right here, this Adobe Illustrator
file, Attika Logo. It's under Course Files,
Logo reveal Attika. Import. Import kind composition, and for Footage
Dimensions, layer size. We don't want to document size. Click "Okay", double-click on the Attika Logo composition, select those Control Command X. Double-click on Logo
reveal Attika composition. Make sure you click here
and then Control Command V, they come to this
area right here, before you Control
Command V. Now, the next thing we need to do here is talk about
the workspace. If you go to Window workspace, you can see which one I'm
working with, it's animation. Down here we have all the scripts that we're
going to be needing. In case I need a script, I'm just going to go
ahead and look for it here and then when I'm done, I'll just close it. One thing about scripts, I don't like using
script too much. I don't like relying
on script too much, but some of them
are super necessary just to make the
workflow much faster. Those that will avoid you
doing the repetitive stuff, those I find helpful. Also in this course, I tried
to keep everything without using scripts because if you just started with
logo animation, you don't want to invest
in expensive scripts. You want to know first if
it's your thing or not. The next thing I
want you to do is go to Edit, Preferences, General and then I want
you to make sure to check this option Center Anchor
Points in New Shaped Layers. This is super-helpful. It will avoid you
a lot of trouble trying to center the
anchor points manually, especially with new layers that you're going
to be creating. One more thing to
do here is click on those Adobe Illustrator files or Adobe Illustrator layers because now they are inside
After Effects, so they are layers. Right-click, Creates, and then Create Shapes from
Vector Layers. The reason why we're creating shapes from these
vector layers is that with shape layers you have more parameters, more
animation options. I'm going to go ahead now and delete those Adobe
Illustrator layers. Just change the
color of the icon on the type so we
can tell them apart. The icon is on the top and
the type is in the bottom. Always go ahead and save. You never know when Adobe
After Effects will crash. Logo reveal [NOISE] Attika, here we go, save. Guys, that's it
for this lecture. Recap highlights. In this lecture, we imported
files to After Effects. We adjusted the
general settings. We converted
illustrator layers to shape layers for more
animation options and freedom. We change the layers
colors to not get confused and we
saved our projects. Up next we will make our
first logo animation.
6. Logo Animation-Reveal and Disappear: Now, it is time to make our first logo animation
after all this talk, and we will start with the
simple reveal and disappear logo animation of this
logo Attika here. This is basically like any
other symbol logos out there, so the technique
you'll learn here, we can apply it to
any symbol logo. Just to let you know guys, if what I'm about to do seems very difficult for
you, that's okay. Especially if it's
your first time doing a logo animation. Don't beat yourself up, don't feel frustrated,
just keep pushing through, and if you feel like you
cannot follow anymore, it's getting too complicated, you can just take a break, take a deep breath, and then come back and then
finish it through. Because I've been
through the same. The first logo animation, I follow those like there
is no way I could do this. But with patience and
the power of well, I was able to finish
the tutorial and do the logo animation.
Let's get started. Now the first thing I like
to do is select both layers and then just move them a
little bit to the right, like 10 frames to the right. Let's zoom into the timeline by holding Alt or Options and scrolling with the
middle mouse button. Now we can see the frames. If you zoom out,
you have seconds. If we zoom in, you see frames. Now let's start and
animate the icon first. I'm just going to click on this solo option just to
single out the icon like this. I'm going to click S to bring
up the scale parameters. We will make the
reveal with the scale. I'm going to click on the
stopwatch to add the keyframe. Then I'm going to move
the keyframe 10 frames, so 10 plus 10 is 20. Now why am I choosing
10th frame is because we are working in a composition with
30 frames a second, and 10 frame is not too fast or too slow, it's the standard. Now I'm going to scale
it down to 25 percent. You're probably
asking yourself about the two decisions I'm making. First, why did I move the layers 10 frames to the right, and then why am I scaling to 25 and not to zero on
the scalar reveal? Now, I did move those to the
right just so I can have enough whitespace to
play the animation. I like it to start
with whitespace, with nothing on the screen. Also very helpful when you work in a longer animation
to have some space before the actual animation in case we need to adjust
the layers or whatever. Now, why did I scale it down
to 25 and not zero percent? The reason is simply
because it's best-practice. When making a reveal with
the scale parameters, it's better to show
a little bit of the shape because
if it's too small, it's going to look like
a dots, like this. Imagine if you're
scaling to many objects and they need to appear in
the same time simultaneously, it's going to look like we
have dust on the screen. Better have the scale between
20-30 percent to 100. I'm going to leave
it 25, and next, I will go ahead and
select those keyframes. Press F9, to the Ease In. What we did here is Ease Ease. Start slow then fast,
then slow again. Let those again. Now let's head to
the graph editor. Make sure you have
these options, Show Selected Properties here. Edit Speed Graph
and snapping on, zoom automatically on as well. Now, here's a pro tip to keep in mind you guys
while making reveal, disappear or morphing animation
is that you want those to appear or to happen at the
peak of speed right here. You don't want to
have any slowdowns at the beginning of these
types of animation. Reveal, disappear, and morphine. You want it to happen fast, discreet and just like
Floyd Mayweather jab. What I'm going to do
now is just select these points or handle, and then I'm going to drag
this to the left like this. As you can see right here, it's still going to take
some slow down at the beginning and then speed up and then slows
down by the end. It looks already better. But to make it even better, I'm going to click here, select this, click here, and then just drag this
to the left as well. Now, animation will happen at the peak of speed right here. Now if we click Play, we can see that
it's much better. Click here to go back
to the timeline. Now what we want to do is
animate the typography. Let's click here again to
get out from the solo. Now we have the type here
that we need to animate. You can either animate
the entire thing in one word or you can animate
the characters individually. To make it more interesting, I think it's better to animate the character individually. What I'm going to do now, is just close this by
clicking here and then open the options for
the Type Outlines. Close Transform for now, and we can open Contents. Now you see right here
we have groups from 1-6. Group 1 is the last character, and Group 6 is the
first character. Now what we need to do is open all these groups up like this, by clicking on this right arrow. Then look for Transform group, also open all of them. This process is a bit tedious. However, there are some scripts that allows you to
do that easily, but they are quite expensive. I didn't want to include them in this course because not
everyone is willing to pay $70 or $80 for the scripts if
they're just starting. You can see that
the A component is located in the middle. To check that out, if I move the position, you can see that it's
moving from the middle. Or if I rotates, you can see it's rotating
from the middle. Now select position for Group 6, select position for Group 5, select position for Group 4, 3, 2, 1. You zoom out like this. Now that you have
everything selected, click on the stopwatch,
there we go. Now what I'm going to do, is select this layer
and click on U. I just have the keyframes
that we just added. Again, I'm going
to select them all and move them to the
right same frames. Then click here to add a new
key frame for the position, and then after you
add new keyframes, you drag the position
to the left. You see that I added
the keyframes first and then I adjusted the
position to the left. If I did adjust the
position first, it wouldn't have affected all the groups but
just a single group. It's a bit different to work with groups than
working with layers. Let's see what we
have now, zoom out. Not bad. Not bad. What I'm going to do now, select all the keyframes. Again, we need to go
to the Graph Editor. You see that it looks linear. It's like a robot's moving. Let's select them. Press F9. Now let's go back. Okay,
we have the curves. Now you see here it
does look like there is only one curve or one line, but actually, it has all of the groups R1 on
top of the other. Select them all and again, let's just make the easings. For this one, we're just
going to be using a simple, easy ease end. Starts fast, ends up slow. Let's just adjust this
handle. Move it to the left. Click on "Play". Fine, but I feel
like I need to make the position parameter or the position animation
a bit more slower. I can go ahead and move it ten frames more and
make it 20 frames, like this. Here we have it. Now, what we need to
do is add a mask. To add the mask,
select the type layer, all of it, Control Command
R to bring the guides. Click here and then I'm
going to move this guide to the right like
this, stop it here, just on the top of the icon, and then select the
Rectangle Tool. Click on this then Tool Creates
Mask and create the mask. Now, I started the mask from
here to here to make it look like this type is
coming from the icon. Now let's click on "Play". There we go Cool. Now that we have more keyframes, what we need to do
is make the offsets. For the offsets, I want
the A to appear first, so the last character
to appear first, and then I want
everything to follow. Now we can either do it
manually by selecting the keyframes and then
just moving them a little bit to the right, but it's going to
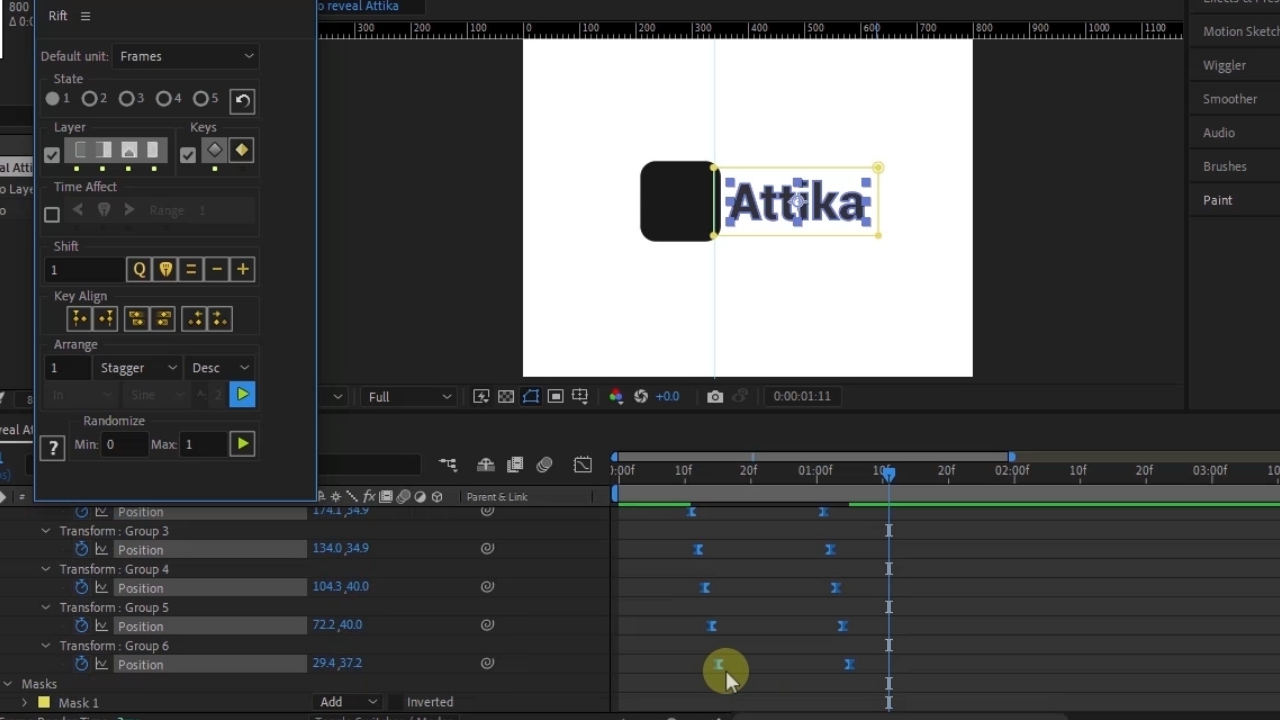
take a lot of time. Thank God, there was
three scripts that we can use and that I told
you to download earlier. The rifts, select
all the keyframes. Then right here, make sure you have the same settings as I do. For this one shifts, you
don't have to worry about it, just right here under
range, I have one, then stagger and
then descendants, not ascendants Then
click on "Display". Now you can see descendants
is going to start from here, all the way up. It looks good. Looks perfect. Now let's go ahead
and play the reveal. Here we go, just going
to wait a little bit and at three seconds, I want to make it disappear. Just let's close the rifts because we're not going
to be needing this. You can put it here
if you want under the Effects panel but you
don't have to. Okay, cool. Now for the Disappear, it's going to be much
easier because we will only animate the
type layer entirely, we will not be
animating the groups. Click on "P" for position
at the stopwatch, same thing for
Scale. There we go. Then I'm going to move 10 frames and make
the Scale disappear. This was zero this time
because we want it gone for good and for the Type, we're going to move 20
frames as we did earlier for the Reveal and adjust
the position like this. This is why we have the
guide in here so we can see where to
adjust the mask. Something like this in here. Next, we need to adjust
the mask as well. Let's go back to this position. Open the type layer,
look for mask, open this thing Mask 1 and then add stopwatch
for Mask Path. Then move the play head towards the position stop or stops, V to select this selection tool and then hold "Shift" and
drag to the right, the Mask like this and
align it with the guide that we had created earlier. There we go. Now if we just play it, let's
see what happens. Cool. One last thing to do is, we need to edit the easings for a smooth disappearance. So click on [inaudible] to
have all the keyframes. Select those F9 to the ease end. Let's go to the speed graph. This time, we want
to do the opposite. We're going to click
here and make ease out. First with an ease
in, now ease out. Start slow and disappear
fast, like this. For both, for the mask
and for the type. Now, this pinkish line is type and this orange
line is the mask. It's flat but you
can still adjust it. Same thing for scaling. We only have easy ease. We need to make ease outs. Drag this thing here. Start slow. The down curve means slow, the up curve means fast. Then drag this one as
well because we want the disappearance to happen at the pickup speed right here. We don't want to leave any slowing down for
the disappearance. Let's play this and see. Okay, cool. Now only one problem
that we have is that, you can that the disappearance
when it happens, the icon disappears
before the type, which is not good. The type needs to
disappear before the icon. One thing I do is that, when I'm making logo animation, I go ahead and adjust
the keyframes and the parameters for
the key-frames first, and then I check the animation and if there is anything off, I'll go ahead and
adjust the keyframes. What I can do here, for example, is select the scale
parameters or the scale keyframes for the icon and then just
drag it to the right. Cool. Now let's
see what happens. It's better. Recap highlights. In this lecture
we covered adding keyframes, adding easings, adjusting the speed graph, working with scripts, and working with masks. Up next, we will make a more advanced
logotype animation.
7. Animating The Position and Complex Trajectories: Now in this lecture
we will start with the more advanced
logo type animation. Well, we'll be
animating characters, jumping, rotating,
switching, and everything. This one is a bit advanced and I want you to note
that there are a lot of techniques to achieve
this type of animation, but I went ahead and only
choose the easiest way possible to achieve
this animation to keep this class
beginner's friendly. Let's start first with
animating the position while respecting the arc
animation principle. I want you now to go ahead and open this Adobe After Effects file where you will find this
logo ready to be animated. First thing first,
I will do is just change the colors
of these layers, so we won't get confused. Now click here, hold Shift
and select the first one, and I'm just going to
drag them a little bit to the right, like this. The first thing we
need to do here is sets the active area. If I go ahead and right-click
on my composition settings, you can see what I'm
working with here. The width, heights,
1920 button ATP. We need again to do here is
now sets the active area. The way to do this
is we're going to go ahead and select
the rectangle tool, and then I'm going
to draw a rectangle like this on the top of the entire Canvas,
just like this. Then I'm going to open
the rectangle settings , a rectangle path. Here we go, size.
You can see a size as the same as the
one on the Canvas. Now to set the active area, just go ahead and dial down
the size to about 400 pixels. I don't know why I
have rectangle 2, I'm going to delete it. Maybe I clicked twice on
rectangle. Who knows? Now we need to change this
layer to a guide layers, so right-click and then
look for guide layer. Here we go. Now
it's a guide layer. I can put it down
here and lock it. Then Layer, New, Solid, want to choose white
color as the background, put it down and lock it. Then I'm going to
shy those away, which means hide then. Click here, so active the shy option and here we have it. Now, we're going to
start with animating the position and then
we will move to path. First, let's animate the T.
Click on P for position, and then we're going to
move the play head to about 25 frames a second because we're going
to be working with more than three keyframes. This is why I choose 25
instead of 20 frames, and I will set the
final position first, so you guys can
avoid looking for the final position after
you make the animation. I'm going to set it at 25
because we want the T to fly and then come back to its initial position
or first position, so set the final position
first always you guys. Then I'm going to move the
play head back around here, 20 frames or 19 and select V for the direct selection
tool and then click, drag up, hold Shift to drag
in a straight trajectory. Zoom in to see
what happens here. Again, we should not
cross the border. Then move this even back
to the first frame, which is 10 frames, and then I'm going
to drag it down, release the mouse, and
then release shifts. Now one more thing I need
to do here is because my computer is making
a lot of noise is I'm going to go and dial down the resolution to about third, select all of those F9. Now, if I click on
Play, [NOISE] not bad. Select everything, speed graph, and then let's go ahead
and adjust the curves. The jump is impulsive, so we going to start fast at the beginning because
when you jump in, you don't take slow down, just crouch and then jump
and you jump at full speed. Here there is no slowing
down at the beginning of a jump. Here we go. When it's dropping down, it will slow down and
then drop down fast. When it's up like this, that means speed, and when you have a
curved down like this, that means slow down. If I click on Play,
this is much better. One more thing is that
this points in the middle, this adjust the freezing when the T is up
here in the skies, so you can adjust it by
either bring it up or down. If we bring it up, it will freeze less time
and if you bring it down, it will freeze more
time at the top. You can see if I
want to bring it up, I have two keyframes in here, so I need to turn them into one because we have
one key frame for the in and one for the outs. This is ease in, this is
ease out, so select both, double-click, and then
check continuous lock, so outgoing to incoming. Now if I move it, we only have one. You just want to move
it just a little bit, just a notch, stay under 5,000. Now let's click Play again. Let's change this a
little bit to the left. This is much better. Maybe I would move this
up a little bit more. The next one is going to be p, so p, again, same thing. Click on Position, drag it here, add a keyframe for the
final position and go back, and then put it up
here and then go back, and then put it down here. You can see I have snapping on. This is why you see it snap
in when you see those lines. This indicates snapping. Then move the play head here, and before it reaches
the final position, I want to drag this then here. A little bit here I'm going
to unselect snap in for now, here we go like this,
just the trajectory. Now here's what I'm going to do. I'm going to select
all these keyframes, right-click Keyframe
Interpolation, and then right here where you
see spatial interpolation, I'm going to change it to
linear just so I can get straight lines like this and I can adjust
this thing properly. If you click on this and
select in everything, just unselect all these
keyframes and just select the one you want to
move and then move it. Like this. This is better. Now I can select the pen tool, hold Alt and click right
here and then adjust the curves, hold Alt. Here we go. Now we can see
in this one we're applying the arc animation
principles because it's going to be flying
in an RF trajectory. We select this, there we go. Of course, nothing
is final, we can always come back and adjust. Now we're going to
do the same thing. Select all of the keyframes, press F9, go to the curves. It's going to start
fast like this, and then it's going
to curve here, and then slows down. When it reaches this position, I want it to slow down a bit. Then same thing here, I want it to slow down a bit. There we go, just like this. Select those, double-click, send them into one key
frame or one anchor points. Now let's apply the animation. Not bad. I just want to adjust the freezing a little bit here, so select this up and same
thing for the final one. I don't want it to
freeze too much, bring it up like this. Click those too much lift, bring it down a bit so we go. If you bring it up and
this thing changes, that means you brought
it up too much. Make sure this thing
doesn't change, the first curve stays
the same. Bring it down. This is much better. Maybe I'll just increase
this a little bit here, so we can get a nice movements from this point to this point. This is better. Now
what I'm going to do is compliments the
jump with the rotation, so click R on the
keyboard for rotation. We wanted to store
like this 90 degrees, [NOISE] sets a keyframe. Then I'm going to select
this layer or click here to show the other
keyframes as well, then I'm going to move it when
it's freezing to the top. Then I will rotate
it again like this. You can see I'm just rotating to the rights in around here. Then when it reaches the
down position is going to do one final rotation to go back to its initial position, so zero. here we go. Now, F9, the essence and adjust those
little bits just like this. There we go. Let's
click on Play. Not spat. This one in the middle.
Double-click on keyframe or one anchor points and then just move
it up a little bit. This is much better.
Let's freeze in up there. Let's move to the R in the
green one, and same thing. P for position at
the final position. Move backward and
then select this one, put it up like this, then move here and
then we're going to put it all the way
down this one. It's going to jump from here all the way from
the bottom to the top. Select this and let's just
adjust the trajectory. Select all of them. Same thing, F9. The jump again is impulsive. Again to slow down
is these outs. It's going to slow
down a bit up here and then boom, it drops like this. Select the middle
keyframe, double-click, continuous lock, and then just bring it up just a little bit. Here we go. Click on Play. Amazing. Recap highlights. In this lecture, we
set the active area, we set the position keyframe, we adjusted complex
paths trajectories, and we adjusted the speed graph. Up next, we will animate using the trim path
and the offset path.
8. Animating Using Trim and Offset Paths: In this lecture we will
try something different. We will be animating
shapes using trim path and offset
path, not letters. After that, we will morph
the shapes with the letters. Make sure you're not
selecting anything. Go to Shape, Ellipse tool, and then I'm going to draw a circle right here. Hold Shift. Release the mouse
and then Shift. Select the Direct
Selection tool. Then we're going to
adjust this line right here in the middle. Or maybe just with
the O like this. Then just drag this
to the rights Now, what we want to do,
you see right here we have Contents and
here we have Add. I'm going to go ahead and add trim paths and add offset paths. Now, for the trim paths, I'm going to go ahead
right here where it says End and dial it down. Then for the offsets path, I will increase the amounts. Then Line Join, change it
to Round Join like this. Offsets, let's adjust it because we want the animation to go
like this clockwise. I'm going to do this. Then just move the position
of the new shape that we created by clicking on the
right arrow on my keyboard. You can hold Shift and click on right arrow to move faster. I will adjust more amount
of the offsets path. Maybe just a little
bits of the offsets and the trim path until we
have something like this. Now, let's start
with the animation. I'm just going to
close the offset paths because we don't
need it right now. Click on the new shape
that we selected. I want to change
the color to red. Then dial down the End path like this until at the
same shape as the O. There we go. Then adjust
the offset a little bit. There we go. Because it's
going to be moving like this. So I'm offseting the
shape a little bit. Add a keyframe for End and
add a keyframe for Start. Then we're going to move,
then let's go with the end, increase it like this. Make sure it doesn't
touch a tail. Then same thing for Start, we will increase it
as well until we have the shape of the O. We'll put here 84. There we go. Then I'm going to set a keyframe for offsets and
then move this little bit. Then offsets this
back to O like this. Now if I click on Play, you
can see nothing happens. But I'll just move this
10 frames so we go to 20. If I go ahead and
offset those keyframes. You can see now animation. What I did is offsets
the Start and End, and I have offset the first
keyframe at the beginning of the animation and another one at the end of the animation. Now we can just select
everything and then F9. For this one if you just use F9, easy ease, it's totally
fine. It looks fine. But you can of course
make it better a little bit by selecting
those keyframes. Just the Start and the End. Go again to the speed
editor and then just increase a little bit
speed in the middle. There we go. I know
it's a lot of things, a lot of information
in the same time. If it's your first time doing
this type of animation. But just take it easy
guys. Take it easy. You can ask me questions and
everything that you want. I know there's a lot of
keyframes, can be confusing. This is why I have included
the final projects and the project
resources for you to download and you can
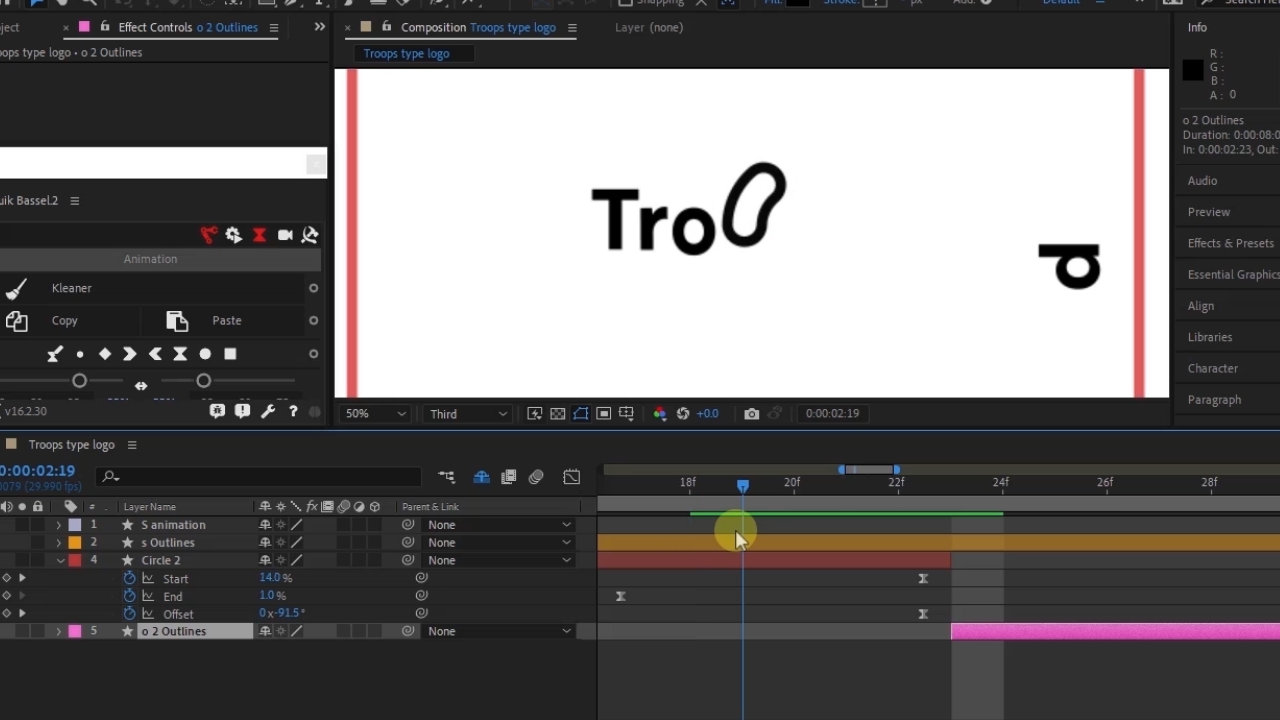
check what I've done. Now, what we need to do is we're going to do the
same thing for the O but we want the animation
to not be clockwise, but to be reversed clockwise. I'm going to
duplicate this layer, close the animation here. Click on U to only show the
keyframes of this layer. Then let's just name them
so we won't get confused. I'm going to rename
this one Circle 1, and this one Circle 2. Now, if I click on
U, there we go. Did we save the projects? You have to save the
projects you guys. Now, what we need to do
is pretty much easier. We're just going to
switch the values. It starts here with
one and ends with 85. We're going to switch that
and we're going to do the same for the one on the top, and then we can adjust
the offsets manually. Here 85 and here one. Now for the top one, the starts. It starts with zero
and it ends with 84. Zero here and 84 here. Select all these
keyframes like this. And then just move using
the arrow on your keyboard. Hold Shift to move faster just to align it with the
second or for the troops. Now, let's adjust the offsets. It starts maybe here and it ends here. I'm going to select
the entire layer and move it to the right. Now let's see the
first animation, and then this one. You can see the
offsets for this one, it starts at the top, and the offsets for this one
it starts from the bottom. Now let's just click on
U to hide the keyframes. Finally for the S, we're going
to try something funnier. What we'll do is I'm going
to select the Pen Tool. Make sure you don't
have anything selected, any layer selected. Then I'm going to
click here to here, and hold and drag, hold Shifts, then hold Alt and hide this
line or this curve. Then click here on S.
Make sure you click in the middle then drag like this. Hold Shifts and here we go. You can do this and you can click on this line to adjust
the curves like this. As you can see, working with the Pen Tool
and Adobe After Effects is pretty much the same
as working with the Pen Tool and
Adobe Illustrator. I guess experience in
graphic design can help a lot in animation if you're switching from
designer to animator. Also motion design. Select the Shape Layer, rename it S Animation, and select another color for this one to Lavender is the
color we selected there. Now we're going to
do the same thing as we did with the o. Open this thing, add Trim
Path and add Offsets Path. Let's adjust the offsets. Miter, Round Join. Then increase amounts like
this until you cover the s. What we can do is
select the pencil, then just adjust these points
a little bit like this. Here we go. So I clicked on Direct
Selection tool and then I selected the anchor
points and adjusted it. Now, let's adjust the trim path. I think this p is bothering us, so I'm going to move the S animation to the
right a little bit. Again, dial down the
end around zero. Add keyframes for
both End and Start. Move the playhead, move the End like this. Then move the Start
like this until you have the o, then move again. Then move the End to the right again and then the
Start to the right. Oh, that was too much. 99 here. Again, we just need to offset
those so click here and here This is better. F9. This is much better, but I feel like it's too fast. So with all the
keyframes selected, click on also option
and then just drag to the right. This is much better. Click on U. Then
we're just going to go ahead and hide the two O's and S by clicking on the eye because
we don't need them right now. They confusing us. I'm
going to shy those as well. That's P. That was a mistake. You shy O and O and
S. Recap highlights. In this lecture we added
shapes and then we animated strokes using the
offset path and the trim path. Finally, we offset the keyframes to
create our animation. Up next we will explore the stretching
animation principle using the path parameters.
9. Exploring The Stretching Principle Using The Path Parameter: Now that we're done with
animating the position, we're going to go
ahead and explore these stretch animation
principle and we're going to do that by using
the path parameters. It's going to be tricky,
but you can do it. At this point, what
you want to do is duplicate the T
Control Command D, change the color or
the duplicated one, and then select the bottom one, U, to show the key-frame. Press J on your keyboard. Select all the
key-frames, shifts, and left arrow, drag it to the left like this
because we're going to use this T as the reference. There we go, U on
the duplicated T, and then we want to
remove the position, we want to remove
these key-frames. But first, let's put it back into the final position before
removing the key-frames. Cool. Now, what I'm going
to do is look for path. Contents, Group, and then Path, and then add position. This is the final position
we're going to add it first. Click U again, bring the
playback at the beginning, then bring the T down like this, just by using the arrows
on your keyboard, holding Shifts, around here. There we go, so now we have the position here for the path, and we have the position
down for the path. One more thing is that select
both those key-frames. Hold Alt plus Command
plus right-click, so you can freeze them. That's why when we're
animating the path, the T won't be moving, so it won't disturb us. I'm just going to bring this one a little bit to the
right like this. Cool. Now, the first thing is we're going to move the
play head to the right. Let me just zoom in a little
bit to the timeline there. Here we go, we are
in the timeline. Once the T starts moving, make sure you have
path selected here. Select the top, like this. Now, you can see that these
anchor points are selected. Then I will stretch this
using again, my arrows. You can hold Shift, stretch
all the way to the top. I'm going to do the
same for the bottom one. Just like this. Now that we set this
key-frame here, the T will stretch from its
normal shape to this shape. We're not stretching using scales because it's not
going to look good, it's going to look horrible if you stretch with the scales. Then move this a
little bit here. Just when the T freezes up here, I'm going to go ahead and
select the first key-frames that contains the
original shape of the T, Control Command C, Control Command V, and then bring this all
the way to the top, hold Shift like this. Now, it will stretch
on its way up. Then once it's up, it will regain its
original shape. Now, select the key frame
that you just added, Control Command C, and then move it a little bit, Control Command V. Why we duplicated this
first key-frame? So we can control the
freezing up here, because we are moving the T now with the path
and not with the position. You can control the freezing
with one key-frame, but with the path, we need to add two key-frames
to control the freezing. Then I'm going to move
the play head again. Let me just adjust this key
frame to the left like this. Here we go, and
when the T reaches its final position like this, I'm going to go ahead,
Control Command C, the last key frame, and then drag it to the right, and then Control Command
V. Then once I do that, I will select the top of the T and then just
stretch it up like this. Here's this thing. Once the T is up here with its
original position, when it reaches down, the tail will go first, and then the top will follow. Now, if I select
all of those F9, Play, you can see what
I'm talking about. Guys, if this's
confusing for you, I have included
the final project. You can open it and check for yourself what I did
with the key-frames. Now, select all of
them, graph editor, and now we can adjust
the key-frames in here. Speed up and then slow
down a little bit. Then here, we're going
to do the opposite. Once it reaches here, slow down a little bit here and then speed up a little
bit here. Click on Play. The last one, I
don't like it much, but I'll do this, let's see. I think it's a little bit
too fast when it comes down, so I will just
select all of those, hold Alt and drag them a
little bit to the right, and then this one
a little bit more. Let's see now. [NOISE]
This is much better. I prefer this animation better. Guys, remember two things
control the animation, the distance between the
key-frames and speed graph. Now, that we've
finished with the T, we can go ahead
and hide this one, the one that we use
as a reference, hide, and shy away. Next, go ahead and select the R and we're going
to do the same thing. So U, we have to
position, animate it. Click here, Contents,
Group, Path. Then, again, we're going to add a key-frame for the path. Original shape, add
a key-frame first, like this, and then
move it to the top. When it reaches the top
position, add another path, and then right here
where it starts moving, make sure you have
Path selected. Select the anchor points and
stretch it from the bottom. Okay, guys, don't
stretch it from the top. Select the Pen tool, click here, and then
I'll just adjust this. [NOISE] Now, if we play it, [NOISE] now it's path. Right here on the position, I may go ahead and adjust
a little bit the R, bring it a little
bit to the top. Let me uncheck Snapping. Let's see now. Okay, cool. Now, F9. [NOISE] I love it,
it looks amazing. Guys, you can see
what we did here. We set the path for the original position
and another path for the original position when
it reaches the top and we only stretch it in the
middle when it jumps in. I want to click on
U to close this. Right now what we're
going to do is offset everything
and make sure not everything is overlapping
when it comes to the animation so we can
move to the next step, which is adding more
life to the animation. Bring in those logo animation
principles into life. I'm just going to
close this and close this by clicking
U on the layers, and then I'm going to bring
all these babies into the same starting point, making sure everything
is well aligned. We have T first and then
we have R and then we need circle 1 before the P and
circle 2 before the P as well, and then P, and then finally
S such as the one here. Select all of them, hold Shift, click here and here, Window, and then look for Rift, and then I'm going to
click here to offset. [NOISE] Cool. Now, if we play the animation. We can still make some
manual adjustments. The rest will give us a hand, but then we can finalize
everything manually. We have the T first and then the R that jumps
right away. Not good. I want the T to reach bottom first and then the R can jump, and then once the R lands, I will bring the
circle 1 after this. Select everything,
all the key-frames. Zoom in and then just
move a little bit, hold Alt and move a
little bit to the right. You can see now. [NOISE] It's still going
too fast for me, so I need to adjust a
little bit more of that. This is way better. This one maybe just a little bit too. Okay, guys, you can see that I'm just
eyeballing the animation. Whatever feels right for me, I'm going to leave it that way. Let's take a look one last time. That's it. We kept highlights. In this lecture, we worked
with the Path parameters. We explored the
freeze key-frames. We used the Rift script
to offset layers and we adjusted the layer's offsets manually to get everything
where we want it. Up next, we'll be adding more animation
principles to our logo.
10. Follow Through and Overlapping Action: Now, in this lecture we'll be adding more animation
principles. The more animation principles
you add to your logo, the better and the more
realistic your logo will look. So we'll be adding overlap and follow through, and again, we'll be using the path
parameters because this is the most easiest
way for beginners. [NOISE] This is probably the most difficult
lecture in this class. A pro workflow tip I do to not get confused in all these
keyframes and layers is that, I go ahead and work
on a specific layer, and then when I finish
everything I want to do with it, I go ahead and shy it away. This way I keep the interface
clean and I don't get confused with a
lot of layers and keyframes along the way.
Let's go ahead now. What the T selected click on
You to get the keyframes. What we want to
do now is overlap the hands of the T.
As it's going up, the hand will bend down, and as it's coming down, the hands will fly up. We will add two more
path keyframes to the T. Now as it starts
going up like this, I'm going to go ahead and
zoom in to the screen, click here, and then make sure you have
path selected, Path 1. Don't select this
one in the bottom, it will select all the keyframes
and we don't want that. Next, with the direct
selection tool selected, go ahead and select this
point and this point. These two points right here, Control Command T. You will
have this bounding box. There was a point in the middle, you probably see it, you
probably don't but here it is. Can you see the small one? Click on it and drag it
to the left, like this. You can see that now the
cursor changed to rotation. We will go ahead and rotate
this hand down like this. Once we finish, click on Escape. Click here, hold
Shift, click here, and show command T. Once you're done again,
click on Escape. Now, what we need to do is adjust this a little
bit more by adjusting the curves and maybe the
points deforming the T-shape, and to do that, we need
to select the Pen tool. This one right here. Now, if I click on this point, you can see that
nothing happens. All I can do is move it
up or down or stretch it. If I want to curve it, I need handles, and in
order to create handles, since we don't have them here, hold Alt or Option and
click on the points. Click here, click here,
and then click here. You will see that we
are going to lose the sharp edges to round
edges but we can fix them, so select the outside
parts of the handle, not the one on the inside. Hold Alt, click, and then just drag back. Alt, click, and drag back. Same thing here, select
first and then Alt and drag. Now we can deform
this like this, click here and adjust
these curves like this. Here we go. Here we go. I can also do this. Stretch them a little bit. Cool. Now let's move this. Then once it starts coming down, so from this point to here, we will do the same thing. Basically the same procedure. I'm just going to go ahead
and speed it up but this time instead of bending
the hands down, we will bend them up
because it's coming down. By the force of its coming down, the hand will go up. So V, for the selection tool, and then select this, Control Command T, and basically the same thing. [MUSIC] Once you're done, you can click on V, and here we have it. Select the Direct
Selection Tool, select all this empty
area to unselect the T, and the now, once the T which is
the final keyframe, I want to go ahead
and squash it, so select the layer again, and then hold Alt or Option, plus right brackets to
cut from the right. Zoom into the timeline
and then just adjust this a little bit. There we go. Now what I'm going to do
is duplicate the T first. There we go, and
then adjust this. Since we want to squash it, we need to duplicate the layers
and then apply morphine. For this class, we
will only talk about one type of morphine
which is frame morphine, which is the one we
will be applying now but on the upcoming class, I'll be introducing
you to new morphines. Anyway, after you
duplicate this, select the duplicated layer, you delete all the keyframes, and then I'm going to
put it right here, so right above the last key of the first T just like this. Now I can add a keyframe
for the path, click, "S," and then a
keyframe for scale but first let's go ahead and
move the anchor points. This points will determine from where the
animation will start. I want the scale to
start from the bottom, so I'm going to move
this one to the bottom. Select this or you
can just click, "Y" to select the anchor
points mover tool, and then I'm going to move
this one to the bottom like this and add Scale, click, "U," and then just move those to the right like
10 frames to the right. I will calculate
10 frames later. Now, what I want
you to do is unlink scale and then just
squash the T like this. Once we do that, we will go ahead and deform
the T again using the path. Select the Path, number 1, select the Pen tool, G for the Pen tool, create them, handles, and then let's just adjust this. Once we do this, the final thing I need to do is apply some damping oscillation. Basically, damping oscillation means when you stop moving
your bounce a little bit. In order to do that, we need
to make sure first that the distance between the
keyframes is 10 frames. [NOISE] 7 plus 10 is 17. I will move this a
little bit to the right. Here we go. Now, I'm going
to Window Duik Bassel. Make sure you save the
project control command S selects the selection tool. Select this one, animation, and then select the two
keyframes of the scale. Then we can apply this
expression, Kleaner. As you can see, I
didn't do any eases on these keyframes because if
you applying an expression, you can't do it on
keyframes that have easy ends or outs or
easy ends in general. Now I will select
the layer, again, deselect and select to show the effects controls and then I'm going to uncheck
anticipation. If we play this, let me adjust the
length of this layer. We're pretty much done
with the T layer. What we can do is
select both T's, click on U to hide
all the keyframes, and then we can shade them away. We can move to the
R. With the R, We have everything
applied to it. We just need to apply
some rotation and some depth and oscillation as
well to give a small life, U to show all the keyframes. I'm going to click on R for now, add a rotation key. Then this is the
original position of the R. I'm going
to put it right here. The R is on the top, like this. When it stars at the beginning, I just want to rotate it a
little bit to the right. Then when it reaches
its final position, I want to rotate
this a little bit to the left and then
move a little bit, then apply zero rotation,
original position. [NOISE] Down here
for the position, this is the final position. I'm going to go ahead
and Control Command C and duplicated here, then go back here,
select this one, and then bring the
position a little bit down by clicking
on the arrows on my keyboard to give it
that bounce a little bit, just one touch on
the down arrow. Select both of
these keyframes and we will apply expression
to this as well. Select them both, hold Control or Command
and remove the eases. For the rotation here, I will apply some easens. [NOISE] Then for these
two keyframes, position, and the rotation, we will apply some depth and oscillation
using the Kleaner. Again, I'm going to remove anticipation. We don't need it. If you play, you see that it looks much
better, way nicer. Here we go, make sure
that it's not going over the actual area.
Then it looks nice. It looks good. Next, we'll jump to the P first, and then we will work
on the OO and S. Because the workflow
for the OO and S is a bit different than what
we're doing right now. Again, we're done with
this one, shades away. Now, let's find the P, and for the P we're
going to apply some overlap and then
follow through to the tail of the P. Here
we have P layer selected. Click on ''U''. Once the P, which is this final position, I'm going to go ahead and open the path [NOISE] content group. Let's save this. As you can see right here, we have path one and path two. Sometimes this happens when you want to adjust the
path of a letter. We have two paths
and you wondering, what do I adjust the
path 1 or path 2? The answer is simple. You click on path 1. You can see these anchor points. There are effects on
the circle inside the P. We don't want
to work on this. We want to work on the tail
of the P. We select path 2. Guys, now just add a
point here. Then move. Let me show the other
keyframes as well. There we go and then add the same points on top of
the final position keyframe. [NOISE] There we go. Now let's open the path again. Click here to unselect. Let's go back here. When it reaches the floor, I'm going to move this
a little bit backwards. Now with path 2 selected, we will go ahead and do
the same thing we did with the T. I'm going to
select this with V, which is selection tool, select the two end coupons and the bottom in short command C. Move this up and then
rotates to the right, escape G for the pencil Alts and then creates them handles. Adjust the corners. Let's adjust the
curves a little bit. [NOISE] Click here. Click on Path 2 again
and adjust this. There we go. Now, will move to the last points. The overlap will end here. Then we will have a
follow-through after it stops, so select these anchor
points and drag it to the left and this one too. Then select these anchor
points and put it here. [NOISE] All of these and F9 for easy, ease. Let's click on
''Play''. Maybe we can move this a little
bit to the right more. Let's click on ''Play'' again. [NOISE] If you don't like to speed up animation, you can of course adjust the distance between the
keyframes to your liking. This is better. Now that
we've done with the T again, you need to hide
all the keyframes, and then let's shine it away. Now for the recap highlights
and this lecture, we shy layers way to
not get confused. We added more animation
principles using the path parameters and
the transform command. We added the Kleaner scrubs of Duik Bassel for some
damping oscillations. We adjusted the distance
between the keyframes to control the speed
of our animation. Up next, we'll see how we can perform a basic frame morphine.
11. Basic Frame Morphing: Now we'll see how
we can smoothly and discreetly morph
shapes into letters. This is frame morphing, basically, the most
easiest way of morphing. On my next class, we'll be talking more
advanced morphing. Now the first thing we need
to do is find the letters we want to morph because these are not letters they're just shapes. I will show all
the hidden layers, and then unhide O, and then O and S, and let's hide the rest. Now, I will put the first
O beneath circle number 1, second O beneath
circle number 2, and the S is under S
animation, which is good. Cool. Now let's start
with the first O. Let's click "U" on
circle number 1, and the animation stops here, and the morphing
will start here. Now, I will go ahead
and cut this layer here by holding Alt plus right brackets or Option
plus right brackets, and just adjust
this a little bit. Make sure you unhide the eye as well because this layer
is still not showing, so make sure you have
the eye selected. Then trim this here. Now we want to change the
color of the stroke to black, and in order to do that, we can just change it from here. Select the stroke and
then change to black. [NOISE] Now this will finish here and then morph to the O. Then for the O, we want to apply again
some damping oscillations or elastic bouncing
in other terms. First is I want to change the position of the anchor
points for the animation, so Y to select the
anchor points. Now look at this, it's
rotating clockwise. The O will bounce up and down. With the O selected, I will move the anchor
points up here, like this. V for the Selection tool, S for the scale, and then P for
position. Click on "U". Select both and again move
them in frames somewhere here. Let's zoom into the timeline
to see what frame we are. We are on the eighth frame, so 8 plus 10 is
18, so right here. I got it right. Experience. Cool. Now, the next thing to do is unselect everything and then
unlink the scale. We will squash this. See what happened?Now,
something here happened because it's not supposed to move like this.
What happened? Where is the anchor
points? I can't find it. Oh, it's here. How
this did happen? Well, it happens all the time. Now we have to do this from the beginning because we
did not pay attention. Stay here, please. There we go, don't move. Add position and scale, move them 10 frames. It's still up. Now let's scale this down like
this, squash it, squash it more around 45, and adjust the width
as well, around 126. Now for the position, I will just bring it up a little bit is like
this. Here we go. Now select all of these
and apply Kleaner. Remove the anticipation. Now if we click on "Play". [NOISE] Now you can see
that it's a bit slow. First, let's check if there is a distance of 10 frames
between the keys. This time I didn't get it right. Here we go. Now if
you remember earlier, we've talked about
morphing and we said the best thing for
morphing is to happen in the top speed
of the animation. Since we only applied easy
ease to these keyframes, the top speed is not at
the end of the animation, but it's somewhere
in the middle. A way to work around this is just cut the layer a little
bit to the right like this and then move
the animation of the second layer inside the animation of the
first layer like this. This is pretty much
the same thing as morphing in the
peak of speed. Now it looks more uniform. [NOISE] Cool. [NOISE] You hide those. Now we do the same thing for circle number 2 and O number 2. Now, since the second
circle is moving down, we will do the opposite
of how we did earlier. It will squash down and then
bounce up a little bit. Again, with the O selected, move the anchor points this
time down to the bottom. V for the Selection tool, then add a keyframe
for the scale, another one for the position. Move them 10 frames, unlink the scale, squash down, and adjust the position a
little bit down, like this. 23 plus 10 is 33, so we have 10 frames here. Select all of these, Kleaner, and remove anticipation from the
Effects Controls panel. [NOISE] Again, do the
same thing for morphing. Cut a little bit from the O layer and then move
it inside the animation. Let's click on "Play". [NOISE] It looks better. [NOISE] Again, let's hide those. Now, finally, we still have the S and we will
do the same thing, but there is no scaling
involved in this one. We're just going to
play with position and rotation.[NOISE]
Change this to black. There we go. U, so it stops here. Cut here. This one,
bring it here. [NOISE] Now for
the S, same thing. Y, bring this
anchor points down. V for the Selection tool. Then we will add
one keyframe for position and one
keyframe for rotation, so R for rotation
and P for position. Now U to show all the keyframes. I don't know why the anchor
point is animated here, but let just remove
it. Here we go. Move this again 10 frames, so we are on the 26th
plus 10 somewhere here. Now for the position, I will just bring it
down a little bit. For rotation since this
thing is jumping like this, you can see it will end here. You can see it moving down
and then to the left, which means the
rotation will be down. The rotation for the S or the
position will be down for position and then rotation
to the left again, to create that continuity. [NOISE] Apply some
damping oscillations, remove anticipation, and do the same thing
as we did earlier. There we go. Let's
click on "Play". [NOISE] Okay guys,
and here we have it. Now we can show all the layers. Then just one more thing
that I need to do here, delete the T. This
one, we don't need it. Just confusing me. This is T number 2 and
this is T number 1. [NOISE] For this
one too we need to move it a little bit to the inside so it
looks more uniform. Now, let's play the
entire animation. [NOISE] Recap highlights. In this lecture, we did some basic frame
morphing and we applied squash and dumping oscillations
to complement the morph. Up next, we'll add more optional steps to make
our logo more interesting, and we'll also be adding colors.
12. Optional Steps and Adding Colors: Now finally, this
is an optional step and you can use it to make
your logo even better. I recommend to use it
but if you're tired, you need a rest I understand. But take a breath and
come back and mediate. This optional step is amazing, let's go ahead and see
what we can do here. We want to duplicate
the T right here, T outlines number 3. Then, I will cut this here, and then I will bring it
down beneath all the T's, put it here, let's see the keyframes for
this one and this one. Now, with this T selected, I will go ahead
and bring it down, I'll select everything, and let's bring it down
a little bit more. Then I will just select the path and then just
squash it even more, click on View, and let's
see the animation. This looks better, I got to say. These next steps are
optional you guys, you don't have to do them if you don't feel like but
you can do them later. Now, one more thing
I want to do is just animate a little bit of
the circle number 2, and circle number 1 because it does start as an entire circle, I don't want it to start
as an entire circle, but maybe just as
a point online. I'm going to select
circle number 1, open the keyframes,
open the offset path, and right here where
we see Offset Path 1, I'm going to add a
keyframe for amounts, click on You, puts the amounts here a
little bit in the middle, and then at the beginning, decrease the amounts,
just like this. Maybe more, just like
this, click on Play. I'll do the same thing
for the other one, and decrease the amounts to 6, there we go, and of course, apply [inaudible], how
could you forget offset what happened to you at M. Now, let's go ahead and check the
entire thing one more time. Now, as you may have noticed, we didn't talk about colors
at all in this lecture. Now, there was a
reason for this. There was a reason why I
didn't talk about color, and we only did black and
whites logo animation. Here's the thing you guys. You can always add colors after
you finish the animation. For example, if I want to
add color to any layer, I can just click here, I'm going to hit this shortcut to make the timeline
area bigger, and then you look for fill, and then you can change
the color from here. You just click and you can
answer the hex code given to by the clients or by you, whoever you are making
the animation for. Let's choose a
color, for example, I'm going to go with, I don't know, this
red right here, just an example, and then click again
on the shortcuts, and now our T is colored. Here's the thing you guys,
when you bring a logo with colors from Illustrator
to Adobe After Effects, and you want to
convert the layers to shape layers, chances are, you always going to
face problems in the conversion when you
are converting the layers. The reason is, After Effect is not so good with converting
layers with effects, or gradients, or any styling
applied to the logo. So if you want to do that, you have to make sure
that the logo coming from After Effects has solid colors. Because after you do the
animation in After Effects, you can always add
stuff in here, we can add gradients, we can add effects, we can add everything
we wanted to absolutely make the animation. My advice is, if a client send you a logo with gradients and effects
and all that stuff, you better ask for a
black and whites logo or a logo with the one color. Now, for my logo, I'm going to keep it this way, and the only thing I want
to do here is go to Layers, or Layer, then solid, and then I want the
background to be yellow. You see this hex
code right here, it's the same as the one
used in the Mailchimp logo. I'm going to keep my
logo black and yellow, like the Mailchimp logo. Now, bring the yellow down
here on top of whites, and here we have our animation. We kept highlights, this lecture we duplicated
the letter T for more action in our animation. We animated the offset
path for both O's and S, and then we added colors. Up next, Outro.
13. Congratulations: If you made it up till
here, congratulations. Now you have enough knowledge to make beautiful
logo animation. What I want you to do next is go ahead and post the logo that you animated in a project
gallery right here. You can post it here and
you can also post it on your social media,
on your portfolio. We covered everything from
logo restrictions to logo animation principles to actually
making logo animations, and we created two
projects not just one. If there is one thing you
should take from this class is animation is all about
placing key frames. Key frame is what
makes the animation. Everything else comes
in the second place. You place the key frame first
and then you adjust them. You just speed graph, you adjust the distance
between the key frames. But that is the most
important thing to focus on. If you like this class, make sure to go
ahead and follow me, leave a review so other
people can find it. Of course, you follow
me so you can get notification when I
post a new class. With that being said, see you really soon.
 Adam Chraibi, Designer and animator