Transcripts
1. Class Introduction: Vast landscape of branding, mascots stand as
enduring symbols. Dink male chap, KFC, or the iconic fingos figure. They carry not just
brand identity, but a certain
timeless recognition. Animating a mascot is
an important skill. It adds a dynamic dimension
to the brand storytelling. They bring a brand's
personality to life, making it more relatable
and memorable. Hi. I'm Mina the CEO
and founder of Cash. I have seven years
of experience, and I have collaborated with brands such as
Nissan, Yeo, and ns. As a mentor and coach,
my community has grown to over
60,000 individuals. Mastering the art of
animating mascots is an invaluable skill in the realm of branding
and marketing. I'm here to teach
you how to create a mascot log
animation in Afterft. This mascot log animation class caters to begin our
motion designers, looking to enhance
their afterfat skills, and master the creation of stunning log animations for
potential client projects. Whether you're designer,
looking to animate your work, a beginner motion designer
or maybe a marketer. This course is for you.
Throughout this class, I'll guide you to creating this lab animation in Afterfat. Here's an overview
of what we'll cover, generating ideas
for log animation, preparing your logo for
animation, animation techniques, navigating after effects,
and adopt illustrator, working with key frames, manipulating shapes,
ensuring smooth animations, exporting the final product. I'll delve into
the ideation stage revealing the tought
process behind it. By the end of this class, you will confidently
create similar animations. These techniques
will empower you to generate ideas and craft
your log animation, utilizing the
knowledge shared here. Project files will
be provided along the way for your
independent practice. I'm trill to embark on this learning journey
with you, so let's dive.
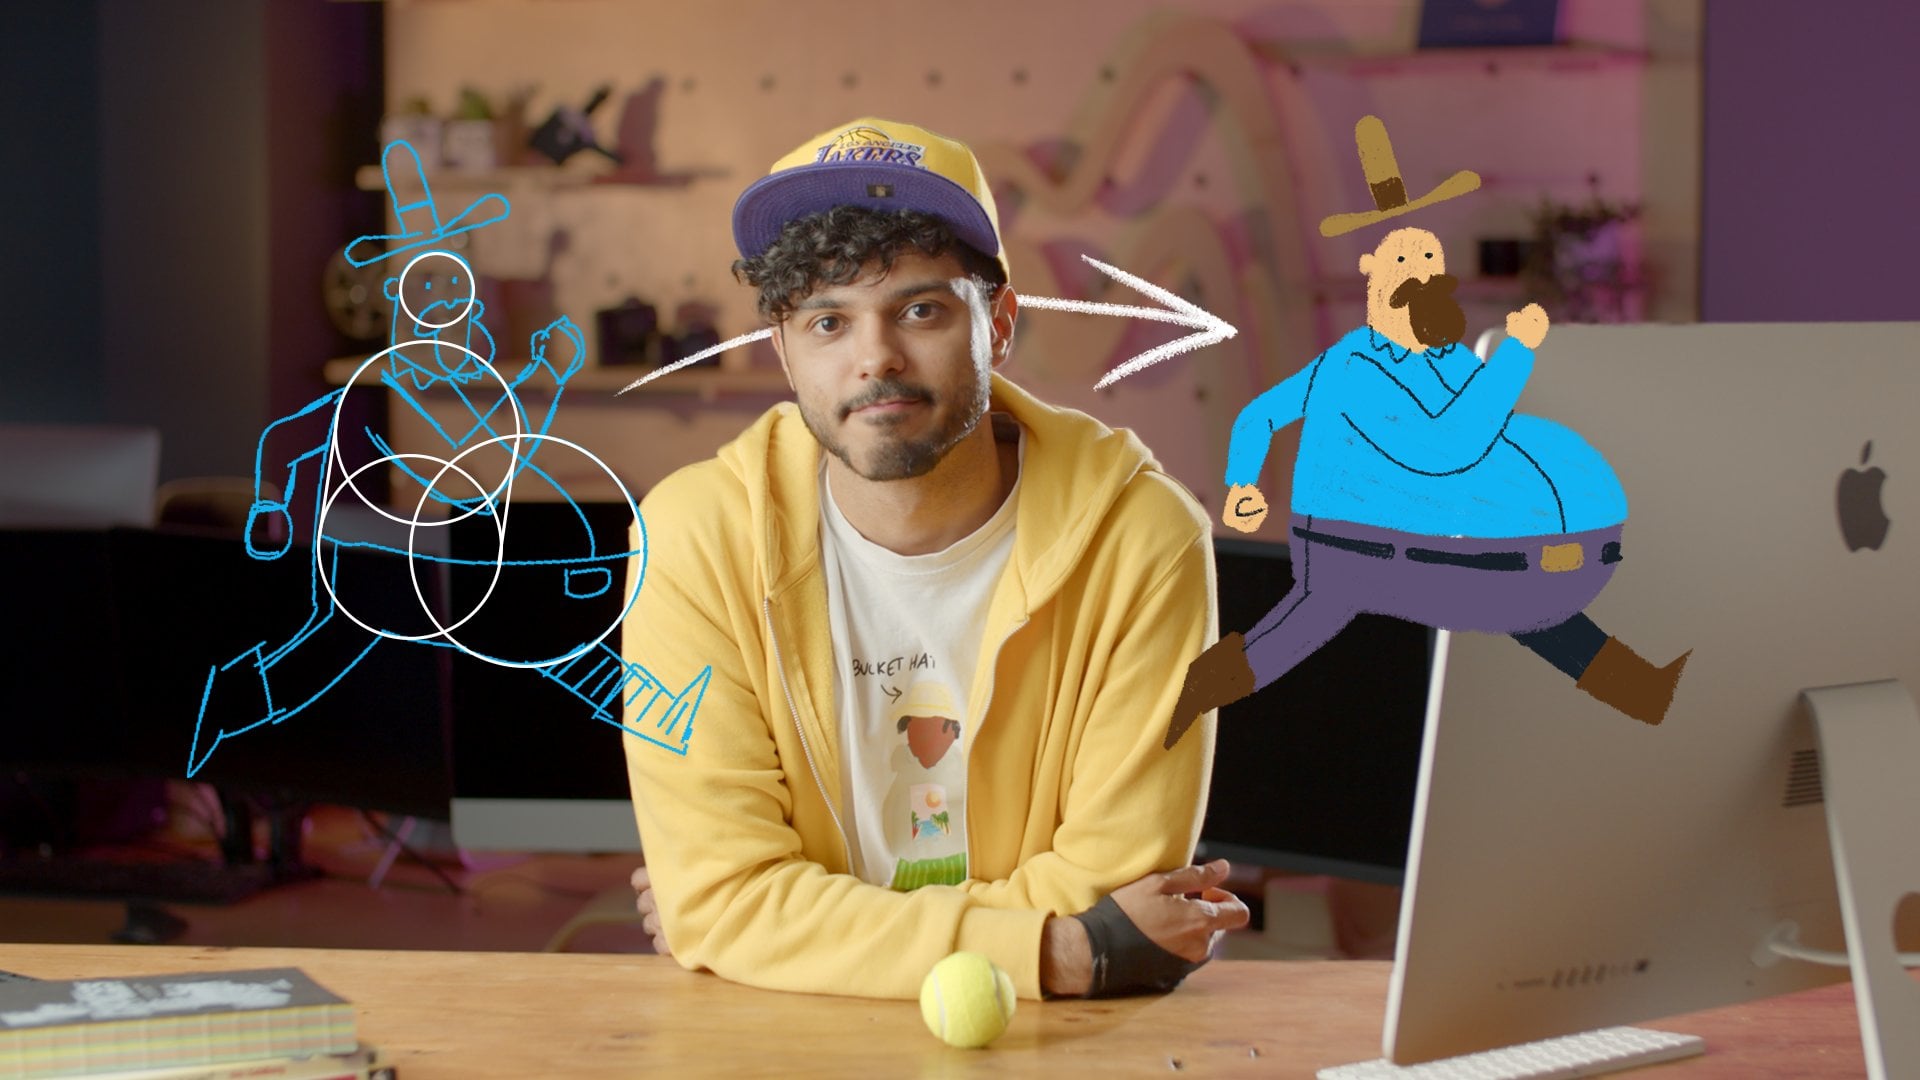
2. Class Project and Orientation : Hey, there, future animators. I'm Nina and I'm here
to teach you something. Pretty cool. Mascot
log animation. Now, the fun part, your job. You're going to recreate this awesome mascot
logo in After facts. You get all the files to
play with after each lesson. If you're new to this,
just copy what I do. At the end of each class,
download my files, copy my moves, and don't stress about making
everything perfect. It's like learning
how to ride a bike. The more you do it,
the easier it gets. My tip for you is to follow
what I do in the course and try to create it yourself without looking at the files. That way you memorize
the techniques faster. Quick as up for this journey, make sure you have After facts and goo Illustrator
on your computer. Make sure they're
newer than 2022. Once you're ready,
post your work in the project gallery so I can review and
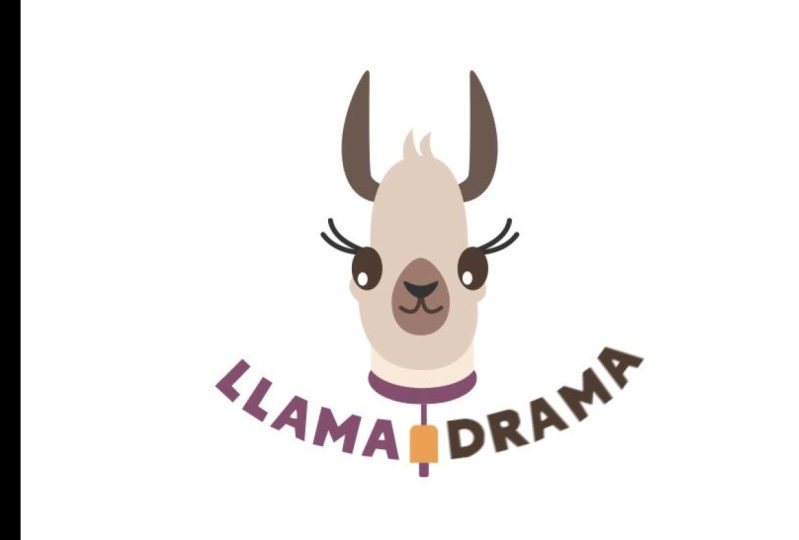
give you feedback. Our mascot hero is a logo made by my friend Martin from
Yes I'm a designer. He made it for his students, and now we're going
to bring it to life. All right, team, let's dive into this animation venture together. Excited to get started. Let's make some
animation magic happen.
3. Preparing your files for Animation: Hello, guys, and welcome. So before we get the
animation started. The first step is to prepare
the files for animation. This is the file that
I got from Martin, and the first thing for us would be to separate it on
different layers and organize it in a way
that would be way easier for us to animate
later on after effects. This is the full
file that I got. So as you can see, we have ODs versions, ODs
different elements. But I will be using
this version. So I'm just going to click
Control C to select it, and then I'm going
to click Control. And my composition would be, let's say, I'm going to change this two pixels,
$1,000 to $1,000. And create. So this
is my new file, and I'm going to click
control fee to pay st and let me scale it
up so I can see it. Okay, so here we go. This is not so important
because after that, we will be importing this
into after fax so we can make any
adjustments later on. But these are my layers. And as you can see,
here I have two layers. This is the first one and
this is the other one. So the text and the ma. However, I will need
to separate more of these layers
because the thing is that, here's the logic. Whatever elements you're
going to be moving, needs to be on a separate layer. In our case, we'll
be moving the bell, we'll be moving even
like this element, we'll be moving you know, the neck, the head, everything. So let me select this layer
and I'm going to click on this Hamburger
menu over here and click release two
layers sequence. Now, I can select these two layers and
dragon drop them here. Uh, the reason why I'm
doing this is because I want this group to be
on separate layers, and I don't want to see a group. And I'm going to delete
the empty layer. And now let's start with the
text because that's easy. Let me just open
up these layers. As you can see here, I
have in the group itself, I have all the letters
on a separate layer. Actually, for now I'm going
to keep them as they are. I might need to precompose
them later in after effects. But for now, I'm
just going to have a separate layer for
all these letters. So I'm selecting
the group again, release two layers sequence, and I'm going to select all of these and drag and
drop them here above, and let's delete this
little layer here. Now it's time To separate
the layers of the ama. Again, I'm going to open up this group,
open up the Llama. As you can see here,
what Martin did was to create two groups. First, we have the bell,
and then we have the head. And same here, I'm just going
to release two sequence, strong and drop it here
and delete this element. Now, let's start with the bell. I'm opening up the
precomposition again, and going to do the same thing. And now, let's see
what we have here. So first, we have the bell.
Then we have the color. Yes, then we have this little line that connects
the color to the bell, and then we have this little element that's part of the bell. Amazing. So all these things
would still need to be on a separate layer because if you look at the
original animation, this element is
involving the bell. This element as well,
as you can see, has a separate motion. Then the color has
its own motion, and then this line that
connects the color to the bell has a
separate motion too. So that's why we need
all these things on a separate layer
because if we have the bell and the element
on the same layer, I won't be able to
move the elements separately unless I create
another shape layer, and this is just
way too complex. So going back to
the illustrator, let's do the same thing. I actually already did it, so let me select
these, bring them up. Here again, let's delete this. Now, I'm going to
open up the heads. Let's see what we have here. So we have the mouth,
we have the eyes, we have the head,
the neck, the hair, the horns. These are the force. These are the ears. So I might need to do some
adjustments here. So again, let me
select all these. I'm going to bring them up here. And as you can
see, doesn't work. The reason why it doesn't
work, these are a group. So I just have to release two layers
sequence as I did before. So I'm going to
drag and drop them here and delete this one. Now, let's move forward
with the mouth. So as you can see here,
we have the mouth. So the mouth consists of
this element that's part of, you know, the shape of the head, we have the nose, and then
we have the tongue as well. So let me open up
the mouth again, and I am going to again
release two layers and select ODs and bring them up here and
delete this one. Great. So now we also have to separate the eyes
and the lashes, although later on
we'll be creating a different shape in
after facts directly, and I'm going to show you
why in the next episodes. So, let me just do the same thing here,
delete this layer. Then I am going to do
the same thing here. Okay, delete this
part D are de lashes, this is the eye, and
the pupil is here too. Now, I have all these
elements on separate layers. And the next thing
that I want to do would be to
name these layers. The reason why I'm doing
this is because if I put them into after facts
the way they are now, I'll just be able to see a bunch of weird names
like shape one shape two, and I won't be able to
understand what's what. So that's why it's way easier to just name them in
illustrator directly. So I'm basically going to be clicking two times
on each layer, and I am going to
being the name. So this is A. This
is. This is a. Great. Now we have all
these layers separated. Let's save this
file by clicking. File, Save A, and I am just
going to find my folder, and I am going to
name this a file. Great. Okay, click Okay. Here. Now
let's open after effects. And here in your product Patel
right click Import File, and just find your file. Here is mine. Okay, so maile this is. Now, something very important here that I want to point out. When you click on the file, it's very important to check this box over here
that says Import as. Click on this and click
composition retain layer sizes. The reason is because
if you don't do that, it will be imported
as the footage. So let me show you what will happen if you don't
import it like that. First of all, it's
just a one file. You don't see any of the layers. If I drag and drop it
here, it's just one file. So that's why we don't
want to do that. So again, let's import
it. Let's find it. Yes. Okay. So now, import as composition retain
layer sizes, and import. When you do that, you
see a composition, you see all your layers here, and you'll be able to make adjustments and create
your Awesome animation.
4. Organizing your After Effects project: Okay. Now, we have all these layers that we
created in Illustrator. We have them into After facts. Just organize these
layers a little bit before we get the
actual animation started. So we have everything
in After facts be completely organized
and ready for animation. Okay. The first thing
would be for me to select all these files. I'm going to click on this icon over here because I want to make sure they are high quality
even if I scale them up. This is what happens if I
don't have this clicked. Okay. So now let's select
all the layers. That are for the Lama tax. Right click precos
and I'm going to name this Lama and click
the second again. I'm going to select all
these layers for drama, and again, precomposed
them drama. Click on this thing
over here again. Now, I want to keep the bell and the element in my
main composition. The color and this element would be on a
separate layer again. So precompose that and name that color Awesome click
on the Sycon here. And now it's time to select all the layers
of the Lama itself. Yeah, without drama, so let me just hide them so
I can make sure. Great. Okay, so right
click precomposed ck. And click on the scon
or here. Awesome, guys. So now we are ready to get
this animation started. We have all the files
organized into After facts. In the next episode, we'll start animating this character, starting with the
bow, and I'm super excited to show you
the next steps. You will find the non
separated file below, as well as the separated
illustrator files. So if you want to practice, you can download these files and separate the layers the way
I did in this tutorial. Or you can also check
the separated version and you can practice importing it into after
facts and organizing it. Thank you very much
for time. I'm very excited for the next episode, so let's get this
animation started.
5. Animating the Bell: Hello, guys, and welcome
to the new lesson. Today, we are going to be
starting the Lama animation, and I'm very excited. So let's get started. I'm going to click on
the original animation, so I can show you what we
are going to create today. So, as you can see, this
animation starts with the animation of the Bow and this little
element of the Bow. So let's start with
that. I'm going to go back to our original file. And last time, we did
some precompositions. We have Lama drama. This is the text.
We have the color. We also have the head, which is actually the head, the neck and kind of the
whole Lama composition. So since today, we won't be animating
everything, obviously. Let's hide some of these layers, so they don't confuse us. So I'm going to hide Lama drama. I'm also going to hide the head. And I'm left with the
bell and the color. Again, I would like to
height the color for now, because we'll start with
the animation of the bell. So as you can see,
these two elements are not at the top
of my composition, and I want to bring
them on top just because I want them
to animate first, and then I want
them to cover one of the lines that we're
going to be animating later. So the first thing
would be to convert these two elements
to shape object. So click on these two
right click and then create shapes from vector layer. Then you can delete these two because we won't
be meeting them. And the reason why we
have these shape layers. You might be using the slain
aftereffects, when possible, I'll suggest you
convert layers into shape objects because let
me show you the difference. If the layer is just a
normal layer like this one. Obviously, you can
change its scale, you can rotate it.
You can animate it. You have all these properties. But when you have a shape layer
instead of a vector file, you can also change
the shape of it. You can do that by
clicking on the layer, then contents, then group, depending on how many
groups you have. In my case, I have just one, and I can manipulate this
shape, which is pretty cool. And this is when you create, you can click on pad and you can change the pad this layer. So we won't be actually creating pad animation for this tutorial, but I just wanted to let
you guys know because this is very important when
you're working after facts. So let me now delete these. And we'll start with the
animation of the bell. So first, the bell ring, I want to parent this
to the bell itself. Now we parented the
bell ring to the bell. I want to change
the anchor point. And let me show you
what this means. So as you can see right now, the anchor point of the bell is at the center of the bell. So, this means
that if I rotated, for example, that'll be kind of the point from
where it will be rotating. But This is not really realistic because even
if I rotate it that way, it's not where it's
kind of supposed to be. So I am clicking on
y on my keyboard, and I'm going to bring the
anchor point around here. So if I rotate it, yeah. So this makes more sense because this is
where the color is, so it'll makes sense it
to rotate from here. Now, let's start
animating and adding some key frames.
By the way, guys. When you're starting
on animation, it's always best
to leave it like 1 second or so like empty, just because sometimes
you might want to add some extra movements or you might need to add
something else later on. So I always give it 1 second to breathe before
I start the movement. Next, I'm just going to open
up this layer, the bell, and I'm going to
add a keyframe for the position and
for the rotation. Then I'm going to click
U on my keyboard, so I can see only the keyframes that I'm going to be using. I'm going to select
these and click F nine, so I can easy ease them. Okay, so now, this is the
original position of the bell. However, it's a bit too low. So it would be weird
for the animation for the bell to start here and
just have like the bell. I'm going to do
something different. I'm going to copy
these two keyframes, and I'm going to
paste them here. That'll be my reference
because later on this is where the
bell roots end up being, but this is after the
animation after it goes up. So I'm going to
select these two, right click and
total hold frames. These are just for reference, I'm going to use them later on. And so now these two keyframes that I created
with the 1 second mark, let's just bring this here. Okay. So we'll start from here. Then at the 1 second
and ten frames. I'm going to copy
and place these, and I'm going to
make the bell go up. So as you can see, this is moving because these were
the original key frames, but don't worry about this now. I'm going to go to about
2 seconds ten frames, and I'm going to copy
these key frames. And now at a I would say 1 second and 25 frames
somewhere like here. I'm just going to bring
these here and I'm going to click Fn so I
can easy ease them. Now, let's see how that looks. Okay, so this needs to be
faster, this movement. So now that we are ready with the keyframes for the
position rotation. Let's open up the graph editor. I'm going to click on position, and I'm going to click
on this icon here. And now, I would like to
make these keyframes slower. And the way I do that
with the position. So with the rotation,
I still don't have any keyframes for
rotation, just the position. So for the position, I'm going to
separate dimensions. So you can click
on this icon here. That separates X
from it position, and you can manipulate that. So says the bell
is just going up. We are going to be manipulating and changing just
the Y position. Let's select this key frame, and let's play with
the graph a bit. Okay, this is a bit too much. So let's just smooth
it like this. Now, let's adjust this one. Okay. This is again
a bit too much. Okay, this way better. Okay. Let's look good. Do you see how smooth
this motion is? This is what we want
you to achieve. I'm just going to smooth
it a bit more here. Okay. Great. Now the position
key frames are ready, and let's start adding
some rotation to it. So when the bell arrives here, I want to start rotating. So I'm just going to
change rotation to I think 36, but we'll see. Next, because I don't
want it to be rotating like all the time
when it's going up, so I'm going to actually
move this here. Okay. And now let's make this ring. That keyframe was 36. Let's make it -30 here. Then I'm going to copy and
paste this keyframe here. Just make sure they're even now you'd like to pay
attention to the timing. So for example, my
previous wasn't okay, so I had to adjust it. Now, since this keyframe and
this keyframe are the same, I'm just going to
copy and paste it. And then I'm going to copy
this one in the middle here, and it'll stop here. Okay. Let's see how that looks. Okay, so this is a bit too much. I think this is a bit too much. So I'm just going
to offset this one, this one, and I'm going
to delete this one. Let's see how that looks.
Okay. Now this is much better. Now, I'm going to click
on this icon here. What this does, it
creates a motion blur. This is going to be very cool. Do you see this here?
It creates like this car tree motion
blur that I really love. So that's why I want
you to keep it. R. Now, let's animate this ring. So we're going to
repeat the same thing. We're going to click y and then bring the
anchor point here. Next, I'm going to click R on my keyboard so I can
bring a rotation. I'm going to add a keyframe for rotation and click
F nine to ***. Now, I'm just going to move my marker where the other
key frames of the bell are, but we're just going to create
a few more extreme pulses. So by this time, I want
this rotation to be here, just a bit more. Yes, this one, like here, this one here, they don't
have to be the same. And then this one here and here, Hero so I'm going to copy
and face the first keyframe. Now, I'm going to apply
motion blur to this. Let's see how that
looks. Okay. I think this animation looks good. I just want to offset a little bit have a bit more
cartoon of an effect. Yes. Perfect. Okay. I
think this looks amazing. And do you see this motion
blur here? This is very cool.
6. Animating the Collar: Okay, now let's
animate the color. I'm going to just unhide it. Let me open up this
precomposition. The first thing that
we're going to do would be to animate this layer here. And this is going
to be very simple. So do you see how the bell
kind of overlaps with this line with this
line here at this time? So I'm just going to make
sure this layer starts here. Let me hide this so you
can see what I mean. Okay. So it's like, Yeah. I don't think we
need animation for this because it's
like pretty short. When the bell is kind of
in front of this layer, just make sure it appears. Yeah. Okay, so we're
ready with this line. So now let's animate this part. What I'm going to do would
be to click on the pent, and I'm going to create a shape that covers this whole shape. So It doesn't have
to be perfect. So click on fill, make sure you don't have a fill. And now, play with the
stroke until you can click G to just the pad until you don't see the color anymore
because of the shape. Yes, like this. Now I'm going to
open up this shape, contents, shape one, stroke, and I'm going to change
the line cup to be rod cup and the line
joint to be round joint. Now I'm going to add
the trim pad effect. So click on this icon here add. Ten trim paths. And now we want to animate the
start and the end. I'm going to click so
I can only see these. Select the keyframes
F nine to Z them. Now, let me zoom
in, first of all. Make sure the start is 50%
and the end is 50%. Two. Now, let me go I say 3
seconds and 15 frames. We might need to adjust
the timing later. Make the start zero
and make the hundred. So I'm going to click N so I can lock this in
my work composition. Okay, great. Now, this is a
bit too slow in my opinion, so I'm just going to move these to three secons
in five frames. Okay, this looks good. The only thing that bugs
me is this day here. So when it starts, there's like a dot before it starts moving, and I really just
want to smooth this. So let me open up again, shape, stroke, stroke quid. I'm going to add a keyframe
for stroke quid, click. And I'm just going to
move this keyframe here and make sure the
start is zero at the start. Okay. Okay. So do you see
how now there's still a dot, but it's smaller, and then
it progressively moves. I actually even have to
move this a bit more. Great. I love it. Now, here's
what we're going to do. We're going to
click on the color. Total if you don't
see these options, click on total switch
switches modes, or if you see a
bunch of options, you can just play around with these buttons over here so
you can see what I'm seeing. So now we want to click on this thing here and click on
Alpha made shape layer one. So what this does is
it creates a mask. So we basically only see
what was inside this layer. So it just masks the
layer to the other layer. And so now, this
is how it looks. I think it looks good, but what we will do would be to duplicate this one
more time, control D. Now, I'm going to
move these here. And do you see how in
the original animation. I start with this
coal pink color, and then the purple appears. So I'm just actually going to directly take this
color from here, go to my color, and I'm going to click
on this color here. So the first layer
that we created, because that would
be appearing first. I'm going to in the effects panel search for
the fuel effect. Apply the fuel effect and
change the color to the pig. So let's see how that looks. Okay. Great. Awesome. Let's go
back to our Lama. Great.
7. Llama’s Head and Face Animation: Hello, guys, and welcome
to the new lesson. Last time we created
this animation, so we have the Bow and
the color animation. And today it's time to
start animating the Lama. This is going to be very cool, so I'm very excited to
show you how to do this. So I am opening up the
precomposition of the head, so this is actually my Lama. The first thing that
I'm going to do would be to select all these layers, right click and click Create create shapes
from vector layer. So what this does is it creates shape objects
for my layers. So if I want to change the path, for example, of the
nose or something, I can easily do that. And that'll create a
much smoother animation. So now, I have a
bunch of layers here. Some of them are
vector files and some of them shape objects. So I want to delete these vector files because
I won't really need them. I can manually select
them like this, but let me show
you an easier way. I'm just going to
go here and right click and then
select label group. And I'll have all
these layers selected, and I'm just going
to delete them. Great. So now let's
do some parenting. If I parent the nose to
the mouth, for example. That is like the child
and that is the parent. So when the parent moves, the child moves with it. So that means that I can
easily, for example, parent all these
stairs to the head, and when I move the head, all these stairs would
move with the head. And I don't have to create a separate animation for
each and every layer. That's why we always
start with parenting. I'm going to first
select the nose and I'm clicking the nose and
I'm clicking on control. So the nose, the
mouth, the tongue, should be parented to the
nose stment the element here. The nose element should
be parented to the head. Now, the left pup and the left lashes should be
parented to the left eye, and the eye should be
parented to the head. Same with the eye. So the right pupile and
the right lashes should be parented to the right eye and the right eye to the head. Now, the head should be
parented to the neck, the hair to the heat, and the right and the left form should be
parented to the head as well. So now if you look
at your layers, on the neck should be empty. All these layers should
be parented to something. Great. Now, let's go back to
our regional composition. So now we would like to
start the am animation here. That's why I'm just going to drag this element,
so this is the head. That was the composition
that we just worked on, and I'm going to drag it here. So this is when this
animation would start, and I'm going to me. Now, let me click
on it, and let's get this animation started. The first thing that I'm
going to do would be to move the neck
and also the head. Now, we need to make some
adjustments to the pad, but we are going
to do that later. I'm going to select
the neck and the head. And I'm going to click P on my keyboard so I can see
the position keyframes. I'm adding two keyframes for the position for
the for the neck. And since this is my last post, like, I mean, this is
when it would stop. I am going to bring
it right here. So I think it would
take around a second, but we can adjust that later on. Now, first, let's let the neck, and let's bring it down here. Let me go back to
the original one. I can see the forms kind of
popping above the color. So it needs to go
down a bit like this. Okay, I think this is perfect. Great. So now, in our
original animation, we have first of all, the head is moving
separately from the neck. So do you see how the neck goes up and the head goes up as well. It's not just the neck. So let me go back. And I am going to move
the head down a bit. Like this. Okay. So now we
have a little bit of pop. So I think kind of
in between the two. I'm just going to copy and paste lasky frame because they
want to have a reference. Then I would like this
head to go up like this. Amazing. And then I
want it to go down. So I'm just going to
copy alas key frame again and make it go down. So there's a little bit of
bounce, boom. Let's see. Okay, this is a bit too fast, and we'll need to
just the keyframe. So let me select these.
Going to bring them here. These here. And,
something like this. I think this needs to
be faster, let's see. Okay. First, let's adjust
the keyframes and then we'll edit the pat of the
neck because as you can see, the head is detached
from the neck. So we're going to fix
this in a second. So first, I'm going to
select the position. Just click on this so you can select all the
keyframes and click on this icon here because we want to
open the graph editor. D so this is how the
keyframes look now. Typically, we can
separate the X from Y. But for now, I'm just going to make some minor adjustments. So I'm going to
suck these handles, and I'm going to play
with them a little bit. So keep in mind that just
in the graph editor, there isn't really
a formula for that. You just have to fill it. So sometimes you have
to make them slower, you have to make them faster. The only thing is
just make sure it looks consistent and
it looks smooth. So for now, I'm going
to just play with these settings and just
see how they look like. For example, do you see how this part here is kind of
a bit too slow for me. So I'm just going to drag and
drop these handles a bit. So it's like I want
it to be smoother, like way, way smoother. And now, for this,
I'm just going to drag this left part on me. So it slows down when it
goes up and then boom. So I just want to make
it a bit smoother. Okay. I think this looks good. So you can take a look at my graph. You can make it similar to mind. But again, just play with the settings until you're happy with the way
your animation looks. So let's fix this
detachment of the neck. So I'm going to open
up the neck contents, pad and I'm going to add
a key frame for the pad. At the start, I'm just going to make it the way
it is right now, so it'll be just the same. Then at around this time
when the head goes up, I'm going to select
these two dots and bring them up here. Now, when the head goes down, just mind the key frames
of the other layer against these and
move them here. And then here. Yeah, we can
leave it the way it is, but, like, actually, let
me just bring it up here. So let's see how that looks. Okay. Great. All right. Now it's time
to animate the face. So in our original animation, when the Lama goes up, our ace goes up too, and we have a little bit of a parallax effect with the
force and the ears swap. So let's do that.
It's gonna be fun. So typically, I can also create a new object and parent all
these heirs to the object. But for this animation, I'm
just going to do it manually. So I'm going to select the nose, the mouth, the left eye, the right eye, the left and the right fn and also the hair. And I'm going to click
P on my keyboard, so I can bring up position. Click F nine to ZEV keyframes. And let me just quickly open up my head so I can see where
these keyframes are. Okay. So let me go up here. This is where I am going
to need to add keyframes. So let me click on the cycle here so I can add
another key frame, same here, and then same here. It's easier for me to
add the keyframes first, that's just the
default keyframe. And then I'm going to make
adjustments from there. So let's start from
the beginning. I'm actually going to start by adjusting these
frames when he looks up and then we're going to
go from there and adjust the And the position
when he looks down to. Let's select the nose
element, the mouth, the nose, and the left
and the right eye. And all these elements, they need to go up, like, yes, I like this. Now, the pores need to go down. To create this cool
parallax effect. And the hair needs
to go down two. Now, let's open up the head
contents group one, Pat. Let's add a keyframe
for the part. I'm going to click so I can see only the keyframes
that I have. And I'm going to
bring this one here because that's my
default keyframe. And now here, I
just want to move these ears down a bit just
so we can make it realistic. When he looks up, the ears
go down with the holes. All right? Now, let me select
just the nose and the mouth and move them here. Like this. He's so cute. There's a
little mistake that I made because I forgot to add
key framsf an settlement. So I'm just going to add
a position keyframe here. Yeah. That was your original position, and I'm just going to
copy and paste it here. And here. Sorry about that. It happens sometimes. All right. So this is the position
when he looks up, and now let's move his face down before he
looks straight at us. So now, again, the nose
element, the mouth, the nose, the left, the right eye. Need to go down. Okay? Maybe the nose element
can go down like this. Now, the mouth and nose. Let's move them this the force. So now it's the
other way around. Like the force would go up. The hair would go
up to Just a bit. So I'm clicking G,
so I can adjust this dot so I can have more
room to move the hair. And I'm not going to kf
for the path for the hair for now because I just want to change
slightly the position. All right. And now I think
we have just the ears left. Okay. Now I can
click G. And select the arsn he looks normal. I'm going to click.
So that'll be the end of my work composition.
Let's see how that looks. Okay. I think this is very cool. I would like to just
adjust the forest a bit. I would like these two forts
to go down a bit more. So we have a closer effect. Great. Now. Let's open up
the original composition. Okay. This is very
cool. I love this guy.
8. Eye and Eyelash animation: Hello, guys, and welcome
to the new lesson. Last time we started
animating this cool ama. And today, we're going to
continue the animation. Let's start with the blink. In our reginal video, we have the Lama blinking because the head of
the Lama goes up. So it would make sense
for the Lama to bring in clothes it's little cute
eyes before it goes down. So let's open up the
composition of the head. So this is a Suma. And let's submit these elements, all of them, and click so I
can see all the keyframes. Actually, I would like the
blink to start kind of here. Okay. Let's first
select the left eye. I'm going to open up
the left eye contents, and I'm going to animate the P. So find the P at a keyframe, click again, so you can see the key frame and
F nine, two ***. Now, I'm going to go one, two three frames after that. And I'm going to
click G so I can start making some
adjustments to D D part. And I want to make this Lama, as we already mentioned, link. So we're going to
adjust the part. I'm going to bring the start
and the start over there. And Yeah. You can play with D ski the important part
is just to make it. Look like blinks. Okay. Like, actually, let me open up the rulers. And I'm going to create a ruler here so I can
make sure they're even Maybe something
like this. Let's see. And ignore the pup for now. Amazing. Now, we're
going to zoom out. It will stay like
this until here. So just copy the key
frame, paste it here. Again one, two,
three frames after that copy and paste the first
key frame. It should open. Now, let's see how that looks. Okay, I think this needs to be faster needs to
start maybe here. Okay, great. I think
this looks good. First, actually, let
me remove this grid. Then let's make
some adjustments. Let's adjust these slashes. So, there's one very
important thing here that I want to
tell you and show you. These slashes,
they're all the same. Like, I mean, you can
see all these thoughts. And in order for you to animate this and to
make adjustments, you need to say, for example, these
dots move them. There is a little
weird curve here. And this is because the way
these slashes were created, I think Martin just created
a path with these two. And they're not
two curved lines, but it's just one element. So, in after effects, it'll be better if
we recreate this, so we can have more options
to play with these lashes, and this is going to be very
simple. So let me show you. I'm going to click all
the pan right there. And actually, I'm going to
draw one more lash here. Okay. As you can see, the stroke is huge. So I'm going to make it and just make sure it's
similar to the way it was, like, very similar
to the original. Ash. Okay. I think this
is good. Let me hide it. So I can see if it's. Now,
click on the stroke cower. Click on the sinc here and
I'm going to take this cower. Okay. So as you can
see these edges, they're like rough and weird, and we're going to
make them round it. So I'm going to
open up contents, shape, stroke, and the lineup, and the line joint
should be rounded. Like this. Okay. Now, this got bigger, so I'm just going to
adjust the P, like this. And actually, I think
the strove is a bit too heavy here. Let's try. Eight. Hi there. Yeah, pretty similar
to the original one. I like it like this.
Click on this. Enter, and I'm going
to name that one left. Okay. Then click on the keyboard and bring
the anchor point here. Now, control D to duplicate this r. So you can rotate
it and rotate it like this, and we need to just
adjust the path up bits. So it can look a bit
more like the original. Very similar. Now,
let's select the two and bring them above the like
the original lash layer. To isolate them. I'm going to click on this one. This is the original d, so I can see only my new
lashes. They look great. And I'm going to
select them and parent them to the original lashes. And I'm going to click on
this icon here and I'll hide the original lashes
because I don't need them. It's I need. I just needed them to be parented to
the right layer. Okay, now we can make adjustments to the PT,
which is the cord. Okay. Let's open up the first
lash Pat and R K frame. Same here, contents
shape pat RK frame here. So these two. Click, so
you can see the keyframes. Let's easy ease them. And now, this is when
the eye starts blinking. And it stops blinking
right there. Okay. So now we need to do the pad by clicking on the lash, then click G. Then select
these two dots and bring them. Here. Same here. G. Select them. Bring them. Here. Okay.
There's a little problem here. Do you see how this
part of the lash looks weird because this is just not
where it's supposed to be, and the I is to ten. So first, let's just double
check if the position, yeah, the position is good. Okay. And now, here's
what we're going to do. Open up this lash, the stroke, then taper, and then add a keyframe for the end
light and the end. Now go here. And I want to isolate
just the lash. Click, so we can see the
keyframes and the end. Let's play with this a bit. Okay. Cool. I think
this looks good. And now, I just want
to ease it a bit. All right. Wow. Now,
this one looks better. Okay. And now for the pad, just go down a bit and
just kind of like this. Let's play with this
just so you can have a little movement of the lashes. It's not so static. Okay. Select them and
click F nine easase them. Now, let's see. Okay? Now,
I'm going to go here. Select create three
key frames again. And then here, I'm just going to copy and paste
the first keyframes. Here. Okay. Okay. I might want to add one more
keyframe here for the path. Let's see how that looks.
I'm going to experiment now. I'm just going to select
it and bring it up. There's a little bows. Let's see how that looks. Okay. Yeah. I think
this one looks good. Now I'm going to repeat
the same process with the add lash. Let's open it up,
stroke, taper, length. You, so I can see all the
key frames and go here. Got the path like this, then the like this. A bit more. Okay. The important thing is to make sure it
looks consistent. Okay? Here, is going to
copy and paste, here, copy and paste, and
here in the middle. And the path. I'll be. Okay. Whoop. Okay. So here, I would actually like to make some adjustments
to the path again. So let's make them go down cause the phase
goes down and it will make sense for them
to go down too. Yes. Okay. Okay, I'm going to select
all these key frames with the ice swell. And I'm going to
bring them up here. Because I just realized
it's a bit too fast now. Let's un isolate them. Okay. And actually, D again, I want them to be
faster like do. Okay. Great.
9. Pupil animation: Now, we need to just
the pupil as well. So here's what
we're going to do. We want to create a mask. So if we move the pupil, like maybe here or here, wherever we move it, we want it to move just
inside the eye. We don't want it to go
outside of the eye. So I'm just going to duplicate
the left eye Control D, above the pupil and parent it to the left,
like the original. So I'm going to click Enter, and I'm going to name
this left eye mask. Okay. And I'm going to
change its cover perple. I can make sure I can
recognize this is the mask. I'm going to click, and
I'm going to remove the keyframes for the position
and for the part as well. Because here's what
I'm going to do. I'm going to open up this mask. I'm going to open up
the original layer. And I am going to hold this swirl icon and parent the pot of the mask to the part
of the original layer. Here's why I'm doing this. Now. If I just kept the
pad options like this. And then I want to
say, for example, here in 2 seconds mark, I decide to change the
part of the original. Now, what I had to do
was to just keep copying and pasting keyframes to the mask as well
because otherwise, I mean, the mask won't
have key frames. And so that's why I prefer
to just keep this layer without any key frames and just parent everything
to the original layer. Now that my mask is
parented to the original. If I want to make
adjustments, for example, here to the path
of the original, my path of the mask would change with the path
of the original. So no, we're going to mask it. So as I just mentioned, the mask is already parented to everything, so
everything is good. Now, let's if you don't
see these options here, you might want to total
switch the modes. Just click here. Yep. And so here, you
can just click on, click on the left pupil and
click AlpMate to left mask. Alphate Amazing. Now, if I want to move
the pup, for example, as you can see, it doesn't
go outside of the y. And this is what I was
explaining earlier. If I change notice that I'm
changing the original pad, the mask is changing
its path two. So I don't have to
ch keyframes here, keyframes there, and
just lose my time. So's delete. Okay. Amazing. No. Great. Very good, guys.
Four, we animate the pupils because we're
going to animate them two, but I want to make
sure I move them out, like I move the left one
with the with the right one. So I'm going to just repeat this same process
with the right eye. But I'm going to show
you a little trick. I'm actually not going to
do all these things again. That's what I'm going
to do. Gonna set everything like this
is the new mask. To the lash and control D. This is I'm going
to duplicate them. I'm going to change
their color to blue blue because everything
else is blue, yellow. And I'm going to
rename them first. So click. Enter and rename
them. That should be right. We're going to
speed this for up, but essentially I'm just
renaming all these s. Amazing. Since all the layers are
connected to the right eye. This is the new right
not the original one. I'm going to click S to
click on the second here, and I'm going to change
this to -100 200%. Now, click fcc all
the keyframes. It's important to make sure your pointer is where you
have a position keyframe. Now, I'm just going to
click on the position. So that way, I'm selecting all the keyframes. Not just one. This is very important because
if I move it from here, that would change
just this keyframe. And I want to make sure
I move everything. So I'm going to click
on the position so I can select all these keyframes. And I'm going to hold shift so I can make sure
it's proportionate. And Great. I'm going
to move it here. Let me just see how that looks. Good. Now, let me
actually hide the original or my lashes. Okay. My lashes didn't move, so I need to change them again. Just parent the slash to this slash and just
do the same thing. I told you they were
connected to the eye. Apparently, that's not the case. Okay. Great. Amazing. Great. Okay. I hope you
like this little. It will save you
a bunch of time. Now, actually, I'm going to delete all these
original layers of the right right pupil and the lashes, because
I don't need them. Now, let's animate
the pupils a bit. I'm going to take the right
pupil and the left one. Click P. I can
bring up position. And I just want them to look up like go
here and this one. I'll say here. Make sure it's not too
extreme because it would look weird. Okay. Okay. And now, it will be
best for them to move right before the eyes open. So I'm adding a keyframe again. And yeah, I would say
here, make them go down. Yeah. And then here,
two more keyframes. And. Great. I'm actually going to move these bits here. But keep in mind, guys,
when you're animating yes, the animation of the ice
needs to be really fast. Otherwise, it looks weird. Like if I, for example, make these key frames like
loder like let's see here, it looks weird, you don't move
your yep like super slow. So at least for me, the way I animate is, I just make them faster. And there can be
a little movement like secondary movement of the eye So it's like. Yeah. You can barely see it,
but there is, like, something that kind
of makes it a bit more looks a bit more natural. Izing. Okay, great.
10. Hair Animation and Polishing Details: Now, let's meet the hair. So I'm just going to
click on this icon, so I can I can change
my background to black, so I can see what I'm doing. I'm going to select the
hair and open it up. Contents, group one part. A key frame for the part. Click, you can see
all the keyframes. Easy easier. Now. When he looks up, I would
like to move it like this. Let's see. Tc. Let me see. Okay. And now, I'm just a copy and paste the
last key frame from here. And when he goes
down, I'd say, here. I want this to change position. There will be a little bounce and don't mind my
bad design for now. I'm going to fix it.
Yes. Then at the end. But actually, a couple of frames after the
last key frames. I'm going to copy and
paste the first position. But then I want to add
one more like here, like a couple of frames before the end keyframe
for everything. I'm going to select
these and I'm just going to make it go backwards
because I want it to be like, Because remember, this is hair. So it needs to
look more organic. So Okay. Okay. Now, I think this one. We need to just it a
bit. I don't like it. So Yes, but, like, Yeah. And again, same with the graph. Like here. You can play around with
this until you're happy with the way
your animation looks. This looks very
cool. It's so cute. Okay. I think there is just one thing that bugs
me, and I have to find it. Where's that frame, but. Yeah, like this one.
I think it's cool, but the shape is a bit weird, so I'm going to click
G, and just a bit. Maybe it's a bit too extreme. Yeah, this better. Okay, great. Very cute. Great. And yeah, I was saying
that same here, you can play around
with the settings, play around with the shapes and the pad until you're happy, and until you make sure it
looks consistent and cool. Okay. The am animation
looks very good so far. We need to make just
a few more things. First, let's select
all these s. Click, so you can see only
the key frames. And I'm going to select
everything from the nose to basically everything except
for the head and the neck. What we're going to do now would be to offset
these keyframes, just a bit like I say, two tree frames, and we're
going to see how that looks. Okay. So do you see
the difference? There is a little bit
more kind of flow to it, so it's not like they
all move together. So, that's when
there's a little bit of bus and especially
with the hair, it looks way more smooth. So yeah, I think this one
looks good, actually. Yeah. The only thing
that bugs me here is the eye animation of the pupils, but I'm gonna keep it
for now 'cause we're going to be animating
the eye as well. Now, let's open up the
original composition. Yep. Amazing. So the bell, the color, and the ama comes here. The last thing that
we're going to do would be to create a mask. So I'm going to go here, right where this
animation starts. Got to click on the pencil here, and I'm going to draw a
mask like a big mask. That is. And don't
worry about this. Like that will be behind the color and you won't
be able to see it anyway. So yeah. So like
like a big mask. Just a random shape. Great. Now, there is just
a stroke. There's no fill. So I'm going to click on fill. Just a random cover.
This doesn't matter. I'm going to remove the stroke. And I'm going to enter. I'm going to name
this Lama mask. Bring it above the
Lama or the head. Of med. All right. So let's see how that looks. Do you see how you don't
see the ama anymore. Like, you just see it when
it crosses the color. This is how the whole
thing looks so far. S. Thank you, everyone
for your time. I hope you enjoyed this lesson. The project files will
be low as always, and I'm excited to
seeing the next lesson.
11. Smoothing the llama animation: Hello, guys, and welcome
to the new lesson. This is the animation that
we created last time, and this is where we stopped. So today we are continuing
with this awesome animation. So before we continue
with the text animation, which is actually the next step, I would like to make some
adjustments to the character. So there are some things
that I'm looking at it now. I would improve and I'm
not really happy about. Let's just do that first. Okay. The first thing
that I'm noticing is this movement here. So I feel like the head
when it goes down, let me just quickly fry my hair. When the head goes down, I just think it's
a bit too much. We can smooth this
a bit and make it. I would say here. Okay.
Let's see how that looks. Okay. I think this looks better. I would like to open
the graph editor and make some adjustments here. I don't think this
is smooth enough. Yeah. Maybe. And again, same as in
the previous tutorials, play around ties keyframes
and settings until you're happy with the smoothness
of your animation. Too much. Yep. Okay, when to click on this icon here, Okay. And the only thing is that
I would like this one. I'm just going to click Control and click two
times on this keyframe, and I want to smooth this. Okay, well, I think
this looks way better. The other thing that I noticed, remember that last
time we changed the path so we can change
the position of the ears. So I forgot to add one more
keyframe that should be here. So at the end, when the
Lama is looking at us, the ears should be normal. So Okay, this is
how it looks now. The other thing is
that and I know we animated that last time, but I don't really
like the movement of these pupils that go
down and then go up. Looking at it now, I don't
think this is beneficial. So I'm directly going to I'm just going
to close the tree, and I'm going to remove
all these key frames. Remove all these key frames, and I'm here, I'm just going to copy and
paste the first key frame. So let me see how that looks. Okay. I think this looks better. Okay, let's go back to the
original Animation. Do Okay. So with these changes, I think the ma looks way better. In my opinion, we just
tweaked a few things, but to me, it's just the way smoother the
way it looks right now.
12. Text animation: Okay. Now let's continue
with the text animation. Going back to the original one, I can see this animation
of the Lama drama. Okay. Now it's time
to go back here. Let me it Lama and drama. So for this text animation, what we are going to
do will be to add key frames for the position,
scale, and rotation. So let me open up Lama first. Position, scale rotation. To see all the keyframes, as them with F nine, and that will be
our final position. So that's where it should land. Now, let's see the timing first. Okay, so drops. And then the Lama stops
its movement here. So the text of the Lama, I
think should start here. Okay. Start here and then here and we can
change the timing layer. Now, actually, the first step is to change the anchor point. Do you see where the
Achor point is right now? So if I move it, look at this, it just looks
really, really weird. So the anchor point is
here as you mentioned. Now, since we want this tax to appear from here and there
will be a mask here. Typically, we can make
the anchor point here. However, if we do that, we have to make a
bunch of key frames, like for rotation, make it, start here, change the graph
and all of that stuff. Okay, so I'm going to
do something different. For the anchor
point, first of all, I just removed all the
key frames because if we have a keyframe for the position and we change the anchor point, look, it creates another
anchor point for the position. So let's just remove all
the key frames for now. So, I am going to move the
anchor point here this time, and I'm going to show
you why in a second. This is my anchor point now. Now, let's add some rotation
to see what's going on. DC. So actually, this is the exact rotation that we
want for this animation. So that's why we have the anchor point
being here this time, and I think this is the perfect anchor point
for this element. So again, let's add scale
position scale and rotation, although we'll probably
just use the scale, but still let's add the other key frames in case
we need to change something. I'm going to bring them here and we'll check the timing later. Now, Let's play
with this rotation. Right here, position. Let's see how that looks. Amazing. So I think
this looks good. I'm going to just open up the
graph editor for rotation. Let's just describe a bit. So, this is a bit
too much now. T. T. I love this. No. Do you see this motion fact right here? This motion effect. Here's how we can do that. If you don't see
these options here, just make sure you click
on total switch mot. I'm going to click this icon here and I'm going to
click on this icon. Now I have this motion. I think it looks amazing. Let's add the mask now. I'm going to click
on the pen and I'm going to draw a mask. Basically, just to cover
this right part like this. I'm going to bring
it above the ama. Again, total switch
these options and Alpha inverted mate. Okay. Great. Okay. Now
I don't see the Lama. Here, I just see it after
it crosses the bow. Let's just do the
same thing for drama. I am going to change the
anchor point to here. Let me test it with rotation. Okay. I think this is good. Now, keyframe for rotation, P position as scale,
see the key frames. F nine is them, and I'm going to bring
it up here. Okay. Now, I'm going to change
the rotation like this, and let's see how that
looks. Okay, great. Okay. I think this looks good. I am going to just once
again, change the graph. Let me see. Okay. I think this will occur again and
click this, click this. Click on this icon,
so you hide the mask. So I can save time. This time, I'm going to
duplicate that mask, bring it up the drama. But this time, click
on Alpha Alpha verte. Basically, what that
would do would be to show the drama only
in this shape, not the other way around
as we had it before. Let me just the mask. The drama. Enter mass ama. Okay. Now, I just
select these four, and I'm going to make
sure they start here. I typically want to keep
my compositions organized. That's why I took that. Now
let's offset these two. T. Okay. Let's see the whole
thing from here. T. Okay. I think Lama
needs to appear sooner. So. Okay. Okay. Amazing. Now
we have the text. And the last thing
that we're going to do next time will be to animate the Lama one more time where he will be
looking at the text, and then he will disappear. I hope you enjoyed this lesson. Thank you very much
for your time, and I'm going to see you very soon.
13. Llama looking down Animation: Hello, guys, and welcome
to the new Lesson. This is the animation
we created last time. We focused on improving the character and creating
this text animation. And now it's time to
animate the Lama. So, in our original animation, we have the Lama
looking at the text, so take a look at this ship
links and looks at Lama, and then a drama. So. Let's go back, and let's create
this. Thanks. So. Okay, so the text appears here. It's best to have the Lama
start its movement here. So it's more realistic. I mean, it'll be
weird if the Lama looks at the text before
the text appears. So I would say this is
a good starting point. So let's open up bull
Lama composition. Like this. And again, as always, let's add
keyframes for everything. As you know, I love adding keyframes for
every new movement. So I don't mess something up. And if I do, I always
have a backup plan. I'm going to click B, so I can have my preview work
area start here. And now, first, let's
make this Lama blake. And as you know, we already
had this animation. The Lama was blaking before. So, in my case, that's from Layer five. Two tier 14. Yeah. Let's click on the second so I can change the background
and see it more clearly. I'm going to click, so I can
see the key frames and okay, do you see what happened here? We don't have key frames here. So let's add them.
And what else? This is just the mask, so
that mask was printed. Now, this is the
blink animation. All right. I'm going
to start with the eye. The eye blinking is here. So I'm going to copy
and paste these here. Same here for the
lash. Same here. And I'm going to go up. That's now for the other eye. Copy paste. The pups
leave that for now. Let's just have the labo blink first and
then we'll decide. What we'll do with
the pups. Okay. Okay. So now, let's add more key
frames because I mean, we just this time, we want you to blink not
have its eyes closed. So. And now go around here. I'll say like two
frames after and just copy and paste these key frames. This is the pupil, I'm
going to leave it for now. Copy paste and copy paste. Let's see how that looks now. Okay. The best thing for the pupils is to move
when the eyes are closed. So that way, when the
ama opens its eyes, you'll already be looking left. So we already have a
position key frame. I'm going to move it
here, move this one here. And then by this time, actually, let me just first see where
this position should be. So I'm going to adjust the
position like here and here. Yeah, this looks good. Now, select this keyframe for the right pupil and the left
pupil and just move it here. And let's see how that looks. Okay. I can kind of
see the movement, and I don't really like that. So I'm going to
select these two. Right click. Total hold
key phrase. Same here. So basically what that does is instead of having a movement, do you see there is no movement? There's just position
A, position B. Okay? So let's see
how that looks. Okay. I'm actually going
to select these two and move them here. Yeah. So basically, they
change exactly here. Okay. Okay. All
right. Let's go back. Okay. And now, the am would
be looking at drama here. So that would be super simple. We're just going to be
changing the pupils. And again, with the hold key
frame, just one position, position A, position B, not a movement because otherwise, I think
it'll look weird. So, this pupiil would go. Here, This one. Let me see. Yeah, I
think this is good. Let's see. Do. Okay. Let's go. Okay. Like I'm going to
select the mask and the drama and just move it
to the right here. Okay? Ten Great. A, cause I think
this part is ready. It's looking pretty good. Great. Thank you so
much for your time. I really hope you
enjoyed this lesson, and I'm going to see
you very soon with a new and exciting comp.
14. Llama Tongue animation: Today, we will be creating
the animation from here. So that'll be the end
of this logo animation. Let's get started. Let's see. First, we have like
the Lama looking left. He's looking right.
And I'll say here. He's going to start his
movement of the tongue. Let's open up the Lama
precomposition and as always, Akers for every thing. Okay. Now we are going to
want to make his head go up. Let's go back to your
original animation. Let's see. The head goes up. The face goes up slightly. So it's not a huge
movement, but slightly. You see how it goes, right? Let's go back. Let's
start adding key frames. I think it should be
around 4 seconds, five frames, but let's
adjust the timing later. The head would go up like this. Let this is slow.
Let's adjust it. Okay. Now it's time to move
the face layers. First, I'm going to select
the left eye. The right eye. The nose, mouth, the
nose element, the mouth, and the s. I'm going
to move them up. Like this. Now, the hair
would go down slightly. The horns, go down slightly too. And let's see how that looks. Okay. I really like it. Let me click this icon so I
can make the back rut black. I am going to fight
my head layer, and let's adjust the
path. I'm clicking G. Slip this dot. Let's select all of these and make the
ears go bound all bit. Let's see how that works. First of all, I think
this is a pit you pass. I'm going to select all these keyframes and move
them to the right. Like I'll say here. 3
seconds, 20 firs Okay. And I'm going to
make them faster. Let me select all of them. And, faster like this. Okay. This is. Now,
let's make him blink. And we already have
this animation, if you remember from last time. This is the animation
of him blinking. Let's start copying
pasting keyframes. But for the eyes, keep in mind, we're just going to be pasting the path key frame,
not the position. Because you already
have a position. Copy key frame. Same here, let's
move the lashes. Same here, the copying
paste de Copan paste three coping base that. Coping base. That. Okay. Okay. This is red cook. The
only thing that I'm noticing is that I want the face layers to go down a bit more. So I'm selecting the Let me see. Left eye, right eye. Nose element. Mouth nose. Make them go up a bit more. The horse can go down a bit
more chew and the hire this. And let me select
actually the nose in the mouth and make them
go up a bit more like this. Okay. Let's see the
whole movement now. ****. This is cool. I love it. Now, let's add
the animation of the tongue. As you can see, our
tongue is hidden now, so let me unhide it. Okay. Now, I would like this tum to appear during
the animation of the mouth. And this is parented
to the new element. I would like to parent
it to the mouth instead because the mouth is moving separately
from the element. And now, I'm going to click P, and other key frame forord
position for the tongue. That would be the last position of the tongue. So move it here. And the first will be here. Okay. Now, make the
tongue element, start here, and now it's
time to create a mask. Click on the Pancho
and just throw a mask. Like this. T. I'm going to hide it so I can
see what I'm creating. This is my mask. I'm going to click on this
one, so I can see it, enter and I'm going to
name this mask tongue. Parented to the mouth. Bring it above the tongue, and if you don't see
this option again, click Total switches moles. Now, click on this and click
on Alpha Mate mask tongue. Okay. Okay. Okay, this
is looking very good. Let's see the whole thing.
Up until this point. Great. Okay. See the monk. Okay, this is cute.
15. Llama Loop out: Thing that we're going to
do would be to just look the animation basically and have the Llama
disappear go down. Let's see the original video. Okay. So from here, the lama goes up, similar to what we had at
the start and then down. Okay. Let's go back. Here. Okay. And the mask, actually, just to keep
things organized. Just make it start here. Okay. Let's see the
timing now. Okay. T. Great. And now I think
I'm going to start the animations here to
roll the five second mark. Again, I k for everything. The left corn tube.
And now let's start. First, let's make
the head go up. Like this, I would
say, the neck. We already have a
keyframe for the path. So just change it like this. I'm going to keep all
the other elements the same because he's
already looking up. So I don't need to add any
additional movement here. So let's just add a
keyframe for everything. Let me see that. And now he'll be
opening his eyes while he goes down and the
face would go down too. I'll say around this time. Yeah, we can fix it la I'm
just going to go here, and I'm going to copy
the first key frames because I don't need to
now go back and forth and look at where that needed to be because I
mean, we already have that. Okay. So just copy and paste basically the first
key frames for the hair, the right horn, the left horn. And now, I'm just going
to manually do the rest. So It's like the left eye, the right eye. No. Nose element, mouth nose. Now, all of these
elements would go down. The part of the head because
of the ears, remember. The part of the head
needs to be said. Just make sure it's
the original position. And let me see everything
so far because we need to animate the tongue
and make him open his eye. So Okay, so add
around this time. Okay. Actually, I'd like to make the face elements go down even more so I can have a more
cartoon effect, basically. So again, left eye, right eye. Nose element mold nose. And just create a more
extreme position. Although you can see it,
you see the movement. Now, same with these two. The horse can go up a bit more. And I think let me
switch to the back. Okay. Amazing. Okay. Let me see that. Okay, great. Now,
let's make him open his eyes and move his tongue. So at around this
time, like, actually, even before that, like here, I would like his
tongue to go up. Okay. And he would
open his eyes. I think here is a good
time to open his eyes. Okay. So here he had
his eyes opened. So by this time, for sure, he would
have his eyes opened. So I'm going to copy and paste this pat Cope for the lash. Copree again for the other lash. Copy the path of the left eye, paste Cope. Copy, Paste. Let me see how that looks. Okay, I think it looks good, although I feel like that
could be a bit slow. So let me see the
whole thing now. No right, then then done. Okay, I feel like
he needs to open his eyes here because I
think it looks a bit weird, and the tongue
should go up here. So let's go back to
quickly fix this signing. First, let's see
the tongue. Okay. So to from here, I'm just going to
move this keyframe, basically the last keyframe. I'm just going to
leave this one. Okay. Okay, great. Now, just
keep a few things in mind. First of all, here
are the key frames that we are going to be moving. First, we have just the
path for the right eye. Move it here. These
keyframes for the lash The key frames
for the other lash. This path for the left eye here. Just remember, don't move the position because we
move the face, right? So for the blinking,
we use just the path. So that's why we're
just moving the path. But for the lashes, we are moving everything
because remember that the lashes are
parented to the eye. That's why we didn't add
any other movements to it, basically. So let me see. Okay. Let's see the
whole thing. Okay. So as I suspect that
this is a bit too slow. I think the limation when
the Lama goes up is fine, but when he goes down,
it's a bit too slow. And so now, let me just
select everything like head, neck, hair, right, left. And actually, all
these positions here. Move them here. Let me see the timing now. And let me see. Okay. Okay.
Now say better. All right.
16. Text and collar loop out: And let's make some
final adjustments, and we are red. So when the ma goes down, we would like to
animate the text again to exit the
screen, also the color. So let's go back here. And let's see when the ma goes. Okay. So I think at
around this time, I am going to again
add key phrase for position scale and
rotation for the text. And at around the
ninth second mark, copy and paste the first
keyframes like this. So two. Okay. I think this looks good. Now, let's fix the color, like I think here, probably. Open up the color again. And now, do you
remember that we had a mask that we applied
the trim pass effect? So add keyframes for this
first one only for this mask only because that one that was for just the pink one. Remember? So I'm just going
to add one more just for the actual
purple color. So around here and then here. And then I'm just going to copy and paste these keyframes. Shoot Right. Okay. Awesome. And now, do you see the pink color
that's behind the purple one. Let me just select the
two and make them side. So with that. All right. And the last thing would be to just
animate this slide. Last time we didn't animate it. It just started right
there because the bell. So now, I would like to
actually animate it. I'm going to move
the acre coin here. I'm going to click
on S, so I can bring up scale. At
a keyframe here. And then here. Actually, that would be the first thing to disappear. I think that would be better. So This is the original
position is fine. And then, before the
color disappears, I'm going to click on this icon. So I don't want to constrain proportions now because
you see y in a second. So just click on this one and make sure the scale is 10020. Okay, I would like to have
these two overlap a bit. Okay. Okay. I think
this is perfect. Let me see the whole thing now. Great. And I'm going to click. That would be my
favor. Ten ten. Yep. Okay. Now, I just
need to move the bow. And I'm going to do it here. So this is when the color in the text disappears right here. And immediately after that, I'm going to click on the bow, click so I can see
the keyframes, add keyframes, and
then I run the s. It shouldn't be that fast, so copy and paste these. So your composition.
Let's see that. Ten. All right. I
think this bits you so. So let me select these. Ease them. Okay, I'm
going to move them a bit. Now, this is too
fast, let's see. Okay. Ah, so he love it. Click N soll beat the N, and I'm going to go here,
and that'll be the start. Okay. Let's see this
cool motion now. Okay, great. Well, we are ready. This is the animation we
created together guys. I really hope you
enjoyed this lesson. And I'm super excited
to see your work. It's a very cool
character animation combined with logo animation
and text animation. So I really hope you
learned a lot from this. Probably the last
thing you can do, if you want, is to
click or control. So you can create a solid layer. So basically a background. I'm just going to add a
white background, I guess, and I'm going to bring it
down here so that I can actually have some color
of a background here. Great. So thank you so
much for your time, guys. I really hope you enjoyed this. The project files are
linked below as always. And happy animating.
17. Export Your Animation: There. So by now, you should have the finished
lama animation of this coup. I reveal that we
created together, super excited to see your work in the project
gallery, by the way. I wanted to record this quick video to show you how you can
export your work. So there are two
ways you can do it. One way would be to render
an after effect directly. And then the other
way would be to use the media encoder ya The first way if you render it natively in After
Effects, by the way, the reason why a lot
of people like to use the media encodor is because you can do like it renders
in the background and you can animate something
else in the meantime. And it also gives you
a lot more formats that you can render on. But if you're using the
latest After Effects version, And this is a new
thing that they added, by the way. It
wasn't there before. But if you're using
the new version, you can now render in h264. It wasn't like available
in the previous version, so that's thank you so much, Adobe for doing this. But if you want to
render natively, in after effects, I'll just recommend you just
select this format. You can also play with other
formats if you need it, export it any other way. For example, if you want
it to be transparent, you can render PNG sequence, and then from there, click on RGB plus Alpha and then render a PNG
sequence that's transparent. But if you want to use
it on social media, or like anywhere online really. And you want this file
not to be 5 gigabytes. What would be the case with V format or the
quick time format. You might just click
on the MP four format. Then you can leave the
settings as it is. Now, the bit rate, well, it's better to render
with a higher bit rate. For this type of animations, it's not that important, so I'm just going
to click OK here. I'm going to click
K. I'm going to select where I want
my output to be. So, for example, here, and then I'm going
to click on Render, and it will start rendering. The other option
would be to again, click on your main composition, the composition, and then
add to media encoder Q. From there, you
should see the pop up with the media
encoder launching. By the way, it sometimes takes
some time to appear here. So from here, you can quickly select your format as
you can see there are a lot more formats
than rendering natively in After Effect. So for example, you
have an animated, you have a normal J,
you have GPA, PNG. For now, again, I'm going to
go my settings are always because most of the animations I create are for digital use. So I'm just going to click
on the MP four format. And then here I'm just
going to make sure it's match sorts high bit rate. And then the output file
where I want it to be. Yes. And then from
there, I'm just going to click on this C,
and it will render. Don't forget to let me know
if you have any questions and to post your work in the project gallery.
Thank you so much for.
18. Class Recap: Right, thank you so much
for finishing this class. This is the last video. And I want you to take
this time to thank you for really taking the time
to finish this class. I really, really do
hope you enjoyed it. Let's do a very quick recap
of what we did together. By now, you should have
the finished video. And as a quick summary, we started with the bell.
We animated the bell. Then we animated the mascot, and then we created the mask. And then finally, we
animated the typography. And then we created a loop
out animation where the Lama. Goes down so that it creates
this very, very nice loop. If there is one
key takeaway here, it's working with timing. In animation, timing is very, very important, actually, it
can make or break a video. So sometimes, especially
when I started out, I was doing a lot of motion
at the same time without keeping in mind that
some animations just need time to breathe. Also, the viewer's attention needs to be directed to
where you want it to go. So when you have already an
idea about animating a logo, and make sure you always with an idea of how you
want it to turn out. Make sure you have the
right timing and play with timing so that
it's not too rushed, and it's not all over the place. I really do hope you
enjoyed this class. And if you did,
please please please don't forget to add your
work to the project gallery. It makes me so happy to see
your work every single time. And I'd love to be able
to provide feedback for the resources or to answer any questions
you might have. I really am here to answer anything you might
have as a question, and I'm available
to help you out. Please also, if I have a second, I'll leave a review
because this is super helpful for
me as a teacher, and it encourages me to
keep doing what I'm doing. So I'll appreciate it. So thank you for your time and
attention and happy anime.
 Ina Gavazova, Motion Design Mentor | CEO of Kashu