Transcripts
1. INTRO: Line in wash. Simple definition of
line and wash is drawing your subject and then painting it with
watercolor washers. Sometimes is called
ink and wash. Wash is just a mixture
of watercolor in water with a
consistency of milk. For the line drawing, whatever pen you are using, make sure the ink is waterproof. Hi, my name is Dan and I'm going to walk you through
the process of line and wash step-by-step
from the beginning till n. We'll look into tools and materials
needed for the class. Then I will show you
some tips and tricks. I have chosen two birds
with color similarities, so we don't have to
use too many colors. We will begin with
pencil sketching, then line drawing
with fine liner. Painting with watercolor wash. Finally, adding
highlights and details. We will end with a
class project by choosing whichever you prefer. Let's begin the class
in the next video.
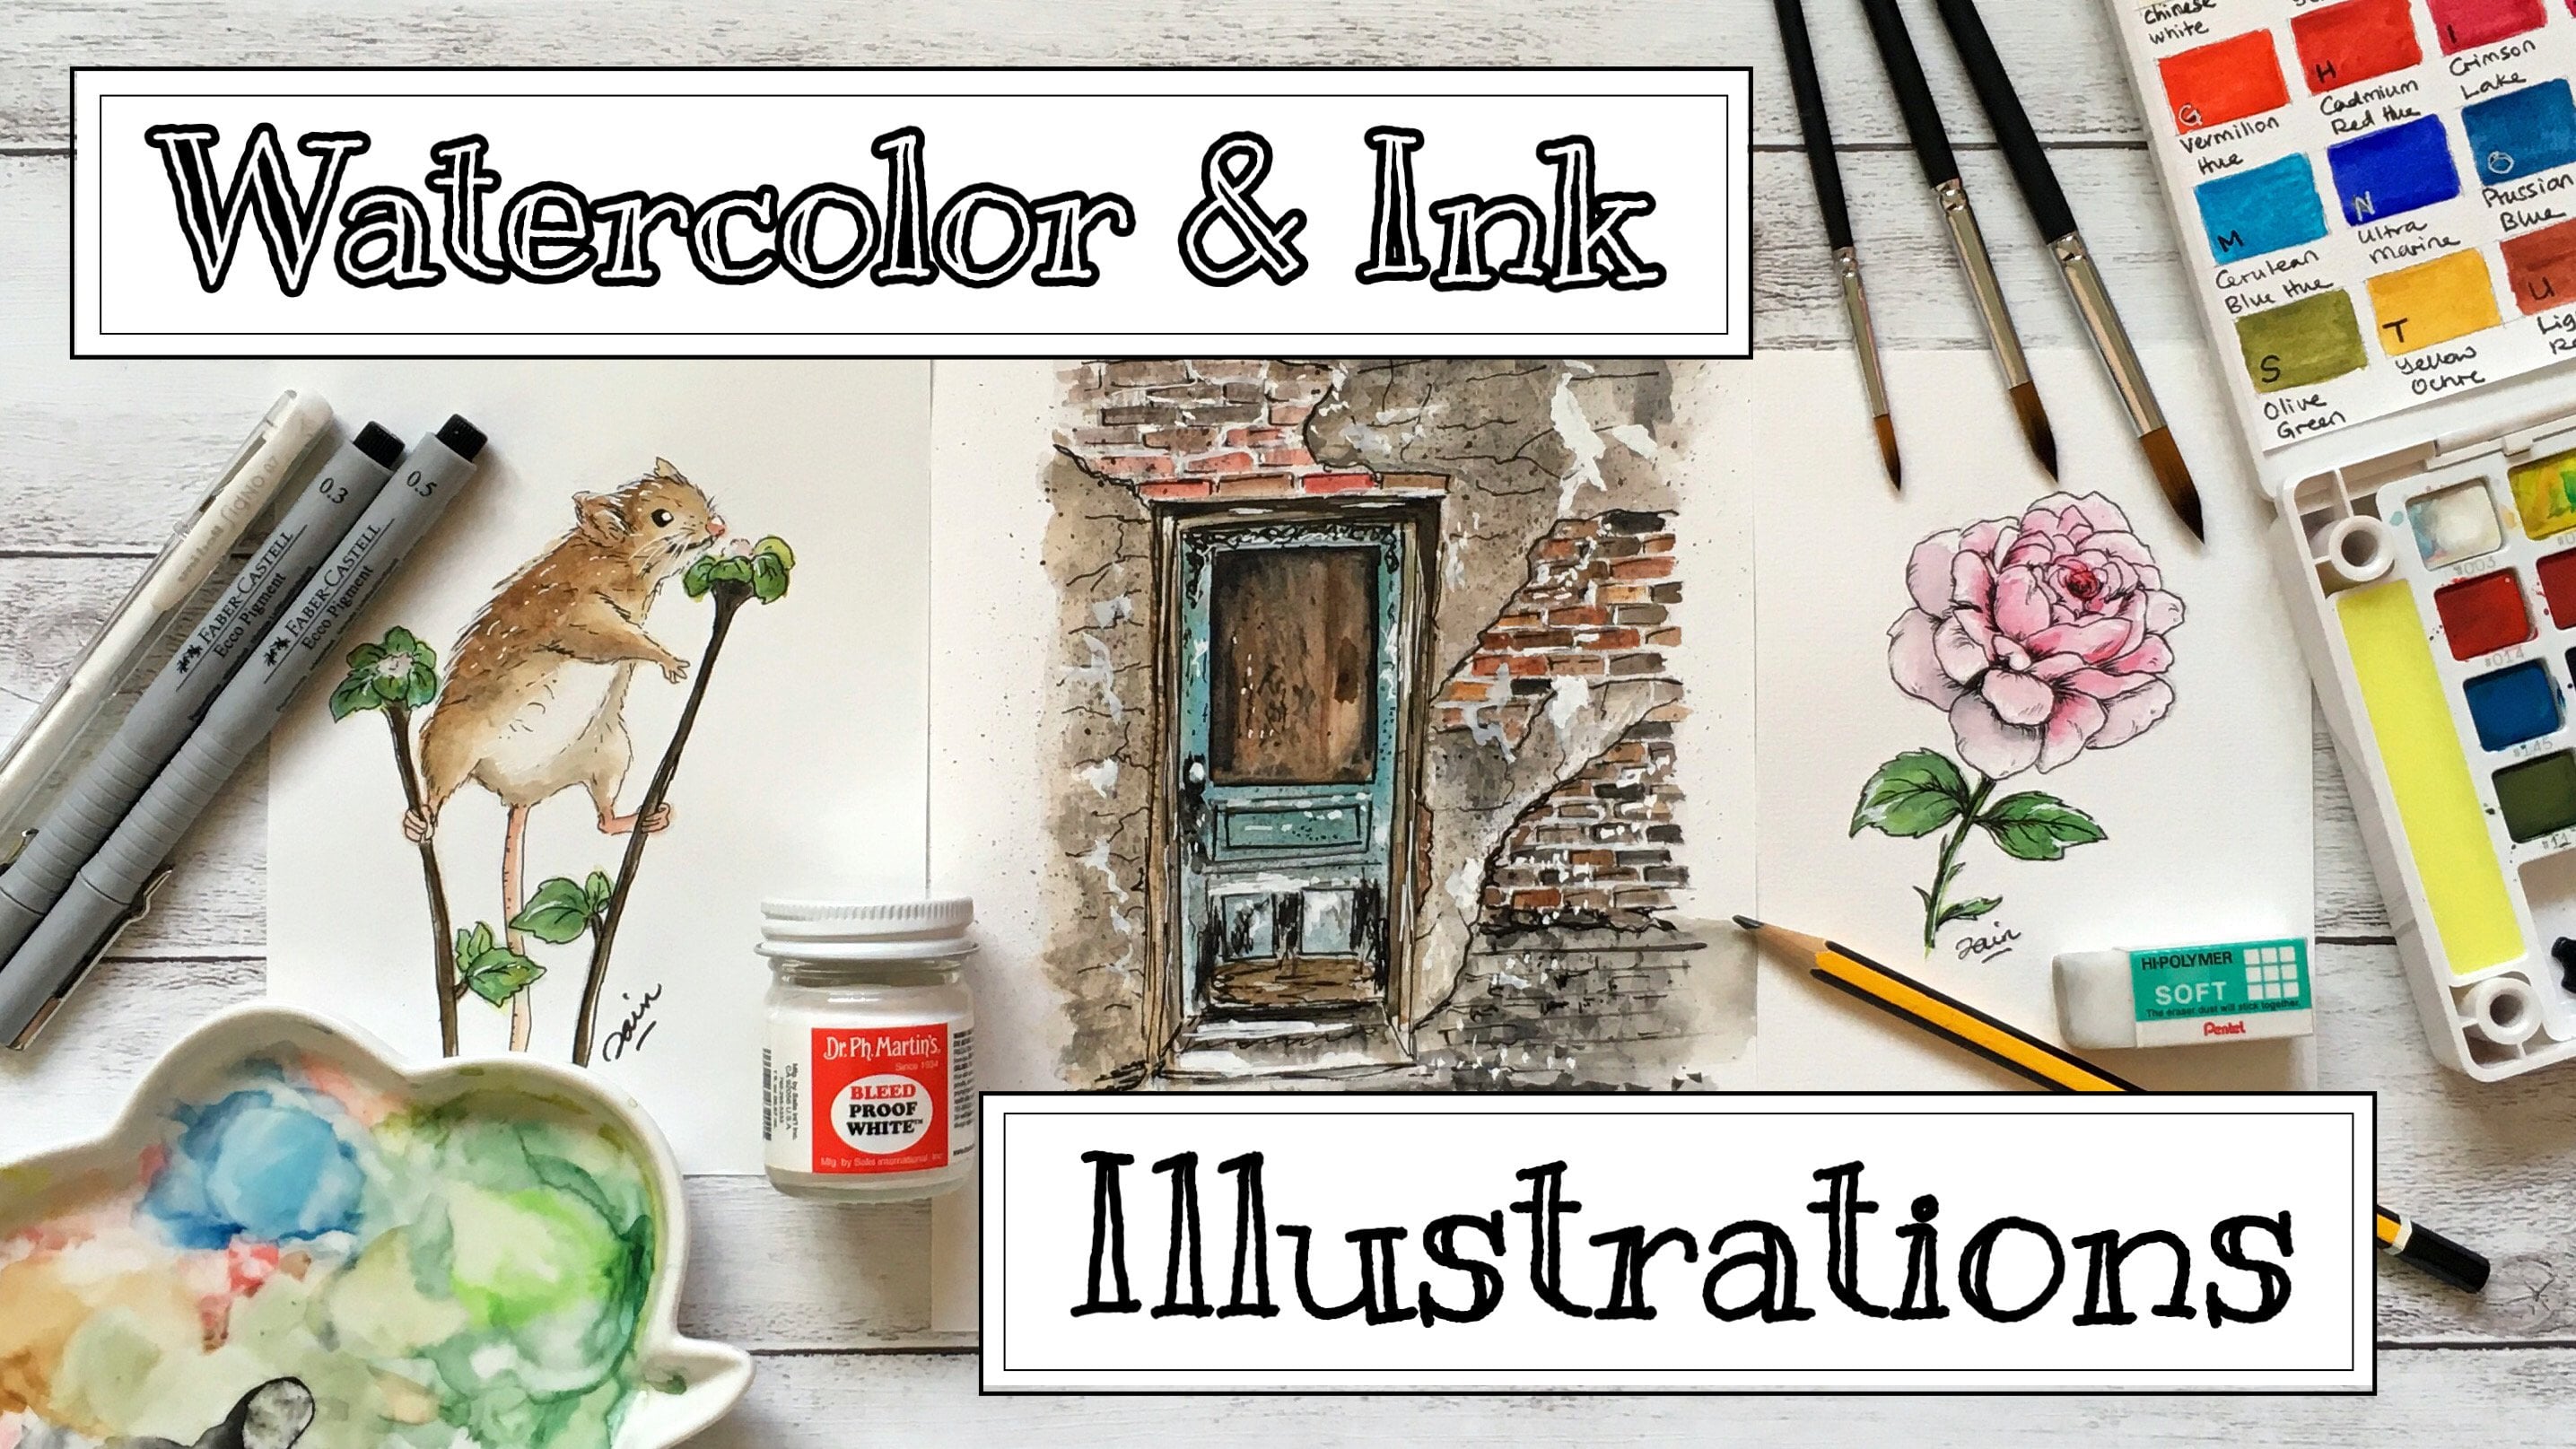
2. Tools and Materials: Tools and materials, things
you need for this class. Some recycled papers
for practicing. After practicing, you can use watercolor paper of your choice. Your paper can be smooth, hot press or textured, which is cold press button must be thick enough for washers. The thickness is 300
GSM or a 140 pounds. You can use a sketch book of the same specifications
as I mentioned just now. Should be pencil and an eraser. Fine liner with waterproof ink. I'm using 0.5. My pen
is febrile customer, but you can use
whatever you have. If you have a fountain pen, but it must be filled
with waterproof ink. I'm using platinum
carbon in from Japan. White gel pen brushes of three sizes, size to size 46. What the colors? Use,
whatever brand you on. But it's always good to
make a swatch like this. It's easier to see the
colors that you have. Two jars of water. One for cleaning
your brushes and another is for adding
clean water when needed. Pellet preferably white color, kitchen towel or a rag. Now, I will show
you the colors I will be using
throughout this class. These are colors that you properly probably
have in your palette. If you are using dry pens
of colors like this, your pens with a couple
of droplets of water. First, you can use a
spray bottle to wet them. This is to activate the colors. First color Indian yellow. Or you can use any duct
yellow that you have. Raw umber, burnt sienna, red color, Indian red. If you don't have Indian
red in your palette, you can mix red, burnt sienna, and a little tiny dot of
black color. Rule in blue. Indigo, which is the
very dark intense blue. Last but not least neutral T. You can get it in
Daniel Smith as moon glow color I'm using here is from
Winsor and Newton. See you in next lesson.
3. Tips and Tricks: Tips and tricks. Let's look at palettes. Ceramic palette versus
plastic palette. Ceramic palette wash, very clean in colors won't stand
surface of the pellet. As for plastic ones, I think it depends on the quality or the
types of plastic. Look at the stands on
this plastic pellet. Pellet is formed. The Sakura set. The standards won't go off even though I wash with
soap and water. This is another plastic palette. These two areas were covered
with Dr. pens before I went off the right parents who have just a damp towel and
see how clean they are. I guess this plastic material
has a better quality. This palette has an
extra tree to use, but so far I only use
the two smaller ones. It has EPT in New else for
you to feel your pins. I also have a tin palette, which I think is very
good as it won't get. Stan. Also have empty spaces
for color mixing. Let's look at brushes. My opinion, the size
of your brush usually depends on the size of your
painting or the subject. Here are some examples. Bending on a sketch
book usually don't need a big brush because you're
painting is quite small. I used them, but it here depend the background of the spender. With this size, I can easily
move around the panda. For the smaller areas like
the ears and around the eyes, I changed to a smaller brush, which he's done before. For the eyes and a nose
which are quite small, I will use number
two or smaller. The branch or the tweet. Fine liners. I usually use your 0.5 as I often paint
on my sketchbook. This usually is for the
outline of the subject. Use bigger ones like one. If you're painting is
bigger than A4 size. For final details by hairs, eyelashes or tiny
feathers, 40 spurt, I will use the open one or 0.3, depending on the size
of those subject. Again, now paper,
his papers with thickness of at least 300
GSM or 140 pounds as we are, you going to use quite a
lot of water on the paper. It can be made of
cotton or cellulose. What adjusts? Try to use to just
water if possible. Gentlemen, one is for
cleaning your colored brush. Then you wipe it off. Watch again in gentlemen, to make sure it's clean. Wipe it off. In January two is always clean if you need to wet
an area with water, always take from Gentlemen tool. Now let's do some
warm-up exercise. Always do warm-up exercise
before starting a painting. This gives you a
better brush strokes. Just pick up any
colors available on your existing palette
and start painting. Penn us many swatches
as you like. With a smaller brush, pick up another color and
practice small short strokes. This is a good exercise
for fur and feathers. Now try on top of
discolored area. Try Boolean disrupts longer. This can be for whiskers of
animals or long head animals. Now, lifting technique. Lifting is when you want
to highlight an area or to be race or color
from a colored area. Then let's start to
paint this area first. Wash your brush
and make sure it's clean and wipe off excess. What sort of brush is just
damp and not too wet. Now do the lifting
as shown here. This is done more easy and cleaner on a damp painted area. You can repeat to
get more pen off, but don't wrap
with your brush or else a fiber of your
paper will come off. You can also leave with a
dry paper towel and again, do not rub, but
instead just debt. Harsh edges. How to soften heart or
harsh lines or edges? Let's start painting again. We are going to soften
this hotline here. The clean brush with water and start to append
the water onto the edge. It works best when the
issue is still wet. Here the pink pen is almost dry, so it's not easy to
soften the harsh lines. Let's do another example. Pens some clean water
onto the wet ages. You can see here that
it's easier to blur out the hotline compared
to the previous one. Here are the comparison
harsh lines still showing on the top example and below the harsh line
is blurred in soften. Split. Split this edit to the
background to add interests, especially if you don't want
to pin your background. Mixed pen and water together
to a watery consistency, locked them with your brush. Here, I only want to split
it on the white area. I'm covering the subjects. To splitter simply tap
the brush on your finger. If it's not working, then you haven't learned
enough pen onto your brush. After split the ring, I like to use my brush in pens some spots with
different colors. Or you can simply mixed some splatters bigger
with the brush. Another split the ring method
is using an old toothbrush. The toothbrush with pen
and run one finger along the bristles and the toothbrush
will give more splatters, but there are tiny ones. Here are the comparison. Now to special bonus. Continuous line drawing, drawing the whole subject without
lifting your pen. I have prescheduled
my Robin and I'm going to start from the peak. Give this method a try and
you will see how easy it is. You can also draw
without a pencil sketch, which is even more challenging.
4. Practice Makes Perfect: The more we practice, the more we'll get better. Let's start sketching
our or being with pencil on the recycled papers. The way to sketch is to pick shot markings instead
of long lines. Sketching like this
makes it easier to roughly estimate
the shape of the bird. Don't worry if
your sketch is not perfect as this is
your first practice. The sketch is a guideline to your final drawing
with your pen. Later. When drawing with your pen, you can always adjust
your lines as you draw. Also, do sketch out the color
suppression of the bird. So it will be easier when
you do your coloring. Now the sketching is done. Next step, let's
draw with the pen. Now. Since this is a practice, I'm just using a ballpoint pen. Remember, line drawings are not supposed to be a
realistic drawings. So Don M for
perfection does what? Mixed line drawings. Very interesting. Okay, if the shape
of your birth is different from the
reference photo, because you are
drawing a robin and not particularly special Robin. Different. If you are
drawing for commission, then you have to follow
exactly how it looks. Goals is done now. Now for our next drawing, Let's start our second but
the belt that king fisher, same as before, starting
with some sketches. I said before I purposely
chose this book. You will get the feel of a
more challenging approach, which makes it a little
more interesting. Compared to the robin, where it has a common
shape of every audible. Take your time to sketch the different parts
in this book. We don't have to
sketch the details of the feathers on the wings. And also on the top of the head. Simple shifts to just suggest
the crest of the head. Now it's time to
draw with your pen. I always start with the beak. Now we can draw the
spiky hit with. Following the pencil
sketch are shown. Draw with jagged lines to
suggest feathers on the bird. Symbol, up and down movements to suggest
longer feathers for the wings. Of course. The tail part. Same jagged lines for the colors on the belly. Stan. Practice a few more times of sketching and drawing
and in no time it will become more and
more easier as you go. See you in the next video.
5. Line Drawing: Line drawings. Practice society. Now for the actual drawing on your watercolor paper or
watercolor sketch book. Start sketching
with shot markings, like what you've practiced
in the previous lesson. Don't be nervous. Course you can always erase whatever you
don't like in Sketch. Again. Don't have to hurry, just take your time
and you will be fine. Sketch lightly to avoid
indented marks on the paper. Eraser is your best
friend in sketching. But do not rub to heart costs. We don't want to lift the
fiber on the paper surface. Remember to sketch the color
separation of the body. Now let us draw
with the fine liner or your fountain pen
with waterproof ink. I always start from the
top of the subject. This also to avoid
your hand from touching when the
ink is still wet. You can always stop
at any point of the sketch and start
drawing again. Because this is not a continuous line drawing is
just a normal line drawing. I will show you how to
draw this robin again in a continuous line in the
tips and tricks video later. Now it's done. Wait till the ink is dry, then erase off the
pencil marks letter. Now it's time for our belt. But King fisher,
the second book, if you notice, the
white of the face, is the same as the
length of the beak. Can always use your
finger to measure. I said before in the
practice lesson. Take your time in
measuring the paths. And again, it doesn't have to be exactly the same as
the reference photo. You can get more details when you are drawing with your pen. Once finish, check if you are
satisfied with the sketch. If not, you can always some men. Now you can start
with the pen drawing. You can always check and look at your reference
photo while you are drawing to see if there's any part you are
missing whilst sketching. Now is done, you can see the comparison between
your practice piece in your final piece. See you in the next video.
6. The Wash: Watercolor wash. Let's repair all the colors we are going
to use in this class. Let's drop some water to
activate the dry pens. This is cadmium orange, which I didn't lease in the
tools and materials video. If you don't have this, you can always speaks a
little red to yellow. Yellow is Indian yellow. Raw, umber, Burnt Sienna, blue, neutral teen,
Indian red, red color. Indigo blue. Here I hopefully stood all the
colors so you can see, you can start
blending to achieve the colors of the bird
with this palette. Here I mix some
yellow, burnt sienna. It is quite yellowish. You can lead a bit
more red color. You can check with the
reference photo to get the Nuris possible color. To get darker part of the robin, we need to add more red in Sienna and afford the front and the side of the bird. I use indigo, neutral
Dean and cerulean blue. More color for darker shade and more water for lighter ****. You don't have to mix
the same amount like me because your color might be
a bit darker or lighter. For lower part of the body. Raw umber and lethal
neutral team. Little Endian read
for shadows or ****. Now for the tail and the wings. Mix four colors together. Raw umber, sienna, Indian
red, and neutral tin. Get the darker brown color. For the legs, mix
some red, indigo, neutral thin mixed you you have something looked
like a dark maroon color. At least down the
color for each part. We will be using
this same palette for our belt that
king fisher also.
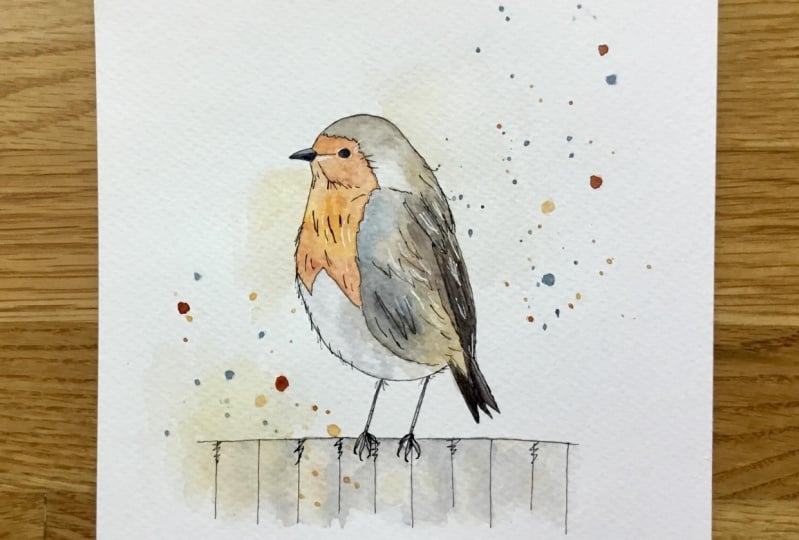
7. Lets Paint : Robin: Let's spend our first
book, the Robbie. Let's erase all the
pencil box first before we begin our
painting process. Using the pellet,
we prepared this. Now, let us start
with the belly. Begin with your brush
with some water. I'm using number six brush, but if it is too big for you, you can change the number for. Wipe your brush a little
if it's two dripping with the whole belly with water. Pick up a tiny bit
of neutral team, then debt onto the wet belly. Not to worry about
it being too dark. Watercolor will dry lighter. Pick up some more color if
your brush ran out of color. Remember to always wash your brush whenever you
want to change color. There are some light brown color on the bottom side of the bus. Bawdy, pick up a liter raw
umber and depth onto that area to get a darker color mix, a little burnt sienna and
neutral tint to the raw umber. Try to mix as close as possible
to the reference photo. That color below the
wings to show shadows. Now down to the platform
under the book. Wet your brush with clean
water and wet that area. Pick up some raw umber and start painting the platform as shown. More on the left side and
less on the right side. Neutral Dean pen along the vertical lines to suggest
shadows of the platform. Let it blends into
the raw umber, but make sure the
surface is still wet. The surface is too dry, just not your brush with
water in width area again. This will mix the two
colors blend together. Then it more raw
umber if needed. Now to the front part of the book with this
part was what? The first mix? Orange, yellow and a
little burnt sienna. If you don't have orange, a little bit of red colour. Pen the whole front area
with this mixture of colors. Darker shades mixed red, Indian red and yellow. Along the jagged edges
up to the first area. Let it dry. Now mixed sienna, neutral, Dean, raw umber and Indian red to get a darker brown pen from top of the head
down to the wings, leaving the neck area white. Notice that I'm painting
on dry surface here because I want this
part to be darker. Now apply clean water to the neck area and
blend the brown into little indigo while
this area is still wet. It more indigo to these areas. Blend some indigo and neutral tint to get
grayish blue color. Apply it to the dry Bailey. In water, too blurred edges. Some more water to blend
all the colors together. At neutral tint our
depth brown to get even darker brown
for the tail part. Mixed neutral teen and
indigo for the beak. Here I notice that my brush is too big for this small area. So I change it to a
number four instead. Pen only the lower
part of the B. Then it clean water to the top part in blend
into the lower part. Bringing the color out
into the first area also. Since the first is darker
at a lethal Indian rate. Now it's some red color
to brighten up the face. Adding some red and
raw sienna to give some texture to the chest area. If you stood at a
little endian rate. Now a lot your brush with
some extra water and tried to push some
colors out of the body. This gives a shadowy background
color from the bird which creates an atmospheric blue pen, some strict max with neutral Dean onto the
site of the belly. Didn't blend with
some clean water. Not washing the brush. It's some water onto
the outer part of the bird to create that
atmospheric look again. Some more indigo
blue on the neck, again, as it dries
a little pill. Brush true, the bird with some clean water to
blend or to blur out. The edges. Now lift some color up below the chin by using a damp brush. Some more raw umber to the
bottom part of the belly. Basically just add more
colors where you find necessary as the colors will be lighter
once they are dry. Mix some red into the existing grayish blue to
get that, that maroon color. The pen onto the upper
part of the legs. Now use some water to bring
the color down to the feed. Mix more of the maroon
and penned upper legs darker to give a shadow loop. Mix Indian red with
neutral tint to darken detail and the wings. The right side of the
platform with water than it, a mix of raw umber in yellow to create that
atmospheric look again. More water to disperse it more. Some more shadows on the
right side of the platform. Water to blow up. The harsh edges. Mixed a little grayish
blue and raw amber in pen, bought them of the belly. Now use black for the eye. We've brush number two. If you don't have black, just use your fine liner pen. Fill up the whole
area and let it dry. Some water on the indigo color in locked up your number
six, brush with it. Your bird with a piece of paper. Then start splintering with taping your brush
on your finger. Now for some yellow
and orange color, split on the same area. Have a mix of color. On the other side. Using the same yellow. You can pin some beaker
spots with your brush. I'm painting some
blues and some reds. Let your painting dry and we'll come back for
the final touch up.
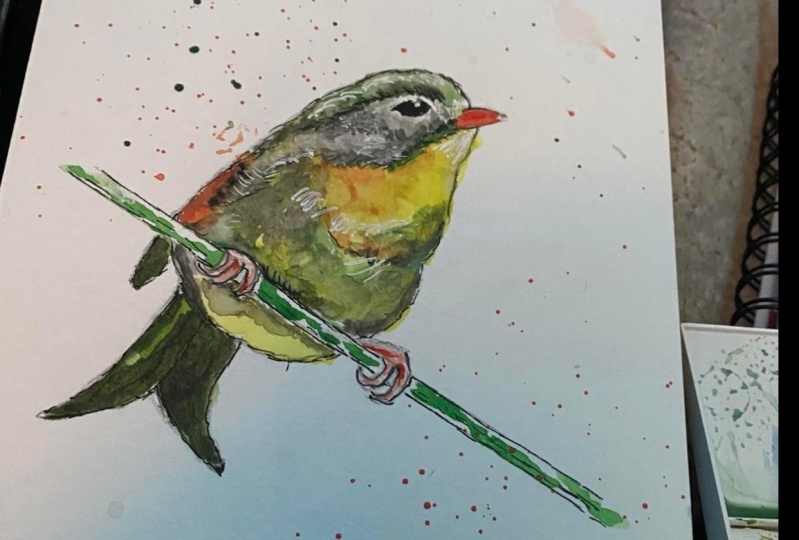
8. Lets Paint : Belted Kingfisher: Let's spend the belt
that king fisher. Before we start, remember to
erase all your pencil marks. We're still using this
same palette cause the king fisher has similar
colors to the robin. First you wet your number four, brush with water and paint
it over the neck area. Pick up a little
neutral tin and tap a few spots around
the inner edges. And then you blend
with some water. Now with the next white
area with some water. Pick up raw umber and
depth deciliter on the right side suggesting reflection from the
neighboring color. Now with the last white area, some water on this
part of your palate, which has a mix of
neutrophil with indigo. Pick up a more darker shade for the bottom part of the book, where there are more
shadows below the wings, just next to the tail. The head area except for the eye and the white spot
between the beak and the eye. My palette just went out of
neutral Athenian indigo. So I add some more from my pens, mixing the two colors
together again to get that grayish blue color. Then pen the whole
area of the head. Mix a darker grayish blue and a leaper yellow to get a
mix of green and ****. And apply it to the
front of the first area, only the front part. Now a darker grayish blue
for second layering. Now blend the greedy
**** onto the head. Depth a little indigo
onto the greedy shift. Now wet the whole wings. Mixed neutral team with
thoroughly in blue and pen the wings down
to the tail area. Depth some indigo
onto the wings. Without washing your brush, pick up some neutral
tin and pen detail. Mix some grayish blue
again and pen on the beak. Leave whitespace as shown, and blended green shed into it. Now wet the rest of the area. Mix orange, Indian
red, and burnt sienna. Now bend the mix onto the book. Cover, that area
where you have just wet it a little more color. Second layer and let it blend into the gray area of the wings. Let it dry. Now for the branch, as usual, wet the area first. Apply this with the
green area here. Dip your brush on the towel. If your brush is too wet. Pick up some more color
and it's some raw amber to the green pen on the lower part of the
branch where it is darker. Raw amber over the first layer. Some water onto the row, Amber on the pellet
and pen as Sean. Extra water onto the pen and
push it out of the branch. Mix orange into the greens pen on the bottom part
of the branch, pushing it out
like the top part. It more water to spread it out. Using a clean damp brush, try to blend orange color
into the white areas. Picked up Indian yellow
with a wet brush and pen onto the orange area. Using a dabbing motion. Adding some red into
Indian red to give a ductile reached red pen on the lower part of the orange. Now it raw umber to your Indian red pen
all over to blend it. A little orange to highlight
a few places are shown. Now wash your brush and
wipe off the excess water. Then lift the colors just
below the neck as shown. And cerulean blue to that spot. Depth some Indian
red onto the front of the neck just
below the big area. Then add some water
to spread it out. Mixed neutral,
indigo, Indian red and orange to create a
damped brownish blue. Depth the mixers onto
the chest of the bird. Then pick up some grayish blue in depth onto the
bottom of the book. It's some water to blend. Little orange on
this white part. And at water to blend it. A little cerulean
blue on the leg. Now pick up some indigo with a wet brush pen along the lines of suggests
feathers for the wings. Water to blow the harsh edges. What some more indigo and
penned up a body with flying strokes to give that
feathery effect. Depth some clean
water onto this rocks to remove hash lines. Now add water to this spot here. Indigo onto the wet spot. Pen indigo on the first and some along the
edges of the hip. Blend with some water. Pen some lines with neutral thin while the area
is still damp. Number two, brush
the smallest taxon, black and pen, the
whole eye area. Wash your brush and pick up some neutral tin and pen
strokes on the wings again. Then wash with water. Lastly, pen the fit with mix
of indigo and neutral team. Our book is done.
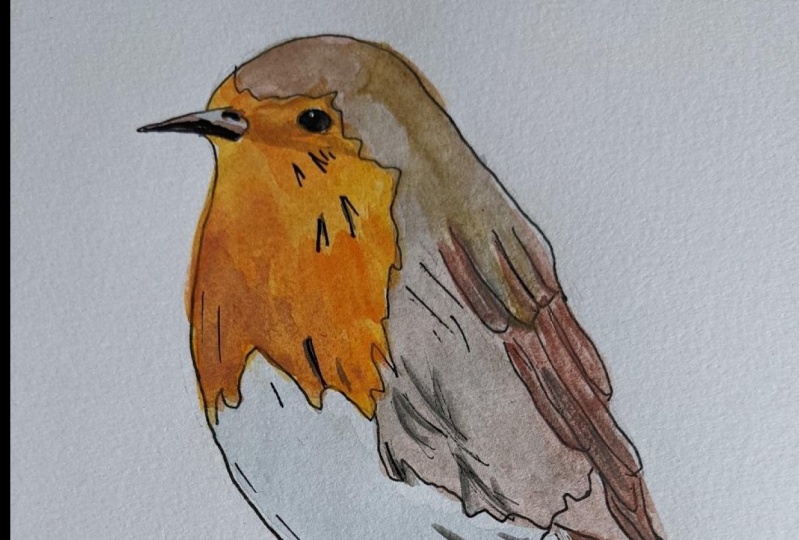
9. Adding Details: Adding details. Let us use a white gel pen
for adding highlights. Let's start with the
highlight in the eye. The sheen on the wings. Down to the tail. Few strokes here and there. Basically just to give that
federally look on the board. Some highlights on the bee and also on the legs. Now with your fine liner, draw a few fine strokes
along the edges of the bird and some places
where you think is necessary. These also will give
some **** to the book. Now if the king fisher is basically the same
as the Robbins, so just watch the
process as I go along. You can see the eyes
once it is highlighted, the birth really comes alive. Highlight is actually very
important in painting. Stand back and check
if there's any place else that you need
to add details. If none, then finish off with your signatures on both births.
10. Recap and Class Project: Before the class project, let us do a recap of what
we have learned so far. With the reference picture. As a guide, we sketch our
bursts from the sketch. We drew lines with
our fine liner, and finally we append them
with watercolor washes. Is the time-lapse version of the whole process from beginning till end for both the books. Lou wash, the whole
full version of the process in the video
lessons again, if necessary, before you start your project, you can choose either
the robin or the belt, the king fisher, or maybe
you can just do both. Do post your project in
the student's gallery to show off what you have learned
to your fellow students. Also do take me at all your watercolor if you post
your project on Instagram. You can also watch some other videos for
more inspiration on my YouTube channel to the
link is in my profile page. Thank you and hope to
see you all next time.
 Zainab Mohamad Ali, Artist and animal lover