Lifestyle Mockups To ​Sell Art ​& Get ​Design Work​​ ✶ ​Free Downloads | Carrie Cantwell | Skillshare
Search

Playback Speed


1.0x


  • 0.5x
  • 0.75x
  • 1x (Normal)
  • 1.25x
  • 1.5x
  • 1.75x
  • 2x

Lifestyle Mockups To ​Sell Art ​& Get ​Design Work​​ ✶ ​Free Downloads

teacher avatar Carrie Cantwell, Illustrator | Surface Designer | Teacher

Watch this class and thousands more

Get unlimited access to every class
Taught by industry leaders & working professionals
Topics include illustration, design, photography, and more

Watch this class and thousands more

Get unlimited access to every class
Taught by industry leaders & working professionals
Topics include illustration, design, photography, and more

Lessons in This Class

    • 1.

      Lifestyle Mockups To ​Sell Art ​& Get ​Design Work

      2:34

    • 2.

      Class Project + Bonus!

      2:18

    • 3.

      Lifestyle Mockups: The Psychology of Aspiration

      3:33

    • 4.

      Fake It 'Til You Make It! Mockups For Pitching

      3:33

    • 5.

      Relevant Mockups For Art Styles & Industries

      5:03

    • 6.

      Apply Patterns to Mockups: Part 1

      16:01

    • 7.

      Apply Patterns to Mockups: Part 2

      14:47

    • 8.

      Apply Art Prints to Mockups

      16:19

    • 9.

      Adjusting Details

      15:44

    • 10.

      Thank you! Final Thoughts...

      2:25

  • --
  • Beginner level
  • Intermediate level
  • Advanced level
  • All levels

Community Generated

The level is determined by a majority opinion of students who have reviewed this class. The teacher's recommendation is shown until at least 5 student responses are collected.

716

Students

40

Projects

About This Class

>>> SNAG THE FREE CLASS BONUS BUNDLE HERE <<<

Go ahead and grab the free mockup (you can use in your portfolio!) that’s included with this class in the Projects and Resources tab below, it’s under the word “Resources.” You can also get the class resources file which includes a link to the Photoshop free trial and the link to my bonus bundle.

The class bonus bundle includes 2 more free beautiful lifestyle mockups that you can use in your portfolio right now, some helpful tips for identifying what kinds of mockups to use for your particular art style and for specific industries, and resources for getting your hands on even more mockups.

ABOUT THE CLASS:

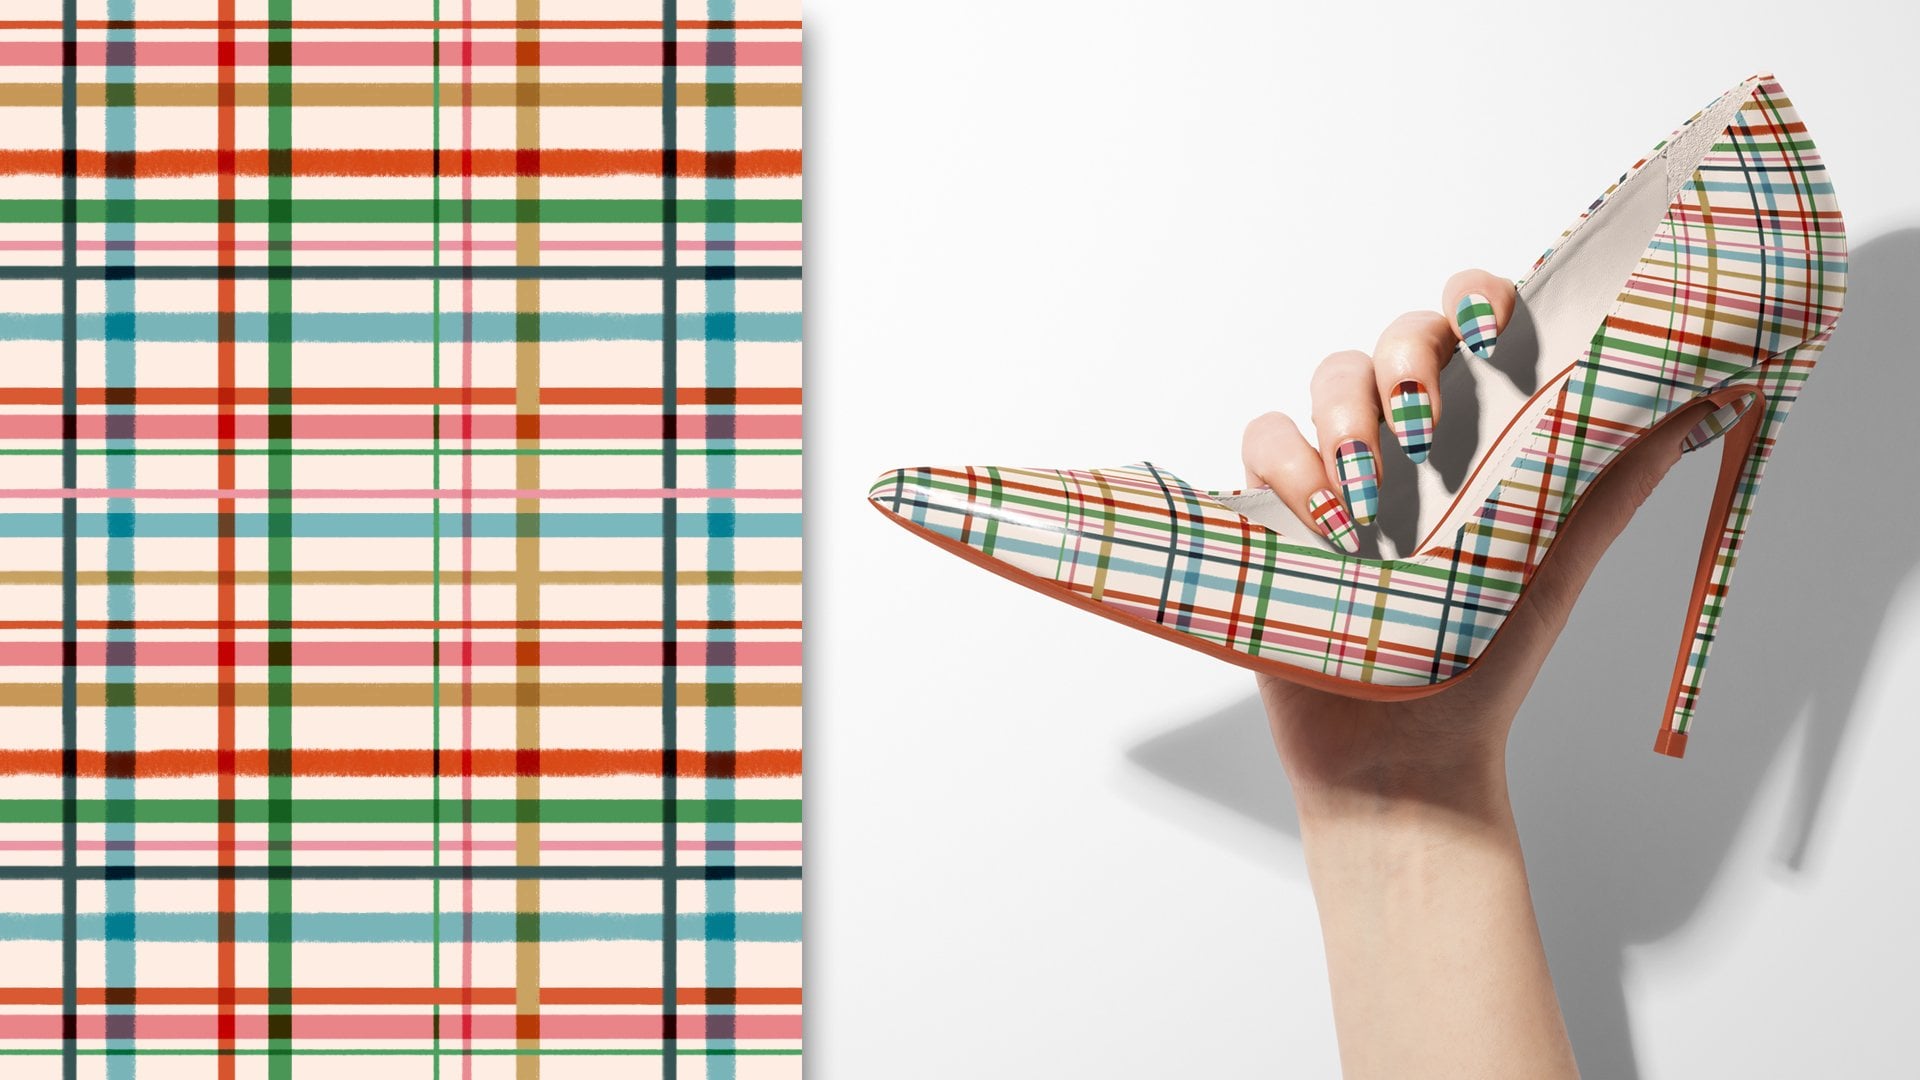
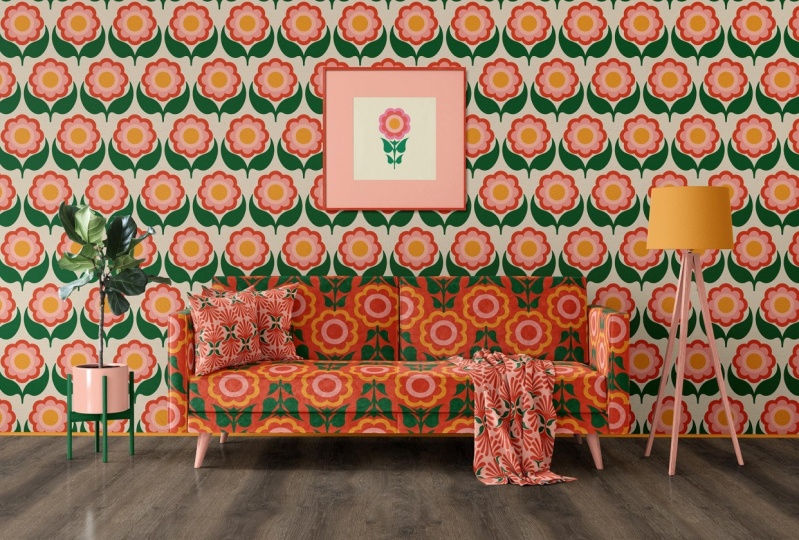
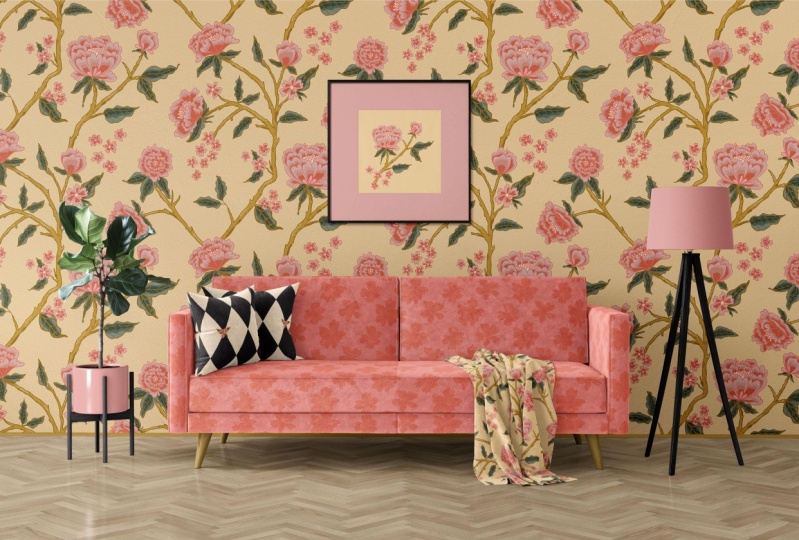
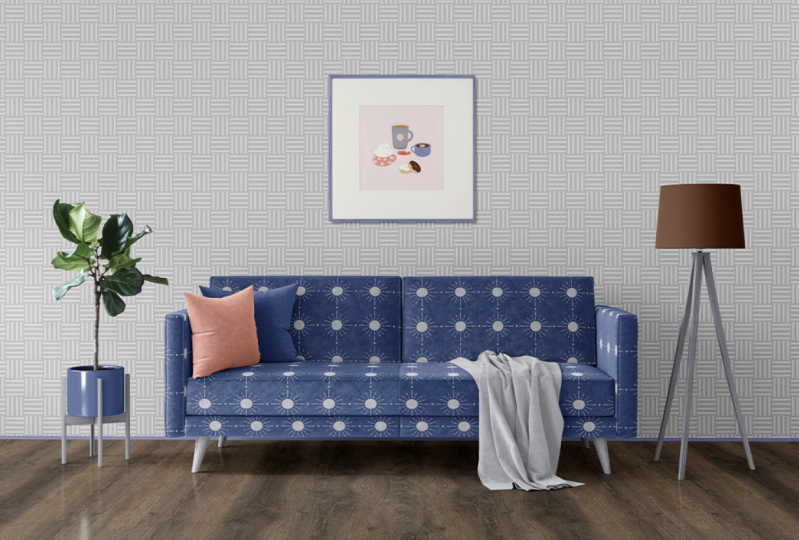
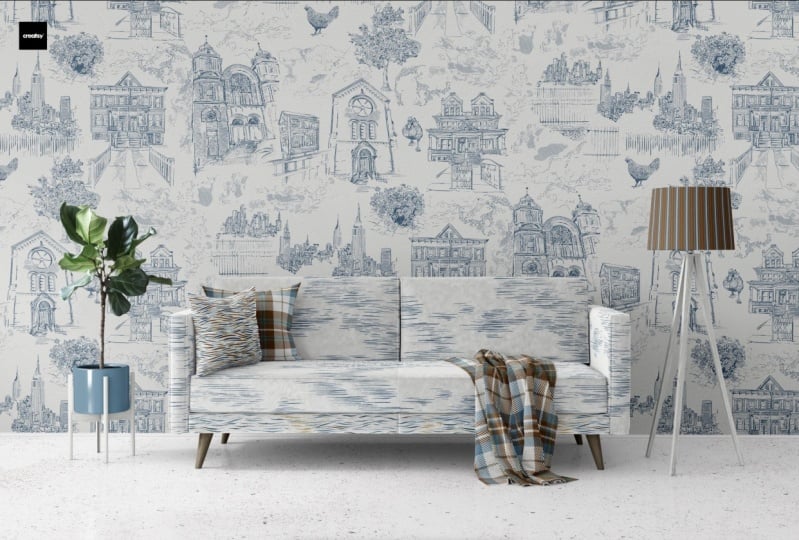
When you see a piece of abstract art in a hip mid century modern living room, or a floral pattern on a duvet cover in a romantic beach cottage, you think “yeah, I want that lifestyle, so I want that in my house!” That’s because those photos tell a great story. That’s why brands we all know and love don’t just show photos of clothes on a hanger, or images floating on a white background. They show their products in context, in a lifestyle you want. If you want to market your art, you need to tell a good story too.

My name is Carrie Cantwell and I'm an illustrator, surface designer and educator. But I’m not a professional photographer, and that’s okay! Want to know what I use to show off my artwork? Mockups! Mockups elevate your art. If you’re just starting your art career, mockups can help you fake it ‘til you make it. 

I’ve partnered with Creatsy to give you 3 free amazing lifestyle mockups in this class. In this class, I’ll explain the psychology of aspiration, and why lifestyle mockups can really help you sell yourself to brands you want to partner with. I’ll show you the nitty gritty technical stuff like how to work with mockup files, how to scale things like patterns and art prints to make sure they look great on any surface, and I’ll show you how to adjust details like color accents in mockup photos to really help your art pop.

This is a great class to take after you’ve finished my SkillShare pattern class, because you can apply your patterns to real products. In this class, I’ll be using Adobe Photoshop, so it requires a basic understanding of the Photoshop interface. If you don’t have Photoshop, I’ll include a link to a free trial. 

I’m giving you a free lifestyle mockup you can use right now in your portfolio, and you can use this file to follow-along with me in class. I’m also giving you a free bonus bundle with 2 additional mockups, some helpful tips for identifying which mockups work best for what industry, and resources to help you find even more professional-quality mockups. 

So, are you ready to level up your art career? Let’s do this!

Meet Your Teacher

Teacher Profile Image

Carrie Cantwell

Illustrator | Surface Designer | Teacher

Top Teacher
Level: Beginner

Class Ratings

Expectations Met?
    Exceeded!
  • 0%
  • Yes
  • 0%
  • Somewhat
  • 0%
  • Not really
  • 0%

Why Join Skillshare?

Take award-winning Skillshare Original Classes

Each class has short lessons, hands-on projects

Your membership supports Skillshare teachers

Learn From Anywhere

Take classes on the go with the Skillshare app. Stream or download to watch on the plane, the subway, or wherever you learn best.

Transcripts

7. Apply Patterns to Mockups: Part 2: Alright, so now let's go to the next big, the biggest thing, we'll come back to these colors in another lesson, but yes, you can change these colors. Let's do the sofa. Now. One thing that is cool about this is that you can change the pattern on the sofa, right? One thing that I don't love and this is not typical of all mockups. So don't stress if you're like, Oh my God, that's so many layers, right? Because you gotta go and change all these. Typically, most mockup companies that create these, including Creatsy. They don't always separate out things like the sofa arms and it is nice when they do that. But I'm going to show you how to do this and it won't take that long. Usually it'll be just like sofa pattern or something. So let's do our sofa. So let's start with the top. I'm just going to start with the top layer just so that I can make sure I didn't miss anything. We're gonna do the same thing. Double-click here. Oops, not here. You're gonna double-click here. And we're opening. This is the I think it was the right side. It doesn't matter. Let's go ahead and create a sofa pattern. I think this is what I'm going to use. I believe. I don't know what should I use? This is probably going to be too much, but that's okay. I'm going to play around with it and see what I think. Here's another one of my pattern blocks, just like the other one. So I'm gonna do what I did before Edit. And then I'm gonna go to Define pattern right here. Click on that and you can just click Okay. Now here it is, it popped up in our patterns here. And if you go to Window and you go to Patterns, if that is not showing up for you and you wanna be able to keep an eye on what you have. You can just go to Window and dropped down to patterns. Again, I have a checkbox there because it is already showing we've defined our pattern. I'm going to leave this open. It's okay to leave it open as long as you can kinda keep track of what you're, what you're doing here. And again, remember this is our thing that we double-clicked on. So let me go back. Here we are again, the sofa right side. I just close that. I'm just going to open it again. There we are. We're gonna do the same thing again. We are going to go to Layer and then we are going to go down to New Fill Layer and pattern and just click Okay, and then here we are again, remember that from before. Now, when you click on this little arrow here on the right, there it is. This is same thing as over here. You're going to click on that. And as you can see, this is ginormous. Now, this is the right hand side of the sofa. So this is like a zoomed in. It's just a piece of the sofa. So don't the reason this is so huge is because it is a piece of the sofa. I'm going to change this to, let's do, let's do 50%. I'm going to see what I think. Let's do this. We're going to click, Okay, I'm going to click Command S to save or Control S on a PC. Command W to close it. And there it is. Now you can see, you see here how it's really hard to tell that scale, isn't it? That's just a little snippet of this thing. I was starting with the top layer because I didn't wanna lose track of what I was doing. But you know what I think I'm gonna do. I'm gonna go to a bigger part of the sofa. Let's go to one of these back pillows here. That's going to give us a really good idea of scale. So Let's see, These are the sofa pillows. So if you want to, if you want to be able to tell, see where it says designs, sofa, pillow left, that should be this. If you want to know what it is for sure, click on the eyeball, it'll hide it, look so you can tell. So before you go changing stuff, you can actually just hide and show it to see what you're going to change. Let's mess with this one first because it's going to show us scale a little better. I'm going to double-click on this square here and we're going to do the same thing we did before. So we're gonna go to Layer, New Fill Layer and Pattern. I'm going to click okay, and remember our scale that we just use for this was 50%. Let's keep it consistent and see what we think. So I'm changing it to 50%. I'm hitting Save Command S or Command W, clothes, there we go. Same scale. You can tell that is ginormous, way too big. It looks cool though, doesn't it? You see it all that cool texture. I love this mockup. It's so great. So let's go. Now that we have a thing, a big piece that's facing us that we can really look at. Let's change that. I'm going to double-click on this again. And it's the same image we had before. Let's change the scale. And one of the great things about changing scale other than you're going to have an image with stuff that's scaled correctly is if you show mockups With a really good showing your good intuition that you understand scale, how something should be scaled in the real-world. How your patterns should be not only applied to products, but should be scaled on products. You're basically subconsciously telling Art Directors that you're pitching. I know what I'm doing. So it's a great changing your scale and making sure your scales are right. And make sense for the real-world is really beneficial. So I'm just gonna go double-click again here on this little box. And remember here's our pattern and our scale is 50. Let's see if we wanna do half of that. It's still really big. I think what I'm gonna do is I'm gonna do, Let's try 15. That's a lot smaller. And really it's just like you want to play around with it and see what you think. So I'm gonna hit Command S and Command W. There we go. Now remember, don't forget you used 15%. If you forget, you can always double-click here again, go back in, and then you can double-click here and you can see your scale so you don't have to remember if you forget it's there. So I'm gonna close this again. So that's 15. I think that looks much better. Now, what we wanna do is go through and make all of these 15. But now we have a scale, we know what pattern we're using, we've defined the pattern. So now let's go back up to the top. Let's go to the one that we did in the beginning. That's way too big, right? Double-click here. And here we are again in our pattern fill, we're going to double-click on your Pattern Fill Layer and there's the 50%. We want to just change it to 15. So change that right there. Click Okay, don't forget to hit Save. It won't let you close it if you don't save it anyway, but just to be safe. And then I'm going to close this. And there we go and matches. Now. We know what pattern we're using, and we know what scale we're using. Now it should just be like second nature. So we want to go through all these layers. And I know there's a few of them, but now it's gonna be a lot faster. Go ahead and double-click on the Smart Object thumbnail. And that's the one we already did. So let me close this and let's see. Oh, I see where it says auto Design, right side. Oh, here we go. Yeah. That's so far right side. So for right side. So let's go to these pillows. Let's do the pillow on the right. So I'm just going through it. I'm going to make sure that I didn't leave anything out. So we're just going to double-click here. Same thing. I'm going to go to Layer, New Fill Layer and pattern. That's okay. And then we're gonna go to here. And then we're gonna go to there. And then we're going to change it to 15. And then we're going to click Okay, click, Save, and Close. Done. See how fast that was. Now we know we have our pattern defined, we know what scale we want it to be. All that good stuff. I'm gonna go through the rest of the sofa really quickly. Just remember, double-click on the layer name that matches what you want to apply your pattern, to. Apply your pattern to that layer. Yeah, let's do the design for the blanket and let's make our blanket and our pillows match. I have a mini collection called G0 granny. That's this pattern block, this pattern block, and this one. They're all the same color palette. They all go together. This is the pattern I want to use for my pillows and my blanket. I'm gonna go to Edit and Define Pattern, just like we did before. You can just click OK and there it is. Now I'm going to leave it open just because we're gonna go back. I'm going to double-click on the layer that says Design blanket. And then we're gonna do what we did before. Layer, we're gonna do New Fill Layer Pattern. Click. Okay. And now we're gonna go find that new pattern. This is ginormous at 100%. See it showed up there as the last one. Let's do ten. Sure, Let's try that. Click. Okay, I'm going to click Save Command S on a Mac, Control S on a PC. And then I'm going to close it. Good. Okay, so it looks like way they and every mockup is different. You really just have to see what happens when you change some of these that are editable. So it looks like in this section here, if you really wanted to change different pieces of the blanket, I don't know. Maybe if it was a quilt, you could do that. I have no need to do that. I also don't want to spend that much time on it. So I clicked on the design for the blanket, which is named very similarly where it's designed pillow Design sofa or Design wall or whatever. It's, it's pretty self-explanatory and there's our blanket. Now we want our pillows to match the blanket. So all we have to do is go to where it says Design pillow one Front and back and then Design pillow to front. Now I don't know why there's a back to pillow want I guess because you can see part of the back. Yeah, that makes sense. So let's go and I'm going to double-click on this little box here, this little object thumbnail for the pillow. For pillow, one double-click. And we want this to be the same, which may call it the same pattern of the one that we just used on the throw blanket. I'm not sure why this is showing up black sometimes my screen does some weird stuff. That's okay. We're going to layer, we're gonna go to New Fill Layer, and then we're going to go to Pattern. I'm going to click Okay, and we're good on that. Now, we can change the scale of this to whatever because it's just a separate thing. So I don't know what 30% look like. Too big. This is too big. Five. Let's try five. Let's try can. Okay, good. This is really up to you. This is all aesthetic. That looks kinda cool. I like it. It's, I think it's a nice, nicely balanced. Maybe you know what, I might go down a little bit. Let's try nine. Yeah, I don't know why I kinda liked that better. Something about that looks better to me. I don't know. It's just my gut. I'm going to hit Save Command S and then I'm going to hit Command W to close. And there it is. And yet you can see here why they have this designed for the back of this pillow. So you can't see the back of this pillow, I guess. And that's why that doesn't have a back. So there's a reason for everything in this mockup. Now, I just forgot what scale I use because I changed it. Oh no, what do I do? I'm gonna go back in DoubleClick. I'm going to double-click here where it says Pattern Fill nine. If I want my, my pillows to be the same scale as each other, then I want to remember 9%. So I'm gonna close this seat. I tried to close it without saving it and won't let me. Then we wanna do the back. Now this, you can have a pillow that has a different back or a different front, whatever you want to do. I'm just going to keep this consistent. And I'm gonna go to Layer, New fill layer. Don't worry about the fact that my screen, that this is black right now instead of that grid, I've been having some weird issues with my specific computer. That should not happen to you. Just ignore that. I don't know if up my graphics card needs to be replaced or whatever. But anyway, so I hit Save, see what we did there and then clothes and there's the back see, and it lines up. Let's do pillow two. And let's see, Design pillow to front and then yeah, so there isn't a back to that, but they put front anyway, which is That's fine. Yeah, I'm just going to do this. And I'm gonna go layer again, ignore the fact that that's black. Yours should have grid, New Fill Layer, Pattern. Click Okay. And yeah, I'm just going to keep the same one. I'm just going to be, I guess, boring with this. I'm going to do all that. Close, save, save and close. There it is. C. Now you've got matching pillows and blanket. This is all totally up to you. You can do this however you want. And now we have our lamp. I've used all the patterns. I only have three pattern mini collection. It's kinda busy, crazy, but it's kinda FUN. I am not going to vote a pattern on this lamb. And I really have no idea yet what I'm going to put in this frame, but we're gonna get to that in the next lesson because I'm going to show you how to do Art Prints. But this, this lamp here, you can absolutely apply a pattern to it. If you were to do that, you would scroll through until you find here it is, Design lamp shade. Are you not sure if that's it? Click the eyeball. Yep. See it appearing and reappearing, disappearing and reappearing. That's how you know, that's what that is. If you decide you wanna do a color, we're gonna get into this in a minute. That's where you would hide this layer and change that, but we're gonna do that in future lesson, a couple of lessons from now where I'm going to show you how to do adjustments