Transcripts
1. Hello !: Hello guys. I'm so excited for today because in this class you will learn all about life with Asian food photography. Okay, I will explain to you step-by-step. So you can also compose very beautiful levied Asian food photography in your home or in your studio. Okay. And then I will explain that bicep from the prop selection, from the background settings and then all the steps in setting the movement of the levitation. And then I also explained to you about how I set the lighting. For the lighting, it's very simple because we only use one like thing. Okay? And then the lighting position, and then the camera setting, the lens I use. And then step-by-step how I added that beautiful pictures. Okay, so let's start our first section.
2. Project 1 : Light Your Food !: Okay guys, In this section we have already Sara our background here and then our explain to you the secret of the light thing, okay? And this action, we will use the one small flash. Yeah, here's the brand. And the three girls. Actually, the flask we use in levitation photography is the high speed flash. So we can show this with the high shutter speed. Okay? And then I'll explain to you the lighting position. This is very simple because in Revelation, it can be shooting in bright mode. But actually for my preference, I really like the dark mood for life in patients with photography because if you want to take every detail of every motion in your ingredients here like this. And then we will pour some powder here for some sauce here. If you take it in the dark scene, it will be very feasible, okay, especially for the liquid one. Because when liquid one like sauce or like a honey, when it hit by your liking, the highlight will be very nice. Okay? It will be very clearly seen in the dark macaron. Actually, in this frame we will SAP into the dark mode. You can see that our background here is blue, but after we set our lighting here, and you can also set the same lighting with what we already set here, which I will explain later than the blue background here will become very dark and very nice, okay? The lighting position here S The distance between our main subject here. So the lighting is about 90 centimeters here to the lighting. And then the position here is the lighting is above 20 centimeters in front of our subject. I put the thing in front of this object is because I want you have some smooth lighting also in this area. If you set the lighting exactly in the sight of our main subject here, it will become a very hard shadow. So I move from 20 centimeter in the front of our subject, so the lightning will be smoother. Okay, and then the heck difference between our main subject here to the lighting, to the center of the lightning is about 20 centimeter also. Okay. For the lighting modifier, we use the strip light here. It doesn't means that you cannot use any underlying modifier. It's because I, I want to make our background here very dark, so I have to make sure that the lighting is not very soft and it doesn't hit our background layer. Okay, so I use this pipe. So if you have the different shape of your top Bach, it means like if you have like Okta Box or the rectangle softball, okay. You also can use them. And then if you find out that the background here, it'll hit by your lighting, then you can just cover the background with the dark February. Okay. Then it's done. Okay. Yes. So you don't have to worry if you don't have district like like this. Okay. I suggest that you definitely have to use the soft box. And then for the power of LED lighting, Here's the setting. I set the higher power for our lighting to make our Liping over powering all the ambiance like here. So the light thing that matters is only this one. Okay? And then yes, there is the settings of our like thing and then we use the high-speed, okay, for, for many reputation for photography. If you don't have the hi CSE bit flash, I suggest you have one if you want to create the levitation photography like this, because you want to capture every detail of the movement. It would be best if you have the highest things pit Flash. Okay, and then let's move to the next section.
3. Project 1 : Compose Your Shot !: Okay guys, In this section I will explain to you every week tail above our settings here for the prop selection until how we set this one. Actually, this is very easy. You don't have to worry that, okay. This levitation photography is only for the professional no, because it is very easy to set up the first tip from me if you want to take this scene, this levitation photography is seen for the first time. I suggest you use the lighter object here. We use chips because it is very light. And then we can hang it, the wire here like this. And then, yeah, we can set the position very easy because we make a hole in this chips so it hang our shapes with the wire here. Okay? And then we can change the position very easy because it is very light. So I suggest you can use the light object like this for the first time if you want to take the reputation for photography because it's very easy to say. Okay? And then for the color we set in our frame, okay? I want to make sure that our chips is the only focus on our image here. So I use the background darker and then we set also the lighting. We make the background here, we'll be done also. So the only thing that really focus and really like S, only this one. Okay? So for the background, I prefer using the dark background and then I also used the dark wood like this. And then also the prompts in the behind. So the focus will be here in this area. To add more color in our frame here, I also sat with this beautiful cherry tomatoes here. So at the color, because if we don't have the colored here, it will be very plain because all of these is only write yellow. And then I add some more color here, and then also I use busing leaves here. So it will also add more color in our levitation photography here. And then in the scene I set the background here will be darker. So the main focus is here. That's why I use this three ply. But if you use an adder, larger softbox, you don't have to worry because all you have to do is block sunlight in here because I plan to make the background darker. So I'll just have to block it like this. Yeah. If you find that the background lighting is very bright, so you can just block using this one here in the back of our main subject here. So the likelihood will go through in our main subject, but block in the background here. Actually this is just ordinary clipboard, Yeah, Through block the liking, you definitely have to choose the black one. Okay? Yeah, this is very simple. And you can have this clipboard. Maybe you can purchase it from online or you can purchase it in the stationary store near your house or your studio. Okay. And then it actually this wire as strong enough if you want to hangs moon like this. So if the object is quite heavy like this, I used to wire, wire, so it will be strong enough to hang our spoon here. Okay? And then the span we use, actually this is just ordinary likes time. And then just this is the, just the background Stan. So we hang our wire in here. Okay. Actually you don't have to or chase purposefully this one because you also can use anything in your home. Yeah. Maybe the one that you hang your quotes. You can also use that one to hang this, okay? Yeah, There is the explanation about the setting of our scene.
4. Project 1 : Adjust the Camera Setting !: Okay guys, In this section I will explain to you about the camera setting here, okay? As I said before, we use the three grid like this. This is the highest speed triggers, so we can take the picture. Even this shutter speed is more than a 160. With this high-speed trigger, we can take even your servers, but it's more than 160. Okay, in this, I think I set the shutter speed is 500. Okay. What happens if you don't have the high speed trigger and high speed flash like this or ICMP replied, like, I have this one. Okay? It doesn't means that you cannot take annie of levitation photography, even you don't have the settings are these device, okay, you can use the maximum shutter speed is 160. And then the only thing I concern is only if you move something as there is very fast, it will be a little blurred. Okay, there is just I think there's just a little problem, but you can practice in your home using your ordinary Flask first. Okay. You don't have to force that. I can only practice if I have the highest things. Repeat one. Okay? No, you can't like this with all the fights you have in your home, even if you don't have the Flash, but you have window while okay. It also possible, okay. You just have to make sure that the lighting in your food is very bright. And then you can use the dark curtain or the clothes in the back of your settings. So your foot, it will be very bright. Okay, then you can increase the shutter speed. Maybe you can increase until more than 200 or more than 300. I think that is enough if there is, if you use the natural light, okay, So, and then for another setting here, okay, that is the shutter speed and then the f-number or aperture, okay? I use a 5.6 and then for the ISO, I used 100. Okay? And then this is this camera. I use a Canon. Okay? Actually this is just Hannon EG p, d. Okay. It's just ordinary camera, not very fancy or very expensive camera. I use this one to make you believe that you don't have to upgrade your gear first. You want you to take the beautiful picture, okay? Actually, if you want to think a beautiful feature, the only thing you have to upgrade is a practice Ananda technique, rather than you add another device. Okay. And then, yeah, folder white balance in Canon, I use the caffeine that links if I use the flashlight, This actually most of the time I set the white balance using Calvin because our source of lighting is very precise, because this is very precise. So I don't have reason to use the auto white balance. If you use auto white balance when you're saying they're sweet light, the result of the color will be very active. So to make your color consistent, if you use the speed light, you can use the Kelvin setting in your white balance. In their settings. I use the Kelvin setting is 5200. Okay, for the Canon camera, yeah, and then I used the wrong row for the image. And then for the lens here I use the 50 millimeter lens. So this is the fixed lens. Yeah, fixed lines for food or product photography is my favorite because the quality is higher than just the ordinary use of glands. Okay? Yeah. And then one of the most important thing you have to make sure that you use the tripod here. It will be make your life easier if you want to take the sin, levitation seems like this, okay? So in this settings using tripod, we will take a couple of pictures. This is the first picture we want to take, and then we will add another motion. We can pour some powder, we can pour some sauce year, and then we will take another picture. Okay, maybe we can combine About 32 and they'll tripping into one. Okay? To be able to combine faster, you have to make sure that your camera doesn't move at all, okay? Just make sure that your camera using tripod and then the, it doesn't move as long as you shoot this one. So in the everything later, you can feel that it helps a lot, Okay? And then the editing also, you don't have to spend very long time in editing if you fix the frame using your tribal. Okay. And then for the orientation, okay, for this levitation photography, one of my favorite as I use the portrait instead of landscape. Because if you want to capture the movement, most of the time the movement is coming from up to down. Okay, so to capture most of the movement, most of the time, I used the portrayed picture instead of landscape. Because in landscape feature you can capture many movement again. But in portrait, you can capture rich movement because we can move many things from up to down, okay? And then the color also you'll be blend between the powder, the chips, the leaves, and then the sauce. Okay. We'll combine into one. Okay, that is the explanation about the cameras and being an amount of frame planning. We sat in this section. Okay. See you in the next section.
5. Project 1 : Basic Shot: We're almost ready to New their father. She has met before we did a fellowship. I will explain to you a little bit about the sequence we want to plan before we take them for the ship, okay? And, and the first time you have to do is you make sure you log base frame for this picture. This is the base picture for what we want to edit. Yeah. Okay, So we can just take the first picture here. If you want to focus, make sure you're focused in the middle area. So all of this axiom or chips will be very sharp. Okay? You can focus on this area and then you can just take okay, here's the preview. Okay guys, and then after we take the basic shot, then we will take the movement shot. Okay, then we will combine in our basic feature. Okay, I have additional tips for you for doing the levitation photography. Maybe if you have something in mind about what you can do. But in reputation with photography, mostly, you cannot control all of the movement. So all thing you have to do is just have fun. Okay? Yeah, we can choose many kinds of things that we want to make it a flying. Yeah. Okay. I have a couple of ingredients here. Then we won't do poor in our frame here. But in the photo shoot, I make sure that I add as many movement as possible. So in the editing session, I can choose what kind of movement there is. Very nice and very sexy. Okay, so the first ingredient, this is the chili flakes. And then we have also solved here. And then this is the chips that we crushed lethal part. So we can also pour this in here. And then we also prepare a sauce. Okay? So it's just sauce. And then we put in plastic and make a hole in here so we can work like this. Okay. So when we want you to do the motion part, usually I start with something dry. So I will start with this one. Then the salt, okay, the crust chips, and then the liquid is the last part because it will make every thing get messy. So make sure the liquid is the loss, okay? And then we have the assistant here. So I will take from the camera and then assess. Then we'll make the movement. So I direct the movement. Mostly the movement will be around here, okay? So, but it will be mixed between all of the ingredients here. So it will be very colorful and it will be very interesting. Okay, let's do it over the chip.
6. Project 1 : Motion Shot: In this lecture, so to speak.
7. Project 1 : The Result !: Okay guys, we have done the photo session and then I will explain a little bit to you about the change. We made a while, we did a fellowship. Okay, we see that the motion we create is moving very fast, then our shutter speed is not fast enough, so we increase the shadows bit to 4 thousand, okay, to make sure everything that both will freeze, okay? And then when pouring something, you can do many alternatives. So when lie querying the seasoning, okay, we pour from up to down. And then the second movement, we smash all the seasoning to the background, so bounced back. So it will create an alert or more Shen. Okay, so the motion is not only top to down because we smash a holiday seasoning to the beggar and bone. So the movement will read down to the top. Okay, So the scene will be quite different. And then we also used to kind of sauce. We've found that when we use that ticker a sauce, the form is different, then be used the more light source like this, okay, we mix it with water so it it, it lighter. And then we put in water and make a hole in this area. So it will be like this. Yes, the relativist. Okay. So the texture, the movement will be also very different. Okay? And then actually you don't have to think so much about how the motion will be, because actually the only thing we have to do in this section is just having fun. Okay, so I add some more alternative. Like I use the wire to make a tomato like this. Then we also take many position of the tomato to make sure it in the editing session, we feel that the color is not enough. Then we can add more. We use this one and then also we create the basal also in this form. So we can take many alternative of the position we like for the basil leaf. Okay? So basically we take many alternative and then we were all the sauce from any direction, from up, from here, and then from the bottom also. So it will create many different movement. Okay? And then the last thing we have to do is move to the editing session. Before we move to the editing session, I'll preview the result of the position before. Here you go. Okay, guys are excited about how we edit the picture. You don't have to worry because we will explain it step by step. How we create an hour. We combine all of the picture into one mutable picture. Okay? Yes, let's move to the editing section.
8. Project 1 : Combine the Image in Your Edits !: Hello. Here I will try to do techniques of combining images for a levitation shoot for is open the Photoshop application. Then click Open, open the image file. The main image file that we will add it here, a 2s VC manage. As the main image. Here, I will take the sprinkles and the bad from the bare ground off this photo. Let's open it directly. Well, before we combine it with another email, we can erase the wires that the strike first. Let's erase it. We make the new layer and then erase the wires by using Spot Healing Brush Tool or less Charcot. See, we just brush it like this. Be careful so that you don't spoil other objects. We can also clean it by using this dam to or using the shortcut S. For small parts like VS. Click option, click this to take assemble that we will steep or stamp. I take the sample from here than just brush it. Well, like this, we're back to the spot healing brush tool. We raised the wires again. Well, we can also use the hand clean it'll gain by using the stem TO, well, if it's done like this now I want to combine it with another image. Here. I want to add some splash around here. We tried to open another email. We open the vial. Well, we will take this flash from up here and those on the chips. Let's open it directly. We move and drop it to the many match. And Dan, we sat in the PARCC and reduce the opacity first. Then create a layer mask. Invert the color of the layer to the black first. Well, we will brash, he began using white color to show the part that we only want. Increase the opacity again. Brushes lowly in the area that we want. Cleaner you seeing the black brush, I saw the sprinkles Don disappear more or less. It is like this. Then we want to add a splash in one of the tips down here. First we duplicate it using Command plus j. Delayed newly mass, reduce the opacity to 50 percent. Dann kommt n plus T2 or transformed. Then we put the splash on the tips that we want. If it's done, make anther click the layer mass inverted first lag the previous one. Then we brought it slowly using the wide brush. Don't forget to increase the opacity first, more or less in his leg. This guys. Let's see the before and after images. After we add the splash K. After this, we can immediately add tomatoes and leaves to make it look content. Well, we open the vial of the tomato image, which we will paste. Well, we reduce the opacity. Then we arranged the position of the tomato as we like it. Then we create a layer mass, invert the color mass that we brush only you do tomato par, increase again, the opacity, 100% letter, we can clean the wires, but now we faced the tomato first. Now I'll open another file of tomato images again. Do eat like previously, reduce the opacity, then arrange the PARCC and now I want a body dafur here. We increase the opacity, create a layer mask, invert the color mass that we brush it like before. Then we open it began doing it laid before. We induce the opacity. And then we put it all vary here. We increase the opacity again, create a layer mass. Brush it again like before. Well, then we can add beliefs too. We open the vial of the leafs image. Then we arrange it like the previous ones. Reduce the opacity first. Let's adjust it. Put it here. Increase the opacity. Click Layer Mask, invert the color mass. Then brush it again. Adjust the position again. Then we can duplicate the layers. Comment plus j lately or mass, rightly, the late layer mass. Then arrange it began. I want to take the leaf here, reduce the opacity just like before. Create Layer mass. Then adjust the position again by using the Move tool. Then we can duplicate com Atlas day. If there are some leaks, we clean it first. More or less. It is like this. Next we can create a new layer. Then we clean the remaining wires on tomatoes and the leafs. Use the spot healing brush. This is the result. Well, in the back here, I want to add the flaying sprinkles here. We can directly open the sprinkles. We're directly open it. Then for the spring goals. Then we arange the sprint goals. This is the flying sprinkles in the back. Well, more or less of these is the result, guys. We can immediately Safavid and continue to the next process. Thank you.
9. Project 1: Color Your Food with Lightroom Editing! (UPDATE Sept, 23, 2023): Hello guys. Now I
would like to show you the process of photo touch up
in light room application. Firstly, we open the
light room application. If you haven't had it,
you can download it. Here. I use the classic
light Room application. Let's open it, then. Such appearance will appear. There are three columns. Well, to import a photo, we can click the input button
here, or click a vile. Then input a photo. Then we can choose
the vile here. Or you can also drag and drop
from the file directly to the light room
application like this. I'll try to input
by doing and drop. Then after pop up, like this appears here, I choose Add, because it will
save space in the hearts. So we'll add a photo without
copying or moving it. We directly click in port, well, all the photos had been
inserted into the library. Then we shift to Develop, to add the photo. Okay, here. Firstly, I'll try to add a
potato chips levitation photo. Firstly, we adjust the pass. Then for the exposure, this is the level of brightness. But for this picture is enough, I don't do anything with it. For the contrast, we don't
need to adjust highlight here, we will highlight the most
dazzling side of the photo. We reduce the highlights
around this match. Shadows are the darkest
parts of the photos. We'll increase so that the
details can be seen clearer. Just increase it a little. Then we increase the
white color of the photo. Two, be careful
to not overdo it. Later on we brush, okay, But after this,
we still continue to adjust the physics first. Then the black color
level can be decreased. It's the level of
blackness of this photo. Okay, Around this the
difference started to be seen. This is before and after. Then for the color part, we'll add each of the
gloominess of this photo. The one that we added
first is the view. Then we increase, like we see, the leaves here aren't green
enough. It's still yellow. So we increase the
level of the greenness. Okay, Like this enough. Just exactly then
the saturation. Okay, for the saturation here, we see the red element
is too flashy, right? We'll try to reduce it just
a little, just like this. Then for the green color, we make it pop more. We increase the satration
of the green color. Okay. Beside green and
red, other colors, elements like aqua blue and
purple that we don't need. So we just reduce
the satration fully. The red and green color will
stand out for the luminance. We'll add it too.
That's the dark and brightness of colors. Okay, here we increase the red color and we
can see the difference. We make it a little brighter. Then for the green color, we make it brighter too. We just the same like
in the saturation, the aqua blue, purple, and other parts, we
can reduce it fully. And then we close. We see to the effects column, we add the vignette effect
to the photo increase. We're just the background soft, well around this that looks smoother and we can see the before and
after in its view. Okay, then we'll try to reduce the highlights
which is over in the side. Okay? As we only
reduce in this area, we can use brush here. We reduce the highlights, which is brush the
area that we want. Only we just the view again. Okay, it's enough. Then here I'm going
to add the saturation and the potato chips so
that the color stands out. With the brush, we click new. Well, to increase the
saturation of the potatoes, we increase the new brush
for the saturation. Then we brush add
the potatoes only it seems not yellow enough. So I'll increase
the temperature. Albeit well it's better now. Now to make it more focused
to the navigation on I'll, the saturation
from the back pop. We'll make new brush
for the saturation, we reduce it fully. Then we brush the
background part, this side too, okay, like this. To make it more focused, I'll also add brush by
increasing the black view. For the background. We brush the background part this side too. Brush it a little bit more. Well, the final
result is like this. We'll see the before and after. This is before. This is after. This is before, this is after. It's much better, isn't it? Okay, the next one, we'll export at the
added word we do, right? Click at the photo below
here. Then we export it. Then we can adjust
the export setting. We can export into
certain filter. Then we also can rename it. Then file setting, we can
export into Pec format, can be in PSD format or
IFF and other formats. The the vinyl export we can choose to be
displayed or not in the Photoshop or other options. In this case, I
choose to do nothing, then we directly export. The exporting process will be seen at the top left corner. After exporting, you guys
can open the vial in the destination folder at the
original exporting place. Okay, we'll continue
to the next photo in the next video. Thank you.
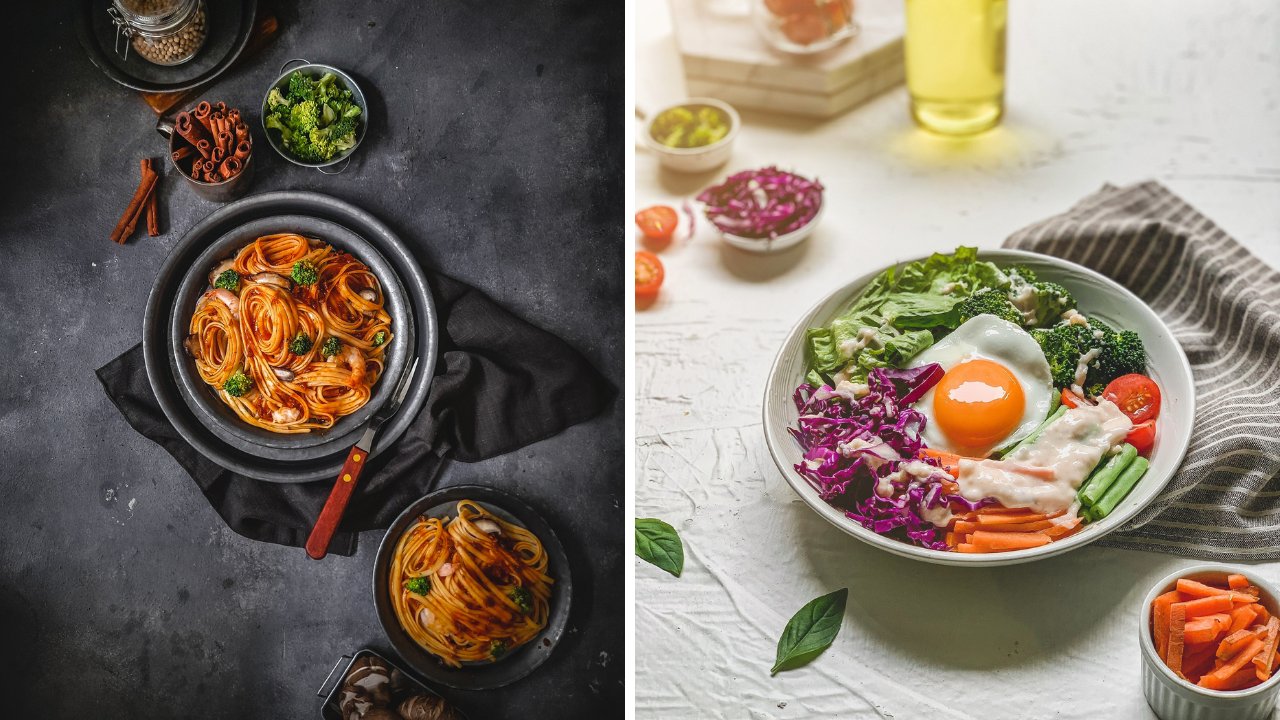
10. Project 2 : Compose Your Shot & Light It !: In this section, we will take another frame of levitation. Okay? Actually, this is quite simple, but the picture will be very nice, okay? First of all, I will explain to you about all the big ground and props we use in this frame. And this frame, same as before. I really focus on the color of that levitate. Okay, so for the background or frying pan and all the props we use will be, we choose the darker one. And then we put some kind of ingredients in the back to give more color. The I purposefully will make it darker. So the one depth will be very focused, is this one, okay? Actually, the plan for this one, we will take three minimum of three pictures, okay? The first one we will take like this, like you can see that below of this frying pan is supported by something, okay? And the second frame will take out this one. And this is, this fragment is hold by hand. Okay, and then we'll edit, edit at labor. And the third frame we will make will flip the pencil. All of this beautiful ingredients here will be elevated. Okay, So this is kind of setting that we will do for now and then I will explain to you about the lighting settings. Okay? So for the lightening position here, we put the lighting in front of the hour frying pan here, it's about 15 centimeter in the front of our main object. And then for the distance between our main object to our lighting, there is about 90 centimeters and the Hague different as about 15 centimeters. Okay. Yeah. It quite similar than the settings we used before. Okay. We'll just use one likely. Okay, so it's bravely symbol and you can also practice if in your home. Okay, and then let's move to the next section.
11. Project 2 : Basic Shot: Okay guys, In this section we will take our base picture first. Okay? So this is our first frame. There will be composed, but it will be the basic one, okay? We will just take one picture here. And then after this one, I will as an assistant to hold our frying pan. So it will look like okay. Like floating. Okay. Yes. And then we will take another shot when an ice and then the last part, we will do some flipping so the ingredients will be up in the air. So we will explain it in the next section.
12. Project 2 : Motion Shot: How about if we can link them? And that's a big difference. Each time step. And continue to learn.
13. Project 2 : The Result !: Okay guys, We have already taken the photo shoot for this frame and then this is a couple of picture we have taken before. Okay? And then when doing this one, I have a couple of tips here. The first one, when I first flip, I see that our festival, It's very dry. So we add more oil and this one, and then we have more thoughts. So the liquid also will be floating. Okay, Now, in this one, I don't make the sauce is very thick, so it's very life. The sauce, so the form will be better. Okay. And then when you try to take the motion like this one, I suggest you pick as many as possible. Okay. Actually for this frame with Paik, about boredom, 20 shots, just for the flipping because you already take the clean background first and we already have the basic one. So in, in flipping process, maybe the background will be messy. It's very okay because the only part we take from the living frame is this area where the foot is floating. Okay. We don't think the beggar anymore. So you can leave the background like this if very okay, because we will cut the area of the reputation and put the reputation area into our basic picture. Okay. So if you've got a bit confused about what I'm saying just now, you don't have to worry because we'll explain in very detail in the editing section, okay, I guess excited about how we edit this picture. Okay, Let's move to the editing section.
14. Project 2 : Combine the Image in Your Edits !: Hello. Now we will try to combine the second limitation, photo. First open Photoshop. Click up and open the image data we want to use as the main image. Well, I just these asked the main image. Then we open it immediately. Then we can clean the area down here first, the Massey area, okay. So bad that the vegetables for over here, we clean it using this spot healing brush tool. I'll forget to create a new layer to clean it. We can clear other stains in the background too. Well like that. Then we can merge it using the Command plus Option plus C If E. Then click Comment plus t to zoom the image again. Well, it is like this case. Then because this is left agent, we make the band low clothing. So we will pass another image of the Panhandle without the hand. We can directly open the image of the Panhandle. Then we adjust the opacity by reducing ed. We bought it and the Panhandle. Let's try to pace the IEP guys. Brush it, doesn't adhere well, we can adjust it again. Let's clean the ages. We voted that. We adjust the brightness in the Panhandle. Let's add a brightness layer. And then we click it by using the comment plus Option plus g. So only this layer is affected by the brightness. Then we sat it approximately this much. Well, we can create a new layer. Let's create a new layer. Then. We use the spot healing brush to clean the edge of the Panhandle. So you can use the constant tool to fix it. Well, approximately this is the result guys. It looks floating right. After that. We can save it for the next process. Okay. Thank you.
15. Project 2: Color Your Food with Lightroom Editing! (UPDATE on Sept, 23, 2023): Hi guys. For the next photo
is stir fry vegetables. Photo guys, we can
open light room. Well then we see through the t develop from the previous
photo which we had edited and we go
to the next step. Firstly, I'll adjust
the basics here. I'll increase exposure or photo
brightness will increase, not too much because
it's dark theme. Then we reduce the highlights around this much. The shadows we increase
to just make it full. Then for the white color, we increase this much. It looks bright, right? Then we reduce the
opacity just a bit, not too much around this much. Then we adjust the hue. Saturation and luminance. We adjust the hue first
for the green color, the green color of the
broccoli is still yellowish. We can increase the green color around this much. Then
for the saturation, we also adjust, reduce
the red color A, Reduce the green color A two. Then for the aqua blue, purple and the magenta
we reduce it completely. We then for the luminance
bright and opacity, we adjust to, for the red color, I want it to be a bit brighter. For the green color,
we make it brighter. Then for the equa, blue purple. And the magenta can be adjusted like in the
saturation previously. After that, we
shift two effects. Well, here we'll make
vignette effects. Again, we reduce the amount, we increase the fitter
to. This is before. After we adjust without
finger. You see the before. After. At this part, it's okay. We can add radial filter and brush to make the vegetables
looks more pop up. We click radial filter. Then we brush the filter
and the page part. Don't forget to
click invert so that the skin is stay in
the circular area. Then here we adjust the
shadows. We increase, we zoom it a bit. Well, look clear. For the white color. We increase this much later, We can copy paste, right click, and duplicate. We choose over the
age like this, the page looks clearer and the details can be seen clearer. Well, we can adjust
the radial mass too. Can be in a row shape like this. Or we can pull and we make it
become a novel as we need. Then for this broccoli out, well, the fetch looks more pop up. Now the next we'll
make the background darker or if not the objects
limitation more pop up. We can we add adjustment brush by reducing the black color red. Then we brush add the
background part like this. We also brush the ages too. We can reduce the black color to at this brush masking, we can hold option or option and the windows beside brush. At this part we add new to added the brush which with math we can click again at the point
where we first brushed. Well, we can add it by clicking, then we re add it. Well, this is the result. We can see the before and after. This is before, this
is after, much better. After finish, we can export the photo by pressing right
click in the photo row. At the column row,
we choose export. Then after adjusting the export, we directly click export. Okay, the second
photo finish for the next photo will
continue in the next video.
16. Project 3 : Compose Your Shot & Light It !: Okay guys, In this section we will very beautiful. These are, yes, there is pancake, Okay. And then it's a little bit different between the settings of our first picture compared to this one. Because you can see we also use like why you're here to hang the pancake. But in the first frame we thins the chips is quite light, so we only need one wire in this section because the pancake as much heavier than the chimps. So we use many wire to hang this pancake naturally, okay, and then we hang the present-day not straight but a little bit field, so it looks natural. Then we also like years could pick to make the blueberries flying also. Then in the editing section, we will get rid of that big. Okay? And then for a delighting, it's also a little bit different from the settings before because our lighting here, we can see that the phase of our food here is the upper side or on the top of the pancake. It's very beautiful. And then we will also put the hammy when we should. So this is the
17. Project 3 : Basic Shot: Okay guys, In this section, we will take the basic short first RK for the camera position. I put it higher than our main subject here. So it's facing down a little. So it will make the top part of the pancake will be more feasible. And then here's the hammer setting. So we will take them basic feature fors here, okay, here's the preview for the basic picture. And then after we have taken the basic feature, then we will take the messy part, okay? Or the honey on top of the pancake, make it flow. And then we will make another movement. Okay, So we can compose our picture. Let's move to the next section.
18. Project 3 : Motion Shot: So now, right now, before.
19. Project 3 : The Result !: Okay guys, We have done a photo shoot and then here's some of the results. Okay, So I'll explain a little bit about the sequence we, when we pour something in our frame here, okay, the first one we choose S are the honey for us because it moves slowly. So we try to use that first and then we continue with the crumble and all the sauce, okay? And then we have taken many pictures or the alternative. And we later we will compose in the editing. Okay, so excited to see how we edit step-by-step. Okay, let's go to the editing part.
20. Project 3 : Combine the Image in Your Edits !: Hello. Now I will try to combine the next levitation folder. First of all, open the Photoshop application, and then click Open. Then choose a main image here. Here. I will choose this image as the main image. Well, I'm about to take the mail from up here and the second one here. We opened in directly. Well, first we create a new layer. We can erase the wires and the hand first. Erased by using the spot healing brush tool are the shortcut G. Remember, be careful, don't ruin other objects. We clean it by using this stamp tool to we erase the hands too. Then we can make it more smooth by using a mixer brush tool. Well, this one, well, this is the US old sapping that I use. Then we just revising it approximately. It is like this. And that'll letter, we will combine the melded Harney up here and the pancake here, here and down here because it still looks empty here. Now we directly open the vial. Well here I want to combine the melt here and here. So we said it first, reduce the opacity. K. Increase the opacity again with cleaning the layer mass than invert the color layer mass to black. Then we brash it using white color in the area that we want. Well, like these, then for the rest of it, we can continue. But now we have to focus on the addition of the honey first. We can add an image to add honey in the empty area down here. And the empty area here. Hang on. Then let's open the next image. We can just reduce the opacity first. And increase the opacity again. Create layer mass. Invert the color layer mass. Then we brush it again. Letter we said the brightness first. To make it the same with the main image. We create a new layer adjustment for the brightness and then clique middle layer below. Click Comment less Option plus G, that we reduce it. More or less, it is this much, we brash it again before the brightness or was not low enough. So we tried to reduce it again. It is enough. For the pen cap below. It is already done. It will be better if we paste the melded Harney and then we can fill the empty area with the honey. We can copy the layer first comment, listen, da Dann delayed a layer mass. Reduce the opacity. We said it again to defend gate up here. We can increase the opacity again. We can feel the empty area. Create a layer mass like before. For the brightness layer, we move it down here first. Clean it like this. Approximately it is like this. Then we can set the brightness again. We can copy the previous brightness layer by clicking Option and drag. Then we click on and plus Option plus g. We can set the brightness, it looks too dark bar, it is fine over here. So we can do masking. We duplicated the layer, then come in philosophia plus g to click the layer. Then we adjust this area only. We brash it, inverted it first, approximately lag this. And then we can merge the layer in the one by clicking the comma n plus Option plus C plus E. Click Command T to transform year dan, or we zoom it, lads enlarge it. And then we create a new layer. Then we clean it again. You're seeing Spot Healing Brush Tool. We can use the clone stamp tool. Then we can add more blueberries. Let's open the vial directly. We wanted, say, the middle blueberry here, reduce the opacity first and then adjusted, increased capacity. Then Add Layer mass. Invert the color layer mass. Dan Brass it again like usual. We add another piece, add a layer mass and do it like me w4, that we clean it and then adjust it again. We can move it using the Move tool. It's fully down here. We brash it again. Then we add the blueberries again. We adjust the position, will reduce the opacity. Do it like before cleaning. We brash it again, focus on the lee. Maybe I will add another one. We just copy the layer common plus j comma n plus j here. Then we erase the lead wire like this. You can directly savvy in guys.
21. Project 3 : Add the Sprinkles to Your Edits !: This is an option. You can add the sprinkles lads up and the file. Reduce the opacity. Then let's adjust it. Gay. Then increase the opacity again. Let's add a layer mask invert. So branch, spread it. The break ground looks quite contrast. So let's try to adjust it. At the layer. Brightness, reduce it. So forgets a click Comment plus Option plus g. Then we add the curves to come n plus Option plus g. And then we brush it again. More or less. It is like this. We just it first because it looks too dark. This is the result for the sprinkles. You can immediately solve it, guys.
22. Project 3: Color Your Food with Lightroom Editing! (UPDATE on Sept, 23, 2023): Hello guys. Now we're going
to edit the third photo which are pancakes first time
we opened the light room, then we continue
to tap the love. This is the photo
that we had edited. Then we shift to the next photo. Firstly, we'll add
its temperature. Reduce the temperature of bit. We increase the thin, sorry, reduce a bit. And then for the tone, firstly, we increase the white
level of the photo, well around this much, then we reduce the opacity for the shadows, we increase
to the highest level. Then for the high light, we reduce okay, more
or less this much. Then here we are also
going to play the curve, The first one for the tone, the upper one for
highlight, the lower one. For the shadow, we
play 11 in the middle. We reduce the shadow a bit. Then for the hues at region
and luminance will also adjust them well for the hue will increase the green as the mint leaves
don't look yellowish, increase the hue
around this match. Then for the yellow color, we adjust, we reduce a bit well this match. And then for the saturation, for the saturation, green
and the others are safe. The others aqua blue,
purple and magenta. Sorry, the blue,
purple and magenta. We, well, after we adjust the luminus to, sorry, we don't do anything with the luminance because it looks okay already. Then the next we
shift to tap detail. We make the pancake
look sharper. We increase the
sharpening amount. Well, after being increased, the noise will appear. We increase the noise reduction. Be careful while increasing
the noise reduction. That don't spoil the picture. After that, we'll try
to edit more detail. Here we can see if we 0 the pancake doesn't
look neat a bit. We can use clearing brush, clearing spot and spot removal. We try to brush here. We can adjust the spot removal. This is the source.
We'll click then. See, well, like this can
be seen neither already. Zoom And then I'm going
to try to increase the shadow under the
blueberry shadow a bit. Zoom. We use the radial filter. Don't forget to take the infert. We try to increase the shadow, we increase exposure, we reduce the contrast. Well, more or less,
it's like this. Then for the upper one, also like this, we can duplicate right the
right, then duplicate. We drag it here. We just again for
the radio brush. Then at this part,
we copy paste. We need to adjust again, we neutralize the
exposure and contrast. Well, more or less it's
like this. We zoom out, we search for, we just again, the top part, It's too bright. We neutralize the exposure and the contrast around this much. Oh, okay, we zoom out for this one. The back pay ground will also brush in order to focus
only on levitation objects. We see the adjustment
brush filter for the background part. We'll continue brushing
on the site too. Maybe we increase the
brush of the black. This site must be more black. Pay a bit attention. If it's not enough, we can increase
all already black. Then the next, we'll
try to make the table. We mute the color. We add
a new adjustment brush. And then we brush so that
the saturation is -100 At the table part, well, it's done. The appearance is like this. We can see the before and after This one, before this one. After The picture
looks so tempting. And then we can export it. Right click Enter. Okay, the third photo
is done for the next. We wait for the next
video. Thank you.
23. Project 4 : Compose Your Shot !: Okay guys, In this section, I will make very beautiful pie here. K. First, I will explain to you about the background and of props we knew is okay for the ambience, we plan to make it darker where you will use the word there is quite dark already. Okay. I have a fixed for you Seems actually we don't have any left when ground. So the one I have S the gray ones. So actually there's a peak to make an engraving don't intuited, done. Okay. So we know that our source of lighting is only one. Then you can see our background there. We visit them. So it all hit by the lighting on my left side. Okay. So I've faced the bare ground into the right side like this. So there will be no light humming chew our background there. Okay, So it definitely can make it become darker. So you doesn't have to like edit in Photoshop since you've had position our bigger like this to make it better. Okay. Yes. And then I'll explain to you about the lighting.
24. Project 4 : Light Your Food !: Okay, and then for delighting the position of the lighting a bit in front of our foods here. So it's about 10 centimeters in the front of our foot, so the lighting will come through here as well. And then these pens here to our lighting. Yeah. It's about equity centimeters and the heck difference between our foot into the lighting is about 17 centimeters. Okay? So we purposefully make the lighting facing down so there will be beautiful highlight in our blueberry here. Okay, and then to hang our beautiful growths here, we use our wire. So this is the basic settings we will pay at the first time. And then we will continue with the motion one. Okay. We have rebar some ingredients to make the motion later, but we have to pay the basic 1 first. So let's do it.
25. Project 4 : Basic Shot: Yes. Before I paint the picture, I will explain to you Obama camera as having folks. Okay. Here's the camera setting videos. And then let's do our basic picture form via selected Asian. Please note that the basic picture is very ordered. Yeah, you have to make sure that our high is in perfect condition because this basic material, we'll be the only picture that we have. The file is still in perfect again, because after we do the motion path, the pirate be really messy and we cannot use the epic tale. We only paid a motion by the pipe. We will crop with this one. Okay. So I suggest that you think a couple of picture and make sure that you focus in many area. So in the API you'll find out that something is least focus, then you have another option. Okay, Let's take some more. Okay, so here's the preview.
26. Project 4 : Motion Shot: During this period, time.
27. Project 4 : The Result !: Okay guys, we have taken the pictures that so here's the result. Okay, so when we are exploring the motion, I have got some ideas to create the motion. So in the first, I make sure this unimportant I don't know, Is it had this one our honeycomb sell this. How does one? I made sure that they are covered by the honey and have some honey dripping. Okay, same with all the routes here. And then we also move the height. So it makes life very beautiful curve of the honey. And then also we poured the grant all apps. So we put it where many gestures and then we will mix it together when we are in editing part. Okay, So in this area, you can explore many movement you like, okay, so since we already pay the basic one, then you don't have to worry if five will be very messy because we don't use it at all. We only take all the motions here. And I'm going to combine with the new PI that we take from the first time. Okay? Yes, So let's move to the editing part.
28. Project 4 : Combine the Image in Your Edits !: Hello. Now I will try to combine the fourth leftists in further. First, open the Photoshop and then click Open, open the vial that we want to set as the main image. Here I use this image as the main image. Let's open it directly. We can erase these wires first. We create a new layer using the Spot Healing Brush Tool or the shortcut is j. We erased the wires, just brush it. Remember that you have to be careful, don't spoil other objects. Then we raise the upper part 2. Well, next we want to pass the melt down here. And we can just open the file. Then we arrange it, reduce the opacity first that we just eat. I think it's this much and turn increase the opacity again. Then we create a layer mass. Then we invert the color layer mass. After dead, we breast the bottom part, the melt down here. Brush it slowly. Well, like this. Then we add another malloc for the blue berry. This open the vial. Well, we are about to base the melt in the blueberry down here. Just like before we reduce the opacity, then we adjust it under. Increase the opacity again. Create a layer mask. Do it like before we inverted the color. Then brush is slowly on the melded blueberry park. Well, approximately it is like this. After this, we add some crumbles on it. Led directly open the vial. Well, for this image, we want to take the crumble up here. So we adjust it first like before. Reduce the opacity, then arrange it more or less. It is like this. Enter, increase the opacity again. Add Layer mass, invert the color layer mass. Then brush the previous crumbles. We can erase the visible wires letter. Now we focus on the crumbles, then clean it a bit. Well, approximately it is like this. The letter we add crumbles on the background. We can open the file directly. Well, we'd say the crumbles on the back here and just see it like before. We increase the opacity. We create a layer mask, then invert that we brush if we take only the small crumbles because the big ones, so we'll look too much. Let's clean it a, B. It is about like this. After that, we can merge the layers by using Command plus Option plus C plus E. Then click Command plus t. Then we transform and zoom it out a bit. About this much. Then we can have crumbles here. So it looks more field. We use the con stamp tool or we create a new layer. First. It is like this. We can directly solve it for the next process. Thank you.
29. Project 4: Color Your Food with Lightroom Editing! (UPDATE on Sept, 23, 2023): Hello guys. Now we continue to the fourth photo, it's a Pi. First time we opened the
light room application, well we shift to tap delo, then we click the Pi photo. Okay, now firstly, we increase
for the white volume. Don't let it be too
dazzling around this much. Then we reduce the
black this much. Then we increase the shadow. We may mute the highlights, we just reduce it completely. Then down here we
play the tone curve. We increase the one between shadow and the mid
tone just a bit. We stabilize the
upper, the point, the lower side too, more or less like this. Then for the hue saturation
and lumin ends, we play to, first time we go to the hue here we'll drag the red
color to the left a bit. And then the purple color, we may drag it to the
red color like this. Then for the saturation, the red color is a bit too much. We reduce it a bit. Then for the green color, we increase the saturation. For the aqua blue and
purple can be muted. For the mega, we
can increase it. Okay, We'll adjust
the Lumina too. For the red color,
we make it brighter. Well, more or less
around this match. Then for the green color, we'll make it brighter. Okay. For the purple color, we just reduce a bit. For the Megan, the blue color, we just make it brighter a bit. Okay, now we add sharpen so that the picture
look more detailed. Well, to reduce the noise, we also increase the
noise reduction. We increase the hayes bit
to make it more dramatic. We now. Now we're going to make
linear gradient at left side so that
the black color between left and
right evenly b***d. We make the background all black here. We reduce the opacity. Then we make gradient more or less like this. But later on we still
need to brush it again. All right. Okay, now we then
the fruit over here. We are going to make it much brighter with the radial
filter in the fred only, don't forget to invert. We increase the shadow. If it's not enough, we can increase exposure more. Well, more or less like this. Then at the lower side here, we increase the shadow more
adjustment brush here, we're going to try this part. We make the detail
look much clearer. We'll increase the shadow, well, the detail
start to be seen. But here for those lights, this dazzling lights increase the high light more so far
the white, we increase to like this. Then we under the brush in this
fred in the middle, that all look brighter. Click option or opt windows while we brush
the middle side. Well, for the pie is okay. Now we're going to mew the background and look
more focus to this pie. We add a new adjustment brush
with reducing the black. We brush in the
black bag ground. First we can see the layer mask. We brush this side, we may reduce the black and the right side too. We brush well after we brush like this, we may also increase
at left part. We make a new brush,
brush like this, reduce the volume some more. Then for the table, we can just we the color. Okay, We make new adjustment
brush for the saturation. We just set it at the least. Then we brush at the table. We make the brush new. Okay, let's finish.
We can export. This is the before
and after preview. Before, and this is after. We directly right
click at the photo. Then we export in GP AG format. Then we export. Okay, finish already for the next picture we
make in the next video.
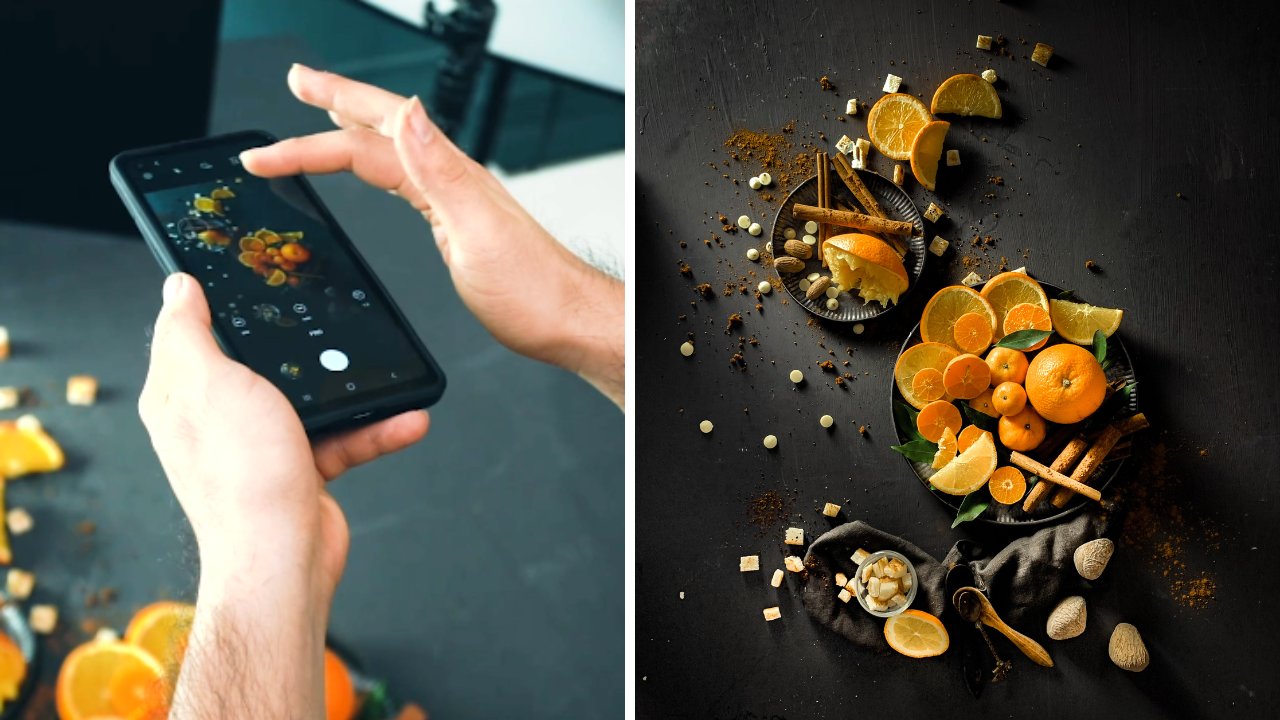
30. Project 5 : Compose Your Shot !: Okay, Very interesting. Okay, If you found in online or in Pinterest or Instagram, someone take a very beautiful by mutation for photography. Or you may think that the behind the scene of the sad thing is very complex. It's very perfect. Actually, it's not really because in reality, when we are assessing the levitation photography, it can be as messy as this one. Look at this. I don't even use the proper tools. Yeah, it's really okay because in life integers with photography, the beauty of it s, it can capture something that cannot be seen in our eyes. So yeah, just have fun doing all the motions because it will be very unique. And then the setting is, you don't have those plan too many times in the settings, especially for this one. Actually, we don't have any beautiful foods here. We just use the cherry tomatoes and all of them. We make it consistent in red. And then we also poor the red sauce in year later. So it will be very messy, but the service is very simple. Okay. So I believe that you can also do this in your home, okay? So it's very practical. And then I will explain to you a bit about the settings here. We also use the wire and we made our cherished per metals hang with a wire like this. I also use mine in here. So okay, and then we also use the dark props here. So it will be very nice. The color will be very pop out.
31. Project 5 : Light Your Food !: And I will explain to you a little about the lighting settings here, okay, From our main subject here, our lightning is five centimeters in front of our main subject. And then the distance between year two, our lighting as about one meter and the Hague different is about actives and Demeter's. Okay, we freeze it down and this time we don't use whiteboard to bounce the lighting because I can see that our product here is very simple, just ordinary round object like this. So I want to make the beautiful transition between the highlight and a shadow. So I purposefully make the shadow in the right area so they're around. We'll be very clear because there's a gradation between the highlight and shadow. Okay, so let's do the basic shot first before we continue the motion. Okay. Let's do it.
32. Project 5 : Basic Shot: Okay, Now we're really the best shot first and then I will explain to you a bit about our setting. Here you go. Okay, then let's do our basic shots first. Okay, let's do it. Okay, I'll make sure the image will be very focused on our subject. Oh, really beautiful highlight here. Yes. Okay. And then let's continue to the next section. We will do the motion part.
33. Project 5 : Motion Shot: Yes. Yes.
34. Project 5 : Tips for Motion Shot: Okay, guys, we have done the photoshoot part for the motion. Okay, So I have done some experiment you have for the splash here. So I used the bottle that I've hole in the cap of the bottle and then I press it to the knife area and then the tomatoes there hanging here in the wire area. So after depth, because I have seen that the class is, the water is too small. Then we decide to open the bottle and the Splash, all of them. So it will be more of them and say, Okay, yeah, that's the beauty of levitation photography. So you're very free to do the experiment. Since angle is the same, then we can just combine in our Photoshop. Okay, So if you guys excited, we'll see how we edit. Then let's go through the editing part.
35. Project 5 : Combine the Image in Your Edits !: Hello. Now I will combine the next levitation further. First we open Photoshop, then click Open. Then we open the vial that we will take as a main image. Here I will choose this as the main image. Here it is. Let's open it. Here. I will erase the wires first. Let's create a new layer. Then we erase it using the Spot Healing Brush Tool or mesure car is J brush It's lowly on the wires. Remember, don't spoil larger objects. Yes, it is like this letter. We will add the space again. Now we will open the photo file containing the splash. Let's open it. Then we take the splash on the tomato over here. We reduce the opacity first so we can arrange it. Enter, increase the opacity, then add a layer mask, invert the color. Then we brush it using white color. In the area that we want to show. The brightness is a bit different here, so we need to adjust it again at layer adjustment, layer of brightness. Then we click on the bottom layer by using comments plus Option plus g. Reduce the brightness. Well, it is about like this. Then we brash it again. Well approximately it is like this. We can add more splash in other areas. Let's open the vial. Click Comment plus t. Then we just hit like before, reduce the opacity. Enter, we increase the opacity again. Then Add Layer mass, invert the color. Then we brush the white color in the splash that we want to show. Oh, we also adjust the brightness. We can just copy it from the bottom layer by using option and drag it. Don't forget to click Comment plus Option plus g. Well, then we continue to add this class in the layer mass. And the splash up here too. After that, we can add the splash on the knife to, let's open the folder of the image. We can directly adjust it. Reduce the opacity. Approximately. It is like this. Okay. Increase the opacity again. Oh, we move up the layer. Click here again. Then we add the layer mass. We invert the color. Then brush it on the Splash of the knife. Now we want to take this pledge on the knife. We can adjust the brightness again. Just copy and paste option and drag. Then click Comment plus Option plus g. Then brush it again, clean it again. Done. Then we can merge the layer by clicking the comment option plus C plus E. Well, then we click Comment plus T. Enter. Then create a new layer. Over here we can add the break ground by using the clone stamp tool. Then we can clean it a bit by using the Spot Healing Brush. Done approximately it is like this. We can save it for the next process. Thank you.
36. Project 5: Color Your Food with Lightroom Editing! (UPDATE on Sept, 23, 2023): Hello guys. Now we continue to the fifth photo,
it's tomatoes photo. Firstly, we open the light room. After that we go
to the T develop. Then we click the photo
that we want to end it. Then here first we
increase the white volume. First we reduce the black two, but not too much. We increase the
shadow to just full. It's okay. So that's the highlight. Then it seems not enough. We increased the exposure
around this much. Then for the curve, we
play a bit at the shadow, we lift up, we stabilize, okay? We adjust
it until balance, more or less like this. Then for the hue, we'll play for the red color we make so that it
looks more red. We reduce it more or less at this. Then for the orange color, we also reduce it to get the red color more
or less like this. And then for the saturation, we reduce the red color a bit, the orange color to for the yellow, green, aqua and the colors below. We just mute them because our focus now
is to the red color. After that, we
adjust the luminant. We adjust the red color
to be darker like this. And then the green color, we make it brighter. We just we the magenta
for the purple, we reduce it a bit. And blue we just increase a bit. Well, because the
photo is a bit blur, we can increase at its haze around this match. And then we'll play the sharpen two so that the
photo looks sharp. We may increase the
noise reduction to reduce the noise at the photo more or less like this will add vignette effect to the
photo to just a bit. And then we'll increase again the saturation of the tomatoes. We use the radial filter
only for the tomatoes. Don't forget to invert, we increase the saturation, then we copy paste to
the other tomatoes. We duplicate it to all parts of the tomatoes so that the
tomatoes color more. Pop up like this. Well, okay, after that
at the background with orange color
will reduce too. And we can brush at an
adjustment brush and reduce the saturation at this orange below tw like this. And then we add a
graduated filter that the back part
of the background, the black color
looks even darker, well, like this. And then we duplicate two for
the right side. We rotate it like this so that the masking
at the right side. Only then for the big ground part, we can brush them more black. To get the black color of
the background even darker, we add a new adjustment brush. We brush the
surrounding background, we increase a bit. Okay.
More or less like this. This is before and
this is after. This red color looks more
pop up and stand out before. And this is a after that
we can directly export. Right click. Then we export. Okay, the photo is finished. For the next photo we'll make in the next video. Thank you.
37. Project 6 : Compose Your Shot & Light It !: Okay guys, this is the new scene we set up. Okay? So we have already SAP, beautiful cookies here. Actually the setting is pretty simple guys, because this is just ordinary cookies and we stack it. So we got Hague dimension of our cookies. And for the top part we suppress the cookies into two and move it like this. K set with wire and then for the lighting, okay, we have to make sure that we got the very beautiful texture in the top of our cookies here. So to get this picture of the top of our cookies, then the lighting have to be from the top. Okay. So I put the light thing pens and a meter in front of our, our cookies here and then the distance to delighting as about one meter. And the Hague difference between our cookies to our lighting is about 60 centimeter k. So with this kind of setting, we will get a very beautiful texture here. And then to make sure that in this era is not really underexposed. So we bounce it with white board here. So this white ball will bounce. So in this area we're a little bit brighter, okay? Yes. Let's do our basic shot first. Before we mess it up again, we will take the basic shock, then we will take the motion for the motion for this one, we will for it with crumble and then we also have the caramel sauce and other things. Okay, so before we destroy with our motion, then we will take the basic shock press. Okay, let's do it.
38. Project 6 : Basic Shot: I'll see you guys. Then I will take the basic shot. Okay. Wow, look at this. Here, the preview. Okay, you can see that the texture is really nice. And then the next we will add the motion in our picture. Okay, let's do it.
39. Project 6 : Motion Shot: In this lecture. So firstly.
40. Project 6 : Tips for Motion Shot: Okay guys, just now we have taken the motion part of our levitation photography. Okay. I have some notes for you. You can try some texture of the crumble that you want to poor from up to down. Okay? Then at the first, i just the larger Campbell, and then the second alternative, I choose the smaller Chromebook. So it gives us different feeling. Okay, So later in the editing part, we will compare which one is better. And then, then we also do the, another motion when we are pouring the crumble. Okay. This second one, we smash the crumbled to the background so it bounced up, so it will create a manner motions. Then for the caravels false. We also have poor in this area. We also poor in the top area and a down area, and also we give the motion stock. So in later in the editing we can compare which one we can combine into one image. Okay, so let's go to the editing Berg.
41. Project 6 : Combine the Image in Your Edits !: Hello. Now I want to combine the next levitation photo. First we open Photoshop, then open. We open the file that will be the main image. Here. I choose this image as the main image here because the board is clean, still clean. So I take this one. Then let's open it. We can erase the wires first. Let's make the new layer. Then we us the wires you seeing Spot Healing Brush. Well this is the result. Then we can add sprinkles up here. Let's open the vial directly. We reduce the opacity to 50 percent. Then we adjust the partition. Gay, increase the opacity again. Let's add the layer mass again, that in for the color of the layer mask to black. Then we use the white brass to show the area that we only want to show. We only back to crumble. We clean it using a black brush. Well, approximately this is the result. We can clean it again. Let's create a new layer. Then we use clone stamp for the sprinkles. In the end, the area. We clean it using the eraser to more or less, it is like this. Then we merge the layer using Command plus Option plus C plus E that we zoom in. Click Comment plus t. Maybe this March. Okay, we can directly solve it for the next process. Thank you.
42. Project 6 : Give Melt to Your Edits !: Let's add the melt here. So it looks like as if the cookies filled with the melt. Jess open the vial, then we just eat. Let's reduce the opacity. Then we tried to increase the opacity to 100% and we brush it on them, melt like this. And then we copied layer for the melted cookies on lap. Quick comment, it'll stay. Then we erase the layer mass verse, right? Cleaved the lead layer mask, then we just hit again so it will feed the cookies. On the left. It has different angles, so we try to maximize it. Let's brush it. Then we clean it. We can duplicate layer again, common plus d. Then erase the layer mass first. Then we reduce the opacity to 50 percent. And then readjust if again, we ingest it again, enter. Lads tried to brush it again. Clean it, then duplicate the layer again. The lady layer mass. Reduce the opacity that we ingest it again. We increase the opacity. Class, brass it again. We ingest the partition again. Approximately it looks like this with the melt, we can directly solve it for the next process. Thank you.
43. Project 6 : Add More Melt In Your Edits !: Hello guys. Now we want to try to explore a game. Okay? It's important that if we have already got a good photo added, we have to spare our time to explore again. I want to add the mouth here. This is the previous one, right? What will it look like if we add it more? Okay? We duplicate the layer first, comment plus j. Then erase the layer mass. Then we arrange the position just a little bit here. We'll take the melt over here, reduce the opacity so we can adjust it carefully. And then we try to paste it here. Here, we'd try it here. Okay, we increase the opacity, Add Layer mass, and then brush it again. We tried to adjust the Bashir. Here, a k. Let's clean it again. Like this. Maybe we can add it to offer here. Copied layer comment c, then the layer mass. Then we try to arrange it. Reduce the opacity, arrange the position. Increase the opacity again. Let's create a layer mass. Invert the color. Then brash it again. Clean it. We can reduce the mouth here a bit. Approximately. It is like this. We tried to add the melt on the right side. We copied layer comment plus j, then erase the layer mass, reduce the opacity comment was T to transform it, then adjust it. Okay, then we increase the opacity. We add a layer mass, then invert the color layer mass. Then we brushes slowly, clean it. I think it's enough. Here. There's a bit leak. You erase it. Approximately. It is like this after adding the mouth. Now we'll just take down here to look still did a bead. So he's trained in it. First we will comment plus Option plus C plus E to merge layer. Well after dad, we select it by using the lesser tool or the shortcut L. Then we make this lecture not only around the tilted cookies. Then we duplicate it using common plus j. We convert it to smart object so the image one lose its quality when we stretch it. Right-click, convert it to the smart object. Then we click the command plus T to transform it. Right-click, then we select Rob. Well, we tried to strengthen it. Okay. We pulled the pine. Try to be as natural as possible. We tried to press Enter. Well, let's see. It's better right? Straighter. Then we clean it because there's a crop mark over here. We can add a layer mass than subtle, only the selected edges that we think our graph. We brush it by using the black color. Well, this is the result. We can see the before and after images. After death directly save it for the next process. Thank you.
44. Project 6 : Give the Final Touches in Your Edits !: Hello. Now we want to try to add another option for the melded cookies over here. First we duplicate the layers command plus g from this layer here. We move it up. And then we erase the layer mass and then reduce the opacity. We adjust it. Enter. We increase the opacity. Then let's create a layer mask and we try to brush it again in the melted cookies. Try brushing it. Clean it. Okay, this is the results guys. You can directly solve it for the next process. Thank you.
45. Project 6: Color Your Food with Lightroom Editing! (UPDATE on Sept, 23, 2023): Is 46, photo is cookies. We just edit it
directly first time, Open light room, then
go to tap, develop. Click the photo that
we want to edit. The one here we just the
tone for the white color. We increase like this. Then we reduce the
black to a bad. Then we increase the
shadow. Just make it full. We reduce the high light full. Well, for the curve we increase at the
shadow part of bed. We stabilize the upper part. The lower part, we
stabilized too, more or less like this,
than blight color. For the red color,
we reduce it a bit. Then we can increase
the magenta so that the purpose can rise into red. Therefore, the saturation and the red color also
we reduce it a bit. For the green color,
we may increase. For the aqua blue and purple, we just mute them
for the magenta. We also can increase then for the luminance or the bright and dark
side, we just too. For the red color,
we make it brighter. The green color,
we increase too. We make the magenta
darker a bit, the purple to, after that, we increase the sharpen two so that the
picture looks sharper. We increase the
noise reduction too, so that the picture
looks smoother. And then we can add
the vignette effect to reduce it at minus nine. We just mute this one. We make the roundness full
so that it looks natural, the feather to so that
the picture looks more. Three D. We increase the D haze, well more or less like this. Then for the background we can so that it looks
more black more. We make a new adjustment brush, we reduce the black, then we brush the
background part. So we brush like this
for the black by grown. Well, we make it even darker. If we think it's not enough, we can make a new bro. We increase the
black, the blackness like this here we can see
there's a little leak. We cover it with spot removal, well like this. And then for the lower part
of the background, we want to make it a bit darker. We use the graduated filter. We drag it to the top, we reduce the exposure for
this graduated filter. We can adjust again here like this. Then we make
the cookies more pop up, we can add the radial filter. And the cookies, don't forget we in for the setting, we play the shadow and has the white color more or less like this. And then we doubly get to
the next cookies beside it. For the black level, maybe we can increase a bit
so that it doesn't look block block in the cookies part. Well, this one, okay, Like this. Now the high light
can be seen more too. We add a new adjustment
brush for the white color. We press the cookies
just like this. And then at the flying cookies, we just the radial filter more. We increase the black. This is before and after. Okay, it's done this one
before and this one after. This is before. This is after. And then we can directly export. Right click at the photo
and then we export. Okay, now we have finished
to add the six photos. Hopefully it's
useful. Thank you.
46. See You !: Okay guys, we are reaching the end of our course, okay, So I have a tip for you when you are practicing our course, okay? The first one, please make sure that you can practice first, okay? The godless, you'll have the limitation of your gears, are your lighting or anything that you think that this is not good, this is not good, but skill can improve when you practice, okay? And when you keep practicing, I'm sure that you will be better by the time. Okay. And then please make sure also that you enjoy the process because the levitation photography is full of exploration. So the more you spend time, maybe you can also find the unique movement that you can create. So it's very exciting and then you can take many options. So in the editing section, you will be able to choose from many beautiful picture, many beautiful motions. Okay, I'm very happy seeing you in this course. And then let's meet again in another course in the future. Again. See you, buh-bye.
 Foodior Class, Professional Food Photography Trainer