Transcripts
1. Hello :): Okay guys, Welcome to do scores. Okay, I'm so happy. Today in this course, we were copper about the bright moon photography
using the SLR camera up. If you guys are
wondering how to create a beautiful rightmost
food photography, how to set the right
thing if you wanted to shoot 45 degree
angle, what is this? If you want the ship, the flip late angle or
many kinds of techniques. And also we'll cover about how to edit beautiful bright
mode with photography. Yes, In the next section, I will explain to you about
the preparation first, I will explain step-by-step for every feature we
will produce today. Okay, so I'll see you
in the next section.
2. Introduction of Camera: There are various intersection I will explain to you about the camera lenses and
how I set my camera off, wore my empire food photography. I will explain to you
about the lenses first, the lens I use the most
if only two lenses. The first one is the
Canon millimeters, 1.8, okay, the most affordable and
high-quality lenses you can find on the market. And even if you are
not using Kennan, you can still find
this kind of blends in different brand,
seemingly method 1.8. And mostly I should.
3. Introduction of Lighting: Okay guys, Welcome
to this section. In this section, I will
explain to you about the lighting equipment
we use for this course. The main tools
here is the liking or disliking is one
of my favorite. I know that you have so many equations for the
light theme was orthography. You can use this flashlight,
this huge flashlight. You can also use the
natural lighting. You can use also the
continuous like thing. You can use smallest
peak light like this. Again, what the decrement Y. Finally, I checked this
one as something that I use for like
maybe seven years. Okay. This is huge. And when you travel a lot, visit not as flexible
as the small one. But finally, I just this one
because I meet the powerful, warlike thing that will
over empower the lighting, ambient light around the house. Okay, When I should in
restaurants sometimes I have no control above the ambiance lighting
in the restaurant. Maybe you delighting the
restaurants have a color like a restaurant that had
the green light being there. There's a restaurant that
have the warm light thing. I don't want the ambiance
lighting whenever I shoot, I don't want the ambiance
lighting effect, my photography. I don't want that green lighting
effect with photography. I don't fund that. Lord lightning effect
my food photography. Oh, I need this
consistent lighting. The powerful, I think this will overpower the
ambiance liking. So wherever I shoot, I will get consistent likely. So that's why I love this 11 of the brand I use the
most, it's the Goldilocks. There's two hundred, three
hundred four hundred four. Its variation, the one I use
the most is SK 400, okay? If you wanted to find
this kind of product, you can just search online
store in your country. Maybe you can pipeline. And then the second question, maybe it's about
liking modifier. Okay? What is the lighting modify? I use the most is this
one before this pandemic. In most of the lighting, you purchase mostly the input. This one, it's been
wonderful year. I used this one the most
because disliked him. What do you fire can give really clear direction
of our life. And I know that if you don't use any diffuser in front of
the liking or disliking. Very hard. That's why we're nip this one. This one is five
in one reflector. If you want your wine in the
marketplace in your country, then you can just pipe like
this in one reflector. The one I use the
most, the one dead. It's like NFO like this. I like this one
is because when I want to shoot on the
top of the table, it is really easy to put
that there's no space here. If you use the round one. Yeah. Maybe if you wanted
to put it on the pay both Dennis Lo many space that the light can come
through. Okay. I liked the old one like this. And then the size of my frame
rate, the 120 centimeters. How I use this one is when I want you to change the
characteristic of the, I think I can just put it in front of the lighting
and I have its role to make it software
on to make it more harsh will further their
life thing from diffuser, the lighting will be software and I made it closed like this. The lighting here will be harsh. So that's how I have control
about my Tourette's. Like being just the
find the distance between the lightning
and the diffuser here. Then the next one
is this one. Okay. This one is reflected
her holder. I use this one. The true hold, my diffuser here. If you want to find this one, you can also type
in Marketplace. You can easily find this one. And then there's two more. The next one is lifespan. If you travel a lot, if you're not sure in
your studio mostly and you should get in
people's restaurants. I suggest that maybe you can choose the smaller one because usually when I traveled to
another person reference, I put this one in
my luggage and k, So it is very handy and very easy to pack if I want you
to find the smaller one, I don't want and to have
the lights and that is more than 7070 methods when
you fold it like this. This is about the lifespan. And then the final one, I will introduce
you, the free goods. This is a trigger we put
on our camera like this. Okay, So when we should
delighting, we'll turn off. This one is X1 t, okay, if you want
to find this one, you can also type here. What is the usage of this one? Actually, it connects our camera to our flask shaped like this. On your camera. Then
every time you shoot, then the flash will turn on. If you buy the guard dogs X1, t, it automatically connect with this thing because this
is the transmitter. It already have the receipt
for it in its machine, so you didn't have to
put anything here, but it connects automatically. Yeah. They have to involve
the right things. And then I will see you
in the next section.
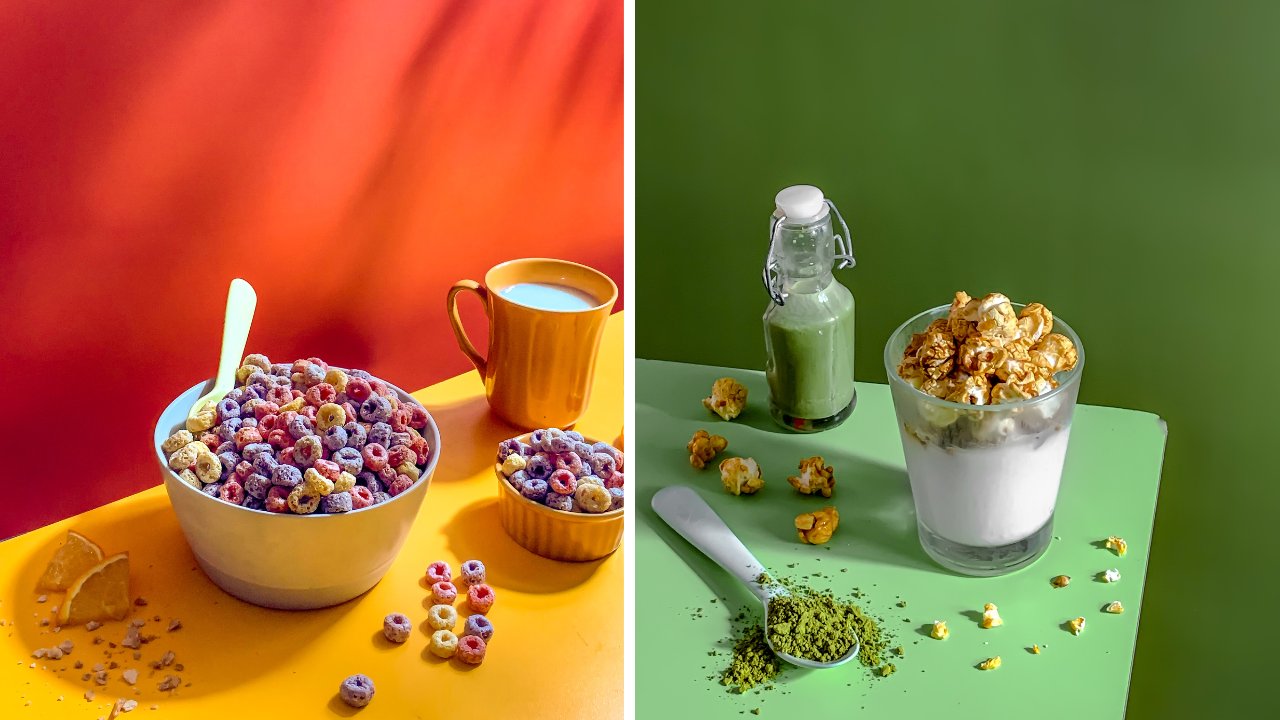
4. Project 1 : Choose the Right Props !: Okay guys, Welcome
to this section. And this section is preparation before we do
the photo shoot, Okay, Before you do that
for those shirts, it is very important to
know what kind of drops, the color of the product that you will use on your pictures. Okay, So I will explain to you how we plan
our props here. So this is our breakdown, and this time we use the bright background and the
big running half fixture. And then to give the complexity of the
texture in our frame inputs, photography may be in general, it's all about prankster. Text. Use our picture will fun. And I really suggest for
you to pay attention for any kind of texture and you want
to put in your brain, but you have to limit the number of color that you want
to put in your frame. The theme of this
watershed is chocolate, so I don't want you
to put some color. Dad is not seeing weird
color of chocolate. Okay. So I won't use any like
blue napkin or blue with orange with I'll
just mute any color and make sure that the top
lip is rarely focused. If baking paper to
add more picture because we already have the
picture of our background. And I want you to have another
texture of the paper here. So I put two pieces of
paper below our foot chair. When you do that
for the shooter, you have to know
about the leveling. Leveling is very fun
technique you can apply while you are
composing your picture. Layering is how many layers
you have on your feature. This is our main
background here. Do we have to baking paper here? And the first baking by
far is the first level. And this is the
second level because I have two vacant February here. The third level is
other foot here, and the fourth level
is our dressing. So I have four levels
in our main foot here. Why the leveling
is so important? Because leveling can add more
complexity for the texture. Okay, I'm done. While I said the props here, I also consider the leveling, instead of just like put all the plates on the top of
the background like this, you can just add
more complexity, just placed backing
your crops here. This is level one, level two, and this is
the lateral pterygoid. So I suggest you
to start treeline in Glasgow to add more
complexity in your prop setting. And also like this, I just stack the props like this just to
add more complexity. And then I have
bought off milk here. I truly, while using
this kind of props, I suggest you to not using
very big props in our frame. So I suggest to you to collect the smaller
props like this. This is quite small digits, just like in Sandy, my third. Okay. Yeah. Because if you put the very
large drops in your frame, then people cannot in any way, what is this drops, okay, So if you use the
smaller one like this, It's very possible
for people who still can see the full
shape of this milk. And then this is measuring cup. I also suspect the
measuring cup like this to add more complexity
and all picture. And then for this
width to Epworth, to add more activity
in our picture, I pulled the chocolate
in like this. Just add more story
in our picture. Okay, so this is how
we prepare props here. And then I will see you
in the next section.
5. Project 1 : Compose Your Shot !: Hi.
6. Project 1 : Lighting Setting: In this section,
I will explain to you a lot of the light things
I think for this frame. In this picture, we will take the top angle the camera
is taking from here. This is the flat, lay it
on top angled picture. Then I will introduce you how to set the lighting for the top
angle and bright the chair. It's very simple. If you wanted to take the top
angle for food photography, we only used one likely, it is very simple, but you have to follow the
lighting position there. Let me suggest you. I will explain to you. Yeah. So here's the lighting position and then I will explain to
you about the position here, the distance between
our thoughts here to the right thing, it's about 50 centimeter. Then the distance
here between our foot to think about 1.2 meters. And then the hate
difference between our background should like
thing there is about 60. Okay? And then you can kill
your liking here. So the lighting is
facing your foot there. And then for the power
off the light theme, you should using the
studio lighting like this, you can try 1 eighth
for the power. And then because we only use one light thing
if you don't use any lighting diffuser and also your picture will be very
dark in the front area. So we want to make the
lighting a little softer. So if we should bear
written like this, the picture will be very harsh and then the shadow
will be very dark. Then if you want to make it softer or you can use
the diffuser like this. I placed the diffuser 45 centimeter in front
of our lighting, so it will make the
lighting in this area becomes softer and then the shadow will be
brighter, Alito. But even if we have already
made the lighting software, then I want to make sure that I feel getting the
details off the shadow here because there will be no ME liking shores
in front on the book. Then I can use the white
fill or form like this. And then we bounce
lighting there. We still can get the detail
of the front of this view. It'll kick. Okay, and then
another tips for you. If you wanted to shoot the
bright MCU typography. In this scene, I purposefully
shot the right mode, but the subject is very dark. You can see that the
chocolate is very dark. But if you shoot like this, I usually give you
review the picture. You will see that the top
what will become very dark. It is very normal. If you shouldn't write most, best, the object is very dark. It is normal and you can
bring up the detail. You can restore the detail
of the area using Lightroom. It I suggest you
to pay attention. Yes. You should. The bright mood like this, make sure that you don't always work exposed
your picture, especially this area, okay, this white area will
be very bright. And I suggest you to set your camera a little
bit darker so you still can get the detail
and texture of the background so it
doesn't over ex-post. It is very easy to bring
the shadows brighter. Then you want to restore the area there is
already overexposed. It is very hard to
reduce area that is over exposed in the
Lightroom because the color will change
and many things. In fact it so I suggest
to you that you can let the chocolate area
darker in the row picture, but it is very easy to bring it become beautiful
chocolate color. Okay, So that's how we
set our life thing. And then I will see you
in the next section.
7. Project 1 : Camera Setting: Okay guys, Welcome
to this section. In this section I will
explain to you about how I set this camera, okay, especially for you if you were quite new using DSLR camera
or a mirrorless camera, this sanction, I will explain to you how I set this, Emma. Okay. So since we already have
the 2D writings there, if you already sent this
to your liking there, you can follow exactly
this kind of thing. Okay, So for the shutter speed, I used 125 to make
sure that even if I should use him and help
with no trouble at all, the result of the
picture will be sharp and locked, shaking. Okay? I always use the 125
and the shutter speed. And then for the isoform,
the entire photoshoot, if I shared with the
studio like thing because the power of the
lighting is very strong, then I can use 100 asked my ISO forgive as entire
in Photoshop session. Okay, the only setting
that I change is only number when I
do the photoshoot, when the result is very dark, I just lower f-number to make sure that the
picture is brighter. In contrast, if the result of
the picture is very bright, then I will bake the
f-number higher, so it won't become
very bright again. After number is higher than
the picture will be darker. So I get the exact exposure. This is how I saved
my DSLR camera. Then adjust the exposure
or the brightness of the result of the picture
using the f-number. And then who are the white balance for
the empire Photoshop? I use Kelvin and
then in this scene, I use 5,100 as the Calvin. Using the DSLR camera
or mirrorless camera, I suggest you to
shoot on Rob picture. Okay, so if you shoot
on draw picture, it is very easy. You will have an advantage
when you edit the picture because the picture you can
add in the color more detail. Then the lens. Because if we wanted to assert
the pump angle like this, I used the wider lens. This is the Canon within
the white angle or a canon. But for alternative, you can
also use fixed plans like 15 millimeter for Kennan lichen or Shawnee and many brands. Okay. Yeah. He's just how I sat my camera and then I'll see
you in the next section.
9. Project 1 : The Result !: Other guys who have just
do the for those youth. And then I will show you
the result of no return. As you can see while
doing the photos, I showed the top angle and
then just for clients, I do the 45 degree angle while I'm doing the
45-degree and I shoot using the macro in 100 million
in the lands for you guys if knew quite
new above the lenses, what is the difference between the 100 million myth of
lenses and 15 limited lenses? If you shouldn't be with
them in whether lenses, then it is very easy to shoot because you
just shoot from here. You don't need to go
up higher using chair. But as you can see before, I should using 100 millimeter
and then I have to move on the top of the chair
just to take the picture. Right. Because it you're shooting using 100 millimeter for
the 45 degree angle, the contrast of the
picture is better, the color is better, and the blur pass big, okay, compared to a
CSV really matter. If you still don't have
no 100 millimeter lenses, you don't have to worry because
you're still can use 15, really matter and
then sell the picture until you have enough
budget to purchase one? Yes. Then I was Julia Roberts. And then here is the
rhombic journal. As I explained before, that you can see the picture
here, the robbing jerk. You can see that the detail
of the chocolate is ready, but you don't have
to worry because we will add it this picture, the taco, really bringing up this shadow on the chocolate. So it will become
a writer and nice. If you should work
client tips for Atheist. Should we apply in
many photographer no debt to save the picture. We will make the picture slightly underexposed
just to make sure that while in the editing section we still can recover
the picture and then we still can make sure that there is no over exposed area. But maybe your client
visit role that drew. So maybe some of
your client does not understand about the editing
will complain to you. Okay? I cannot see
the chocolate, gonna see the detail on my book then you
don't have to worry. Usually while during the
coefficient in front of cryo-EM, I usually two types of exposure. The diaper as
torture I should for anything for the review per
course in for my client, I take another big jump
that is brighter so I can see the detail of their food and they
can review it better. Okay. So I always take twice. Yeah. And then I will show you the comparison between before
and after the editing. Then if you guys
want you to know the step-by-step editing for this beautiful rightmost
food photography. Then I will see you
in the next section. I will explain to you step-by-step when we
are editing the color, the light thing, and
manage settings. In the next section, I will see you in
the next section.
10. Project 1 : Lightroom Editing (Update): Well. Okay, Hello guys. We've entered the
editing stage guys. Well, here I'm using
Adobiliteroom for editing guys. You can just download
it directly on the App Store or
Google Play store from your phone because Adobilite
Room is free guys. Well, now I'll edit
this food photo guys. Well, here I'll turn this photo
into a spatial meal guys. This is a special photo guys. And we'll edit the colors guys. Because honestly,
when we take a photo, then we get the raw file. Of course, the raw photo
is not enough guys. There are those whose
photos are really lacking. Like this guys, for example, this is a photo
that is still pale, still dirty, and we
still have to edit guys. Well, by doing an editing
step in Adobe Light Room, we can still maximize
the photos we take guys. Let's get straight to it. No need to talk a lot. We'll enter the
light menu, guys. Well, in the light menu there is such a thing as exposure. The exposure is the
brightness level in your overall photo. For example, if we
increase it here, the brightness of your photo
will be very bright guys. If we reduce it here, then your photos will
be very dark guys. Therefore, if we want
to play the exposure, we have to be careful and
also don't overdo it guys. Well, here I'll
increase the exposure to around 0.70 maybe. Okay, now here there is a tool
called the contrast guys. While in the contrast we'll
change the saturation to make the color of arrow
image more classic. Now in this photo,
I'll not adjust the contrast because I
rarely adjust the contrast. In Dob light room guys
after the contrast, there is a tool
called highlight. The highlight is the
reflection of light from your lighting to the object
you are taking photos of. For example, guys, this
cake has white parts. Well, these are the highlights
from the lighting guys. Therefore, in this photo, I want the highlights
to look soft. I want to reduce the highlight
to the left or -100 Guys, we can adjust the
highlight again, guys, in another edit. Well, after the highlight
there is the shadows guys. While the shadows are areas
that are not exposed to the lighting from your
photo shoot here, I want to maximize
the shadows guys until they are right
aligned or plus 100 guys, well, like this guy. For the whites here, the whites are almost the same
as the exposure. The difference is
if the exposure changes the overall brightness
level of the image. But the whites only adjust a few objects whose brightness
is increased, guys. Well, here I want to
add up to plus 70 guys. Well, after the whites, there is such a thing
called the black guys. Well, we only change
the blacks if the object from our photo
is dark black guys, if it's not there, we don't have to play with
the black guys. Okay, for the light
menu, we're done. We'll move to the color menu. Well, in the color
menu in this photo, I'll reduce the
temperature guys. What is the temperature? Temperature is the level of
atmosphere in your photo. For example, if I add here, the atmosphere of this
photo will look warmer. If we reduce it, then
the atmosphere in this photo will
look cooler guys. It's more or less like this. How the temperature works guys? Well, I'll reduce
the temperature here guys, but not too much. I'll reduce it to
minus seven here. Then here guys, there is such
a thing as color mix guys. Well, this is available
next to grating. There is such a
thing as color mix. Well, I'll set the
color mix here. First of all, that is
the red color guys. Well, in the red color,
I slightly reduce the saturation guys
around the 70 guys. Well, for the luminance here, I'm reducing it a bit
again to almost -90 guys. If you're done guys, we'll move on to the next color, which is orange guys. Well, in the orange color, I'll adjust the saturation. I'll increase the saturation
by about plus one. Then for the luminance here, I'll reduce it, two
minus ten guys. Well, next it's the
yellow color guys. In the yellow color, I'll
reduce the saturation guys. Then I'll move to the green. Now in the green color, I'll reduce the hue a little because in this photo it's really a little
green for the color. Well now for the saturation, I'll also reduce it. Then guys will immediately
jump into the dark blue color. Guys in the dark blue, I'll add the saturation
to plus two. Okay, next we'll move to
the purple color guys. Now in the purple color, I'll make the hue to
write a line or add full, which is plus 100 here. For the saturation, I'll
reduce it to -100 guys. Well next is the
pink color guys. Just like the purple color, I'll increase the
hue to plus 100, then I'll reduce the
saturation to -100 guys. Next we click Done guys. Well, actually it's as
simple as that guys to edit the image for the
bright mood theme guys. For the bright mood theme guys, this is the image we want guys. Well, for example, this is the
image before editing guys. Well, after we edit it with
just two editing men guys, we have got a good picture. Like this guys, this is
before and this is after. Now after you followed the editing stages of the two menus in Ob
light room guys, you can click the
share icon above, then you can directly
export to camera rule. Well, if you're done,
your pictures are immediately available in
your respective gallery. The cool thing is guys, you can get these
two editing menus without subscribing to
Edo B light room guys, all these menus are
free for editing guys. Well, maybe that's
all for the editing. I'll see you again in
the next session guys, for the next photos
guys. Thank you guys.
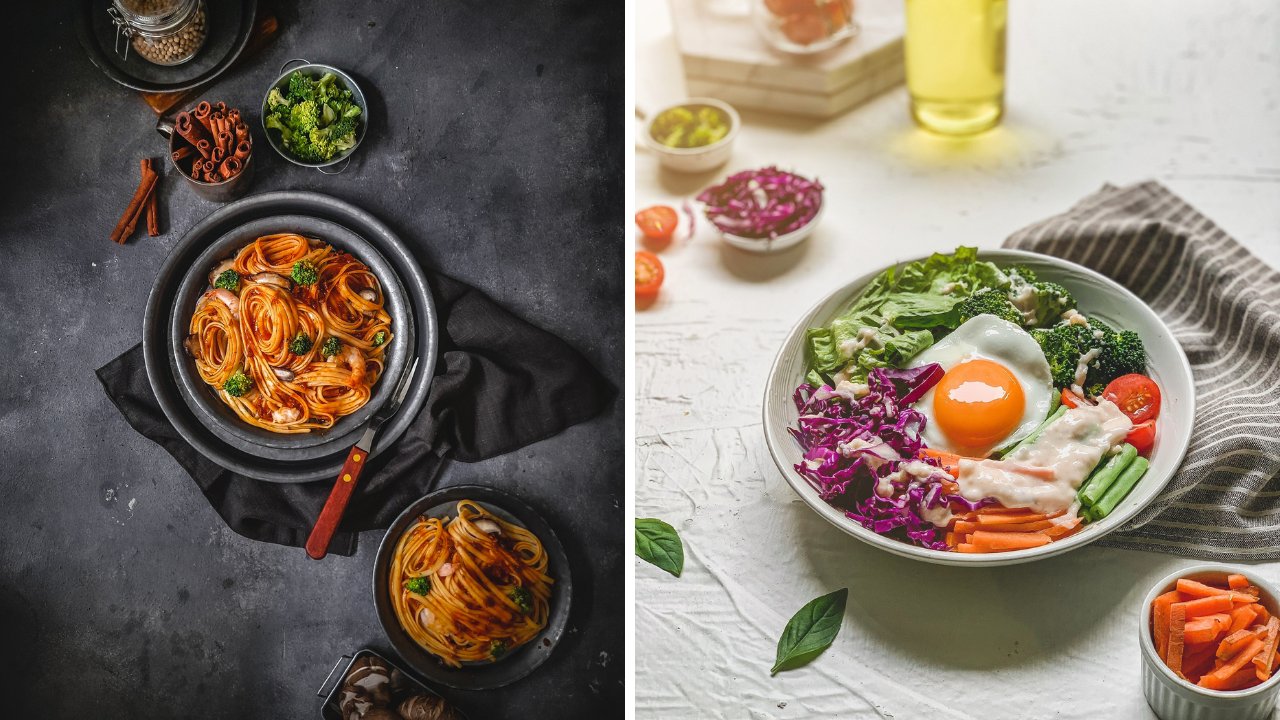
11. Project 2 : Choose the Right Props !: Okay guys, Welcome
to this section. In this section, I will
explain to you how we think a beautiful melting
honey on our pay. And then before we have
already explained about the settings for
the flat lay shots or top angles job
and Debbie section, I'll explain to you how
we take a beautiful bright blue peak Turkey if we
pick with the front angle, okay, This is the front
angle that we want to shoot because this capillary will look beautiful with the front angle. Okay, and then for the breakdown here we
still use the Patch. General wife begged John, and then we use manny
White props here. Okay, so for the first block, we use the small
cake plate here, I expect into three levels. So who get more texture
in our frame here? And then you can also use
like glass props like this. You have to pay a pendulum
with what ingredients you put inside this kind
of glass products, okay, because this is bright mode, I will make sure that I put the bright ingredients
inside this glass frogs. Because if you put Toklas
inside and you put it here, this thing will become the
object in our prayers. So even if you put it in, in area and it is blurred, but you cannot get
played on the chocolate. Okay, so we'll drag the pension. It will make the attendance Here module the attention
over here, okay, so you want to
make sure that you put the right
ingredients inside this blessed trucks who makes
sure definitely only affects you're not
adding the color. And for another box, we use the glass of
milk again, you here. And then in this frame, we will shock with the
golden triangle composition. Okay, that's why I also need
the higher ups like this, because I want to
impose it like this. I will still you the result of the golden
triangle composition, so you can imagine, okay, so here's the composition. Usually when I do the golden triangle composition
for the front angle, I need the proper depth, quite tall, I guess. Okay, So this is how
we plan our frame. And then I'll see you
in the next lecture.
13. Project 2 : Lighting & Camera Setting: Okay guys, Welcome
to this section. In this section I
will explain to you about the lighting
position for this one. For this beautiful cupcake, we really should 45 degree
angle and an angle, okay? Because the face of our food is in the
front of our angles. So we will make sure that every single one depth
see our picture, can know the future of our cake, the beauty angle of our cake. Okay, So the copyright here, the area is the best fuel to recede a feature of the gate. And then we plan to poor
honey on this case. So we plan to put economy in this area in the right
side of the cake, from the top to the
bottom of the tree. Okay, so if we want to get a beautiful highlight
in our picture here, I'll explain to you
a little bit about the highlight that I mean, okay, so I will show you the example
of the picture we have taken so you can see how beautiful the highlight
that we want to produce. Okay, here you go. As you can see in this picture, this is the highlight
that we've plan. If you want to get a beautiful
highlight like this, then you have to plan
before you do to photoshoot this kind of a
highlight, the result planning. Because we plan on having a beautiful highlight on the
top right area of our cake. Then we've placed the lighting on the right side of our cake. So to create a
beautiful highlight, we have to make sure that the reflection of the
lighting come to our lens. I will explain to you with
a camera in front of me. Wait a minute. Okay. So I have already placed my camera
in front of here. Before we do that
for those shoots, we have already planned to have beautiful highlights on It's
bright area of our cake, the front cake here. To get a beautiful highlight, then I have to place
our lighting here, our movement diffuser first
so you can see the lighting, but she's in here to get
a beautiful highlight. Highlight comes
from reflection of the light that come
to our lens directly. I will simulate here. This is
the lighting position here. And if we should not liking, then the light will come here. And we'll directly hit the
top right area of our cake. And if we put the
lighting when it bounced, dialect me chew our lens, then the area bones
that at least to our lens will
become the highlight. So that's why I put
my liking here. This position of the
lighting will create a beautiful highlights
over there. As you can see later
in the picture, because we don't put
any lighting in here. You won't see any highlight in the left side of our cupcake. There will be a highlight on the right side because
there is a point of interests that we plan to create before we
shoot the picture, okay, so highlight is the
result of the planning, not the result of lag lucky. Okay? And then this force
of life is very small if we don't use
in the diffuser, okay. If you don't use the diffusive, the source of lighting
is just like this. But if you use the diffuser in front
of our life theme here, diffuser real directly, make the sort of the
lighting larger. So if you put the diffuser
here in front of lighting, then this is the new
source of the likely. This is no longer under
source of the lighting, but if you put it here, then the source of
the lighting will be this huge render,
then this mole. To break a beautiful highlight, I make sure that the source of your lighting is larger because I want you to see the beautiful white highlights in the case. And then in this position, I put the diffuser about 45 centimeter in
front of our liking. Then, because in the left
side of our kids in here, we don't have any
source of the lighting. You can either use new lighting here to
shoot in this area, or you can use this
white board for the bright motif
you wanted to shoot using the new lighting
in this position, you have to make sure the
power of the likely It's much way weight
lower than that one. Okay? They don't, It's the main
source of your liking, but if you want to
place a new light here, you have them make sure that
the power is much lower, but you do blown half the
low-power of the lighting, then you can just use this one. Just Brown's liking from here. So it will give
12 white light in the left side of our cake
to make it more beautiful, to make sure that
the left side of the cake is not very dark. I will explain to you
about the camera settings. Explained before. In the first section, I used the outnumber about 6.3. Okay, so this is
the setting that we use in this activity before, while I use the
same settings here, the light thing
is really bright. I have explained before, what will you do? The right thing is very bright. In my case, I don't change
my shadow speed at all. I don't change my ISO at all. The one that I change
is only the f-number. When you get the
very bright results, then increase the
African brothers. So in this case I increase
my ethanol and virtue 9. So I found that when I use
the F9 0 as the f-number, in my case here, the lighting is great. Okay, so the exposure is also exactly to the
exposure that I want. So I used the 9 as my f-number. And for another setting, it's still the same at
the section before, I use 145100 as the ISO and I don't change
the Calvin and all. This is the advantage
you can get if you shoot with the studio
lighting like this. It because if you shoot with the studio like
thing like this, even if it's morning
is already live, then it's suddenly raining. You don't have to worry
when the weather changes, when the lighting changes because the lightning like this, we'll give you the
consistent result that will make the camera
setting this symbol. And then for the lands here, macro 100 millimeter lens. And please make sure that
you put your lens hood on. Because if you don't put
your lens with fear, sometimes like being
better be our lens. It will make the count
of less beautiful. But sometimes when I
don't use the lens hood, if I totally cannot
see the difference until I put this on and then I take another shot
sometimes will get shocked because this is much more
beautiful than the shoot, I think before we dug
the lens or a thought, I suggest to you that you
usually just the Lancet, especially when you're using the macro 100 millimeter lens. Yes, this is how
I prepare cameras having and how we
prepare the lighting. And I'll see you in
the next section.
15. Project 2 : The Result !: Um, regarding have already do the photoshoot and then I
will show you the Robbie. Okay. Here you go. Pay and then you shoot the
motion shot like this. I suggest you to take as
many pictures as possible, and then you have your
assistant to make sure that we wanted to
take the right fight of the area because we
want you to make sure that the honey in the right side of the area will get
beautiful highlight. And you have to make
sure that the assistant, born poor in Judah left side, only the main area is the
right side. You have to brave. You actually tend
to do that. Okay. I'm then I was showing you the comparison between before
and after there anything. So here you go. Many of you bought, asked
me about how to get the exactly correct
white balance when you are doing
them anything. Because sometimes if you have already used the
studio lighting, which means that
the studio lighting half standard white balance. And you also use the calving in your camera up or
the white balance. It's supposed to be
exactly accurate. But most of the case when you inform the photos into
your bright role, then you will feel that
the background looks yellowish or bluish
most of the case, yeah. I do think that you and
I will show you how you will get consistent white
balance all the time. I was showing you in
the next section, in the editing section.
16. Project 2 : Lightroom Editing (Update): Okay, hello guys. Well, we've entered
into this foot guys. In the bright mood
DSLR course guys. Well, in this photo guys, this is a raw photo
in Dob light room. I'll edit again according to the stages that I've seen in
the previous session guys. Well now I'll repeat it
for this photo guys. Okay, first of all I'll
enter the light menu guys. Well, in the light menu, I'll adjust the exposure for this image because this
picture is too dark. I'll adjust the
exposure a little guys, don't overdo it here. I'll add about 1.55 Okay. Then for the contrast is already fixed here,
I won't change it. And for the highlights here
are the same as before. I'll reduce it guys,
for this photo, I'll reduce the highlight
to -100 or left line guys. Well, here for the shadows, I'll reduce it guys to
-22 Now for the whites, I'll increase the
brightness here, guys, to plus 60, about that much. Well, for the blacks here, I'll also reduce it guys. That's for the Lat menu guys. Well, that's enough
for the Latch menu. Now we'll go to color guys. I'll change is the
temperature guys. I'll make the
temperature cooler, around -12 maybe, guys. Now, if you've lowered the
temperature for this photo, I'll go to color mix. Well, in the color mix
what I'll change is the red color guys here. I'll change the hue
to plus eight guys. Well, for the saturation
here I'll reduce it guys. Well, for the lumines'll
also reduce it guys. The color I'll change
is orange guys here. I'll just change it A little
guy for the hue color. I'll reduce this orange color. Just a little guy
for the saturation. I'll reduce it to
minus a little guys. Next we'll go directly
to the Evac menu guys. This is, we just click here. Then we go to the
Evac menu guys. Well, in the Evac menu, I'll add the texture guys. What is the texture?
The texture is a color texture in
our image guys. For example here
inside this cake there are stripes while
includes texture guys. Well when we add the texture it means the lines will become stronger guys here I'll add the texture
about plus 20 guys. For the clarity I'll
just reduce it a little, minus one maybe you guys then for the deha here I'll add the dehays but
only a little. Okay, then we'll enter
the details guys. Now in the details menu, I'll increase the
sharpening guys to the 140. Well, when we increase
the sharpening, our photos will be sharp guys, Like this photo guys. Now this is going to
look sharp. Very sharp. As a result, this photo produces ends in our picture right guys. As a result, we need a counter whose name is masking
guys in the masking. I'll also increase it so that our photos don't
have too many ends. Right, So I'm going to
increase it to 85 here. It's a bit better,
isn't it guys? Well, to reduce it again, we use a tool called
noise reduction guys. Well, in the noise reduction, I'll also add to remove
noise in our image guys. Well, here I add about 16 guys. Okay guys, That's for
the details menu guys. Actually for this photo, it's enough to edit
guys, it's over. We've got really good
photos guys, right? This is the before and
this is the after guys. If you want to see before, you can just press it. If you want to see after, you can just release it. Well, that's a way to see
the before and after images. Now, I want to get rid of this object guys because
it's a bit awkward guys. If there is honey here, right guys, you can use
the healing brush here. Healing brush in Db light room. You can get it if
you subscribe to dub lit room or you
have to pay guys. But if you want to
remove it manually, you can look for other
applications that can remove stains or objects that are really annoying
on your pictures. You can look for
other software guys, you can look for other
free software and you'll edit separately from the
photos in Db light room. Now I'll remove the
honey object guys. Well, more or less
like that guys. Well, if we're done we can
immediately click the tick. So this is the before and
this is the after guys. The honey drops are
gone, aren't they? Well, now we'll go
into the masking guys. Well, in the masking
you can only get it if you subscribe to
Adoblt room guys. The advantage of the masking
tool is that you can select several positions
in your image. You can adjust it guys here I want to use the masking
which is a brush here. I'll select photos of honey
that are around here, guys. Then I'll adjust the highlights, guys, because I need the
highlights around here. I'll adjust the highlights
to the right guys around 96. Okay. Then guys here, I'll add the whites
or the brightness of the whites here
around plus 20 guys. Well, after that we can
immediately click the guys. Then we'll move to
another drop of honey. We also brush on the
honey drop part guys. You can delete it if you select the wrong object
using the eraser. Okay, then we're going
to light here over here. Okay, then we'll change
the highlight to plus 12. Then we'll also add
the shadows here. Then we'll also add
the white skies. If it's done in the
light menu here, I'll change the saturation
in the color menu, guys. I'm going to reduce the
saturation to minus nine. Then I click the thick guys. Well, if you can see here, the object of the
hand is to dark guys. Therefore I'll use the masking in the hands part two guys. Okay, then we'll
change the lights. Well, we're going to change the shadows to around
plus eight guys. After that, we'll change the saturation in the
color menu, guys, we make the saturation
decrease to -16 Well, that's it guys, if we're done, this is the result we
want for this photo guys. This is before and
this is after. If you follow step by step from start to finish
in this photo, you can just click
the Share icon and then click Export
to Camera Roll. If you're done,
the photos will be directly stored in
your gallery safely. Actually guys, you don't
need to subscribe to this Dob light room guys, you only need to use our method by editing these four menus. The light, the color, the effects, and
the details menus. You already get a good image. And it's also very different
from the raw image guys. However, if you have
subscribed to Adobe Lightroom, you can follow our
method for using masking and also the
healing menu guys. Well, maybe that's all
I'll give in this video. We'll meet again in the
next video session, guys. Thank you.
17. Project 2 : Preparation of Levitation Shoot: Okay guys, Welcome to
this oneness sanction. In this section, we will
have fun because we will create beautiful
reputations year. We really make this
Pune levitate. Actually the levitation
is just a combination of some pictures
like this one we take when we hold the
spoon like this and we picked another peak Joe when we hold the
spoon like this. And then we will combine the picture later in
the editing section, you will know how
are we combined the picture to make this
would levitate, okay? And then we will also
combine another big gender. We put something here. So this is this combination about like tree
until five picture. And then I suggest you sharp using a tripod here
because you want to combine tree until they're into one who have to
make sure that you get consistent position on the cake for every
single picture. And then pulled the
lighting settings, I can say thinking it's
just the same with the war, but we changed the
lighting year. This time I used the
guard dogs AD 200 row. Here's the product. Actually, this is not
a paid promotion. I personally used this
kind of settings. I want to shoot with the
higher shutter speed, especially when you want to pour something, went very fast. You no longer sharp with the 100th friendly fly faster
the shutter speed, but maybe you will use
the shutter speed. There is more than 300. To make sure that if you put something that
wouldn't be freeze, then you need maybe
like shadows bit above 300 and this lightning
support that. So yeah, this is the
position is just the same. So in the next section we
will do it in photo shoot, and I'll see you in
the next section.
19. Project 2 : Levitation Photoshop Editing (Update): Hello guys. Well, back again in the video tutorial on how we combine Levitation photos, guys. Well, for this time I've opened the DOB
Photoshop software, here, this is the initial view. We can just go to the
file, click open, then select the folder
where the folder already contains the photos
that we've selected guys. Well, here by chance, there are already
some photos that I've selected to be used as
Levitation photos, guys. Well, here I'll
choose the main photo of our Levitation guys. You can just click on the photo, then click open Guys. It will appear like this guys. Well, here I'm going to add some cupcakes that will
be flying around here, over here and over here guys. And also some sprinkles
of grains and nuts that will spill
from above faults. Well, that's the
image we want guys. Okay, now we'll add the
cupcakes first guys, we can directly open
the file Xplorer. Then choose which
cupcakes we want to add guys at this cups we track. Then if it looks like this, we can rotate right click, then click rotate 90
degrees clockwise. Then we equate the layer
with the existing layer. Then click Enter. Then we can just reduce the
opacity right here, around 50% Here, we can
fit the photo first. Where do you want the
cupcakes to be placed, guys? Okay guys here. I'll rotate the image because I need a slightly
tilted cup K here. Guys, more or less
in this position, Guys, if you're done, we can immediately
increase the opacity guys. When the opacity
has been increased, we can directly click
Add Layer Mask here. Then we change the color
to black again here guys. Then we spill the
paint bucket tool on this picture guys
until it disappears. Then we can change the
color again to white. And we copy this
layer first control, then delete the layer mask. We lower the opacity, we return to this layer, we select the layer mask, then we select the brush tool. Well here I just brush
on the cupcakes guys. If you are sure we can turn off the cheat layer first guys. So we can tie the up on the edge parts guys to delete the edges that
have already been selected. You can immediately change them to black, then you
can delete them. Okay guys, if it's done we can just delete
the chat layer. Okay guys, I'm here to
add a cupcake here, guys with a different shape. I'll repeat the steps. I'm going to open the
file Explorer here, then I'm going to select the photo with the
cupcakes that I want guys. Then we drag the photo. Then we rotated 90
degrees clockwise here. Then we feed the shape guys, well, like this guys. Then we set the opposite
to 50% more or less. Then we'll set the
position over here guys. More or less. Okay guys, if you get the
position you want, we can immediately
increase the opacity. Then we just click
Add Layer Mask here. Then we select the
paint bucket tool, make sure the color
is black here guys. Then we spill the color into this layer mask guys
until it disappears. Then because we
need a cheat layer, we'll copy it with control J. We delete the layer mask first. Then we lower the opacity guys. Now after we lower the opacity, we can immediately select
the layer mask below. Then we select the brush tool, then we change the
color to white. Okay guys, don't forget. Make sure the opacity
below is 100% guys, because if not, the results
will look like this guys. Okay, we can directly
brush here guys. Because here there
are the hands guys. So we don't need a
brush on the hands. We can just turn off
the cheat layer, make sure what we've
selected is correct guys. Also, we can thicken the
edges to make it better guys, Also pay attention to the
details like this drop guys, we want these drops
to be seen guys, make sure these details
will be visible. Guys, don't forget to make sure the colors here
are changed guys. Yes, if you want to
make it thicker, you can choose the white one. If you want to delete it,
you can choose black. Don't get confused, guys. If you're done, we'll override this cupcake with the photo in this section.
Without hands guys. We open the file Explorer, then we select the photo, then we drag it
again to Photoshop. We rotate, we fit
the layer here guys, then we set the opacity. We are using the
move tool here guys. Well, we'll try how this cupcake is the same
as the cupcakes here guys. Okay, let's equate the
shape and position guys, if you're done here, you can just increase
the opacity. And for the previous
cheat layer you can just delete it as before. We click Add Layer Mask. Then we spill the paint bucket
tool here until it's gone. The click control J
as a chat layer here. Let's delete the layer mask. We return to the
layer mask below. Then don't forget, we
first set the opacity. Then we go back to the bottom
layer, this layer mask. Then we can just click
the brush tool here and brush the part that is missing because there is
a hand part guys. Well, you can see there are some parts that
are not fit guys. Well, if there are parts
that are out of sync here, you can just manually adjust it. Like this guys we drag so that the position fits according to
the existing layer. Well, if it's done, then the result will be
like this guys. Then we're also going to add a cupcake over here on top guys. Okay guys, I'm here to add another cupcake over
here on top guys. We'll repeat the step. We open the File Explorer, then select the cupcakes
that we want to include in our image guys, Then we rotate. Then we fit the layer according
to the existing layer. Then we set the
opacity guys here. Well, if we've
lowered the opacity, we can adjust the
layer and place the cupcake where
we'll place it guys. Well, if you get the
position you want guys, you can immediately
increase the opacity. Then we just click
Add Layer Mask here. Then we spill it with the
paint bucket tool with black color until it
disappears like before. Then we copy the layer, then we delete the
layer mask here. Then we lower the opacity. Again, this layer is
just a cheat layer. Then we select the
layer mask below again. Then we change the
color to white. Then we select the
brush tool guys. Well, brush on the
cup kick part guys. If it's already selected, we can first delete the
cheat layer so we can focus more to select
the ones that are not good to look at guys. Well, guys. Here is the part that is
affected by the hand guys. Well, here now I'm
going to overwrite a photo that doesn't
have hands on it guys. Well, we can go directly
to the File Explorer. We choose a photo where this object doesn't
have hands guys. We can just rotate
it right click, rotate 90 degrees clockwise. Then we fit the layers
here guys until they fit. We can just delete the
cheat layer earlier guys. Well, this one, this new layer, we have the opacity to fit. We lower it, then we use the move tool
to move the cup guys. Then we fit the position
with the cup earlier guys. If you're done we can
increase the opacity. Then we click Add Layer Mask. Then we change it to black. Here we spill it with the
paint bucket tool gas. Well if it's done we can
copy it using control J. We delete the layer mask. We change the opacity to lower, then we go back to
the layer below. Then we select the brush tool, then we change the
color to white. Then we brush the parts
that were erased by the hand guys, it's
like this guys, we can select the
layer below guys, tidy up where it's
still lacking guys, the result is like this
guys, more or less. Then I'll also add a scene here, like someone pouring
honey from above here. It's the same way
as before guys, you can just delete
the cheat layer that we created earlier. Then we choose a photo with
honey being spilled guys. Well, we can just go
to the File Explorer. Then we choose photos that
already have honey guys. We can immediately rotate again. Right click. Rotate 90
degrees clockwise guys, we feed the layer here guys. Well, if it's done we
reduce the opacity. Then we can just match it
with the first cup cake guys. Well if you're done we'll increase the opacity
again, guys. Then we just click
Add Layer Mask. Then we click the
paint bucket tool with black color
until it disappears. Then we copy the
layer control J. We delete the layer
mask here guys, we reduce the opacity on
the cheat layer here. Then we go back to
the layer mask below. Then we brush with white guys. On the honeyside guys, we can turn off the cheat layer first to see if our
selection is correct. Okay, it turned out
to be correct and this is the result of the
honey that we brushed Guys, we can just delete
the cheat layer. Well, okay guys, this photo looks like someone is pouring
honey from above guys. Now I'm going to add some grains that seem to have fallen
onto display guys. Well, here I'll add
some grains that fell and seem to be
hit by display guys. You can directly select
the file Explorer again, then select a photo
that does have an object that we
want to display guys. Then we rotate, right click, rotate 90 degrees clock wise. Then you can adjust the layers to match the existing layers. Well, if you're done, you can immediately lower the opacity. Then you can adjust
the object with the grains in the
position you want, guys. Well guys, if you get
the position you want, you can immediately make
the opacity even brighter. We'll increase it again. Then you can directly
click Add Layer Mask. Then you change the
color to black guy. You can select the
paint bucket tool, then you can just peel the
color until it's gone. You can directly copy it using control J. Delete
the layer mask. Here we reduce the
opacity for this layer. As a cheat layer, you can directly select the
layer mask below, then you change the
color to white. Then guys, you just
click the brush tool. Then guys select the grains that you really want to
display here guys, so guys, if you have got
the object you want, you can just delete the chat
layer. Well, like that guys. Well, this is the result
of levitation editing. For this foot guys, it's as if someone poured honey and also some grains spilled
onto the plate guys. Well, this is the end of our
levitation editing guys. Well now we'll save this image
by clicking control plus. Then we can set the name. For example, the name
is Cpk Levitation. We can just save the document. The document is a Photoshop
document file guys for the Cpk photo
that we are editing. We'll save the document first. If you want to save the JP file, you can directly
click Control plus, then you can select JP here
guys, then click Safe. Well, for this rule, I usually
use the maximum quality, this is the most right corner
guys, then click okay. Then the photo will be directly saved in your gallery guys. Well maybe that's
all for the tutorial on editing levitation
photos, guys. Thank you. See you next time.
20. Project 2 : Levitation Lightroom Editing (Update): Okay, hello guys. We've entered this foot, guys. They are the image
of lying cap K guys. Well, for this photo
we just have to follow step by step according
to the previous videos. Guys, let's go straight
to the light menu here. We'll change the exposure
for this picture. I'll add a little exposure guys. As usual, we'll reduce
the highlights to -100 The guy here
for the shadows, I'll add almost the
right align here, the highlights around
993, to be precise guys. Then for the brightness here, I'll increase the whites
around plus 60 guys. Well, for the plaques here, I'll reduce the bit guys -19 guys to produce a slightly darker image
for the foot guys. Well, we can go directly
to the color menu here. Now in the color menu, we'll reduce the
temperature a little guys, -12 Then we're going to enter the color mix right here for the color mix
and the red color guys, we'll reduce the hue
first to minus eight. Then for the saturation here, I'll also reduce it to -14 guys. Then I'll also reduce
the luminance guys, well at -63 guys. Well, for the next I'll go to the orange color guys
in the orange color, I'll reduce the hue a bit. Minus two here guys, for the saturation here, I'll also reduce
it to minus seven. Now if we're done, we can
immediately click done. We don't need to
edit the yellow, green, light blue, dark blue, purple and pink colors because in this picture
they don't exist. Guys, we can just
click Done here. We can immediately move to the next menu which
is the evac menu. Guys, in the effect menu
I'll add the texture after re done with the texture then we'll reduce the
clarity a little bit. Okay, after that I'll add
the hayes to plus four guys. Well, next I'll enter
the details menu guys, in the Details menu, I'll add the sharpening to plus 140 guys. If we increase the sharpening, then our image will
be broken guys. Therefore, we'll
counter the sharpening using the masking guys. Add the masking
here to about 85. If we're done, actually, our photo is finished guys. This is before. This is after. Well, this is a tutorial for
editing levitation guys. Why am I only using form
menus here actually? Because it's enough guys. There's no need to make
things complicated, right? We only need formnuse. We can immediately get a
photo as good as this guys. Besides actually for
this levitation photo, it's actually been edited
in Adobe Photoshop. Guys, the images have
been combined one by one, guys in Adobe Light Room, we only need to adjust the
image color and light guys. Well, maybe if you
follow the step by step from start to finish for
this video tutorial, you can directly click
the shared icon above. Then you can directly export to camera role to save
your edited images. You can just wait
for the rendering. Well, if you're
done, your pictures are already safe
in your gallery. Well, that's all for this video. We can immediately move to the
next foot guys. Thank you.
21. Project 3 : Choose the Right Props !: Okay guys, Welcome
to this section. In this section we will take
beverage photography, okay, So in this section we will explain to you how
we take beverage, how we set the lightning. But in this section
above the props we use for this scene. So we have already
prepared to beverage here. And then one has the focus and the other one
has the background. And to add more levels
we used is fibril. We use this one as
the leveling to make our beverage look higher then
because this is green tea. So someone from Japan maybe
familiar with this one. I don't know. Maybe people use
this one to shake the grindy powder and we
used small spoon like this. Actually, if you want, you purchased wound for your food photography or
beverage photography, I suggest you to invest the
smallest wound like this. I think this is smaller
than dessert spoon. I suggest to you
to have this one. Don't use the large bone in your food photography
because it will make your foot looks very small, even if your food is large. But if you've put the large
wound beside your beverage, it will make your beverage
looks way, way smaller. And then to add more seen, I use green powder on the
top of this wound here, and then to add more texture because the background is
already full of fixture, but I want to give
another texture. So I use this kind of close. Actually, I just buy this from the marketplace and you can purchase this as
large as you want. But the only thing
you have to pay it is if you want to buy this kind of throughout
close like this, you have to make sure that
you don't buy the glossy one. You buy the math one. Okay? We will put like right here to add more texture
in our frame. So this is how we
set our frame here. I don't want to put too many
crops in this background because actually we already have quite complex subject here. So I will make this
scene notes more simple to make people easier to look at the
main subject here, okay, So this is how we
frame our scene here, and I'll see you in
the next section.
23. Project 3 : Lighting & Camera Setting: Okay guys, Welcome
to this section. In this section I will
explain to you about the lighting for beverage,
bright moon photography. Okay, So before we have
already shoot different food? Yeah. Okay. I'll show you the picture
that we have taken before. This one. If you see this one, the phase of this
k is on the top, the top area of this k, The main interests
of this gate is on the top on the
chocolate area. But I have a question for you. Which part of this bed for each new thing is the main
face of this beverage. Is it the fraud or
is it the top area? Okay. For me, I wanted
to see beauty of this beverage is on
a beverage, okay. You can see the layers
in this beverage. So this is quite different with the first case
that we have taken, because the first cake
that we've taken, the beauty of the
cake is on the top. But this one, the beauty of
this benefit is in the floss. Actually the face, most of the vapor is on
the front area. For this kind of product, we will use the different
lighting position. If you wanted to shoot the
beauty of this beverage, I suggest you try using this
lighting position, okay? The first symbol
rule is if I want to get the beautiful texture
in front of this beverage, the first I make
sure the hate off the lighting is slightly the
same with your beverage. So I don't want you
to put the lighting here taller than our French, but I make sure that the Hague of the
lighting is the same. The distance here is
about like one meter. Then the likelihood
machine we've pushed the lighting five
centimeter to the front of our beverage to
make sure that the lighting a little bit
come through this area. Then if I didn't use the
diffuser just like this, the likey will make very
harsh line of light here. But if you use the
fuser here like this, it will diffuse the lighting
of the studio light to make beautiful soft lighting in this right area
of R be abridged. This case, I put the diffuser 50 centimeter in front
of our lighting and then the left side
of our beverage here because this area
will become a shadow, then I bounce the light
using this whiteboard. Actually you can also, if you use another
lighting here. But in this case, I still want you to get a beautiful transition between
the light, darker area. I use this one because
if I use this one, the lighting real thought that strong but still enough
to feel the shadow. Because if I use the same strong lighting in the left side of
the area, this case, I will lose many texture because I want to make
a little bit drama in our picture like the
steel little bit shadow in the left side of
our bare friendship. That's why I use this
kind of white the board. Okay, so this is how
we said are likely. And then for the lenses, if you want to specialize in food and
beverage photography, I suggest you in the 100
millimeter macro lens, is it for candidates,
for nickel? Is it horizontally, whatever, but 100th millimeter macro lens? Yes, one of the best if you
wanted to shoot the beverage. Okay. So what I suggest you not
to do is I prevent using wide angle lens to
shoot this kind of thing because this
object is quite call, if you use the wide angle, the dispersion will be
very, very visible. Then for the camera
setting is still the same. The only setting that I
changed is only the f-number. I changed the f-number to
7.1 because in this typings, the 7.1 aperture produced
the exposure that I need. The brightness that I like is when I said the
exposure become 7.1. This is how we set our camera. And then I'll see you
in the next section.
25. Project 3 : The Result !: Okay guys, We have already
affected our picture. And then still you can see that we have already
get beautiful exposure. But if you feel that the
picture is quite dark, then we will move into the
editing section and I will explain to you step-by-step how we added this
kind of feature. Here is the comparison between before and after the editing. How do you experience
something when you add it with right route food
photography and you feel that this picture is too bright. I don't think this is bright mug because this is too dark. And then when you move your
picture to the smartphone, you feel that all the
contrast is too high. So many first-generation
of the screen, we'll make our picture
looks different. We have already experienced
this kind of situation, and then that's right. While we are doing anything, we've made sure that you
don't use the quantity, It's too high or too low. Who makes sure that when we post our picture in the Instagram, whatever screen anyone
used to see our picture, it still looks okay. It doesn't look like overexpose. It doesn't look like
all birds saturate and under the right mood
is very sensitive. In many, most cases sometimes, but when you are editing
the breadboard here, if you see in different screen it will look like overexposed. Are, sometimes it loop
like oversaturated. In the next section, I'll explain to you
the step-by-step, how we edit most of our grade will be just
crazy reform beverage. Okay. I'll see you
in the next section.
26. Project 3 : Lightroom Editing (Update): Hello guys. Well, we've arrived at the foot
guys which are green, green like this guys. We'll edit the colors using
Adobe Light Room guys. Well, now we'll
use the crop guys. The crop menu is
used when we have raw photos that don't
fit with our frame guys. For example, this one is
a bit tilted guys, well, therefore, I'll use the crop here until it doesn't tilt guys. If it feels like
it's not tilted, we can immediately
click the thick, then we can edit it directly on the light menu here,
the same as before. We immediately reduce
the highlights guys until they are left a line here. Then for the shadows here, I'll use almost right a line. Okay guys here, I'll
increase it to plus eight's. Then for the whites, the brightness of
the whites here, I'll use almost to right a line to guys around the '80s maybe. Okay, As for the blacks here, I'll reduce it to -40 guys. If you're done then the light menu is finished
for the editing guys. Well now we can immediately
move to color guys. Now in the color I'll reduce the temperature
to be cooler. Okay guys, well,
minus nine guys. Well, you can see the photos are whiter guys according
to our theme. Right, Mood guys. If we're done, we can go directly to the
details menu guys in the Details menu
sharpening to 120 guys. Well, according to what
we said before guys, if we add the sharpness, we need something
called the masking guys to counter the sharpness to be smoother guys here
for the masking, I'll add about the 80 guys. Well after that we'll also use the tool called
the noise reduction. Well, for this noise reduction
I will add about 14 guys. Then here we'll use the geometry to reduce the distortion guys. Two minus one because our photos are a bit
too tilted guys. Well, if it's done, actually our photos are finished guys. This is the before and
this is the after guys. However, if you subscribe
to using Adobe Lit Room, which is paid for, you can use a menu called the
Masking menu Guys. While in the masking,
we can change certain objects that
we've selected. Just like the following
example guys. I'll change the first object which is the glass guys here. I'll add using the brush tool
on the glass object guys. Then I'll go to the Details menu guys and add the sharpness. Why? Because I want
to add sharpness in the glass area guys
to make it sharper. Well, we can immediately
click the thick. Then guys, we can
immediately add the masking. Again, I'm here using the radial gradient to
select the glass guys. However, I'm here to select
on the outside of the glass. Therefore I'll add
the inverted here. I'll use an invert
on the outside guys. Now if you're done, we can go directly to the
Details menu here. Because I want to reduce
the details of sharpness. The sharpness outside of
the glass object guys here, I'll reduce it to -50 Well if we're done we can
immediately click the tech. If you're done guys, here you can see that there is a glass area that is too
over the highlight guys. Right. Therefore, here
I'll use the brush tool to select the edge of
the glass so that the highlights are
not too over guys. Well, now I'll
enter the Lat menu. Then I'll reduce the
highlights guys here. If there is an object that
has already been selected, you can delete it right
away here using the eraser. Well, I'll delete guys on this part so that only
the Gs are selected. Well, that's it guys. It looks like the glass line on the H is not too over
For the highlights guys, click the ten for this picture guys,
the highlight is too. So I'll brush on this part, then I'm going to the
light menu right here. Then I'll reduce the
exposure a bit guys. Then here I'll reduce the
highlight to -100 Well, it's more or less
like this guys, for the edges of
the bottle guys. Now here I'll also brush
on the entire glass object guys because here the area is quite bright guys and
it's also over right. Well here I'll reduce
the highlights guys. In the light menu,
we click the tick, then this is the
image we want for this bright mood
them image guys, this is the before guys, this is the after guys. Well, it's better guys, right? If you've reached
this stage guys, you can directly
click the Share icon, then click Export
to Camera role. If you're done,
your photos can be directly saved in your gallery. Well, that's all I might share in the tutorial for this photo. We'll immediately move to the next session,
guys. Thank you.
27. Project 3 : Preparation of Levitation Shoot: Okay guys, Welcome to
this bonus section. In his bonus section,
we will prepare to take the left rotation
photography for this one. We have already
sapped it before. The only thing that we changed, It's only the lighting there. The lighting before
we shoot with the studio lighting
Goldilocks and the 300, actually delighting
we used before. It's not support thing. If you want those shoot
the high-speed like this. If you wanted to
shoot the levitation, if you want to pour something, you have to shoot with
the higher challenge me. So we use the Go dogs AD
200 fro for this one. We plan to shoot yours
this ingredients here, everyday being we were poorer, something, we will combine some picture like me
and therefore picture. In the next section, we will show you how
we pick and how we combine into one while
doing the editing. In the next session, we will
directly should this one. Okay, I'll see you
in the next section.
29. Project 3 : Levitation Photoshop Editing (Update): Hello guys. In this
video I'll explain a video tutorial
on how to combine levitation photos for
the second Al guys, well, this is the main view. When we open Adobe
Photoshop guys, we can just open the
file, click open, then we select the folder that contains the photos that
we've selected guys. Incidentally, these are
the photos that I've selected as our
Levitation photos guys. This is the main photo and
you can just click open, it will immediately
appear like this guys. Well, okay guys, I'll add a spoon that's spilling
seeds Here guys, we can just go straight to file. Well, we can just
select the file that will insert into
Adobe Photoshop. Guys, just track it if
it looks like this. Right click and select rotate 90 degrees clockwise so that the result is
portrayed guys, then we fit the photo with the layers that
are already here. Well, if you're done, we'll reduce the opacity so that it looks shaded
like this guys. Then we pull it up, we fit it in the place where we want the
spoon to be placed, guys. Okay guys, I want
to put it here. Then we can just
increase the opacity. Then we just click
Add Layer Mask Here. We change this part to black
using the paint bucket tool, we spill it until it disappears. Then for the cheat, as usual, we click control J. Then we delete the layer mask. Then we can lower the opacity
to 50% or around 40 to 50. To make it a bit shady, we can just brush on the
layer mask below guys. Well, if your brush tool
doesn't have a circle or arrow, you can directly
click caps lock here, then you can enlarge it. Well, here I'll just
select the spoon guys. Just the spoon. Don't forget to change the color from
black to white guys because here there
is a hand object. I don't select the hand because later we'll override
it again with a photo. Whose hand is not in
this position, guys? Okay guys, if it's done, we can see first if it's tidy. If it's not, we'll tidy it up first so the image
looks like this. Well, to delete the hand that
has already been selected, we can delete it by changing
its color to black. Okay, if it's done, it's a bit lacking here. We'll delete our
cheat layer first. Well, okay guys, so I'm here to overwrite the spoon with a photo that is
in this position, the spoon has no hands. I can go directly
to file Explorer. Then we select a photo
that doesn't have hand guys as usual. Right click, select, rotate
90 degrees clock wise. Then we fit the layer. If we're done, we can
immediately reduce the opacity. Then we change the position until it matches the
first spoon guys. If it's already fit, we can immediately increase
the opacity. Then we a layer mask, then we spill black using
the paint bucket tool here. Then we first copy the layer using control J as a chat layer. We delete the layer mask. Then we reduce the opacity and return to the bottom layer. We select the layer mask and then we brush with
white color guys. We can turn off the
bottom layer first to make the selection
ter here guys, if you're done we turn on
the main spoon image again. Well, here there
are more handles, so we'll remove them
using the brush tool on this first layer
using the black color. Okay, well, we can
just delete it here, our cheat layer for
the second layer. Well now I'm going
to add some of the green biscuits
flying around here. Guys, the method is
the same as before. Let's go to the File Explorer. We choose a photo that
will select guys. Well, here I'll
choose the photos that will include
to our main layer. This is the layer guys. We can just rotate it with the
layer until it's the same. We can lower the opacity. Then we can adjust the position to the position we want guys. Well, if you're done, we can immediately increase the opacity again to 100% Then we
click Add Layer Mask. Then we spill the paint
bucket tool with black color. Then we copy it using control J. Here we delete the layer mask. Then we lower the opacity
as a cheat layer. Let's reselect the
layer mask below here. Then we select the brush tool, Then we change the
color to white and we select the biscuits
that will appear guys. Okay guys, here are some
sticks that are still visible. We can remove them by changing
the color to black guys. Well, if there are some
minuses like this, we can just stamp it with
the clone stamp tool. Then we click the old key here, then we drag it to the part
that we want to show guys. Well, okay, if it's done we can delete this again,
the cheat layer. Then we'll add some more
biscuits around here guys. With the same process, we
go to the file Explorer, then we select the photos we want to take from the folder. Then we drag, then we rotate
here 90 degrees clock wise. Then we feed it guys. Well, if it's done,
we set the opacity, we lower it, then we position it with the
position we want guys. Well, it turns out that the rotation was a
bit tilted guys. The goal is for me to get the position of the
biscuit that I want guys. Now let's increase the opacity. We click Add Layer Mask. Then we spill it black color
using the paint bucket tool. Then we copy it using control J. Then we delete the layer mask. Then we lower the opacity. We select the bottom
layer mask again, we change the color to white. Then we brush using
the brush tool guys, we can turn off the
cheat layer first. Then let's tidy
it up a bit here. Well, here is the stick object that we have to get rid of. Let's delete it first
using black guys. Now, since there are still
sticks visible here, guys, we can just right
click on this layer. Then we select the
rasterized layer. Then we can directly select the spot healing
brush tool guys. This will remove
the stick objects, there are still visible guys. Well, like this guys, if it's still not neat, we can directly select the
clone stamp tool. Then we copy it
using the out key. Then we drag here to
make it look neat guys. Well, if you're done it
will look like this guys. We delete the cheat layer, then I'll add some
more biscuits guys. Well here I'll repeat
the steps as before and I'll add some more biscuits in some of these places, guys. Well, we are done in the
biscuit section, guys. Now I want to add some chi that will fly around too, guys. Well, the process
is also the same. We just go to the file explorer, then we choose the
photo that we'll insert into the main layer guys. Well, like this, we just
rotated 90 degrees clockwise. We fit the layer to
fit the main layer. Then we select the opacity. We lower the opacity guys. Well, if it's done,
we can immediately fit it into the
position we want guys. Okay guys, if it's already fit, we can immediately increase
the opacity again. We click Add Layer Mask. Then we spill the
color with black. Then we copy it here
using control J. Then we delete the layer mask. Then we change the opacity
to low as our cheat layer. Then we select the
layer mask below. Then we select the brush tool. Then we change the
color to white Guys, let's brush the mochi here. Everything has been selected. We can turn off the
cheat layer first. Well, from here we
can tidy it up even more for the stick. We can immediately delete it using black so it's
not too feasible. Well, if we're done, we'll delete the cheat layer. Then we'll add more
mochi here guys, just like before we
open the file Explorer. Then we add a photo to take the mochi again into
the main layer. Guys we drag it, then we rot it
using right click, we fit the layer,
we click Enter. Then let's lower the opacity. Then we fit the position
with the position we want. Well, if it's done, the
position is just right. Then we increase
the opacity again. Then we click Add Layer Mask. Then we change the color to, then we spill the color
here until it disappears. Then we copy it as a
cheat layer control J. Then we delete the layer mask. Let's lower the opacity
again, guys here. Then we select again
the layer mask below. We change the color to white. Then we select the brush tool. Then we brush again the mochi
part that we'll insert into our image guys to make sure
everything has been selected. We can turn off the
cheat layer first. Then we tidy it up again. Here, well the stick part here. We can remove it again
using black guys. Then if it's not thick enough, we can brighten the
edges again using white. I'm still going to add
one more moche here, but first let's delete the
layer that is actually our cheat layer as usual. Let's go to the File Explorer. First we select the photo that will insert into our image. We track it. Then we wrote
it using right click. We rotated 90 degrees clockwise. Then we fit the layer to fit
just like our main layer. We click Enter. Then
we lower the opacity. Then we fit the position to
the position we want, guys. Well, if the position
is the same as we want, we can increase
the opacity again, we just click Add Layer Mask. Then we spill the black color
here guys until it's gone. Then we click control J
to copy as a chat layer. We delete the layer mask. Then we lower the opacity guys. Then we move again to the
main layer, this layer mask. Then we change the
color to white. We select the brush
tool to brush the part. We want guys to be more sure we can turn
off the cheat layer first. Let's delete the stick.
Guys use black here. Well, this is the mochi we want. Well now we're going to add the grains that come
out of the spoon. It's going to spill over
the biscuits and onto this mochi guys who's going
to crash like this guys? The method is the
same as before. Okay guys, we're going
to add some grains here. It will look like it was
built by the spoon guys, so it's going to
crash like that guys. Well, that's how it was.
We open the File Explorer. We open the photo, then
we select the photo. The image is here guys. We drag it, then we put it here. Then we rotated 90
degrees clock wise. Then we fit guys to
the existing layer, lower the opacity guys. Then we fit it according to
the position we want guys. Well, I want the position
to be here guys. I'll take this part guys. If we get the position we want, we can increase the opacity. Then we just click
Add Layer Mask here. Then we change the
color to black. Then we spill it using
the paint bucket tool. Then we copy the layer
using control J. Then we delete the layer mask. Then we lower the opacity as
a cheat layer on this layer. Then we move again to
the layer mask below. Then we select the brush tool. Then we change the
color to white. Then we select the grains
we want to display guys. Okay, if it's done, we can
turn off the cheat layer first so we can see the selection whether
it's need or not. If not, we can delete
it using black guys. Now that's already need, we can delete the cheat layer. Then guys will add
some more grains that fill here in the
same way as before. Guys, we open the file Xplor, then we select the folder, we want to take the photo guys, we rotate as used wall, we fit it like the first layer. Then we choose the opacity. Then we choose the
position we want, guys. Here is the position.
Like this guys. Then we increase
the opacity again. We click Add Layer Mask. Then we spill black here
until it disappears. Then we click control
J to copy the layer. We delete the layer mask. Then we lower the
opacity as a cheat guys. Here we select this
layer mask again. Then we select the
brush tool using white color guys. Then we brush, well, if it's elected, you can just delete the
cheat layer directly. Well, this is the result of
the second foot photo guys. If it's done, you
can just save it with the Control plus button. It will save your Adobe
Photoshop document. Well, if you want to
save your J Pac photos, you can directly click
Control plus Shift plus. Now you can directly
select J Pac here. Well, you can directly
name this file. For example, second
foot levitation guys. You can directly save here
and choose the maximum for the image
quality. Click okay. Then it will
immediately save guys. Well, that's a video tutorial for the second
levitation foot guys, we can move to the next
foot guys. Thank you.
30. Project 3 : Levitation Lightroom Editing (Update): Okay, hello guys. We've entered on the
next foot photo guys, the image of Macha, like this guys, the ones
that have green colors. And there are also seats
that fall like this guys. Okay, well now I'll
follow step by step. Like the previous video guys, I'm going straight to
the light menu here. Then I'll increase the
exposure a little bit guys, then for the highlight as usual, I'll reduce it to
left line guys. Well, for the shadows guys, I'll just add a bit in
the mid, around 50 guys. Okay, then for the brightness
here, I'll use the whites. I'll add about half of the
whites, maybe around 56. Then for the black here, I'll reduce it to the
best at -38 guys. Well, if you're done guys, we can immediately move
to color menu, guys. Well, in the color
menu I'll reduce the temperature just like
the previous images. But guys, what you
need to know is if you have a raw image that
is already cold, already bluish guys, you can immediately increase
the temperature guys if the case is your
image is too warm. So you can reduce the
temperature guys. Well, here I'll reduce it
to about minus nine guys. Well, if you're done, we can go directly to the color mix. Here in the color mix, I immediately choose
the green color. Why? Because the screen color is quite dominant in our food guys. Well, here I want to reduce the luminance for
the green color. If you're done, we can
immediately click done. Why can't I set the red, orange, yellow, light blue, dark blue, purple, and pink colors? Because these colors don't
exist in our image Guys, we can immediately click Done. Then we'll go directly to
the Details menu, guys. Well, in the Details menu, I want to increase the
sharpening to around 120. Then as usual to counter
the sharpening here, I'll use the masking guys. Well, if you're done here, I'll increase the noise
reduction as well in the below. Okay, actually guys, your
image is finished guys. Yes, you just use three
menus to edit this image. Guys, don't use the
effect menu for this image because the texture
is already strong enough. This is the before image, this is the after image guys. After we edit it, we only
need to set three menu guys. This is a menu that
you can use for free in Adobliteroom guys now. Meanwhile, if you have
subscribed to Adoblite room, you can go directly
to the masking menu. Well, for this
photo, I want to use the masking for the whole
class using the brush here. Now if you have
selected the area guys, we can immediately arrange the objects that
we really want to throw away here for selection
using the eraser guys. The point is the red one is the object that will
change guys here. I'm going to move
to the evac menu, then I'm going to add the
texture guys around plus 70. Then for the clarity here, I'll add just a bit
to around plus 26. Then for the Hayes here, I'll add about plus one guys. Then we'll move to the
details menu for this photo. I'll add the sharpness to
right a line or plus 100. Then guys, if you're done, we'll select the outer part of our main object by selecting
the radial gradient, then we select the part
of our main object. Now since we want to select on the outside of our main object, we'll use the inverted
menu here guys. Well then the part that will be selected is the outside guys. Well, I'm going to use
the Details menu here. I'll reduce the sharpness other than our main object guys. Well, we can immediately
click the tick. Well, that's it guys
for this picture guys. This is the before and
this is the after. You can see the
image is sharper in the main object because it can be seen when we
see the before image, it still looks soft guys, right? When we change it using
the masking menu, the main object is visible. The wafers become sharper guys. And that's the
photo we want guys. If you have followed step
by step from the beginning, you can immediately
practice it in your photos. Guys, don't hesitate to watch this video tutorial when you're editing
as an example. Don't be afraid, Don't worry, because you really have to practice it with the
photos you have. If you're done, you
can directly click the Share icon above the guys. You can click Export to Camera. Well, if it's rendered, then your photos can be directly
viewed in your gallery. Well, that's all for this video. Tutorial. Goodbye and see you
next time guys. Thank you.
31. Project 4 : Choose the Right Props: Okay guys, Welcome
to this section. In this section, I will show you the preparation for
this week journey. Okay, so before I show
you the props we use, then I will give you a hint all the result of this settings, okay, So this is the result
that we wanted to take. Then the strategy behind
of this composition, we use Ledi lines as the
composition strategies. What is leading
lines is the line that direct our new worse I, okay, so I'll put little
lines in this picture. And as you can see that there's
a curve on our picture. We use our breaths through
shape the curve. Okay. So as you can see in
this picture, yes, this is called leading lines. There's some strategy. If you want to use
the leading lines, you can use the straight line. You can put your
props that shaping straight line or shaping
length of c article, either ask or
another composition. And then I'll start
with this a props, okay, So keep using the
Laffer link in your props. So I use this as the
props, the first level, this is the second level, and also we have the
ingredients at the third level. And the forklift will
use this small spoon. Ok, so the four levels of props, we'll add complexity
in our frame, but it won't be
stretching our eye because we still use the
dry props for bright mode. And then one principle
that I really look up to, when you shoot the top angle, I usually make sure
that my hero foot here is the largest
items in my frame. I don't want you use the, another plane that's
the props that is larger than my hero. I used the smaller plates. You have to fast
on smaller plates because it will be
very useful and you can use as many times as you
want without considering that anyone already noticed that you use the same
prompts all the time. But if you use the
smaller crops, you can use as many
times as you want. But if you use the
larger play it, then I can guess that maybe you just use a couple of times. And then the next one is, I also use this
linen tablecloths under my goal here
to add the lamppost. And I also use this
kind of loneliness and bulkload under my food
share to add more levels. The next one, I also
use bread here to increase our story here because this is a
breakfast scene, so I add the breath here
and then this small plate, I also put some bread
and fish tables. Okay, so, yeah, this is how
we plan our props here. And then I will show you
in the next section.
33. Project 4 : Lighting & Camera Setting: Okay guys, Welcome
to this section. In this ion channel,
we really sharp using the angle like this. As you can see, we shot
a beautiful tool here. And then because the soup
half heck stirring it, I want to make sure that I
have the highlight in my soul. I will show you in here
the comparison retreated, the soup that half the highlight and doesn't have the highlight. Okay, so I will show you first this is the highlight
with I, one. You can see inside the wall, you can see the highlight, that beautiful shiny
white light on our bowl. Okay, this is what I
mean about highlight. It makes a beautiful
texture in our soup. And then I pick another picture without highlight so you
can see the difference. So these are the companies
in-between the picture that doesn't have highlight
and have the highlight. So sometimes if you cannot
see the difference, that it is very hard
to create the picture with highlight with if
you already get it, you already can see
the difference, then it is very
easy to note this if you need to change the
lighting position or not. Again, to make sure that you have a beautiful highlight
inside your Bohdan, you have to make sure
that the lighting is bouncing back to your lens. Okay, So as I said before, we should the top angle, so my camera position
here and then to make sure that that is a liking bones in
vet to my glands, then I make sure that the
right thing is quite high. So when the lighting
come through the bowl, it will bounce back
to our camera. That's why the highlight is so beautiful
because the lighting from the air come to the ball and bouncing back to the camera. If you want to make
more highlight, it is very easy. You just make the
lighting higher. If you make the writing in
this position and facing down, then it will easier to
bones to the camera. In this section, I will
make the lighting a little bit lower because I
still need shadow here. But if you really like
beautiful highlight, then you can try to put
your lighting way higher. Yes, this is how we
set the highlight and then delighting
position here from the fourth year to the
lighting is about sixties. And the method and
the distance here, which under fortunate
lighting also since this centimeter and then the difference between
our background here to delighting is also
60s and Demeter. And I use this board
to block delighting. I just wanted to make sure that the lighting is straight
to our foot year, so I blocked the unnecessary
lighting in back down. Yeah. And then I also put
the diffuser here. I put 35 centimeter
in front of our liked him and to make sure in the front area
you're still bright. So I put whiteboard
here so make sure that the lighting bounce
back to our frame here. Before the ****, I
will show you in cameras I think that
I use for this one. Actually, yes, the camera
setting is still the same. This is the end
frontpage that we can get when you should using DSLR camera or a camera with
the studio lighting there. Okay. So the one that
I changed because I want you to make the
picture is split or darker. So I use nine as my
f-number or aperture. Okay. I changed my land through
1740 wide angle lens. Okay, So that is housing, but I sat my thing and then I'll see you in
the next section.
35. Project 4 : The Result !: Okay guys, We have just due to photoshoot and then I'm so excited to show you the results. So this is the result
of the row picture. This is the result of
the comparison between before and after the editing. You guys careers, how
we added this one extra 1.5 different mood compared to the picture we
take the floor. So if you want to know how
we added this kind of mode, then the next step
we will show you exactly step-by-step
how we edit it. I'll see you in
the next section.
36. Project 4 : Lightroom Editing (Update): Okay, hello guys. We've
arrived at this photo guys. In this photo guys, we just
have to follow the step by step that we've gone through in the previous sessions, guys. Well, now I'll go directly
to the light menu, guys. Well, in the light
menu I'll increase the exposure guys because the exposure will increase the overall brightness
here, I'll add it a bit. Well here I will add it to
plus 0.95 for the exposure. Then in the highlights, like the editing in previous meals, in our bright mood DSLR theme, I'll reduce the highlight
skies to left line or -100 Then under the highlight
there is the shadow skies. I will add the shadows
to plus 70 skies. Well, for the whites
because it's different from the exposure here here. The whites will increase the
brightness in certain parts, only not in the whole area. I'll add the whites
here quite a bit, which is plus '60s. Okay. Well, if
everything is set, then the light menu
is complete, guys, we immediately move to
the color menu guys. In the color menu,
we immediately choose the color mix
for the photo guys. We immediately reduce the
saturation in the red part, guys, because here the red part is a bit too strong, right guys? Then I'll reduce it here. Then for the orange part, In the orange part, I'll
reduce the saturation guys. Then for the yellow color guys, I'll reduce the saturation
for the yellow color. But just a bit guys, maybe around minus two
then for the green color, because here there
is a green one, we can see here. I'll reduce the hue
first around -11 okay, until it's just right guys. Then for the saturation here, I'll reduce it to, well, for the luminus here. I'll also reduce it guys. Well, it's done for
the green color guys. We're moving onto
the light blue right here in the light blue color. I'll reduce the
saturation to left line guys because I want the light blue
color to disappear guys. Then we go to the
dark blue color here it is the same as
the light blue color. I'll reduce it full
to left align. Then in the purple color here, I'll reduce the
saturation to guys. Now for the pink color, I'll also reduce
guys because indeed, when we reduce the
color that doesn't exist or the color that
is no need in our photo, it is quite helpful for the
main color of our photo to pop up or come out,
guys. Yes guys. We can just click Done here. We can go directly to
the Evac menu guys. But in the Evac menu there is
a tool called the texture. I'll increase this texture
until it is right aligned. Then for the clarity, I'll just add a bit here to plus 20. And for the dehaze,
I'll add up to plus 15. If we're done, we can go
directly to the details menu guys. In the Details menu. As usual, we'll add
the sharpening guys. Well, if you're done we'll add the masking to counter
the sharpening guys. Now if we have
added the masking, we can immediately add the
noise reduction guys here. We'll add the noise
reduction to reduce noise in our image guys, we're done. This is the before
and after guys. By setting up just for
menus in Edoblightroom, you can get photos
as good as the guys. This is the before and
this is the after. Well, if you have followed
from the beginning to the end of the
tutorial in this photo, you can directly click the
Share icon above the guys. You can choose Export
to Camera role. Then your photos will be rendered directly
to your gallery. Well, that's how we
added this foot photo, guys, we'll move to the
next section, guys. Thank.
37. Project 5 : Choose the Right Props !: Okay guys, Welcome
to this section. And in insect January
will take a new picture. Okay, So the compensation
strategy for this one, the golden triangle
conversation, okay, so this is the result that
we are taking right now. Okay, So this is
the result. Then. I'll drive the guideline of the golden triangle
here in the picture. As you can see that that is the main composition of
the golden triangle. And there's also
the support thing blinds that come through the main diagonal lines that
ships 90 degree position. That is what we call the
golden triangle composition. And we can put the
ingredients, the props, and the main subject
along our main diagonal. And then the next
I will show you some prompts that we use here because our food already
quite complex to make sure that the focus
is badly to our product. Because the product is
already very complex year, I made sure that I don't have too many things in my
background because this is, is already very complex. I would manage things
in the background, then people will be
very difficult to identify which one is
my point of interest. I'll just simply put
some chocolates here, ingredients and then
to add more texture, I also use this white cloth
and through ethmoidal Emily, I used plate under my cake here and then I'll use
this more or less. Okay, I suggest you to
have this small glass as your props because
the first advantage is this is very cheap, okay? This is very affordable. You can buy like 612 and
it is very portable. And then because
this is very small, it doesn't dominate picture if you put it with your
main subject, okay? If you put it beside
your main subject, the focus will still remain in your main subject because
this is quite small. Okay? So in France and small glass like this instead
of the larger one, this is how we prepare all settings and I will see
you in the next section.
39. Project 5 : Lighting & Camera Setting: Okay, guys, In this section
I will explain to you about our liked
things strategy here. Before you set your liking, you have to know your food. Because there's
so many toppings. Our cake here, almost all the pumping is dark because
it has some chocolate. You have to notice that
it is not that easy to shoot the dark item
in bright background. Because if you want to make
the top look up their bright, then the big data
we'll be over exposed. But if you want to save the
color of the background, this area will be really dark. Okay? So there are so many
dealing in mind when you're shooting the item using
the bright background. But I will show you the trick because this area will be very, very dark and Manny texture
on the top of our cake. I wanted to make sure that I
get very beautiful texture. I'm there because the
face of our food is on the top and I want to make sure every single lighting reach our, our chocolate in front of here. So I'll keep using the backlight to make sure
we get the most highlights. But this time, I
the lighting way, way higher than before. So you set the
lighting how you're, then I make sure that
the lighting reach here, also reach the area of our cake. And then the camera
pushes it is over here. So to get the most
highlight in our area here, I make sure that when the
lighting here brown seen breaching the cake and
bouncing back to our lenses, then it will become a highlight. So I make sure that the angle of the lighting they bounce
it will reach our lens. So the higher position will
be better for this one. Because is sat there, I think like this, then this area will
become bright, but this area will
be very, very dark. And that is the condition that I don't want because since I'm only using one light thing and I wanted to get all
the picture here, then I will send the likely
way higher like this. Okay, so the distance
between our food to our lighting here is
about 60 centimeter, and then the distance here, it's about fifties and Demeter. And then I put the fuser here. Yeah. About 45 centimeter in
front of our lighting. Okay, So this is the
fun part of using the future here to
make sure that the lighting reaching the
front of our luckier, we have to make sure that
the lighting source is quite high so they can
reach the front area. You can also adjust the
diffuser like this, because the diffuser is the
new source of delighting. Actually, when you
don't use any diffuser, okay, this is the source
of the light pink, but if you use the diffuser
in front of the lighting, then diffuser become the
new tore off the lighting. The lighting will come from
the **** off our cake here. So the lighting will attribute from the back area
and the front area, okay? Yes, this is how I will set our pizza here then
to make sure that the front area will
be brighter than output this whiteboard
here to bounce, delighting back to our feet. So this is how we
set our liking. And then I will show you
how we send out a camera. The camera setting is the
same setting as before, and the one that I change his own leader as
number as he used world then the afternoon but I
use this time is 8. Okay. I will see you in
the next section.
41. Project 5 : The Result !: Hey guys, We have already done the photo shoot and I'm so excited to show
you the results. So this is the result
of the row picture. This is the comparison between before and after the editing. So I wanted to show you
this is the highlight. This, I mean, okay, So this is the close
up of the edited one. And as you can see on
the top of the cake, We got the highlight
in most of the time, IT on the top of our cake. This is the texture
and I really, really want, for every
time I do the Photoshop. In the next section, I
want to show you the step-by-step how we ended this speech at how we bring up the past chair when
they are under exposed. As you can see that
there's some area that is too dark that
we can break up. The new fail in Lightroom
is the magic of Lightroom. And I was telling you
in the next section.
42. Project 5 : Lightroom Editing (Update): Okay. Hello guys. We've arrived at
this foot, guys. I'll repeat the
step by step that I have told you in the
previous sessions. Guys, for this photo,
I'll drop it first. Well, here I'll
adjust the tilt guys because I want to get
the right position. If we are done, I
click the tick. So as usual we're
going to the lat menu. First guys, light menu here. I'll increase the exposure
guys, but just a bit. Then for the
highlights as usual, I'll make it left a
line or -100 guys. After the highlights here, I'll add the shadows to right
a line guys or plus 100. Okay, after the shadows
here are the white guys. Well, because the
background is white here, I'll add the white skis up
to around plus 60 guys. Well, if we're done here, I'll reduce the
black sky because here there are some objects that do have black color. Right guys? Well, here I'll make
the black minus so that the black color is a
bit more visible guys. Well, if we finish
setting it up, we can immediately move
to the color menu guys, in the color menu
for this photo, I'll reduce the temperature
guys to make it cooler. Now, if the temperature
has been set, we can immediately enter
the color mix guys. Well, in the color mix, I'll
change the red part first. For the hue, I'll
add about 17 maybe. Then for the saturation here, I'll reduce it to left
the line or -100 Well, for the luminance
in the red color, I don't set it guys. Next it is the orange color. Now in the orange color,
I change the hue. I'll reduce it to minus a bit. Then for the saturation guys, I'll add about 12 guys. Okay, now for the luminance
in the orange color, I also didn't set it
for this photo guys. Next what I'll set is
the yellow color guys. Well, in the yellow color, I just want to make it
appear a little bit. I'll just add about
plus one then guys, we'll move to the
light blue color. Well, in the light blue color, I'll pull the
saturation up to minus, almost left a line guys here. I'll make it around -90 Then
for the dark blue color, I'll reduce it to
the left because this image doesn't
have dark blue color. Then for the purple color here, I'll also reduce
it almost to left the line around -93 guys. For the next one in
the pink color guys because we don't have the
pink color in our photo guys. We'll reduce it to -100
for the saturation guys. If we're done we can
immediately click down here. Okay, then we move to the Evac menu Guys,
in the Evac menu, I'll add the texture around
plus 14 for the clarity, I'll add up to plus
three for the Hayes. Here for the photo, I'll
add a bit to plus ten guys. Then here I'm going to
add the eight guys. I'll add the fine
around eight guys. Then I'll add the
midpoint to plus 50 here in the effect
menu. It's done guys. We can immediately move
to the details menu guys. Well, in the details menu, I'll add the sharpening. About 130 guys. Now to counter the sharpening, we can immediately
add the masking guys. I'll add the masking
in the '90s. Then guys, we'll also
add the noise reduction under the masking guys here. I will add about '40s for the noise reduction
guys for this image. Well, if you're done
actually for this photo, it's finished guys only
by editing four menus. We've got the photo, we won. This is the four, this
is the after guys. The color is more pop
up and better guys. However, if you really have Adobe Lightroom premium
or are subscribed, you can choose the
masking menu as your choice to add the
quality to your images. Here, I'll just add a brush
on top of the keys here. I'll add it around here. You can delete the
parts that you don't want to select using the eraser. Well, if you're done
you can adjust it here. I'll set the color menu guys in the temperature part here. I'll reduce it a bit
to minus nine guys. Then for the tin, I'll add it so it's a little
purplish on the top. Okay, here, I'll add
about plus 13 guys. If you're done guys here, I'll use the radial gradient to select certain areas here. I'll only select
the cake part to add the sharpness
to the cake guys, while the red part
is the part that is selected or the part
that will change guys. Well, here we'll go directly to the Details menu to increase the sharpness that the colors
of our cake are sharper. And also more detailed guys, we can immediately click the tick and we've got
photos like this guy, this is the before,
this is the after guys. Only by setting the
menus in Dob lit room, we can already get photos
that deserve to be posted. Guys, those are our tips on how to edit images
in Dob Lit Room guy. Well, if you follow from the
first step to the end step, you can directly click
the Share icon above. Then you can click
Export to Camera role. Then your image will be
available in your gallery guys. Well, that's a
tutorial on how to edit photos with Bright
Mood theme guys. Thank you. See you
next time guys.
43. Project 5 : Preparation of Levitation Shoot: Okay guys, just in
the bonus section. Okay, I will shoot the
levitation photography, so we will use the chocolate
levied painting here. We will take a couple of
pictures that we have to combine and then to
add more texture, some environments we have to be graded like this chocolate. Actually, there's some ingredients inside
these chocolates, so we will break the
chocolate and also use it for levitation photography
here to add more texture because most of
the ingredient is chocolate. I want you to have The left with Asian ingredients look
like the same color. So who makes sure that
any ingredients that are left with dating is
not in the same color. We will pour some ingredients
here and make it brace. So the lighting we use over here is the same Goldilocks,
AD 200, okay? With the exactly same
like the position. Okay, So it will be very fun. We'll combine like war
until six picture here, and we will show you
also exactly the step-by-step how we combine and how we added in the picture. I will see you in
the next section.
45. Project 5 : Levitation Photoshop Editing (Update): Okay, hello guys. In this video I'll explain
a tutorial for you guys. How do we make levitation
photos? In this video? Levitation photos like
this guys will be edited with software
called Do B Photoshop. Well, this time I
happen to have opened the software page of DB
Photoshop on my computer. You can just click open in B
Photoshop on your computer, then this is the main screen. When we open B Photoshop, well, you can just click file, then click open and select the main photo from
your Levitation photos. This time I've selected
some photos that I've chosen to be my
Levitation photos guys. Well, this time I'll
select the main photo. This one guys. When
it is selected, you can immediately click open. Well, when you open
it, your photos might look like
landscape like this, because some cameras may still
be set landscape, right? Well, we can directly
click Image, then click Image Rotation. Here we choose 90 degrees
clockwise so that we can directly get a portrait
photo like this guys. Okay, well now I'll
explain the tools that we'll use to edit this
levitation photo guys. First we'll use the move tool. Well, the use of the
move tool is that we can select the photos that
we've chosen guys. Well, here I've copied from
the first photo earlier. Then we're going to click
here on this first layer. Then we can choose, we can
immediately move it guys. Okay, after that, when we
want to use the move tool, we'll also enlarge
and reduce the photo. We can immediately
reduce it like this. We usually, when we take a photo we also have to
press the shift key. Why? So that our
photos remain precise. Guys, if we don't
use the shift key, then you'll produce inaccurate
photos like this guys. Okay, well that is an
explanation of the move tool. Then the second tool that
we'll use is the brush tool. For the brush tool
is a tool where we can paint or draw
like this guys. Well, we can also
choose the image color. We choose, for example, we want the white color. Well, we can paint
white like this guys. Well, that's what the
brush tool is for guys. Well, the third tool that we'll use is the pain bucket tool. What is the paint bucket tool? The pain bucket tool is the
same as the brush tool. The difference is
the pain bucket tool will spill color on
a full layer guys. For example, I'll select
an empty layer here, I'm going to spill
the white color, then it's going to
look like this guys. If I spill black color, it will be like this guys. Okay, that's what the pain
bucket tool is for guys. Why do we have to
use an empty layer? Because if we spill
the pain bucket tool on a photo that already
has a picture like this, what it looks like will
be like this guys, because not everything
is selected to be black. That's because the
pain bucket tool only spills onto one color. For example, if we
only select white, what will change to black is
only white like that guys. The example of the
paint bucket tool, well the four tool that
we'll use as a tool for editing this levitation photo is the spot healing brush tool. The use of the spot healing
brush tool is like this guys. The use of the spot healing
brush tool is to remove images that may be disturbing
in your photos like this. Now it will disappear.
Well, it will disappear. That's the use of the
spot healing brush tool. Just like painting. That's
how it is guys how to use it. Well, okay, that's the
spot healing brush tool. The last tool that we are going to use is the clones stem tool. Here guys, the use of the clones stem tool is to
copy the texture or image, or color that we've chosen. For example, here I'll copy
the page or cream color here. Okay, In the cake with the
old key on your keyboard. When I've selected, we'll
drag the image down. As a result, the
color or texture that we've chosen will go
down like this guys. This is an example of
the clone stem tool. We simply from the
clone stem tool, we'll copy or move the
texture, or color, or image from the texture that we've selected on
your image guys, those are the tools we use to
edit this levitation photo. Well, those are the tools
that we'll use guys. Well, now I'll explain
the technique. The technique we're going
to use is that we're going to choose add
layer mask right here. Add layer mask is, we'll add a new page on
the layer we've selected. For example, earlier for
the plane bucket tool, we had to select or open
an empty layer first. We are now just adding layers to one layer without
changing our main layer. For example, if I select
add layer mask here, then I spill black here. Then the layer I selected here and the layer
mask will be black. However, the main
layer that I chose did not change the
image at all guys. Well, that is the
technique we'll use to edit levitation guys. Well, that's a brief explanation of the technique we'll be using. Let's move to editing from
the first stages, guys. Let's go. Okay guys, I'll remove the hand
part first here. Well, the way to remove
the hands is we'll overwrite it with a photo that doesn't have
the hand here, guys. Well, how we'll open the photo that we've
previously selected. Okay. So we're going
to choose a photo that doesn't have
a hand here. Okay. If it looks like
this, we can click, Rotate 90 degrees
clockwise again, here by right clicking. Then we'll change to
the same shape as our layer here from H to H, so that the shape and
size are also the same. Then we can add layer mask here. Then we use the paint
bucket tool with black color guys
Will automatically, when we color it with black, the photo will disappear guys. Now we'll select photos
that we only brush using the brush tool guys
with white color guys. Well, here we can just
brush on the hand. Okay guys, when the
hands are gone, we'll change or delete
the stem or stick here by copying it first
here with control J. If you're done with control J, we can turn off the
bottom background first. If it's like this,
we can just use the spot healing brush tool to remove the stick here guys. Okay, It's more or
less like that guys. To remove the stick we use
the spot healing brush tool. I'm going to add
these choco chips in certain areas here in the same way as before.
Layers like this. We'll repeat the steps. We'll select first
the folder is here. Okay, let's just
rotate it clockwise. We arrange the photo
according to our layer. After that, we add layer mask. We change the color to black. Then we use the
paint bucket tool, then we override it here
until it disappears. Then we'll also brush
with white color. Well, here I have
tips for you guys. How can we know if what we
brush is the correct object? Because if we have overwritten
the color with black here, the photo will automatically disappear and cannot be seen. Therefore, we need
a cheat layer guys. Well, how we can just
click on the layer here. Then we click control J. Then we delete the layer here. Delete the layer mask. Then we change its
opacity to 50% Well, when the obpescity is
changed to 50% you'll see the shadows from here. We can know which chocolate will draw or which
one will choose. For example, I'll add
chocolate in this part, guys. Okay, we're going to brush here. Okay, if the object
that we've selected is visible or we've
brushed here, we can immediately delete the opacity layer that
we've lowered earlier. Well, let's just delete it then. It will be like this guys. Okay. Okay guys, I'm here to add the
melted chocolate chips. In the same way as before. We select the photo that
we want to add here, I want to use this photo
we add, then we rotate. After that, we measure it until it fits the
layer we've created. Then we'll set the opacity
to 50% Again, we brighten. Then we'll adjust or change the position using
the move tool. Okay. Or you can directly
click on your keyboard. Well, I want to add a
melt to this Choco chips. Guys, if you're done we can just add the
opacity right away. Then we click Add Layer Mask. Then we add the
paint bucket tool here with black color
until it disappears. Then the tip is, which was
earlier, we control J. Then delete the layer mask here. Then we change the opacity down. Then we select again the black layer here,
the dark one here. Then we change the
color to white. Then we select the brush tool. Then we brush the melted
part of the chocolate. Guys, if we're done, we can just turn it off
immediately or delete it here. Yes, on the chat layer. As a result, it will
look melted there, because I think
the melt is good. Right. Next, we'll also
add more choco chips. In the same way, we
open the File Explorer, then we choose here,
then we rotate. We choose here. Okay, then we set it so that we can
just lower the opacity. Well, I'm here to add other choco chips guys
which are a bit open, so there's variation
in the picture. Okay? Okay. After that, I'll add choco chips which are different from the
previous choco chips guys. The method is the
same as before. Let's open the file first and then we select the
photos that will include guys we drag directly
here from the folder. Then we rotate it first. If the ship doesn't fit right, then we first fit the ship according to the layer
we've created guys. Well, here I'll add the
different choco chips from the others which have
a different shape. Like this guys which are a bit split and open
like this guys. Well, as usual here, I'll click at Layer Mask first. Then we're going to spill
some black on the layer. We're going to control J. Let's delete the
layer mask first, then we lower the opacity. Okay, I want to set the
position first. Very good. I have range. We just have to brush in
this position guys. The layer below it,
guys with white color. Okay, if we're done we can delete this one
just like before. Then I'll add another
photo of choco chips with the different
shape guys here. I'll add choco chips with the different shape to
make it more unique guys. Well here I'll rotate as usual. I'll clone the previous one. And let's lower the opacity. First we choose the position that you think is right guys, here I want to add choco
chips with different shapes. Like this one guys, we
increase the opacity. Then we click Add Layer Mask. Then we override it with black
color until it disappears. Then we control J
the layer mask. Then we reduce the opacity. Well we select the
lowest layer mask again, then we brush with
white color guys. If it's done, we
delete it again. Don't forget then
the same as before. We repeat. We are going to add different
shaped choco chips. Here, I want to use
other choco chips. We rotate first, then we fit the position with
the existing layer. We lower the opacity. Okay, after that, we
increase the opacity again. Then we click Add Layer Mask. Then we use the paint bucket
tool with black color. Then we choose white color. Then we brush the object
here on the cheat layer, we'll click control chain. Let's delete the layer
mask here first. Then we lower the
opacity so we can cheat. Then we can directly
brush on the part that we've selected here
with white color guys. Okay, let's tidy up first here, if you want to delete, choose
black to tidy up guys. Well, okay guys, don't forget to delete the top layer
first. The cheat layer. Okay, we'll repeat to add
another choco chips here. I'll speed up the
process for all of you. The process is almost
the same as before guys. First, we open the file, then we select Photo. We insert the photo, then we'll continue the same
as what we did earlier. Okay, let's lower the opacity. We choose where the object
will be drawn. Here or here. When it's done, we increase
the opacity again. Then we click Add Layer Mask. Then we select the
paint bucket tool, overwrite it with black
until it disappears. Then we copy it with control J, We delete, delete
the layer mask. Then we lower the opacity, Delete the layer mask below. Then we brush with white color on the Choco chips earlier. Guys we delete, don't forget. Okay, so I'm going to repeat the same process with some
choco chips here guys. Well, here I remodel the
photo so that I can get the position of the
choco chips object that I want guys here. I'll lower the opacity first. The position I want
to reverse like this, so that the choco chips
are more diverse. Okay? Okay, here the Chocoate chips look a bit piled up, so I'll arrange them first
using the move tool guys. Okay, I think the choco
chips are enough. I just add some
crackers or biscuits that have been broken in
some of these positions. Guys, just like before, I have to open the folder first, then we choose the photo
with the biscuit crumbs. Then we drag the same as
the previous process. We'll rotate the
position First we position it the same as
the layer we've created, then we reduce the opacity. Well, here we can set where the biscuit crumbs
will be seen, guys. Well, I want those biscuit
crumbs to be seen here guys. While the position is more
or less like this guys. Well, I'm here to do the previous thing like
click add layer mask. Then we'll overwrite
it with black. Then we go to the brush. We first copy control J. We delete, delete
the layer mask. We changed the
opacity to 50% Okay, for this opacity, don't forget, it has to be up to 100 guys. Okay, We can just
brush with white, don't forget guys in the biscuit crumbs position
that will appear, guys. Well, I'm here to brush on the parts that I'm
going to show up here. Okay guys, let's delete
the layer above this. Well, just like before, I'll also add more
biscuit crumbs here. Okay, we rotate then we
align the layers first. Okay, let's add the
opacity down the bit, then we'll position it where the biscuit crumbs
are going to show. Then we increase the opacity
again, add layer mask. Then we use the black
paint bucket tool until it's erased. We first copy click control J, We delete the layer mask. Then we lower the opacity. Then we click the
layer mask below it. Then we choose white color. Then we go to the brush tool. Just like before we brush
whichever object we want to choose guys as a cheat layer, there was already the
biscuit crumbs guys, so that you are more
easy with the new brush, you can click this to disable
it first so that you are more concerned about
choosing which biscuit crumbs
you'll choose, guys. Okay guys, it's more
or less like that. If we add it to
the previous one, it's more or less like this. We're going to delete
the cheat later. Then we'll repeat the same
thing with the new photos, guys, because I'll add them
at the top here, guys. Okay guys, so I'm here to
add a glass here guys. Okay. First, let's open
the file folder here. There is a photo that
only has the glass guys. Let's lower the
opacity first guys, then we can first adjust
the position of the glass. In this position, guys, we'll increase the
opacity again, let's use the add
layer mask technique. Again, we change the color using the black
paint bucket tool. Here we override it. Then first we copy control J. We delete the layer
mask, lower the opacity. Let's select the
layer mask again. We choose white color. Then we use the brush tool guys. Well, here we'll only select the glass guys until
the glass is visible. Well, here we are just selecting the glass because
here there are hands, so the hands don't need
to be selected Guys, we can turn off the cheat
layer first so we can focus on the part that we are going
to brush. Well, like this. Okay guys, we can
delete this first. Then we tidy up this part because there are hands
that are visible. Guys, we'll override
the hand area again with the same photo, but the position of the
hands is different guys. No hands. In this photo, we first we'll tidy up the areas where the
selection is a bit messy. Okay. So it's like this guys, because we haven't
selected all of these because there are parts of
the hands that are visible. We'll choose photos that
don't have hands, guys. We rotate it again. We first equalize the size with the layer we created here. We lower the opacity, then we equate the shape
with the glass earlier guys. Well, more or less
it looks like this. We're going to take
the bottom part of this photo guys to add the bottom part that's
missing because of his hands. We can click Add
Layer Mask here. Then we overwrite it
again with black. We copy the layer, we delete
the layer mask first, then we reduce the opacity. Then we select the
layer mask below. Then we choose white color. Then we brush again on the glass part that we
have to brush guys. Okay, it's more or less like
this guys. The glass area. Well, here because there is a fracture where
the top glass is still visible guys and there is chocolate
still visible here. Well, I'll delete it using
the technique overwritten. Again, like the one at
the beginning here. We'll first delete the
cheat layer for the glass. Then we add an empty
layer at the top. We rotate first we fit it, okay. Then just like before, we click Add Layer Mask. Then we overwrite it with black. Then we'll brush with white
color on the part that we really want to
eliminate in this part. Guys, to make it a bit neater, we can use the spot
healing brush tool here to remove areas that are
a bit rough guys. Well, it's more or
less like this guys. We're going to add
chocolate here guys, to make it look like we're pouring chocolate
from the glass. Well, it's the same
way as before. Let's open the folder first, then we'll select the photo. Then we drag, then we rotate. Then we equate the position
with the layer we have. Okay, well we're going to take the chocolate
in this class, guys. Let's reduce the opacity first. We match the glass
here. Around here guys. Okay, just like before, we'll click Add
Layer Mask first. Then we'll change it with the black using the
paint bucket tool. Then we copy the layer first, we delete the layer mask, then we reduce the opacity. We don't forget this, we'll increase the
opacity again, the previous opacity too. So you can see it again. Okay, here with the
brush with white. Using the brush tool on
the chocolate part guys. Well, it's more or
less like this guys. The glass is already visible. You can delete the cheat layer, it turns out like this guys. So it's like there is a movement when this glass
pours the chocolate. Well now I'll add more biscuit crumbs first
on it guys in the same way. Okay, let's go to the
opacity and lower it. Then we fit here first. Then we click Add Layer Mask. Then we pour the
paint bucket tool. Then we change it to the
brush tool. Let's copy it. First, control J, we
delete the layer mask, don't forget the opacity
below. We make it full. We select the layer mask again, then we go to the brush
tool, choose white color. Then we brush on the part that we really
want to show guys. Okay, guys. More or
less like that guys. So we can see here, there is a glass pouring
chocolate on our cake. Then there are also some
chocolate chips and also crumbs from the broken
biscuits that fail guys. That's more or less
what I can convey in this levitation
photo editing guys. That's the editing method from start to finish for
this meal guys. Now we'll say first you
can save by clicking control here to save
from the document guys, you can save the document
by clicking control. Here you can see directly
saving what is that document. The document is a raw
file from DB Photoshop. Now you can also save by clicking Shift
plus control plus. Now you can directly select
JP to save the photo. For example, here I want to name this editing result as chocolate levitation K. Let's say guys, well we select JP here, then we save, well here, the J Pec option
for the quality. I'll select Maximum.
Then click okay. Automatically the
photo will be saved. Well, that's a tutorial for this Levitation food photo guys. We can immediately move to the
next food guys. Thank you.
46. Project 5 : Levitation Lightroom Editing (Update): Hello guys. We've arrived
on the Levitation editing image for the bright mood
DSL R course this time guys. Well, in this photo guys, actually it's been edited guys called photo merge editing in Adobe Photoshop guys before
entering Adoblite room. Actually this image
has been entered in Adobe Photoshop guys to edit the image and
to beautify it. A little and polished
little Ballitle guys. Well, now that we're
in Adoblite room, we just need to
change the color. Okay, let's go straight to
the light menu guys here. As usual, we're going to
the light menu first. In the Lat menu. I'll increase the exposure guys because here the background of this levitation image is white guys. I want to give more
exposure here. I'm going to add a
bit for the exposure. Don't overdo it, because when
we increase the exposure, it will increase the overall
brightness of arrow image. Well, for the contrast here, I'll just add a bit about plus two, then for the highlights. As usual, I'll make it left
align or -100 The next guys, as usual, I'll also make the
right align for the shadows, or plus 100 for this photo. Well, to add brightness here, I'm going to use the white guys. Well, here I'll add a
bit more for the whites. Instead of adding the
exposure guys here, I'll add the whites around
the plus '70s guys. Okay, then for the blacks, because our object
has black suss guys, I want to make the black color
a bit more striking guys. So I'll reduce the
blacks here just a bit because if
there's too much, the result will be darker
and the image looks dirty. Okay, then guys here, I'll add the color guys. We go to the color menu. Then for the temperature
here, I'll reduce guys, so that our picture
becomes bluer. Yes, it's cooler. Well, when we reduce the
temperature of our image, our image automatically
looks cooler. Let's go to the color mix
guys next to creating. Okay, let's go to
the red color guys. In the red color guys, I'll just add a little for
the saturation to plus nine. Then we'll move to
the orange color. In the orange color,
I'm going to reduce the saturation a little
bit around minus one. Then we'll jump straight to the blue color guys
in the blue color. I want to reduce the
saturation to nearly left a line here. I'll reduce it to -90 Then we're going to the
blue color here. I'll change the blue color
to left a line or -100 guys. Why? Because there are no blue
colors in our image guys. Right. Next let's go to
the purple color guys. In the purple color, I'll
also reduce the saturation to -100 guys or
close to left align. Okay, let's move
to the pink color. Well, in the pink color we
just make it right align. Why? Because in this image, the pink color
doesn't exist, guys. Well, if it's done, we can
immediately click down guys. After going from the color menu, we go directly to the Evac menu. Guys, in the Evac menu, we'll increase the texture
by around plus 13. Then the clarity, I'll increase it a little bit
around plus three. Then for the Hayes here, I'll add about plus ten. Then for the vignette guys here, I'll add about plus eight guys. Since we've already increased or changed the vignette here, I'll also change the
midpoint a little bit. I added about one. If you're done,
we'll go directly to the Details menu, guys. Well, in the Details menu, we'll add the sharpening
to around 130. Well, if we've added sharpening, our image will automatically be more broken or like
there are ends. To counter this, we can add the masking so that our
image becomes smooter. I add the masking
around the '90s. Then after the masking, here is the noise reduction. The noise reduction will reduce
noise in your image here. I'll add about 40 for the
noise reduction guys. Okay, well if you're done guys, actually the levitation photo for this time has
been completed guys. It's really good guys. This is the before image and
this is the after image. Well, actually it's
only done by changing the four menus here
guys in Adoblitroom, we've got an image as good as the guys better
than our raw image. Well, we also don't need to immediately subscribe
to Adublitroom, set the for menus. We can get images that can
already be post worthy. Guys, if you follow step by
step from the beginning, you can directly click
the share icon above. Then you can directly
select Export to camera O. Well then your image will go directly to your gallery guys. If the rendering
process is complete, your edited photos will be directly saved in
your gallery guys. That's all the tutorial
for editing in Adobilt room in the food photos. We'll continue with the
next photo guys. Thank you.
47. See ya !: Okay guys, finally we are reaching leap and
off our course, but actually visit the
start of your journey. So actually, I have
some tips for you. The first one is sometimes
I also feel it with depth. I started learning this. It is easy to feel frustrated when we first
did practice foreign. It is merely easy to feel frustrated like when you
first practice on my gut, I think this is wrong. Oh my God, this is wrong. Oh my God, I shouldn't do
this. I shouldn't do debt. Okay. It is very easy to feel that
the one that you have to pay attention is even for a
professional photographer, like myself, when I do
the photo-shoot book first 15 minutes
of my photo shoot, maybe like 2025 weeks after I paid for the
first 15 minutes. Most of the time, I believe those pictures. And why? Because
most of the time I use pan until 15 minutes
to trial and error. Okay. When you are doing
your practice, you don't have to be
across tracheids, board your first one,
our first two-hour. You don't have to feel
frustrated because the enjoyment of this empire
photoshoot is the process. When you pick the first picture, you add another element, you take another picture, you move the lighting, and you take another picture to compare each of those
feature and vinyl, you take FriendFeed and under Wendy percent of the picture
that you want to do. Real pleased with
change and apply many technique that I have
already shared in the course. And then I suggest to you if you are doing
your photo shoot, you can also play this
course once again to make sure that you follow every detail of the instruction. Wow, I'm so excited
to see the result. If you have already
do the practice, feel free to share. And then I will see you
again in the next course.
 Foodior Class, Professional Food Photography Trainer