Transcripts
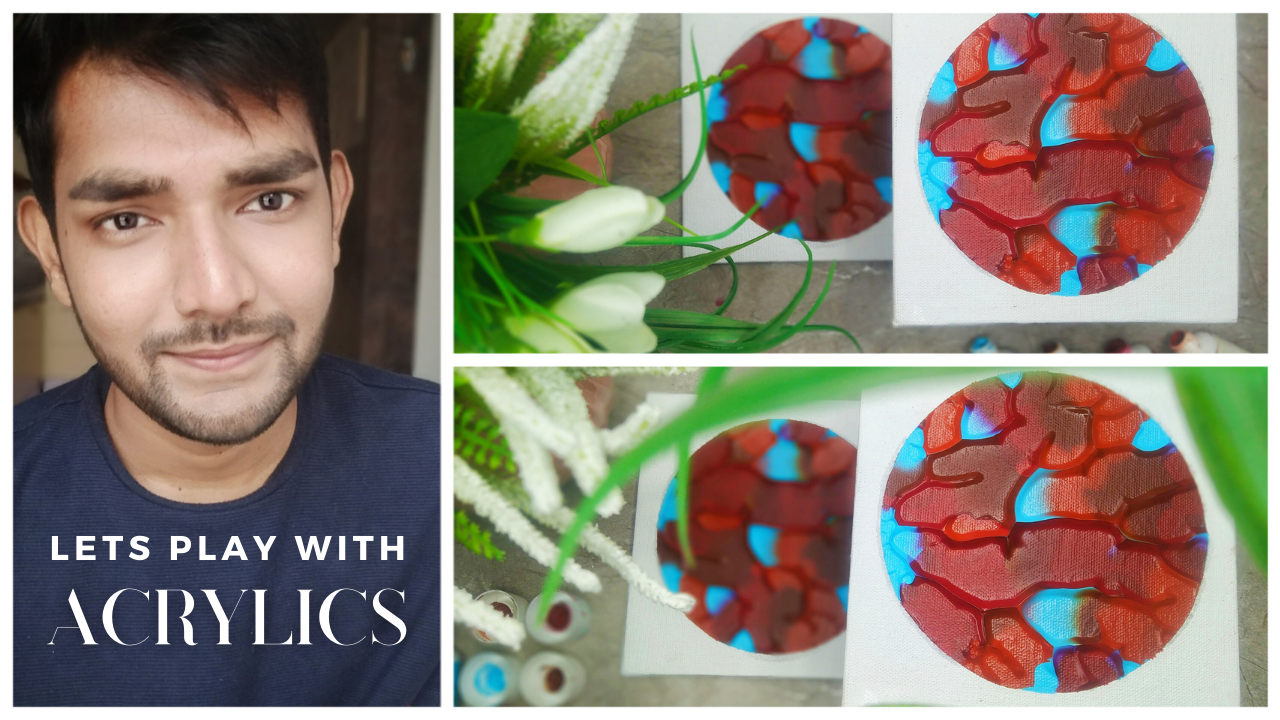
1. Welcome to the Class: Hey, chronic pains are
versatile medium for artists to explore different
colors, textures, and ideas. In this class, we
are going to create a beautiful abstract
acrylic painting. You will be very surprised
when you see the end result, which is the elegant
abstract painting, which is going to be
very easy to create. We're going to use acrylic tubes to create the entire project. Hey everybody, I'm retired. I'm a self-taught
independent artist based in Gujarat, India. I'm also an interior
designer by profession. You can find most of my artwork is being
displayed on Instagram. I go by the name
**** Raj antigens. I'll be giving you
all the details about the art supplies that
we are going to use. We're going to talk about
the acrylic tubes in specific that you will need to create this
beautiful painting. I'll be giving you the
details about the Canvas. No need to worry at
all. You will find all the art supplies very easily in any nearby
local art store. Before creating the magic, I'll be teaching you how
we are going to apply the masking tape in a specific
method on the canvas. No need to worry at all.
We are going to move in a very systematic and
step-by-step manner. I'll be teaching you
how we are going to cut a perfect circle out
of the masking tape. Once we are done applying
the masking tape, we are going to create
a beautiful combination of colors using
the acrylic tubes. And just by doing a simple step, will be ready with
an amazing set of two electronic paintings, which is going to be abstract. That would be an amazing texture once we remove the
canvases from each other. With a beautiful textured effect on an amazing color combination, which is going to be vibrant and elegant at the same time. At the end, we'll be removing
the masking tape and you'll be seeing the
amazing outcome. We're going to finish
the entire product using some white like color. The class is best suited
for beginners and also intermediate and advanced
level artists can try it. It's a very short class
and everything will be explained in detail in
a step-by-step format. My glasses designed to develop your skills and explore
your artistic potential. No need to worry at all. It is a very easy
and simple class creating a beautiful pair
of acrylic paintings. So without any delay in grab your supplies and
let's get started. Let's play with some acrylic.
2. Art Supplies: Hey everybody. So
before we start, it is very important
for all of you to know the correct art
supplies that you will need for this
particular class. So as you can see, the first
one is a simple ruler. No need to worry at all. This is a little bit fancy ruler
with a lot of measurements, but you can use a
simple scale as well. Now let us talk about
the acrylic tubes that you will need for
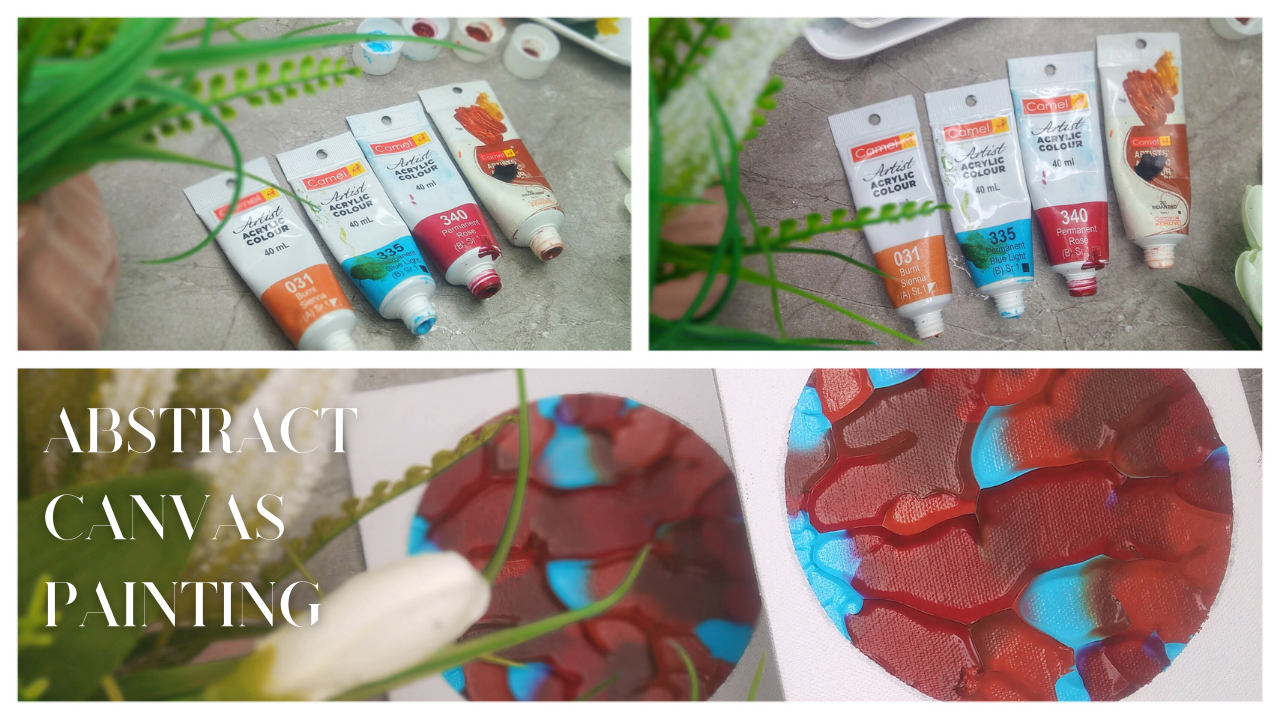
this particular class. So we are going to use basically only four colors
that you will need. And it is not at all compulsory to use the same four colors. You can create your own
color combinations as well. So the first one
is a simple blue, which is a light blue
shade of acrylic. The second one is burnt sienna. The third one is permanent rose, which is a little
bit of red and tone. The last one is Indian red. So these are the four
acrylic tube colors that you will need for this particular
abstract canvas painting. No need to wait at
all in case you do not have the specific shade, you can definitely go for any other good
alternative as well. Let me talk about a simple
pencil that everybody must be having that we are
going to use to make a simple center line. Then we have two canvases
which we are going to use to create the
abstract painting. These canvases are ready-made
canvases basically, and it has a nice
hardwood on the backside, so we can use it in a
very proper manner. The size of the canvas
is six inch by six inch, which is basically 15.24
centimeter by 15 point to 4 cm. No need to worry
at all in case you do not find the exact size, you can go for any other
good alternative as well. Then next up we have the
most important part, which is a two-inch
masking tape. Basically, the masking tape, It's going to play a
very important role in this particular class. Then we have our simple cutter
that we're going to use to cut the masking tape into a perfect circle. No
need to worry at all. You can find a cartel
very easily in any nearby local art store and just be very much
careful while using it. Then next up we have our simple white acrylic paint that we're going to use to
finish the end product. And to use this
particular acrylic paint, you will need a single brush, which is going to be
around rash basically, which is also called
as a detailing brush. The brush size is eight. Then one of the most important
tool that you will need for this particular class
is around there basically. So as you can see, that
under basically have a simple pointy edge and
a pencil attached to it. This roundup we're going to
use to draw a perfect circle. And between the canvas. These are all the art supplies that you will need for
this particular class. These are very minimal
art supplies and you will find them very easily in
any nearby local art store. No need to worry at
all in case you do not have the same art supplies, you can go for any other
good alternative as well. Now let us move
towards the next part.
3. Class Overview: Hey everybody. So before we start, I would love to give you
a class overview. So here are the class projects that we are going to create. Basically, it's a
single project only, but we're going to divide
it into two canvases. Basically, the
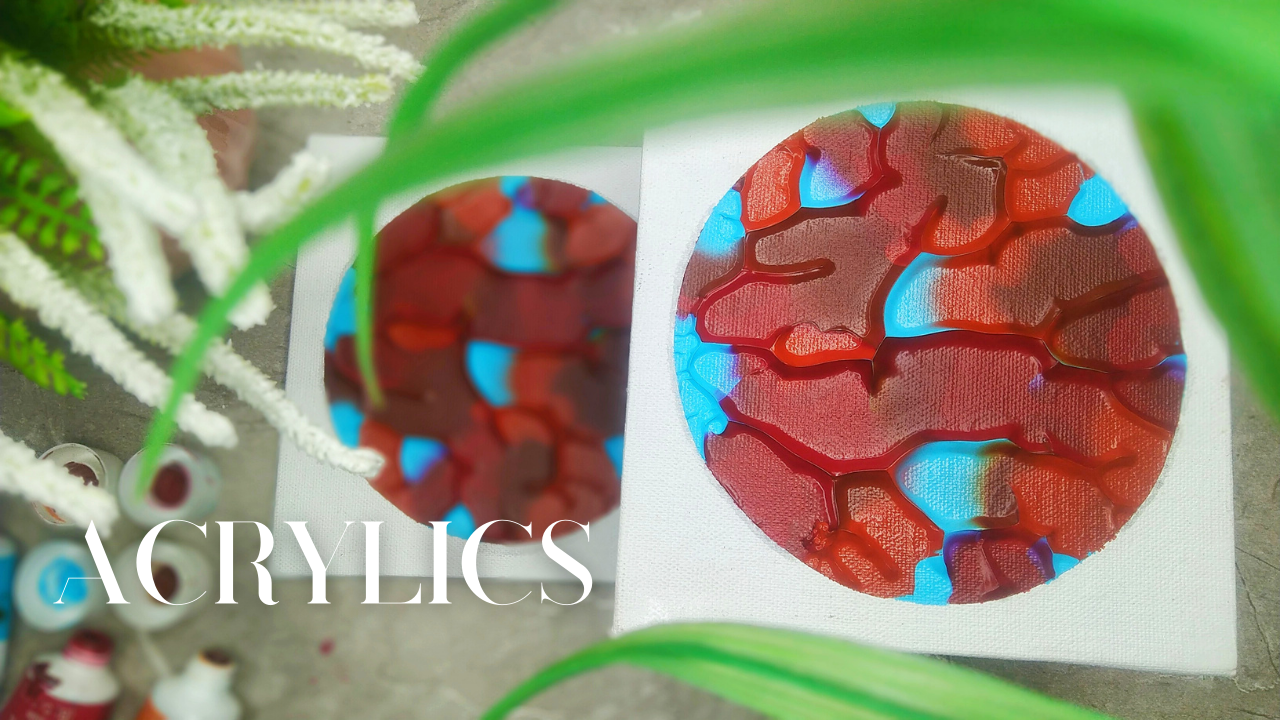
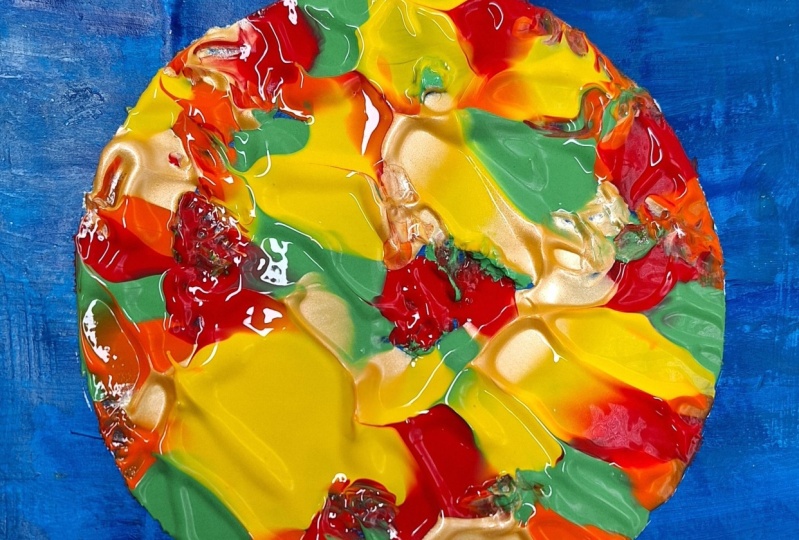
process is going to be very simple and elegant. The abstract painting that you can see right
now in front of you is a beautiful
acrylic canvas painting. You can observe the
color combination, the texture, and the vibrance
of the entire painting. And you can also
see how beautifully the canvases are looking
in a good combination. Whether you are a beginner
or an experienced artist, the class is designed in such
a manner that it will help you to develop your skills and explore your
artistic potential. I'm very sure that you are
going to fall in love with the process of creating this
beautiful abstract painting. I assure you that you're
going to definitely enjoyed. The entire process is also going to be very much satisfying. We are going to use for beautiful acrylic
tubes and you can go for any other good
color combination and alternative as well. So without any delay in grab your supplies and let's
start with the first step.
4. Lets Tape the Canvas: Hey everybody. So let us
start with the first step, which is, let's take the canvas. This is going to be a little
bit observing part where we are going to apply
the masking tape and a very careful manner. No need to worry
at all. The step is not at all difficult. As you can see here, I'm having my masking tape
of size two inch. We're going to place
the masking tape on both the canvases. You can just simply observe, I have my board and I have
placed my post Canvas. I'll be placing
the fourth step on the top portion of the canvas. I don't
need to worry at all. Just try to keep the
masking tape a little bit on the canvas and try to
leave a little bit of space of the masking tape outside the canvas so that
while we apply the color and does not spoil the white part of the canvas. You can also make sure that
your masking tape aligns with the Canvas edge so that it can be parallel and
in a perfect manner. So now I'll be placing the masking tape on the
vertical side as well. Also one thing that
you have to make sure is that tried to
apply some pressure using your finger or thumb
on the masking tape so that it gets stuck with the
Canvas in a perfect manner. You're going to observe
that I have left some space of the masking
tape outside the canvas. That is because when
we spread the color, it shouldn't spoil the white
portion of the canvas. You can see we already applying the masking tape on
the forest canvas. Similarly, I'll be taking
the second canvas as well. You can observe the steps again so that you
do not miss out. I'll be taking one
masking tape again, and I'll be placing it on the top portion of
the another canvas. Again, the step is
absolutely same. Just make sure that you apply some pressure using
your finger so that your masking tape gets stuck to the canvas
in a perfect manner. Then I'll be placing another masking tape on the right side of
the second canvas. Just tried to align your
masking tape with the edge of the canvas so that it can be parallel with
the Canvas edge. No need to hurry while
placing the masking tape. Just do it in a very
slow and steady manner. So you can already
observe the step was absolutely same
like the first one. You must be thinking why we are applying masking tape
on board the canvases. We are going to apply
color on only one canvas, but we're going to
place another canvas just upside down to it. So that's why it is important to apply the masking tape
on both the canvases. As you can see, we
are done applying the masking tape on
both the canvases. Now we want to have
a perfect circle, which is going to be the
space where we are going to apply the acrylic
color tubes. That'll be taking
my simple ruler. You can go for any other
simple scale as well. Take a pencil, place
your scale from one corner to the other corner
and draw a simple line. Similarly, we'll be doing this on the opposite side as well. This is a step which is needed to get the center of the canvas. Now once I've got the
center of the canvas, I'll be just making a simple
dot so that it can be clear. This step is basically done
so that we can get the center of the canvas and we can use the download to draw
a perfect circle. So again, you can
observe this step. Just try to align the
corners of the square, which is forming with
the masking tape. Or you can also use the
corners of the canvas, draw a diagonal line. Then similarly on
the opposite side, try to take the corners of the canvas and draw our
simple diagonal line. And we got the center, just tried to dock it up with the pencil so that
you do not miss out. We haven't got two centers
on both the canvases. Now I'll be using
a simple rounder. Let me explain you
about the rounder. Rounder basically
have a pointed edge and a pencil attached to it. Then you can place
the pointed edge on the center of the canvas. And you have to rotate your pencil the way
I'm doing right now. You can see I got a
nice perfect circle on the masking tape
as you can absorb. Now similarly, we
will be doing this on the second Canvas as well. Some already having the center on the second Canvas as well. Just place the nib
of the rounder on the center and
simply draw a circle using the pencil. No
need to hurry at all. You can do it in a
very careful manner. Just tried to apply the
pressure on the needle. And we are done applying the masking tape and
drawing the circle. Now, let us move
towards the next part.
5. Lets Cut the Tape: Hey everybody, now let us cut the masking tape that we
have applied on the canvas. As you can see, we have two perfect circles
on the canvases. And now we're going
to use a cutoff to remove the internal
circular path. So just to be very much
careful when you use a Qatar, having a sharp blade, basically, you just
have to follow the line that we have
drawn with the rounder. Be very much careful. Tried to hold your Qatar
in a vertical manner. Use the edge of your cutoff
very carefully and do not apply too much pressure
on the masking tape. Because you shouldn't end up cutting your canvas
sheet as well. So just try to make an
optimum pressure on the codon so that you just cut
down masking tape portion. This particular step
will require a lot of patience and a precise
movement of your hand. So no need to hurry at all. Do it in a very slow
and steady manner. We just have to simply complete the entire circle
line by applying the cutter on the
pencil portion. Once you are having a good grip on the codon and
you feel that you are now comfortable moving the cutter on the masking tape, you can simply rotate
the canvas and get the exact moment so that your hand can move in
a comfortable manner. We are almost done applying the entire cutoff on
the circular format. Once you feel that
you have applied the cutter on the
entire pencil line, what you can do is you
can just make sure that no spaces left where we
have not applied the codon. Now I'll be using the
tip of the Qatar and I'll be just trying to remove the internal part of the masking tape so that
we get a nice plane. So colossal phase
where the canvas will be and where we are
going to apply the color. Just simply place the tip of the Qatar and just try to
remove the internal part. As you can see, I
have just taken out the internal portion of the masking tape and you can already see
the circumference. I'll be removing the
other side as well. So it is quite difficult to
remove it with the fingers. So you can use the tip of the codon to remove
the internal part. Now we can see I have got a
nice circular whitespace of the canvas where we are going to apply the acrylic tube colors. Now similarly, I'll be repeating the same process for the
second canvas as well. You can observe the steps. Again. We already have drawn the circle on the
second Canvas as well. So I'll be using my Kata again and we are going to
repeat the same process. Just observe the movement
of mycotoxin fully. I'm trying to place it
in a vertical format. You can rotate the canvas according to your
hand movement so that it can give you a nice comfort while
you're moving the cutoff. I can assure you that
this particular step will definitely increase the
precise of your hand movement. And it will also help
you to work with kiddos. Another important
part is that you must be wondering why we have
chose so-called only. It is not at all compulsory. You can play with the shapes
that you want to create inside the canvas as when
you can go for a squared, a hexagon, or a
pentagon as well. That is all up to you. It is very important
that you can explore with the creativity. This time we have chosen
our so-called, basically, the reason behind keeping the so-called onboard
the canvas is, is that once we apply
the color on one Canvas, we're going to place
the other Canvas just upside down on it. And we'll be getting the
same textured effect on both the canvases. So now I'll be removing
the internal part of the masking tape from the
second Canvas as well. Just simply use the tip of the Qatar and you'll be able to remove the
masking tape easily. So now you can see
that we are ready with both the canvases and the masking tape is
placed perfectly fine. No need to hurry at all while
doing this particular step. The step has to be done in a very perfect and
precise manner to take your time and be very much comfortable
while doing this. You can make sure that
the masking tape is attached to the canvas
and a good way. Now let us move
towards the next step.
6. Lets Add the Colors: Hey everybody. So
you're most welcome to the amazing part of
this entire class, which is let's add the colors. You can see I'm ready with
all my four acrylic tubes. The first one is burnt sienna and no need
to worry at all. The step is very easy. You just have to simply apply the color randomly on the
entire so colossal phase. So there isn't any specific
method or pattern in which you have to apply the
color just in a random way. I'm applying these
color patches and just make sure that you do not apply that much color on this office. Now let us take
the second color, which is light blue, one
of my personal favorites. As you can see, I'll be
applying the light blue just around the first color
that we have applied. And again, there isn't any specific pattern in which you have to
apply the color. Just make sure that you
apply it in a random format. It is very interesting
that we are trying to make a nice
color combination. It is not compulsory that you follow the same way
I have applied. You can create your own color combinations patterns as well. Now, I'll be taking Indian
red. No need to worry at all. In case you do not
have the same colors, you can go for any other
good alternative as well. It is not compulsory to
use the same colors. This is basically
experimenting and creating natural abstract form. So it is absolutely fine. You can also even
use the combination of two colors or
three colors as well. Now I'll be using the last tube, which is permanent rose. And it is also a very
nice shade of red and it gives a nice vibrant effect
to the entire painting. Now you can observe
I'm filling the color on the white portion
which is left. Now once you are done applying
all the four color tubes, it is known that we have
used all the four colors. Now we can use any
particular color to fill in the white
space which is left. You must be thinking what is the result of
applying this color together on this circular
area of the canvas. So it is going to be a very amazing and
surprising part for you when we are going to put another canvas just upside down on
this particular canvas. So you can see how beautiful that is looking on the Canvas. And let me just show you
a little bit closer. Now we're going to do the most amazing and
satisfying part. Just place your Canvas
on a stagnant position. Just make sure that you do
not move it in any direction. Just tried to place
it carefully. Now what we're going to do is I'll be taking the
second Canvas, which is really with
the circular portion of cutout from the masking tape. Now what you're going to do
is that we are going to place the canvas just upside
down on the forest Canvas. Be very much careful
while doing this. Try to align the canvas with the Canvas which is
placed on the board. Now you have to just apply some pressure using your thumbs. On the second canvas. No need to hurry at all. Just do this particular step in a very careful and slow manner. So the color will be applied on the second canvas
automatically. Now what we're going to
do is that we are going to remove the second Canvas. So you can observe how beautiful the color
combination looks with an amazing texture
on both the canvases. And it is giving us a nice natural and abstract
pattern on the canvas. Once the magic is done, just place these I can Canvas because Canvas very
carefully on the board. Now the step comes
is that we are going to remove the masking
tape from the side. And this step needs to be done in a very careful and slow way. By removing the fourth
t. Be very much careful while doing this because
the color will be jolly, very much solid and very much
in liquid state. Right now. I have removed the fourth step. Now let me remove
the second tape as well. So here's a trick. What you can do is try to remove the tape and an
angle so that you do not end up spoiling your
beautiful texture painting. You can see we are getting
a nice circular shape. So we are done. Now, let me remove the
last tape as well. So as you can see,
that step comes here that I told
you that we have to keep the masking
tape a little bit outside the canvas as well, so that we do not end up spoiling the white
portion of the canvas. You can see the color is almost there outside the masking
tape, but it is fine. We'll manage it by
removing the last tape. And you can see how beautiful the entire painting is looking. One thing that you can
observe right now is the circle is not that
perfect because it happens. The color is very much in liquid state and it is
in a high quantity. So we'll manage that by
adding the final touches, finishing it up with
white acrylic color. You can see how beautiful
the texture is looking. The painting is
quite wet right now, but we will let it
dry for awhile. Now let us take the second
canvas and trust me, there's processes, Jolie, satisfying While you
remove this item. So the steps are
absolutely same. You just have to remove
the masking tape carefully one-by-one, tried to remove the masking tape and an angle so
that you do not end up tearing our spoiling
your precious painting. As you can see, I have removed
the second tape as well. Now let me remove the
remaining tapes as well. You don't have to worry about the distorted
circumference line. We will balance it by applying
some white acrylic color. And it will look like
a perfect circle. As you can see, we are ready
with both the canvases. And I hope that you enjoyed this beautiful acrylic
abstract painting creation. Let me take you a little
bit closer so that you can observe the details for
this beautiful painting. Let me tell you one
more thing that once the painting dries, the texture will
remain the same and the color combination will
look even more beautiful. Now let us move
towards the next step.
7. Finishing the Final Product: Hey everybody. So as you can see,
we are ready with both the abstract
canvas paintings. Now, let us finish
the entire product. So as you can see,
the circumference of the entire painting is
a little bit distorted. This happens when we use
more amount of color, but no need to worry, this
can be fixed very easily. I'll be taking some
white acrylic color. And I'm also having my
round brush oxidizing. It is basically a
detailing brush. No need to worry at
all. In case you do not have detailing brush, you can go for any other
good alternative as well. Just make sure that the tip
of your brush is pointing. So you can add some
amount of water in the color so that
it can loosen up. And you can apply the color very easily on the circumference
of the entire painting. You can just simply observed, I'll be just covering up the distorted portion
on the circumference. Just make sure that
you move your brush in a very careful and slow manner. Just try to make it a
little bit smoother. No need to hurry at all. This step needs to be very
much precise and accurate. So just try to
move your brush in a very slow and steady way. And you can see
that we have made the entire distorted line
a little bit smoother. Now what I'm going
to do is I'm just going to flip the
canvas a little bit. But before that,
let me just create this distorted portion a
little bit more clear. You can take color from
the white acrylic. If you view that
the brush is empty, you can observe that
how we are just trying to cover up the
distorted portion. So let me tell you
something about this particular
paintings that you can use in your art studios are where you can
use it to display. And you can also
mean while observed the finishing part that
I'm doing right now. These are basically
abstract paintings which you can place an, a very aesthetic manner
and your art studio. And these are basically
many canvases. And the look of this painting is very minimal and elegant.
At the same time. You can already observe
the beautiful texture that has been created on
these particular paintings. And what you can do is
you can also create them in a set of four canvases. Our eight, but an even number, because we use two canvases to create the same print on each. So that is how you can create some beautiful combination of these beautiful acrylic
abstract paintings. Also, one more thing that
I would like to tell you is that here in this
particular painting, or I will say class project, we have used
so-called as a shape. But you can also
experiment by placing the masking tape and a
different shape format. You can go for a square, you can go for octagons, you can go for a pentagonal. You can also go for a hexagon. And you can also experiment in any other shape if you want to. So there isn't any limitation
to the creativity. You can also create your
own beautiful shapes. At the same time, you can also experiment with the
color combinations. Just make sure that the color comes in a very
contrasting manner. And it looks a little
bit more aesthetic when you just remove the
canvases from each other. Now you can already
observe that we have finished the entire
this dotted line. And I'm just trying to cover
up the remaining portion. Now once we apply this white acrylic paint on
the circumference, the so-called will look a
little bit more smoother and the painting will
look a little bit more finished and aesthetic. Also, one more thing
that I would like to tell you all is that you have to make sure that
you give some time for both the paintings to
dry in a proper manner. Since we have applied color
and a very massive way. So it will definitely
take some time to dry and get completely solid. Also, in case you want to make your painting dry a
little bit faster. You can use a dryer
to make them dry. We are almost done finishing
the entire circumference. In case you find your brush moving a little bit
hard on the surface, you can definitely add
some amount of water, but just make sure that it
doesn't dilute that much. Try to keep the color quantity a little bit more in the brush. Also, just make sure that you do this particular step in a very precise and
careful manner. Just make sure that the
white color doesn't go inside your
beautiful texture. As you can see,
we are ready with this beautiful abstract
canvas painting. I hope that you enjoyed making
this beautiful painting. It was a very quick and
easy class project. So just be very
calm and patient. Enjoy the process
and happy painting.
8. Class Conclusion: Hey everybody, you are most welcome to the class conclusion. Being an artist,
I always loved to explore new art forms
and art mediums. And that is something I always suggest my students as well. Being an artist that
is very important to maintain an art journal
in which you can always keep a record of your practice and
see your progress. Practicing is something that will always take
you one step ahead. I'm really very happy to share this particular class
with all of you. And I hope that you
got to learn something new and creative from
this particular class. I would be really happy to
see all of your projects into the project gallery in case you have any questions or doubts
related to the class, feel free to ask them in
the discussion section. Let me know your
reviews for the class. Keep practicing and
happy painting.
 Rutvik Patel, Artist and Instructor