Transcripts
1. Introduction: Hello, hi and welcome to my
very first Skillshare class. Have you ever seen
those seemingly effortless, those
magical landscapes? I'm wondering if you
could paint them. Have you been itching to ditch
the roles and just let go? Are you curious about exploring color and experimenting
with composition? My name is Amber and I'm a
self-taught Watercolor artist. I've been painting since 2018 and excited and fall of 2022, that this was going
to be my thing. I've painted every day since. I've also taken a
Skillshare class myself, every single day
since fall of 2020 to the end of June of 2023. I'm extremely passionate
about all things Watercolor. I love to share with
you how I create loose and what I happen to thank
our magical landscapes. Escape with me while we play
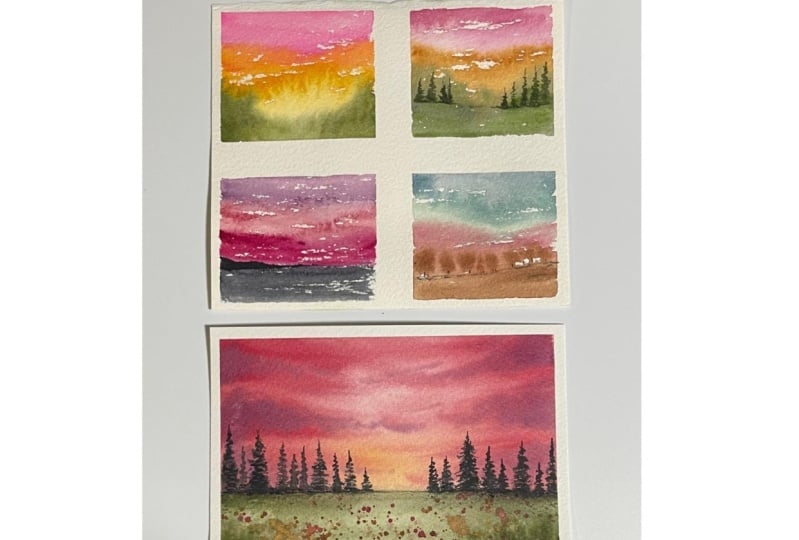
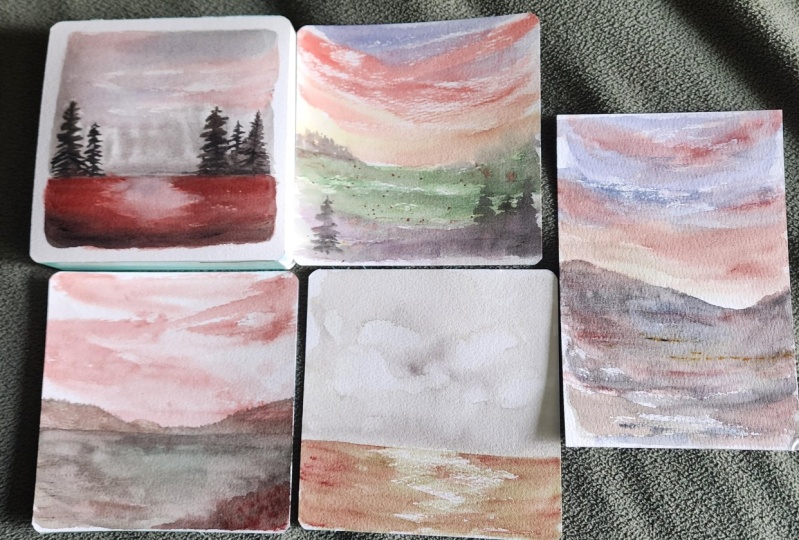
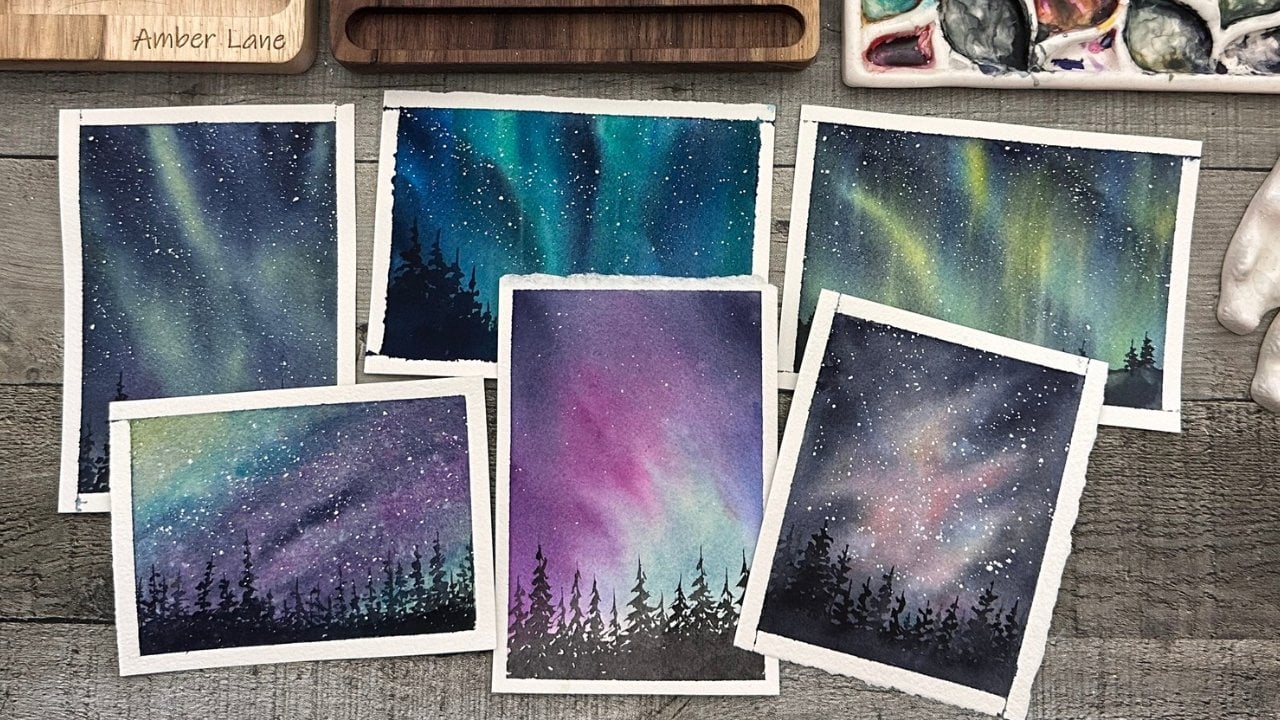
and have a bit of PFK-1. During this class, we'll create four mini quick
warm-up landscapes where we get a play
with color and explore. Adding minimal details are Final Project will create a
FUN and loose sunset sky, will add the
Foreground as well as some details including yep. You guessed it. Me juries. I happened within the
Pacific Northwest. So you can figure out what
kind of trees I love. Painting loosely can
really help you, not only in your life, but I've found that letting
a bit of control you can really spillover in your
day-to-day life as well. Adapting a looser style of
painting can allow you to, He's in more Painting
moments throughout your day. Maybe having a super tough day, super tough moment, or
even a super tough week. And you're able to sit down
for even five-minutes and Paint a quick little
satisfying Landscape, whether you're a
beginner or further along and your
watercolor journey, join me in practicing letting go and let's
see where it takes us
3. Tearing Paper by hand: Okay, so what we're gonna do, I'm gonna show you how I
retain these decal edges. I take a larger piece,
cotton rag paper, and I fold it in half, slightly high
crease, the middle. And I hold my finger
at the very top of the crease and they
slowly start tearing. I move my finger down. I tear more, move my finger, tear more, move my finger
tear more until the end. And it's not exactly
as difficult as this. They're cutters. There's different
ways you can use it, but these are for
my quick minutes. So for me, this is the perfect
way to divvy up my paper. I'm really quick and say I didn't put my finger there
so you can get a little. But when we cut it in half or repair in
half one more time, for the most part goes away. So you're just wanted to
be a little more careful. Hold your finger, tear your finger, tear,
hold your finger tear. This way. You can do this
before you paint for actor. And if I do it after, I'll just follow the
lines that I made. So you can have four
pieces of paper again. So they're altogether
like this and you're just paint your
four pictures real quick. And then you tear them up
and you have your form and he's nuts it. Any size you like, you can go even smaller and
do a super mini. You can keep them the half size, go in half again and quarters,
whatever size you like. And you're ready to go
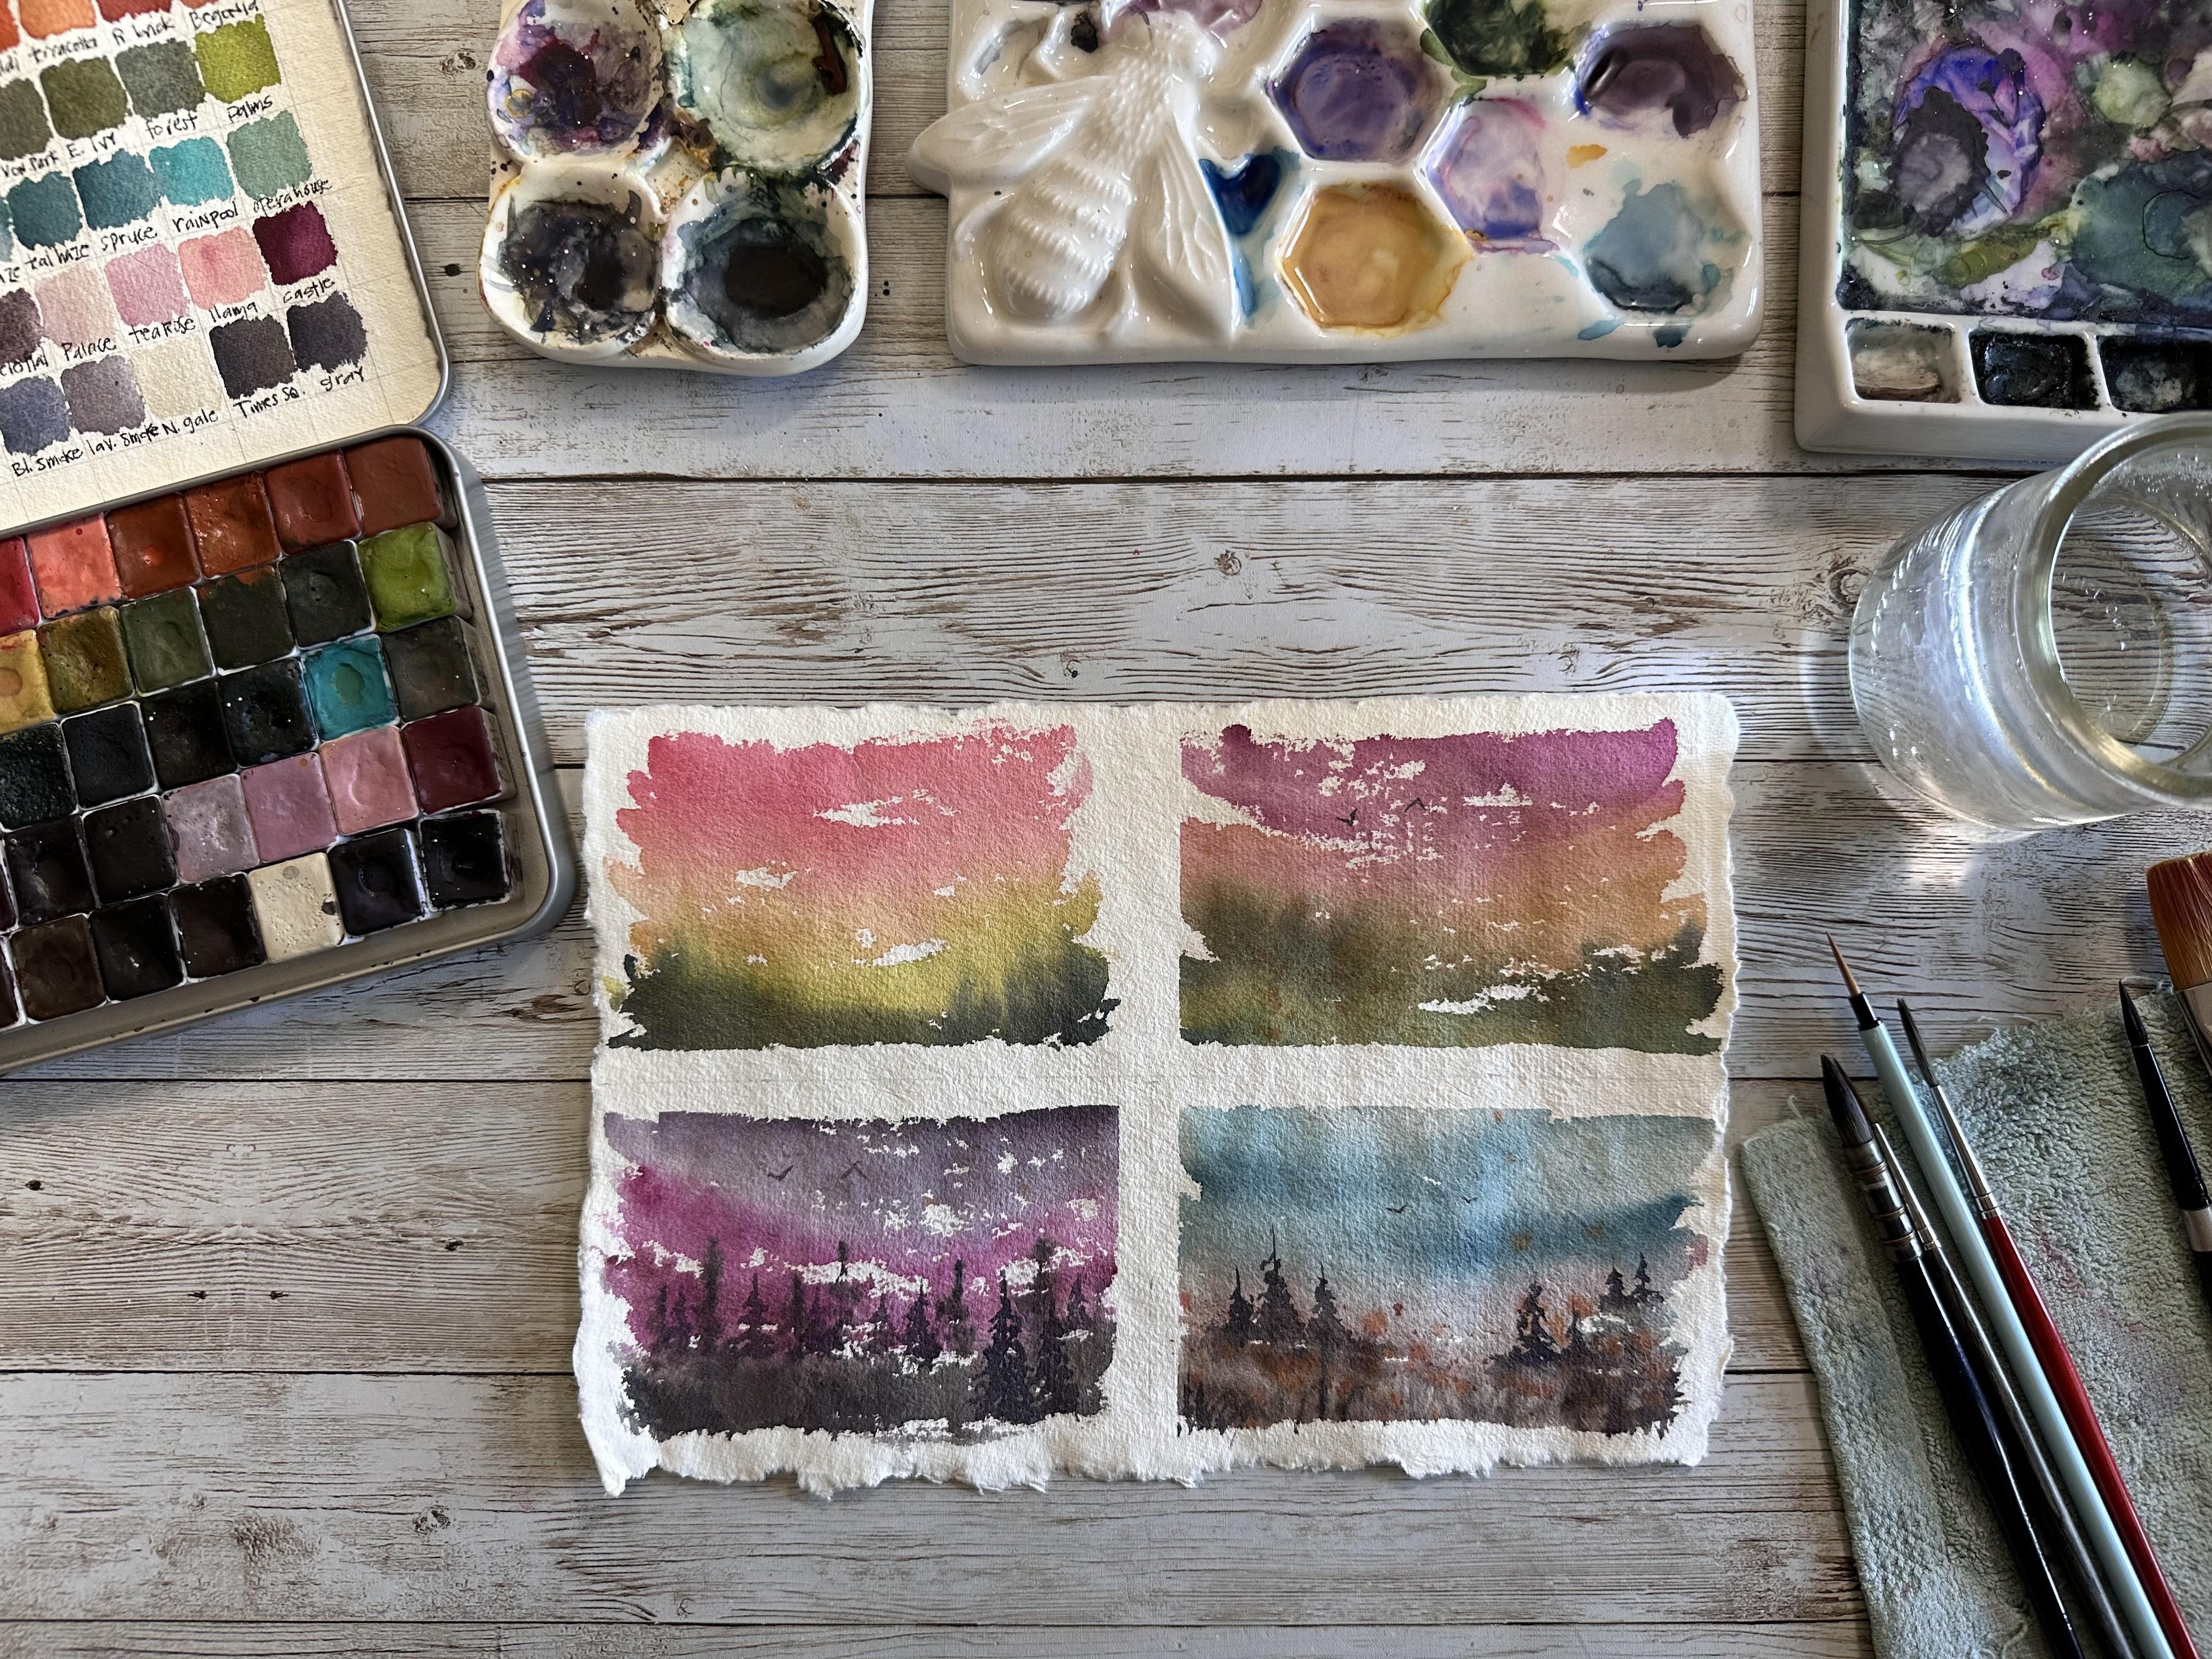
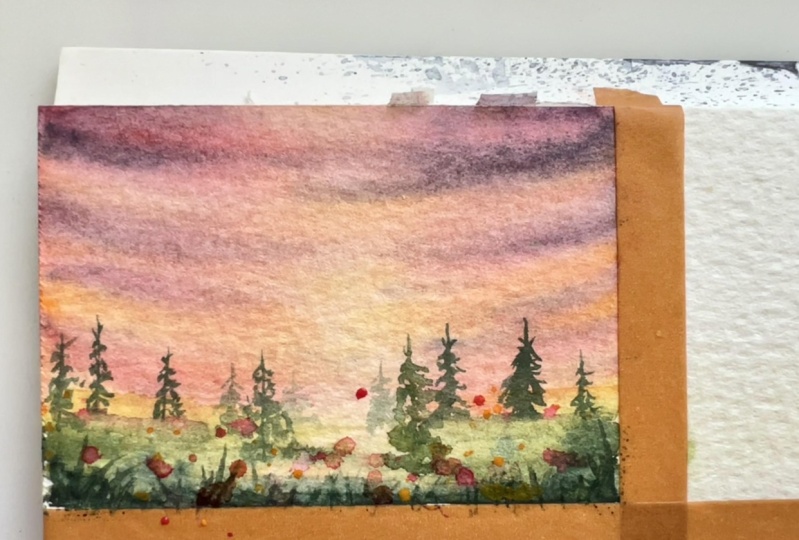
4. Mini Sky Warm-ups: What I'd like to show you
now is taking this paper, what I do is divide
it into fourths. This is a nine by six. So whatever paper you have, you could do just
2.5, you could do 4s, whatever you're more
comfortable with. I'm happy with this. I'm going to go four-and-a-half, about four-and-a-half mark. May 2 marks. Draw my line down
the middle here. Then I'm going to go
down this line six, so six months or three
minute ago, about three. And we'll just give myself a
third line, mark it there. Draw my line here. This is all just rough, does not have to be perfect. This is just a quick mini and I'm not using my great tape. I'm using my so-so tape. So you don't want your tape
to stick to your paper, which you'll wanna do is take a towel or a rag or your pants. And Navy just especially if you don't have a
really nice tape. Like I said, I'm using
my cheaper tape. So I just want to take some
attack you off. There we go. We've got some buds on there.
We should be good to go. Shouldn't have too many
problems sticking. And we're going to do
one tape that way. We're going another
tapes is this way. And honestly, I usually
tape off the edges, making them neatly
them rob this time. I'm just going to
tape my lines here. These are my Addison
and Sedgwick pains. I don't want you to
necessarily repeat the colors I'm doing. So I'm just going
to pull some idea, a very rich wine burgundy color. Now I'm taking a color
called a ganglia, which isn't orangeish color. I'm going to grab pizza color, which was a yellowish. And I'm just going to play and I'm going to lay
these colors down. I'm going to grab some greens. I'm just mixing the greens
together right in my palette. I'm not even putting them
on my mixing palette. I'm just taking
it from Pan Japan and getting some color on there. I'm going to take a
little bit of yellow for the foreground here. And then just a touch of indigo to give ourselves,
give us some depth. And that was about what, 2 min touching some
indigo in here. That's it. That's all
I want you to do. Just swipe some color, get them on there,
and move on. Okay. Now we're done with that one. Let's go with a more day. Let's go with a lighter color. We're not going to overthink it. Just start grabbing your
colors and playing. So I grabbed a pale bluish gray. Let's get a little
more blue in there. And then let's grab
that blue back again, the Polish blue. And I'm just mixing as I go. I'm just letting the colors now I'm going to grab maybe a pink. This one is called tea rose. And I'm just grabbing it down there and maybe one paler pink. I do want to kind of
merge those together. Blend them slightly. You don't want to just stripes going straight across, right? You've kinda want to
show a little bit of a little bit of
different colors here. We can drop them more color
if you don't care for that. And there we go. And let's add a
little bit of ground. And they use my link. This is a cappuccino color. We're gonna go a
bit around here. And they grab a darker brown that wasn't quite
dark enough for me. I'm used this celestial color. It's kinda pinky brown. We're just going to drop
that in very quick. And we can just drop
some colors in here as some ground right along where
the ground meets the sky. And we can pretend
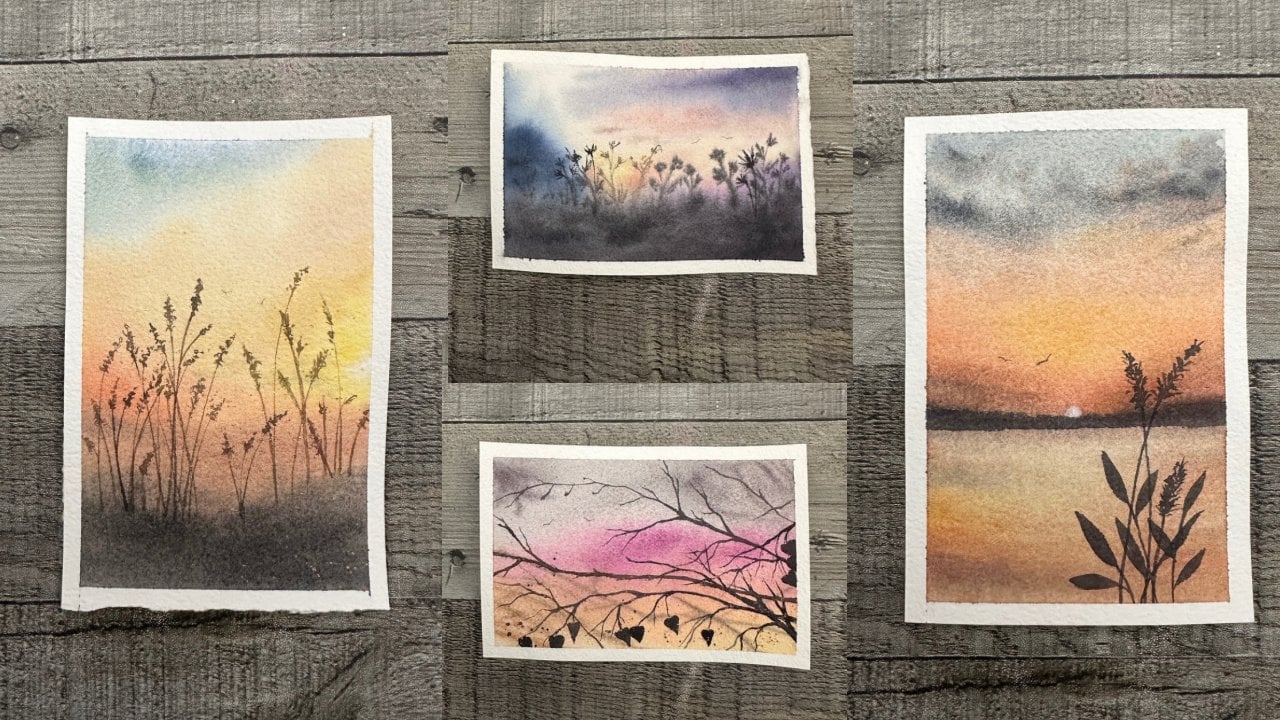
those are shrubs. That's it. Okay. Move, move on to the next one. These are just a very
quick plays with color. We're not aiming for
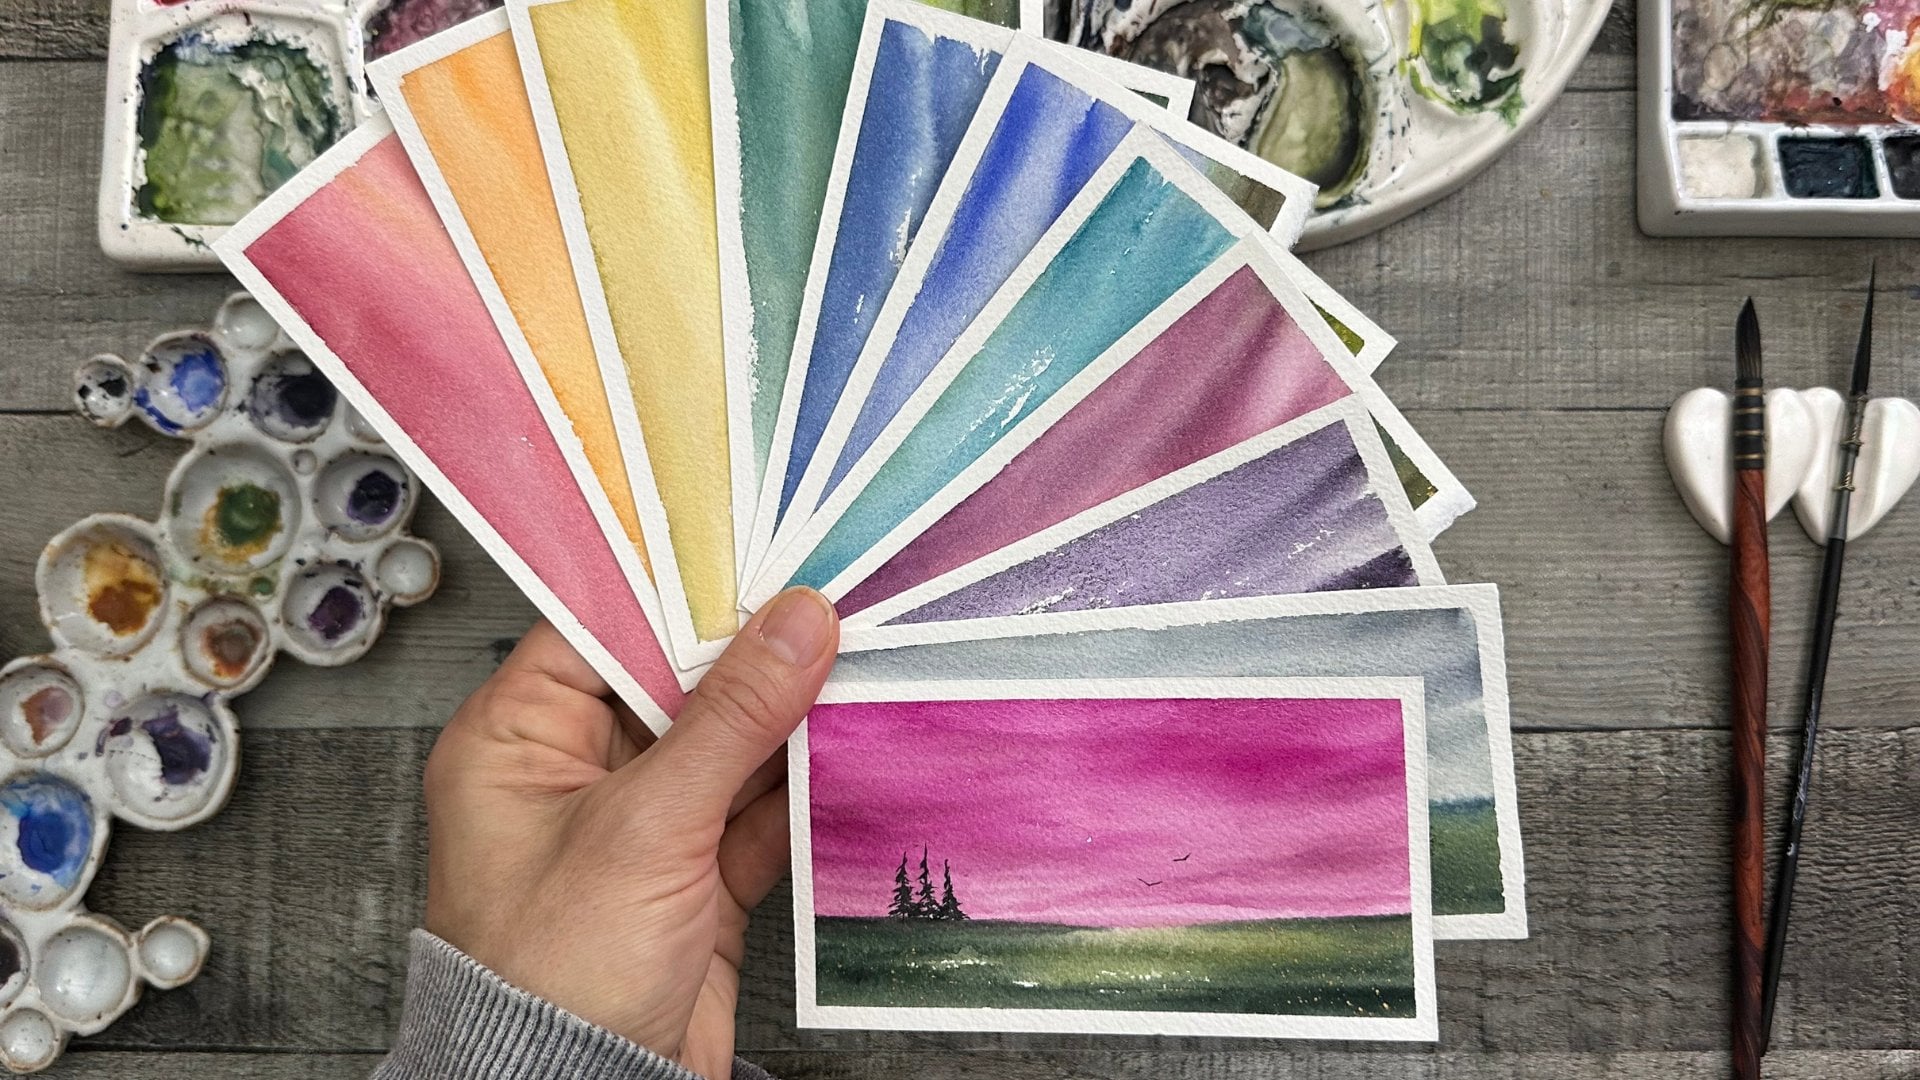
anything specific. We're just playing with color
often I'll do the rainbow. So let's try that here. Let me show you what that looks like. What we do for that
is all find a red. Let's do this. Read Glen Getty. Here, we're gonna get our red, it's kind of a reddish pink. Actually. Want to grab something that's
a little more red to go. And we're going to grab an
orange and grabbed terracotta. I'm going to grab a yellow and I'm not overthinking
these colors. I'm just grabbing them
as they as I see them. Okay. Let's do a lighter green. More of a what is an apple
green are running out of room. So we'll just do a darker green here if that in
the bottom there. And you know what, since
we ran out of room for the blue will use, how about we use
some indigo again, just little dabs down here and we'll just
throw them up as little, maybe part of some some shrubs and these
are all very loose. We're letting the water bleed, doesn't matter if it blooms,
blossoms, color, flowers Doesn't matter if it's
pretty or not pretty, right. We're just we're just
going for it here. Okay, so let's see, we have a blue sky or purple, pinkish, reddish. Let's go. What color we knocked out and
we haven't done per full, I guess purple or yellow. Let's go look purple. And I'm just randomly choosing. No rhyme or reason, just whatever looks pretty
on my little swatch card. I'm going with that. And that's why I'm picking. So it's not it's not methodical,
it's not premeditated. It's just grab-and-go. So purple, a little bit of it. This is called pink haze
and very, very bright pink. And I'm just going to throw in some lilac servers on
pinks and purples here, bring back some of
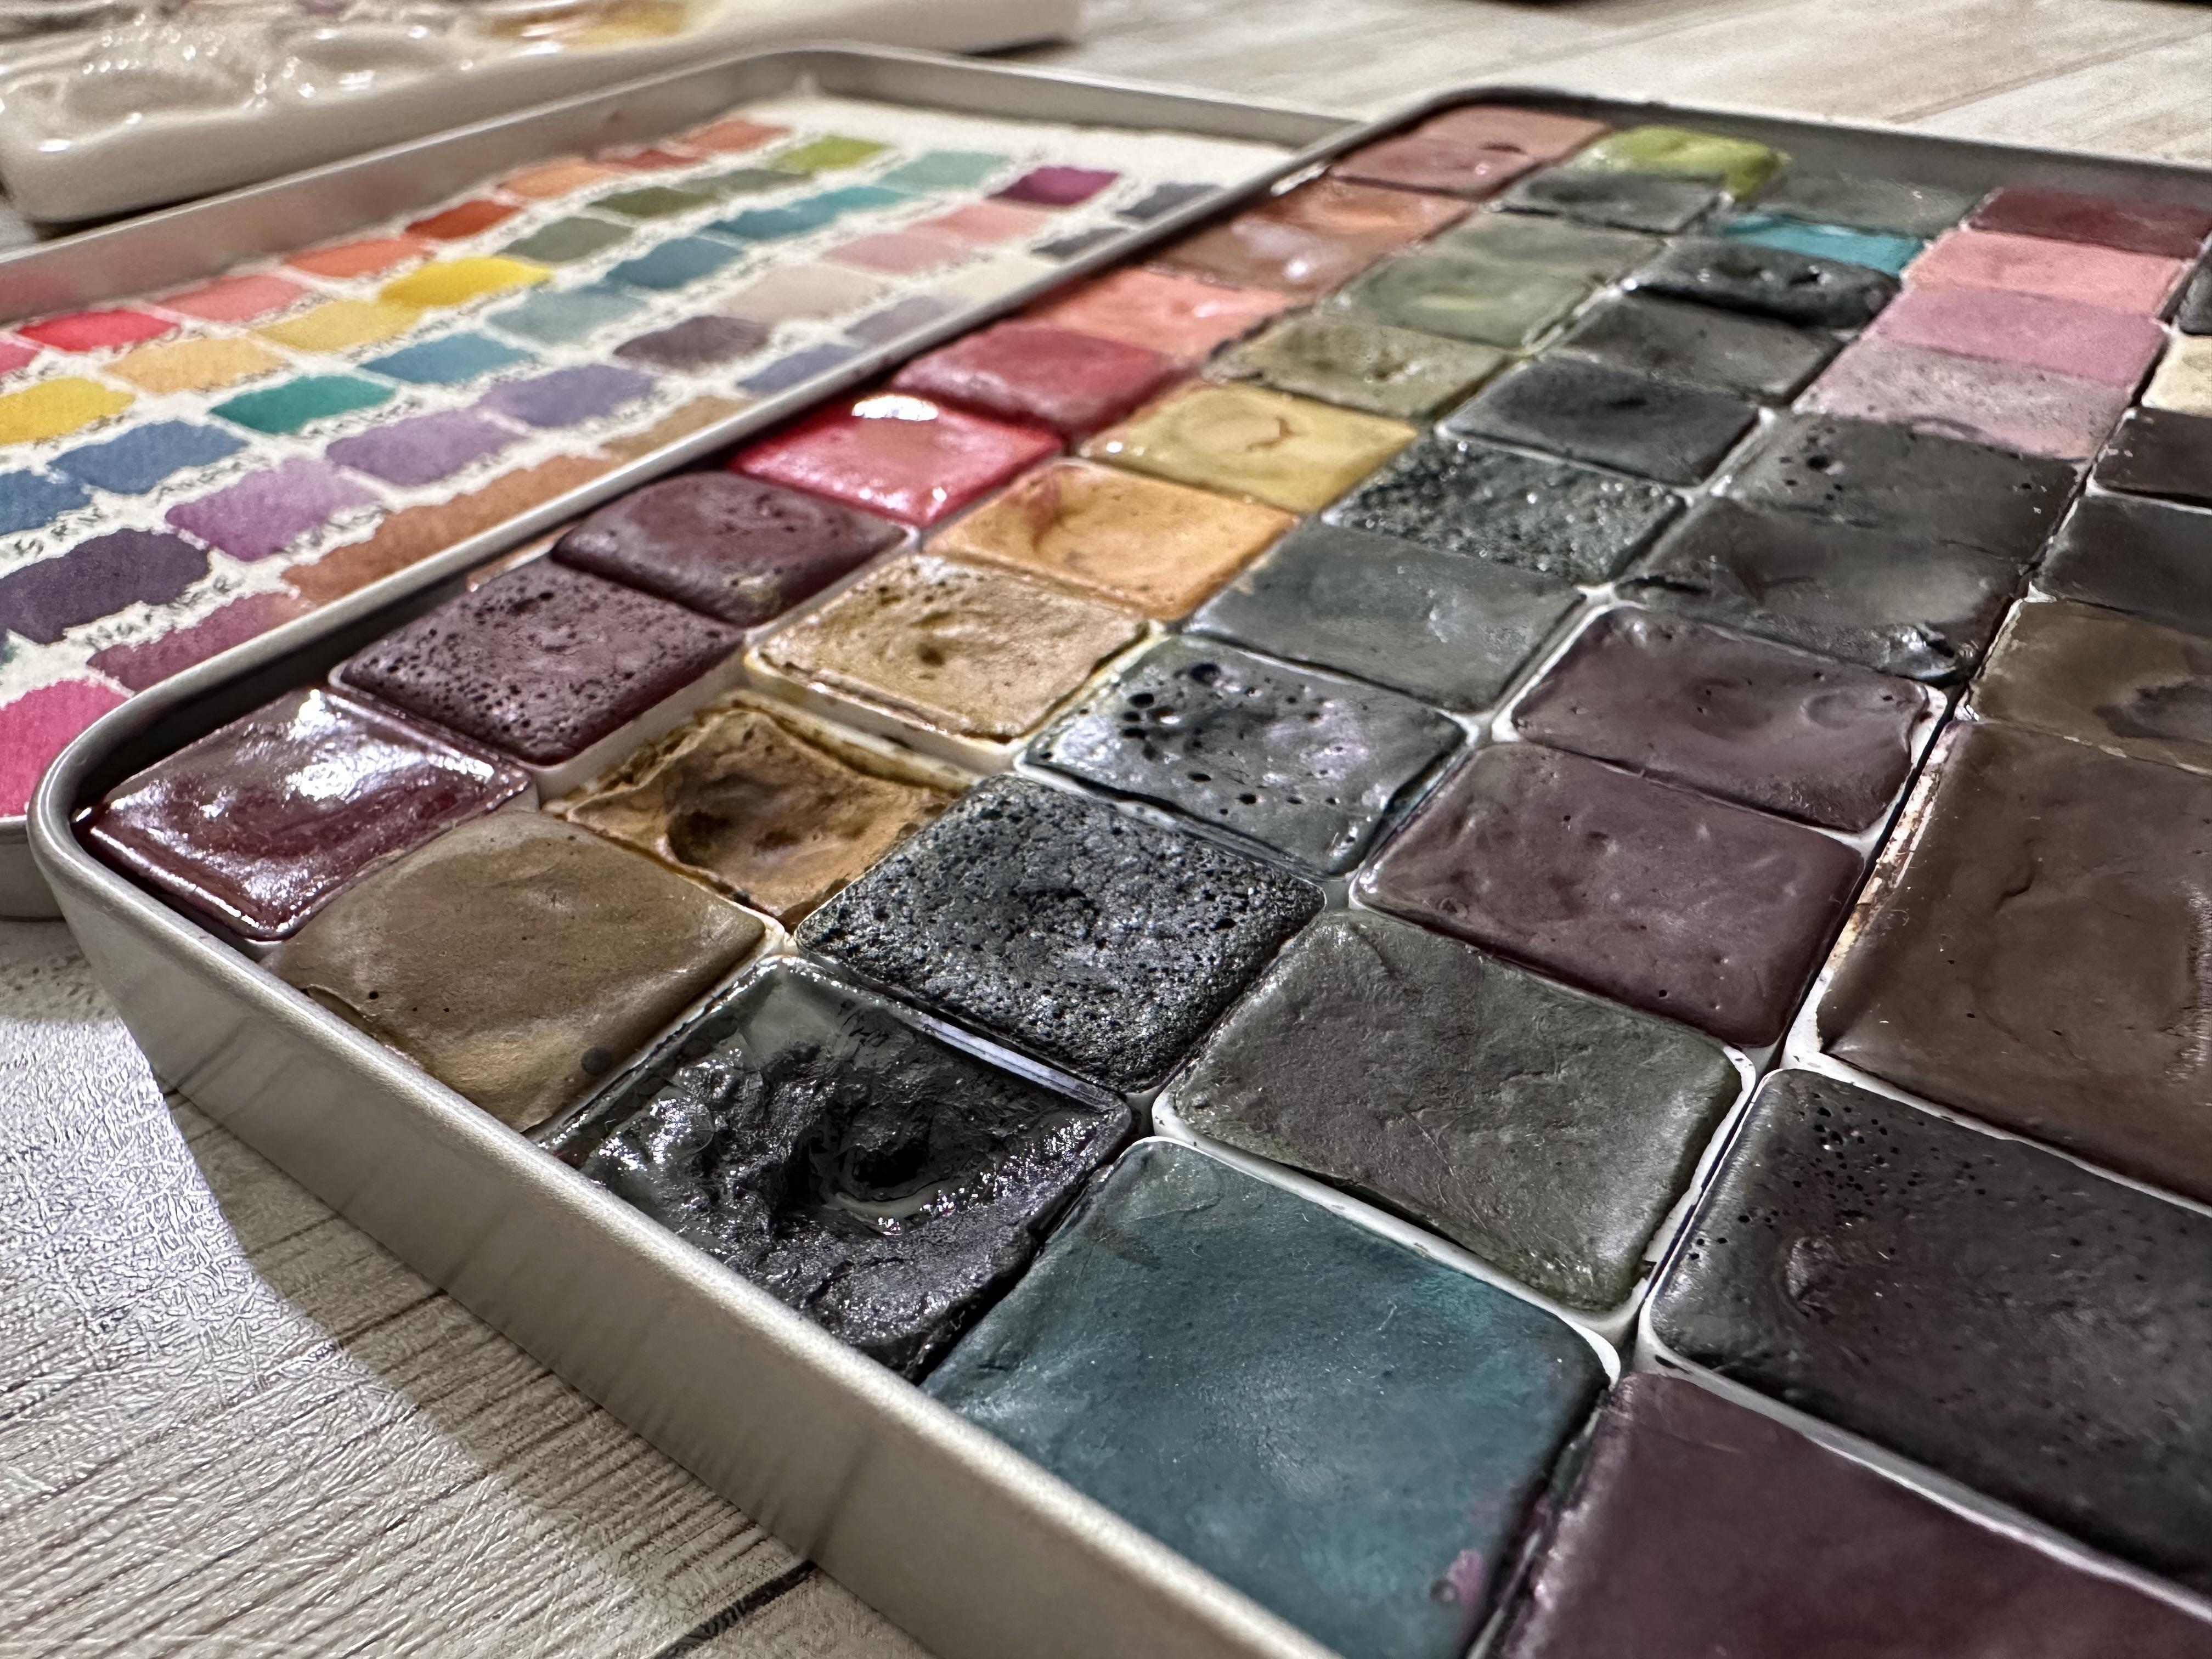
that castle color. These are handmade paints I mentioned and I
really loved them. I'll list them in. My supplies are super
affordable and let's do let's just go straight to what color ground shall
we do on this one? How about we just go gray? Let's go a grayish color. Maybe it's night and you can't really see
the details of it. Ground too much. Okay. So then if we want to grab just one little
skinny brush, my liner. Sometimes I will drop in little trees and they're
just suggestions. I'm making a line just going
side to side very quickly. That's all. I want these to be well
under five-minutes. I don't want you to
take a long time. Better yet two to
3 min if you can. I know a lot of times
if you're new to this, it won't be that fast. But you just want to
get some ideas down. You can go back in with some
splatters if you wanted, who take a smaller brush, maybe you grab, this
one is lacking. So maybe we grabbed some. I'm going to just introduce
a brand new color. I'm gonna introduce
orange because this one is lacking little bit. So we're gonna introduce
some orange in there. It's okay if it gets in the sky. Again, it's just, we'll give
this one some orange too. And maybe we'll grab
our liner back and we'll go back in with
some What do we go with? A brown since we already
have some browns of brown and black will
mix a little bit together. And we'll just draw some very quick stems,
some quick details. And you don't have
to go back and undo these details so you can
just leave them as is. I'm going to add to it. I'm going to leave
them just like that. We're going to want
to let it dry. You always want to
tear your paper, your paper, your tape
at an angle like this, and stay close to paper
low and at an angle, you have your little
force on them. They're not perfect. They're not they're just not
perfect and that's okay. You can practice some
more trees in here. You can practice birds. You can leave it as is, you can use the backside. It is what it is. And it's just, it's freeing. It's you letting go and hits
you playing with colors and compositions without a care
because it's just paper
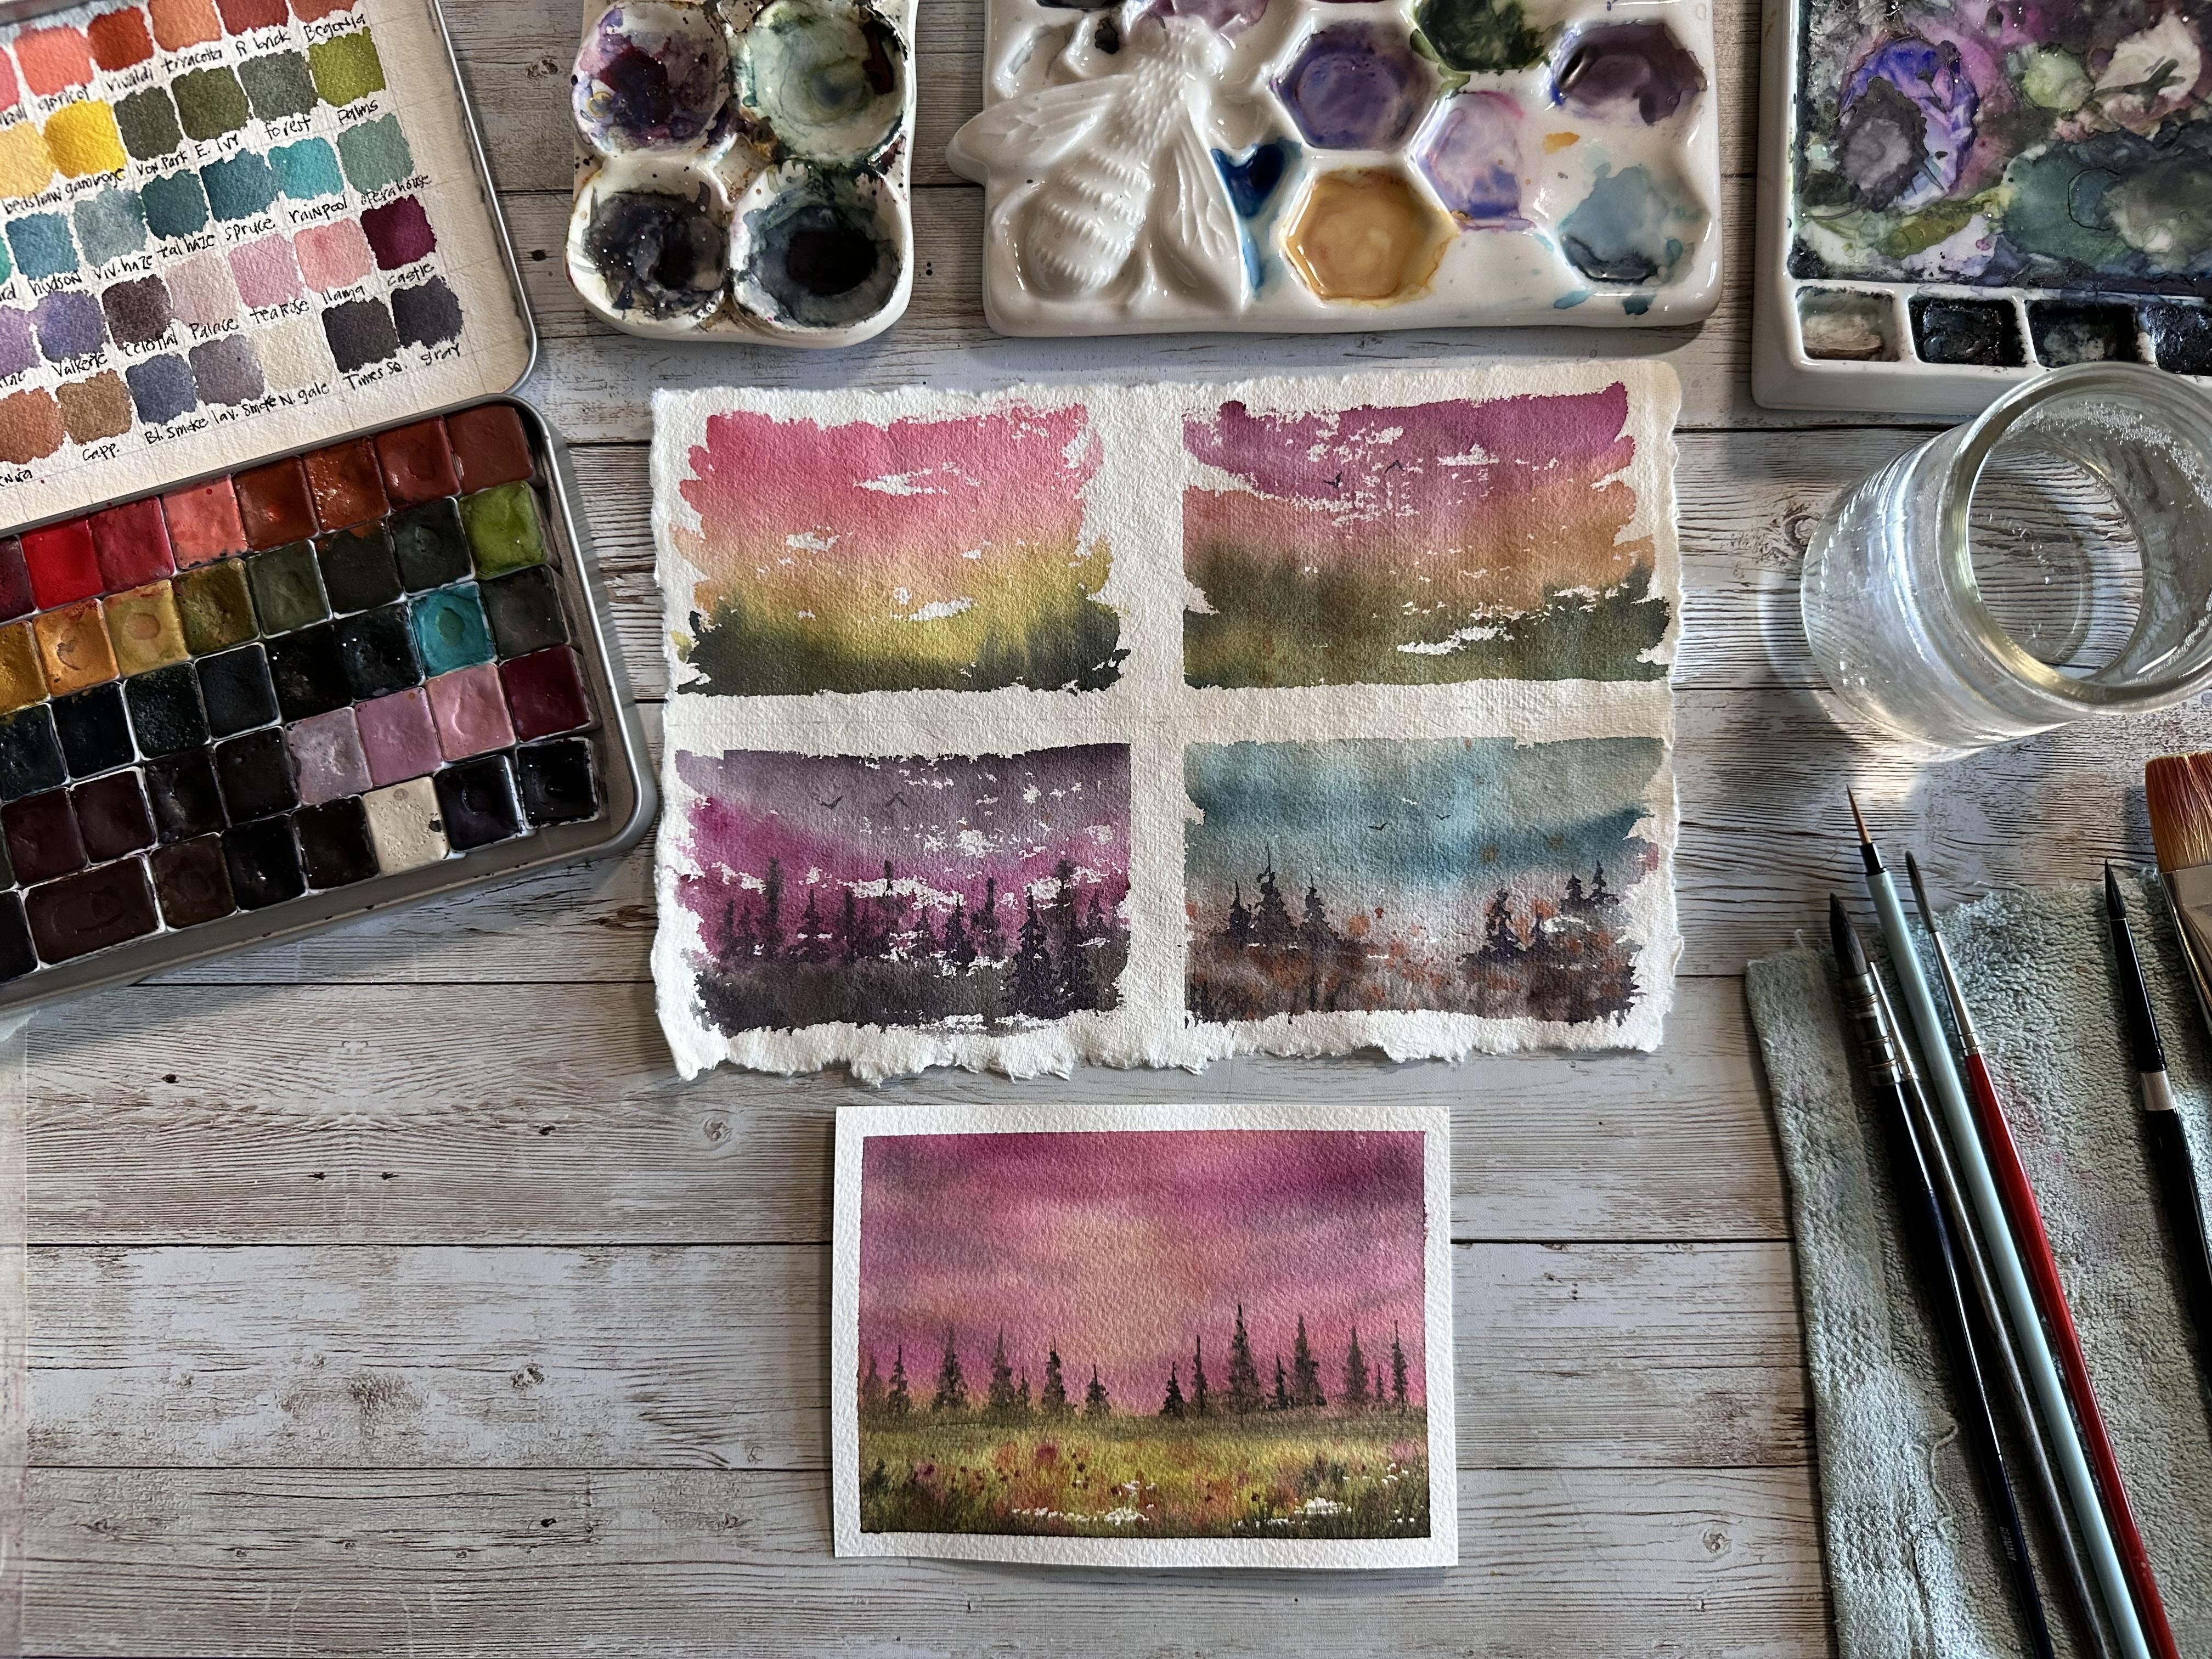
5. Mini Landscape details: I thought we would do we
would go ahead and add some details to these to show you how to do the
finishing details. I'm just gonna do it separately, but I think here's
going to be good. We're gonna kinda look
at what we have going on and see what we
can add to what we already have instead
of making you. So let's go, let's take
this scene right here. I'm just using a
liner script brush. You can use any brush that
you like to make trees with. And I'm just going to
draw straight line. I'm going to dance
my brush back and forth to get some trees. Now, you are going to want to do trees the way that you
know how to do them, whatever way that is
what works for you. I feel that everybody does their trees a little
bit differently. And if you're still learning, I highly suggest trying
all different sorts of brushes and all different
methods that you've seen. I don't think there
was one tried and true way to paint trees. I think there are many. And I think you
really have to work to figure out which
one works for you. So I'm just looking
at the scene, seeing where it can
pull things forward, push things back, and trying
to decide what works. I just pulled a dark color. In this case, it happens
to be black, blackish. It's called Time Square. It's actually kind
of a shimmery gray, charcoal black, charcoal gray. And again, I'm just letting
my brush do the work. I'm not thinking about
the branches I'm making. I'm just suggesting trees versus trying to draw the
exact shape of a tree. They don't, you don't
want them all the same. You want them to be
different right? Now I'm gonna take my brush and I'm I've got to clean water, just a little bit
of white on there. Just going to blur the bottoms. Not too much water.
You don't want to introduce too much
back in there. Just going to lower
the bottoms of it. So it looks like they
go into the ground. May have used too
much water there. That's okay. I'm going to grab
my black again. And I'm going to maybe draw some little very loose squiggle, just like little grasses. So that's all we're
gonna do there. Maybe some taller grasses here in the foreground and darker. I do definitely like
to do my details and dark dark colors. So let's kinda for that one, what we can do if we want to is we can take
our orange bag. And what we can do is flatter and some orange
right in that foreground. To make a little
bit more contrast, give it a little more. Since his dry,
you're going to see your orange splatters
a bit more. We can also add some
birds if we want to. We can take our B, which perverts you want a
pretty good liquidy paint. You don't want it to dry. You want a pretty watery, you want a very thin brush. And I'm not a bird expert in, but just wanted to go less
is more for me on birds. So I'm just going to do to lift that and leave it be high, add a third and they usually
look like a Smiley face, a winking face or a frown face. I think two is my new
my new happy spot. So that's one. I'm gonna leave
that for this one. I feel like I kind of like
what's going on here. So for that one, I want to just
keep it simple and maybe add some
birds to this one. Okay, and we're just going to do one little simple bird there. I did get a little too
much burden on that, so we'll just give it a
little bit of a more of a body and will act
sent this wing as well. We'll just give this
bird over here. And I think we'll
leave that one. So down here where I made
some of these blurry trees, these are gonna be
pushed further back. And these ones I'm going to
make are gonna be forward. Okay, So they're going to be darker and they're
going to be more crisp. So automatically they're
going to come forward. And I'm also dropping
them down to this edge or the
edge of the paper. A little bit more. The edge of the
paint, I should say. And you don't have to, they'll still be fine if
you left him back there. I'm going to switch to
my Paulina bright rigor. Grab some more paint and get to paint in
some more choice. And I'll put some back
on this line back here to bring another one forward
here, varying the heights. I try never to make
them the same height. And so we're just going to
keep building our trees. The ones in the front,
you want much darker. The ones back here, you can start to
get a little less, less bold and less detailed. That can be a lot looser. And you can use any style
of tree that works for you. If you're not into evergreens, like I am, you can use
any tree that you like, whatever is more comfortable
for you to paint. Whatever you enjoy
painting as well. Okay. So let's switch back to my really thin liner and we'll
practice some more birds. I tend sometimes not breathe when I'm doing
stuff like that. You should breathe. Okay. Alright. That's, that's, that's that one. Maybe we'll add some little
things my foreground here, just to break up. I'm just taking it
from the base and just pulling the
brush up and letting the lines just lead off like kind of literally
chicken scratch. That's what they still call
it, the chicken scratch. Okay. Emily, That one? This one. I don't know. Maybe we'll just
leave it as it is. Maybe it doesn't eat anything. But you have to be
the judge of that. You have to think about
it and look at it. And that's it for details, we would just want to keep
them loose and play with it.
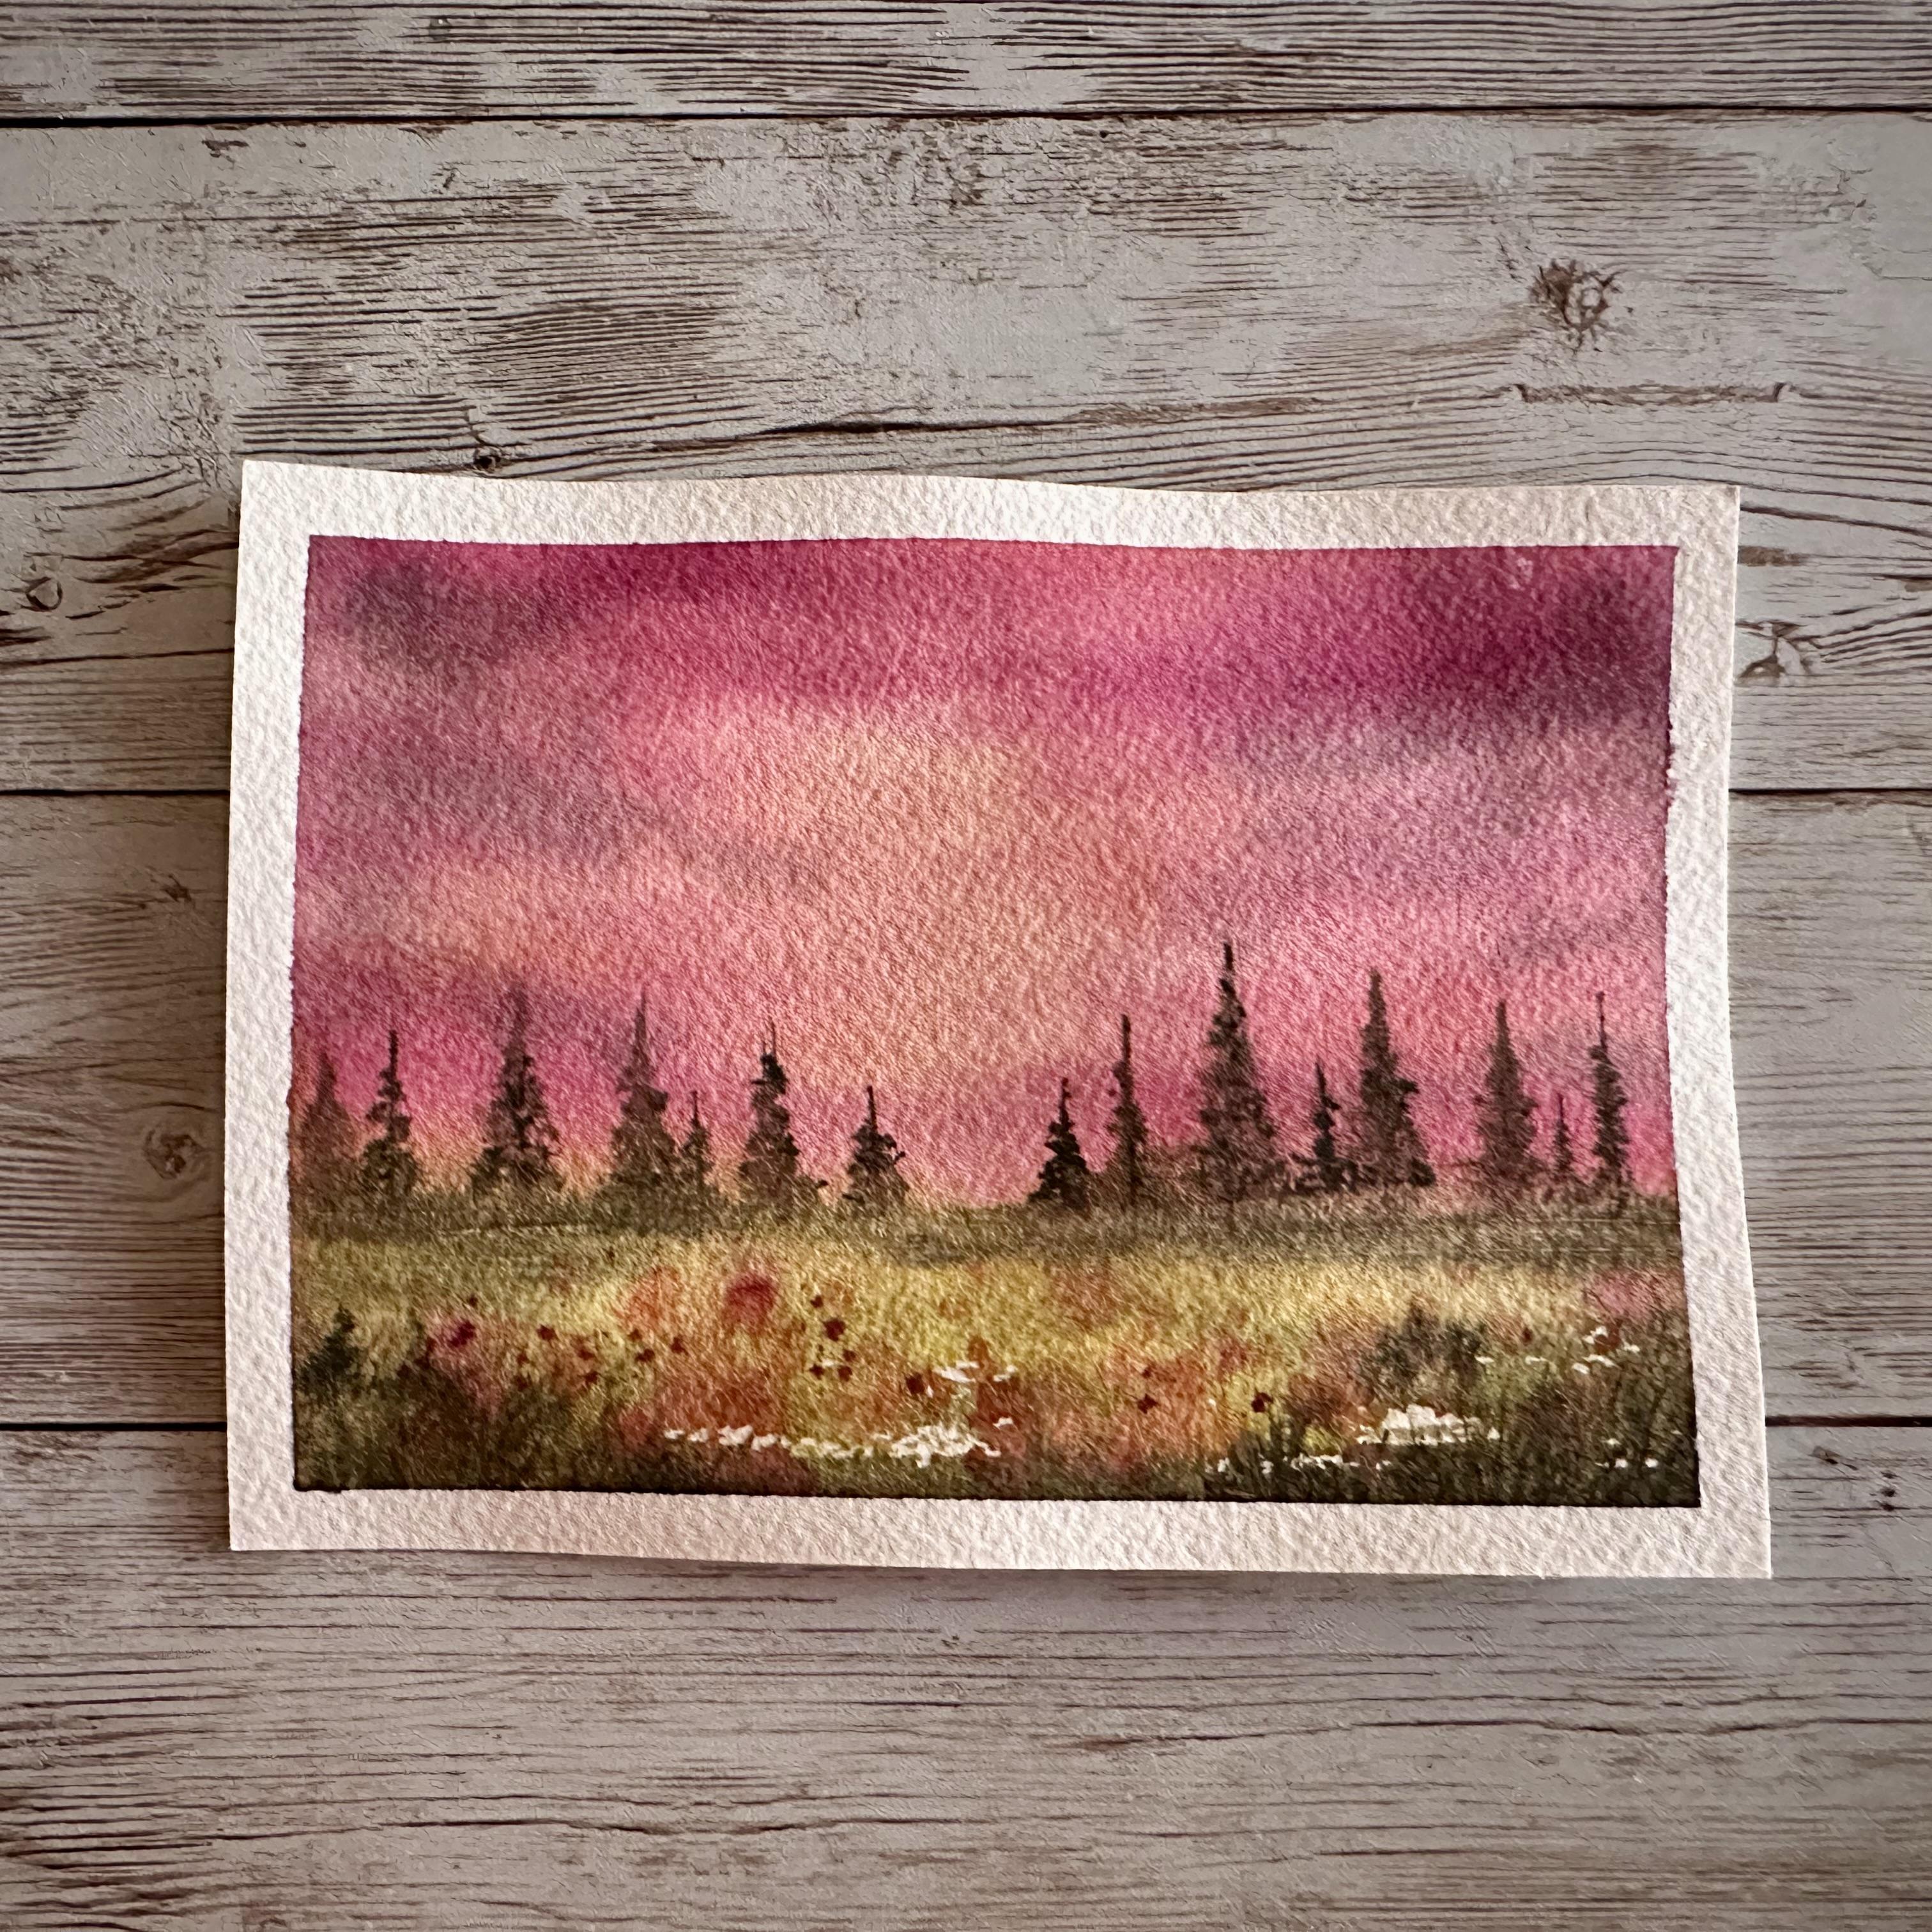
6. Class Project: Today for our class project, we'll be exploring color, practicing letting go, and letting the watercolor guide us. At the end of this class, we'll have a loose and magical
inspired sons get glands. I chose this particular project specifically for its looseness, its lack of predictability,
in its versatility. I want us to let go or maybe even have to
rein ourselves in a little bit to learn how to rescue parts that
are going astray. Not everything goes
right in watercolor, so we need to learn
how to save ourselves. I love that you can use any
colors for this project. I'm not going to call
it specific colors. Choose the colors that call
to you that feel good to you. That class is perfect
for beginners and those beyond
for our project, I hope to inspire
you to dive into the supplies that
you have and to be inspired by what's in front
of the feeling to need to run out and buy all new supplies or something that I show you. I'd love for you to find
out what inspires you. And my hope is that
you'll end up with your own unique
piece if you need to let go and give yourself
a bit of time to escape, you're in the right class,
grab your supplies. Clean water, preferably
100% watercolor paper, cotton, paper, paints
of your choice. And let's get started.
7. CP: Prepping our Paper: Hey, welcome back. So to get started, I thought, like always, I prefer to tape down my paper. You don't have to. But since we'll be
doing wet on wet today, I prefer to tape it down and I do like to tape it to
this plexiglass board. And I find I can use
a heat tool on it. It doesn't bend,
it doesn't warp. Very, very sturdy. I'm gonna take my spray
bottle to wet my paper. I like to give it
a little bit of a pre-vet, use some clean water. I have three cups of
water here going on so that I can have access
to clean water all times. I do want this water to
set in for a moment. I wanted to just kind
of soak into the paper. I want to make sure I
have a sheen everywhere. Not puddles, just
nice layer of water. So as unintuitive artist, which means that I rarely
paint from a reference. If I do maybe once a week, and then I also like
to do tutorials. So I'm often on here
doing tutorials myself. So what I've learned
from that is that I often struggle with
the colors people choose. I often will also struggle with creating the
way they create. So I don't want you
to feel like you have to create what
I create or paint. When I paint, I want you to use colors that make you happy, that you have that are
convenient for you, not anything that you'd
have to rush out by. So what I'm going to use, go and use this palette. I've curated this
palette, handmade paints. And it is mainly my preference
to use handmade paints. Not always so. And I do mix. So you'll see me a graph from all overall graph
from my palettes. I'll grab from the
pellets to my right. I'll grab them handmade
paints to my left. I just do what I feel. I don't prepare,
pre-prep everything out. Like I don't have all the
brushes I'm going to use today. I'm going to just grab
this round size four. I'm going to grab maybe maybe
I'm going to grab my mop. I'm going to grab my
Paulina bright mop. I loved that brush, and that's it for now. I'm going to check my
paper to see that it's pretty wet and there's
no weird dry spots. And I'm just going to
make sure the corners. Oftentimes I'll
find the corners or the weird little dry spots
and I don't know why. Okay, So again, intuitively, these are really
hard to describe and plan out because they
are again, just ways. They're just in my
head. They're not even in my head because
I don't even know what I'm going to paint.
They don't know the colors. I'm going to choose
either, which is funny to demonstrate
something or teach something when you don't really know
what you're doing. But I want you to explore and
I want you to be curious. And so what I do is I look
at my pains and think, what colors appeal to me today. What colors I want to play with. This opera house color
is standing out to me. This Lama color, maybe Tea Rose. And I don't know, I'm
thinking I'm just going to go from there and just
start pulling colors. So I don't want you to go run out and buy all
those four colors. I want you to look at
your own paints and think about what appeals to
you and what sounds good
8. CP: Painting our Sky: So let's start. I tend to start with the sky, particularly the
right side of the sky by somebody pointed
that out and I'm like, Oh, you're right, I do do that. So that being said, I'm just going to play with some yellow and I'm going to make
sure it's a warmer yellow, that one seems a little cooler. Just going to give some
of that on the paper. A little bit of a
glow going on, right? Abstract, loose
doesn't have to be. It doesn't have to
be. You don't always have to have something in
mind what you're going to do. I'm one of those people, one to 5% that can't actually
see things in their head. I can't visualize
what I want to paint. It's sad and the sad truth. But I can't, I cannot
visualize what I think. So I don't know if that's
why intuitive works for me, which is sounds kinda bizarre
and I'm saying it out loud. I don't know. So now bringing maybe an
orange terracotta pumpkin, a color in and just
kinda sweeping that through U-shapes on keep
dabbing my brush and the paint. I'm keeping my brush full
of water but not soaking. And so I'm just going
back and forth. I'm going to grab some
of that pink color. So we have Safari,
orange, yellow, pink. And I'm just kinda playing and see what
feels and looks right. If something doesn't
look right, this big, big bright yellow, I'll probably end up covering
that up a little bit. You don't love how
bright it went. So if I put pink
over that yellow, It's going to turn a little bit more orangey but a
little more rosy, if we will, if we will. And so I'm just going
to keep playing, keep bringing colors in. And I'm not a super
clean palette girls. So you'll sometimes
see this little gray that made its way and
sometimes quite honestly, that will inspire
something else. And so I say be open and be curious and let things
happen the way they happen. It doesn't have to be put these colors here,
put these colors there. And magically this
is going to happen. Let them flow and
let them go on their own and see what happens. And I'm going to drop some, maybe some reddish pink in here. Sometimes I don't love what
I do and that's okay too. It's okay to just explore. We don't get so caught up in
making these perfect things. Especially somewhere
like this where we're learning and we expect
this perfect outcome in, or we hope for this
perfect outcome, right? We know better than
you expect usually. So often. We expect an outcome
in it and it can get frustrating when we don't get the same outcome that
somebody else got. Or you see the project pictures and they're
all coming out. Amazing and you're like, Oh, I don't want to post mine. And so that's that's hard and I do post everything I paint because I feel like
it's important to see the journey and see
how others do it. Okay, so we have the pinks, the reds, the yellows. I feel like we need
to get a little, a little more, a little
more vibrant Navy. And so I'm gonna, I'm gonna, I'm going to, going to
bring in some more colors. And you'll notice, I'm not
gonna do things perfectly. I don't have a method for
foolproof perfect outcomes. And that's kinda
what I want to show. Show people. It's okay to do that. It's okay not to have
the perfect outcome. It's okay to explore
and experiment and be curious and find what works
for you and what doesn't. You might do this. It'd be like this absolute
doesn't work for me. I wasn't for me at all. But you'll learn something
no matter what, right? You're going to learn that. You're gonna learn from even
things that you don't like, you're going to learn from
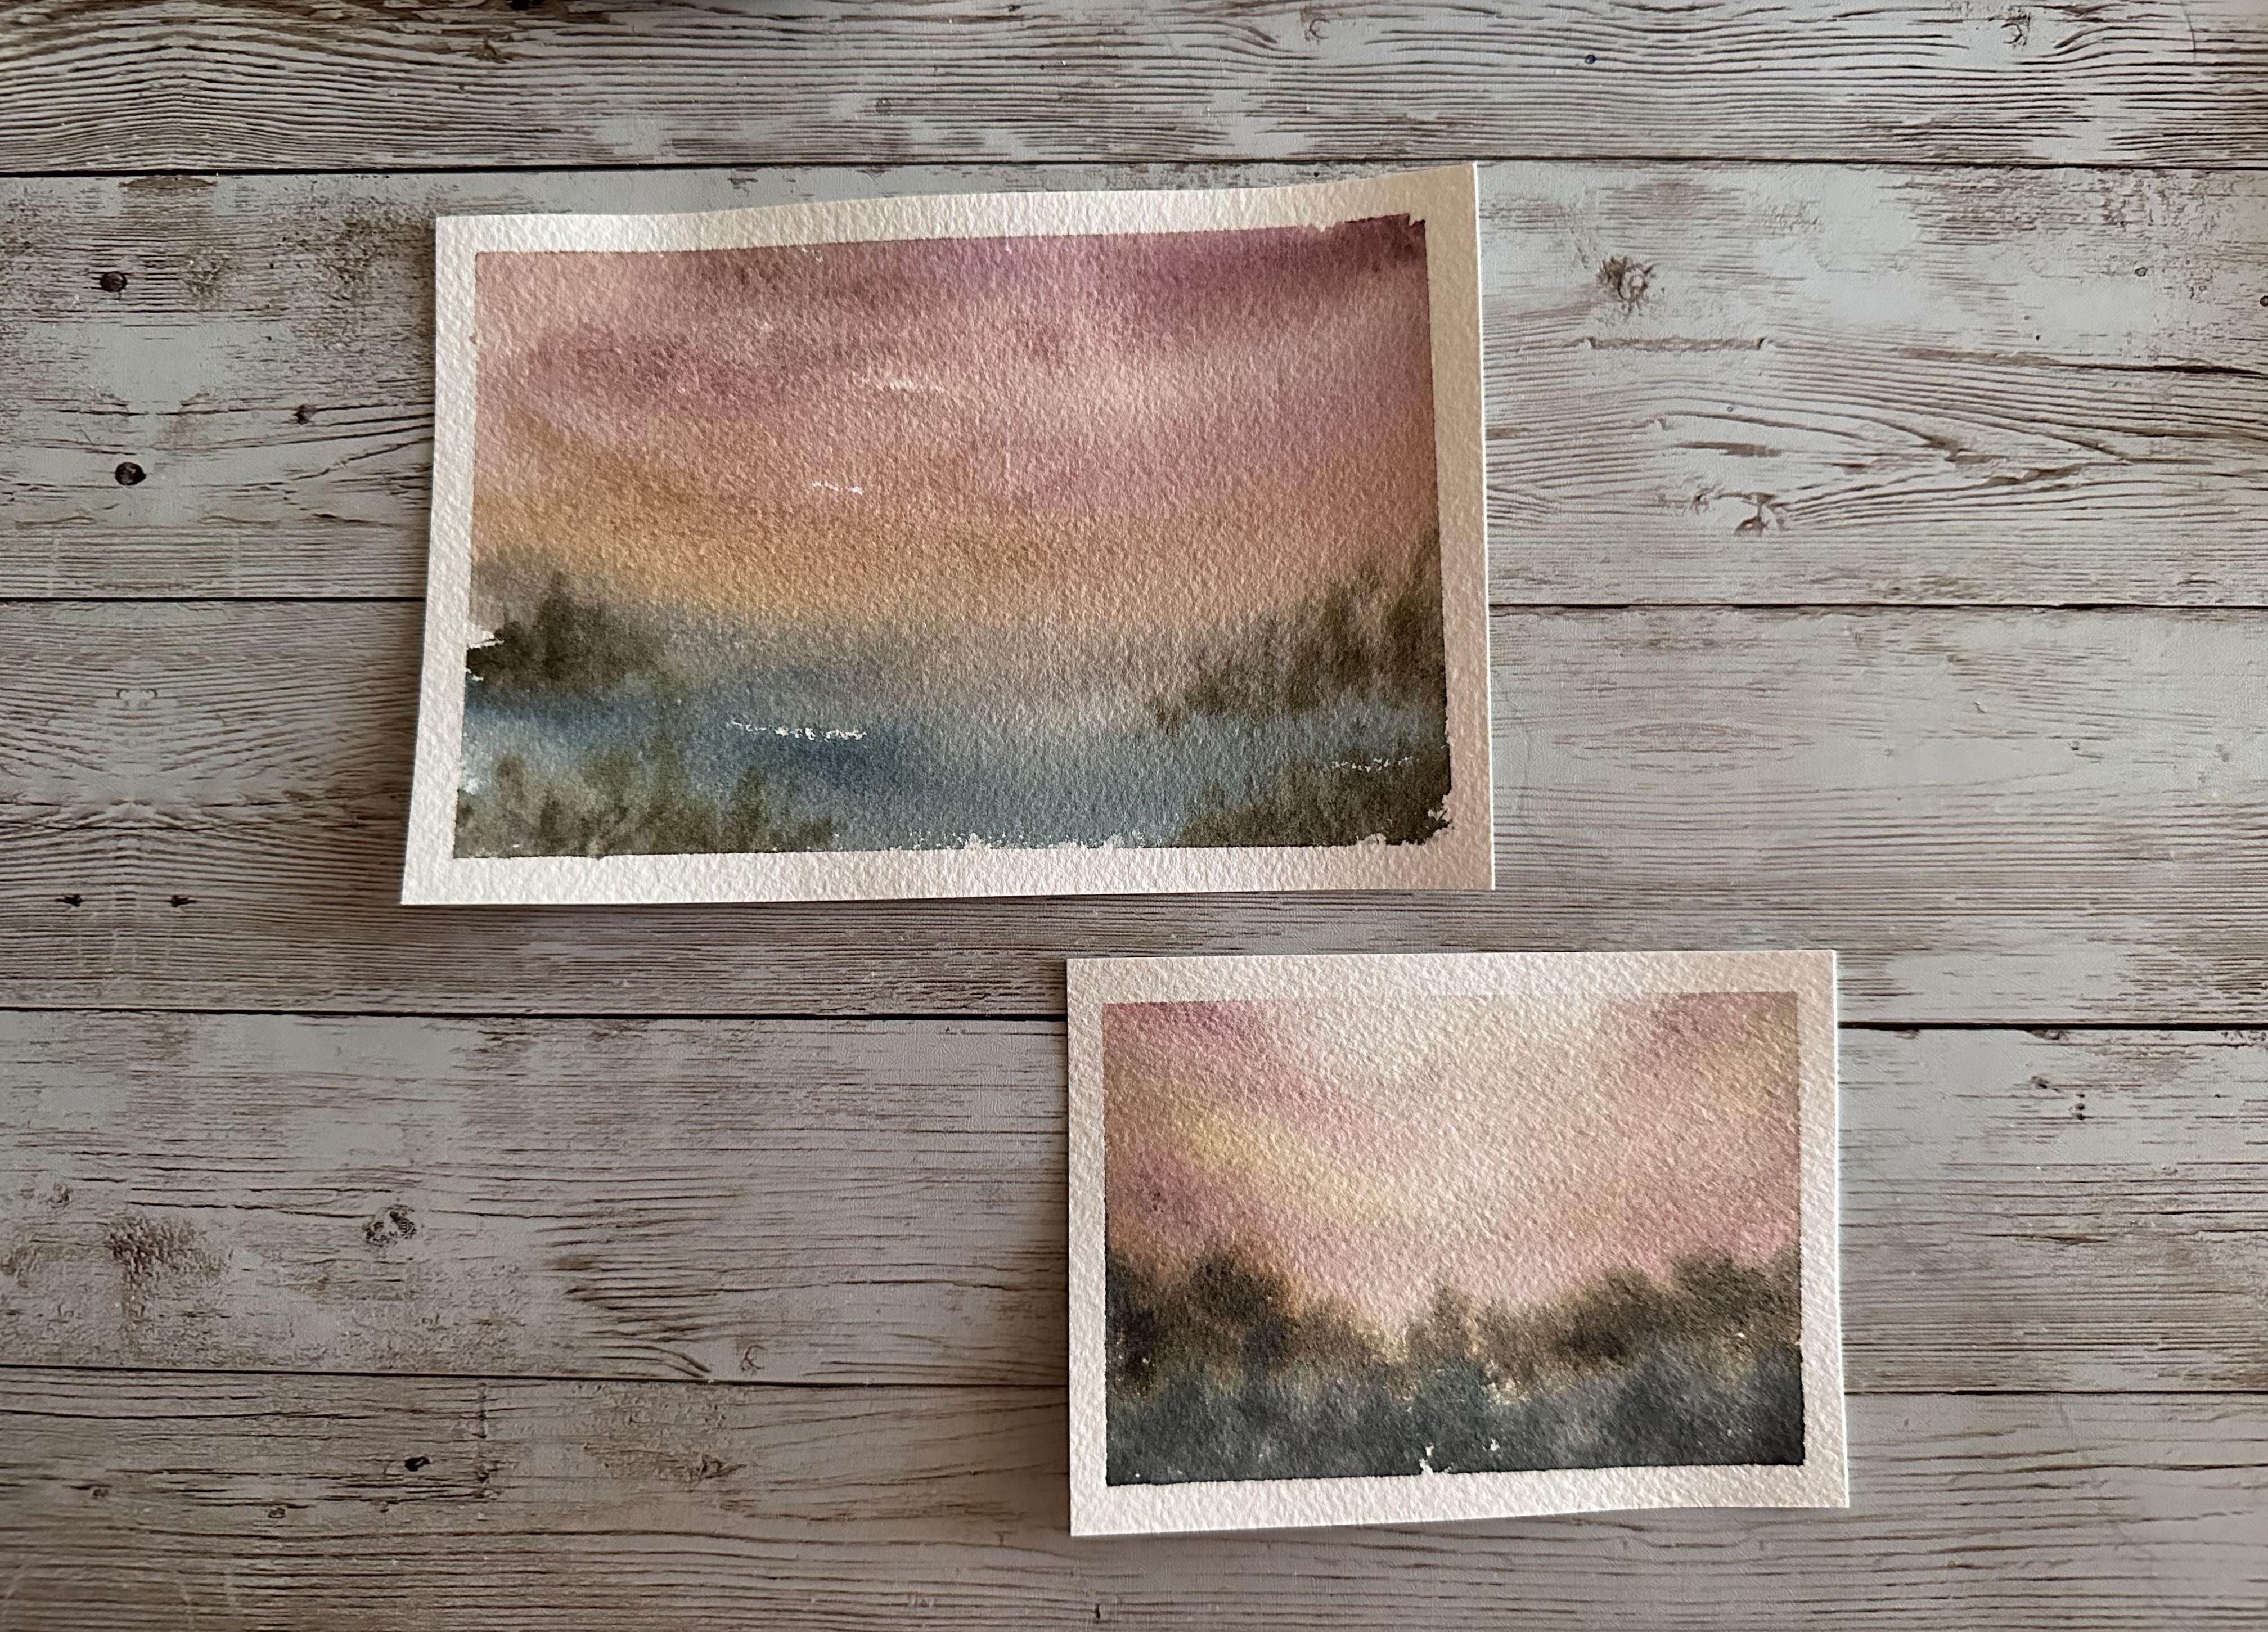
things that don't work. So it's okay. It's okay. It's just paper. We've got much more paper. And if you're worried
about using paper, make it smaller, especially
when you're learning. I feel like the smaller you go, the easier it is to
explore and you feel more free than big old paper
looking at you going, Oh my gosh, what am going to
paint on this and holy moly, will it dry and time or will
it dry before I'm done? With smaller paper, it's
much easier to work. Okay. I'm speaking of working, I'm overworking this
with the same color. So I'm kinda getting
just pink, right? I'm gonna take my orange back and it's a game
of give-and-take. Hello, I won't go into song, which I wanted to do there. It's a game of give-and-take. And you're just going
to kinda work at back-and-forth and find
what works for you. What, what makes you
happy in step back. I'll stand up right now and
I'll look through the camera. And it looks like a
sweeping motion which isn't a deal perhaps,
or maybe it is. Maybe that's okay too. Or maybe we just explore and we do a little side
to side, side, side. We take away that sweeping motion just with a
few other strokes. So we can go back in with the
pink and we can drop it in Just a little bit
and try not to use too much water because we
don't want a bunch of blooms. So we're just going
satisfied here, trying to get some more pink
in there, certain spots. And maybe we'll do the
same with the orange. This is just exploring. This is you picking up a
brush, playing with color. The colors you already have. You don't have to go,
but I'm buying something special and just
seeing what happens. Saying, if you're enjoying it, if you're not enjoying it, if there's a way to make
yourself enjoy it more, help yourself enjoy
it more, right? Maybe you're not using
hundred percent cotton paper, so it's not as enjoyable,
which I hope you are. So that is 11 thing
I would recommend is definitely getting
100% cotton paper. That would take precedent over
brushes and paints for me. I took a little heavy
with that yellow. And so if you do that, just just kinda work it
out a little bit. Just just spread
that paint around. If there's some spot
you don't care for. Your paper's still wet as long as your
paper is still wet. And again, if you're
questioning it, just turn it sideways and you can see my bottom
is definitely drying. So if I want to do
anything on the bottom, I would want to add water
right now and I could still blend this so
that we would be okay. Now if it starts
drying up in here, we're going to want to take the heat tool or sit
it out and let it dry. For now. I'm okay. I'm gonna
let it stay like this. What I am going to do is bring in more pinks down
here, a brighter pink. I did, I did a little more
watch too much water in there. So I'm gonna take my brush and I'm going to roll it
on my cloth towel. Then I'm going to fix
this little area, just going to suck up that
extra water with my brush. Mop brushes work great because the bellies
helped suck up. Anything extra that
you might have. A look up. There we go. We're just going to blend it in and suck up that
color which we did. And so now we'll take
a little bit more that color and onto
the other side. So we have a kind of an even I do tend to kind of
even stuff off. I do think something to one
side, I do to the other. Not always, but
for the most part. I am also one of those people
that believes in the odds. So if you have odd
number of trees, odd number of mountains,
that kind of thing. Again, I'm just mostly
going horizontal, but bringing some of those strokes down a little
bit so it breaks up. The horizontal
field does not too abrasive or too intense. It's not. That's the better word. We can also go in
here and pick up some paint if we wanted to
bring some light back in, just roll your like to
take my dry brush again, I dry it off on the
cloth pretty well. And then I just like
to kinda move my brush around a little bit and if
you dry it off too much, sometimes it'll just
suck up too much paint. So you want to find
that happy medium. And just kind of bouncing
my brush around, picking up a little
bit here and there. I'm not going to go. I'm
not the bestest at clouds. I'll be I'll be honest with you. So I'm just going to kind of explore and see if I can
get some cloud shapes. And again, I'm going to stand up and then step back and look. Just take take a kind of
a stock, so to speak. It take stock of
what we're doing. I think we'll let this dry and then we'll move
on to the next step. Okay, Now we're
back for round two, layer two, we let
everything dry. I'm going to re-wet everything. I'm going to spray it again with my spray bottle
to get us started. I'm using my flat brush to just waking up the paper
and re-wet it all again so that I can
add some more layers. I felt like this when
it fell a little flat. I think we're gonna go
big, go big or go home. Get some more color on there. I'm going to use this
vibrant color I was tempted to use last
time, didn't use it. Went a little safe. Let's go. Not so safe. I use too much water so you
can see all those bleeds. Well, that's okay. I'm just going to
kind of I'm going to push on poll and I'm
going to bring it in. And it's okay. If you use too much, just kinda explore
and see what happens. It's okay, It's all okay. Maybe we want a tiny bit
of light right here. Maybe you don't maybe
you want to lighten nurse backup and you can pick
some paint backup, right? If you're like No, no, no, no, no, no, no. Take your brush and
let's get those sides cleanup so we don't have you do want to kind of keep
your sides clean? I did not hear.
And you could see the paint went back into
the paper and that's okay. Again, assault practice, it
doesn't have to be perfect. Just want you to
really explore and enjoy the exploration versus trying to do something
that's perfect. So maybe we want a little
bit of light under this. So we're just going
to kind of pick up a little bit of paint
if you want to. If you don't, you don't have to. I'm going to take
some more orange. I feel like I might've
got a little too much water on my brush. So again, I'm just
going to take it and con role the belly there. I'm going to leave
the paint on there, but I'm just rolling to make sure some of the water
gets out of there. We're going to drop
a little bit of that orange and grab some more. Maybe just, maybe, maybe. And another thing,
if you're feeling like you're out of
control with a brush, this big just switch to around. We'll switch to around now And then maybe you'll
feel a little less, especially on smaller paper. I do think it's wise to switch to a smaller brushes sooner, only because then
you feel like you might have a little more
control of what's going on and what you want to happen versus what's just going
to happen on its own. But happening things on
its own is okay too. If you want to
loosen your control, backup off your brush, go on the anterior and just
kinda let your brush float around the paper versus gripping it like a pencil
and don't get me wrong. I grew up like a
pencil all the time. I'm notorious for getting
up on that paintbrush, so I try to stay back farther. Helped my my my looseness. Sometimes it works,
sometimes it doesn't. Sometimes different things will work for your different days. Sometimes it won't. And that's okay too. If you're not
feeling this kind of brush, grab a different brush. If you want to use a
dagger, grab a dagger. If you prefer a flat, you can absolutely do
this with a flat brush. Just explore and use
what works the best for you and what were
the happiest width. And so I'm gonna, I'm gonna stand up here again. I'm just going to glance
down on my paper. It's getting darker, right? Which is better. Now, I can decide,
kinda thinking, what do I want my, my lower third to be? I did work in thirds
a bit, right? So the sun's slightly
above the middle. If you weren't even call
that the sun and we can drop a little yellow
in there if you wanted to make that the sun. Again, nothing has
to be perfect. Nothing has to be anything. If you don't want to
do this, don't do it. I'm just exploring.
And that's okay. It's okay to do that. If you don't like it,
just get rid of it. If you don't like
the way it went. It's okay. It's not it's not
I'm not sat there. You can move it. That's what I love about watercolor,
is forgiving. It's not set in stone. So now I'm taking
a darker color. I'm just going to drop
in some, some swoops. And since scribbles, and at
first I was doing lines and now I'm just going to kind of just get it on
there a little bit. Maybe just more in the
corners and the end. Yeah, this is not
pristine color. There's all sorts of
colors in my palette here, and I use whatever I just
grabbing use if it's dark gray and I need
that, I'll grab it. Let's make it nudity. You don't have to, you can
leave it as bright and cheery. I decided to bring some in. Now if you're here
and you're like, Oh, I'm not sure what to do. You can always grab a brush like this brush like
your hockey brush. And I'm not sure if it's
pronounced hockey or Hawk Day hoc. I'm not sure. Just clean up the edges real
quick before we do this, we don't sweep that
paint right back in. And you can lightly it's
a dry brush by the way. Lightly, very lightly. Just sweep across
some of those darker, darker cloud shapes
or Skype colors. And just very
lightly blend it in. And we'll step back
again and we'll look. And it's okay if
it's not perfect.
9. CP: Painting the Foreground: Probably do mountains,
should we do grass? Let's go green grass. I'll grab this
fairly bright green. And I am going to
actually switch brushes. I want a little less
water involved in this. I might try to save some
of those whitespaces. It's going to bleed
up and that's okay. It's okay. It's okay. Ideally, I do like to go little dark in the
background, right? So let's add, just look maybe
a little bit darker, green. I'm just mixing on
my palette as I go. I'm grabbing a
green and the green and mixing those
greens together. And I'm not going to
show you all that because I don't
want you to get so stuck in your head that you need to do it
the way I do it. I want you to do it the
way that makes sense for you and you're
comfortable with, right? Let's grab some yellow and
some leftover yellow in this. And it looks really good. Let's just grab some
bright yellow green. And we'll do that. And I see some
darker green here. We'll just grab another bit
of darker green over here. And we'll just throw
that in there. But experiment, explore, and
test your own colors out. It doesn't have to be what I do. And honestly, there
are so many videos out there that if you do
want to know the colors, maybe, maybe pick one of
those videos for now, right? Because there are plenty of out there and they're amazing too. I trust me, I do that. I do a tutorial
every single day. Every single day, no matter what I've
been doing a tutorial since last fall from
Skillshare or other places. And I've done them
over and over. And I've learned
every single day something new from
somebody else. And so you might be in the
mood for certain things, certain days and not things the other days and that's okay too. You don't have to want
the same things every day and the same things
won't appeal to you every day and
that's okay too. But I do want you to stay curious and I do
want you to explore. I'm just taking some dark
and randomly dropping in here just to kinda give some more dimension
and depth, right? I'd like to keep
my darks up close and farther away in the middle, I do tend to leave
things a little lighter. I find I'm not an expert on
any of that kind of stuff. What I am, what I can bring to the table is having
fun exploring, experimenting, and creating
something that you feel like. You're learning
something from creating something where you have to try it again and
again and again. And maybe you'll not
like any of them. And you'll just have
to keep trying. And that's okay too.
10. CP: Painting the Details: Now it's time for details
is ten for trees, it's maybe time
for a few things. That paper is still wet though. I grabbed a few liners
and that goes off to the side for when I'm
ready to have those go. So now that we're doing
the few more details in the foreground and a little
bit in the background. I'm going to add something
to this for brown, I'm going to grab
a color, maybe. Maybe I'll grab, I was
thinking orange or pink. So usually what I
gravitate towards, I'm gonna go with pink here. And I'm going to get
enough on my brush. And I'm going to splatter, those were, those were
bit big, but that's okay. If you want it smaller, use less water and perhaps
a different brush. And that's okay. Okay, so now I'm going to
grab some orange as well. I'm going to use this
terracotta color, kinda like a pumpkin. And I'm just going to
splatter with the pink. You can use a paper over here. I like to use my hand to
speak because it's quicker, but I do wipe it
off because they don't want the toxic pain on me. Not all not all paints
toxics don't get me wrong, but I don't want the
paint to sit on my skin. Alright, now, what we're gonna do is we're going to take
our really fine brush. I'm going to take a dark color. I'm gonna go with a darker green and I'm going to also mix some brown and the green are
gonna get a green brown. And my goal is here, not so much the colors more just to have
something very dark. So you could use a green
and a blue and a brown. You could use a panes and you can use many things you could do is neutral tint
if you wanted to. I'll even add some
neutral tint to this just to really
darken it up. You can choose what
you want to choose. You don't have to do. So. I'm just going to draw
some little bitty lines here and let the bleeding do
most of the work for now. I'm not going to make
them the same height. There we go. One's a
little bit bigger. So I'm mostly drawing a line right now
with my fine liner. I'm trying not to add too
many details because I do want the bleed out to
do the work here, right. So we're just
letting the line and then maybe a few little hops from side to side of the line. I'm trying to go as
light as I possibly can, just dropping in a little bit and I can go into darker paint. And I can draw actually drop in some darker paint with trees. I find the best way that
you can make your trees. I've tried many methods here on Skillshare of making trees. Truth be told, none of
them worked for me. I literally had to paint
thousands of trees until I found that worked for me and what brushes worked for me. If you're struggling with
making something like trees, just keep trying, keep trying all the tutorials, keep trying all the
brushes and just, just keep at it over and
over and over and over. And you eventually,
eventually it happens, you find your rhythm. And so here's also the
beauty of trees I find. You're just suggesting them. I am not not paying
exact replicate, replicate, duplicates,
replicating replicas of trees. I'm painting the idea. I'm giving you the
idea of a forest, especially with this wet paper, mostly wet and dry spot there. And that's okay. You don't want all your trees
to be the exact same color, right? And exact same deaths. Some come forward, some go back. But you do want to make sure that
you're just getting the idea of a tree so that
when they're all together, they look like a forest
versus the exact tree shapes. You make a triangle
basically, right? And it's going to look
like a tree eventually. It takes the pressure off when you have many,
many, many trees. So you're not just focused
on say, this one tree. You're seeing the
overall picture. And I think that really, that really helped me when
I was practicing trees. I just kept paying them
over and over and over. And the more I painted, obviously, the less I thought
about it, which is good, because the less I think
about it in a faster I go, I feel like they get better. And so whatever works
for you though, if it works to go slow and meticulously paint each branch, then by all means, do what works for me. I just couldn't do that over thought it and it
was just a struggle. So I'm just going to
continue adding these trees one by 1.1 and using a
very thin liner brush. If you have some other
brush that works better for you, again, use it. I am not a stickler
with tools or methods. I always say, do a style that works better for
you if it's a side salad, just go side to side. If it's a different kind
of tree completely, if you prefer to
give herself all. I don t know, oak trees give yourself an old
oak trees, right? There is no reason for
you to have to paint. When I'm painting. You should paint what you like to paint. What's in your neck
of the woods, right? What's in your land, what's in your backyard, what's, what you crave? What, what inspires you, what motivates you
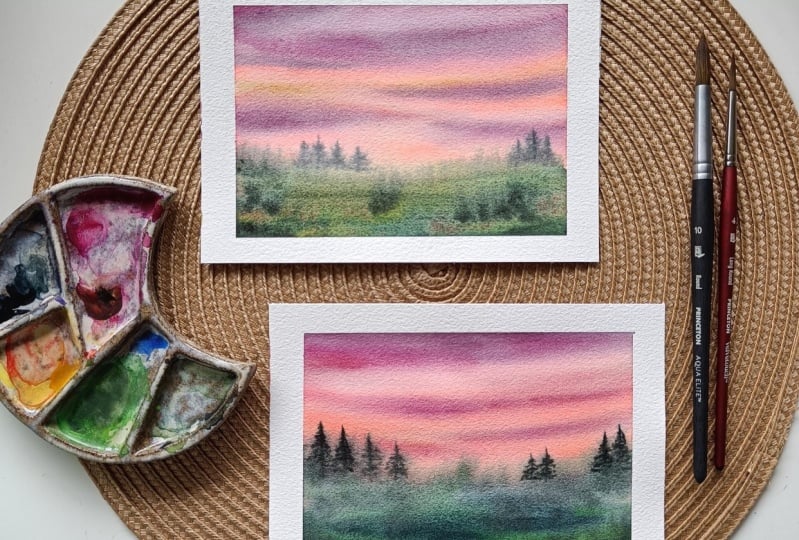
write all these things. And I do live in the
Pacific Northwest. So I am very much surrounded by Christmas tree like trees and pine trees and ever evergreens
and all that stuff. For me, that's, that's what
I'm very much motivated by. But that doesn't mean
that has to be you take whatever motivates
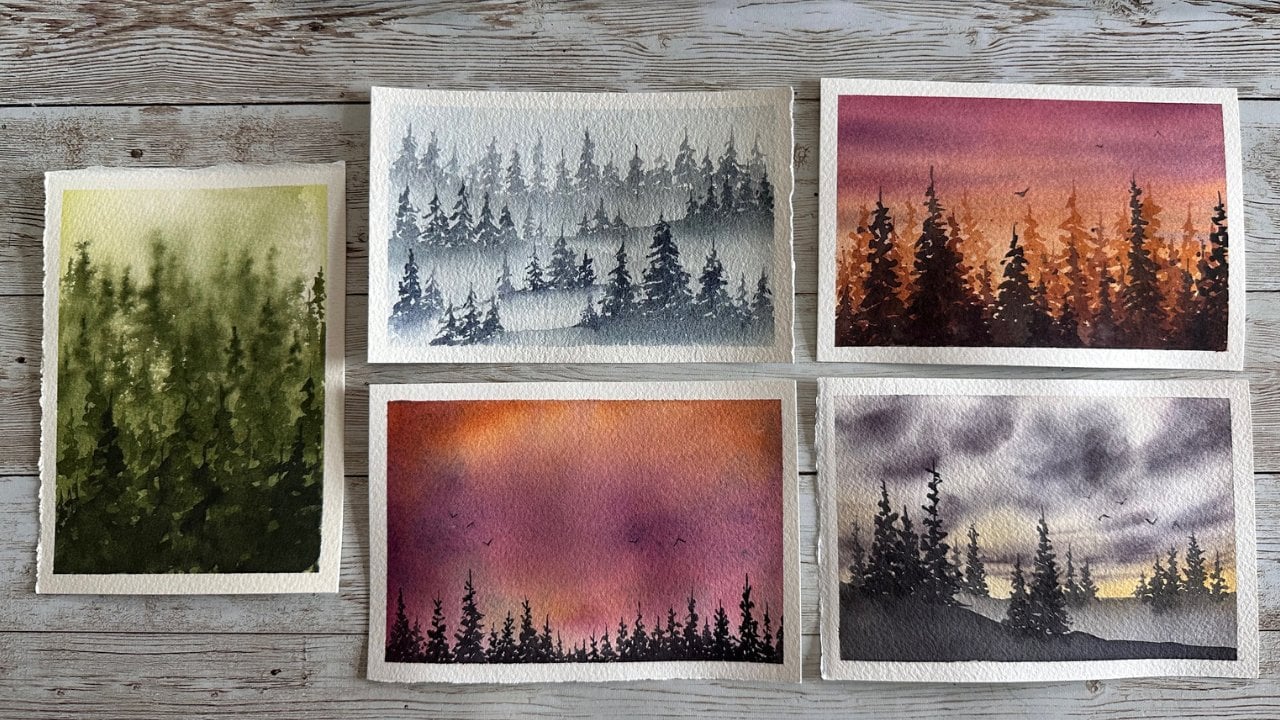
you, whatever you enjoy. Yes, I made is a
very saturated kind of a, kind of a picture. And you don't have to, you could have, you
could go light. You could stop at layer one. You could just do a blue sky
with hints of hints of gray. You could do. The possibilities are endless. And that's, that's
the beauty of, for me, of watercolor. And especially if
sharing what I love. I'm the first to say
I'm not an expert. I just really, really enjoy what I do and I find I end up being, end up being super
passionate about it. I may not be the most
knowledgeable, but I really, really want to share that
anybody can do this if I can sit down and do this in front of you all, you can do it. Anybody can, I guess
it's challenging, right? But the challenge is worth it. And the outcome, that
little mental health bonus. All these things
just, are just make, watercolor project will lose. So rewarding for me. And I'm just in the
connections I've made within the
community and being able to help inspire the
community and help bring curiosity and continue. All the excitement over things. All things watercolor, all
things apply watercolors. I just love every aspect of it. And then also lift you're
in people on for what they're worth they're doing and how they're, how
they're enjoying it. Alright, I think this last step, the last step is what we'll do. We'll take a marketing tool. It can be anything. It can be the pointy
stick you have. It can be the back of a brush. You can go old school like
some of the classic artists. You can use a credit card that the possibilities
are endless. I actually end up having
finding this little clay tool. You can use the pointy
end of a clay tool. You can use anything.
I just use this. I think it's a weaving tool. And I'm just going to go in here my grasses and just maybe pull a few of them out. The paint's still a little
bit wet and so it'll just it'll pull it into the
dry a little bit and just, just have little fine
lines of grasses. Maybe I'll go up here
and just kind of scratching just a few lines and you don't have
to do this step. This is just, I like to
do it every once a while. You can also go into
trees and give yourself three lines if you
really wanted to. You don't have to
do that either. You can also go back in and add more details to your trees. But I'm going to keep it loose. I just like to keep it loose. I'm gonna stand up and
look again and see what I do like what I don't
like, what could be tweaked? You could add birds if
you wanted to right now, I could add a cutout. I could add just a little bit. Don't usually do
this to be honest, but I could add maybe just
a little bit of detail. And I don't mean a lot, just
maybe a little bit of color. I'm going to try and
see if I even like it. A little bit of color to some of these little floral and no, I don't, I don't care for that. So I'm going to
skip that and I'm just going to blur out
what already have here. Make sure my brush is not too wet and I'm just
going to do that. But I will do, since I
liked that idea in general, I'm gonna take a smaller
brush and I'm going to find maybe a size four,
going to wet it. I'm gonna get more
pink, more darker pink. And I'm just going to
do splatters again. That way, since it's
more dry, more dry, dry air will get more
fine and darker colors. I'm gonna go back
in with my orange, the same orange I used earlier, using the same two colors
just there'll be more intense because again,
the paper is dry. So instead of trying to put
the centers on the flowers, I find like a more
organic feel, right? Just letting the splatters kinda do the test or to the rest. We'll do the best. You'll find. I loved value humor. So hopefully you
appreciate my humor and hopefully you'll
appreciate my chaos. Okay, so last step, come back the tape reveal
11. CP: Final Reveal: Alright, this is it. This is the last
this is at before we taken off the tape
and wrapping it up. And so I really, in this kind of exercise, I want you to explore
with what you have. Be curious with what you have. I'm not having to go out and buy what other people
might have N naught. Not worrying about having
the right colors or the right brushes or
the right supplies. I will say again,
the only supply. What stress is the 100% cotton. I do feel that is pretty darn imperative in a lot
of these things, especially in law,
he's kinda paintings, especially wet on wet. The tape I use, by
the way, is amazing. So if you need to get more
new tape, there we go. That's it. Except that little
plexi to the side and show you when the
light is not dry, 100%, but it is pretty darn dry
12. One more! Some Final Thoughts: Congratulations, we did it. Hopefully you learned
a little bit more about color and what
colors you like, and what your preferences are. And maybe you have some
ways to practice on your own in some quick
little mini ideas. So I would love if
you wanted to upload your work to the project
and resources tab. I would also love if you wanted
to leave me any feedback. Obviously, it's very
helpful for future classes. And really just
thank you so much for joining me with for my
first Skillshare class. Also come find me on
Instagram and YouTube, and I'd love to cheer
you along your journey.
 Amber Lane, watercolor landscape artist