Transcripts
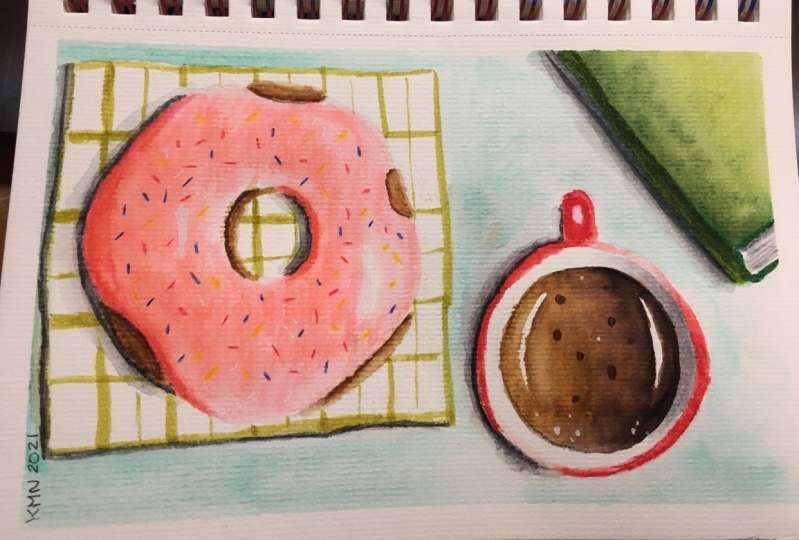
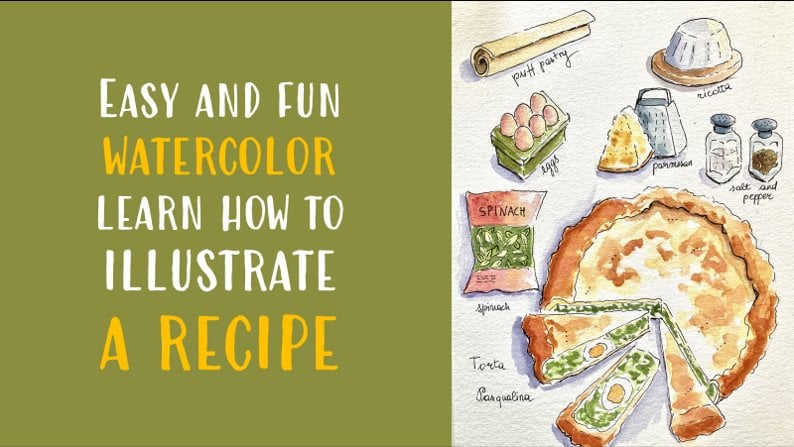
1. Introduction: Why Watercolor Markers?: Hello and welcome to my new class. This class is going to be slightly different from my previous classes. And it is all about the new fun and easy, medium. Watercolor, brush pens, watercolor brush pens, or whatever color markers are an extremely fun medium for sketching. They are most known for calligraphy, but that they have a very high potential for sketching and they are very easy to play with. They give you a lot of control. And they have incredibly vibrant colors. Look at collection of watercolor markers that I've had, loves Christmas from my house. Lung is a collection of Tom goes by. You can have great results. We've done some markers, etc, our budget friendly like this one. The important thing is that you will use markets that have a brush nib, like CS1, and that are soluble in waters, and you can achieve incredible results. Today we will paint along step-by-step, but flat lay. A flat lay is a view from top BPA. And it's Coffee. It's a doughnut. And the book, reading while I have breakfast. And I thought it was a cozy moment to paint, and I just had drawn it from my imagination in this class. So there will be not too much theory, I believe in learning by doing. It's an easy drawing. And you will learn plenty of Citrix and tricks about watercolor markets. Just by following along, you will learn how to lay out a composition from your imagination. How to achieve a consistent shadow being just shooting an arrow on a coordinate. How out to achieve with smooth gradients and washes. How to use watercolor mark is just as water column and how to blend the different columns together. And also the great thing about the sketch markers, watercolor markers, or brush pens, they have a lot of different names, is that they are very portable. You can just sleep some markets in your purse. Brush, pen, and pencil you need to sketch on the Gulf. Some really fantastic. Hello, I am Elizabeth In Italian artist and illustrator. I am mainly a watercolor artist about, I like to explore different media. I have different fastest constituent about watercolor and oil pastels. But this new one really makes me very happy because it's so vibrant and fun and easy. One thing very important is that there is no experience required to join this class. You can really be new, not just to Marcus, but to act as well as watercolor markers are a fantastic introduction to art because they are so to use and you can achieve great results with no experience. So this class is suitable for Venus SQL for intermediate students that wanted to try something new or F to us about some mark is that you have at home and you never use. So. Join me in the class and let's start sketching right now. See you in the class job.
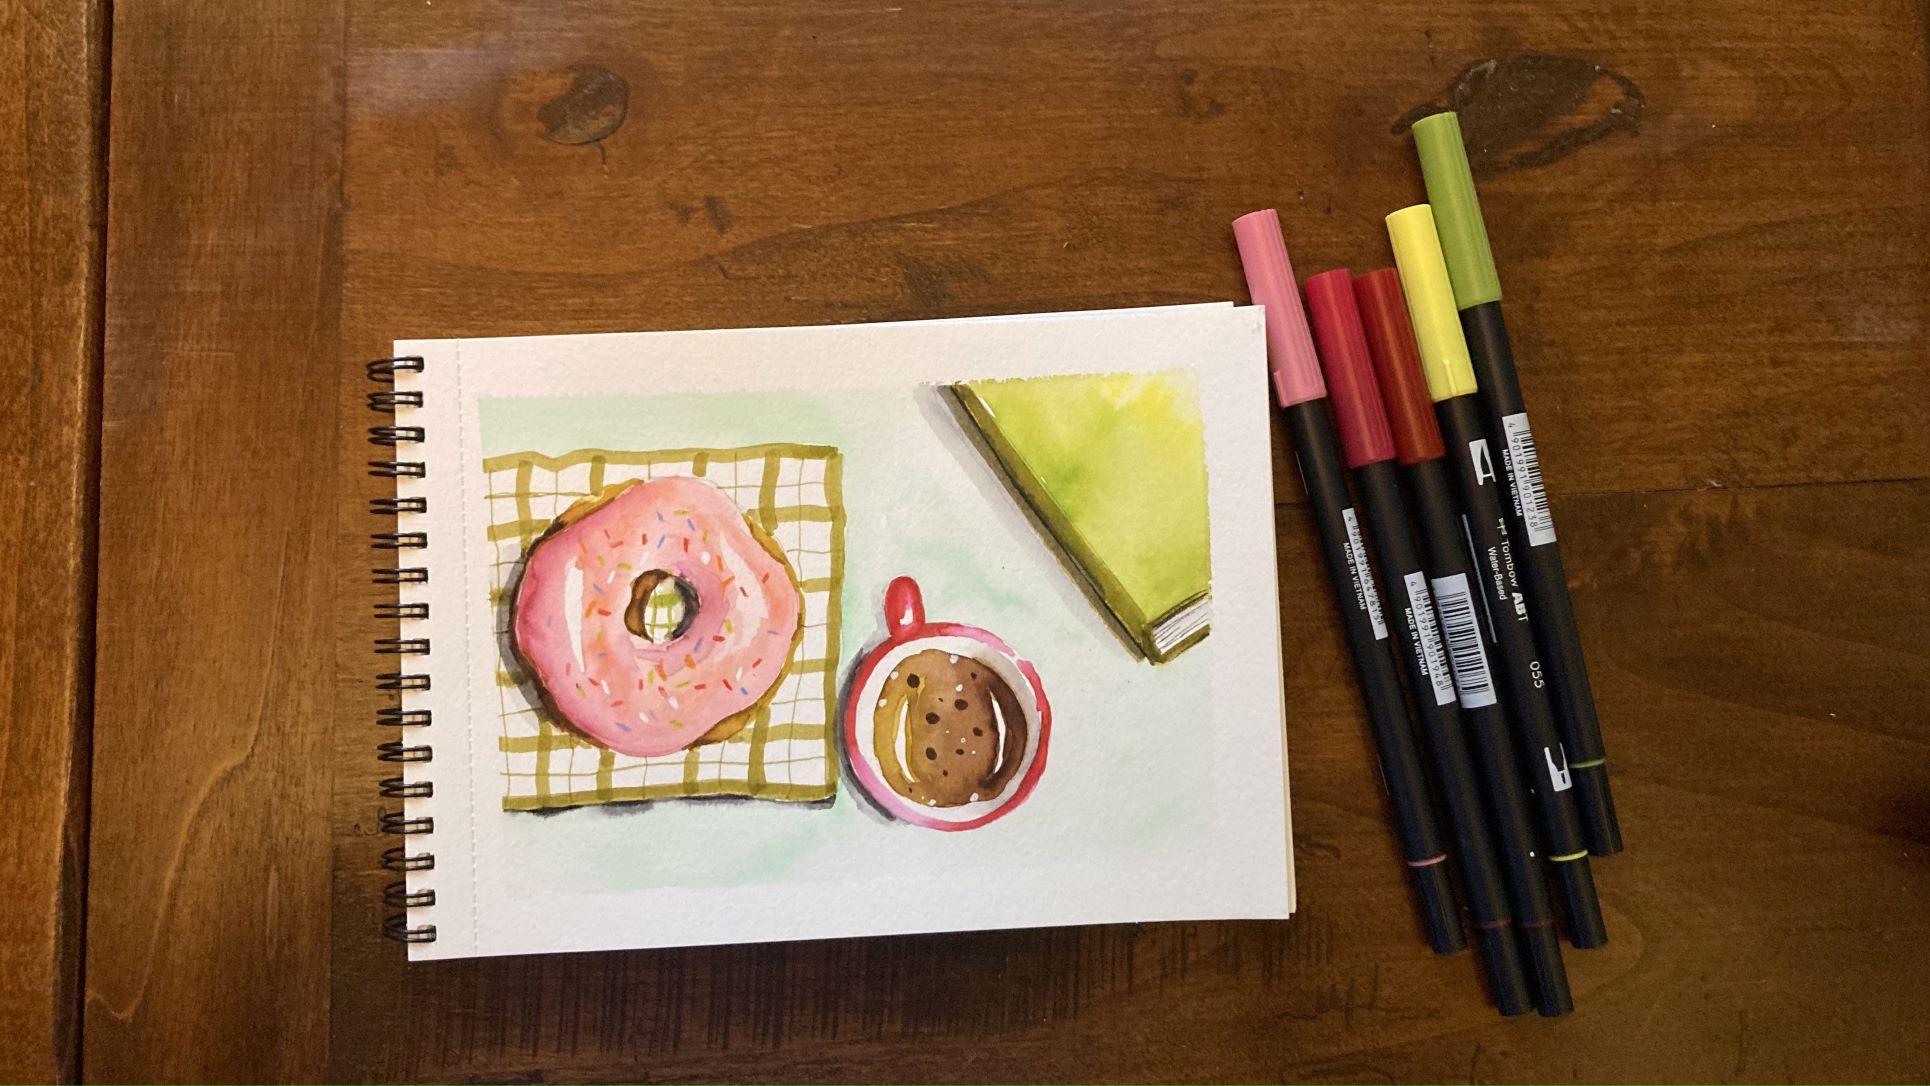
2. Supplies: Let's talk about supplies sum, the first thing you need that for this project is some water color paper, and we'll be using the Canson XL watercolor paper. It's sturdy because it's specific for watercolor. We will not be needing cotton paper because it's not necessary for this project and for watercolor markers. But the good, the thick paper, it is very important. So I suggest this, this product that, but any paper with a 300 GSM is perfect for this project. That also you don't need a very big format, that the size is very good. There is a N95 and so it's six by eight inches or 15 by 21 centimeters. I don't know if you can see it here. So the first important thing is paper. I'm very specific about paper. Then we need, of course, our watercolor markers. Any brand will do just make sure that it blends. And it is also with water. Once you apply water on the ITS, I will use the term boss. I have the whole range of tumbles, so I have a very wide choice of colors by you don't need to have this brand. I can also, I have also done some very nice painting with some much cheaper brands like these, stationary island. These are very many. They have It's important that they have a need with the brush. Like tumbles, you see it's a brush. So if you have watercolor markets that dissolves we water and has a rationally, but you can draw this project perfectly well. Then we will need, for our sketch, a pencil, a ruler, and a round shape. I'm using a glass self. And like the cern, has a wider side and the smaller side, then we will need the course. An eraser, optional some masking tape, but to have so crisp borders. A water brush. I don't usually use the water brush for my regular watercolor, but I think it's very, very good for watercolor markers because it has a very sharp but pointer and it's stiffer than regular watercolor brushes so you can scrap a vector and this also vector, the markers. And finally, we will add some final details. For the final details, we will be using white gel pen or come up getting why do we define needful and some colored pencil for the decorations. You will also need obviously some kitchen paper just like a regular watercolor to blot your brush or absorb excess water in case of mistake. And that's it for supplies, as easy as that sketching.
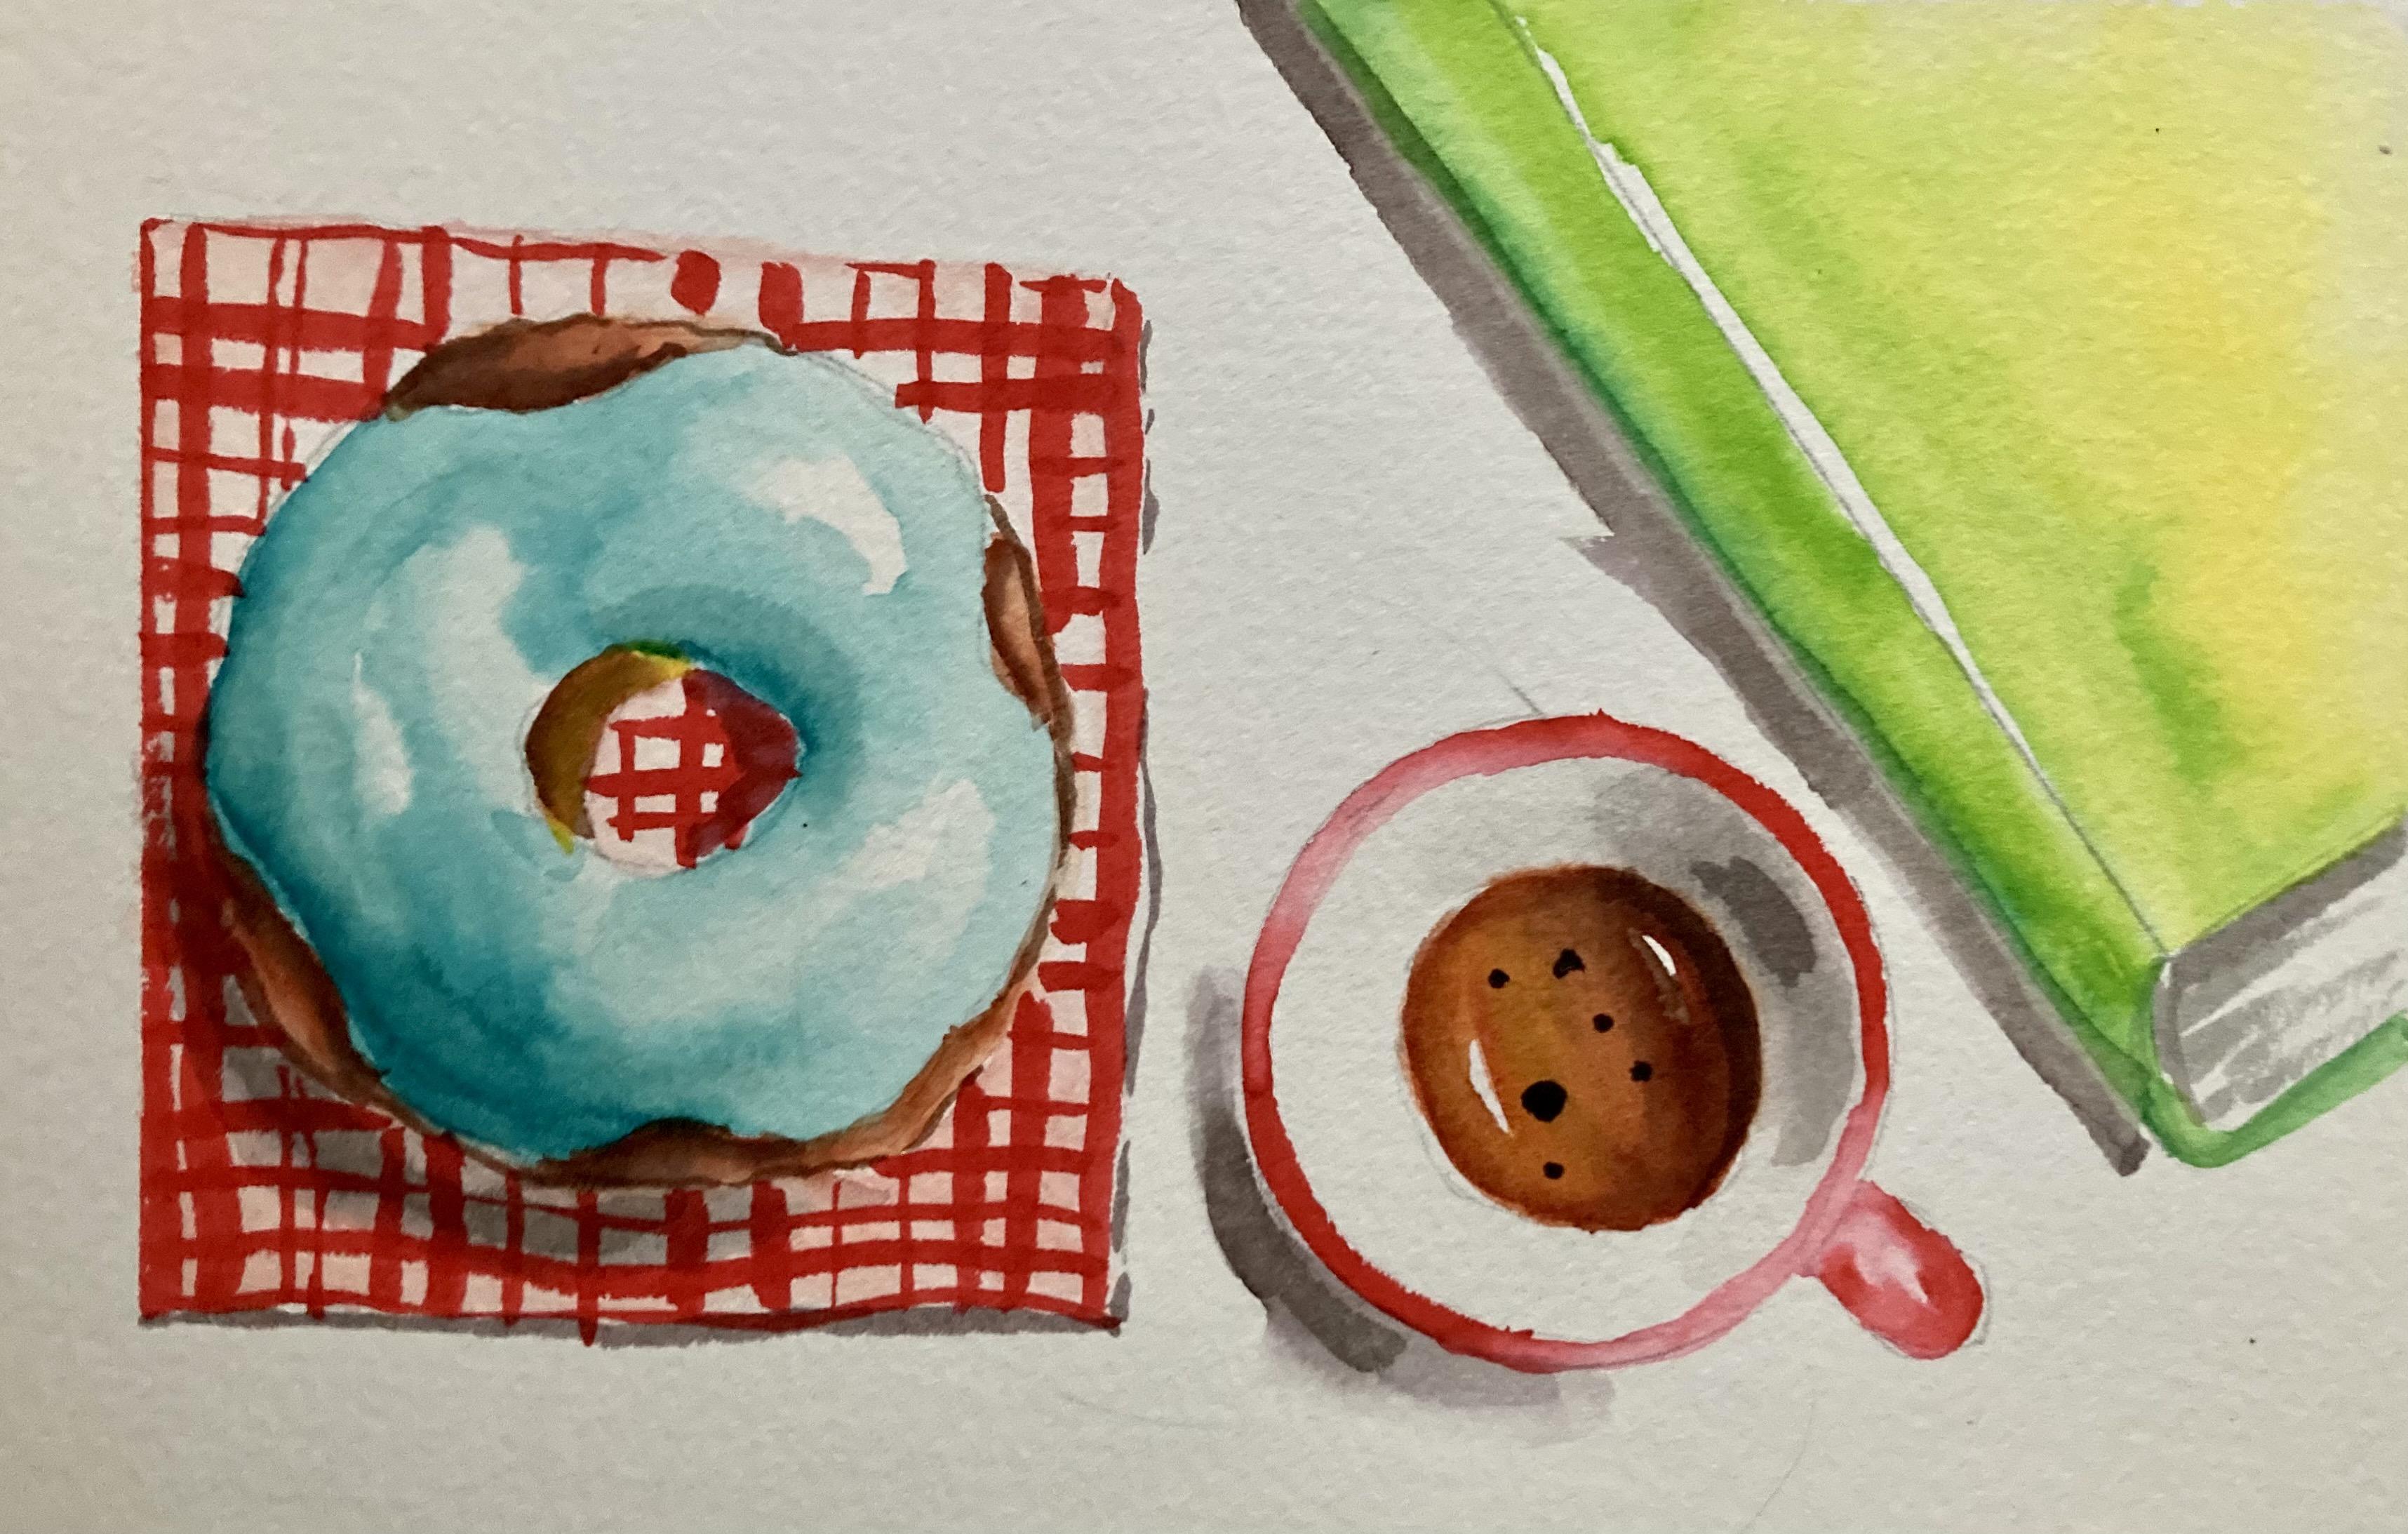
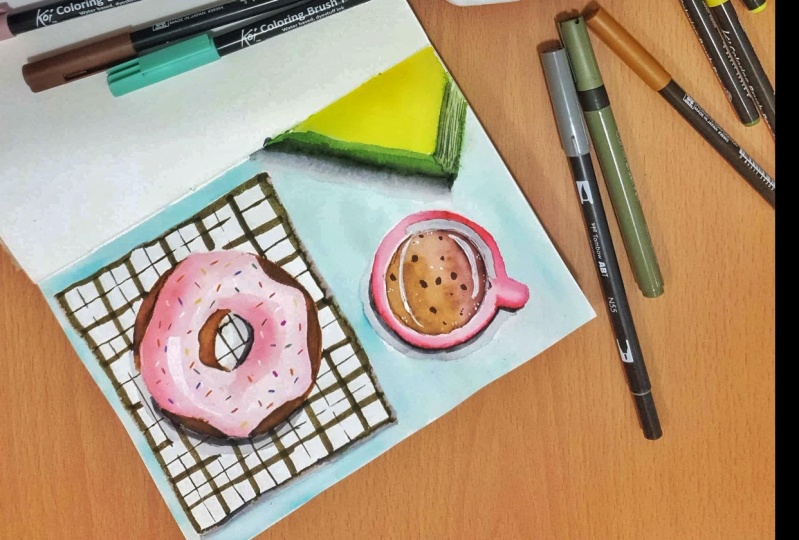
3. Pencil Sketch: First of all, we need to apply masking tape. But remember that the masking tape, if you want to be sure that it doesn't tear of your paper. You can also stick it quickly on your genes before you paint them on a piece of cloth, so your sweater, so it loses some stickiness at the, it's less likely to tear off your paper once you Take it away, which is the most satisfying part of the project. So once you have applied your listing page, just make sure that it's well down and we can start sketching. So he placed the larger objects first two, so I will place our donor, likely because it's just a guide the sense not the shape of a donor. Then we the ruler, I will place my MOOC that I'm raping. And then I will freehand and put some perspective. And then we then, this was done with the larger side of my glass, with the solar side, and we place my cup of coffee. You see there is not a symmetry in this drawing because I don't like symmetry and drawings. It's a composition. And then we have the, we can have the handle that goes like this. Okay? Then we need to make a hole for our more or less in the center. Then we need to draw the coating, which is shaped like this, and the dough around it. That will be somewhat more than our initial round. Then we need to draw very lightly the edge of our little kappa very, very likely. And then follow the edge at the constant, constant that distance. And feces for coffee. Coffee. And for our business. Just bizarre is handled. So we face there we could start to sketch finger.
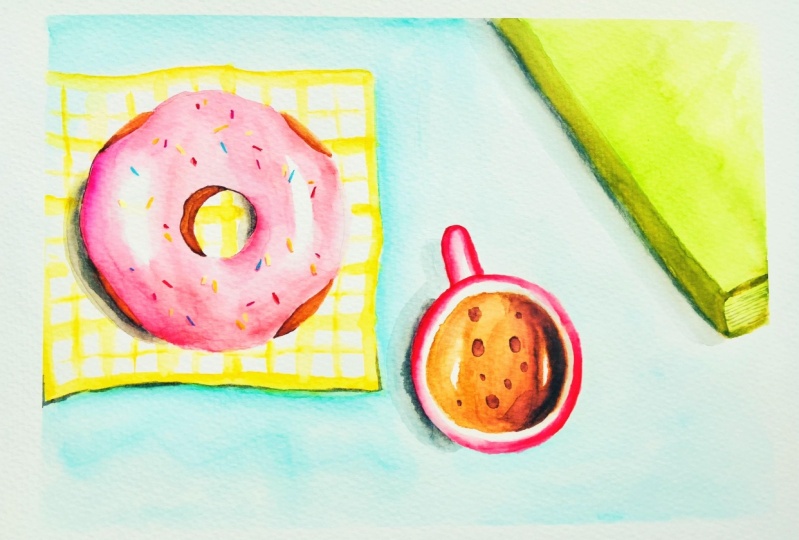
4. First Layer: First of all, we need to pick a color for the glazing of the ddo, not done, but before that we need to decide our light source. I would put it here, my light sources, so I will know that my shadow will be here, here, here, and cast shadow here. And we will have darker values here. I always start applying paint from the side which is far away from the light source. And I will tell you, though you cheat towards the lie, the same with coffee, but be careful because we will have some casts shadow here, so we have some darker value here. Let's start from the left hand side. So I will not smarter what I have been built before. So I think I will start fainting, applying some incur for my donor. Here. And here we have the darker Values. And then I will apply some lighter maybe value here. So we have some color variation. Remember to leave some highlights in the middle, maybe here and here. Does it matter if you don't remember to leave the highlights because then we will apply them later. We can draw them later with that. Why the Posca marker or a war for anything that we think. Now we distribute the painter with our rough draft. Oh, I forgot to leave some white to here. I can always find the thing. I wanted to distribute my paint before it dries. So this must be very fast otherwise you dries and relieves the hard edges. I don't want too many hard, they're trees. Although that's part of the characteristic of markers. I will leave some white here and here. Okay? And here we are. Now, we need to draw here some door that we see. Okay, let's see. Now we don't capture anything near the donor because it's wet. But we can still sketch a little towel around it like this. A piece of cloth. Plus two hour. Then we can start the painting our coffee. For coffee, we need some yellow ocher and some darker brown. So we apply, we know that like actually we have put the, the darker light here and here. So I changed the direction of the light, would put it here. So these go away because I have shadow here and here. And so we decide that, that I would put some lighter lighter yellow ocher here and some ground on the sides and how it may be leave some highlights. Same here. Its leaves some highlight. And I will make them meet these two colors with my water brush. I just drop some water. And I start from the lighter color. And I make them fit in the middle, leaving the highlight and delete them blend in nicely. I had these with my water brush. Maybe we need this second layer of this. And we let this dry. Now we go to the book for the Booker who can do this, for instance, in green, but you can pick any color that you like. I will take the two shades of green. One will be lighter, one will be the actor. So we will paint in the back of the bootcamp. Just here is also the cover here in the bottom. Here. And then here I will put some of these lighter green now. And towards the light may be I cannot put some yellow. And I can let them blend in nicely. I add some water and let them land. Maybe I can leave. So why? Towards steam engine. Okay, let them blend nicely organically. And I will also add water to the base of the neck. This now we let the book dry and we can paint the door because it seizes try for the dough. We just apply the same, same yellow ocher. And we're going to need to solve it. Okay? And here also. And now we take a slightly darker burnt sienna and we will in the side that is away from lighter. Now we turn in so I don't touch the blue curve. It is here on this side. And then when we blend it slightly with a brush or with whatever brushes, same here. And maybe below and some points below the glazing there. Okay? Or we can leave it like this without blending. Gap. Here is working. Here. We can slightly blended in this with the meat. Now we can paint the background. And for the background we can choose any color that will lie here. For instance, I have chosen a very light like this, but you can choose any color that you like. And we will do these little by little because we don't want that to lector. Mock can dry the one to dissolve it applied in the solid itself. Here. You can apply stronger because it's away from the light. And just drop some UWP, the source. To indie solve it. I can turn it. So it's easier for me to follow. You see, don't let these dry, just apply them out. And immediately same here and we'll apply some and then immediately insolvent. Because if you let it ride and you see the amounts, so do it Iturbide it. I'm not completely satisfied with the back of the book, so we'll go back. Drop some water. Following pair. The edge of the kapha, SEA edge of the cup will be red. I will try. I will paint it further last thing because it stains aloft. So I don't want to there's a storm outside and the light goes away. Okay, Now we let these dry. Yet the background right.
5. Second Layer: Now we will add, casts a shadow of objects in them. We will add the final details for cast shadow. I will use the gray. So far. Has shadow. Just fainter. Let you be so behind the book can you remember obviously, the light comes from here. So we will have a shake like this. They can blend that because that's how behaves shadow. Okay? Then we will use the same gray behind. Here. The lambda is based on the plot. Then we will have some casts shadow here. We'd always remember dropped some shot. Let go a drip, drop of water and we use these water. He said, it's okay if it blends with coffee. It's nice actually. And we've got new words. New words, okay? And then the cast shadow behind my donor. And then I spread it to with my trash. Much water. Okay. And also some cast shadow here behind in the whole of the donor. And let's see for cats Shandong. Now we can start the paint in the stripes on the squares, so on now are closer and we can use our lighter for instance. Or even, yes, I want a lighter green Oliva. I will alternate the SEC, I can use the darker one so there is more contrast with them. The ground. As it is closed, this shouldn't be too straight down. And we'll alternate. You'll see see these big strides and put them at a distance. Okay, This is perfect. We've seen stripes. I take the other side of my Tombow. Or you can also use the tip of your Russia. We forgot, I forgot the, the inside. Let's go. And this same factor on the other side here should be precise. And the same here. It can. Then it could, of course, use a different color like a blue would be lovely. And now the scenes trypsin. Okay, maybe I can factor that way. Now we need some casts shadow also maybe here below the cloth. So we take this thinner side of my gray and just you see in some it's thicker in some points. It shows that the cloth is not completely sitting on the table by making, it is making waves. So you see you can make the seeker like this in the corner as well. Also you can take this Ni, the finding of the gray and accentuate the border of the shadow. If you think is necessary. Here. We can maybe slightly blended. Also, as I said, I didn't like much sure. The back of my book, I think it should be darker, so I take a second layer of this, olive green and I will not blend the Titanic. I will just leave it like this. Now. Last but not least, we let everything dry. And then we apply our dark red around the edge of our guy. And then I would just try with this one is expected. I go over ten and then I will draw to our cheese. Note the home edge. And then I will tell you to eat with my brush. So independent. So we have natural highlights, organic. I think we can have a darker coffee on the society them. So we take a second layer of my darker brown. And so I keep turning my paper. If I feel this is more comfortable, I always try to make things as easy as possible. I invite you to do the same. Be careful to blend well, otherwise really hard edges. And I don't like them very much. Okay. We can also add some color variation like this. And we let everything dry. Wanted to blend this vector. We can work it as long as it is with once you start drying, don't touched. It's better. Okay. Now we let everything dry and then we are under the final details panel. Sorry, we need to add some shadow for the pages of the book. For the basis of the book, I will add one thick shadow like this. And then maybe when it's dry and add some phages. Also. I want to rounder back here. Okay, like this. We let these dry.
6. Final Touches: See if you like. And maybe we can adjust done here. The dog here in the very fabric of brown. And here as well, just below the glazing slug be blended with an almost dry brush. You can also blend the vector has to shadow here that is some hard edge. And then we draw again this types. So it's defined. Now with our darker brown. We can make some dark circles. This is really stick. That's rarely is missing. Scattered, different size. Some would be bigger. And also you take your white gel pen and you add some white dots, especially the corner around the edge. We can improve them. Here. We should use the brain. It can on the pages. Yeah. It's finally here. We can improve with a castrato here. Without blending is just like here without cleansing. Base 10 holes. So here to improve the Constitution. And we need also to draw the stripes. Maybe we can add some darker pink here and here. And these we can slightly blend. Always been the highlight. Now we take our pencils are colored pencil. I will take some red and some blue. I will also take some green. With the white gel pen. We will add the decoration on the doughnut. It should be it should be dry. Some wait until it's dry. But we can start applying some white gel. Pixels states. Now you take your read. The same. All in different directions. Still applies mainly July. Don't overdo it. But I think the look nicer with the donor. All in different directions. Some like blue, some green that I use these waxy pencil because it's a very softer and it leaves some very opaque marks over markers. So it's nice. We're not orange as a Chao. Yes. Just try. Okay, now I think there are enough. And that's it. That's everything. Right? You've done it. The fun part. You take away your masking tape, but be careful. Just stay away of just tear it off away from you. This, if you feel that might that they're off your paper, use a hair dryer too heated so the rule will melt at. It will be easier to check it off, to turn it off. But today it's a half today it's the summer. So I don't need it. And we'll be very careful. You see I away from the paper. So if accidentally tells the paper one really knew throwing some crispy, it's done.
7. Wrap Up: Congratulations, you have finished your sketch with me. I hope you had fun as much as ID. If you have enjoyed the class, please do not hesitate to upload your project that other students can see what kind of results you can achieve. And I would really appreciate if you can leave a review on my glasses so I can learn in proof for my next classes. Also, if you follow me on Instagram, please do tag me. If you post your work and from this class, I'm very excited to see your projects and also follow me on Skillshare so you won't miss minutes, passes. A big Chow, and I'll see you in my next class. Thank you.
 Elisabetta Furcht, Anyone can paint!