Transcripts
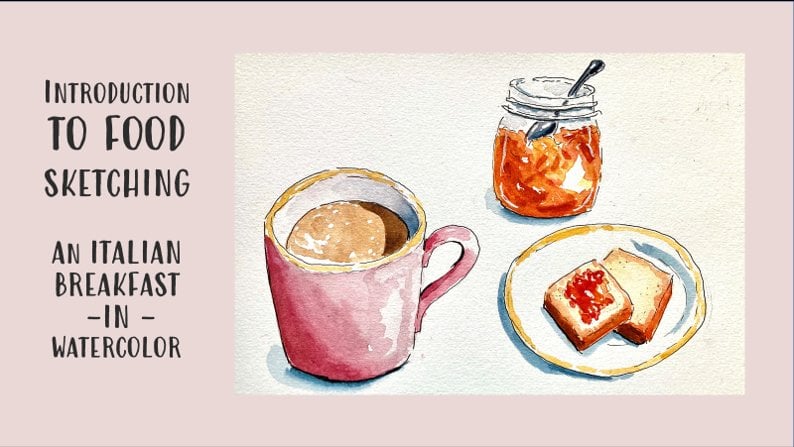
1. 1 intro: Have you got a family recipe that you very proud of? today with this class, you can learn how to sketch a lovely illustration with your recipe that you can frame and hankgin your kitchen. Hi, I'm Elisabetta,an Italian artist based in Turin. I started sketching later in life. And I'm persuaded that talent is completely overrated and that practice matters. So why don't you start sketching with me? I will take you through the process in small steps, and we will paint along. After this class. You will learn not only illustrate my favorite dish, this one, the Italian recipe of the Easter pie, but you will learn how to illustrate your own recipe, and you will be able to frame it and hang it in your kitchen. This class is suitable for beginners and also for intermediate students that want to take a fun class. So without further ado, let's start sketching!
2. Materials : We don't need some strange material for this class. What I'm asking you to have some quality watercolor paper. I'm using Clairfontaine It's a 100 percent cotton paper. Don't use a small format, at least this format that is 18 by 24 centimeters or seven by 9.5 inches, at least because we have a very cluttered layout. So don't use a smaller format then this, you can also use cellulose paper, but it must be at least 300 grams because we will be laying, we will be putting watercolor on it. we will need some sturdy paper. So if you want to use a cellulose paper, you can use Canson XL for watercolor, very good cellulose paper. Then we will need some paint. For paint. I have a collection of watercolor paints. I have my go-to palette. This is a ppalette thatI have built through time because I buy the tubes that I like and I squeeze them into pans. But if you don't have a regular watercolor set, maybe you can get yourself this small Winsor and Newton Cotman student watercolors set, which is very good quality aat a very affordable price. Or maybe you just use what you have at home. If you don't have anything else, just use what you have. Then we will need a pencil. An HB pencil will be better because we need a very light line with pencil because we don't want marks when we will be erasing the pencil. So then we need an eraser. To erase all our marks with pencil. We need a pen, an ink pen. Be very careful. This is very important. Watch out that the ink is waterproof, because if it is not waterproof, once you apply watercolor, you will smudge your ink everywhere. And we don't want this. Then we can use an ink pen with a thicker nib like these, Sakura Micron 08. Because at the end of our recipe for the final touches, we will be adding some thicker lines here and there. But if you don't have it don't worry, because we can just make double lines with our regular pen. By the way, this is an excellent pen. The uni-ball eye micro, is common pen. It's perfectly waterproof. Just wait a couple of minutes until the ink is dry. Then we will need some watercolor brushes. Have a bigger brush. I have these Da Vinci Nova 8, a bigger brush, and then you need some more, some smaller brushes for details. Just any synthetic brush will do. But it's better if they have a very fine point because it makes easier the details. So you can also use an even smaller brush like this. For details. you see, so three brushes, la large one, a medium one and a smaller one will be perfect. But if you have only one it's perfect, if it is very pointy, then we need 2 jugs of water, one for dirty water and one for clean water. I always have to, that's important not to pollute your paint. We need some paper towel. Then for the final touches, we also need some white gel pen. I have these Jelly Roll, which is very good in different sizes. This is 08 or 05. Just make sure that it is a good quality. Otherwise, you don't use it. a jelly roll or uni-ball signo, a very good quality. And that's it for the material. Let's start sketching together.
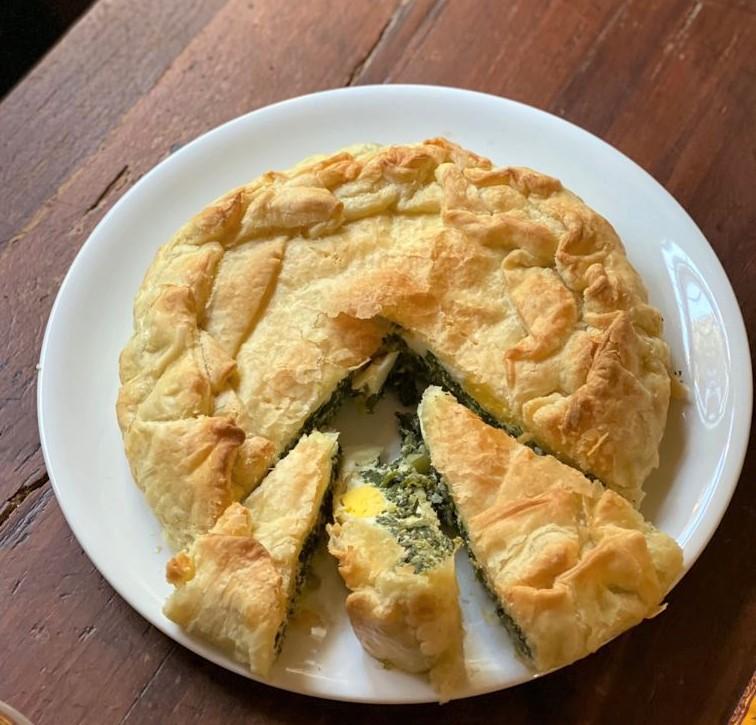
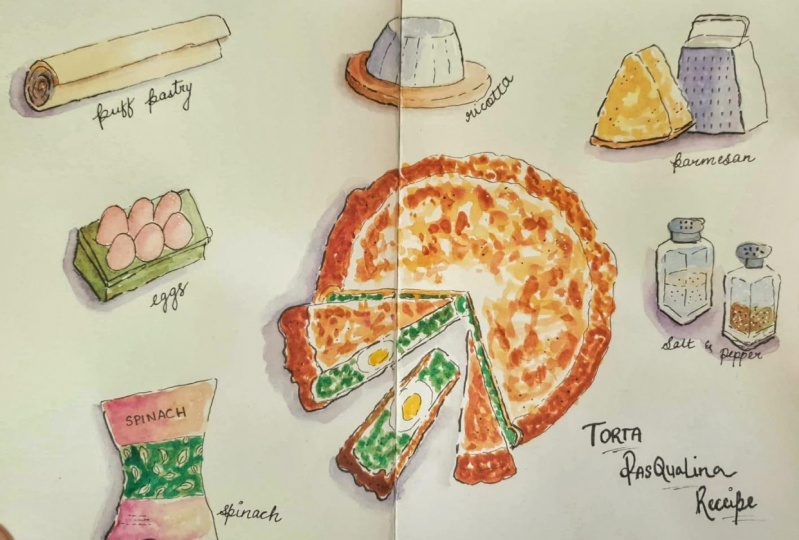
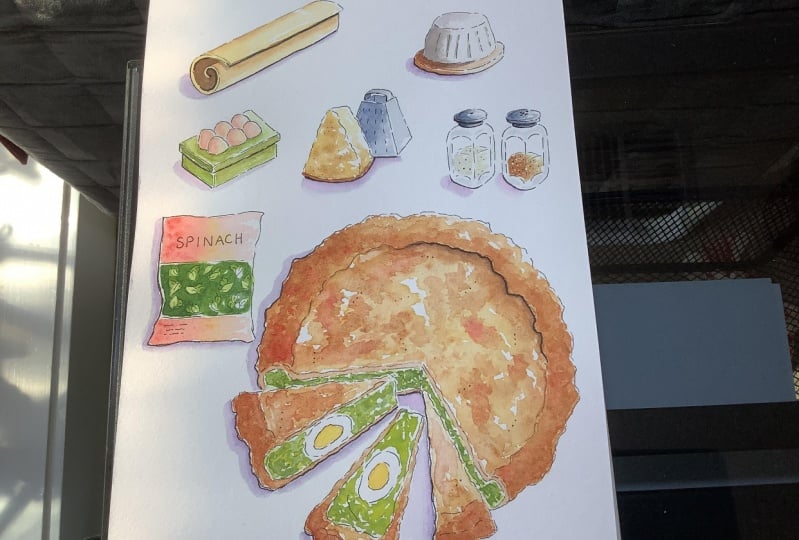
3. Sketch the Pie & Place Ingredients: Let's start sketching! It's time to sketch and find a place for our cake, Easter Cake - and our ingredients. So the first thing we do is placing a round for our larger object, which is the Easter cake itself. So we take any round thing that you have around the house. And we trace very lightly with the pencil. A Pencil HB is much better. This of course, this is an example of composition. Your layout may vary, but I like it this way. Vertical, with the finished cake in the lower right corner and the ingredients around it. So this is, the...our round for the cake itself. Then we start from the top left corner. I use my reference. This one, you see? I use this reference. I had it in horizontal. I use this as a reference. So I start with puff pastry sheets. And we place them. We just occupy some space for them and we place them here. Then we place Ricotta, just find the space before we sketch them, Eggs. Parmesan... ... we can put here and spinach here. And then we have salt-and-pepper here. So you see, if we make some mistake and we realize that there is not enough space for our ingredients, we can always erase and change. So let's start sketching the cake. And in the next lessons we will sketch and paint the other ingredients. So as you see, the Easter cake has a border, a crust, its puff pastry so it has a warm look. Color variation is very important. And then inside there is spinach mixed with ricotta and some eggs. So it's not difficult to, to make. It's prettier if we take some slices out. So the important thing is to have edges that are rough. So we need some rough edges like this. Or we can do that directly with when we outline with a pen. Then we have, let's say, okay, let's decide that slices... ...we put them here and we have the border here. Just go around the larger circle, with a smaller circle, we can erase this. We take our eraser. I use these for sketching because it's very precise. And now we make another. You see here we don't have space for salt and pepper, so we have to find some other space. We have our other slice. We make a triangle like this, the round edge. And here it goes down parallel and then here. And then here, here is our first slice. Then we have a second slice here. Smaller triangle this time from the top. So it's easy. The crust. And then we have a slice that we put on the side, this one, like this rectangle. And inside this rectangle, we will make the filling...an egg. Very loose the sketch! because we can be more precise when we outline with our pen. Another egg here. Loose...and... You can outline the crust Here. Inside here we have the filling ...same here. And here. You see there is the other. There is the filling of the inside. So now we have sketched with pencil... We can take our pen, waterproof ink pen, and outline. To sketch, we need to take a waterproof ink pen. I use this uni-ball Eye Micro, which I find very, very nice. It gives some sharp lines and it's very smooth to use. So I really like it. But you can also use some other brands like... Sakura Micron for instance, which is also very good. But remember, it must be always be... double-check that it is Waterproof ink. Make micro pigment ink for waterproof and fade proof. Fine lines. Always double-check. If you're not sure, try on a piece of scrap paper before and then you go, Otherwise you will smudge your ink allover.
00:07:18.830 --> 00:07:26.164
So the important thing when we outline with ink is not to make a continuous line. We... it's prettier if we use broken lines, like for instance, some lines like this. Of course, the edge of the... our Easter cake is very irregular. So use some irregular wavy lines and make them broken. Like this. Not continuous because it's a bit unnatural if it is continuous. So if you make your irregular wavy lines, it is much easier. The brain, your eyes and your brain will fill the gaps. Also. Try not to make very sharp angles. Corners must be as round as possible. So this is the outer edge. In here, you have your inner edge. So let's start sketching. You go around the first circle with that wavy, irregular line. Like you would be in real life. Now that you're here. You'll go like this ...curve. Okay? And it's finished. Now it's cut. These is a bit more regular. Same here. There is an arch here. An arch here.... because this is the way the crust behaves, makes an arch. Now we sketch the second slice. This is more regular because this we cut with a knife, but here it's going to be, you know, wavy, wavy. And remember to leave some gaps. It needs to be a bit broken. Same here. Wavy. The bottom. Here we make an arch. And we follow along for the craft inside. The other edge of this slice. Remember, never make corners that are too sharp, always round them. It's prettier and more natural. Here we just give a clue of an egg. Same here. The crust. The crust here is, the inner crust. Here. It curves. Same here. It will curve here. Okay? We finished the sketch. Some crust here. Same here. You see some crust. We finished with the Easter cake. We let the ink dry before we erase the pencil.
4. Sketch Ricotta & Pastry: It's time to sketch our ricotta cheese. For our ricotta cheese, we make two ellipses. So we put a little cross here. And we make this very loose. Like this. We make a slightly larger cross here. And we make another oval. Now that you have the oval... And put another oval around these one for the tray, we put around like this. And now we erase the back pencil because we don't need them. We don't see the back. We can't see through the ricotta cheese and we can also erase the crosses. So try to be as symmetric as you can. Just make sure that this curve is exactly like this curve, and like this curve. At this stage with your pencil... now I'm making it darker than usual because otherwise you won't see it on the camera, but you can make all the mistakes you like because you will erase the pencil after you outline with your ink. Also, ricotta cheese has some lines, some stripes going down, very, very light like this. So this is our ricotta cheese. This is the tray... will have a certain height. So we go like this with our so this is our Ricotta. We can go straight with ink for the ricotta cheese. Let's go. Remember always broken lines, especially the lines that are inside. So they divide the top of the ricotta cheese from the side. These will be very, very broken and you can be more continuous with the lines that are the true edges of the ricotta cheese. So here we can make it more continuous, okay? Always remember rounded edges. And here... just very light. Also, now... ...Rounded edges. And here, just to hint of a line. Now put some lines over the ricotta. Now here we have to decide where is our light source... Our light source... is here, let's put an arrow, because we must take this into account when we paint. But here already, we will be seeing darker stripes here with our ink and less here. So already we can put maybe a continuous line here and some very broken lines here. Okay? So this is our ricotta cheese. For the puff pastry sheets... I'm going to say, I cheat and die by puff pasturing sheets. I don't buy it... I don't make it at home. But remember to erase the ricotta cheese... remember to erase the ricotta cheese. The pencil. Because now the ink is dry. Okay. Further, puff pastry sheet. It's not so easy. So I will teach you some tricks. You just draw a cylinder like this, a normal cylinder. Then here you make this curve that goes further on the right-hand side like this. You see, now you can erase this. So here it is. And here... You can erase these ones. So, and you make some height for this, and you go inside, you follow this curve. And you go inside and you follow. You see it's easy. Tak, tak. So! this is our puff pastry sheet. It was easy. Now we ink it. For ink... we can always use our broken lines method. Always remember: Never sharp corners. They're not nice unless you really need to, like in a house, I have elongated a little make it longer these sheets because it was too fat. So you can always correct it with your pen when you outline it. Broken line. Here, we have to move a little further. Okay? Now the inside. Now we let this dry before we erase it. Herea line ...here a line
5. Sketch Eggs & Parmesan: Let's sketchthe eggs now. To sketch the eggs, it's a bit tricky. I have decided to put them in a tray. Let's find out how to sketch them easily. So we can draw a little rectangle like this. And here we can place six ovals for the eggs, 123...123. So here we have the front row of the eggs and here the back row. We start from the first egg. We have it here. And we make our egg. Then we have the second egg here slightly overlapping and slightly overlapping. Here. Here we have the second egg. Slightly overlapping, slightly overlapping and slightly overlapping, okay, so here we have our six eggs, our rectangle. That is our tray for the eggs. A rim for the rectangle. And the base indenting ...this. The lines must always be parallel as in a box. This is an example you can of course, make your own idea or just sketch this eggs as they are. But I find this quite pretty. Now, we can use our ink and outline them and make them even prettier. Okay, so we start with the hole for the first egg. Let's try and make it as symmetrical as possible. Here we have the first line... And here. You see, I sometimes change something with the ink, I make it even more perfect. Second, fourth egg. Another egg. Another egg... first line. Here, here small rim and indented, even more indented. You see our eggs? Perfect. Let's go and draw Parmesan cheese. Parmesan cheese is more or less a triangle. Like this, very irregular. With a side like this. And behind... we can make a grater, a little parmesan grater a rectangle. Some perspective like this. I want to make you more on this side. Let's draw first the box here and here. And then we will, with our ink, make the small holes to grate the parmesan. And okay, now we can go with the ink. Remember that it must be very, very irregular. The edge of the Parmesan cheese. So we will go with very broken lines. smoother fir the bottom because it's the crust, smoother here. Here we will have the crust, just the a clue of side. And then like this, behind we have it slightly taller. I like to change things when I'm inking it to make them. I see that things can be changed. I like to do this. Here you see I made a mistake. Perspectives not perfect. But this is the beauty of sketching, doesn't need to be perfect. And here, I will put the small holes in regular rows. Okay? This is nice... I like it.
6. Sketch Spinach, Salt & Pepper: Now let's draw the spinach. Spinach...I really go the easy way. I buy them in bags already washed. So let's put here a bag, slightly irregular because this is how they are. Those big bags of spinach. Here. we put a window where you can see the spinach through and you will put the leaves. We just put some leaves with the pencil and we will add some more with the ink in all directions. To make the leaves just make the shape of a leaf.... And a small line like this. Let's go with ink. It is larger on the four corners. It's a bit indented inside. So you see... okay. Let's put some leaves... all directions. You don't have to fill it all. You have to put some... your eyes and your brain will make the difference and fill that gap. Here, we will write spinach with a ... White pen gel. Okay? But we can do it later just to let you know how it works. So this is our spinach bag. Okay? For salt and pepper, it's easy. You make here too small rectangles like this. HowNow goes inside; a small cylinder. And then an oval. Here. We have the glass. And this is our pepper. Of course, we can make it better when we put ink. That's just an idea...you know that we can make mistakes with our pencil, but I don't like to trace , I think you should try and draw freehand because that's the way you become better. Same here. It's too large, make it smaller, round corner a small cylinder. And an oval. Let's go with our ink. Here. We will need to be careful not to make mistakes. So we go down, very round corners. Rounded corners, make small lines at a time. So take your time. You don't make mistakes. Your cylinder. And you're oval here. Just a hint of these two arches. Arches. Same here. Round the corners... here around. Small arch here, small arch here. Our little cylinder and the oval. Okay, perfect. Now we must wait that the ink is dry and then we erase all the pencil lines and we can start painting. which is obviously the fun part.
7. Paint the First Layer: Pastry & Ricotta: You must always remember, where is your our arrow, your arrow is where your light source is. Always remember it. This will make things much, much easier. I am right handed, so I always start painting from the left-hand side on top and I go down like this. And the last thing I paint will be the cake because it is the bottom right-hand side, so I don't smudge the paint. ALso... I always apply paint first on the darker side because we have the light source here. We will have dark here, and light here. So the darker values will be here. I start applying painting always on the side that is further away from the light source. So if your left-handed it's just to the opposite, put your arrow with the light source here. So we will apply, start applying painting on the further away side, which is easier for you. And then you dilute paint towards the light. Let's start with pastry. Puff pastry: to obtain a nice color and do something that many artists will not agree. And it is mixing white water color with other paints. They say that you don't need to use white watercolor because you just dilute the paint, but I like it because it gives a nice thick pastel color. So I have diluted already some white here with some yellow ochre from my Cotman set here. And I willl make some more. Yellow ochre. Always rinse your brush before touching white, otherwise you will pollute it. And I start. I also put a hint of yellow because you know, raw pastry, it's paler. So we start applying from the side. Then we put darker values inside. Here under the sheet is darker. Always remember to leave some white space to make the drawing breathe. I always use a rag on my left hand. So leave some white space. Then... this is our first layer. There we will come with some darker layers for the inside. Now, the first layer of the pastry sheet is done. Let's go to the ricotta cheese. The first layer of the ricotta cheese. Ricotta cheese is white. So we will just apply some gray, some shade on this side and in the lines. And also, we will paint the tray. Let us start with the shade; to obtain a nicer shade, we can make some gray with a purplish touch. SO. If you have some gray like I have, I have these Payne's gray, you can use it. If you don't have Payne's gray, you can always mix your gray with burnt amber and blue. But I have it so I will use some payne's gray. And I will add a touch of purple. And I will use this very, very diluted. I will switch to a smaller brush for this because it's a tiny drawing. So I will take this smaller brush. I dilute my shadow very much. It's very watered down. And I start applying from the side that is further away from light source. And then I just rinse my brush and with clean water, I just pull it towards the light. Same on top. Just scribble just to show that there is something there. Just scribble like this. And we're done. If you like, towards the light, you can put a touch of very diluted yellow too. I have some yellow already on my palette. I will water it down and add a touch of yellow here to indicate that there is light. It's very diluted, leavea lot of white. Then we must wait that these dries on. When this dries, we can paint the first layerof the tray
8. Paint the First Layer: other Ingredients: The first layer of the egg. Eggs in Italy are pinky beige. In other countries, they are completely white, so we will paint them using some yellow ocher and some pink. So we will start applying some Alizarin crimson on the darkest side, so like this, a C stroke of alizarin crimson. And then we'll take some yellow ocher and mix it with the pink. Leave always, some white space towards the light. They must not be perfect. Not all the same. Just blend them on the paper. Take some more. Okay? Like this. Now you rinse your brush, you blot it dry, and you blend even more. So it's better to be light at this stage and have a second layer later. Okay, so now we wait for these to dry before we put paint on the box because we don't want the color, the paint to bleed into the eggs. Now, let's paint the parmesan cheese. For parmesan cheese. We will take, if you have it, some raw sienna. Raw sienna is a very transparent, light earthy color. If you don't have it, don't worry, use some yellow ocher, but I'm using some raw sienna because it's slightly more transparent than yellow ocher. I will water it down and I will apply it here in there, leaving some white space, especially on the side that is towards the light. This side will be in shadow. So we'll apply some more like this. Now. It's still wet so we can work it and we can apply some darker spots of same color. So just on this side, some very light here. So it's irregular because Parmesan cheese is very irregular. And then we will try, we can put some darker shade of color. We can even add some yellow ocher. At this point. Just for some color variation. You see? Okay, For the crust that we must wait, that it's dry. Now, let's go to the spinach. For the spinach, we will do some negative painting. So the first thing to do is we put some very light green on this window where we can see through the leaves. So I will wet the surface with some water. This is some, what we call wet in wet technique. We haven't done it so far. We have done the only dry wet on dry. This is wet-on-wet. We'll make a very light green, which is a mixture of sap green and yellow. We always try to use the same colors. So we have a limited palette. It's nicer. And we will put this very diluted green, darker in some places. So maybe here is pure, pure green. So we don't have all the same. We have some, remember that color variation is very important in watercolor. So we just drop some color here and there. And we will have some color variation and we'll let this dry. So this is the first layer of our spinach. We let this dry before we go back to leaves and the bag itself, the plastic bag itself. Now, we will be painting the first layer of salt and pepper. For the first layer of salt and pepper, we will just put, put a hint of shade here for salt and an interesting color variation here for pepper. So for salt, we will take our Payne gray diluted with purple. Well, okay. It's very good to make mistakes. So I will show you how to fix them. I will just apply clean water and rinse my brush ...clean water and die will absorb it with a clean rag or with even better with some paper, paper tower. Okay, so let's go back to our salt and pepper. I take my diluted grayish with a hint of purple and I just ...I just I dab it on my paper towel. It isn't enough. It's a hint of color. It's enough. For pepper We take some sap green here, sap green here. And we will put some sap green here and there. And then we add some burnt umber, always from my Cotman. Not too much water. So I dab it. Okay. So you have some color variation you see? okay. So this is your pepper you see?. Then we will add the second layer, some texture, but for the moment is enough. Here you have your pepper, your salt. And now we can add some Payne's gray, Payne's gray for the cap here. So for this I will take an even smaller brush, you see? Because it's very small, I will take some Payne's Gray from my palette. Here. It's very intense, Payne's grey, so you just water it down. If it didn't have Payne's gray, you can take indigo, indigo blue and add a touch of black. For instance. It's nice to mix your own colors. And you apply here. Where you have shadow here. And here. We apply some color. And you rinse your brush and you pull the color, leaving some white space. Same here, pull it. Okay? And then with the ink we need to make some, little holes here and there. So this is sort of impact. Now.
9. Perfecting the First Layer: Now we're ready for the second layer of the puff pastry. We touch if it is dry... to make sure that it is dry, what we need to do is to see...you can tilt the paper... If there is a sheen... It's still wet. I don't see any sheen, so it's dry to make it even to be even safer because it's always better to be safe than sorry, you touch it with the back of your hand. If it is cold, it's wet, but I think it's dry so we can add darks inside the roll of the sheet. So I take some burnt amber with my detail brush this... is a number four, Winsor and Newton Cotman. I take some burnt amber... burnt Sienna, sorry, from my Cotman. I put it here where I have my earthy colors and I just put it here where I have... where I think I have shadow there. We can have even more shadow here and then a small line here along the rim. And then we will just blend it a little to make the edge less hard...to have a soft edge. This here can be and we will put even some darker, some even darker value here. Now we can paint the tray of the ricotta cheese. To do so, we take some burnt sienna and burnt sienna that we have used for the inside of the pastry. And we just put the first layer. I always start from the side that is further away from light and then go towards light. Always remember to leave some white towards the light, like this. You can pull the color in from light towards the dark ... you see....?. You pull it in. Same for the rim here, for the height. Just stay away from the rim. You can leave some white space in here. It's very pretty if you don't touch the corner here. And then when it is dry, we can put even some more, some darker value where we see a shadow. Let's paint the box around the eggs. To do so, I suggest we use some green that we already use in other parts of our recipe so that we have. Color harmony. This is what we call a limited palette. So I will take some sap green here from our Cotman set, sap green. And I will paint it diluted. And we will paint first the side that is in the dark here. and then a bit more diluted For the part that is towards the light here. Always don't touch, remember, don't touch the edges. So it's more interesting. Same here. Around the eggs...go just around the eggs. You don't need to be too precise. You can be sketchy. Now you rinse your brush and you pull a more diluted color towards the light. Here. Here you are. Then we will add some shading here. But for our first layer of the box, That's enough. Okay, let's paint the bag around the spinach. We can use for this some Alizarin crimson. As we have already used Alizarin crimson in the eggs, and we will use it in the crust of our quiche. So I'll take some Alizarin crimson. I warm it up with some yellow, otherwise it's too pinky. And I start the from the side which is further away from the light. And I just go towards the light. I rinse my brush and I pull the color. Too much water. So just leave some white space here. Now you take some pure Alizarin Crimson and you drop here... where it's supposed to be darker, you just drop some pure alizarin crimson. Same here. We take this diluted Alizarin crimson with yellow. You dry you pat dry your brush and you pull it towards the light. Remember to leave some white towards the light source. So here you can go to the edge, but here just leave some space here on the bottom also you drop some pure alizarin crimson, and you can also drop some pure yellow towards the light, just to vary the color. Color variation is one of the interesting things of watercolor. Now we go back to Parmesan and we can paint the crust. And the grater. For the crust and the greater. I take a smaller detail brush. I take some diluted Payne's gray here. And we'll start from the dark side like this. And then with some clean water, I will just pull it towards the light, some diluted color here. And on this side I will just put some diluted color because it will be towards the light. In the inside.... We need to put some darker color. Be very careful not to touch the other sides because that will bleed. Also put some here... and here you can leave light, just the white of paper because there will be towards the light. So the inside of the handle here will be dark. Can put the second layer later. Now we paint the crust. For the crust We take some burnt sienna. Good.
10. Second Layer: Ingredients: I would like to put some darker values on the pastry. I will take some Payne's Gray, very little water and just paint where I think I will have some darks... here and here. Okay. Some shadow. very thin. Okay. Just a hint. When it dries, it will be nicer. Okay. Let's now add some shadows on the ricotta cheese tray. To do so, we take some burnt umber, burnt amber, and we just put some here on the left-hand side. And behind the ricotta cheese. This; we rinse our brush and we pull it towards the light. And we pull it towards the light. Then we take some extra gray and we just put some gray here on the side and some alon the lines, like here. And that is done. We can also darken eggs now, we will put some Alizarin crimson here, restate the color variation. So we take some Alizarin crimson and we put a C shape like this. And then we blend it towards the light. Some clean water. We clean the brush, we tap it dry, we blend it. Okay. Now we add some more leaves here to spinach; to do so we said that we would do some negative painting. So we take some sap green and we paint around the leaves because the leaves that are in the bach will be darker. So we just paint around our leaves. Then I will show you a third layer what we can do. You see, I go around ...some sap green. I will go around the leaves. It's fun. Just be careful. You don't need to be too precise. It's a sketch. Always remember. And you let it dry. Now, we add some shadow behind the eggs. To do so, we add the second layer of the same green. And maybe we can add a touch of burnt umber to make it slightly drier, slightly darker. Like this. Sap green. Okay? So we go behind, you see the eggs. This is shadow. Here also is in shadow and behind the lid here. Then we can blend it a little here. And blend it a little here. Okay? So this is. Here also... it's going to be darker. Between the eggs. Also, we can put some color variation, our salt and pepper, of the same color, but we'll see it later. You see, you see some nice color and you have ideas of where to put them. You see mixing colors, gives, always interesting. Hues and tones and values. More than straight from your palette. We go back to salt and pepper. For salt and pepper, we need to put some gray over the glass to show that we have glass there. But because we already have a lot of gray, we need to use a different gray. So we take our Payne gray and we add a hint of blue. So we take some blue that you have in can be Cerulean blue or ultramarine blue, cobalt blue, just a hint of blue that you like. And with this very light grayish blue, you just put some hints around the glass. Like here, it's very, very light. Just means that we have glass. Well in some points leave a lot of white. Also, we need to restate shade under the cap. So we take our Payne gray here. Here where is metal and we go here where you have darker parts on the side and under the cap, you blend it ...same here. Be careful here. Okay. So you have some light here and some dark under the cap ...here... also on this side, you will have... now it seems strange, but once it's dry, it's going to be lovely. Just slightly blend it, not too much. Also pepper needs some color variation. Here we have the shade you take just some burnt amber. and you add it like this And then you just blend it a little around. Not too much on this side we will have light, but this is the darker side. You drop some even more color. like this. Don't blend in too much leave a granulation, okay. Also on the Salt here where you have the light, you can add some white with a very, very slight hint of yellow. We'll take some white We put it on the salt. And this, there is just a hint of yellow . And we will blend it. So it makes a contrast with the white of the papers because there is salt. Actually here is not nothing. So you have salt, pepper and we need only to make shadow. Let's add some more leaves for a further negative painting here. So now I take my pen once again. I make sure it's dry, it's dry. And then we'll draw some leaves that are behind the leaves that we have painted like this.... this...this. Behind. Just some, directly with the pen. We let it dry. We don't want to smudge it around these leaves.
11. Let's Paint the Pie!: Our Torta Pasqualina So we need to make your first layer. With raw sienna. If you don'thave raw sienna. Don't worry because you can use a very diluted yellow ocher. As I said, raw sienna is slightly more transparent, than yellow ocher, so I like it better, but you don't really need to have row sienna. So I take my raw sienna and make your first layer dancing with my brush. I just dance with my brush. Very diluted... ...value. Just dance with my brush. Take more paint. It can be darker in some points, then it can be slightly lighter in other points. Remember that you have light here, so leave more white here on this side and darker more paint on this side. Now that we have painted this first layer, while it is still wet, we take some burnt sienna and we drop some paint of burnt sienna around the crust just like this. Just to indicate that it is darker and warmer to give these baked look. And also here and there, in the middle of our cake. Here we have some diluted row sienna here. Okay? We go up to the edge in the back and more diluted. You can also take some clean water and blend this. It's easy right? In this slice for this slice, we take first some raw sienna, leave some white space, and drop some burnt sienna. So it's burnt sienna and raw sienna. Drop it especially here in the back. And also along the slice. Same here. Take some raw sienna for this slice. Dance with your brush, and take some drops here and there. Here in the back. You can have it darker. I would reinforce around here you see here we can reinforce more burnt sienna here because it dries much, much lighter with watercolor. So remember this... double layer. And also now take a smaller detail brush and paint the inside of the crust with a very light raw sienna. Here. The back. This slice, some burnt sienna on the back of the slice where it would be more in shade and more baked. So it's darker around the edge. Here. Add some more burnt sienna here on the back. Along the crust. Restate it here. Oh, I made a mistake here. Never mind. I take my paper towel, clean water, and absorb the excess. Clean water. Absorbs excess. Mistakes are invented to be fixed. Here another... So you see I'm not perfect either. Okay, it's okay. Now we let dry the first layer and then we will paint the inside. But I think we can add more burnt sienna inside. So I will take some diluted burnt sienna and go in there. Dance with your brush and some diluted warm Sienna. And like this, and make a lot of color variation. Especially on the back here we have the crust. Now you can take some pure alizarin crimson and just drop somewhere when where it is wet. That will be very nice color variation. Now some burnt sienna. Here again. I have some Alizarin crimson on my brush, which makes and very nice color variation. Okay, So, so now you have darker baked look away from the light, some lighter burnt look towards the light, and some white space to make the cake breathe. Now we need to put inside the spinach mix with the ricotta cheese. I also need to put some raw sienna inside here, inside the crust. We let it dry we can start from here. Okay, here we have the egg, so we need to put some very warm yellow inside. So we'll mix some cadmium yellow, deep yellow with some of our Alizarin crimson. And we'll paint here the yolk. I have painted the yolk. And now we go around the yolk. And here we have the white. And here what we can do is we mix light sap green. So we take some sap green and we mix it with some yellow to make it very light. And we dab here in there with our brush, the smaller brush here too... just dab it, scribble. Try to scribble with our.... here too scribble with your little brush
00:09:27.135 --> 00:09:31.580
And just scribble. Now, we need to add some color variation, darker green. So we take the same green and we add some of the blue that we have used before, you remember. So I take my sap green and add some ultramarine blue that I have used for the shadow of salt and pepper. And I will put some...drop this darker paint here and there. Just drop it like this. This is spinach that are mixed with ricotta cheese. So they look, ease of color variation here will be in shadow, so it will be even darker. So we take some more ultramarine blue, we mix it with our sap green. And we put even more of this darker spinach. Okay? Here we are. If you feel that you need some more you put some more. Okay. Don't overdo it. Now. We are ready for the final touches
12. Adding Depth: The first thing to do is to observe our drawing and to double-check if it needs something else. Probably we need a second layer on the cake itself. But let's start adding cast shadow behind all the ingredients. To do so, I take my smaller brush. I take my Payne's gray with a touch of purple, rather diluted. Then I will put my cast shadow. Where is the cast shadow? We know that light comes from these corner, so we will have some cast shadow here, here, so it's behind the object, like this. And then we can just really pull it away. Just a small shadow will do the trick; and behind it, because it's a round object, you remember. Behind it. Same here. We have some cast shadow here. And behind. Just a small cast shadow. Can pull it, here. On the back. On the side of our, um, our spinach bag. Blend it, if you feel that the edges are too hard to just blend it, please. Just put the shadow otherwise your objects seems to be flying. Our parmesan.... Now, the salt and pepper, small shadow. And now around the cake. So will be... around this side. That's a bit dark, so I will around this side. So here, also, here you will have some shadow. Blend it. Okay, On this side we won't, on this side we will have also... and blend it. You can turn it so it's easier to blend it. Okay? Now, we can add more leaves to the spinach. Now we can add more leaves to the spinach. So we take our darker green that we have used. You remember, for the filling of the cake and. We can go around these new leaves for some negative paintings. So I go around, not too much water and go around every leaf that I see, including the new leaves. And make a very dark background. So you will see itìs a very nice effect. You don't need to be too precise here. but some precision will help. You can also avoid to arrive up to this edge. Okay, so here you have all the different layers of spinach. Now is there something that we want to do even darker, maybe inside the puff pastry sheets. There is some...even darker. So we take burnt umber or any brown that you have. And you go inside here. And here. Here you will be even darker And you just blend it a little. The other thing to do, we need to put some cast shadow. on the ricotta cheese here. And also here. Okay, So they're not flying anymore
13. Final Touches: Now that everything is dry, we take our pen ink and we need some final touches. I start from salt and pepper because I need to put some texture in salt, like some dots here and there, and also some white dots. In ipepper. I take my white gel pen. and I will put here and there some white dots. I can also add some darker dots because it adds texture. Okay, I also need to put holes into the salt and pepper here. And here. That's for pepper. Also, now that we have the ink in our hands, I can put holes in the crust because when I cook the cake, I always with my fork do some holes before cooking. And I will do this. So we'll put three dots like this to indicate the holes that I make with my fork here in there. This is very realistic. I always do it. Here also, okay, so here it is. We could also put some shadow here because we have light from here we have the crust. And now I see that we can add some shadow. To add some shadow, I can take my gray, mix it with some burnt amber and put some shadow here. Now it seems too dark, but it will be nice once that it is dry. because it becomes more natural. Just blend it a little. This is too hard, take some clean water and blend it to make it more natural. You can also take some burnt sienna and add it here. So it gives a more natural look. But it needs to be darker. Because here we're going to have also on this side of the crust. It's going to be slightly darker. So we take some burnt sienna and we add some touches here and there to indicate the roundness of our crust. Our border here and there, same here. On this side, it's going to be darker. So we put. Some extra burnt sienna here. And it gives roundness to the crust. Some more paint same in every side that is on the opposite side of our light source, like here. Like here, an extra layer. It gives roundness. Not everywhere, just here and there. On this side to just add some extra layer of burnt sienna. Dancing with your brush. Okay. Here it's towards the light so we don't put it. So it's much rounder now, right? Insist if you think so. Just being a little realistic. Okay, So maybe we can add some more here. Okay, so now it's very nice. Then we take our pen and we write the word spinach on here. If you don't feel safe to write them directly in Ink, you can write with the pencil first and then in with ink. I don't really care either have a very bad handwriting, but I will try to write the word spinach in here because the word Spincah is a long word Maybe I can put the N right in the middle. So I'm sure that it will be centered. Then I go with i p, s. So it is in the middle. Here. We can put some writing like this. It's nice, isn't it? We can also, when it's striking at some shadow here, I don't want to overdo it. We can also add some texture to our Parmesan cheese. We should put some dots here and there. Without exaggerating. Here we are. I think it's everything. And now we take once again, either a thicker pen or this pen and we make thicker lines where we see shadow, for instance, we make it double line on this side to underline Cast shadow. Here. We restate the lights in here in the back. And the bottom part. Here also. On this side, on this side, every time we see a shade, we can put a thicker line or we outline once again. Here. It will give a very realistic look here. Here, here, and here, also under the cap. On this side, on this side, the pepper bottom And around the crust: try to follow the wavy border, the wavy edge Also because you have shade. Find, follow the older line. But don't be too precise. If we wanted a Perfect picture would have taken a photograph with our iPhone. This is not what we want. Here, where we see cast shadow. You can put a thicker line. Okay? Shadow. Here. Here we are. I think we are done. I hope you like it.
14. Add Captions: Now, what I can do, although I have a very bad handwriting. I can write the name of each ingredient next to the small image. So let me... let's be brave and write it. So I will write puff pastry eggs Parmesan Maybe I can go ricotta cheese Salt and pepper spinach And that's it. To make it perfect, you should write here the name of the cake. So I'm not that brave. And we make two lines with a pencil and then erase it. The name is a bit complicated. You can call it Easter cake. I will put the Italian name, Torta Pasqualina And then once it's dry, the ink is dry. We erase the pencil. I'm finished. So it's a nice Easter, Italian Easter cake that you can frame and hang in your kitchen. Thanks for painting with me.
15. Conclusions: Congratulations. You have sketched your version of my Italian instead by and I hope you uploaded in the gallery. I also hope that you will illustrate your favorite recipe and upload that as well. I will give you my feedback. Don't forget if you post it on social media to tag me as well. I feel wait to see your projects and I hope to see you in my next class. Bravo. And for the moment be Ciao.
 Elisabetta Furcht, Anyone can paint!