Transcripts
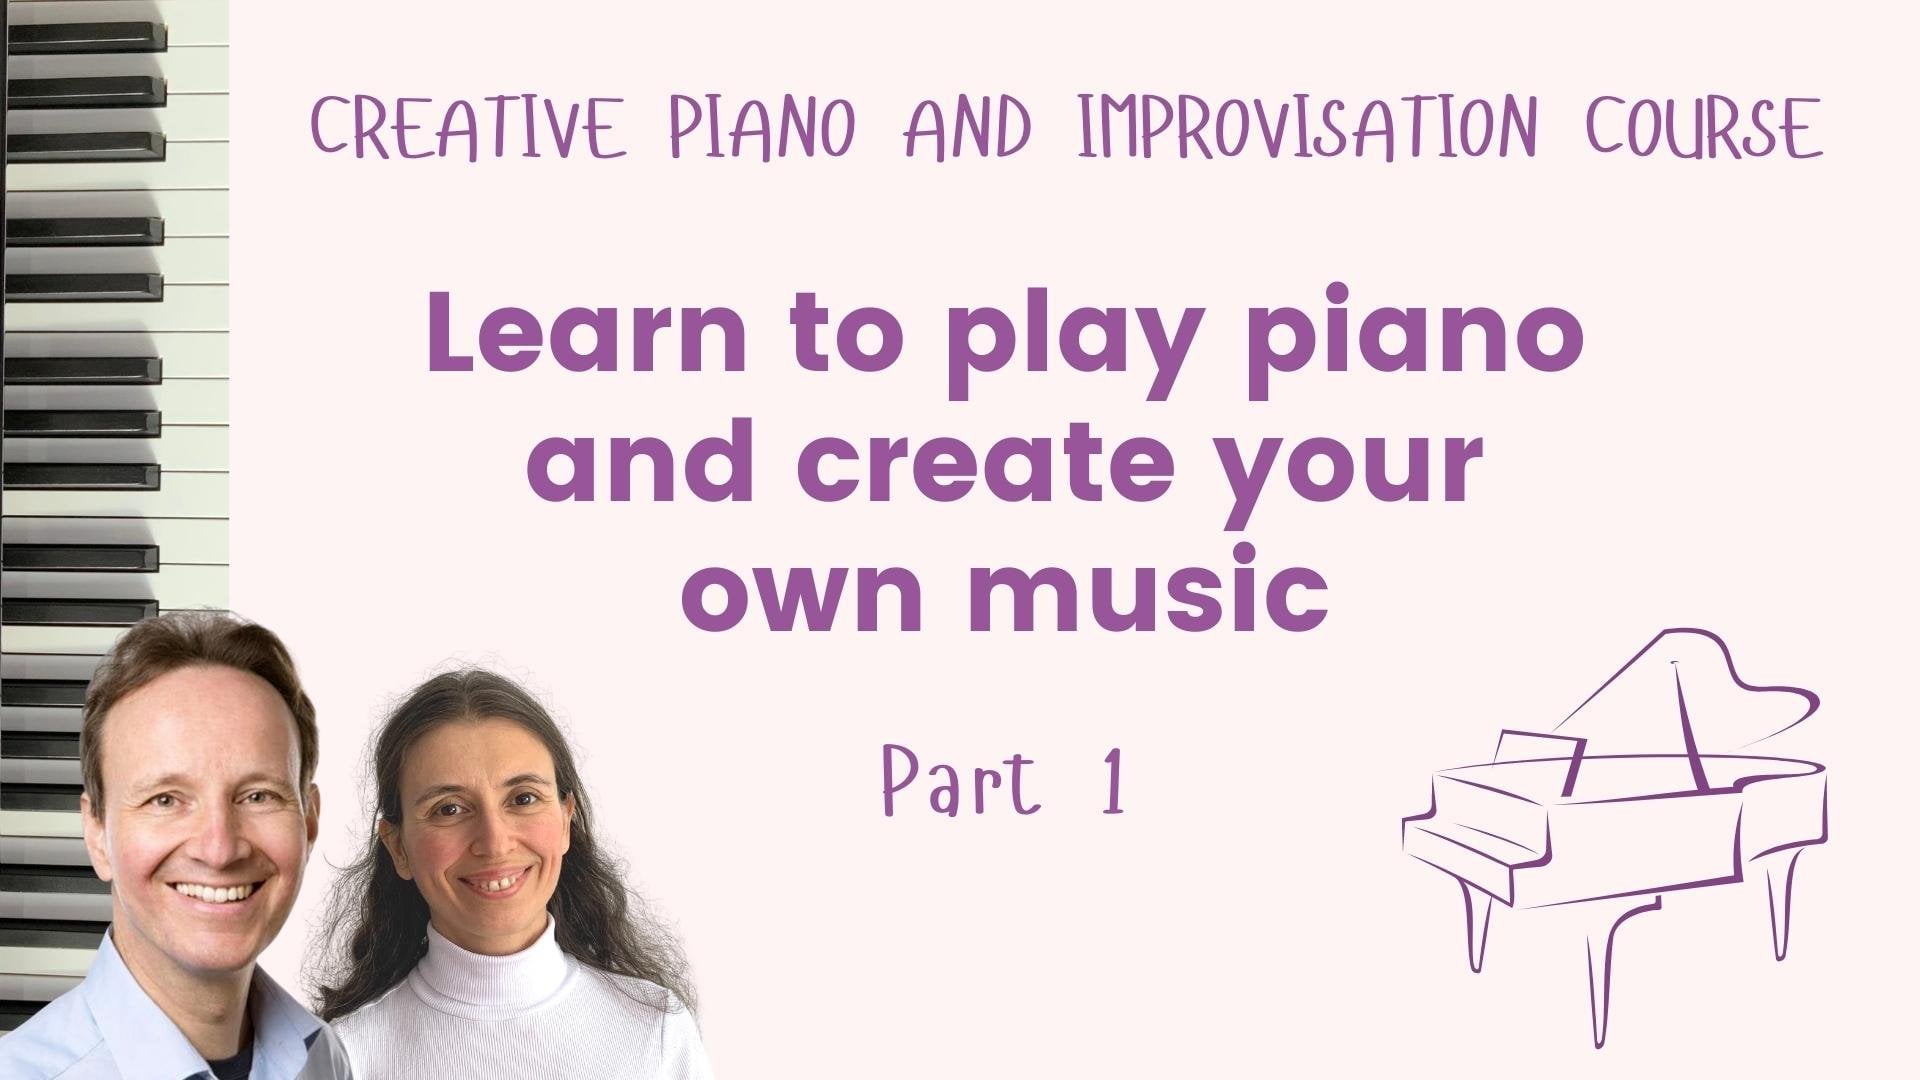
1. Presentation: Welcome to our creative
piano and improvisation course part 2. In this
series of classes. We show step-by-step
how to play piano and how to improvise
and compose music. You will also receive nine lovely piano pieces, that Martin wrote for this class. You can find them for download in the resource section
of this course. They lead you on your way to
master the instrument. You will be shown how to play
these compositions and how to create
similar piano music on your own. You will be shown
the staff music notation and you will discover
how to use harmonies. You will make progress in piano improvisation
using chords and also tones that
do not belong to chords. Hello, I am Martin
and I am Stella Martin, can you tell us more
about yourself. I studied at the
Universities of Music in Vienna and the Mozarteum
in Salzburg. I received a master's degree in organ and degrees in piano, piano pedagogy, and
orchestral conducting. And what about you? Concerning music, I have two Master degrees, One in musicology and
one in music education. But presently I focus
more on developing art activities as art teacher and surface pattern designer. But I always love playing
different musical instruments, such as piano, organ, harp and even accordion. But you know, Martin,
I really fell in love with your method of teaching
piano through improvisation and
creativity. Can you tell us more about the music you
compose and improvise yourself. I often perform improvised
music in concerts, church services, silent
movies and other events. I improvise in many
different styles. That could be in classical
or popular style,
or crossover between various styles. I also composed and recorded several albums of
music for relaxation, meditative piano music and music that creates
a calm and loving ambience. Many of my recordings are on YouTube
and can be found over my websites. I know you have
many students that learn with you piano improvisation
and composition. How do they make it?
isn't hard to accomplish. Piano improvisation
is not difficult. Just enjoy every
step of the process. And with the time, you will surprise yourself with what you are able to do. Many of my piano students
achieved great success in piano improvisation and
composed beautiful piano music. By practicing, you can reach
a level that listeners will believe that your music is written by a great composer. It is much easier
to achieve , than many people believe. And beside this: All who like to play
from sheet music will enjoy the music Martin
wrote for this class. Great. I can't wait to see
what you will teach us. Let's go inside of the class.
2. Materials: Martin, before we start, do we need something
special for this class? You will need a
keyboard or a piano. Any keyboard works? You can start out
with any keyboard. But for continued progress, it is helpful to
have a keyboard or digital piano with sensitive dynamic piano
touch and a pedal. Acoustic pianos of cause are always great. Thank you Martin. That's all we need
for this course. Please notice that we can also prepare some additional
resources for you and you can
download them from the project and resources
section of this class. You will find the button just
below this video player. See you in the next video.
3. Class Project: The project of this
class will be to play one of the little piano
compositions of this course, or one of your own
improvisations using what you have
learned in this course. You can record yourself and
and upload the recording on YouTube or another platform
you are familiar with. Then share your link in the project section
of this course. We will be happy to provide feedback and to answer
your questions.
4. The Pentatonic Scale and the Piece Chinese Garden: In the first part of our series "learn to play piano and create your own music", we played and improvised
music where left and right hand alternate. Now let us play music. where left and right hand
play together. For our first piece, we use. the pentatonic scale. Chinese music often uses
the pentatonic scale. The pentatonic scale
uses five tones, when the tone C is
the fundamental tone. then the other tones are D, E, G, and A. When you compare the C major scale with
the C pentatonic scale, then you see that the C major
scale has two more tones, the F and the B. First let us learns the piece
"Chinese Garden". You find all the music of this class in the resource
section of this course. We wrote the letter names of the tones below the
notated melody. In this way, you can easily piece. The staff
music notation we will explain in
the next video. Let us first listen
to the music. It will be helpful to observe the fingering included
in the music. The little numbers in the notated music show which finger to
choose for playing. In the first part, the left-hand alternates
the tone C and G. They right hand
plays the melody. A good approach for learning the music Chinese Garden is to first practice the right hand alone in measure 1 to 8. And then the left hand by itself
in measure 9 to 16. When you are secure in playing measure one to eight
in the right hand and measure nine
to sixteen in the left hand, then we play both
hands together. Let us do it first
in a very slow speed. I demonstrated this piece
played in a very slow speed. Sometimes one finds spots,
that need more attention. Especially to reach a good timing.
For example in the spot
from the end of measure one to the beginning of
measure two: The second eighth note, the tone A before the bar-line. This note should not be longer than the first eighth
note on the tone E. Both eighth notes should
have the same length. We find the same note values
at the end of measure 3 and 5, in the middle of measure six, and also at the end
of measure seven. Also in the second part from measure number nine to 16, you find several
spots where we have two eighth notes
followed by a beat, where both hands play
at the same time. When you are happy with your
playing in a slow tempo, then it's time to increase
the speed gradually until you finally reach the tempo of my fast demonstration of
the music Chinese Garden. It could be helpful to watch the demonstration of my
playing several times. After your music Chinese Garden, you could improvise
with pentatonic music. The first step is
to form melodies with the tones C, D, E, G and A I invite you to try out the various rhythms
for these melodies. For most people, it will be easier to play a melody
with the right hand. After your formed your melodies, you can add the tones C
and G is the left hand. You will notice
that the tone D in the melody harmonizes
together with the tone G. And the tone A
in the melody is better together with the
C in the other hand.
5. The Grand Staff: In the first part of our creative piano and
improvisation course, you learned the name of the notes and the
different note values. In this video, you will discover the grand staff that we use to write the notes
and their values. The grand staff is a
combination of two staffs. Each of them has five lines and four spaces that are
in between the lines. The note heads are either on a line or in a space
between the lines. Their position on the staff shows us which tone
should be played. The piano keyboard has a
bass and a treble range. Therefore, piano music
uses two different clefs. The treble clef shows the notes in the higher
range of the keyboard, and it indicates the
tone G. In treble clef the tone G is on the
second line of the staff. The bass clef is used for the bass or the lower
range of the beyond. The bass clef
indicates the tone F. The tone F is on the
fourth line of the staff. In treble clef, the 5
lines of the staff show the tones E, G, B, D, F. The spaces show the tones F, A, C and E. In the bass clef the lines have the tones G, B, D, F and A In the spaces the tones A, C, E and G. On the grand staff most of the time, the higher staff is
for the right-hand, and the lower for the left-hand. But there can be exceptions. The right-hand can
also play tones on the lower staff in case
it is easier to do so. Or the left hand could reach
into the higher staff. Often we find the treble clef in the right hand and the bass
clef for the left hand, But it could also be different. The treble clef could
also be in both staffs. And sometimes even the bass
clef can be in both stuaffs. Therefore, it is always
necessary to read what clefs are used before
playing notated music. Notice that you can
also find notes where the note head is placed higher than the top
line of the staff, lower than the lowest
line of the staff. For going higher or lower, notated music uses
additional little lines. We call them ledger lines. Here are some examples. In the treble clef, the tone
above the highest line is the G. On the first ledger line
will be the tone A, then B. And on the second ledger line we have the tone C. In the bass
clef at this position we find the toes B, C, D and E. Let's see now the notes
below the lowest line. In the treble clef we find the tone D under the lowest line. C on the first ledger line. Below, we find the
tone B. And the tone A is on the second ledger line. In the bass clef below
the lowest line, we have the tone F, then E, D and C. You'll find all of the notes of the grand staff on this chart. You will find the chart in the resource documents
of this course. It is helpful to
memorize the position of the middle C in both
treble and bass clef. In treble clef,
the middle C is on the first ledger line below the staff lines.
In the bass clef, the middle C, which
is the same note, is on the first ledger line
above the staff lines. We invite you also to memorize quickly the position
of some other notes. For example, the tone B on the middle line
of the treble clef, and the tone D for the
middle line in the bass clef.
6. The Sixteenth Notes: Let us divide the eighth
notes into two faster notes. This will lead us
to the 16th notes. The 16th notes are stated with
two flags or two beams. Four 16th notes have
the value of one quarter. There exist also sixteenths rests. You can see it here. You can find a chart we
the note and rest values in the resource
section of this class.
7. Create Melodies Accompanied by a Bourdon: We all know the
bagpipes of Scotland, The piper plays on one pipe and
and three other pipes sound at the same time. These three static
pipes don't change their pitch. The tones from
these pipes form the drone. The drone is also
called the Bourdon. Let us look at the piece, "The bagpiper from Elgin". To help you read
this music easier, we still include the
letter names for the right hand melody. But with time it
would be great to learn to read from the
staff music notation. The Bourdon is played with the tones C and
G. We repeat these notes in every measure.
This piece includes the 16th notes. I demonstrate this piece. When you are
learning this music, it could help to first
play the right hand alone, before adding the
Bourdon in the left hand. You could also improvise
your own bagpipe music, with the tones C and G
in the left hand. The right hand could start
out with the tones C, E or G. Or if you use a pickup, the first strong beat of
measure number one could have the tones C or E or G. We should end
improvisation with the tone C It is easier to first improvised music
that has no 16th notes. But then when you are
comfortable doing this include the 16th notes
into your improvisations or bagpipe compositions.
8. Triads: Music is built on melody,
harmony and rhythm. Let's look at harmony. Harmony in music is
built on chords.. The name chord is derived from the French word accord,
meaning to agree. Three or more tones played
together form a chord. A three-note chord built on
thirds is called a triad. What is a third? The third is an interval, or a three note distance
between two keys, including the first
and the last keys. We will speak later about
intervals. For the moment, just remember, that
the interval of the third has the span of
three letter names. For example, from C up to E, we have the interval of a third. From E to G, we have another third. The C major chord is made
of three notes built on thirds above C. That is
why we call it a triad. Now we are ready to build triads on every
single tone of the scale. Let us look at the
C major scale. And we will start by putting a number under each
tone of the scale, from one to seven. We call these numbers
degrees of the scale. Let's go and form trials on every tone of the
C major scale. The triad on the first stone, or the first degree is C, E, G. It is the C major chord. The second degree is D
The triad over it is D, F, A. We call it the D minor chord. The triad on the
third degree is E, G, B. It has the name E minor. The fourth degree
has the triad F, A, C, called F major. The fifth degree will
give us the triad G,B, D, called G major. On the sixth degree, we form the triad A C E, called A minor. And the triad on the
seventh degree will be B, D, F, which is called
B diminished chord. For the moment we will avoid using the diminished chord or the triad on the
seventh degree. We will explain the qualification
of the chords as major, minor and diminished in the
third part of this series. For the moment, we don't want to overload you with theory, and recommend you to
focus on playing by using directly the chords
of the C major scale. Let us turn back to the
degrees of the C major scale. After the seventh degree, we turn back to
the first degree, or the C major chord, C, E, G, played an octave higher. We can make a practical
exercise by playing triads. There are two ways
to play the triads. We could play the
three tones together. We call those blocked trials. Or we can play the
three tones separately, one after each other. Those are called broken triads. For a beginner pianist, it is easier for the
hand to start practicing the broken trials before we experiment with blocked triads, Let us play broken triads going up and down with the right-hand. We use the fingers 1 3 and 5. And then with the left hand with the fingers 5 3 and 1. Let us do the same exercise
with both hands together. In the next video you will discover a musical
composition built on triads. And you will also learn the
importance of the first and the fifth degree of the
scale for composing music.
9. Play a Piece Built on Triads: The next step is: To use in our improvisations
and compositions. the triads, that we
have learned. Let us start in an easy way. We look at the piece
"Singing River" We wrote the letter names of the tones only for the
left hand. Try to read the upper staff with the treble clef from the
staff music notation. It is very easy to read a triad in root
position on the staff. All the three tones of the
trials are either on staff lines or spaces. I used the word root. The root of a chord is a degree or scale problem on which a triad is built. The root position means that the lowest tone of
a chord is the root. In this piece, we use only
the root position of a triad. In the composition
"Singing River" you find the triads
in the right hand, while the left hand plays long tones. I demonstrate
playing this piece. It is a good idea to start
out practicing slow, as we usually do. Let us listen to a recording in a slow tempo. I hope, you don't tell me it is boring, because it is a good idea to
start out playing slow. As we gain security by
practicing in a slow tempo. By practicing, you will soon reach the speed of my
first demonstration of the piece "Singing River:
and you will be perfect in play it faster. The left hand has ties. Remember the tie means,
that you hold the tone for the total number of
beats of the two tied notes. We explained it
in part one of this serious. Measure 22 and 25, use exceptional fingerings
for the triads. The fingers 1 2 and 5. It might be a good idea to practice measures twenty-two
and twenty-three and also twenty-four and twenty-five more often. Just start out with the measure
22 and play until 23. Also practice measure 25 and 26 by itself. The more you repeat
certain spots, the easier it will be
to master them. With the time you will smoothly play the
whole piece in an equal tempo.
10. Harmonies and Structure of the Piece "Singing River": When you play the
music "Singing River" you discover that it
has four musical phrases. Each of the four phrases
is eight measures long. The first phrase starts with
a C major triad and ends with the tone G and B. G and
B represented G the major chord, or the chord on
the fifth degree. The scale of C major, the first degree is C, and the fifth degree G These two tones of a
scale have special names. The first degree
is called tonic, the fifth degree is
called dominant. The chords built on the tonic and the dominant are the two
most important chords. We encircled the tonic
triad and the dominant triad. Often music has
dominant chord tones as second-last tones before
an end on the tonic. As we are in C major, that adre the tones G, B or D. When we look at
the end of the piece, we see, it is actually
written this way. The piece ends on C. And before that, we find the G
major triad, the dominant. Let us have a closer look
at the four phrases. The first phrase
starts with C major and ends on G majorette dominant. The second phrase:
It starts with A minor and ends on C major. The third phrase starts with C major and ends on G. The fourth phrase: it starts in G major and ends
on C. First and second phrase are like one group belonging
to each other. Often in a group of two phrases, the first phrase ends
on the dominant, and the second phase
ends on the tonic. The same is with the third and fourth phrase. Both phrases belong to each other with one phrase
ending on the dominant, and the last one on the tonic. You hear the difference
between the ending of the first group, or
second phase on C major with the G In the right hand, and the final ending
of the last phrase, with both hands on C. When both hands play C,
it is like a final, ending, a musical conclusion. When we
play the C in the left hand, but the right hand either with G or E, we feel we have
reached our tonic chord, but we are still waiting
for the music to continue. Now let us look more
on the four phases: We discover that
other chords fill the spaces between the
start and end of the phrase, We see A minor, E minor and F major. D minor is not
used in this piece, but could be part of a phrase, and I invite you to use it in your own improvisations
and compositions.
11. First Improvisation Built on Triads: You have heard me
talk a lot about my little piece
"Singing River"
It is, time for you to
improvise with trials. We invite you to use various
combinations of trials. For the first step, it might be helpful not to think upon a structured
piece with phrases, but just try out and play
different combinations. You might want to
include also measures, where the right hand does
not play a broken triad. I did this in measure 13 to 16 of
the "Singing River". If you want, as next step, you
could create music, that is similar structured to the "Singing River"
12. Learn Another Composition Built on Triads: In this video, we learned
that song built on trial. I gave it the name of the app. You find the sheet
music for download. As in the music of
the previous video, bleeding through on these
electrode names of select tag. Try now to read
the left-hand from the staff music notation used selected names only as
how it's necessary. Before we places some of
the different fingering, further trials, we will use
the fingers Yvonne, fall. Contexts of music
accomplish the mission. Really traumas. Use figures 135 fought, try it via to
demonstrate, we assume. And now you can watch the triads BC fingers thought
to one in the left-hand. Next we played both
hands together, use even button to fall. Now let us listen to the song. View is it will be half-full to the figure we
treated waste in music. You will discover that the music of the
sum of the Alphas, again based on triads. Triads is right, just in a
different order than before. The right type of place in middle node of the trials first. Sometimes the triads up plate
going from the top down. Again, I suggest that you
play it first slowly. Demonstrate playing this
piece in a slow tempo. It will be helpful to watch the demonstration of my playing, the sum of the
self-settled times. Probably you will prefer demonstration of
the fastest speed. After GF learn some of the, you could go ahead and improvise mom music built on trial. You could use a trial in a similar way as I
use them in the sun.
13. The Dominant Seventh Chord: The chord we will learn today is called the dominant seventh. It sounds complicated,
but it is not. Let us go to the fifth
tone of the C major scale. It is the tone G. Remember that the fifth tone
is called the Dominant. Now we play the triad over G. This is G, B, D. In order to form
the Dominant Seventh, we need to add the seventh
tone over g, which is the f. The whole chord
together is G, B, D, F. The chord G B, D, F is also called
the G7 chord. The Dominant Seventh chord
is used a lot in music. Often it is followed
by the tonic chord.
14. Learn the Piece "Melodies from Bavaria": The next piece includes the
dominant seventh chord. I gave this piece the
name "Memories of Bavaria", as it is in the style of Austrian of Bavarian folk music. Let us listen to the piece. in order to learn it as usually we start out by learning it in a very slow tempo. I demonstrated it. In measure three to six
we play the chord with the fingering 4, 2, 1. We rehearsed this fingering in video ten. The right hand
shifts position in measure nine and also
from measured ten to 11. When you take some time
to practice measures nine to 11 for themselves, you will be able to
play them easily. We aim that oll beats
are equal in time. When we play a piece
for the first time, this usually does not work. But when we practice the more
demanding spots more often, we will soon accomplish to play the entire piece in
the same tempo. It is helpfull to discover the chords that I
used in this music. In this way, you will
understand the harmonies and you will be able to improvise and compose your own music easily. As the chords are distributed
over both hands, we need to look at the left and right hand at the same time. Start reading the
chord from the button note. In the first two measures, you will find the tones of
the C major triad. Remember, the C major triad is the
chord over the tone C, And has the tones C, E, G. The tone C is
in the left hand, while E and G are in the right hand. In measure three to six we play
the dominant seventh chord, G, B, D, F, also called the G7 chord. The tone G is in the
left hand, and B, D, and F are in the right hand. Then measure 7 and 8 go back to the C major chord - C in the left-hand, E and G in the right hand. In measures 9 and 10, you will
find the F-major triad. Remember the tone F is the fourth
degree of the scale. You find the F in the left-hand, and F, A, C in the right hand. You see that this music
uses only three chords, C Major, F major, and the G7. This is typically for the folk music from the
Bavarian, or Austrian Alps. These three chords, C, F, and G or G7 are the main chords
belonging to the C major scale.
15. Improvise Using the Dominant Seventh Chord: Now it is your turn to include the G7 chord in
your improvisations. You could do it as I did in my piece, "Memories of Bavaria". Just use the tones of the chord. You could play them in the
right hand in broken form with various rhythms in an
order that you would enjoy. In the left-hand, you
could either play the root of the chords, or if you want also other tones of the chord. Remember, C is the
root of C major, F, the root of F-major
and G the root of G major, and also of the G7. When you limit the chords to C, F, G, and G7. The music may sound similar to certain European folk music. When you include other chords, the music will get
another character. Just go on and
improvise and try out various combinations
of chords and see how the music will sound.
Best is to end the music on the tone C both
in the right and left hand. First try out very simple with C, G, G7 and the F-Major chord. We start out with
the C Major chord. I always use the root
in the left hand. What did I do there? I started out with C, then G7 and then C again. I play it again. Now the music wants to go
somewhere else. Let's go to F Here the G7 again - now again F. Now let us try out to also include
the D minor, the A minor and the E minor. Now, let us include
some syncopation. Remember the syncopation was first an eighth notes, then a quarter note,
and then again an eighth note.
16. Helpful Tips for Improvisation: When learning
improvisation, it is helpful to try out many
different combinations. Don't be disturbed. If some of your improvisation don't sound perfect
in the beginning. That is normal and part
of the steps of learning. We explain in
the next videos of this class, several
non-chord tones. We invite you to learn all
the elements we explain, experiment with them and
make them part of your own. Later, when you have
gained experience with all the elements, that
we learn in this class, you don't have to think anymore closely upon
individual subjects. You don't have to think
anymore. What is this? What could I do there? All is part of
your own expression. And you can follow the melody. You can follow the harmony. You can follow the
imagination of your heart and your minds. And if something
didn't turn out so well, it doesn't matter. Don't stop the piece. Just build the music upon
which you have played before. Music can involve. Musicians that are good in
improvisation have learned to
build the music, upon that, which
they played before. And let it just involve
as one beautiful piece. No matter whether one little
part was so good or not, the whole can still be a very nice music, a very
beautiful improvisation. The music that we
learn for this class, often has a specific musical form. We learned about the
ternary form in part one of this series. In improvising, it is not necessary to give to the music always a certain form. A lot of beautiful music
has no form at all, and is very free. In order to improvise
music with a certain form. It is necessary to
memorize a certain part, so we can repeat or play
something similar. If memorizing is easy for you, then it is nice to
sometimes include a certain form into
your improvisations. Otherwise, just create the
music that you like to play and that gives you the
greatest joy in improvising.
17. Neighbour Tones: In the compositions of
the last four videos, we used only chord
tones to build a music. Now, let us explore
how to use tones that do not belong to a chord, that is used
at a certain time. We call those non-chord tones. One of the non-chord
tones is the neighbour tone. The neighbour tone can
either be a step higher or lower, than the original tone
belonging to the chord. And it occurs between
two stable notes. You will find these examples in the download section
of this course. Let us first look at
example number one. In measure one, the left hand plays C and the right hand E. The tone E belongs
to the C major triad. The second tone of this
measure in the right hand is D The tone D does not belong
to the C major chord. When you play the D
together with the tones C in the left-hand, you will hear it is dissonant. That means C and D do not sound pleasant ,when played
together at the same time. But by going from
the E down to the D, and then back to the E again, the D sounds perfectly good. It is called neighbour tone,
because the D is the immediate neighbour to the tone E. Did you find all the neighbour
tones in this example? Now let us discover the second example: It has
upper neighbour tones. That means we go to the next higher tone and then come
back to the original tone. You could also play this example on your piano or keyboard. Example number three has neighbour tones,that are either on a medium
or strong beat. Do you remember, we learned about strong and medium beats in
part one of our series. If you are not at ease
with this notion, go and check our course
"learn to play piano and create your
own music part one". Back to example number three. You notice here, that those
neighbour tones that fall on a strong or a medium beat
are on an accented time. You'll hear that the
accented neighbour tone on beat one of measure six sounds a little harsher than the
other neighbour tones. Let us listen to this example. Now you know everything about
neighbour tones. Use them and experiment
with them because they are an important element to
include in our improvisations.
18. Learn a Piece with Neighbour Tones: The piece, that we learn in this video,
I call. the "Flower Song" It is an example of a
little composition that has several neighbour tones. You find the sheet
music in the download section. Let us listen to it. You discover neighbour
tones in measure number 1, 3, 5, 6, 7, 9, 11 and 13 and in the repeat of the first section
from measure 33 on. You will notice: The music
has ternary form. The middle section starts
in measure 17. The first part repeats
from measure 33 on, just played one octave higher. You need to pay attention to the clef change in the left hand in measure
number 33. The treble clef sign before
measure 33 indicates, that the notes are notated in the treble clef until
the end of the piece. That means the left hand plays
in measure 33 the middle C. In measure number 45 and 46. you find the tone
G below the middle C. When notated with
the treble clef, this tone is written below
the second ledger line. You could start playing
this piece single-handed. That means you first
play the right hand by itself, and then the left hand alone.
And of cause play this piece also slowly. I demonstrate it played
in a very slow tempo It is a good idea to
make a special practice for the spots, where the hands
shift positions. Especially the big jump in the left hand from measure 12 to 13. One could start out in measure 11 and play
until measure 13. You will gain security by repeating this spot
several times. If you want you also
could place this measure first with the left hand alone. The same practice you
could do with the shift of the hand position from measure
20 to 21. In measures 29 and 30, you'll find the tones of the dominant seventh chord in the left hand. The broken chord in
the left hand played with fingering five,
four, two, one might also need some extra practice
until you will play these measures in a
smooth equal tempo. In the left hand you find
triads in broken form. Broken chords are a good way
of accompanying a right hand melody with harmonies. You
discover broken chords with quarter notes, for example in measure number 17, 19 and several other measures. Or with half notes
and quarter notes, like in measure number 3 and 4. In this piece, we find eighth notes, quarter notes, half notes, and dotted half notes. Our goal should be that we play the whole piece with an equal beat regardless
what the note values are. Two eighth notes
together should have exactly the same time
value of one quarter note. We should pay attention, that the half notes are as long as two quarter notes. After you know how to play the "Flower Song" in
a slow tempo, increase the speed gradually
until you finally have reached the tempo of my first
demonstration of this piece. The "Flower Song" gives to you some ideas how to
use neighbour tones. We invite you to experiment
with your own ideas. And improvise and compose music, that includes neighbour tones.
19. Passing Tones: In this video, we will
speak about passing tones. The passing tone is a tone that does not
belong to a chord, just as the neighbor tone. The passing tone is used in a stepwise progression and it is played between two
different chord tones. Let us look at the
examples for passing tones that you will find in the download section
of this course. You see that the
first measure has tones from the C
major chord, C, E, and G. And there are two tones that don't belong
to the C major chord. These are the tones D and F. They are in-between
the chord tones C, E, and G. The melody progresses stepwise upward. in measure two the tones E and G are
the passing tones because they do not belong
to the chord of D minor, which sounds in this measure. In measure three, we
find the G7 chord. The tones E and C do not
belong to this chord. These two tones are
also passing tones. But this time in the stepwise
downward progression. Let's look now at
example number two. Here we find, that the tone F is a passing tone on the
accented strong beat one. It is called accented
passing tone.
20. Learn a Piece with Passing Tones : Le us go to the music
"Melody for Stella " You find the sheet music
in the download section. Let us listen to the piece. This little piano compositions includes passing tones
as well as neighbour tones. The tones of the triads are
often distributed throughout both hands Measure number one starts
with the C major triad, C and G are in the left hand. The tone E is in the right hand. So you find all three tones of the triad. The same is the case
for the next triad This D minor, D and
A in the left hand, F in the right hand. Also here, we have
the complete triad, D, F, A, when we consider
both hands together. When we look at
measure number one, then you find two passing tones. The tone F is the
right time, or beat 2 and the tone E in the right hand on
beat four. You find many other passing tones in this piece,
for example the tone F on beat two of measure number three . It a good idea to
learn this piece first single handed. I demonstrate the left hand. It will be helpful to also
play the right hand by itself. When you know the piece single handed then play the hands together - first slowly. In measure three, we cross the
thumb under the hand. It will help to practice
this spot for itself. And also to focus on the
move down to the low E in the left hand from
measure three to four. In measure six, the
hand crosses over the thumb. Also, this spot will be
easier to accomplish, after you have play
it several times. With the time you will reach the tempo
of my first demonstration of this piece. At the end
of this composition, you could get a
little bit slower. Often music gradually slows
down before the final tone. Just as in previous pieces. We find the G7 chord
before the final tone C.
21. Improvise with Passing and Neighbour Tones: Now let us see what we can do to improvise
with passing tones. Let us try out several
different examples. For example, we play
things like that, You see. I had the passing tone between E and C And then I jumped up to the G to get
the complete C major chord. Here I used the G7 chord
starting G and F. So we had a posse tone
between F and D And also a passing tone
tone between D and B. Let us try out some more option
of simple elements for improvisation. Or we include also neighbour tones. And if you want, you can also play a little faster passing tones. What did I do there?
I played the tones of the C major chord with two
passing tones. Now, the tones of the G7 with two passing tones. For this is a G7, f, d, b, and the g in the left hand. And then I put the passing tones in
between. Here C major... And do you remember the syncopation? Let's try it out. It was an eighth
note, a quarter and then again an eighth notes.
22. Sharp, Flat and Natural Signs: So far we use only
the white keys. Now we will include
also the black keys. Let's first see how the black keys are
notated in sheet music. There we find two signs, the sharp and the flat sign. In notated music, they are placed in front of the note to which they belong. The sharp raises the note
a half step higher, which means that we should play the next key to the right. Usually it is a black key. The F sharp is the black key at
the right of the F, The G-sharp, the black
key right as the G, the A-Sharp, the
black key right to the A. Now, what should we play when we find a sharp
sign in front of a B? There is no black key directly
on the right of the B. The immediate neighbor key the right of the B is the
white key of the tone C So the B-sharp on the keyboard is
identical to the tone C. Now, let us look
at the flat sign. The flat lowers the
note with a half step, which means that we should
play the next key to the left. The B-flat is the black
key left of the B. The A-Flat, the black key
left of the A, the G flat, the black key left of the G, and the F flat is on the keyboard identical
to the tone E. Train yourself to find all the flat and sharp signs for every tone on the keyboard. For example, where is the
E-flat, D-flat, C-flat. Now, where is the C-sharp, the D-Sharp, the E-sharp. In this class, we will use only sharp signs indicating
to play a black key. Here's an important rule. When a sharp or a flat
sign appears in a measure, it carries for the
rest of the measure, but it is no more valid. after the bar line, I show you an example. In this measure, the sharp sign is only placed
before the first G. But as the sharp sign is valid for the rest
of the measure, the second G has to
be played as G-sharp also, even if the sharp
sign is not repeated, The same with an F sharp. In the next measure, the sharp is written only
in front of the first F, which means that
the second F in the same measure should also
be played as an F-sharp. After a bar line
starts another measure, and the sharp or flat sign from the previous measure
will be no more valid. For example, here, the D
sharp is only valid until the bar line. In measure two the fourth note is the
tone D on the white key. Now let us look at another
very useful sign: The natural. The natural sign cancels a sharp or a flat. It is always a white key. And in notated music, it is also placed in front of the note to which it belongs. I showed you an example. Let us look at measure four
of "Ride Through the Prairies". It is the piece that you
will find in the next video. The second tone in the right hand of that
measure is a D-sharp. But in front of
the fourth tone, we have a natural sign, which means that here we will play a D natural
on the white key. Sharp, flat, and natural signs are
also called accidentals. Often we find sheet
music where accidentals, in particular sharp
or flat signs, are notated after the clef sign at the front of the staff. These sharp and
flat signs indicate that the accidental is
valid for the entire piece. Or as long as there is
no change of sharp, flat and natural signs shown. We call this key signature. In this sheet music of an advanced piano
composition you see a sharp sign after
the clefs in each staff. All F notes in this piece
are played as F-sharp. Later, the key
signature changes to two sharps, F-sharp and C-sharp. That means from that spot on, all F and C tones should be played as F-sharp and C-sharp. There are measures where one
should play an F natural because it is indicated by the natural sign in
front of the note. In this class, we play
only music in C Major. That's why you will not find accidentals after the clef
sign in front of the staff. Keep on going to
the next video where you can apply what we have
learned about the accidentals.
23. Learn the Piece "Ride through the Prairies": Let us look at the composition
"Ride through the Prairies" You'll find it in the download section. Let us
first listen to my demonstration of this piece. The piece starts with
the C major chord, C and G in the left-hand
and E in the right hand. The second tones that we
play in the right hand is a D sharp. The D-sharp is the black key
between D and E. When you take a close look, you see the D-sharp
is a neighbour tone. This time, the neighbour tone is the next black key to the left. This piece has many
neighbour tones that use the black keys.
In measure two, we find a passing tone on the
back key, C-sharp. Actually there are
two passing tones connected
right to each other. One is C and the other C-Sharp. The character of
this piece is formed by the use of neighbour
tones and passing tones on black keys and also
by syncopation. We explained the syncopation in part one of this series. We find it in
measures number one, 11, 12, 15, 17 and 19. Before
we learn this piece let us listen to a
demonstration in a very slow tempo. It is a good idea to
play first, right and left hand single handed before we play it
hands together. This piece has staccato notes. The dot under or on top of the
note-head shows that we should shorten the notes and
detach them to the next one. The slur indicates a smooth
connection of the notes. This music has often slurs
connecting two notes. That means the first and second
notes are sticking together. But the second note detaches to the third note. Let us look at the left hand. It always has two tones playing
together at the same time. In this piece, the two tones form always the
interval of a fifth. The interval of a
fifth is created by counting five tones
on white keys We also count the first
tone, that we play, and the last tone, that
we play. In this piece, we should play this interval with the thumb and the
little finger. You discover that these
two tones are always first and third note of a triad. The left hand does not play
the middle note of the triad. But most of the time we find the middle note of the
triad in the right hand. You can discover,
that the fith by itself, often sounds empty. But if we have the middle tone
of the triad in the right hand, then we have the full complete rich sound of the triad. Measure three has a
dominant seventh chord. We find the tones, G, D, F, but not the B. A dominant seventh chord
can either be complete, having all four tones, or it could just be three tones, G, B, F, or G, D, F.
24. Improvise with Neighbour Tones on Black Keys: S Next, we could
play police stations that a US naval black keys. I demonstrate. The next site. You see in this example. I started out with
the left path alone. Live the rest. I proceeded to G major
with, as they talk. F major, G sharp as
a neighbor tone. Later, I used also the D-sharp. Go on and try out what
neighbor tones on black keys you could use
in your employees safe.
25. Appoggiatura: In this class, we will speak about another
non-chord tone. It has the Italian
name of appoggiatura. The appoggiatura is always
on an extended time. It always moves
towards the CTO by one step or a half-step,
downward or upward. Most of the time
it moves downward. We call this move Resolution. Contrary to the best asymptote
and the neighbor tone. It can also be
approached by a leap. By the way, the approach to an appoggiatura is quite free. An example, I will show you
the beginning of the piece, little volts, which you can
learn in the next video. Let us listen to the beginning
of the little vaults. Number to the court. The major, C, E, G. That is the non-court tool. It is an appoggiatura, moving down by a step to the tone G. In
measure number three, the court is the G 7th
colored with the tones G, B, and F. Hear the tone C is
obviously a non-chord tone. It is an appoggiatura, which results down to the
tone be imagined number for. The chord is a minor eight CE. The W G is an appoggiatura
that results to the sea. In these three measures, you can see that
the chord tones are distributed over all the
three beats of the measures. As you already know, B12 is an extended time
and the appoggiatura, in this example,
false on beat one. In all three measures, we find that a melody leaps
into the appoggiatura. Whatever we are in
full floor time than the appoggiatura could also be on beat three of the measure. When we have eight nodes, then the appoggiatura
could be on the first eighth note of a beat. We see in all the examples that the resolution
is an a week time. Often the appoggiatura is split stronger and the tone of
the resolution software. In the next video, we invite you to learn
the piece, little volts.
26. Learn the Piece "Little Waltz": In the last video, it just counts the beginning
of the piece isn't waltz. Now this is a composition. You find the sheet
music is tau seconds. When we look at the sheet music, then we see that the
left-hand test, two paths. The lower part is stuck, taped it with stems
going downward. The notes of the upper part
have the stems going upward. Let us look at
measure number two. The notation indicates
that we should sustain, denote see that we
play on beat one. It should be held
until the end of B2. That means it's a C in
the lower left-hand part, continuous to sound, plays a second node
of the left hand. The total E. The
E replay on beat two beat provided we
find the rest above the lower node C. This rest shows
that's a higher part of the left tag does not pay anything by replay the
left-hand see on B2, B3, if I'm to vests, lactate it on top of each other, because both paths have arrest, we can discover similar
sustained left-hand nodes in many measures of this piece, I demonstrate the left hand. Best is to learn the
left-hand byte itself. And to pay attention
to halt the law though it's off the left-hand
as long as indicated. In measure eight, we hard to see that replay on deed provided
for fly-bys in measure 18, be hard too deep for six feeds. Also, in the following measures, we see that the nodes this is stemmed down but
have the value of six beats on the second
beat, replay another node. It is a tone, a in measure number
18 on deep to. It is hard for five beats. The same length has an F
and B to measure Napa, trend T, and a G in measure 22. It will be helpful to practice the crossing of a
measured number line. Also the shift of the
hands for measure number nine to ten, several
times itself. That's a spot that you might
want to practice on its own, is a move of the left
tag from ten to 11. And also the move of them
might tag it measure 12 to t. In this way, you will get in security
of these methods. Let it will be easy to place an entire piece in
an equal tempo. This walls has many
a project to us. In measure 18, be find an appoggiatura that
repeats its tone. A stepwise resolution is
in the following measure, 20 been appoggiatura
term g is trice, end the resolution
chunk f is also twice. We find the same emitted
2020 environment. The upper deck to R times C and resolution in turn
be a plate twice. Also measures 2223,
a similar tones, F and E being paid twice. This piece has turned away from the mid section
stats and measure 17. It pete of section a, stats in measure 30. In the little girls, we have the opportunity
to learn dynamics. The piano, Thom, sounds
louder when we press stronger and softer
and you play Jenga. In our worlds,
generally beat rarely split stronger than
the beats 23 softer. When we have the appoggiatura, it will be beautiful to plan additional
dynamic difference. The aperture two
electrons should be strong and the
resolution tones soft. Also observes the slurs. It needs to be fancy slash slash money because next project
tool to gather.
27. Improvise using Appoggiaturas: Let us includes the
aperture to police, say, just experiment these
various combination. Play an example. First C major, then
G major, C to B. C to B, farmed out. To that. I'd like to again, to upload that to be
in the right tab. We see Hall measure, long haul measure, phase
it, except the lines. In the middle part, I had several outputs
at two hertz. I started out with D to C, an AMI that in the left-hand experiment, this is what you find can be
done until I put a 200 is a natural part of your in police
stations could create a conversations that have
a specific structure. Now let us do it different than the first time when we created equalization is for phrases. Remember at that time we had to first phrase and a G-major, the second phase and on C major, the fat face, and on G-Major. And the fourth phase and C. Now you make different
phrase endings. Last phase always ends on see. In the example that I will now
play off of phrases and on C major could get its fire as acceptable
and create your own. In previous sessions. I used in this
improvisation cards into left-hand rebuild on law
about lefthand cop peptides. In part three of our CES, you've got to take piano
and create your own music. Try out various combinations
and practice the Alabama's. Next we have for you
out in this class. With time, you will build
all the elements and combinations into the massive
memory of your fingers. They will become part of you. Your fingers will naturally do. You will get more light, is, is creating improvised music. That you don't have to think any law upon two
different elements. You can just follow the flow
that comes from within. And your fingers will respond.
28. Final Thoughts: Thank you for watching this
class and congratulations, you have completed it. You learned about
music notation. You experimented with chords and discovered non-chord tones. You'll also learn to play
several PAM or positions. If you have new tools for
improvising on the piano, we encourage you to practice the pieces of his class
and give you a feel happy. And it is, is playing them. And we invite you
to experiment with your own improvisations
until they are like little beautiful
piano compositions. Don't be discouraged if it takes longer to
accomplish certain steps. That is novel. Don't hesitate to reach out to us if you have any questions. We also want to invite
you to record yourself playing one of the compositions you can learn in this class, or to make your own
piano improvisations and upload them in the project
section of this course, we'll be happy to
provide feedback. Impact free of CSeries, you will learn more about cards, how to use a damper pedal, more about major and minor. And you will discover new
piano compositions and further steps to proceed
in piano improvisation. In order to be in farm, when we release a new class, we invite you to click
the follow button. If you want to discover more about us and margins
compositions, you can visit our
website under a music art.com and some
surprising spirit.com. We also offer individual
music lessons for those who would like to have one-on-one in-person or online lessons. We hope you have enjoyed
this class and be really happy to see you in some of our awesome USE
can have classes.
 Stella and Martin Anderle, Artist and Musician,