Transcripts
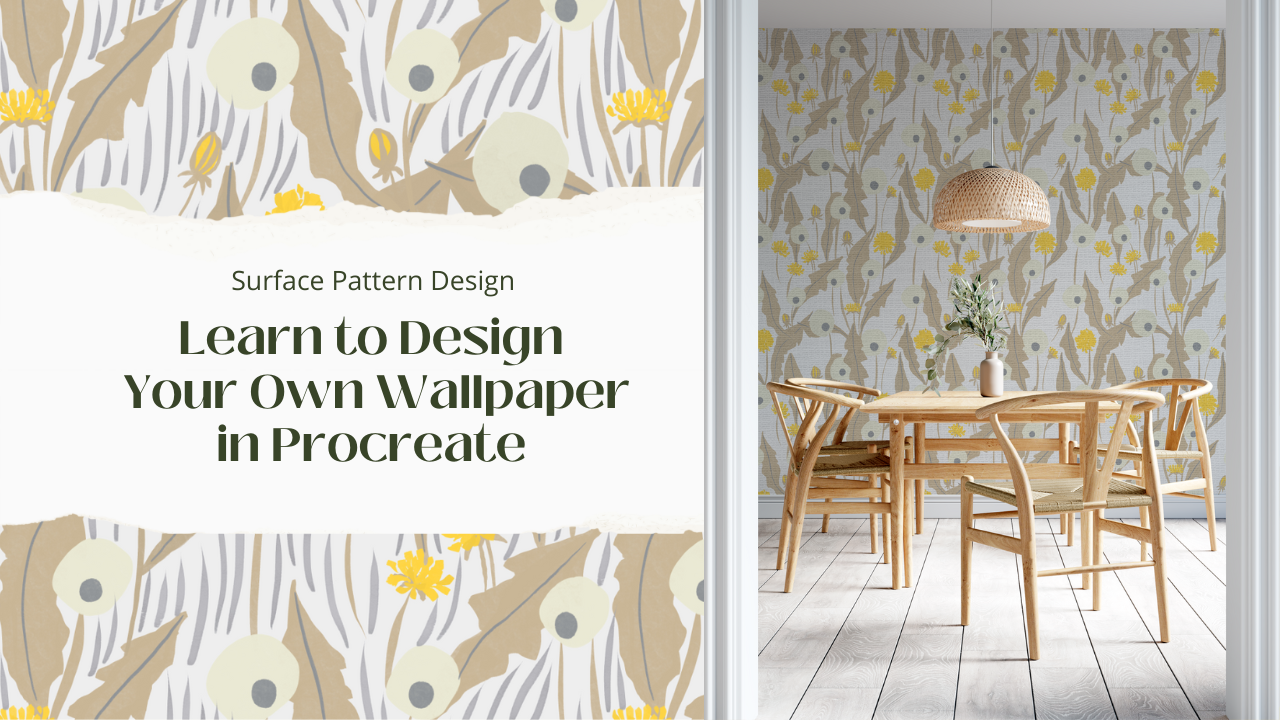
1. Introduction : Have you ever dream of your wallpaper for your
droom with your own design? Have you ever wondered
how to design your wallpaper even though
you are not designer, it's super easy now to make a wllpaper with
your own design, with an iPad and Procreate. And let me show you how. Hi, I'm Phuong Lempinen an illustrator and surface pattern
designer living in Finland. I design patterns
in my daily life from simple to complicated one, I can make pattern in different softwares such as
Photoshop and Illustrator, Affinity Designer
and Procreate. Procreate in my most
favorite software to pattern because of its convenience and I can make pattern
everywhere on my iPad. There are many ways to
make pattern in Procreate. But in this class, I'm
just going to show you the easiest and relaxing
way to make pattern And if you are a
beginner in Procreate, you can also follow
along easily. I'll show you some
basics tools of using Procreate and
step-by-step how to make your first pattern
and then upload it to Spoonflower to order
your first wallpaper And all you need for this class
is an iPad, Procreate app, and of course, Apple
pencil or any stylish. So let's have fun together
and see you in the class.
2. Class project : For the project of this class, I would like to see your first pattern and you can just follow those steps in the class to show off your design here in the Project section, you can also post the mockup from Spoonflower site by taking screenshots and upload your screenshot here. For the resources of this class, I've prepared for you a document which is a kind of theory how to make a repeating pattern. A pack of brushes that I'll be using in this class. A pack of elements that you can use to make your own pattern. But do you remember it is just a personal use. So if you have Photoshop, check out the link in the Project description below where you can find a free mockup to show off your wallpaper design. I would be super excited to see your wallpaper installed in your house. So if you do that, please, please, please definitely share with
us in the Project section and I would like to see how your final products come out. So now let's jump into the class!
3. What is repeating pattern?: Hi, In this lesson
we're gonna learn about what repeating pattern is and
what is made traditionally. So if you are familiar with
the repeating patterns, please skip this lesson, yeah, I just think maybe it
will be easier for some people when they
can see on paper. So in this lesson, I just
want to show you how a repeating pattern can be
made in a traditional way. And we actually going to make our repeating pattern
in digital way anyway. And I hope it can help you understand better
when we work in Procreate, when we need to move our Canvas. But it actually a later lesson. So let's start
this lesson. Here is what we need in this lesson, I have, this is kind
of perfect squares. And just a maker or any pen I don't know, or even pencil it is up to you and any
kind of scissors. And you actually need a tape. I actually didn't find
any better tape so I'm gonna use
it in this lesson. In digital We can this square canvas
to have a repeating pattern we're gonna
make these edges at the top and the bottom repeated. And the edges from the left
and the right repeated So let's draw some circle here, or flowers or rectangles
or anything that you like. I'm gonna just draw
a flower here. And remember that you
don't touch the edges. Smaller. Like this. Don't touch the edges. Just something that goes together like this but yeah, I think it's perfect for me. So now we're going to
cut it into four pieces. I first we're gonna, we're
gonna make it like this. We need some lines. I'm going to cut
this into four pieces. It's actually like this. Okay, So we have now
four pieces like this. And the original was like this. So now we're going to, now we're gonna move the edges here and here to the center, and the edges at the top and
the bottom to the center. So how we can do that? I'm going to show you, I'm
gonna move this like this. And the same with this one. Then we're going to just move,
change the place of this. So you can see that now the edges at the left and right are repeated at the edges
at the top and the bottom are repeated Now we're going to use the
tape to make them together. You see the center is empty. So we're going to fill
it with the same motifs. Continue to draw until
you pleased with it. Okay, we got, so we've got repeating tie here. If you put the same tile next to each other it's gonna
never end. So it is just the example. And these tiles I actually
scanned from the original, so I didn't draw it
really accurately. So you see, this's just example
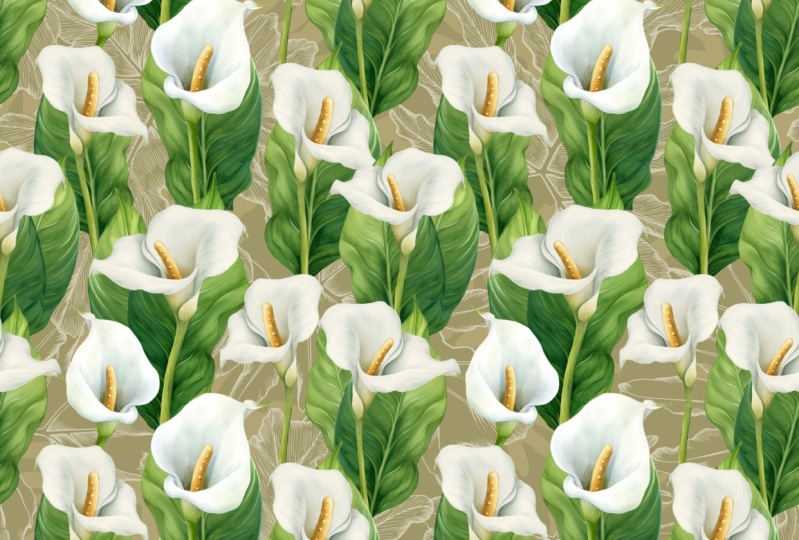
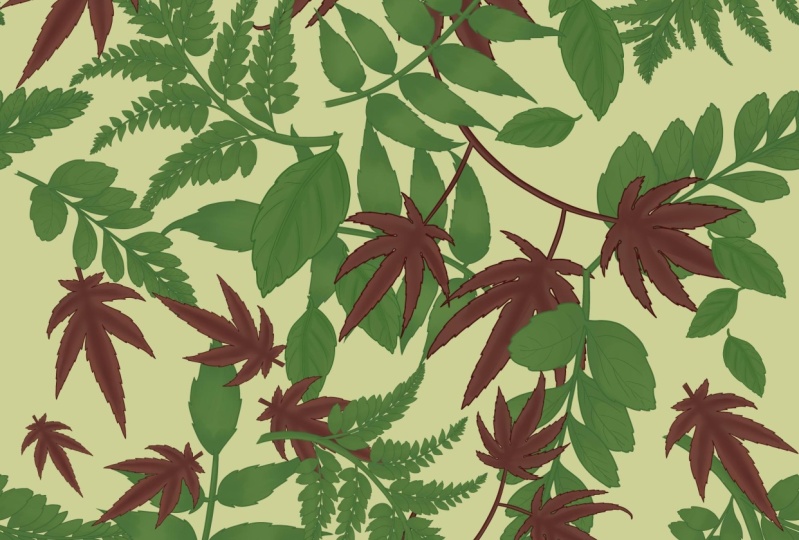
From the repeating tile, We can make a lot of things for fabric, wallpaper I can show you some of my fabrics with the repeating tile that
I make from Procreate. Or you see some tiles of mine on different fabrics. So we just got our
repeating pattern on paper and I hope you understand how
a repeating pattern made. So see you in next lesson!
4. A basic beginner’s guide to Procreate: This is really a quick guide to use Procreate for beginners. So if you are familiar
with Procreate, please skip this lesson. It is just short
introduction to Procreate. You can use some tools to
help you work with Procreate. We need to make a new file. Here at the top right you
can see a plus button. You are on the size
of Canvas that I have used. Tap the plus button
at the top right. And it will bring you to the custom canvas where you can set the size of your
choice and resolution. DPI of your canvas. And three hundreds 300 DPI is the high resolution
of an artwork for printing. So I recommend you also use it. And let's make a Canvas with 3000 x 3000 px I have this here, but
just fill it, like this. The maximum layers will vary depending on
file size in DPI, also depends on your iPad. My iPad is iPad Pro with
500GB memory, so it gives me 70 layers. But actually it's a lot. Make sure you also
choose pixels here. This one. Here at the color profile, you can choose
the RGB or CMYK file, but we aim to make our
wallpaper with Spoonflower. So on Spoonflower we can send our file
with RGB profile. So let it be at RGB. And yeah, and then just create. Now this white is your Canvas Under the left, the
bar with 2 sliders The top slider, we change the
size of your brush strokes. While the bottom slider
will affect the opacity of your strocks. Tapping the small square in
the middle will allow you to utilize the eyedropper tool, which will let you pick a
color from your Canvas. Actually, I don't use tit much
because I just touch to the screen to pick a color
from a photo or any sources. Okay. Beneath that, there are
some undo and redo. buttons So let's talk about the
tools for drawing first, and that's on the main
tools that you use, often all over your
process Let's look at the top right. Here is the brush library, Smudge, Eraser and
Layers, and then Color. Click on this circle. You can change your color to the new one by
tapping another color, another color here, or
you can choose it here. The most used in
the Palette here Tap it Here at bar shows
your color palettes. You can save your color palettes that you want to use here. Here is a little plus, here. By this way, you can create
a new color palette. Yah when you tap this, you can choose the
color from your canvas or any sources that, and then add it to your
color palette here. Or you can add any photos and the Procreate will
automatically make it for you. Or from file from photos. Yeah, these functions, it
actually depends on the iPad, but I actually use a lot
the "create a new palette" And I just pick my
color by myself. Okay, choosing,
choosing your color, I am going to use this one. We just chose our color Now, let's choose Brush go to Brush Library. My favorite brush pack
from Procreate is the Inking here. And my favorite brush from this pack at
this moment is Tinderbox. I call it tinderbox
are tiderbox. I don't know. Yeah. This is the original. And you can see the Tinderbox
2 or Tinderbox 1 they are the custom brush that I make from
the original one. It's easy if you are
interested in making custom brushes in
Procreate by yourself. Check out my two other
classes on Skillshare. So let's make a
stroke on the canvas. Like this. Something. If you want to
adjust your stroke, you just slider
from the left side. Yeah, you can make it super small like this or
you can make it bigger. If I try with another
Tinderbox brush that I have custom, then this's gonna give me even
bigger, bigger stroke. You can choose
other brushes from other from other packs
that procreate offers. Smudge Smudge tool also has different brushes for
you to choose from. And it depends on your projects. You will need to use this tool Then eraser. Eraser tool has the
same brush library for you to choose from and
depends on your project, you will need different brushes. Now, the Layer one, the Layers where you also
use a lot in your process. You can make your
canvas transparent by unchecked the
background like this. You can add a new layer by
clicking the plus button. Like this. You can also hide
any layer if you want by just unchecking
the box of that layer. Now, move to the
left of your canvas. Gallery brings you back to
the Procreate interface. And the first one is the
Actions tool, let's tap it. Here. You see the action tool, you actually have
different functions here. But here the most used
buttons is Add and Share. With the Add button. You can do these things Insert a file, Insert a photo, photo at texts. I'm going to show you
how it works when we're going to make our work. But now I'm just talk about
it a little bit like that. With the share button. The share button allows you
to export your work in the format that you need
Artwork is often exported with Pdf or JPEG or PNG file. If you want your artwork
with transparent, remember, just to uncheck the box of the background layer
before you go to Share. By the way, if you wonder, if you have a dark
interface now And you wonder how to have a
light interface like mine. And go to this Preps here and then turn on the Light
interface like that. And you can have the same
interface, alright, mine. Yes, Right-hand
interface for moving the slider from the left
side to right side. And it's up to you. It works for me
when the slider on the left Let's move
to the Adjustments. Here are different effects
that you can use depends on your project is
not for beginners, so you can take a look
at it by itself and use it when you feel free
using Procreate. Let's go to another one. The Select button. When you tap it,
the Select button helps you select the element
on one layer, I often use the free
hand tool and copy paste It will copy the selected
element to another layer. Let me show you. Use your Apple pencil and
just circle one element And my sure that on the
layer that has that element. So I'm going to choose
the layer one here. And let's tap it again. So I'm going to tap it again. I'm going to circle it again. Now. The Copy paste is on is active, I just tapped
copy paste And now you see I have the same elements
in another layer. this's just a copy from
the original one, but it works the
same. The Arrow here. helps you move your elements around the Canvas.
Let me show you. I'm going to turn on the Select. First. You need to choose the element that you want
to move around the Canvas. So you need to circle
anything I think I want to make another element actually can
make two element like this. And then the arrow here helps
make them active like this. You see? Now you can use your Apple pencil and
just, just move it around like this makes sure that it is in Uniform to
keep the form of elements. So if you go to Distort you can also move it around and make it
bigger or smaller, but it distort
form of the elements. And what the uniform do is just, when you want to make it
smaller or bigger. The form of that
element doesn't change. Free form. This Free form is
actually changed by the pressure or by the
movement of your Apple pencil. You see? So that's all about the basics
of procreate for beginner. And I think it is
enough for you to work in the project
of this class. So let's go to the next lesson!
5. Terms of making pattern in Procreate: Why did I decide to make this
into the separate lesson? That's because I think you
should know some terms of what I use to make a
pattern and why I do that, then this is gonna be better
for you to follow along. So let's jump to the lesson. First, Canvas Canvas. Canvas is where you place your element to
make a pattern tile Before you make your tile, you should know the
size of your canvas. Motif. motif it's just
one element of your tile And in surface pattern design, we call it motif You can have many motifs in your pattern and you can
also have just one motif. Canvas and motif are the main elements when
you make a pattern, placeholder is kind of assistant and helps you move your motif from
side-to-side in the Canvas. Doesn't change the form
of your motif or it helps you move your motif to the right place in the
other side of your Canvas, also helps you move the edges to the
center and vice versa. Remember when you use
the place holder, you need at least 4 free layers
to complete the process. Let's jump into Procreate Here is a small tutorial about
how to use placeholder. This is our canvas. In Procreate, if something
is lying outside the canvas is gonna be cut out. If you put something outside
the canvas like this, that means you just
deleted that element. You see? So if you put something between inside
and outside like this, your element is
going to be cut out. So choose it again. You see? So that's why
you need two same elements. One, you move to the right
and another one you move, you move to the left. Like this. That is, can be repeated when
the edges meet each other. But the problem is that when you move your elements
like like that, with eyeballing,
you can make sure that the parts of the
element are match each other So that's why we
need a placeholder. Let me show you. Now. Go to the layer, then tap the little plus. You're gonna choose
another color, just, any color
from your palette. And you can fill the
layer like this. You can just tap this
layer, then Fill layer. Now we're going to turn
down the opacity of this layer that you
can see your element. You can choose them by swiping
left to right like this. Then at the top
right, tap Group. Now you have the first group. Now you need two same groups, swipe the new group to the left, like this, then
you see Duplicate. So now, so now you
have two groups now we're gonna
move one group to the left and another
one to the right. Let's move the first
one here to the left. Make sure your
snapping is active. And the magnetics
and snapping is on, distance max velocity max. And now turn off your arrow. Now go to Layers and to
another turn on the arrow. And now we're gonna
move to the opposite. And to, to see your Canvas, Hey, the same color. You can be sure that
the left and the right. Now repeated. And you know, when you're
snapping is all, you can see. The yellow and the blue
lines are telling you that the first and the second group are
matching each other. Now you see your
Canvas has one color. Now just the turn off,
the arrow here. Now go to layers
and you can delete the placeholder because
you don't need it anymore. Delete it. Delete it. Now you can merge
these layers together. Remember the repeating
part and listen. You can use the place holder to bring the edges
to the center, then this center line,
repeat on paper. You see I have Canvas view with the elements that
don't touch the edges. Now I'm going to move the
edges at the left and right, and the top and the
bottom to the center. So let's go to layer. I'm gonna make a
copy of this layer 3 here Yes. You know when you have a
copy for backup , if you do wrong, then you can have
something to start in. So I'm going to hide
the lower layer here. And maybe I'm going to change
these two original. Yes. Now, make a new layer
and fill it with color. We're gonna do the same with
like we did with one elements Now I'm going to turn
up the opacity of this placeholder layer
to 70% 79 it is fine. Okay, So I'm going swipe the layer 3 to the
right to choose it. I'm going to group
them together. Now. I'm going to
duplicate this group. Now we have the same groups. So I'm going to turn on the arrow here to activate
the first group now, and then I'm going to
move it to the right. You see, when you
see the yellow and the blue lines are here. So you can know that
this mapping Esau. So turn off the arrow. Now we're going to move
to the second group to the left. Now. Snapping here, help us to know that when it meets the
center of the canvas. So turn off the arrow here. Now you see the Canvas
has the same color. You can now delete
the place holder layer You don't
need it anymore, then you can merge
these layers together. Okay, so we're going to
make it backup again. So I'm going to duplicate
and rename, left right repeated So I'm gonna hide this. And now with the layer 3, I'm going to do the same. I'm gonna do the same, like we just moved the left and right
edges to the center. Now we're going to do with
the top and the bottom So I make a new layer and I'm
going to fill this layer. Now I'm going to turn
down the opacity of the layer, placeholder
layer now and then swipe layer 3 to the right and group them
then duplicate this group We have two groups with
the same elements here. We're going to move
the first group down and then turn
off the arrow Now we're going to active
the second group . Arrow on, then move it up. Yes. Now turn off. Now we're going to delete the placeholders layers
don't need it anymore. So I'm gonna merge
these layer together now the edges are repeated So you can, you can fill the center with
the elements you want. So I'm going to make another layer and then
I'm going to fill, then I'm going to fill this
tile with the new layer. In case I need to change
something later. You can test it by
merging these layers like this. Now, I'm going to
duplicate this layer. And I'm going to go not resize this layer by tapping
the arrow and hold, hold the top right
corner of the tile, then slide down until the corner point, meets the center of the canvas, shows the size of
the tile right now is a half of the canvas. Turn off the arrow. Now you're going to
hide the lower layer. I often do like this. So I'm going to
duplicate this layer. Then I'm going to move
this to the right, next to the first one, make sure that they
are perfectly matching each other Now, I'm going to merge the first and the second
one layers together. And then I'm going to
duplicate this layer. Now, I'm going to turn
on the first layer here. I'm gonna move it up
and makes sure that the top and bottom are matching
each other perfectly. Yes. Yes. I'm going to merge
We have a new tile with scale is smaller
than the original. So now let's jump
to the next lesson.
6. Wallpaper Design: Let's talk about
wall paper design. It's actually easier than you think if you are a designer. There are many
things to cover when you design for a
wallpaper company. Here in this class, we're going to make a
wallpaper for ourselves. So we just want to have fun and something that just for us. Something special and unique
to design a wallpaper, you need to have
first up Canvas size You need to decide what
big your canvas can be. Actually, it's up
to you when you make a wallpaper for yourself, you can decide how big you
want to see the motifs on the wall and draw the
motifs that dimension. Second, color palette. If you choose to make your wallpaper with available
elements from market, then just need to have in mind that the colors
you want and what style of your house right now to find the right elements
for your design. When you have some ideas or
what you want in your mind, you can find it faster
If you draw a new wallpaper. You should also
consider the style and what kind of wallpaper for
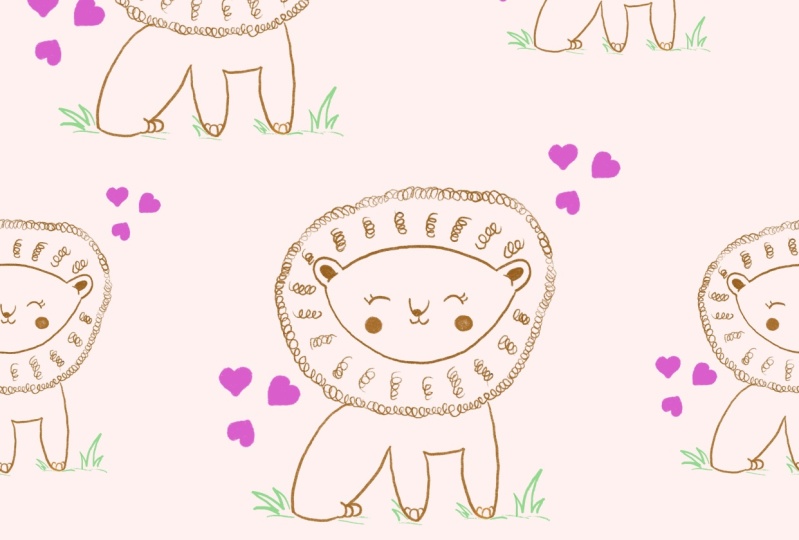
what kind of room is used For Kids the colors properly
will be more colorful, bright, or with fun motifs. Black color background might
not be used everywhere. So make sure you know how to use black color for your house
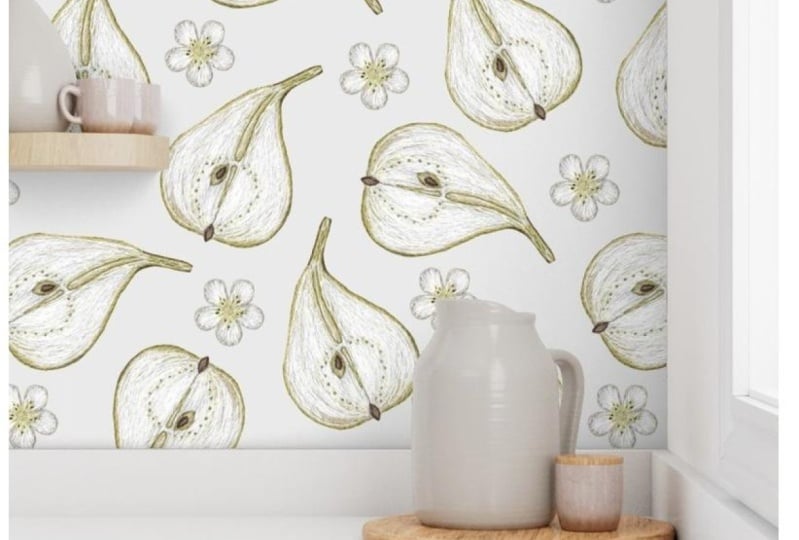
As we live in Finland, a country from Scandinavia. You can see the color from
wallpapers from the store are almost neutral
or muted colors. If you want something with vibrant and colorful
then Spoonflower site is really the best place to find One of the most important
thing is the motifs or design elements that you put into your Canvas to
make it a repeat tile. It depends a lot
on your home style or depends on the
use of every room in your house to get the right wallpaper you absolutely
don't need to draw beautifully to make a wallpaper. If you're wondering
how you can design your wallpaper without
drawing skill. Then the next
lesson is for you, I'm gonna show you
how you can make pattern tile that is from
available element then I also show you how you can
draw your wallpaper with simple or complicated
elements with the choice. And I also show you how
to garther inspiration from where you live or on the Internet to get
your own design. Now see you in the next lesson!
7. Available motifs: As I told you in
the last lesson, that you don't need to draw beautifully to
design your wallpaper. You can find different kinds of illustration
from the Internet. This is Creative Market where I often buy
mock-up for my work. But there are many
other things too. Let's see, if you need a summer illustration
for your wallpaper. You can go to search
here and type. There are tons of related
contents, choose what suits your home-style. Let's try this.
You see there are lots of things that we can
do with these elements. There are also some
patterns made with these motifs too. Another
site called Design Cut where I used to buy a lot
of brushes for Procreate. You can find any topic
by typing in search. When you find the
illustration you want, just add to cart. Remember to read the
caption to see what's included in this pack
and what kind of file you'll get. The best file that work with Procreate is PNG with a transparent
background. Remember, 300 DPI is a need. Now, go to Skillshare
with your web browser. I'm going to show you
where you can get my Mongo illustration
at project section go down and you
see the resources. And then you can find
a link to my Dropbox, click on that link
tap that ZIP file And it takes you
to another page. Then tap the three dots at
the top right, then Export. Now save to files
or to your Dropbox. It's up to you. It's going to take
some time to download. And then when this process finished, go to Procreate and then create a document with 4000
by 4000 pixels. Now, we're going to import
our file to the Canvas, go to the Actions here, then "Insert a file". You can do it one at a time until all illustration
are on the Canvas. In the next lesson, we're going to make our pattern
with these illustrations.
8. Design wallpaper with available motifs: Okay, So all
illustrations I here, I often make a back up first. So now we're going to
make another document, choose, Select, and
then Duplicate. Now I'm going to make it
a little bit smaller. You actually just eyeballing. You can choose the
size that you want. I think now it's okay. Yes. I think I'm going to and
I'm going to separate them a little bit that
I can see them better. Before we go to
make our pattern, I have something to tell
you about this method. Sometimes it just
super hard to see if you have a good combination. So you need to try
all your ideas. I mean, try what do you
think that's right first and then come back to fix. So let's start. I'm going to hide all layers and let only one layer active. This one. Now, turn on the arrow here. I think I want it to be here, and I want the top
and bottom edges repeated
You need to bring the motif next to the
edge as much as you can and use the same
method we learned with the place holder at the previous lesson
to move this motif. First let's make another layer. Fill it with another color. Turn down the opacity. Now choose motif 1 and then put the placeholder
layer .Duplicate. For the first group, we move up and the second
group we move down. You can decide how you want
it to be cut out at the edge. I think it's okay. Now, turn off the arrow here. Now with the second work, we're going to move it down. Choose it and turn on the arrow. Remember to turn on Snapping. Move it down until
you see the canvas, has the same color. Now turn off the Arrow. Delete the placeholder layers
and group layers together. Now I'm going to
lock this layer and move this layer down. That it won't disturb us. I often want to
have the edges repeated then fill the center. Now, I'm going to turn
on this without fruit. I think it would be great if you could repeat
it at the corners. Now I'm going to resize
but just a little bit. And then I'm going
to try to move it to the edges at the
top right corner. Actually, I'm not
sure all about that. All I do is just try and
find the best composition for all. I'm trying to put it next to the edges and the
top right corner. With this kind of place, You need to first make the edges at the left and the
right repeated. Then do again to make the edges at the
top and the bottom, repeated. With the same
method and moving it up. Now, we're going to make the top and the bottom
edges repeated. First, let's make a backup. Then I'm gonna bring deep
backup down, then hide it. And the next we're going to use the placeholder method
and do the same things. Now I'm going to
bring this layer down and then I'm
going to lock it. The next layer. I think the Mongo
illustration without leaves, it is gonna be good to be under the leaves without
fruits one So I am going to
use these layer. Then I'm going to try to
move it next to the edge. And then I'm gonna
try to give it a position under the leaves. The next step with
placeholder is gonna be the same as we did before. Let's do it. Sometime. I feel like he
doesn't listen to me. So I used my two finger to hold the screen and
then zoom out to make it bigger. These have these courses
easier for you to move the motif to
the place you want. So now this motif is also
repeated at the edges. I'm going to move it down to now I'm going
to turn on this. Yes. And I think I'm going
to move it a little bit to the bottom right corner. But wait, I think it is a
little bit small for me, so I want it a
little bit bigger. But, you know, in Procreate, when you make it smaller, you just cannot make
it bigger later. So that's why that's
why I made a backup before I started to
make bargaining. Now I'm going to go to
the backup document, and then I'm going to copy that same motif
to this document. Another way you can
do is that you can just go to the action
and add another file. Do what you feel easier, but I just want to
show you this way Now, the original is here. And then we're going to
resize it a little bit. Yes. Like this. And I'm trying to move
it to the bottom right again. Yes, like this. I think I'm going to bring
this layer down under the layer of the mango
with the leaves. I want to see how it's look
behind the Mongos with the leaves and it's a
really good, look better. So yes. Yeah, I'm really
pleased with this composition. Now I'm going to
turn on next one. Make it active,
and then move it a little bit to the left. We're going to feel
this whole year. Yeah, I think actually
it's a little bit big. Maybe I'm going to resize it
just a little bit like this. Bring it a little bit down. And then I think I'm going to turn it a little
bit to the right. Yeah, it looks good. And let's see how it looks
behind those elements. It's good. Just make a little
adjustments here. Now this tile still
have a hole here. So I think I'm going to turn on the last motif and I'm
going to put it here. And then I'm going to
make some adjustments. And we're going to test our
tile in the next lesson.
9. Test repeating tile: Okay, Now we're going
to export the tile. Go to Actions then Share. We're going to export
this in JPEG file. If it's JPEG file, so it is in your Photo gallery. Now we're going to now
go to Actions again and ADD we're going to "Insert the photo "with the same method that I showed you in the previous lesson
about placeholder. I'm going to resize, be tile to the half
of the canvas. And then duplicate this layer and move it and move the
second layer to the right. Now I'm going to
merge these layers together and then
duplicate this layer, move it, move it up, and now merge them together. I think it is good. But I yeah, I don't like this hole here
and I actually want to have something
here to hide this place So now I'm going to
come back to my tile And I decide to duplicate
the last motif And then I'm gonna flip horizontal because I
want it to look not the same. NowI resize it. And then I move it
down next to edge Now I'm going to
make it repeated So we're going to use placeholder and we're
gonna do the same with it. Now I'm going to share it into JPEG file and then add to my file to Canvas again, resize and now resize it to
the half of the canvas. Duplicate. And then move the
layer to the right, Merge these layers together. And then duplicate. Move this up. Now, I think it's look better. Let's look again all over. I think it looks good. And now I'm going
to delete this test And then we're going
to save this tile Before we save it, I'm gonna show you how you can add the background to the tile So go to this circle and you can see these, these are my color palettes. And go to Disc you can try different
backgrounds here. By the holding the circle and changing it in the circle. Or you can choose from
your color palette choose the one you like. When you got your color palette, then go to go to Actions then Share. So we're going to upload
it to Spoonflower so you can save it with
JPEG or PNG file. And remember when
you want it with the transparent background, then you're going to
need to choose PNG file. Yeah, we are done See you in next lesson.
10. Inspiration and moodboard: Where to find inspiration
for your design. Sometimes it's just
hard to make art. You want to draw your
motif or your pattern You can find even inspiration
in your life around you, you can take photo of interesting things around
you then draw it when you have time, you can also take a sketchbook with you and draw everything that
you give your attention to. Have a walk, look around
and take a breath. Maybe some new idea will come. Remember to take
photos of everything, even when you see an insect. It also can become your motif, pattern or even some wildflower You can also get inspiration by looking at artworks
from other artists. Make sure that you have an
account on Pinterest to gather your inspiration and
divide them separately into different topics that you can easily find what you want. This mood board I make
from Canva.com
00:01:07.340 --> 00:01:11.210
the dandelions in illustration
I got from Canva and the photo at the bottom
left is a sketch that I made the composition I
want for this pattern here is color palette. I want it to have
neutral color tone. You can also make
a moodboard for yourself by collecting photos illustration and put them
into a document like this. in Procreate, you can
use it as a reference when you work . The pattern, we're going to make
it the next lesson is a kind of pattern that needs references, just because
you're going to need to draw different forms of motifs. We just draw everything
on the canvas next to each other that
they don't touch the edges. Then we're going
to move the edges to the center and fill the center with the new motifs that
are in the same topic. So make a mood board for yourself and let 's
jump into the next lesson.
11. Drawing pattern: With this pattern we also need 4000 by 4000 pixel canvas. But actually it's just optional. You don't want square Canvas. You can make it with Rectangle Canvas and the
same method with it. In this lesson,
we're just going to have fun with the process. So we just go with
a doodle style. Now we're going to import the mood board to the
canvas that we can help reference
to draw . Actions. then Canvas, then
turn on reference. Now we're going to move it to the corner that we
can see our canvas. You can adjust
this reference to the side that suits you, that you feel comfortable
to work with. Now we're going to use
the tinderbox 1 1 here. And now we're gonna draw first a dandelion,
the white dandelion. I'll just draw a doodle flower. You can see
that flower and you just just draw like
you paint like this. You don't need to make
it really detailed. And the next, the
leaves of dandelions, You don't need to make it 100% look
like a real dandelion leaves. You can make it yourself something that looks
like your style or the way you want to see the leaves of dandelion
just like that. So we're going to fill this
canvas with dandelion motifs with the yellow and
the white dandelions. And the leaves When you draw the
leaves and the body of dandelion you should consider, consider to draw in right layer. Makes sure that all
flowers in one layer and then on the leaves
are in one layer Then when you want to try
to change the color it's going to be
easier for you to, when you want to change
the color of this pattern And now we're going to
continue with the flowers. So you can, so you can
guess where this comes from. Remember that you make
it with the lose tile. Yeah. I adjusted a little
bit that brush. Now, another leaf here. Oh, I just realized
that it's wrong. It is in wrong layer, so I use my three fingers
to touch the screen, then swipe down
until I see this. And then" cut the paste" What is made the brings the
element to separate layer, and then you can match
the right layer. I continue filling this space because I think it has
lots of spaces here. Again. Again, it was in the wrong layer, so I just cut in paste to the new layer and then merge
it to the right layer. Now with the smaller flowers I just made a backup just made a backup group and
then I duplicated that group. And then with the copy group, I just l flattened it because now I'm going
to work with the copy, not going to use the
placeholder to move the edges from the left
and right to the center. And now I'm going to
fill the center with new motifs that look the same. I'm going to make
a back up for it. And then a new layer. Then I'm going to draw on that layer when I'm
sure everything is Okay. I also made it in separate layer too I made to backup for that. Now, the top and the bottom
to the center and I also fill that center with
more motifs until I'm pleased
with that space. Now I made another document And in the new document, I actually much all layers together because
it have the backup so I decided to make
all layers together. Now you should know that we
have here repeating tile Then you can type
this tile because You can test this tile
before you continue, but I'm sure that it's repeated. Now It is the repeating tile So the thing I want to do is I just want to give it a
little bit more details So I, i'm, I'm going
to make another layer. And then on that layer
I'm going to draw details for this tile. Just try it. But yeah, I decided to
help just like that. And then I'm gonna give
the least details too some thing simple that everything just don't
touch the edges. You're just going to move to
the edges, to the center. Three layers. One
with a placeholder. Another one is the detail layer. and the tile layer, we just gonna do the same. Sometime it's just hard to move. Sometimes it's going to happen
some errors but it's okay. You can undo or you can delete the placeholder layer
and then do again. When you merge the layers you're gonna give the same layer to the same group and
then you merge them. Then you'll have the separate
different layers. Now we continue with
the detail layer. We're going to fill our tile Everything is okay. So now we're gonna move the top and the bottom to the center with a same method
but first backup And you also fill on the leaf or a flower open
doesn't have details Now we're going to test it
with the same method. Yes. Now we are done with this.
12. Order your wallpaper from Spoonflower: So now your design is ready. So we're going to jump
into Spoonflower. I'm going to introduce you really quickly about Spoonflower and show you how to
upload to your design and order a wallpaper
for yourself. Spoonflower is the Print on Demand company where you can
order your custom fabric, wallpaper and home decor products. So let's take a
look at this site where you can find different
products with designs that are available on Spoonflower
from other artists. Or you can upload your designs. You can see here fabric, wallpaper living and decor, dining, bedding. You can also find intruction
from Spoonflower, how it works. But yeah, to upload your design, the best way is
have your own account. The registration is easy So I'm sure you can
do it by yourself. I have already account here, so I'm gonna just log in. Now at "your profile". You can find a section , "upload your design" or you can also find it here
at "design and sell". Now click "upload
your design" Now we've got select our file. If you saved your work with
JPEG or PNG on iPad. You can find it from the Photo library and
I'm on my PC now, so it's somewhere in
the download section. Now confirm a copyright
and choose upload We need to wait for it up there. So here are all my
latest designs that I've uploaded to Spoonflower. And we here at Fabric section. You can make your fabric
smaller scale by choosing "smaller" here. After you think you get
the scale you want, remember to save
changes to save scale look. What we need is our work papers. So let's go to Wallpaper. Here you can see your design on Spoonflower
wallpaper mock-up, but it's not a good
mockup for sure. So choose just "Design", you also can make
this scale smaller, but I think I'll let
it with the size, 24 inches by 24 inches. Now you can choose the
type of wallpaper. They are different here. For me, the last option
would be the easiest way for me to install
the wallpaper later. And now we're going
to choose the size. I think I need to test it
first I want to see how it looks so I'm
going to choose "swatch" to get a
sample of it first. But you see here
different sizes and make sure you measure your
wall before your order Then "add to cart" Now your order is in your cart. So if you don't want to
order anything else, then go to cart and "view cart" the checkout process is familiar just do what
is asks you to do. And here are
different pay methods Choose the one
that easy for you. If you have promo code, then put it here. Spoonflower often offers SALE, so make sure you pay
attention to them. You want to make your
wallpaper for sell Check out the link on the description to
see what tasks you need to do to start
selling on Spoonflower.
13. Final thoughts : Well done! I have had really fun Tom
working with you in this class. And I hope you also have really fun time
making your own design. And now I'm really excited to
see what you come up with. Please share what you've made in the class project section. And I hope you learn new
thing from this class. And I'm really looking forward to see your
class projects. If you would like me to share your wallpaper design
on my Instagram, please tag me at @lemfindesign. And thank you so much
for taking this class. I have had a really
fun time creating this class and see you next
time! Bye bye!
 Phuong Lempinen, iPad artist| Surface pattern designer