Transcripts
1. Introduction: This class, we are going to create a beautiful
crochet flower pot. This project is perfect for anyone who loves crochet
and handmade decor. By the end of this class, you will have your own
adorable flower pot that can be used as
room decoration, a handmade gift, or even as a product for
your small business. This class is suitable for
crochets of all skill levels. Whether you are a beginner
or an experienced crochet, you can easily follow along
and create this project. However, if you are a beginner, you should already be familiar with some basic
crochet techniques, such as making a slip note, magic ring, chain stitches, slip stitches, and
basic stitches like single crochet
and double crochet. First, I will walk you through all the materials and tools
needed for this project, including the yarn,
crochet hook, stuffing and other essentials. Then step by step, I will show you how to
crochet the flour boot itself in an easy and
bigner friendly way. After completing the pot, we will move on to
making the soil for the pot to give it a
realistic and neat look. Then we will crochet
beautiful tulips along with leaves that will
make the project look vibrant and elegant. Finally, I will
guide you through the complete assembly
process where we will put all the pieces together and turn them into a beautiful
finished flower pot. So grab your crochet supplies, and let's get started on this fun and creative
project together.
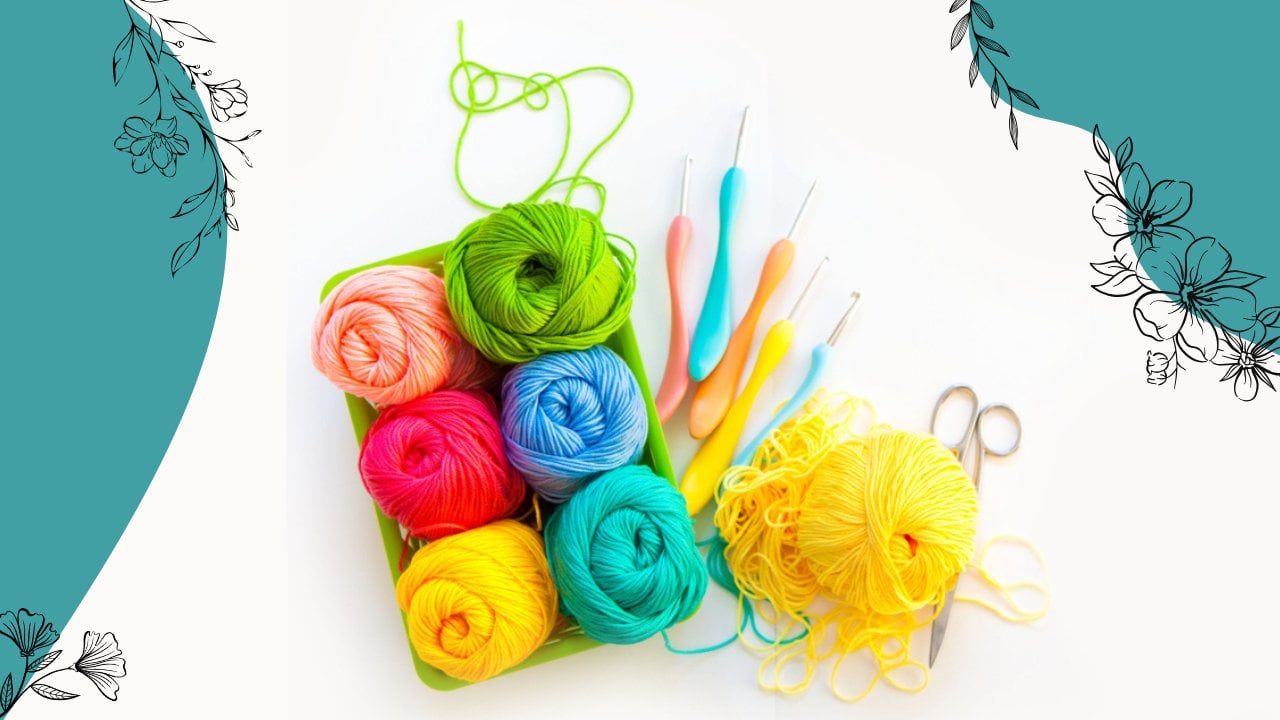
2. Materials & Tools Needed: This lesson, I'm
going to show you all the materials needed to make this beautiful
crochet flower pot. First, we will need a medium
weight, dark brown yarn. You can use either
cotton or acrylic yarn. This will be used to
make the flour pot. Next, we will need a medium
weight, light brown yarn, either cotton or acrylic, which will be used to create
the soil inside the pot. For the tulips, we will need lightweight
lavender and white yarn. You can also choose any other colors you
like for dead ulips. We will also need
lightweight green, cotton or acrylic yarn
for making the leaves. Apart from the yarns, we will need a two MM
crochet hook, casar, applier, craft wire
for the stems, and leaves, a yarn needle, and some cotton
stuffing for filling. So these are all the materials that we will need
for this project.
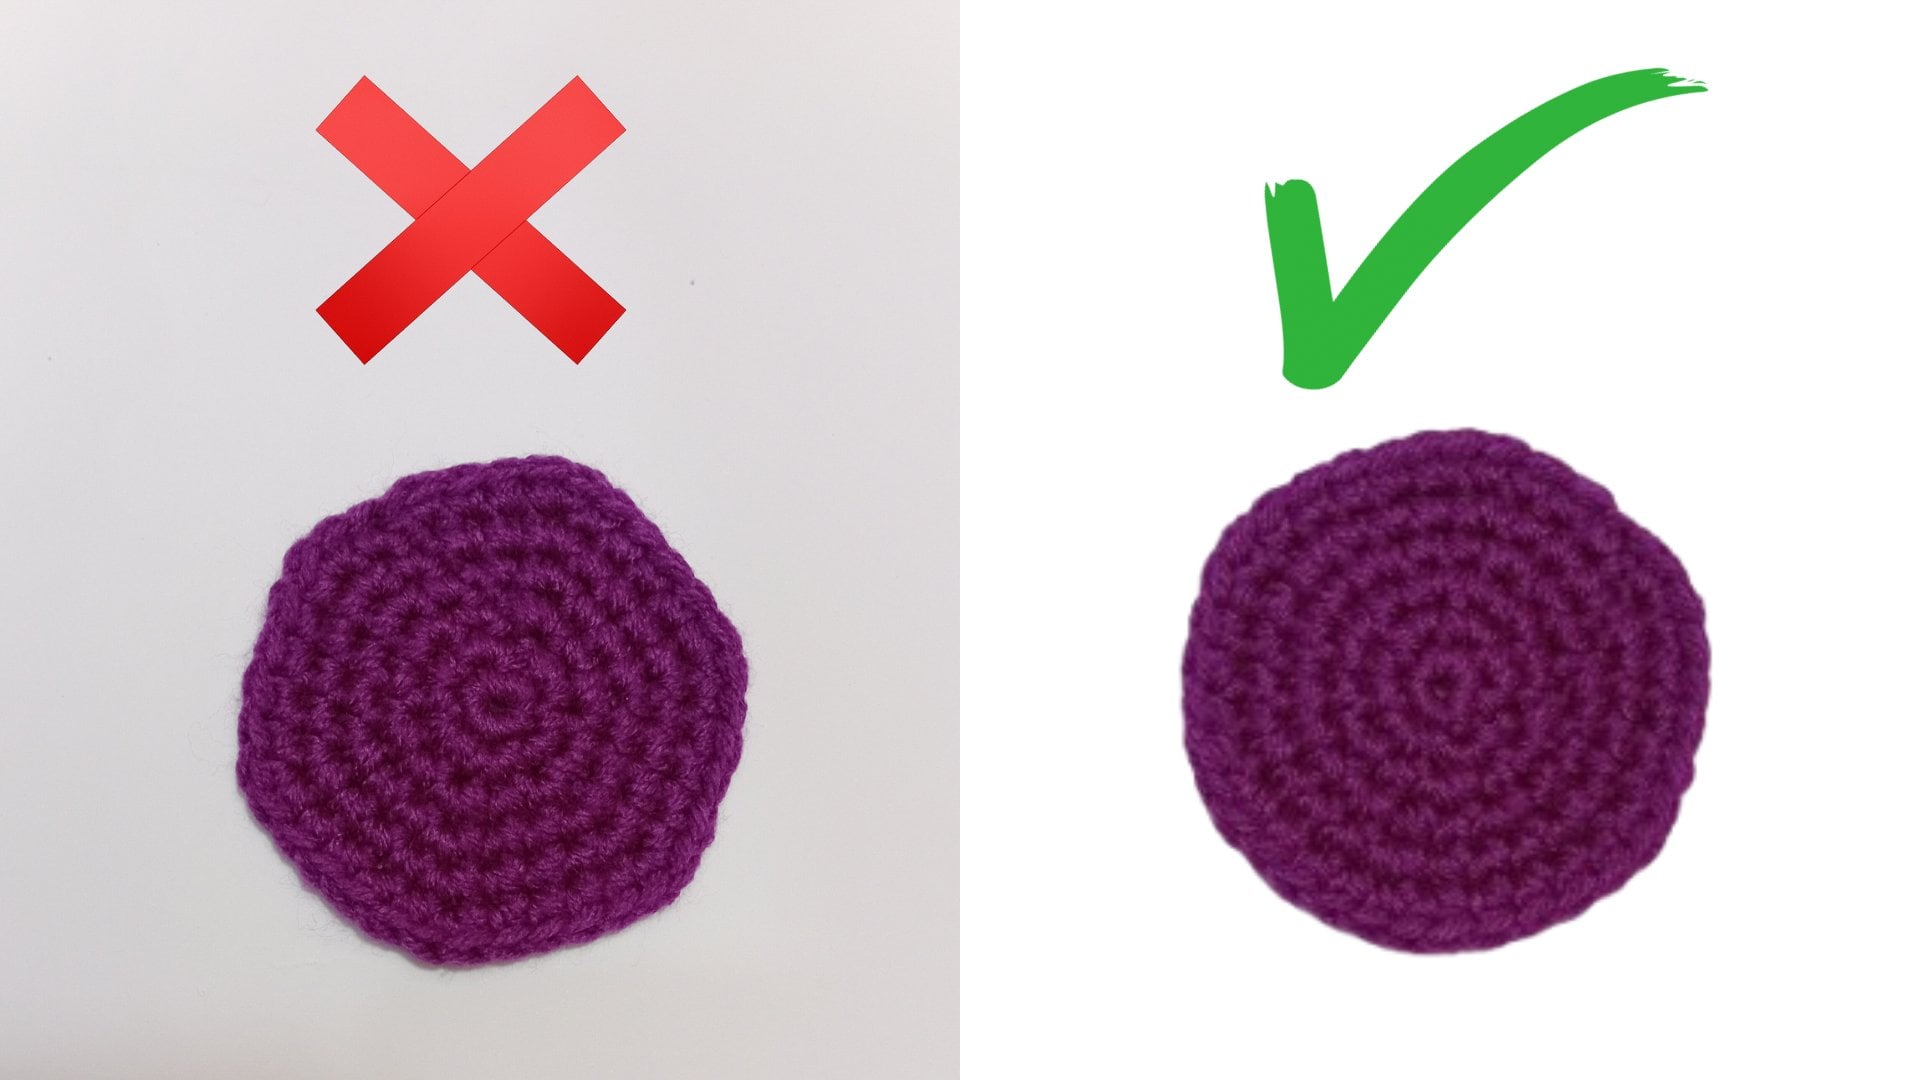
3. Crocheting the Flower Pot Part 1: This lesson, we are going
to start by making the pot. So take the brown
yard and the hook. Begin by making a magic ring. I hope you know how to make one. So our magic ring is ready. Now make six single
crochet into this ring. So insert the hook, yarn over and pull through. Yarn over and pull through
both loops on the hook. That's first single crochet. Repeat this process until you have six single
crochet in total. So now we have completed
six single crochet, and now let's pull this
until to tighten this ring. We are going to join it with a slip stitch into this
very first stitch, insert the hook yarn over and pull through the stitch and the
loop on the hook. This completes the first round. For the second round, we are going to make two single
crochet into each stitch. So chain one, insert the
hook into that same stitch. Yarn over and pull through. Yarn over and pull
through both loops. Make another single crochet
into that same stitch. Insert the hook. Yarn
over and pull through. Yarn over and pull through
both loops on the hook. Make new single crochet
into the following stitch. That is the first
single crochet. And that is the second one. Continue making
two single crochet into each of the
following stages. In the end, you will
have a total of 12 single crochet
into this round. Now join with a slip stitch into the first single crochet. Insert the hook, yarn over
and pull through the stitch, and the loop on the hook. This completes our second round for round three, chain one. Make a single crochet
into that same stitch. Now make another single
crochet into the same stitch. Then make a single crochet
into the following stitch. We are going to make
two single crochet into the following stage. That is the first
single crochet. And that is the second one. Then make one single crochet
into the next stage. Again, make two single crochet
into the following stitch, and we are going to repeat
this pattern around. In the end, we will have a
total of 18 single crochets. To finish the round, join with a slip stitch. Four round four, chain one, make a single crochet
into that same stitch. Then make a single crochet
into the following stitch. Make two single crochets
into the next stitch. That is the first
single crochet. And that is the second one. Now make a single crochet
in the next two stitches. Again, make two single crochet
into the following stitch. Repeat this pattern
all the way around, and in the end, you will have a total of 24 single crochet. You complete the round, join with a slip stitch
into the first stitch. For the next round, chain one. Make two single crochets
into that very first stitch. That is the first single crochet and make another one
into this same stitch. Make a single crochet into each of the following
three stitches. Then make two single crochet
into the following stitch. Make a single crochet into each of the next three statches. Again, make two single crochets into the following stitch. Repeat this pattern around. So I have completed Round five
for the next round in one. Make a single crochet into
the very first stage. Then make a single crochet
into the following stitch. Make two single crochets
into the next stitch. That is the first
single crochet. And that is the second one. Then make a single crochet into each of the following
four stitches. Again, make two single crochets into the following stitch. Repeat this ran all
the way around. So we have completed six rounds. In this round, we have
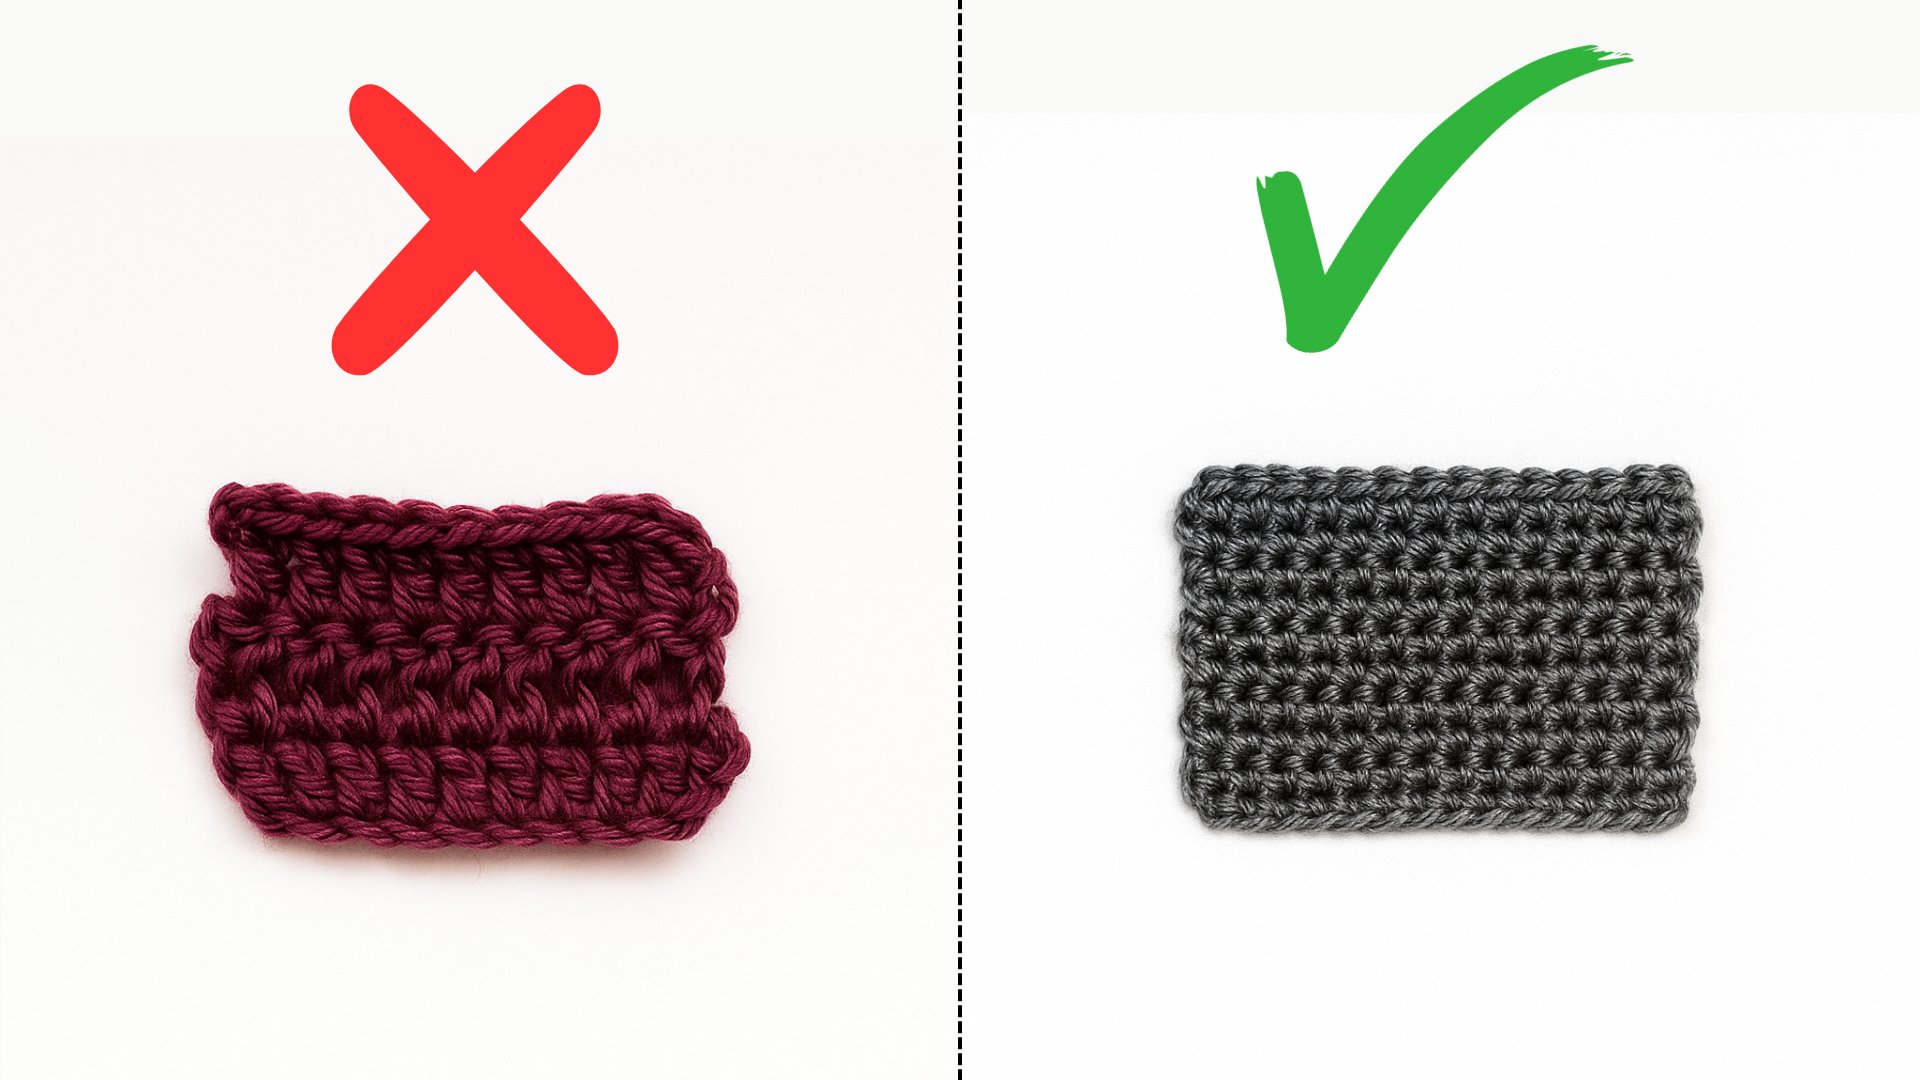
a total of 36 stages. Now chain one and turn
your work like this. We will now work in
the back loops on the as each stitch
has two loops. So insert the hook into the
back loop of first stitch, yarn over and pull through. Yarn over and pull through
both loops on the hook. Make a single crochet
into the next stage. I Make one single crochet in each stitch around, working in back loops only. So here I have
reached to the end, and let's join it with
a slip stitch into the first statch
insert the hook. Make sure to insert the
hook under both loops. Yarn over and pull through the stitch and the
loop on the hook. Turn your work again like this, and now we will work into different loops that
were left unworked. Insert the hook into
one of these loops, yarn over and pull through
both loops on the hook. Gene one. Make single
crochet into that same loop. Make a single crochet into each of the following
four loops. Now make two single crochet
into the following loop. That's one. And now make a single crochet into each of the following
five loops. Again, make two single crochet
into the following glue. Repeat this pattern
all the way around. We have reached to the end, and now we are going
to join it with a slip stitch into
this first stitch. Insert the hook,
yarn over and pull through the stitch
and the loop on the hook for the next
round, chain one. For the next nine rounds, make one single crochet
in each stitch around. This will build the height
of your flower pot.
4. Crocheting the Flower Pot Pot Part 2: This lesson, we are going to
continue working on our pot. Here I have already
completed nine rounds, making one single
crochet in each stitch. I hope you have completed
these rounds as well. Now let's continue. I have made one chain. Next, we are going to make one single crochet in each
of the next five stitches. So make a single crochet
into this very first stitch. Continue making
one single crochet in each of the next four stages. Now we are going to decrease. So for this, insert
the hook into the front loop only of
the following stitch. Then insert it into the following stitch
under both loops. Yarn over and pull through. Yarn over and pull through
both loops on the hook. That completes one decrease. Now make one single crochet in each of the next five stitches. Again, we are going
to decrease here. Insert the hook into the front
loop of the next stitch, then insert into the following
stitch under both loops. Yarn over and pull through. Yarn over and pull through
both loops on the hook, repeat this pattern
all the way around. I have now reached the end wine with a slip stitch
into the first stitch. Insert the hook into
the first stitch, yarn over and pull through the stitch and the
loop on the hook. This completes our tenth round, and we have a total of 36
stitches in this round. Now we are going to
make the last tround. Yarn over, skip this
very first stitch and insert the hook
into the second stitch. Yarn over and pull through. Yarn over and pull
through two loops. Yarn over again and pull
through two loops on the hook. This completes one
double crochet. Now make four more
double crochets into the same stitch for a total of five double crochet
in one stitch. Next, skip one stitch and slip stitch into
the following stitch. Insert the hook, yarn over and pull through the stitch
and the loop on the hook. Now skip one stitch and make five double crochets
into the next statch. And Again, skip one stage and slip
stitch into the next statch. Insert the hook, yarn over and pull through the stitch
and loop on the hook. Skip the following
stage and make five double crochets
into the next stage. Skip one stage and slip
stitch into the next stage. Continue repeating this
pattern all the way around. So I have reached to the end, and here is the last stage. Skip this and make a slip stitch into
that very first stage. So our last round
has been completed. Now let's finish the pot. Take your casar
and cut the yarn, leaving a few
centimeter off there. Pull the loop all the way
through to secure it. Insert the hook into
the same stitch from the back and pull the yarn
tail to the back side. And now your flower
pot is ready.
5. Making Soil for the Pot: This lesson, we are going to start making the
sole for our pot. Take your light brown
yarn, and let's begin. Start by making magic ring. Once your magic ring is ready, make six single
crochet into the ring. After completing
six single crochet, hold the yarn tail
to tighten the ring. Finish the round by joining with a slip stitch into
the first stitch. So insert the hook, yarn over and pull through the stitch and the
loop on the hook. For the second round, we are going to make two
single crochet in each stitch. So chain one and make a single crochet into
that very first stitch. Now make another single
crochet into that same stitch. Make two single crochet
into the following stitch. That is the first
single crochet. And that is the second one. Complete this round by making two single crochet
into each stitch. So I have reached to the end, and now let's join it with a slip stitch into
this first stitch. So insert the hook, yarn over and pull through the stitch and the
loop on the hook. This completes our second round. For the third round, chain one, make a single crochet into that very first statch. Then make another single
crochet into that same stitch. Make a single crochet into
the following stitch. Make two single crochets
into the next stage. So that is the first
single crochet and that is the second one. Again, make a single crochet
into the following stitch. Repeat this patron
all the way around. Complete this round by slip stitching into
the first stitch. Insert the hook, yarn over and pull through the stitch
and the loop on the hook. At the end of this round, you will have a total
of 18 single crochet. So for round four, chain one, make a single crochet into this very first stage. Then make a single crochet
into the following stitch. Make two single crochets
into next stitch. Make a single crochet in each of the following
two stitches. Then make you single crochet
into the next stitch. That is the first
single crochet, and that is the second one. Repeat this pattern
all the way around. So I have completed round four, and we have a total of 24
single crochet in this round. For the next round, chain one, M two single crochet into this very first stage. So that is the first
single crochet and make another one
into the same statch. Then make a single crochet into each of the
next three stages. Make two single crochets
into the following stache. That is the first single crochet and that is the second one. Again, make a single crochet in each of the following
three stitches. Make two single crochets
into the next statch Repeat this pattern
all the way around. Complete this round
by joining it with a slip stitch into
the first stage. For the last round, chain one, make a single
crochet into the first stage. Then make a single crochet
into the following stage. Make two single crochets
into the next stage. So that is the first
single crochet and that is the second one. Make a single crochet into each of the next four statches. Make two single crochet
into the following stitch. Again, make a single crochet in each of the following
four stitches. Make two single crochets
into the next stitch. Repeat this pattern
all the way around. So I have reached to the end, finish this round by slip stretching into
the first stage. So our soil is ready, and sadly, my hook could not handle the pressure and
retire mid round. Okay, now let's cut this yarn. So take the casar and cut it by leaving
a few centimeter tail. Pull this loop all the
way through to secure it. Now insert the hook into
that same stitch from the back and pull the
Santa to the back. Our soil for the pot is ready.
6. Crocheting the Tulips: This lesson, we are going
to make a beautiful tulip. So let's begin. I'm using
this lovely purple yarn. Start by making a magic ring. Once the magic ring is ready, make seven single
crochet into the ring. So that's one, two, three, four, five, six, and seven. Now pull this until
to tighten the ring. Complete this round
by joining with a slip stitch into
the first stitch. So insert the hook. Yarn over and pull through the stitch and the
loop on the hook. For the second round, we are going to make two single
crochet into each stitch. So chain one and make a single crochet into
this very first stitch. Insert the hook, yarn
over and pull through, yarn over and pull through
both loops on the hook. Make another single crochet
into that same stitch. Then make two single crochet
into the following stitch. Complete this round similarly by making two single crochet
into each stitch. In the end, you will have a
total of 14 single crochets. Now join with a slip stitch
into the first stitch. Insert the hook, yarn over and pull through the
stitch and the loop on the hook for round
three chain one, M two single crochet into
this very first stitch. Then make one single crochet
into the following stitch. Again, make two single
crochet into the next stitch. Then make one single crochet
into the following stitch. Complete this round in the same way by
repeating this pattern. Finish this round by slip stitching into the
first single crochet. Insert the hook, yarn over and pull through the stitch
and loop on the hook. You will now have 21
single crochet in total. For the next eight rounds
means round four to round 11. We are going to simply make one single crochet
into each stitch. Jane one, make a single crochet into the very first stitch. Then make a single crochet
into the following stitch. Continue making one single
crochet in each stitch. This will form the
height of the tulip. Once you complete round 11, finish by slip stitching
into the first stitch. Inside the hook, yarn over and pull through the stitch and the
loop on the hook. Now take the casar and
cut this yarn by leaving a few centimeter tail and pull this loop
all the way through. Insert the hook into
the same stitch from the back side and pull
the tail end to the back. At this stage, you
will notice it does not look like a tulip
yet, but don't worry. We are going to shape it now. Take a piece of craft
wire about nine to 10 " long and fold it
in half like this. Now take your green yarn and tie it securely at the
top of the folded wire. Eat the tulip piece we made and insert the folded wire
into the center of the flour. Next, take a small piece of yarn and tie tightly
around the base inside. This will secure the wire so it cannot come
out of the flour. You can also use a
glucen if you prefer. Now the stem is
attached securely. Now we are going
to add filling in the flour before stuffing, insert and hide any extra
yarn tails inside the flour. But do not hide the
final yarn tail as we will use it
to shape the tulip. Take some cotton and
fill the flour evenly. So I have filled it completely. Now take your yarntailPunt
ten stitches from any side and insert the hook into the 11th stitch and pull that Yantail through. Good. Now insert the hook into that same stitch and
into the starting stitch on the opposite side and pull that yarn tail
through like this. Now count five
stitches from here and insert the hook into the sixth stitch and
pull the yarn through. Now count five stitches on the other side and insert the
hook into the sixth stache. And pull that yarn til through. Again, insert the hook into that same statch and
the opposite one. And pull that yarn til through. Now you can see the flower has formed a beautiful tulip shape. Let's weave this yarn tail. Weave the yarn tail neatly and bring it
down toward the stem. Now take the gran
yarn attached to the wire and wrap it neatly around the craft
wire all the way down. When you reach the end, cut the urn and tie it securely like this. And your beautiful
tuulip is ready. For the flower pot, we will need a total
of three tulips.
7. Making Leaves for Tulips: In this lesson, we will
crochet a leaf for the tulip. For this, take the grain yarn. Begin by making a slip note. Once the slip knot is
ready, make 18 chains. After completing 18 chains, take a piece of raft wire
about six to 7 " long. We are going to insert it into this very
first chain stitch. So carefully insert the wire. Now let's continue. Keep the wire aligned along your work as you
continue croching. Skip this very first
stage and make a single crochet into the
second stage inside the hook. Yarn over and pull through. Yarn over and pull through
both loops on the hook. Now make a half double
crochet into the next stitch. Yarn over, insert the hook, yarn over and pull through, yarn over and pull through
all three loops on the hook. Now make double crochet stitches
in the next ten chains. So yarn over, insert the hook
into the following stitch, yarn over and pull through. Yarn over and pull
through first two loops, yarn over and pull through
remaining two loops. That is the first
double crochet. In the same way, make double crochet into the
following nine chains. So here I have completed double
crochet into ten chains. Now we are going to make a half double crochet
into the following chin. So yarn over, insert the hook, yarn over and pull through. Yarn over and pull through
all three loops on the hook. Then make another
half double crochet into the following stitch. Now make a single crochet into each of the following
two statches. That is the first
single crochet. Again, make a single crochet
into the next stitch. Now we have one chain remaining. But before working into that, we are going to bend
the wire like this. You can do it with your hand or also use a plier for this. Now work three single
crochet stitches into the last chin. Next, we are going to work along the opposite side of
the foundation chain. Make a single crochet into
the following stitch. Continue to keep
the yarn tail along your work if you want to
weave it in as you go. Then make another single crochet into the following stitch. Insert the hook, yarn over
and pull through this stitch, yarn over and pull through
both loops on the hook. Make a half double crochet
into the following stitch. Again, make a half double
crochet into the next stitch. After that, make double
crochet stitches in the next ten chins. Then make one half double
crochet in the next stache. And one single crochet
in the final stitch. Join with a slip stitch to the first single crochet.
Insert the hook. Yarn over and pull through the stitch and the
loop on the hook. Now, in one, make a slip
stitch into the same stitch. Continue making slip
stitches across the next 16 stitches for a
total of 17 slip stitches. Now make a slip stitch
into the 18th stitch. Chain two, then slip stitch into the first
of those chains. Continue making slip
stitches across the remaining stitches
until you reach the end. So here I have
reached to the end. Finish this by slip stitching
into the first stitch. Insert the hook, yarn over and pull through the stitch and the
loop on the hook. Now we are going to cut this yarn by leaving
a few inches tall. And pull this loop
all the way through. Wrap the yarn and around the
wire securely, like this. In the end, tie it to fasten. So our leaf is ready. We will need two search
leaves for this flower pot.
8. Assembling the Flower Pot: This lesson, we are going
to assemble our pot. So take the tulips
that you have made. We need three tulips. The leaves and the soil
that we have crochet, we are going to insert these flowers and leaves into
the center of this soil. But before that, take
the crochet hook and insert it into the
center to widen it a bit. Now take one flour and
insert it into the center. Then take another one and carefully insert it
into the center. And then take the last
one and insert it. It might be a bit difficult
but carefully insert it. Then adjust these. Now, similarly insert the
leaves into the center. So here I have inserted
the leaves as well. Now take the pot that
we have crochet. Place the soil onto
the pot like this. Now we are going to seeep
the soil onto the pot. So take a yarn needle and
thread some yarn into it. Now, let's sieve it. Start from the opposite
side. Like this. And continue sieving
it like this. As you can see, I have
not sewn it completely, as we have to fill
cotton into it. So take some cotton and insert it into this,
fill it completely. Now let's sew the
remaining part. After completing, bring the
yarn to the end of the pot. And cut the remaining yarn
with the help of casars. Do the same with the
other yarn as well. So our flower pot is ready.
 Nida Younas, It's me :)